Config-配置中心2.0
Config-配置中心2.0
:::color5
与 Nacos 相比,
Spring Cloud Config 更偏向“纯配置中心 + Git 版本管理”,
而 Nacos 还具备服务注册发现、配置热更新等更丰富的功能。
根据项目需求选择即可,若需强版本管理可优先考虑 Config,若需一站式微服务治理则 Nacos 更合适。
:::
一、Spring Cloud Config 概念
Spring Cloud Config 是分布式系统的集中式配置中心,分为服务端(Config Server)和客户端(Config Client):
- 服务端:作为配置中心,通过 Git 仓库存储配置,对外提供配置获取接口。
- 客户端:微服务应用,启动时从服务端拉取配置并加载。
- 优势:基于 Git 天然支持配置版本管理,适合多环境、多服务的配置统一管理。
二、构建 Config Server(服务端)
步骤1:创建 Maven 项目,引入依赖
<!-- pom.xml -->
<dependencies><!-- Config Server 核心依赖 --><dependency><groupId>org.springframework.cloud</groupId><artifactId>spring-cloud-config-server</artifactId></dependency><!-- Spring Boot 基础依赖 --><dependency><groupId>org.springframework.boot</groupId><artifactId>spring-boot-starter-web</artifactId></dependency>
</dependencies>
步骤2:启动类开启 Config Server 功能
// ConfigServerApplication.java
import org.springframework.cloud.config.server.EnableConfigServer;
import org.springframework.boot.SpringApplication;
import org.springframework.boot.autoconfigure.SpringBootApplication;@SpringBootApplication
@EnableConfigServer // 注解开启配置中心服务端功能
public class ConfigServerApplication {public static void main(String[] args) {SpringApplication.run(ConfigServerApplication.class, args);}
}
步骤3:配置 Git 仓库(application.properties)
这里以远程 Gitee 仓库为例(也可使用本地 Git 仓库,调试时更方便):
# 服务端口
server.port=9000
# 应用名称
spring.application.name=config-server# Git 仓库配置(远程仓库地址)
spring.cloud.config.server.git.uri=https://gitee.com/xxx/spring-cloud-config-repo.git
# 仓库下的搜索路径(可配置多个,逗号分隔)
spring.cloud.config.server.git.search-paths=config-repo
# Git 仓库账号(若为公开仓库可省略)
spring.cloud.config.server.git.username=your_username
# Git 仓库密码(若为公开仓库可省略)
spring.cloud.config.server.git.password=your_password
若用本地 Git 仓库调试,只需将
uri改为本地路径:
spring.cloud.config.server.git.uri=file:///Users/yourname/Desktop/config-repo
步骤4:在 Git 仓库中创建配置文件
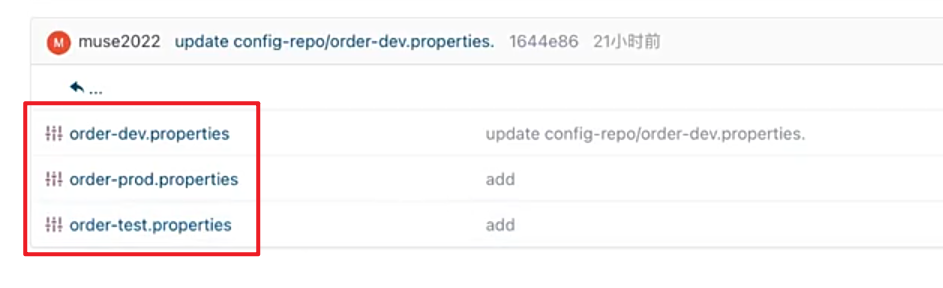
在 Gitee(或本地 Git 仓库)中创建配置文件,命名规则为:{application}-{profile}.properties/yml,例如:
order-dev.properties(order 服务的开发环境配置)order-prod.properties(order 服务的生产环境配置)
以 order-dev.properties 为例,内容如下:
# 配置示例
server.port=8081
from=git-dev-1.0
步骤5:启动服务端并验证
启动 ConfigServerApplication 后,通过 HTTP 接口访问配置,URL 规则为:
http://localhost:9000/{application}/{profile}/{label}
application:应用名(如order)profile:环境(如dev)label:Git 分支(默认master,此处示例分支为config-muse)
发送请求:http://localhost:9000/order/dev/config-muse,返回如下 JSON 表示配置获取成功:
{"name": "order","profiles": ["dev"],"label": "config-muse","version": "xxx","state": null,"propertySources": [{"name": "https://gitee.com/xxx/spring-cloud-config-repo/config-repo/order-dev.properties","source": {"server.port": "8081","from": "git-dev-1.0"}}]
}
三、构建 Config Client(客户端)
步骤1:创建 Maven 项目,引入依赖
<!-- pom.xml -->
<dependencies><!-- Config Client 核心依赖 --><dependency><groupId>org.springframework.cloud</groupId><artifactId>spring-cloud-starter-config</artifactId></dependency><!-- Spring Boot Web 依赖(用于测试接口) --><dependency><groupId>org.springframework.boot</groupId><artifactId>spring-boot-starter-web</artifactId></dependency>
</dependencies>
步骤2:配置引导文件(bootstrap.properties)
Spring Cloud Config 客户端的配置需写在 bootstrap.properties 中(优先级高于 application.properties):
# 应用名称(对应 Git 配置的 application)
spring.application.name=order
# 环境(对应 Git 配置的 profile)
spring.cloud.config.profile=dev
# Git 分支(对应 Git 配置的 label)
spring.cloud.config.label=config-muse
# Config Server 地址
spring.cloud.config.uri=http://localhost:9000
步骤3:编写测试类,获取配置
通过 @Value 或 Environment 读取配置:
// ConfigClientApplication.java
import org.springframework.beans.factory.annotation.Value;
import org.springframework.boot.SpringApplication;
import org.springframework.boot.autoconfigure.SpringBootApplication;
import org.springframework.web.bind.annotation.GetMapping;
import org.springframework.web.bind.annotation.RestController;@SpringBootApplication
public class ConfigClientApplication {public static void main(String[] args) {SpringApplication.run(ConfigClientApplication.class, args);}@RestControllerclass ConfigController {// 通过 @Value 注入配置@Value("${from}")private String from;@GetMapping("/from")public String getFrom() {return "配置值 from: " + from;}}
}
步骤4:启动客户端并验证
启动 ConfigClientApplication 后,访问接口 http://localhost:8081/from(端口由 Git 配置的 server.port=8081 决定),返回 配置值 from: git-dev-1.0,说明配置加载成功。
四、执行流程梳理
- 客户端启动:读取
bootstrap.properties中的application、profile、label、config.uri,向 Config Server 发送配置请求。 - 服务端响应:根据 Git 配置连接远程仓库,
git clone配置到本地,再将配置返回给客户端。 - 客户端加载:将远程配置加载到自身环境中,优先级高于本地
application.properties。
五、服务端安全配置(Spring Security)
为防止配置泄露,可给 Config Server 增加身份认证:
步骤1:服务端引入 Spring Security 依赖
<!-- pom.xml(Config Server 模块) -->
<dependency><groupId>org.springframework.boot</groupId><artifactId>spring-boot-starter-security</artifactId>
</dependency>
步骤2:服务端配置账号密码(application.properties)
# 配置认证账号密码
spring.security.user.name=muse
spring.security.user.password=123456
步骤3:客户端配置认证信息(bootstrap.properties)
客户端要拉取服务的配置必须先配置服务对应的账号密码才可拉取。
# 原有配置不变,新增认证信息
spring.cloud.config.username=muse
spring.cloud.config.password=123456
重启服务端和客户端后,配置仍可正常获取,且非法请求会被拦截。
六、Config 集成 Eureka 提升高可用性
为了避免 Config Server 单点故障,可将其注册到 Eureka 注册中心,实现服务端集群化和客户端负载均衡。
步骤 1:搭建 Eureka Server
<!-- Eureka Server 依赖 -->
<dependency><groupId>org.springframework.cloud</groupId><artifactId>spring-cloud-starter-netflix-eureka-server</artifactId>
</dependency>
// EurekaServerApplication.java
import org.springframework.cloud.netflix.eureka.server.EnableEurekaServer;
import org.springframework.boot.SpringApplication;
import org.springframework.boot.autoconfigure.SpringBootApplication;@SpringBootApplication
@EnableEurekaServer
public class EurekaServerApplication {public static void main(String[] args) {SpringApplication.run(EurekaServerApplication.class, args);}
}
# application.properties
server.port=8000
spring.application.name=eureka-server
# 禁用自我注册(单机Eureka)
eureka.client.register-with-eureka=false
eureka.client.fetch-registry=false
步骤 2:改造 Config Server,注册到 Eureka
<!-- Config Server 新增 Eureka 依赖 -->
<dependency><groupId>org.springframework.cloud</groupId><artifactId>spring-cloud-starter-netflix-eureka-client</artifactId>
</dependency>
# application.properties(Config Server)
# 原有配置不变,新增 Eureka 注册配置
eureka.client.service-url.defaultZone=http://localhost:8000/eureka/
启动多个 Config Server 实例(如端口 9000、9001、9002),它们会自动注册到 Eureka。
步骤 3:改造 Config Client,通过 Eureka 发现 Config Server
# bootstrap.properties(Config Client)
# 原有配置不变,新增 Eureka 发现配置
eureka.client.service-url.defaultZone=http://localhost:8000/eureka/
# 开启通过服务名发现 Config Server
spring.cloud.config.discovery.enabled=true
# 指定 Config Server 的服务名
spring.cloud.config.discovery.service-id=config-server
此时,Client 会通过 Eureka 自动发现 Config Server 集群,实现负载均衡,提升高可用性。
七、配置对 Config Server 的快速失败检测
默认情况下,Client 启动时若 Config Server 不可用,会延迟很久才抛出异常。通过 <font style="color:rgba(0, 0, 0, 0.85) !important;">fail-fast</font> 配置可快速检测故障,立即失败。
步骤:在 Client 端启用快速失败
# bootstrap.properties(Config Client)
spring.cloud.config.fail-fast=true
当 Config Server 未启动时,启动 Client 会立即抛出异常:
java.lang.IllegalStateException: No instances found of configserver (config-server)
这有助于快速发现配置中心不可用的问题。
八、动态刷新配置
默认情况下,Git 配置修改后,Client 不会自动更新。需引入 <font style="color:rgba(0, 0, 0, 0.85) !important;">Actuator</font> 实现配置热刷新。
步骤 1:Client 引入 Actuator 依赖
<!-- pom.xml(Config Client) -->
<dependency><groupId>org.springframework.boot</groupId><artifactId>spring-boot-starter-actuator</artifactId>
</dependency>
步骤 2:Client 配置 Actuator 暴露刷新端点
# application.properties(Config Client)
# 暴露所有端点(生产环境建议按需暴露)
management.endpoints.web.exposure.include=*
# 健康检查详情始终显示
management.endpoint.health.show-details=always
步骤 3:添加 <font style="color:rgb(0, 0, 0);">@RefreshScope</font> 注解,支持配置刷新
// ConfigClientApplication.java 中的 Controller 新增注解
import org.springframework.cloud.context.config.annotation.RefreshScope;@RestController
@RefreshScope // 该注解标记的类/方法,配置更新时会自动刷新
class ConfigController {@Value("${from}")private String from;@GetMapping("/from")public String getFrom() {return "配置值 from: " + from;}
}
步骤 4:触发配置刷新
- 修改 Git 仓库中的
<font style="color:rgb(0, 0, 0);">order-dev.properties</font>(如将<font style="color:rgb(0, 0, 0);">from</font>改为<font style="color:rgb(0, 0, 0);">git-dev-2.0</font>)并提交。 - 向 Client 发送 POST 请求:
<font style="color:rgb(0, 0, 0);">http://localhost:8081/actuator/refresh</font>。 - 再次访问
<font style="color:rgb(0, 0, 0);">http://localhost:8081/from</font>,返回<font style="color:rgb(0, 0, 0);">配置值 from: git-dev-2.0</font>,说明配置已动态刷新。