网站建设分析报告网站如何快速备案
nginx的安装
- 前言
- 一、rpm包安装
- 二、源码编译安装
- 1. 修改主机名
- 2. 禁用firewalld和selinux服务
- 3. 下载nginx
- 4. 解压nginx
- 5. 编译安装
- 6. 启动nginx
- 三、监控nginx
- 四、一键安装nginx
- 1. rpm包安装脚本一键安装nginx
- 2. 源码编译安装脚本一键安装
前言
nginx是什么?

nginx官网:https://www.nginx.org
nginx 是一个非常著名的web服务器软件,可以用来搭建一个网站
一、rpm包安装
1.安装nginx
[root@rocky-1 log]#
yum install nginx -y
2.启动
[root@rocky-1 ~]#
service nginx start
[root@rocky-1 ~]#systemctl start nginx
Redirecting to /bin/systemctl start nginx.servic
设置nginx服务开机自启
[root@rocky-1 ~]#
systemctl enable nginx
启动服务的方式:
- service 方式 ,非常古老的启动服务的方式
- systemctl 方式,比较新的方式
查看进程
[root@rocky-1 log]# ps  aux|grep nginx
root        2447  0.0  0.0  11292  1468 ?        Ss   15:13   0:00 nginx: master process /usr/sbin/nginx
nginx       2448  0.0  0.0  15560  5052 ?        S    15:13   0:00 nginx: worker process
nginx       2449  0.0  0.0  15560  5052 ?        S    15:13   0:00 nginx: worker process
nginx       2450  0.0  0.0  15560  5052 ?        S    15:13   0:00 nginx: worker process
nginx       2451  0.0  0.0  15560  4924 ?        S    15:13   0:00 nginx: worker process
root        2454  0.0  0.0   6636  2176 pts/0    R+   15:13   0:00 grep --color=auto nginx
[root@rocky-1 log]# netstat -anplut|grep nginx
tcp        0      0 0.0.0.0:80              0.0.0.0:*               LISTEN      2447/nginx: master
tcp6       0      0 :::80                   :::*                    LISTEN      2447/nginx: master
建议关闭防火墙服务
[root@rocky-1 log]#
service firewalld stop
Redirecting to /bin/systemctl stop firewalld.service
[root@rocky-1 log]# iptables -L
Chain INPUT (policy ACCEPT)
target prot opt source destination
Chain FORWARD (policy ACCEPT)
target prot opt source destination
Chain OUTPUT (policy ACCEPT)
target prot opt source destination
设置firewalld服务开机不启动
[root@rocky-1 ~]#
systemctl disable firewalld
主配置文件
/etc/nginx/nginx.conf
进入nginx的主配置文件所在的目录
[root@rocky-1 log]# cd
/etc/nginx/
[root@rocky-1 nginx]# ls
conf.d fastcgi.conf.default koi-utf mime.types.default scgi_params uwsgi_params.default
default.d fastcgi_params koi-win nginx.conf scgi_params.default win-utf
fastcgi.conf fastcgi_params.default mime.types nginx.conf.default uwsgi_params
/usr/share/nginx/html 这是存放网页的目录
[root@rocky-1 nginx]# cd /usr/share/nginx/html/
[root@rocky-1 html]# ls
404.html 50x.html icons index.html nginx-logo.png poweredby.png system_noindex_logo.png
index.html 首页 : 打开网站第一个看到的页面
[root@rocky-1 html]# vim index.html
<!DOCTYPE html>
<html>
<head><title>feng</title>
</head>
<body><p><h1>my name is feng</h1></p><img src="sc1.jpg" alt="My Photo 1" width="300"><img src="sc2.jpg" alt="My Photo 2" width="300"><a href="huang.html">huang</a><a href="sc/feng.html">feng</a><a href="https://www.baidu.com">baidu</a>
</body>
</html>
如果网站访问不了,如何排查?
进入日志文件
[root@rocky-1 nginx]# cd
/var/log/nginx/
[root@rocky-1 nginx]# ls
access.log # 记录正常的访问日志
error.log # 记录访问出错的日志
[root@rocky-1 nginx]# tail -f error.log
二、源码编译安装
全新机器中
初始化的操作
1. 修改主机名
[root@localhost ~]#
hostnamectl set-hostnameweb-1
[root@localhost ~]# su
[root@web-1 ~]#
2. 禁用firewalld和selinux服务
禁用firewalld
[root@web-1 ~]#
service firewalld stop
Redirecting to /bin/systemctl stop firewalld.service
[root@web-1 ~]#systemctl disable firewalld
Removed “/etc/systemd/system/multi-user.target.wants/firewalld.service”.
Removed “/etc/systemd/system/dbus-org.fedoraproject.FirewallD1.service”.
禁用selinux
[root@web-1 ~]# getenforce
Enforcing
[root@web-1 ~]#setenforce 0# 临时设置selinux策略为宽容模式
[root@web-1 ~]# getenforce
Permissive
[root@web-1 ~]# vi /etc/selinux/config
SELINUX=disabled
修改/替换文件内容
[root@web-1 ~]#
sed -i '/^SELINUX=/ s/enforcing/disabled/' /etc/selinux/config
-i 选项的作用是直接对文件进行操作
/^SELINUX=/ 查询以SELINUX=开头的行
s/enforcing/disabled/ 进行替换操作,将enforcing替换为disabled
3. 下载nginx
curl是linux里的字符界面的浏览器
[root@web-1 ~]# curl -O https://nginx.org/download/nginx-1.28.0.tar.gz
% Total % Received % Xferd Average Speed Time Time Time Current
Dload Upload Total Spent Left Speed
100 1250k 100 1250k 0 0 635k 0 0:00:01 0:00:01 --:–:-- 635k
[root@web-1 ~]# ls
anaconda-ks.cfg nginx-1.28.0.tar.gz
4. 解压nginx
[root@web-3 nginx]#
tar xfnginx-1.28.0.tar.gz
[root@web-3 nginx]# ls
nginx-1.28.0 nginx-1.28.0.tar.gz
[root@web-3 nginx]# cd nginx-1.28.0
[root@web-3 nginx-1.28.0]# ls
auto CHANGES CHANGES.ru CODE_OF_CONDUCT.md conf configure contrib CONTRIBUTING.md html LICENSE man README.md SECURITY.md src
src  存放nginx的源码包的文件夹  source  code
conf  存放nginx的样例配置文件的目录
html  存放了默认的首页文件目录
configure 是编译前配置的脚本 --》给nginx在编译的时候传递参数,当编译的时候会使用这些参数
--prefix=PATH                      set installation prefix 安装路径--without-http                     disable HTTP server  禁用http功能--without-http-cache                disable HTTP cache    禁用http缓存功能--with-mail                        enable POP3/IMAP4/SMTP proxy module 开启邮件功能正则表达式 是一种方法,用来查询内容非常方便
正则表达式: 将字母、数字、特殊符号组合成一个公式,用来表达某个意思。echo  "rootttttttfengdeyong"|egrep  "^root{4,6}"PCRE  -->perl  语言发明了正则表达式 python ---》RE
NGINX  ---》支持正则--》调perl语言的库
regular expression --》RE
5. 编译安装
什么是编译安装?为什么要编译安装?
将nginx的c语言源代码编译成二进制的程序的过程
编译安装的好处是可以定制软件的功能,哪些功能开启,哪些功能禁用
gcc 是linux里的编译工具,可以将c语言程序转换为二进制程序
[root@web-3 nginx-1.28.0]# yum install gcc -y
编译安装3步曲:
- 编译前的配置工作,本质上就是收集用户的需求信息,产生Makefile文件
[root@web-4 nginx-1.28.0]#
./configure--prefix=/usr/local/nginx1 --with-http_ssl_module --with-http_v2_module --with-http_v3_module --with-http_sub_module --with-stream --with-stream_ssl_module --with-threads
- 编译,将nginx的c语言代码编译成二进制这种程序–》背后调用gcc工具去根据Makefile文件里的要求去编译
[root@web-4 nginx-1.28.0]#
make -j 2编译
- 编译安装,本质上就是将编译好的二进制程序和默认源码包里的文件和文件夹复制到指定的安装目录下
[root@web-4 nginx-1.28.0]#
make install
6. 启动nginx
/usr/local/nginx1/sbin/nginx
[root@web-4 sbin]# cd /usr/local/nginx1/sbin/
[root@web-4 sbin]# ls
nginx
[root@web-4 sbin]# ./nginx
查看进程和查看端口
[root@web-4 sbin]# ps aux|grep nginx
root        1425  0.0  0.0   7468  3456 pts/0    S    14:54   0:00 bash one_key_install_nginx.sh web-3
root       14651  0.0  0.0  12076  2304 ?        Ss   16:47   0:00 nginx: master process ./nginx
nobody     14652  0.0  0.1  16364  5248 ?        S    16:47   0:00 nginx: worker process
root       14654  0.0  0.0   6636  2304 pts/2    S+   16:48   0:00 grep --color=auto nginx[root@web-4 sbin]# ss  -anplut|grep nginx
tcp   LISTEN 0      511          0.0.0.0:80        0.0.0.0:*    users:(("nginx",pid=14652,fd=6),("nginx",pid=14651,fd=6))[root@web-4 sbin]# yum  install net-tools  -y
[root@web-4 sbin]# netstat -anplut|grep nginx
tcp        0      0 0.0.0.0:80              0.0.0.0:*               LISTEN      14651/nginx: master
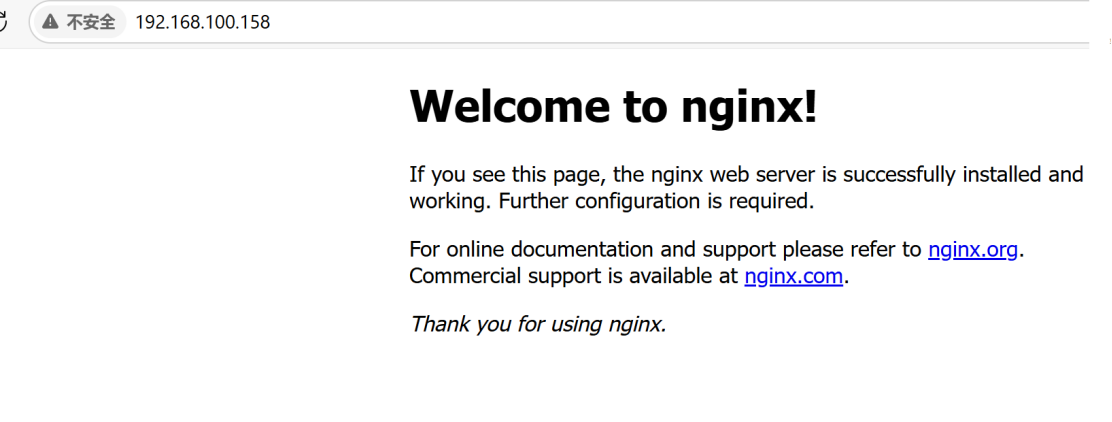
访问网站
停止nginx
[root@web-4 sbin]#
nginx -s stop
修改PATH变量
echo 'PATH=/usr/local/nginx1/sbin:$PATH' >> /etc/bashrc
无论在哪个目录,输入 nginx 都能启动
三、监控nginx
编写监控 nginx服务的脚本monitor_nginx.sh,一旦服务停止记录日志到monitor_nginx.log
[root@rocky-2 monitor]# vim monitor_nginx.sh
#!/bin/bash#如何判断nginx是否运行?
#1.看进程  ps aux|grep nginx
#          pidof nginx
#2.看端口
#3.直接访问while :
do#获得当前的时间w_time=$(date +%Y%m%d-%H:%M:%S)#获取主机名host_name=$(hostname)if  pidof nginx &>/dev/null ;then#echo "nginx is running"  >>/var/log/monitor_nginx.logecho "${w_time} $host_name  nginx is running" | tee -a /var/log/monitor_nginx.logelseecho "${w_time} $host_name nginx is not running" | tee -a /var/log/monitor_nginx.logfisleep 1
done
四、一键安装nginx
1. rpm包安装脚本一键安装nginx
脚本: install_nginx.sh
功能: 检测nginx是否已经安装,安装好了,是否启动
root@sanchuang:/nginx# vim  install_nginx.sh
#!/bin/bash
# 安装 nginx 的脚本,在rocky  linux  9.4
if  rpm  -q nginx ;thenecho  "已经安装了nginx"service nginx restartif  pidof  nginx ;thenecho "nginx进程已经运行"elseecho  "nginx进程没有启动"fi
elseecho  "没有安装nginx"# 安装  nginx yum  install  nginx -y# start  nginxservice  nginx  start# 检查 nginx 进程if  pidof  nginx ;thenecho "nginx进程已经运行"elseecho  "nginx进程没有启动"fi
fi
2. 源码编译安装脚本一键安装
set -e 脚本在遇到错误时立即退出
[root@web-1 ~]# vim install_nginx.sh
#!/bin/bashset -e
#修改主机名
hostnamectl set-hostname $1#禁用firewalld和selinux
systemctl stop firewalld
systemctl disable firewalldsetenforce 0
sed -i '/^SELINUX=/ s/enforcing/disabled/' /etc/selinux/config#配置国内源
#创建pip配置目录
mkdir -p ~/.pip# 编辑 pip 配置文件
cat > ~/.pip/pip.conf <<EOF
[global]
index-url = https://pypi.tuna.tsinghua.edu.cn/simple
trusted-host = pypi.tuna.tsinghua.edu.cn
EOF#下载nginx
mkdir -p /nginx
cd /nginx
curl -O https://nginx.org/download/nginx-1.28.0.tar.gz
echo "下载nginx成功"#解压nginx源码包
tar xf nginx-1.28.0.tar.gz
cd nginx-1.28.0#解决nginx软件依赖
yum install pcre-devel openssl-devel zlib-devel gcc vim -y#编译前的配置工作
./configure  --prefix=/usr/local/nginx1    --with-http_ssl_module  --with-http_v2_module  --with-http_v3_module   --with-http_sub_module  --with-stream   --with-stream_ssl_module   --with-threads
#编译
make -j 2
#编译安装
make install
echo "安装nginx成功"#修改PATH环境变量
echo 'PATH=/usr/local/nginx1/sbin/:$PATH' >>/etc/bashrc
source /etc/bashrc#设置nginx开机自启
echo '/usr/local/nginx1/sbin/nginx' >>/etc/rc.local
chmod +x /etc/rc.d/rc.local#开启nginx
nginx
#/usr/local/nginx1/sbin/nginx