【深度学习系列82】joyagent上手体验
代码参考这里:https://github.com/jd-opensource/joyagent-jdgenie/tree/main?tab=readme-ov-file
概述参考这里:https://opendeep.wiki/jd-opensource/joyagent-jdgenie/mindmap
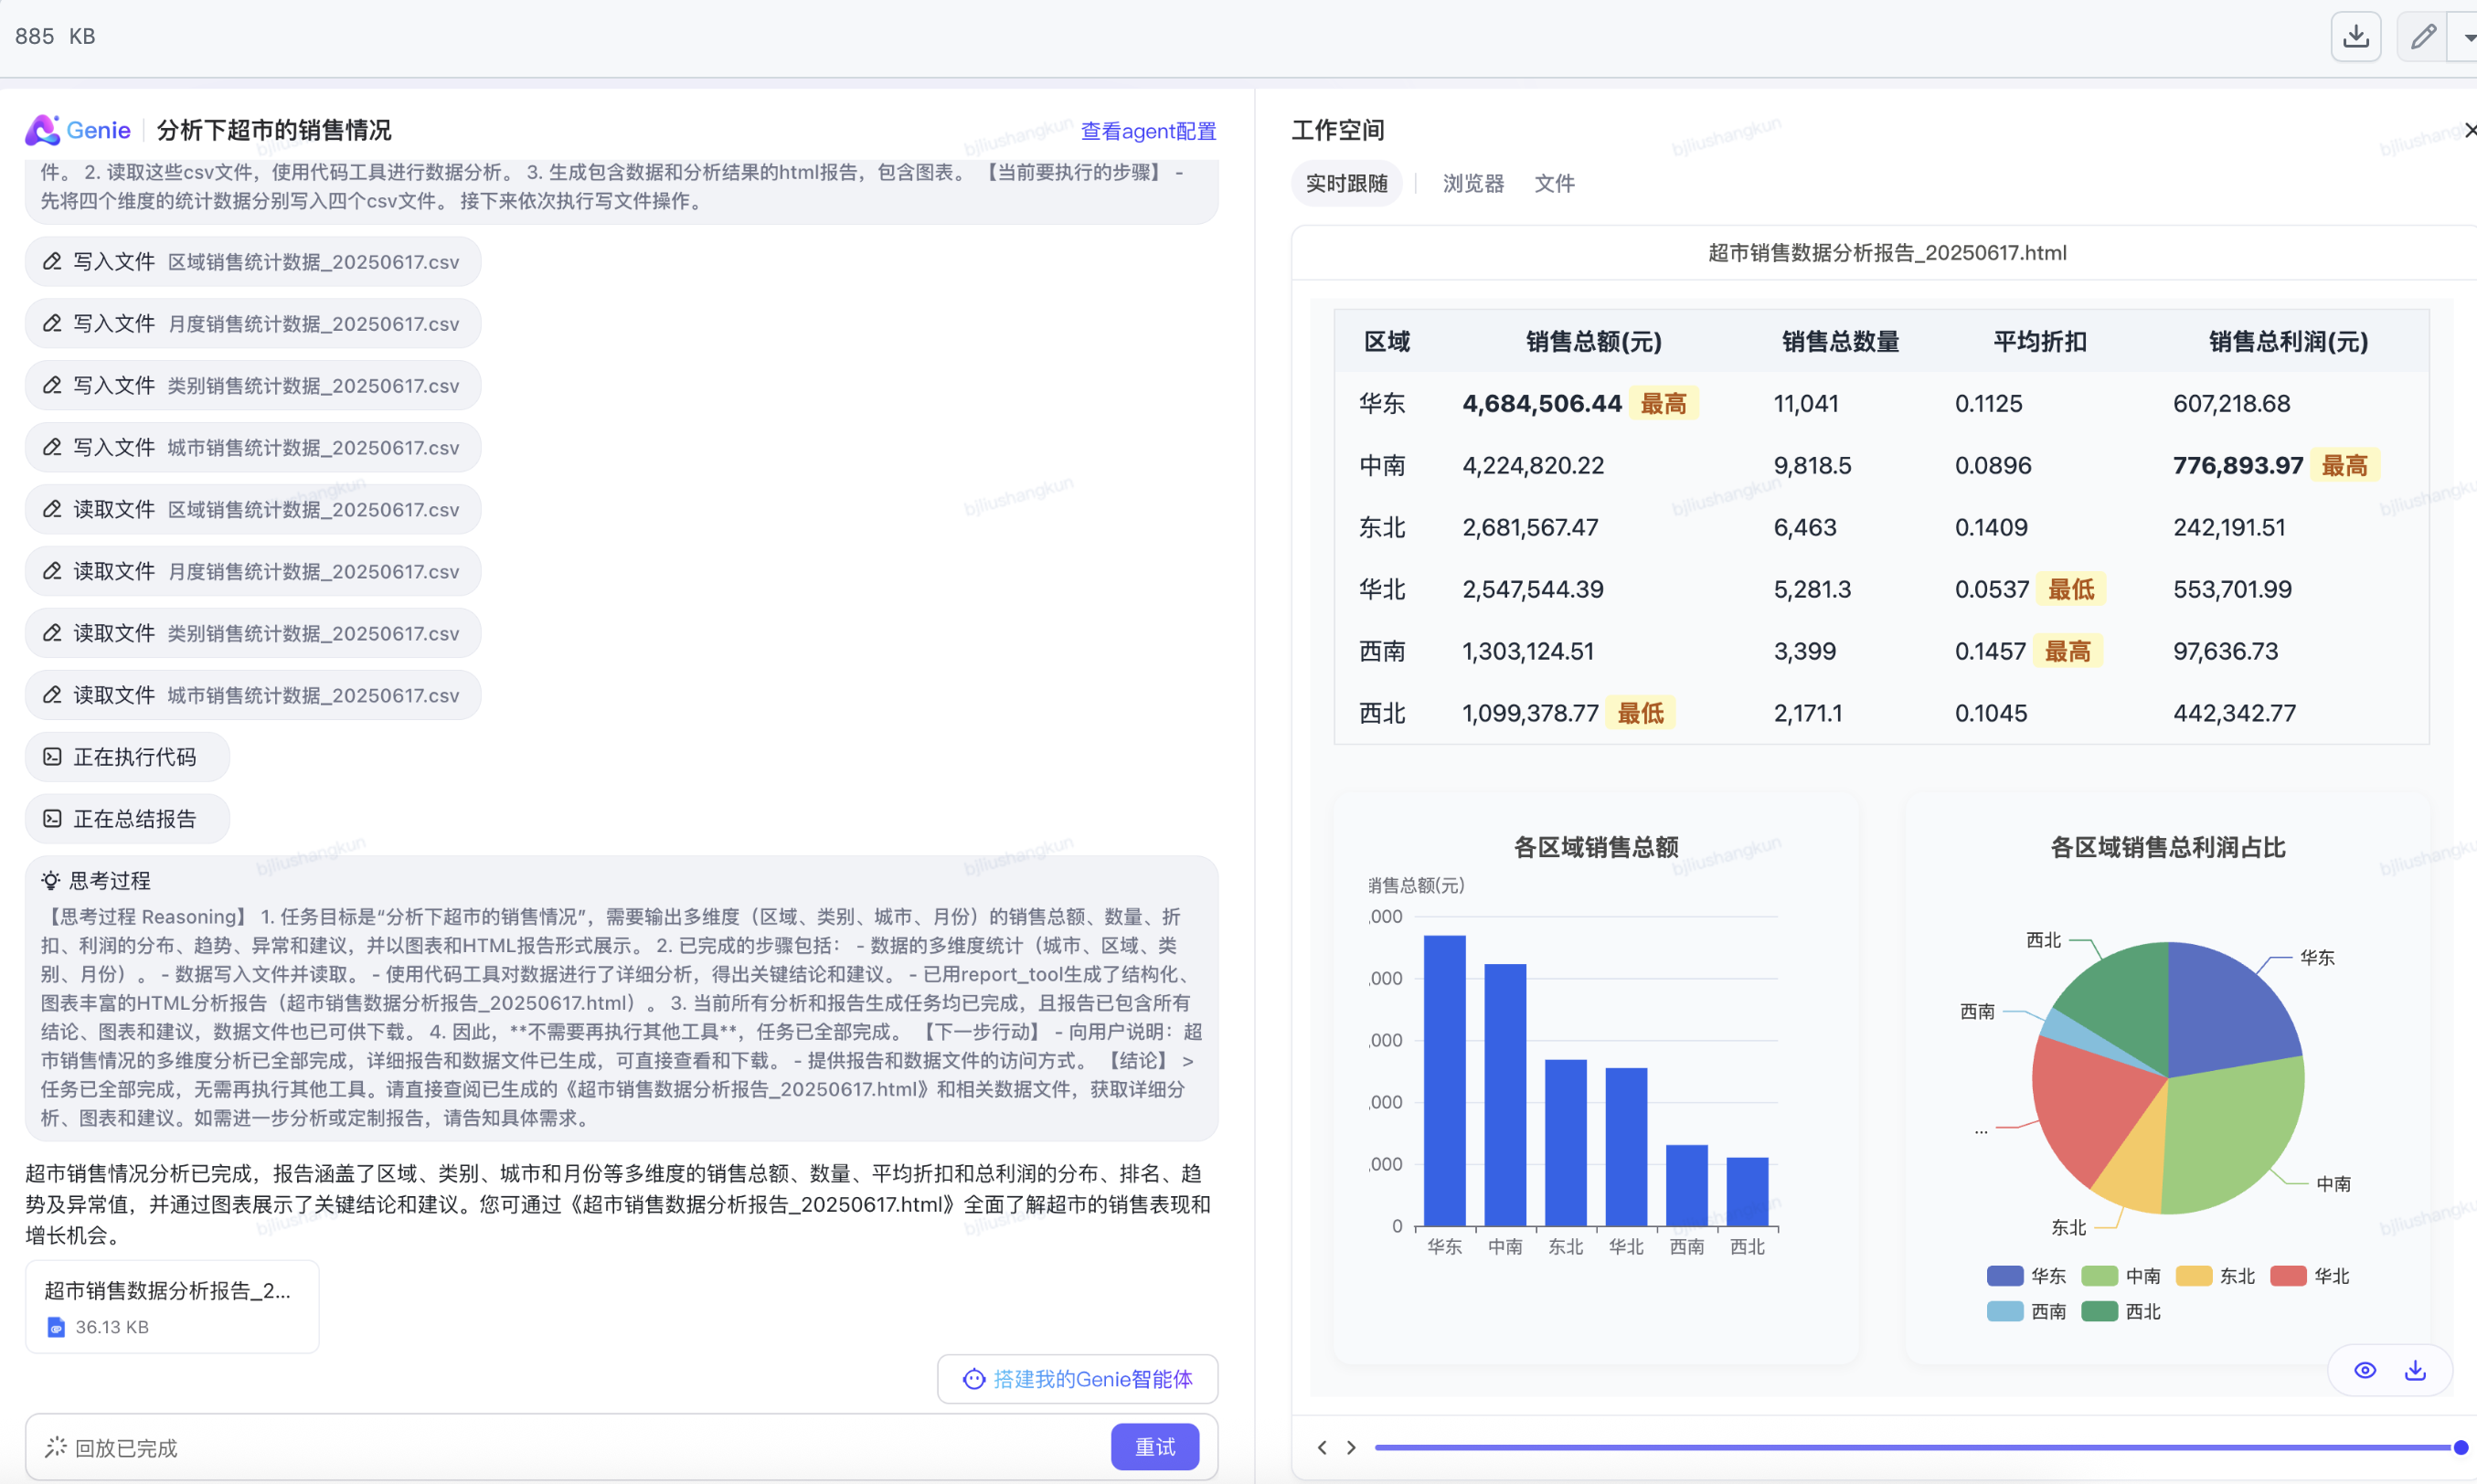
JoyAgent-JDGenie是一个通用的多智能体框架,对于用户需要定制的一些新场景功能,只需将相关的子智能体或者工具挂载到JoyAgent-Genie即可。下面是官方给的效果图,本文介绍一下上手步骤。
1. 安装
因为要做二次开发,所以这里选择了手动安装的方式,按照https://github.com/jd-opensource/joyagent-jdgenie/blob/main/Deploy.md一步步启动。

1.1 前端
首先是前端,在ui文件夹下。这个比较容易,安装好环境基本就OK了,执行sh start.sh启动如下界面:

1.2 tools
接下来要启动tools,在genie-tool文件夹下,将.env_template复制为.env。谷歌要收费,这里改用https://langsearch.com/api-keys,修改env文件的SERPER_SEARCH_API_KEY,然后按照对应的查询结果数据结构,修改tool/search_component/search_engine.py中SerperSearch类的代码,用于进行网络数据的搜索。首次启动需要执行 python -m genie_tool.db.db_engine 之后则无需执行。然后通过 uv run python server.py 启动服务。
async def search(self, query: str, request_id: str = None, *args, **kwargs) -> List[Doc]:body = self.construct_body(query, request_id)async with aiohttp.ClientSession() as session:async with session.post(self._url, json=body, headers=self.headers, timeout=self._timeout) as response:result = json.loads(await response.text())print(result)return [Doc(doc_type="web_page",content=item.get("snippet", ""),title=item.get("name", ""),link=item.get("url", ""),data={"search_engine": self._engine},) for item in result.get("data",{}).get("webPages",{}).get("value",[])]
然后这里也可以自己实现agent,需要实现BaseTool接口,声明工具的名称、描述、参数、调用方法。在com.jd.genie.controller.tool.common下:
/*** 工具基接口*/
public interface BaseTool {String getName(); // 工具名称String getDescription(); // 工具描述Map<String, Object> toParams(); // 工具参数Object execute(Object input); // 调用工具
}// 天气智能体示例
public class WeatherTool implements BaseTool {@Overridepublic String getName() {return "agent_weather";}@Overridepublic String getDescription() {return "这是一个可以查询天气的智能体";}@Overridepublic Map<String, Object> toParams() {return "{\"type\":\"object\",\"properties\":{\"location\":{\"description\":\"地点\",\"type\":\"string\"}},\"required\":[\"location\"]}";}@Overridepublic Object execute(Object input) {return "今日天气晴朗";}
}
在com.jd.genie.controller.GenieController#buildToolCollection中添加如下代码,引入自定义Agent
WeatherTool weatherTool = new WeatherTool();
toolCollection.addTool(weatherTool);
1.3 后端
接下来是后端,在genie-backend文件夹下,修改src/main/resources/application.yml。每次修改完配置后,重新build.sh,然后start.sh,然后通过命令tail -f genie-backend_startup.log观察日志情况。
1.4 MCP服务
接下来是mcp服务,在 genie-backend/src/main/resources/application.yml 添加mcp_server服务,多个server逗号分隔:mcp_server_url: “http://ip1:port1/sse,http://ip2:port2/sse”
在genie-client目录下,sh start.sh 即可启用mcp的client服务。
如果配置都没问题,后面可以直接执行住目录下的start_genie.sh。