文章目录
- 1 引入管道,并全局启用
- 2 针对请求参数文档`user_copy.swagger.validator.ts`文件内的代码修改
- 3 引入并使用
- 4 测试拦截效果
注:不要关心注释代码,那是属于后面功能的区域。因为随着代码体量加大,功能不再明确,只需按照步骤并参考效果图,把关键代码写入即可,所以下只写关键代码,具体请看效果图。
项目地址
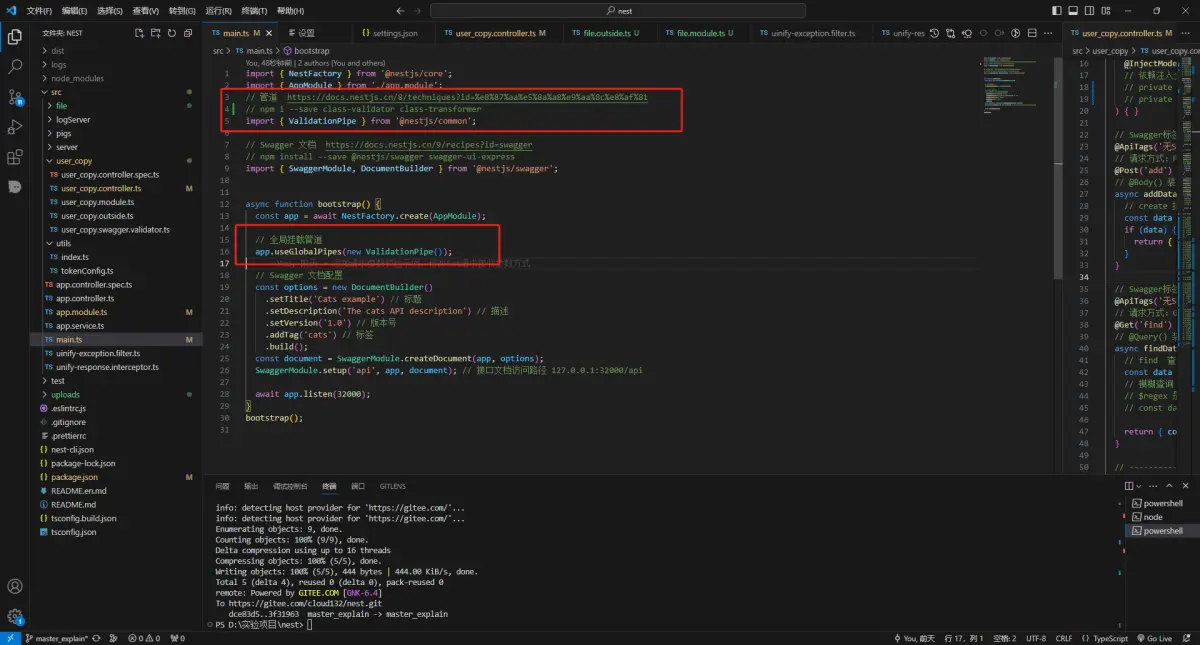
1 引入管道,并全局启用
npm i --save class-validator class-transformer
~/src/main.tsimport { ValidationPipe } from '@nestjs/common';
app.useGlobalPipes(new ValidationPipe());
2 针对请求参数文档user_copy.swagger.validator.ts文件内的代码修改
- 加入
@IsNotEmpty() 即可开启请求参数校验
~/src/user_copy/user_copy.swagger.validator.ts
import { ApiProperty } from '@nestjs/swagger';
import { IsNotEmpty } from 'class-validator'export class userResponsesValidator {@ApiProperty({ description: '', example: '账号', required: true })@IsNotEmpty({message:'账号必填'})user_name: string;@ApiProperty({ description: '', example: '密码', required: true })@IsNotEmpty({message:'密码必填'})password: string;@ApiProperty({ description: '', example: '年龄', required: false })age: string;@ApiProperty({ description: '', example: '性别', required: false })sex: string;@ApiProperty({ description: '', example: '时间', required: false })date: string;
}export class GetRequestDto {@ApiProperty({ description: '', example: '账号', required: true })@IsNotEmpty({message:'账号必填'})user_name: string;
}
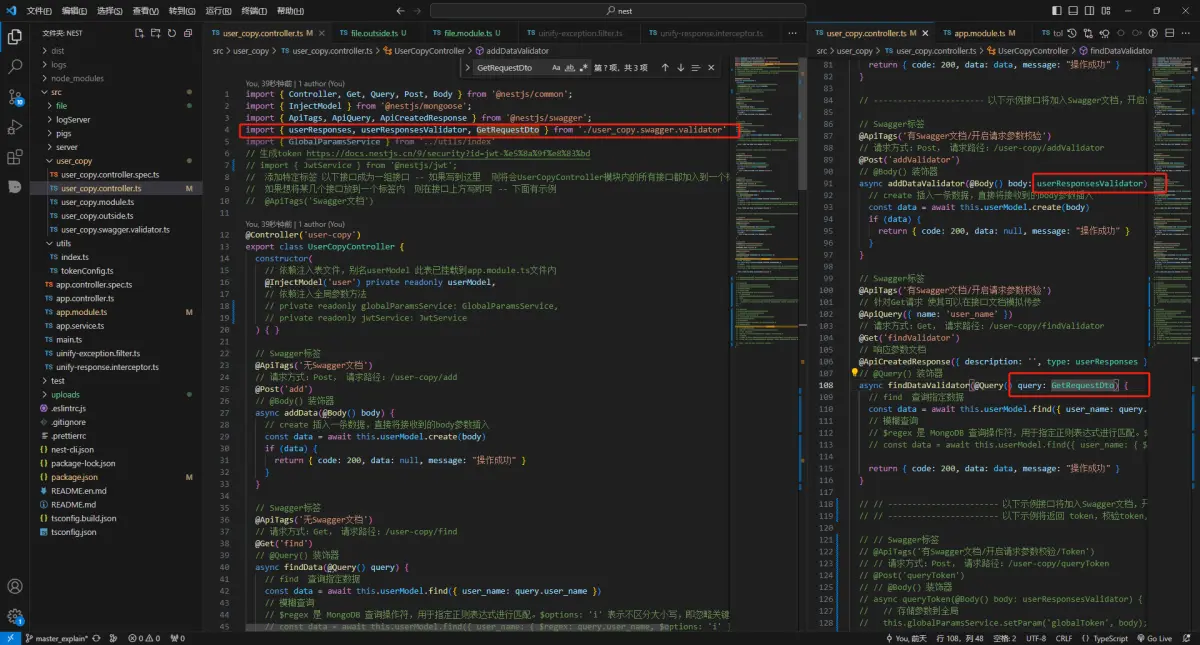
3 引入并使用
~/src/user_copy/user_copy.controller.tsimport { userResponses, userResponsesValidator, GetRequestDto } from './user_copy.swagger.validator'@ApiTags('有Swagger文档/开启请求参数校验')@Post('addValidator')async addDataValidator(@Body() body: userResponsesValidator) {const data = await this.userModel.create(body)if (data) {return { code: 200, data: null, message: "操作成功" }}}@ApiTags('有Swagger文档/开启请求参数校验')@ApiQuery({ name: 'user_name' })@Get('findValidator')@ApiCreatedResponse({ description: '', type: userResponses })async findDataValidator(@Query() query: GetRequestDto) {const data = await this.userModel.find({ user_name: query.user_name })return { code: 200, data: data, message: "操作成功" }}
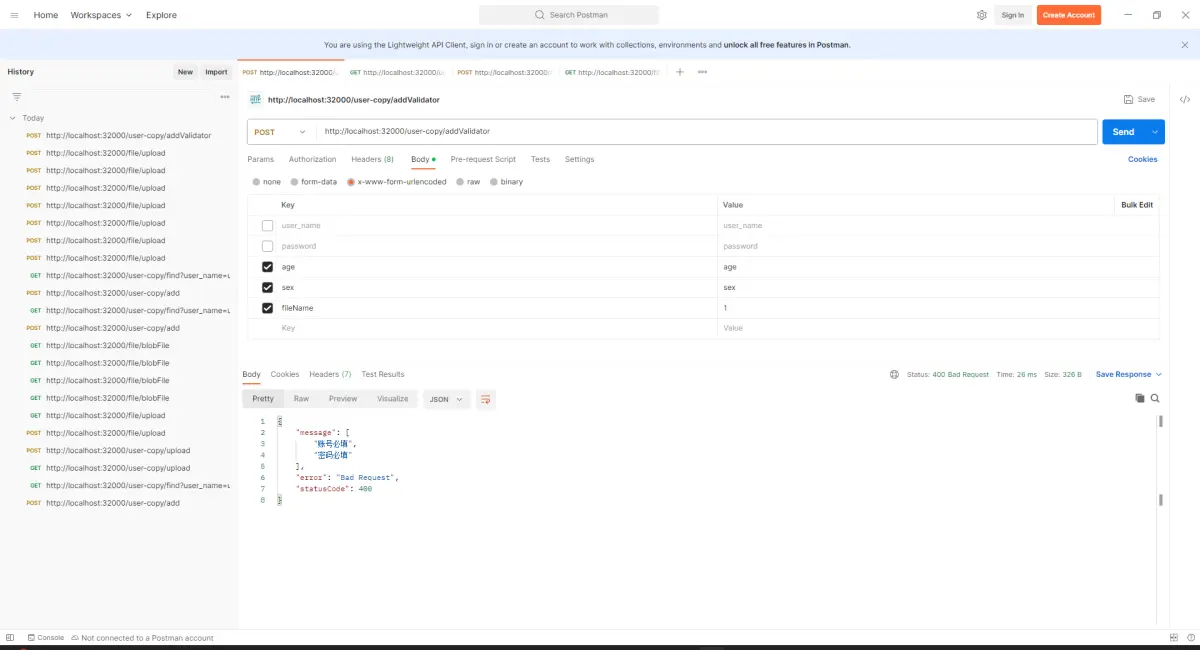
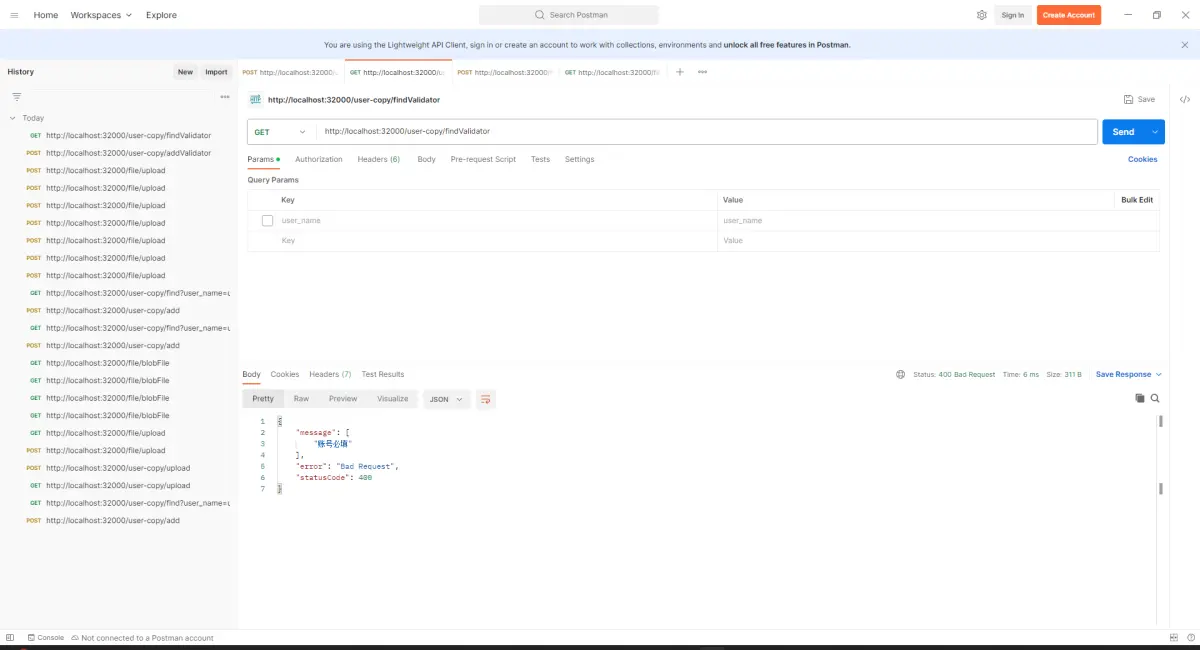
4 测试拦截效果
- 现在账号/密码字段已加入必填校验,那么试试不传会发生什么