Spring —— AOP
一、前言
本文需要的Maven坐标如下:Spring框架、MVC框架、Spring的aop和aspectj的aop,和junit的Spring测试注解
<dependency><groupId>org.springframework</groupId><artifactId>spring-web</artifactId><version>5.1.9.RELEASE</version></dependency><dependency><groupId>org.springframework</groupId><artifactId>spring-webmvc</artifactId><version>5.1.9.RELEASE</version></dependency><dependency><groupId>org.springframework</groupId><artifactId>spring-context</artifactId><version>5.1.9.RELEASE</version></dependency><dependency><groupId>org.aspectj</groupId><artifactId>aspectjweaver</artifactId><version>1.9.24</version></dependency><dependency><groupId>org.springframework</groupId><artifactId>spring-test</artifactId><version>5.1.9.RELEASE</version></dependency>AOP 的基本概念如下:
切面(Aspect):定义了横切关注点的模块化,比如日志记录、权限校验等。
切点(Pointcut):定义了在哪些地方插入横切关注点。
通知(Advice):定义了在切点处执行的具体操作,包括前置通知、后置通知、返回通知、异常通知和环绕通知。
总而言之,大致就是把一个功能单独剥离出来,通过通知(增强)来实现对这个功能的强化(对功能的补充),对功能的补充称作通知(增强)。
二、动态代理
对动态代理不熟悉的可以查看Java反射入门 —— 详解反射-CSDN博客
1.基于jdk的动态代理
jdk的动态代理是通过接口实现的。
首先我们创建一个目标接口和实现接口的目标类:
public interface TargetInterface {public void save();
}
public class Target implements TargetInterface{@Overridepublic void save() {System.out.println("save running...");}
}
类中含有一个save()方法作为目标方法。
我们这里使用动态代理来调用目标方法,设计一个代理类,并直接调用方法:
public class ProxyTest {public static void main(String[] args) {//创建目标对象Target target = new Target();//增强对象Advice advice = new Advice();//返回值就是动态生成的代理对象TargetInterface proxy = (TargetInterface) Proxy.newProxyInstance(target.getClass().getClassLoader(),//目标对象类加载器target.getClass().getInterfaces(),//目标对象相同的接口字节码对象new InvocationHandler() {//调用代理对象的任何方法 实质执行的都是invoke方法@Overridepublic Object invoke(Object proxy, Method method, Object[] args) throws Throwable {Object invoke = method.invoke(target, args);//执行目标方法return invoke;}});//调用代理对象的方法proxy.save();}
}
这里我们再设计一个通知类(Advice),用于对目标方法进行强化:
public class Advice {public void before(){System.out.println("前置增强...");}public void afterReturning(){System.out.println("后置增强...");}}我们这里先只设计两个方法,分别是前置增强和后置增强。
这时,我们再在代理类中调用这两个方法:
public class ProxyTest {public static void main(String[] args) {//创建目标对象Target target = new Target();//增强对象Advice advice = new Advice();//返回值就是动态生成的代理对象TargetInterface proxy = (TargetInterface) Proxy.newProxyInstance(target.getClass().getClassLoader(),//目标对象类加载器target.getClass().getInterfaces(),//目标对象相同的接口字节码对象new InvocationHandler() {//调用代理对象的任何方法 实质执行的都是invoke方法@Overridepublic Object invoke(Object proxy, Method method, Object[] args) throws Throwable {//前置增强advice.before();Object invoke = method.invoke(target, args);//执行目标方法//后置增强advice.afterReturning();return invoke;}});//调用代理对象的方法proxy.save();}
}
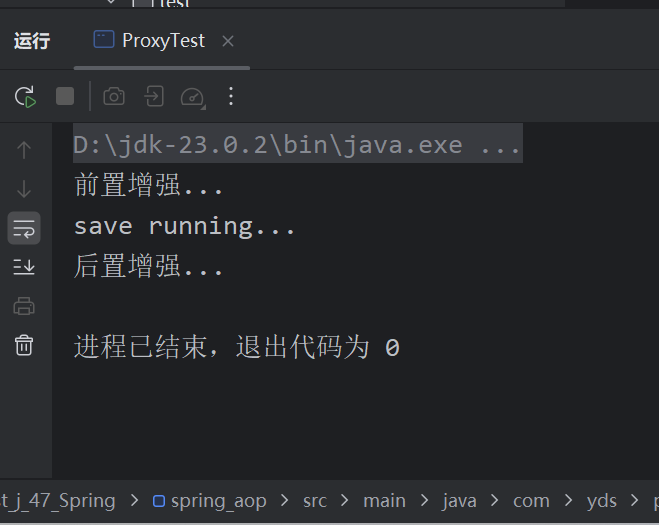
我们运行后得到如下效果:
2.基于cglib的动态代理
cglb的动态代理是通过继承实现的。
这里我们就不再需要使用接口了:
public class Target {public void save() {System.out.println("save running...");}
}
通知类不变。
代理类更改如下:
public class ProxyTest {public static void main(String[] args) {//创建目标对象Target target = new Target();//增强对象Advice advice = new Advice();//返回值就是动态生成的代理对象 基于cglib//1.创建增强器Enhancer enhancer = new Enhancer();//2.设置父类(目标)enhancer.setSuperclass(Target.class);//3.设置回调enhancer.setCallback(new MethodInterceptor() {@Overridepublic Object intercept(Object proxy, Method method, Object[] args, MethodProxy methodProxy) throws Throwable {advice.before();//执行前置method.invoke(target,args);//执行目标advice.afterReturning();//执行后置return null;}});//4.创建代理对象Target proxy = (Target) enhancer.create();proxy.save();}
}
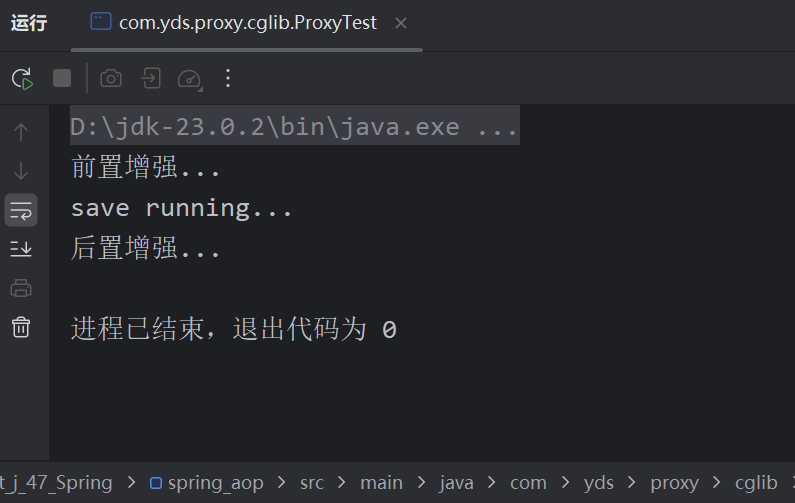
效果自然相同:
三、基于xml实现AOP
Spring框架为我们提供了aop的实现方式,并且也集成了aspectj提供的aop实现方式。
我们不需要再自己通过动态代理实现AOP了,只需要通过xml配置文件进行配置即可。
这里和之前一样,只是我们不需要自己再写代理类了,只需要写一个Spring配置文件即可。
1.快速入门
我们首先还是写出增强类,目标接口、和目标类:
public class MyAspect {public void before(){System.out.println("前置增强...");}public void afterReturning(){System.out.println("后置增强...");}//ProceedingJoinPoint:正在执行的连接点==切点public Object around(ProceedingJoinPoint pjp) throws Throwable {System.out.println("环绕前增强...");//切点方法Object proceed = pjp.proceed();System.out.println("环绕后增强...");return proceed;}public void afterThrowing(){System.out.println("异常抛出增强...");}public void after(){System.out.println("最终增强...");}
}
public class Target implements TargetInterface {@Overridepublic void save() {System.out.println("save running...");}
}public interface TargetInterface {public void save();
}
@RunWith(SpringJUnit4ClassRunner.class)
@ContextConfiguration("classpath:applicationContext.xml")
public class AopTest {@Autowiredprivate TargetInterface target;@Testpublic void test1(){target.save();}}
我们先将目标类和切面对象放入Spring容器中:
<!--目标对象--><bean id="target" class="com.yds.aop.Target"/><!--切面对象--><bean id="myAspect" class="com.yds.aop.MyAspect"/>然后我们配置织入(先不管pointcut中的切点表达式):
每一个通知的类型都有自己的标签,这里我们先写前置增强:
<!--配置织入:告诉Spring框架 哪些方法需要进行哪些增强--><aop:config><!--声明切面--><aop:aspect ref="myAspect"><!--切面:切点+通知--><aop:before method="before" pointcut="execution(public void com.yds.aop.Target.save())"></aop:before></aop:aspect></aop:config>接下来就是测试了:
@RunWith(SpringJUnit4ClassRunner.class)
@ContextConfiguration("classpath:applicationContext.xml")
public class AopTest {@Autowiredprivate TargetInterface target;@Testpublic void test1(){target.save();}}
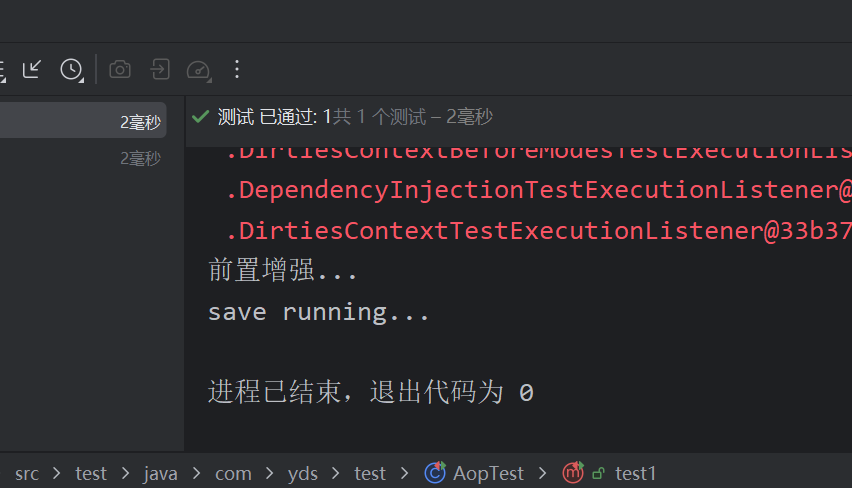
效果如下:
2.通知的类型
通知的类型
- 通知的配置语法:
- <aop:通知类型 method=“切面类中方法名” pointcut=“切点表达式”></aop:通知类型>
- 前置通知,标签<aop:before>,用于配置前置通知。指定增强的方法在切入点方法之前执行
- 后置通知,标签<aop:after-returning>,用于配置后置通知。指定增强的方法在切入点方法之后执行
- 环绕通知,标签<aop:around>,用于配置环绕通知。指定增强的方法在切入点方法之前和之后都执行
- 异常抛出通知,标签<aop:throwing>,用于配置异常抛出通知。指定增强的方法在出现异常时执行
- 最终通知,标签<aop:after>,用于配置最终通知。无论增强方式执行是否有异常都会执行
我们这里重新配置:
<!--配置织入:告诉Spring框架 哪些方法需要进行哪些增强--><aop:config><!--声明切面--><aop:aspect ref="myAspect"><!--切面:切点+通知--><aop:before method="before" pointcut="execution(public void com.yds.aop.Target.save())"></aop:before><aop:after-returning method="afterReturning" pointcut="execution(* com.yds.aop.*.*(..))"/><aop:around method="around" pointcut="execution(* com.yds.aop.*.*(..))"/><aop:after-throwing method="afterThrowing" pointcut="execution(* com.yds.aop.*.*(..))"/><aop:after method="after" pointcut="execution(* com.yds.aop.*.*(..))"/></aop:aspect></aop:config>效果如下:
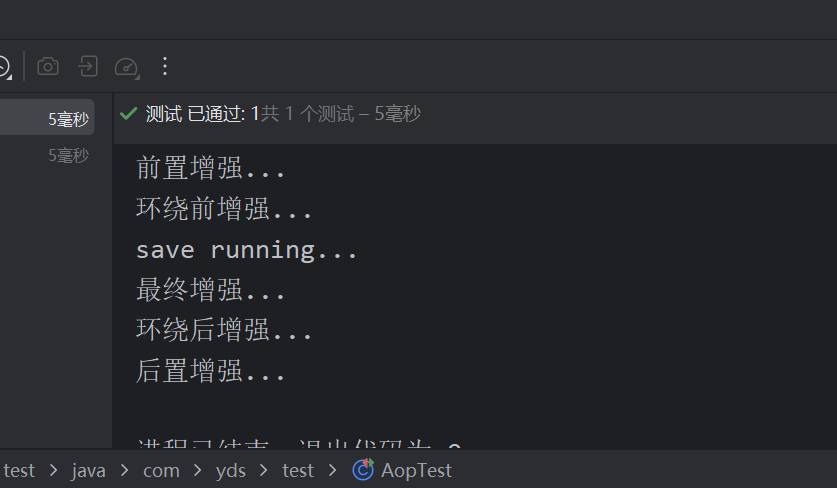
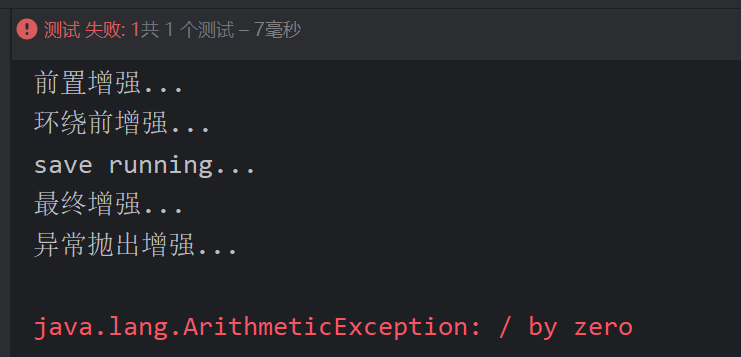
如果我们抛出一个异常:
public class Target implements TargetInterface {@Overridepublic void save() {System.out.println("save running...");int i = 1/0;}
}
就会有异常抛出增强:
3.抽取切点表达式
切点表达式的写法
- 表达式语法: - execution([修饰符]返回值类型 包名.类名.方法名(参数))
- 访问修饰符可以省略 - 返回值类型、包名、类名、方法名可以使用星号*代表任意
- 包名与类名之间一个点.代表当前包下的类,两个点..表示当前包及其子包下的类
- 参数列表可以使用两个点..表示任意个数,任意类型的参数列表
- 例如:
- execution(public void com.yds.aop.Target.method())
- execution(void com.yds.aop.Target.*(..))
- execution(* com.yds.aop..(..)) - execution(* com.yds.aop..())
- execution(* ...*(..))
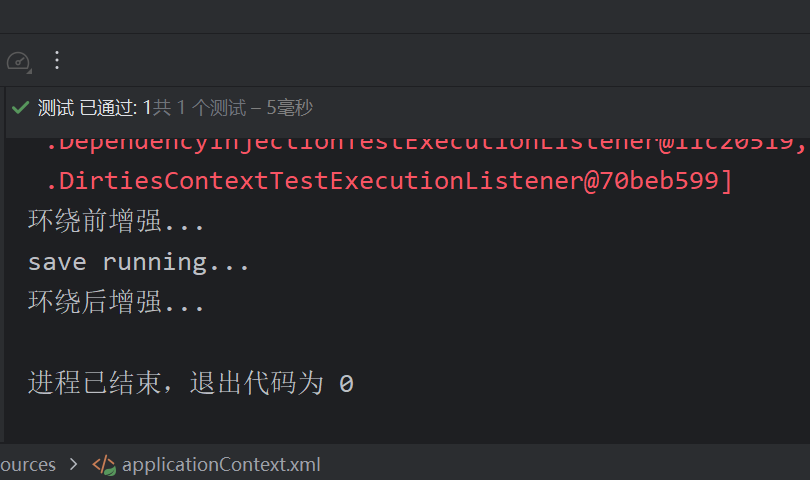
我们这里可以简化书写抽取切点表达式:
<!--抽取切点表达式-->
<aop:pointcut id="myPoint" expression="execution(* com.yds.aop.*.*(..))"/>
这样我就可以直接引用抽取的切点表达式了
<aop:around method="around" pointcut-ref="myPoint"/>
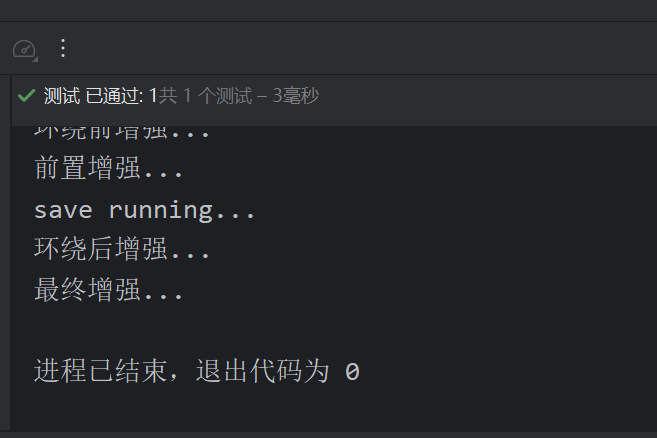
效果如下:
四、基于注解开发AOP
首先配置一下Spring,不能再使用之前的配置文件了:
这里只需要执行这两个操作:
一个是组件扫描,目的是为了扫描注解,将对象添加进容器中去。
一个是aop自动代理,Spring将会自动检测Bean中的@Aspect注解,并为匹配的Bean创建代理
<!--组件扫描--><context:component-scan base-package="com.yds.anno"/><!--aop自动代理--><aop:aspectj-autoproxy/>这里我们只需要更改切面类即可:
@Component("myAspect")
@Aspect //标注当前类是一个切面
public class MyAspect {//配置前置通知@Before("execution(* com.yds.anno.*.*(..))")//参数value为切点表达式public void before(){System.out.println("前置增强...");}public void afterReturning(){System.out.println("后置增强...");}//ProceedingJoinPoint:正在执行的连接点==切点
//    @Around("execution(* com.yds.anno.*.*(..))")@Around("pointcut()")public Object around(ProceedingJoinPoint pjp) throws Throwable {System.out.println("环绕前增强...");//切点方法Object proceed = pjp.proceed();System.out.println("环绕后增强...");return proceed;}public void afterThrowing(){System.out.println("异常抛出增强...");}//    @After("execution(* com.yds.anno.*.*(..))")@After("MyAspect.pointcut()")public void after(){System.out.println("最终增强...");}//定义一个切点表达式@Pointcut("execution(* com.yds.anno.*.*(..))")public void pointcut(){}
}
当然,还是需要在目标类中添加注解的(放到Spring容器中去):
@Component("target")
public class Target implements TargetInterface {@Overridepublic void save() {System.out.println("save running...");
//        int i = 1/0;}
}
而测试类也只需要改一下配置文件(改成新的配置文件即可):
@RunWith(SpringJUnit4ClassRunner.class)
@ContextConfiguration("classpath:applicationContext-anno.xml")
public class AnnoTest {@Autowiredprivate TargetInterface target;@Testpublic void test1(){target.save();}}
效果如下,和xml配置的效果是一样的,并且书写更加简单:
