Apache服务——搭建实验
实验一:访问控制
策略:
- 指定IP不能访问
- 访问页面需要用户名和密码
一、服务器(77.77)拒绝(77.78)客户端访问
1.修改主配置文件
[root@localhost ~]# vim /usr/local/apache2/conf/httpd.conf<Directory />AllowOverride noneRequire all denieddeny from 192.178.77.78  #拒绝77.78客户机访问#deny from 192.168.77.0/24   #拒绝77.0网段的客户机访问
</Directory>
2.重启服务器
[root@localhost apache2]# ./bin/apachectl stop
[root@localhost apache2]# ./bin/apachectl start
3.在客户端访问
#77.78客户端
[root@localhost ~]# curl 192.168.77.77
<!DOCTYPE HTML PUBLIC "-//IETF//DTD HTML 2.0//EN">
<html><head>
<title>403 Forbidden</title>
</head><body>
<h1>Forbidden</h1>
<p>You don't have permission to access this resource.</p>
</body></html>
二、拒绝真实机访问
1.使用真实机登录

2.查看登录日志
[root@localhost apache2]# tail -n 5 logs/access_log
192.168.77.78 - - [11/Sep/2025:19:33:56 +0800] "GET / HTTP/1.1" 200 12339
192.168.77.78 - - [11/Sep/2025:19:34:42 +0800] "GET / HTTP/1.1" 200 12339
192.168.77.78 - - [11/Sep/2025:19:37:15 +0800] "GET / HTTP/1.1" 403 199
192.168.77.1 - - [11/Sep/2025:19:39:24 +0800] "GET / HTTP/1.1" 200 12339
192.168.77.1 - - [11/Sep/2025:19:40:06 +0800] "GET /favicon.ico HTTP/1.1" 404 196
#即真实机访问ip是77.1
3.重改配置文件,再次访问
<Directory />AllowOverride noneRequire all denieddeny from 192.168.77.78deny from 192.168.77.1
</Directory>

三、保护某页面
方法一
注:保护/htdocs/zhongyao/index.html页面
1.在目录zhongyao下创建并使用.htaccess文件
[root@localhost zhongyao]# vim .htaccessAuthName "重要"    #提示信息
AuthType basic    #加密类型
AuthUserFile /usr/local/apache2/htdocs/zhongyao/user1.list    #密码文件
Require valid-user    #允许密码文件中的所有用户访问
2.创建密码文件、添加用户
#创建密码文件,添加lisi用户,密码123
[root@localhost apache2]# ./bin/htpasswd -c htdocs/zhongyao/user1.list lisi
New password:
Re-type new password:
Adding password for user lisi
#添加wangwu用户,密码342
[root@localhost apache2]# ./bin/htpasswd -m htdocs/zhongyao/user1.list wangwu
New password:
Re-type new password:
Adding password for user wangwu
3.在主配置文件中开放权限
#添加目录权限
<Directory "/usr/local/apache2/htdocs/zhongyao">Options Indexes FollowSymLinksAllowOverride AllRequire all granted
</Directory>#或直接修改根目录权限
<Directory "/usr/local/apache2/htdocs">AllowOverride All    #允许.htaccess文件中的权限加载</Directory>
4.重启,清缓存测试
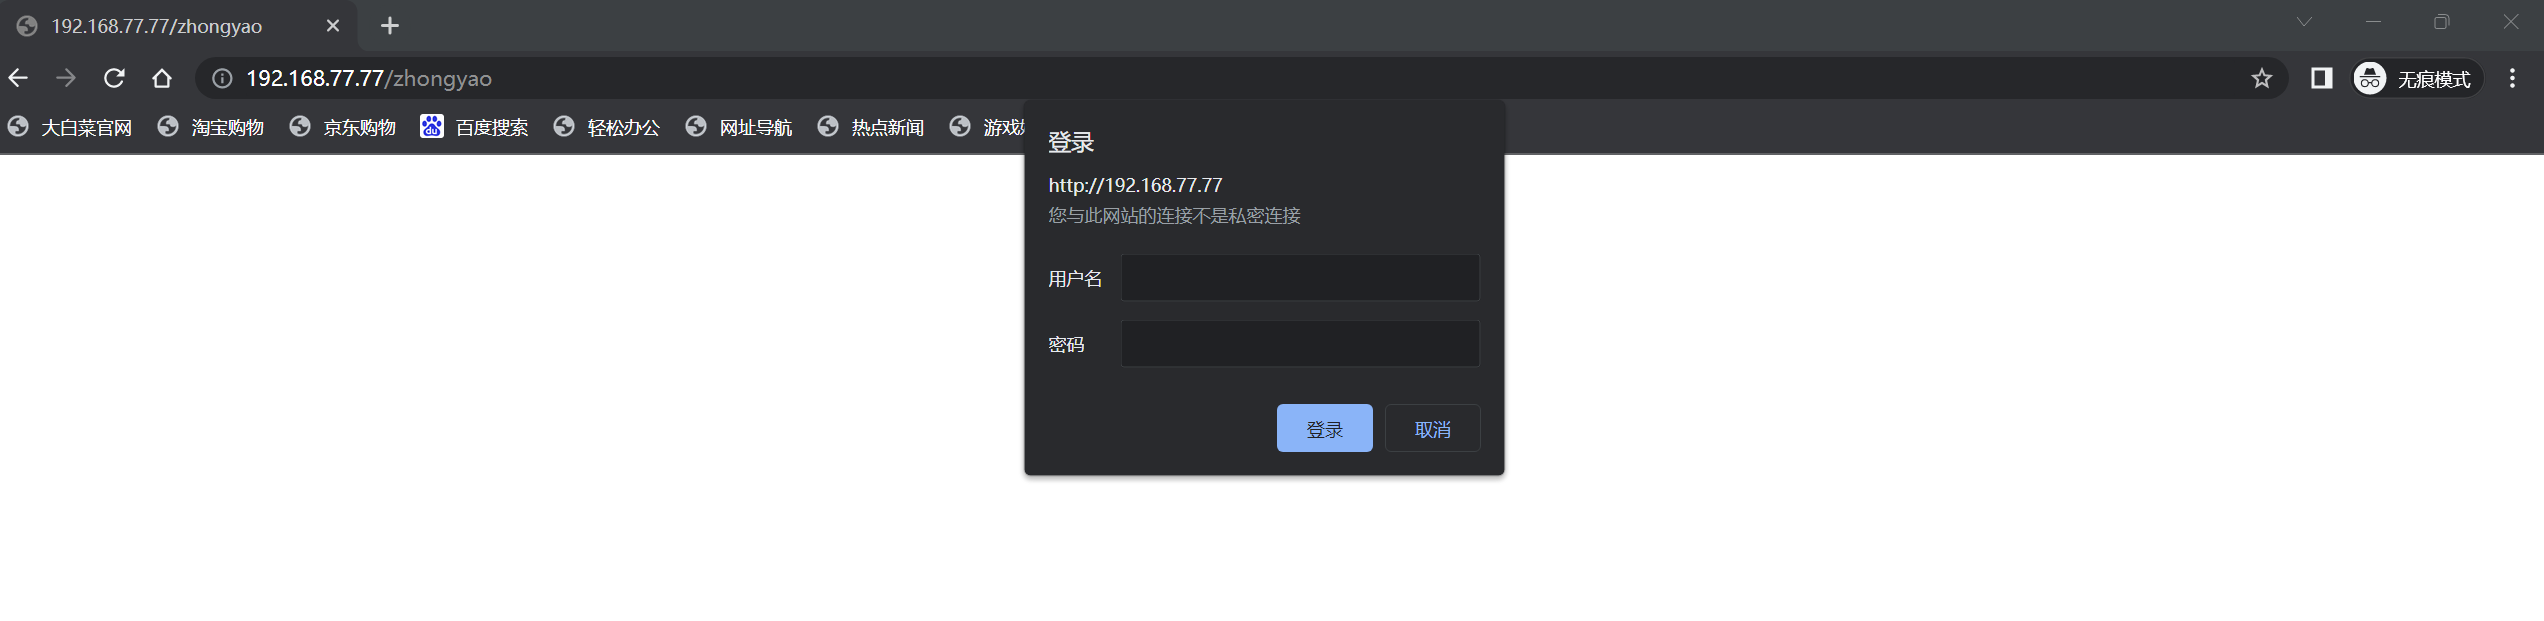

注:输入密码后可正常查看网页(因为不识别汉字所以是乱码),取消验证则返回状态码401,即未通过认证;而且字符界面无法弹出窗口,会默认验证失败,返回401状态码
方法二
注:直接在主配置文件给htdcos/zhongyao目录设权限
<Directory "/usr/local/apache2/htdocs/zhongyao">AuthName "重要"AuthType basicAuthUserFile /usr/local/apache2/htdocs/zhongyao/user1.listRequire valid-user
</Directory>
实验二:虚拟主机
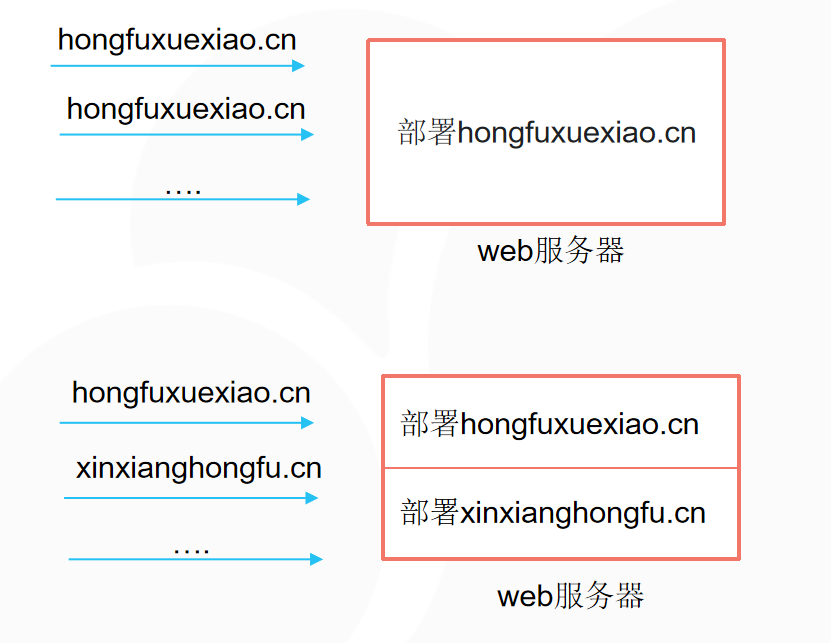
作用:一台apache服务器搭建两个网站,常用于中小型企业和大企业部门
模式:
- 基于域名的虚拟主机
- 基于端口的虚拟主机
- 基于ip的虚拟主机
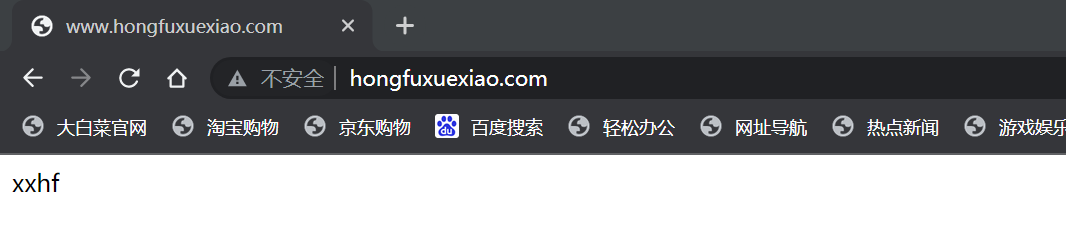
一、基于域名的虚拟主机
1.加载相应模块和子配置文件
vim /conf/httpd.conf——开启vhost模块,导入子配置文件
Include conf/extra/httpd-vhosts.conf
LoadModule vhost_alias_module modules/mod_vhost_alias.so
2.修改子配置文件
<VirtualHost *:80>ServerAdmin webmaster@xxhf.example.com    #管理员邮箱DocumentRoot "/usr/local/apache2/htdocs/xxhf"    #网站主目录ServerName www.xingxianghongfu.com    #完整域名ServerAlias www.dummy-host.example.com    #别名ErrorLog "logs/dummy-host.example.com-error_log"    #错误日志CustomLog "logs/dummy-host.example.com-access_log" common    #访问日志
</VirtualHost><VirtualHost *:80>ServerAdmin webmaster@hfxx.example.comDocumentRoot "/usr/local/apache2/htdocs/hfxx"ServerName www.hongfuxuexiao.comErrorLog "logs/dummy-host2.example.com-error_log"CustomLog "logs/dummy-host2.example.com-access_log" common
</VirtualHost>
3.创建文件和目录
[root@localhost htdocs]# mkdir {xxhf,hfxx}
[root@localhost htdocs]# echo "xxhf" >> xxhf/index.html
[root@localhost htdocs]# echo "hfxx" >> hfxx/index.html
4.在真实机hosts文件中记录

5.重启服务,真实机访问


问题1:若此时直接用ip访问?用example.com访问?
- 用ip访问:主配置文件——子配置文件——第一个虚拟主机
- 用默认域名访问:主配置文件——子配置文件——域名匹配失败——换ip匹配——第一个虚拟主机
注:加载子配置文件后,不再走主配置文件的网站
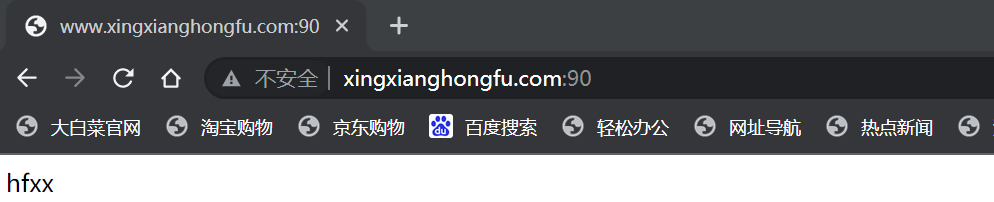
二、基于端口的虚拟主机
1.在主配中监听80、90端口
Listen 80 902.修改子配置文件
<VirtualHost *:80>ServerAdmin webmaster@xxhf.example.comDocumentRoot "/usr/local/apache2/htdocs/xxhf"ServerName www.xingxianghongfu.comServerAlias www.dummy-host.example.comErrorLog "logs/dummy-host.example.com-error_log"CustomLog "logs/dummy-host.example.com-access_log" common
</VirtualHost><VirtualHost *:90>ServerAdmin webmaster@hfxx.example.comDocumentRoot "/usr/local/apache2/htdocs/hfxx"ServerName www.xingxianghongfu.comErrorLog "logs/dummy-host2.example.com-error_log"CustomLog "logs/dummy-host2.example.com-access_log" common
</VirtualHost>
3.重启服务,真实机测试
实验三:域名跳转
1.加载相应模块和子配置文件
LoadModule rewrite_module modules/mod_rewrite.so注:权限设在要跳转的根目录下
2.修改主配置文件
<Directory "/usr/local/apache2/htdocs/hfxx">RewriteEngine onRewriteCond %{HTTP_HOST} www.hongfuxuexiao.comRewriteRule ^(.*)$ http://www.xingxianghongfu.com/$1 [R=301,L]
</Directory>
或
1.在需要进行跳转的目录下添加.htaccess权限文件;
2.保证包含该.htaccess权限文件的目录的AllowOverride All是打开的;
cd /usr/local/apache2/htdocs/old
vim .htaccess
RewriteEngine on
RewriteCond %{HTTP_HOST} www.old.com
RewriteRule ^(.*)$ http://www.new.com/$1 [R=permanent,L]
3.重启服务,真实机测试
问题1:如果此时访问不存在页面,如何才能访问到?
- 将页面放在跳转网页的网页根目录下
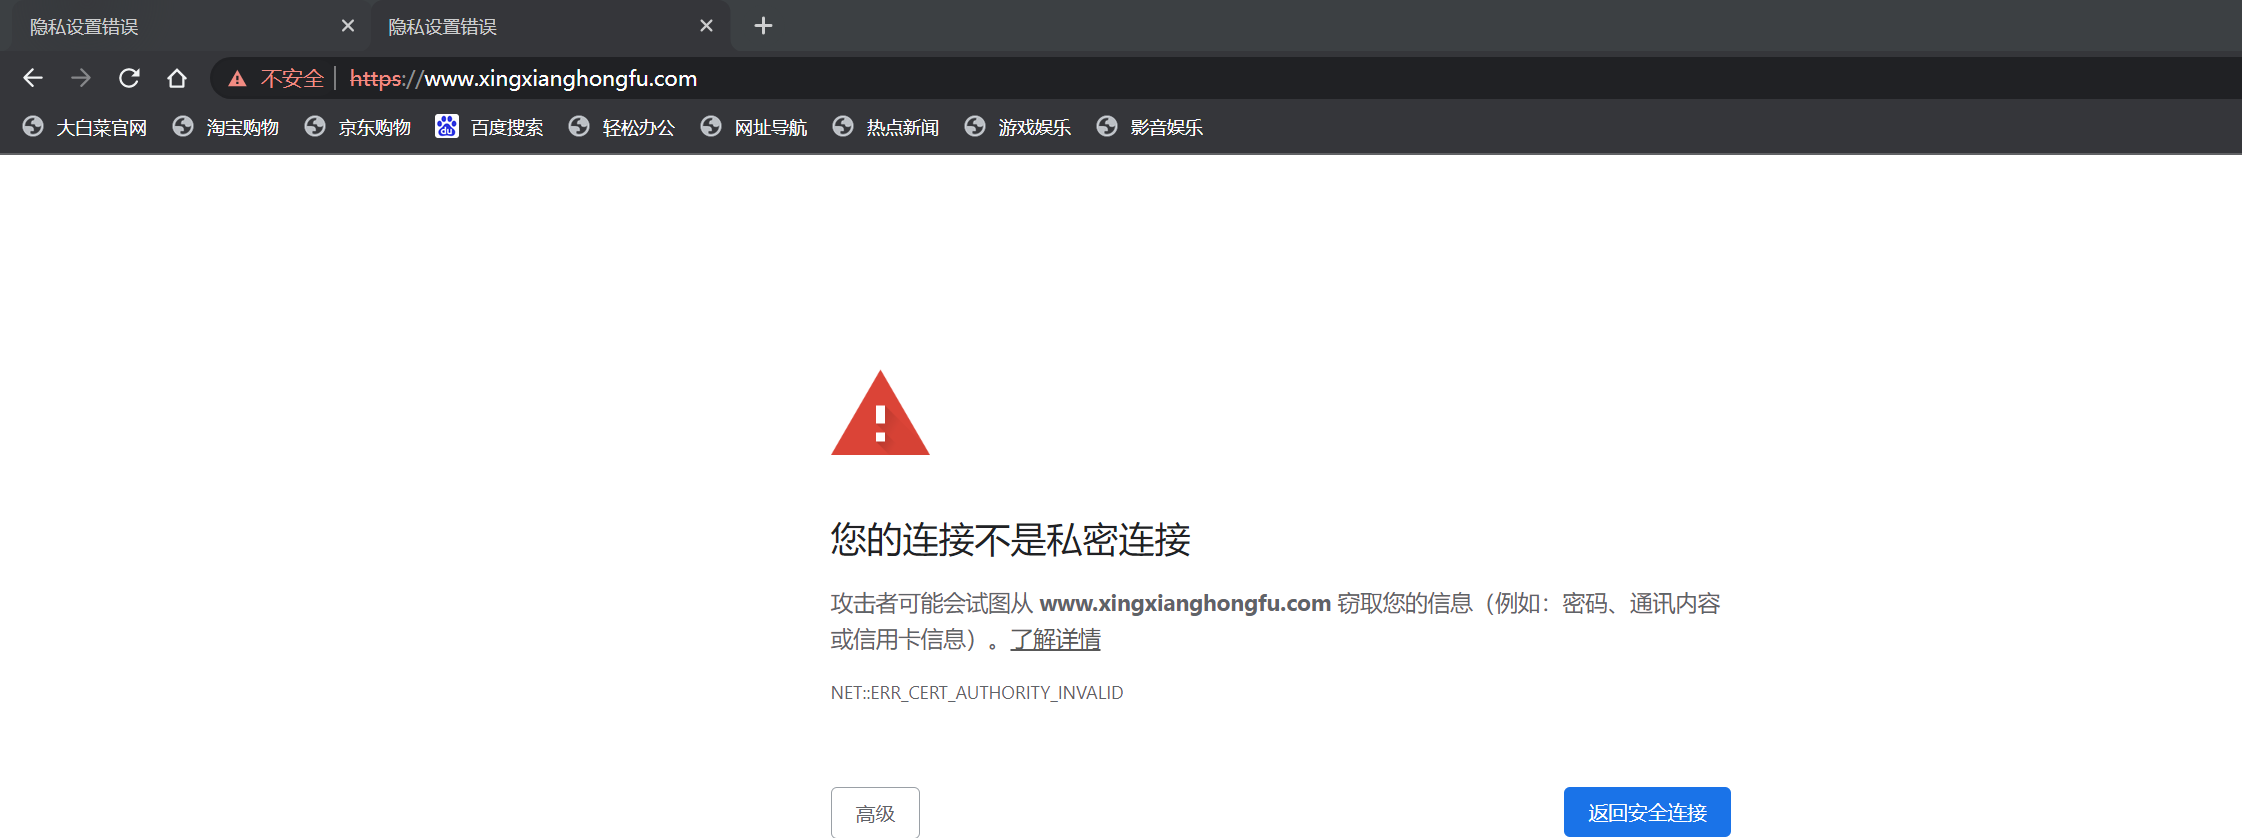
实验四:搭建https加密
1.加载相应模块和子配置
Include conf/extra/httpd-ssl.conf
LoadModule ssl_module modules/mod_ssl.so
2.修改子配置文件
<VirtualHost _default_:443>#   General setup for the virtual host
DocumentRoot "/usr/local/apache2/htdocs/xxhf"    #指向加密页面根目录
ServerName www.xingxianghongfu.com:443    #加密域名
ServerAdmin you@xxhf.com
ErrorLog "/usr/local/apache2/logs/error_log"
TransferLog "/usr/local/apache2/logs/access_log"
3.创建证书
[root@localhost conf]# openssl genrsa -out server.key 2048
[root@localhost conf]# openssl req -new -key server.key -out server.csr
[root@localhost conf]# openssl x509 -req -days 365 -sha256 -in server.csr -signkey server.key -out server.crtCertificate request self-signature ok
subject=C = XX, L = Default City, O = Default Company Ltd
4.重启服务

发现缺少一个shmcb的模块,在主配置文件中打开注释
LoadModule socache_shmcb_module modules/mod_socache_shmcb.so再次重启服务,真实机测试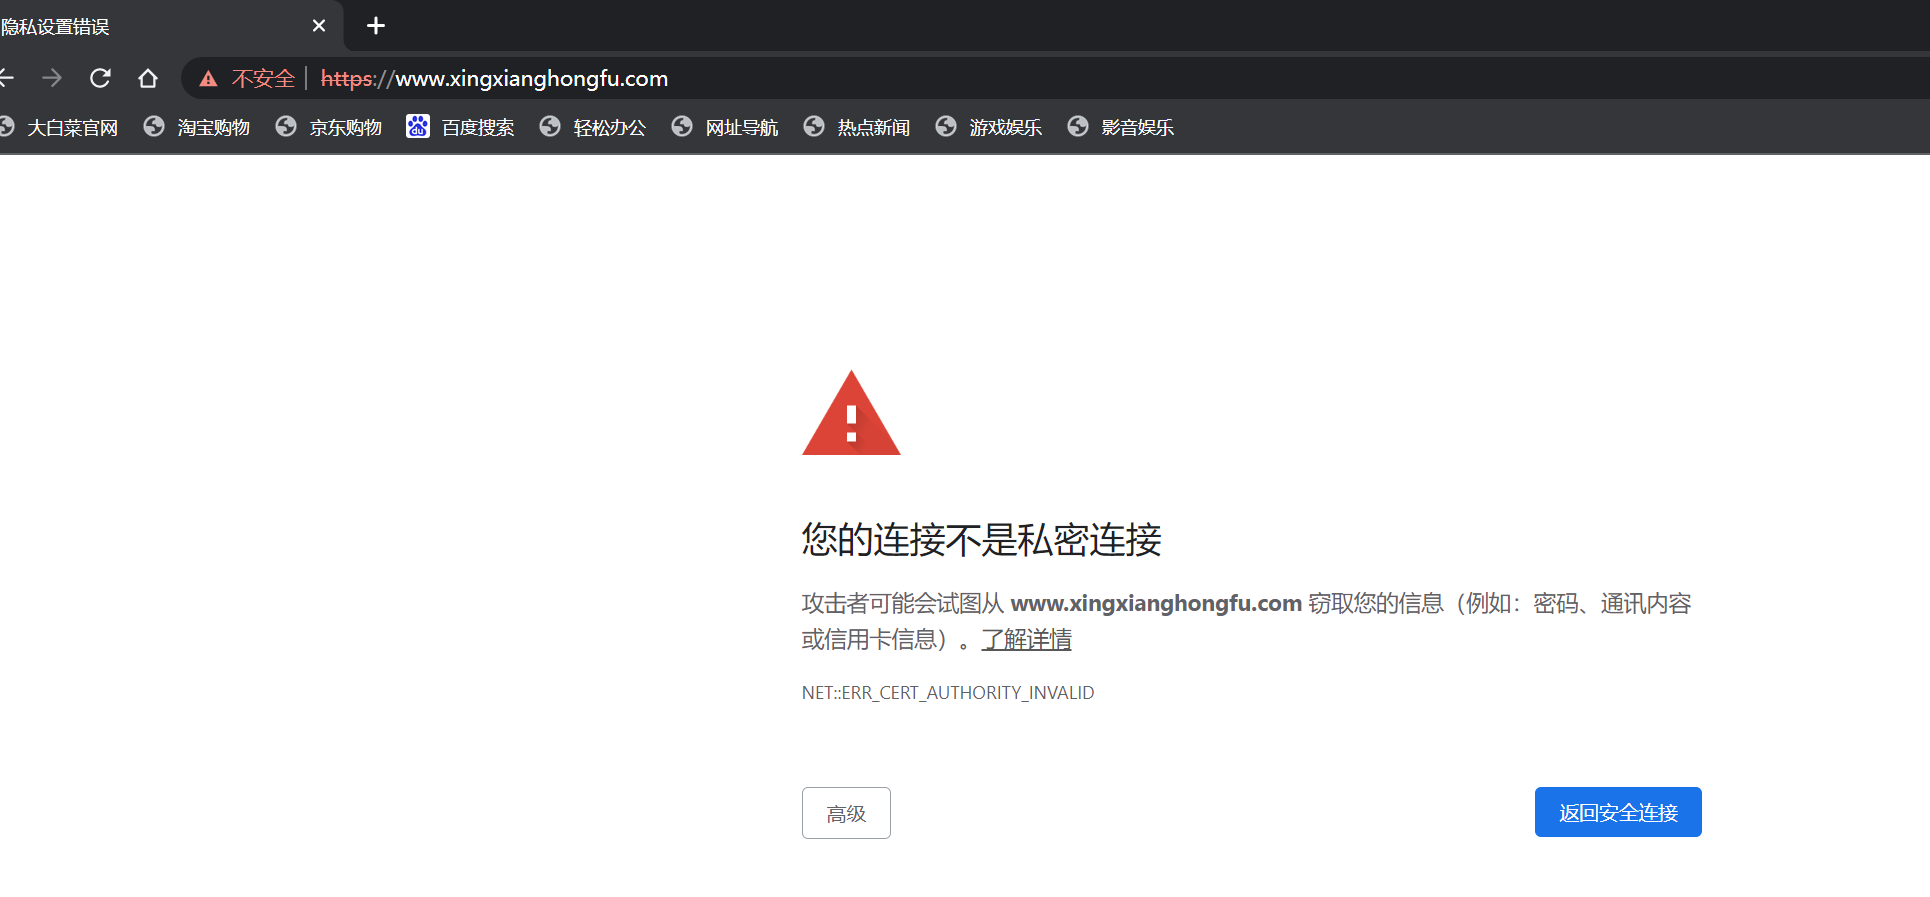
打开开发者工具,发现版本是1.1,不够用
5.搭建https(h2),加载相应模块和子配置
主配置文件,打开http2相关模块
LoadModule http2_module modules/mod_http2.so子配置文件,添加h2协议
[root@localhost apache2]# vi conf/extra/httpd-ssl.confProtocols h2 http/1.16.重启,测试,打开开发者工具
问题1:为什么要用h2?
- http2特点:二进制分帧、带宽变少,支持多路复用,首部压缩,服务器推送,可以把服务器数据较快的返回给客户端
实验五:地址跳转(80—443端口)
注:访问xingxianghongfu.com,可以直接跳转到https://xingxianghongfu.com
1.修改主配置文件
<Directory "/usr/local/apache2/htdocs/xxhf">RewriteEngine onRewriteCond %{SERVER_PORT} 80RewriteRule ^(.*)$ https://www.xingxianghongfu.com/$1 [R=301,L]
</Directory>
或
#在需要进行跳转的目录下添加权限文件
cd /usr/local/apache2/htdocs/xxhf
vim .htaccess
RewriteEngine on
#判断站点访问端口,不是443的时候,进行处理;HTTP_PORT是80
RewriteCond %{SERVER_PORT} 80
RewriteRule ^(.*)$ https://www.xingxianghongfu.com/$1 [R=301,L]
2.使用www.xingxianghongfu.com访问
实验六:设置缓存
1.修改主配置文件
LoadModule expires_module modules/mod_expires.so2.设置缓存模块
#添加各文件类型的缓存时间
<IfModule mod_expires.c>
ExpiresActive on
ExpiresByType image/gif "access plus 1 days"
ExpiresByType image/jpeg "access plus 4 hours"
ExpiresByType image/png "access plus 24 hours"
ExpiresByType text/css "now plus 2 hours"
ExpiresByType application/x-javascript "now plus 2 hours"
ExpiresByType application/javascript "now plus 2 hours"
ExpiresByType application/x-shockwave-flash "now plus 2 hours"
ExpiresDefault "now plus 0 min"
</IfModule>
3.重启服务测试
[root@localhost apache2]# ./bin/apachectl stop
[root@localhost apache2]# ./bin/apachectl start
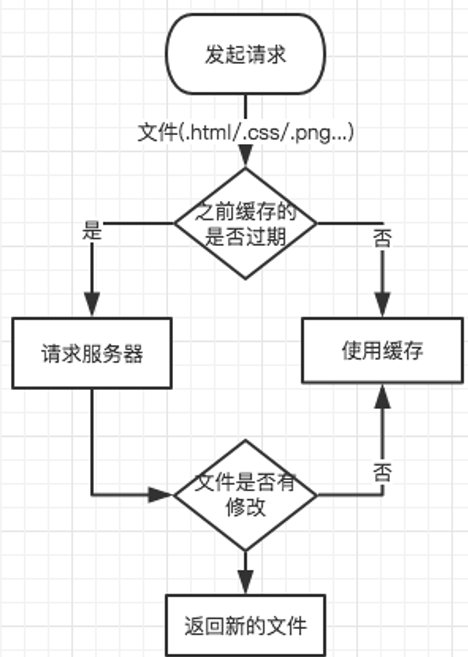
4.缓存原理