一、WPF入门介绍+Grid和StackPanel布局介绍+实战模拟Notepad++页面布局
该博文参考B站博主丑萌气质狗视频学习小笔记,如有侵权联系立删
视频链接:WPF入门
一、WPF入门介绍(Winform和WPF对比)
1,WPF是C#的一套关于Windows界面应用开发框架;当然Winform也是一样的,这两者有很多区别
| 区别 | Winform | WPF |
|---|---|---|
| 诞生 | 老 | 新 |
| 界面描述 | C#语言去描述 | XMAL去描述 |
| 界面实现效果难度 | 复杂 | 简单 |
| 绑定 | 1,修改变量的值;2,需要手动同步更新到界面中 | 可直接绑定,自动更新同步 |
2,创建Winform项目
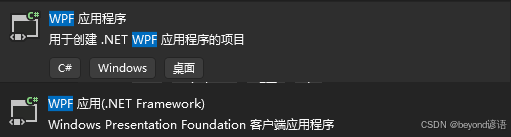
Windows窗体应用(.NET Framework)使用的是.Net Framework平台
Windows窗体应用使用的是**.NET Core平台**
俩都是支持C#的,没啥太大区别,我喜欢使用Windows窗体应用(.NET Framework)

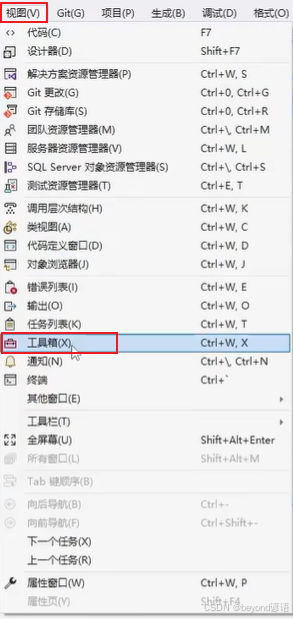
视图–工具箱,显示所有的控件
拖一个button之后,会生成一个Form1.Designer.cs文件,该文件是界面描述文件
当界面里面的控件拖动修改的时候,系统会自动修改该文件
直接使用C#语言去描述页面
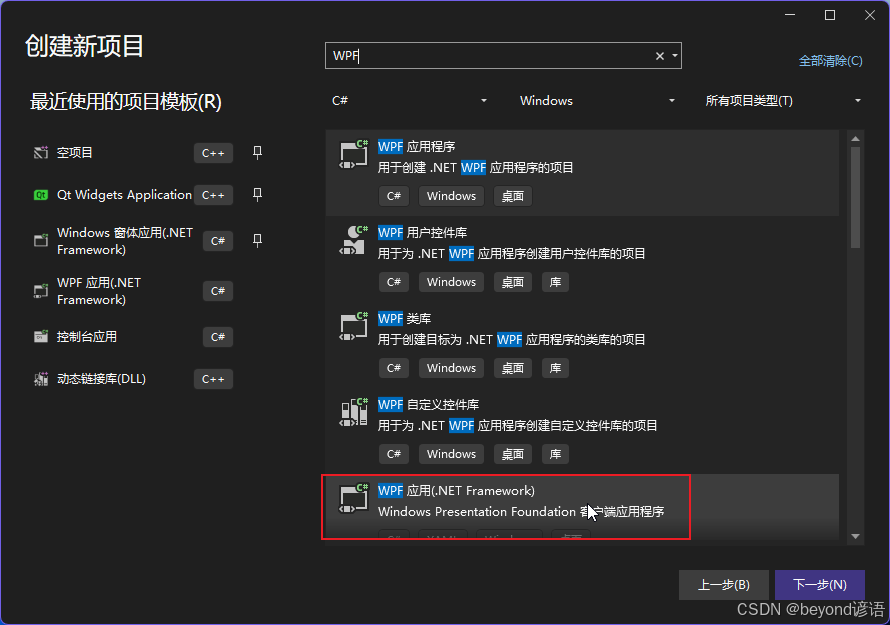
3,创建WPF项目
和Winform项目一样,只是平台不一样而已
拖一个button之后,会生成一个MainWindow.xaml文件去描述页面
该文件主要是通过XAML类似标签的形式进行描述
二、创建项目
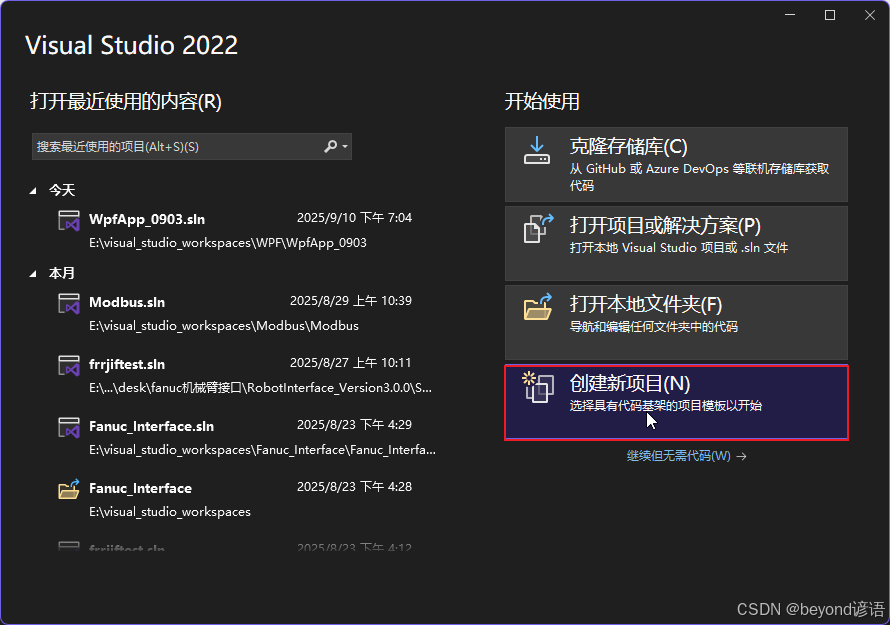
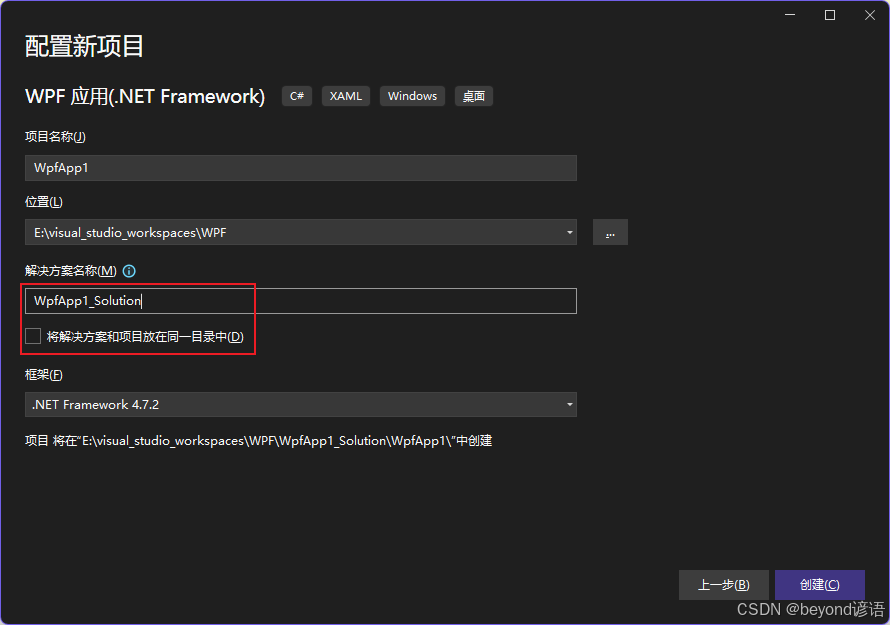
创建项目的本质:创建文件模板
创建一个文件模板名称为WpfApp1,这个文件模板所在的文件夹名称为WpfApp1_Solution
若网上下载的项目中没有这个.sln解决方案,找.csproj打开即可
.sln管理着多个项目,项目是.csproj
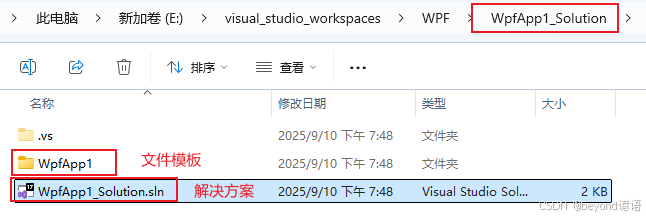
这个WpfApp1_Solution.sln解决方案里面存放着各个项目的所在位置,多个项目的信息都会进行显示
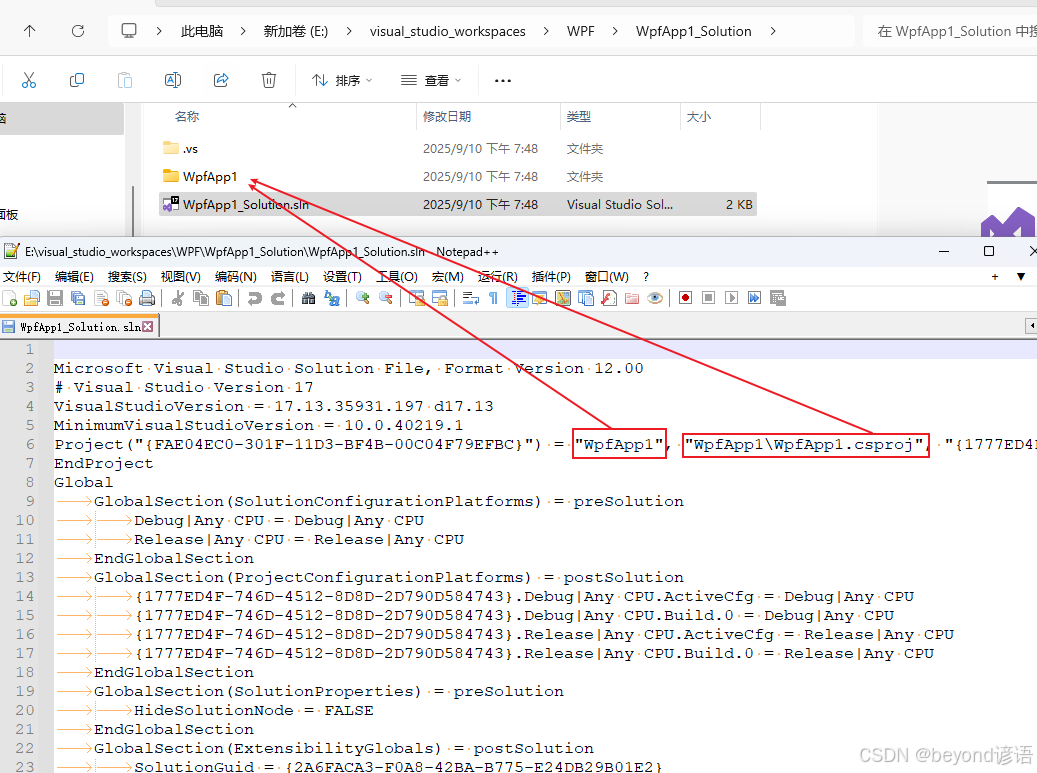
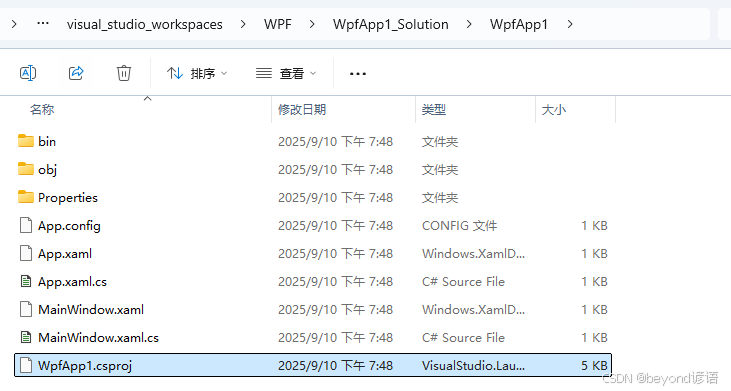
WpfApp1.csproj里面就存放着项目相关的文件路径信息以方便VS进行管理

| 文件/文件夹路径 | 存放内容 |
|---|---|
| bin | 编译之后生成文件的地方;若没有引用第三方库,对方电脑有对应版本的,NET Framework框架,直接把exe丢给对方即可 |
| obj | 编译中途产生文件的地方 |
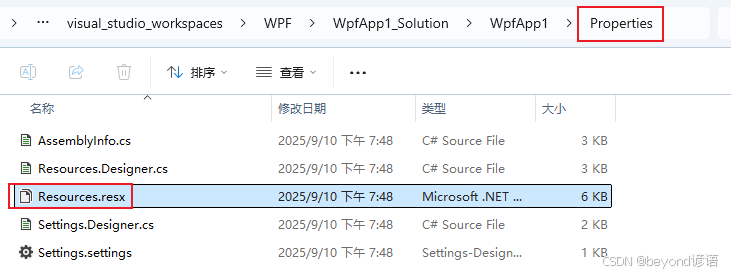
| Properties/Resources.resx | 存放图片资源等 |
| .xaml | 页面标签代码 |
| .xaml.cs | 页面功能实现C#代码 |

三、项目代码基础介绍
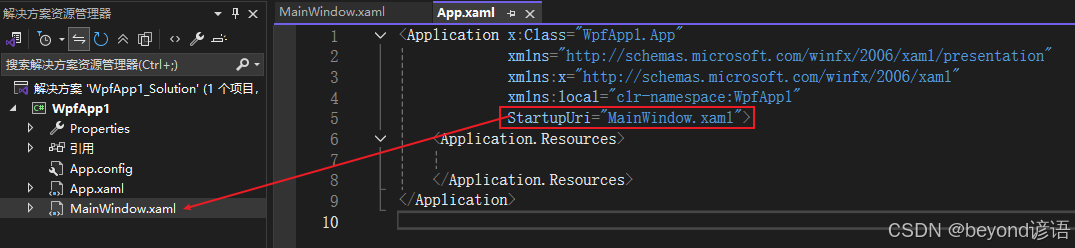
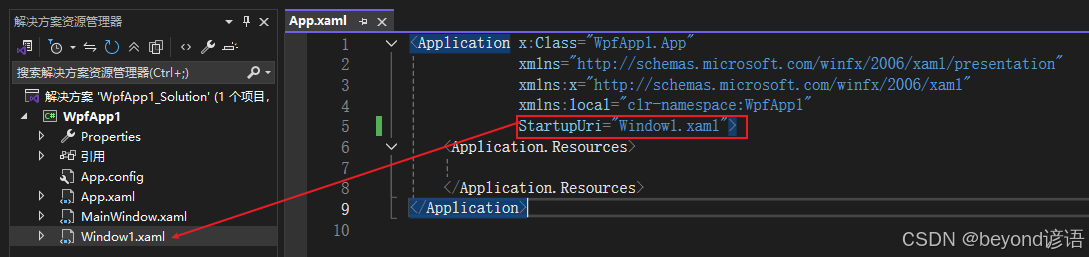
在App.xaml中可以设置优先启动的窗口
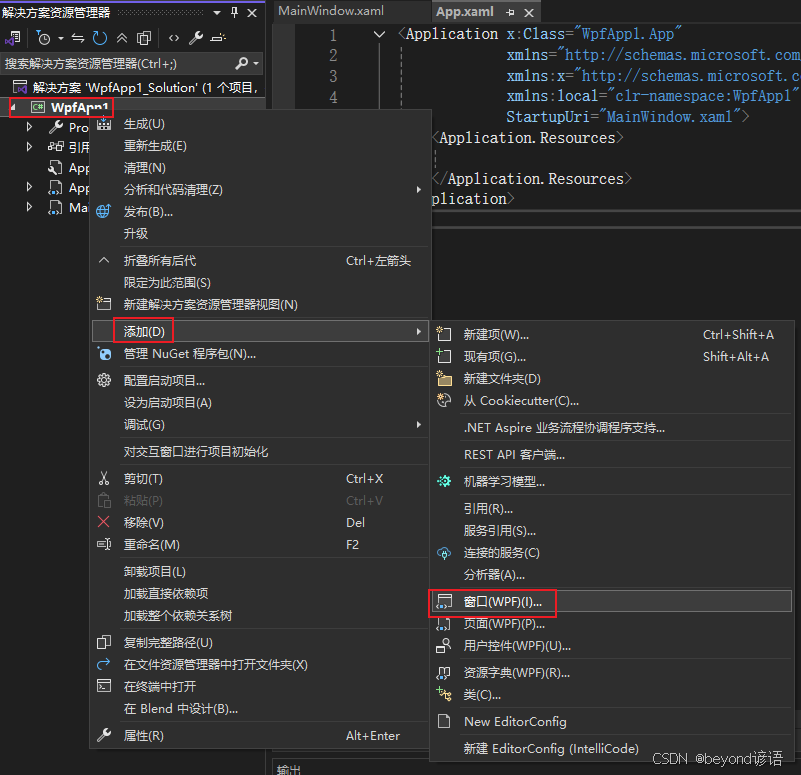
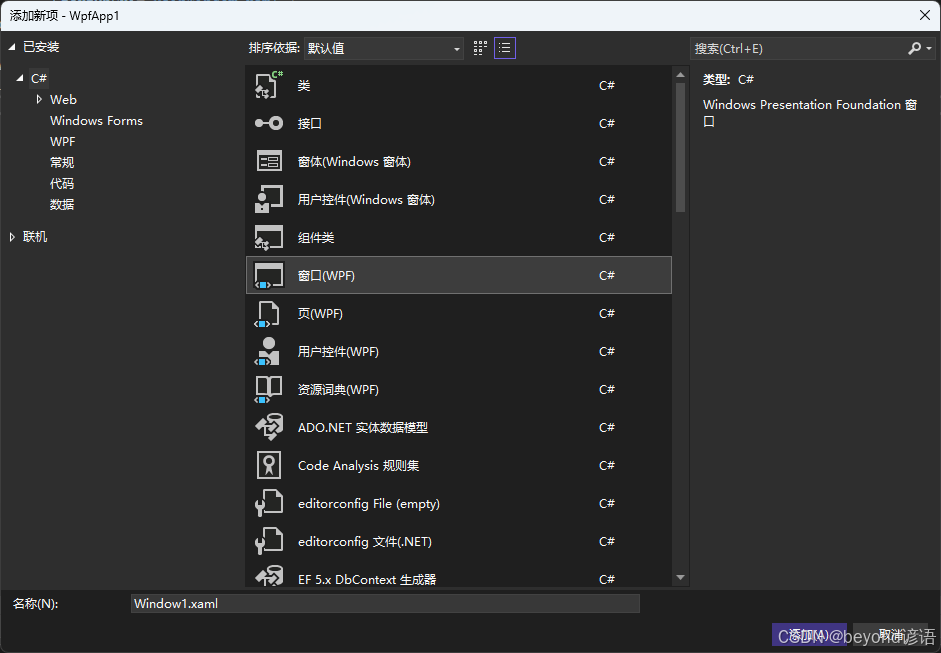
右击项目可以新建一个窗口
添加、窗口
在App.xmal中就可以设置启动窗口
MainWindow.xaml页面代码分析
Title、Height以及Width就不多说了,整个窗口的标题以及宽高布局
<Window x:Class="WpfApp1.MainWindow"xmlns="http://schemas.microsoft.com/winfx/2006/xaml/presentation"xmlns:x="http://schemas.microsoft.com/winfx/2006/xaml"xmlns:d="http://schemas.microsoft.com/expression/blend/2008"xmlns:mc="http://schemas.openxmlformats.org/markup-compatibility/2006"xmlns:local="clr-namespace:WpfApp1"mc:Ignorable="d"Title="MainWindow" Height="450" Width="800"><Grid></Grid>
</Window>
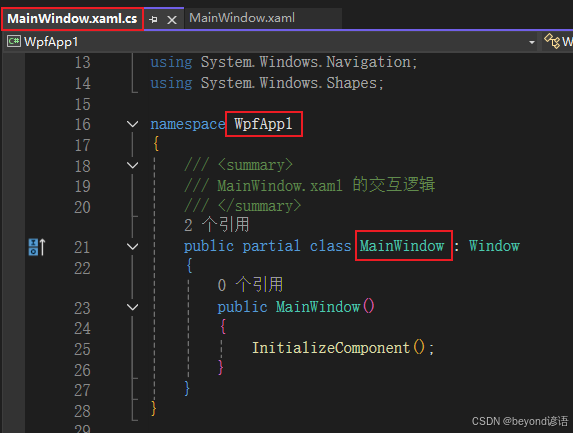
其中x:Class="WpfApp1.MainWindow"会找命名空间为WpfApp1下名为MainWindow的类,前后台对应即可
xmlns === xml namespace
xmlns=“http://schemas.microsoft.com/winfx/2006/xaml/presentation”
xmlns:x=“http://schemas.microsoft.com/winfx/2006/xaml”
xmlns:d=“http://schemas.microsoft.com/expression/blend/2008”
xmlns:mc=“http://schemas.openxmlformats.org/markup-compatibility/2006”
xmlns:local=“clr-namespace:WpfApp1”
mc:Ignorable=“d”
这些都是在页面里面引入的命名空间,比如在C#后端实现的时候,需要引入命名空间,这里就相当于在前端xaml中引入的命名空间一样,以防止程序在编译的时候报错,先引入的时候可以保证在编写页面xaml的过程中查找问题,直接报错,体验感拉满。
四、布局控件:Grid和StackPanel
Visual Studio 快捷键
F7:代码
Shift + F7:XAML界面
1,button控件简单布局
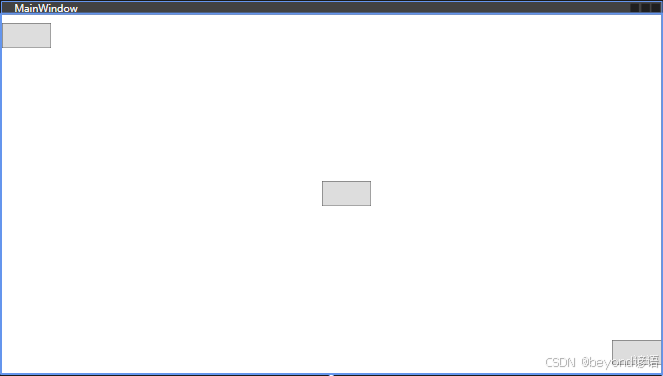
<Grid><Button Width="60" Height="30" HorizontalAlignment="Left" VerticalAlignment="Top" Margin="0,10,0,0" /><Button Width="60" Height="30" HorizontalAlignment="Left" VerticalAlignment="Center" Margin="388,0,0,0" /><Button Width="60" Height="30" HorizontalAlignment="Right" VerticalAlignment="Bottom" Margin="0,0,0,10" />
</Grid>
| 属性 | 描述 | 选项 |
|---|---|---|
| Width | 宽 | 数值 |
| Height | 高 | 数值 |
| HorizontalAlignment | 水平方向排布 | Left、Center、Right |
| VerticalAlignment | 垂直方向排布 | Top、Center、Bottom |
| Margin | Margin=“400,165,0,0” ,表示当前元素边缘轮廓左上右下到窗口四边的距离 | 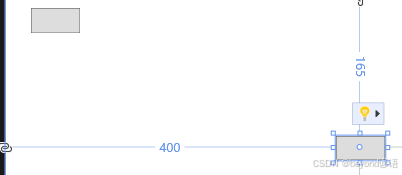 |
WPF里面的单位不是像素,它是可以随着电脑显示器的DPI进行动态变化的,为了展示效果更加合理人性化;而Winform里面就是以像素为单位的,若显示器DPI差异很大,那么整个页面就会看起来很离谱。
2,布局控件——StackPanel
布局Button的时候默认会按纵向 依次排序,而Grid会重合叠加
StackPanel布局控件会将所有的控件自动紧密贴合
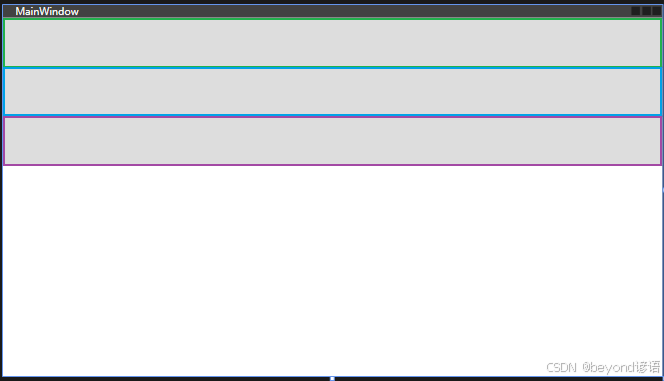
<StackPanel><Button Height="60"/><Button Height="60"/><Button Height="60"/>
</StackPanel>
Orientation:取向
Horizontal:水平
Vertical:垂直
可以通过修改Orientation="Horizontal"进行水平排布,当然不写的话默认Orientation="Vertical"
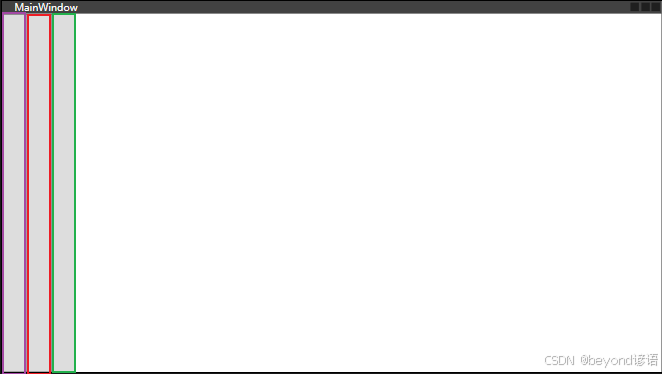
<StackPanel Orientation="Horizontal"><Button Width="30"/><Button Width="30"/><Button Width="30"/>
</StackPanel>
3,布局控件——Grid
其本质是一个表格布局,啥都不给参数表示一行一列
默认的button是占满全屏且居中显示的
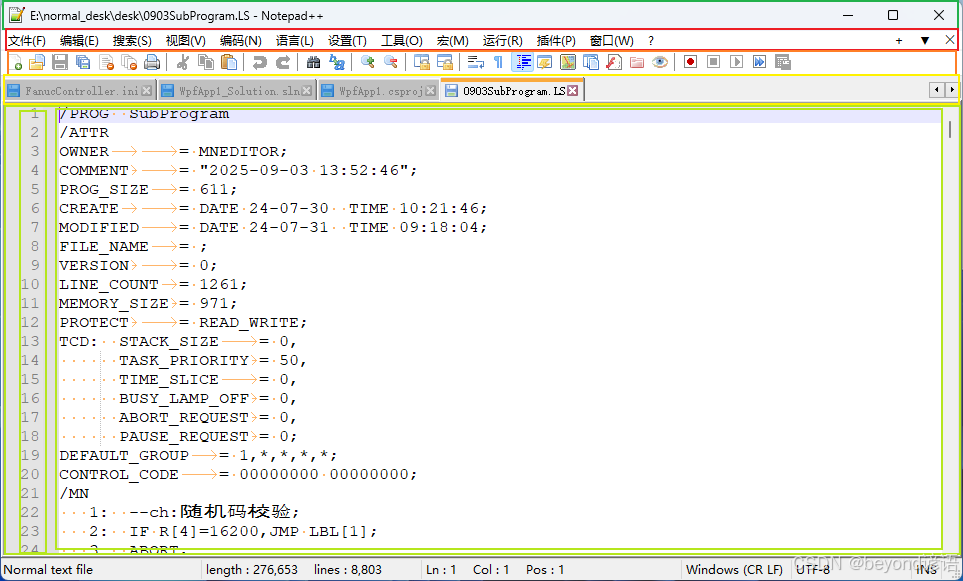
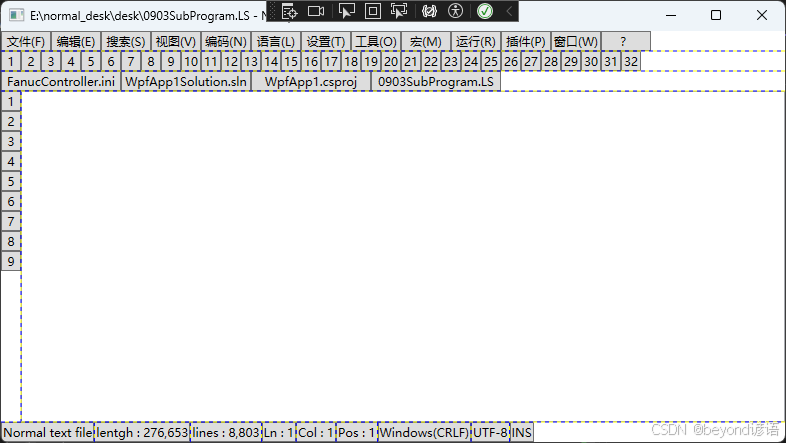
五、实战模拟Notepad++页面布局
项目实战:仿照notepad++页面的大致布局
分析:
1,整个项目分为五行,前三行和最后一行使用StackPanel进行紧凑布局,第四行因为是内容编译,故剩余系统填充即可
2,前三行高度固定,第四行使用剩余的空间填满
3,第四行使用一个两列的Grid表格
4,第四行左半部分使用StackPanel,右半部分使用TextBox
5,最后一行再使用一个Grid表格
接下来开始分步骤进行实现:
整个项目分为五行,前三行和最后一行使用StackPanel进行紧凑布局,第四行因为是内容编译,故剩余系统填充即可

最顶端是标题行,对Window标签里面的Title设置一下即可
Title="E:\normal_desk\desk\0903SubProgram.LS - Notepad++" Height="450" Width="800"
通过设置ShowGridLines属性,方便我们看布局效果
<Grid ShowGridLines="True">
分成五行
<Grid.RowDefinitions><RowDefinition Height="20"/><RowDefinition Height="20"/><RowDefinition Height="20"/><RowDefinition/><RowDefinition Height="20"/>
</Grid.RowDefinitions>
1,第一行是一个StackPanel,内容是水平排列的,即Orientation="Horizontal"
<StackPanel Grid.Row="0" Orientation="Horizontal"><Button Width="50" Content="文件(F)"/><Button Width="50" Content="编辑(E)"/><Button Width="50" Content="搜索(S)"/><Button Width="50" Content="视图(V)"/><Button Width="50" Content="编码(N)"/><Button Width="50" Content="语言(L)"/><Button Width="50" Content="设置(T)"/><Button Width="50" Content="工具(O)"/><Button Width="50" Content="宏(M)"/><Button Width="50" Content="运行(R)"/><Button Width="50" Content="插件(P)"/><Button Width="50" Content="窗口(W)"/><Button Width="50" Content="?"/>
</StackPanel>
2,第二行也是一个StackPanel,内容也是水平排列的,即Orientation="Horizontal"

<StackPanel Grid.Row="1" Orientation="Horizontal"><Button Width="20" Content="1"/><Button Width="20" Content="2"/><Button Width="20" Content="3"/><Button Width="20" Content="4"/><Button Width="20" Content="5"/><Button Width="20" Content="6"/><Button Width="20" Content="7"/><Button Width="20" Content="8"/><Button Width="20" Content="9"/><Button Width="20" Content="10"/><Button Width="20" Content="11"/><Button Width="20" Content="12"/><Button Width="20" Content="13"/><Button Width="20" Content="14"/><Button Width="20" Content="15"/><Button Width="20" Content="16"/><Button Width="20" Content="17"/><Button Width="20" Content="18"/><Button Width="20" Content="19"/><Button Width="20" Content="20"/><Button Width="20" Content="21"/><Button Width="20" Content="22"/><Button Width="20" Content="23"/><Button Width="20" Content="24"/><Button Width="20" Content="25"/><Button Width="20" Content="26"/><Button Width="20" Content="27"/><Button Width="20" Content="28"/><Button Width="20" Content="29"/><Button Width="20" Content="30"/><Button Width="20" Content="31"/><Button Width="20" Content="32"/>
</StackPanel>
3,第三行也是一个StackPanel,内容也是水平排列的,即Orientation="Horizontal"

<StackPanel Grid.Row="2" Orientation="Horizontal"><Button Width="120" Content="FanucController.ini"/><Button Width="130" Content="WpfApp1_Solution.sln"/><Button Width="120" Content="WpfApp1.csproj"/><Button Width="130" Content="0903SubProgram.LS"/>
</StackPanel>
4,第四行是一个Grid,由2列组成
左半部分是StackPanel,内容是水平排列的,即Orientation="Horizontal"
右半部分是TextBox

<Grid ShowGridLines="True" Grid.Row="3"><Grid.ColumnDefinitions><ColumnDefinition Width="20"/><ColumnDefinition/></Grid.ColumnDefinitions><StackPanel Grid.Column="0"><Button Height="20" Content="1"/><Button Height="20" Content="2"/><Button Height="20" Content="3"/><Button Height="20" Content="4"/><Button Height="20" Content="5"/><Button Height="20" Content="6"/><Button Height="20" Content="7"/><Button Height="20" Content="8"/><Button Height="20" Content="9"/></StackPanel><TextBox Grid.Column="1" TextWrapping="Wrap"/>
</Grid>
5,最后一行是一个Grid ,由9列组成
行和列标签里面的Width属性可以是Auto也可以指定,还可以给数值比例
<ColumnDefinition Width="Auto"/>
<ColumnDefinition Width="20"/>
<ColumnDefinition Width="1*"/>
<ColumnDefinition Width="2*"/>
<ColumnDefinition Width="3*"/>
表示三列,共6份(1+2+3),第一列占1份,第二列占2份,第三列占3份

<Grid ShowGridLines="True" Grid.Row="4"><Grid.ColumnDefinitions><ColumnDefinition Width="Auto"/><ColumnDefinition Width="Auto"/><ColumnDefinition Width="Auto"/><ColumnDefinition Width="Auto"/><ColumnDefinition Width="Auto"/><ColumnDefinition Width="Auto"/><ColumnDefinition Width="Auto"/><ColumnDefinition Width="Auto"/><ColumnDefinition Width="Auto"/></Grid.ColumnDefinitions><Button Grid.Column="0" Content="Normal text file"/><Button Grid.Column="1" Content="lentgh : 276,653"/><Button Grid.Column="2" Content="lines : 8,803"/><Button Grid.Column="3" Content="Ln : 1"/><Button Grid.Column="4" Content="Col : 1"/><Button Grid.Column="5" Content="Pos : 1"/><Button Grid.Column="6" Content="Windows(CRLF)"/><Button Grid.Column="7" Content="UTF-8"/><Button Grid.Column="8" Content="INS"/>
</Grid>
6,完整代码&页面
<Window x:Class="WpfApp1.MainWindow"xmlns="http://schemas.microsoft.com/winfx/2006/xaml/presentation"xmlns:x="http://schemas.microsoft.com/winfx/2006/xaml"xmlns:d="http://schemas.microsoft.com/expression/blend/2008"xmlns:mc="http://schemas.openxmlformats.org/markup-compatibility/2006"xmlns:local="clr-namespace:WpfApp1"mc:Ignorable="d"Title="E:\normal_desk\desk\0903SubProgram.LS - Notepad++" Height="450" Width="800"><Grid ShowGridLines="True"><Grid.RowDefinitions><RowDefinition Height="20"/><RowDefinition Height="20"/><RowDefinition Height="20"/><RowDefinition/><RowDefinition Height="20"/></Grid.RowDefinitions><StackPanel Grid.Row="0" Orientation="Horizontal"><Button Width="50" Content="文件(F)"/><Button Width="50" Content="编辑(E)"/><Button Width="50" Content="搜索(S)"/><Button Width="50" Content="视图(V)"/><Button Width="50" Content="编码(N)"/><Button Width="50" Content="语言(L)"/><Button Width="50" Content="设置(T)"/><Button Width="50" Content="工具(O)"/><Button Width="50" Content="宏(M)"/><Button Width="50" Content="运行(R)"/><Button Width="50" Content="插件(P)"/><Button Width="50" Content="窗口(W)"/><Button Width="50" Content="?"/></StackPanel><StackPanel Grid.Row="1" Orientation="Horizontal"><Button Width="20" Content="1"/><Button Width="20" Content="2"/><Button Width="20" Content="3"/><Button Width="20" Content="4"/><Button Width="20" Content="5"/><Button Width="20" Content="6"/><Button Width="20" Content="7"/><Button Width="20" Content="8"/><Button Width="20" Content="9"/><Button Width="20" Content="10"/><Button Width="20" Content="11"/><Button Width="20" Content="12"/><Button Width="20" Content="13"/><Button Width="20" Content="14"/><Button Width="20" Content="15"/><Button Width="20" Content="16"/><Button Width="20" Content="17"/><Button Width="20" Content="18"/><Button Width="20" Content="19"/><Button Width="20" Content="20"/><Button Width="20" Content="21"/><Button Width="20" Content="22"/><Button Width="20" Content="23"/><Button Width="20" Content="24"/><Button Width="20" Content="25"/><Button Width="20" Content="26"/><Button Width="20" Content="27"/><Button Width="20" Content="28"/><Button Width="20" Content="29"/><Button Width="20" Content="30"/><Button Width="20" Content="31"/><Button Width="20" Content="32"/></StackPanel><StackPanel Grid.Row="2" Orientation="Horizontal"><Button Width="120" Content="FanucController.ini"/><Button Width="130" Content="WpfApp1_Solution.sln"/><Button Width="120" Content="WpfApp1.csproj"/><Button Width="130" Content="0903SubProgram.LS"/></StackPanel><Grid ShowGridLines="True" Grid.Row="3"><Grid.ColumnDefinitions><ColumnDefinition Width="20"/><ColumnDefinition/></Grid.ColumnDefinitions><StackPanel Grid.Column="0"><Button Height="20" Content="1"/><Button Height="20" Content="2"/><Button Height="20" Content="3"/><Button Height="20" Content="4"/><Button Height="20" Content="5"/><Button Height="20" Content="6"/><Button Height="20" Content="7"/><Button Height="20" Content="8"/><Button Height="20" Content="9"/></StackPanel><TextBox Grid.Column="1" TextWrapping="Wrap"/></Grid><Grid ShowGridLines="True" Grid.Row="4"><Grid.ColumnDefinitions><ColumnDefinition Width="Auto"/><ColumnDefinition Width="Auto"/><ColumnDefinition Width="Auto"/><ColumnDefinition Width="Auto"/><ColumnDefinition Width="Auto"/><ColumnDefinition Width="Auto"/><ColumnDefinition Width="Auto"/><ColumnDefinition Width="Auto"/><ColumnDefinition Width="Auto"/></Grid.ColumnDefinitions><Button Grid.Column="0" Content="Normal text file"/><Button Grid.Column="1" Content="lentgh : 276,653"/><Button Grid.Column="2" Content="lines : 8,803"/><Button Grid.Column="3" Content="Ln : 1"/><Button Grid.Column="4" Content="Col : 1"/><Button Grid.Column="5" Content="Pos : 1"/><Button Grid.Column="6" Content="Windows(CRLF)"/><Button Grid.Column="7" Content="UTF-8"/><Button Grid.Column="8" Content="INS"/></Grid></Grid>
</Window>