《Python红队攻防零基础脚本编写:入门篇(二)》
注意事项
你得先学完我的第一个入门篇才能看得懂,我这里完全零基础教程,哪怕你是小白,按着记就能懂了,虽说不是很详细,但是加油吧,看你们了,这个只是我的学习笔记,做的时候记录出来给你们看,不过我教的方向都是倾向于渗透之类的
基础并发(asyncio + aiohttp)
-
asyncio:Python 自带的异步调度器,单线程就能 juggling 几千个任务,不卡壳。 -
aiohttp:专为 asyncio 打造的 HTTP 库,异步发请求 / 搭接口,一条线程随便并发上万条连接。
人话版:这是做工具最基础的动作,伪装成正常流量,因为现实实战中waf满天飞,但凡你就像工具一样都是固定的访问,包被封IP的
代码例子:
import asyncio, aiohttp, randomurl="http://192.168.22.163:8084/"
ua_list={"Mozilla/5.0 (Windows NT 10.0; Win64; x64) AppleWebKit/537.36 (KHTML, like Gecko) Chrome/132.0.0.0 Safari/537.36","Mozilla/5.0 (Macintosh; Intel Mac OS X 10_15_7) AppleWebKit/605.1.15 (KHTML, like Gecko) Version/17.1 Safari/605.1.15","Mozilla/5.0 (Windows NT 10.0; Win64; x64; rv:128.0) Gecko/20100101 Firefox/128.0"}with open(r"S:\新建 文本文档.txt",'r',encoding='utf-8') as zidian,open(r"S:\1.txt",'w',encoding='utf-8') as jieguo:async def scan_path(session, path):# 随机延迟 1-3 秒,模拟正常用户行为await asyncio.sleep(random.uniform(1, 3))target_url = url + path.strip()headers = {'User-Agent': random.choice(list(ua_list))}try:async with session.get(target_url, headers=headers, ssl=False) as response:if response.status == 200:result = f"[FOUND] {target_url} - Status: {response.status}\n"print(result, end='')jieguo.write(result)except Exception:passasync def main():paths = zidian.readlines()# 限制并发数为5,更接近正常流量connector = aiohttp.TCPConnector(limit=5)async with aiohttp.ClientSession(connector=connector) as session:tasks = [scan_path(session, path) for path in paths if path.strip()]await asyncio.gather(*tasks)asyncio.run(main())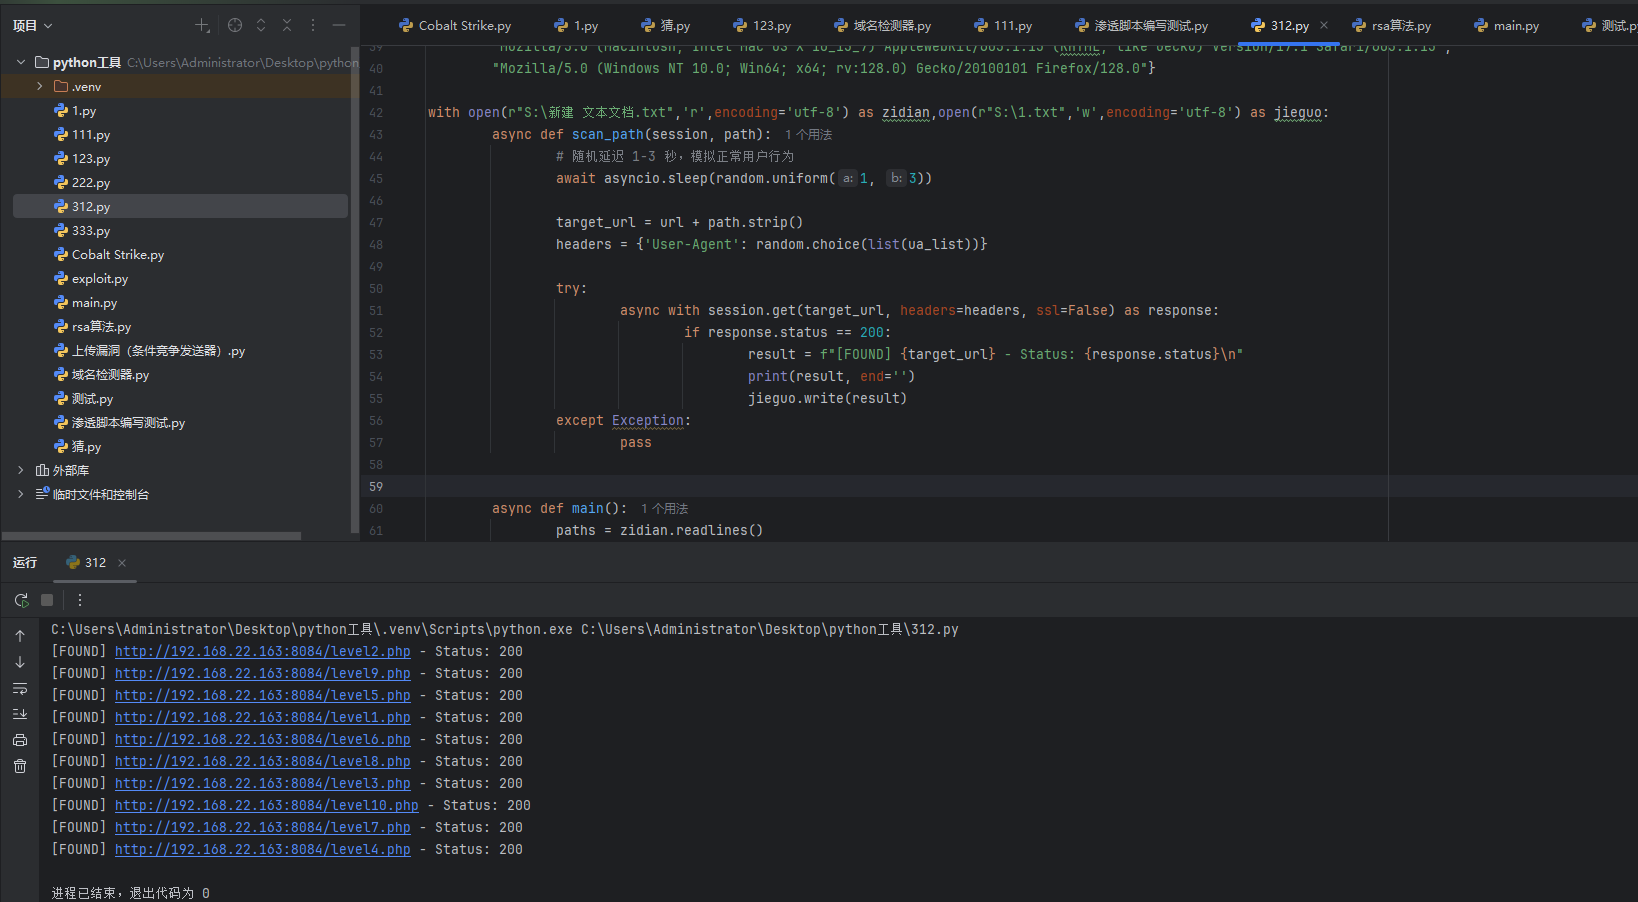
参数介绍
代码部分主要分为两类,第一类是async def scan_path的工具利用代码,第二类是async def main()的代码函数定义类
第一类:
async def scan_path(session, path):
#这里是指定了一个名为scan_path的东西,def是指定的意思,里面有path路径和session会话,这些在第二类那里赋值了
await asyncio.sleep(random.uniform(1, 3))
#这时候就有人问了,这里为什么是await?async 贴招牌,await 踩刹车,记住这个口诀即可,因为这里需要随机等1-3秒,所以要踩刹车,然后random就是随机的意思,import引用了,sleep是时间的意思,uniform是random库里面的,这是返回随机的1-3的随机浮点数,然后asyncio是提供sleep之类的
target_url = url + path.strip()
#这里没啥好讲的,就是url和字典拼接,strip是为了去掉字典末尾的\n的
headers = {'User-Agent': random.choice(list(ua_list))}
#这个我入门篇一的时候说过了
try:
#这种就差不多是那种炸了就换地方执行的操作,比如说我请求失败了,他这里不显示失败,他是跳到except继续执行
async with session.get(target_url, headers=headers, ssl=False) as response:
if response.status == 200:
#当你理解了前面的那些后看这里的就简单多了,我就不多解释了,如果你实在不懂扔给AI,让AI跟你解答
result = f"[FOUND] {target_url} - Status: {response.status}\n"
print(result, end='')
jieguo.write(result)
#这里就只是最简单的记录200的操作,f就是把引号里面的全部当作字符串来赋值到result,end=''的作用就是防止自带的换行导致空行,jieguo.wirte就是直接写入我们指定的文件里面了
except Exception:pass
#这里就是对应着刚刚的try了,如果try执行失败就到这里来执行,except Exception是不管超时还是失败都是他的判断条件,pass是一条都不输出然后跳过这一条
第二类:
async def main():
#没啥好说的,就是定义一个main
paths = zidian.readlines()
#也没啥好说的,就是zidian文件里面的所有都读出来然后赋值给paths
connector = aiohttp.TCPConnector(limit=5)
#这里就是管理底层 TCP 连接池——建连、复用、限并发、关连接,全由它包办,然后limit是限制并发数量的,最后赋值给connector
async with aiohttp.ClientSession(connector=connector) as session:
#这里没什么好说的,反正就是弄一个限制,然后明明为session
tasks = [scan_path(session, path) for path in paths if path.strip()]
#这里的主要作用是传实参for是把paths里面的所有参数全部去掉\n然后赋值给path,scan_path的作用是把实际数据传进去,但是还是没有发送到async def scan_path(session, path):里面,所以就要用到下面这个函数
await asyncio.gather(*tasks)
#这个就是拿来发送数据到async def scan_path(session, path):上的,*号是代表tasks里的全部数据,asyncio.gather就是把数据一次性全部发送到async def scan_path(session, path):
asyncio.run(main())
#这就字面意思run那个main,先弄赋值,因为async def scan_path(session, path):是先定义,然后就是asyncio.run(main())了,然后赋值完才执行的
绕过傻白甜waf(httpx[http2])
先声明,教这个的原因只是因为,让你动基础而已,因为现在的waf已经不会像十年前那样当傻白甜了,现在都是猛猛防啊,但是比如说哪些教育系统还是十年前的waf的话就可以简单的弄一下
-
走 HTTP/2 协议,JA3 指纹与 Chrome 一致
-
连接池 5,随机 1-3 秒延迟
-
命中 200 实时写
S:\1.txt,比 aiohttp 更像浏览器流量
import asyncio
import httpx
import randomurl = "http://192.168.22.163:8084/"
ua_list = {"Mozilla/5.0 (Windows NT 10.0; Win64; x64) AppleWebKit/537.36 (KHTML, like Gecko) Chrome/132.0.0.0 Safari/537.36","Mozilla/5.0 (Macintosh; Intel Mac OS X 10_15_7) AppleWebKit/605.1.15 (KHTML, like Gecko) Version/17.1 Safari/605.1.15","Mozilla/5.0 (Windows NT 10.0; Win64; x64; rv:128.0) Gecko/20100101 Firefox/128.0"
}with open(r"S:\新建 文本文档.txt",'r',encoding='utf-8') as zidian,open(r"S:\1.txt",'w',encoding='utf-8') as jieguo:# 读取字典文件中的所有路径paths = zidian.readlines()# 定义异步扫描函数async def scan_path(client, path):# 构建目标URL:基础URL + 字典中的路径target_url = url + path.strip()# 随机选择User-Agent,增加请求的多样性headers = {'User-Agent': random.choice(list(ua_list))}try:# 使用httpx发送异步GET请求,设置超时和SSL验证response = await client.get(target_url, headers=headers, timeout=10.0, verify=False)# 如果返回状态码为200(成功),则记录结果if response.status_code == 200:# 格式化结果字符串result = f"[FOUND] {target_url} - Status: {response.status_code}\n"# 打印到控制台print(result, end='')# 写入结果文件jieguo.write(result)except Exception as e:# 打印错误信息(可选)# print(f"Error scanning {target_url}: {str(e)}")pass# 定义主异步函数async def main():# 创建httpx异步客户端,设置连接限制和HTTP/2支持async with httpx.AsyncClient(limits=httpx.Limits(max_connections=5, max_keepalive_connections=3),http2=True  # 启用HTTP/2支持,有助于绕过某些WAF) as client:# 为每个路径创建扫描任务,跳过空行tasks = [scan_path(client, path) for path in paths if path.strip()]# 等待所有扫描任务完成await asyncio.gather(*tasks)# 运行主异步函数asyncio.run(main())
这个代码我就在上面的基础并发那个代码进行了简单的修改,我只重点介绍修改过的就行了哦,后面我在教你们playwright,这个是真浏览器遥控器,伪装成真人的的,不过是下次了,得是进阶版我才教了,因为我平常也是有事的,我还在校,每天上课,下课就跑来训练室打实战然后写博客
参数介绍(重点):
# 之前
import aiohttp# 现在
import httpx
#这个就是换个模块引用而已,毕竟httpx和aiohttp的功能差不多所以直接替换就好了
# 之前
connector = aiohttp.TCPConnector(limit=5)
async with aiohttp.ClientSession(connector=connector) as session:# 现在
async with httpx.AsyncClient(limits=httpx.Limits(max_connections=5, max_keepalive_connections=3),http2=True
) as client:

#为了避免你们看不清,我截了个图,
#async with就不介绍了,万能开头罢了
#httpx.AsyncClient是跟aiohttp.ClientSession都是一样的都是“异步会话大管家”:发请求、管连接、复用 TCP、控并发,功能一样,只是换了个引擎
#limits=httpx.Limits(max_connections=5, max_keepalive_connections=3),limits是httpx.AsyncClient 配连接池的遥控器,然后max_connections=5,是并发数,max_keepalive_connections=3是长连接的数量,就是能长时间连接,不用重新三次握手
#http2=True就是开启http2协议,能勉强绕过傻白甜waf
# 之前
async with session.get(target_url, headers=headers, ssl=False) as response:# 现在
response = await client.get(target_url, headers=headers, timeout=10.0, verify=False)
#这里的target_url, headers=headers我都不讲了,timeout=10.0, verify=False,第一个是十秒超时,第二个是忽略证书校验
# 之前
if response.status == 200:# 现在
if response.status_code == 200:
#这个就是简单的库不同状态码的函数也不同,也没什么好介绍的了
问题解释:
-
http:// 目标:能用 httpx 扫,也能绕过“傻白甜”WAF
-
高级 WAF:无论 1.1 还是 2,都得加 playwright/代理池/行为伪装
Python红队攻防脚本零基础编写:入门篇结束
后面我还会出入门三然后还有进阶的,只不过那是后面的事情了,先学着吧