Linux系统之----POSIX信号量
1.基本概念
信号量(Semaphore):信号量是一个非负整数,用于控制对共享资源的访问。它的值表示可用资源的数量。信号量的操作主要有两种:
P操作(Wait操作):将信号量的值减1。如果信号量的值小于0,则进程阻塞,等待信号量的值变为非负。
V操作(Signal操作):将信号量的值加1。如果信号量的值大于0,则唤醒一个等待该信号量的进程。
2.相关函数
2.1 sem_init()函数
该函数初始化信号量
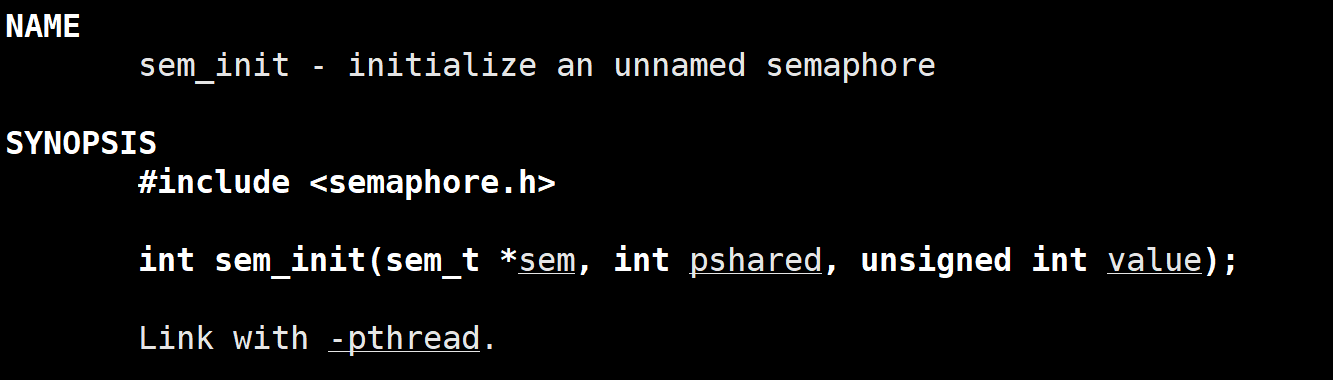
参数说明:
sem:信号量的指针。
pshared:是否跨进程共享,0表示仅在当前进程的线程间共享,非0表示跨进程共享。
value:信号量的初始值。
2.2 sem_destroy()函数
该函数销毁信号量
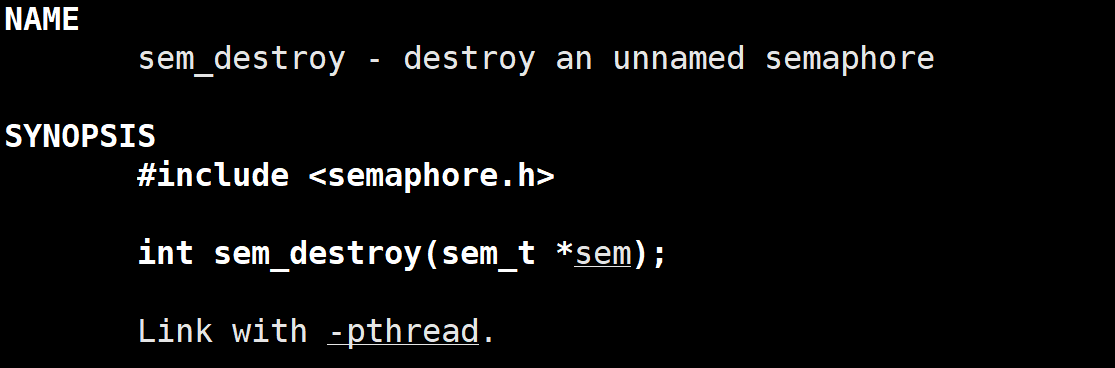
返回值:成功为0,失败为-1

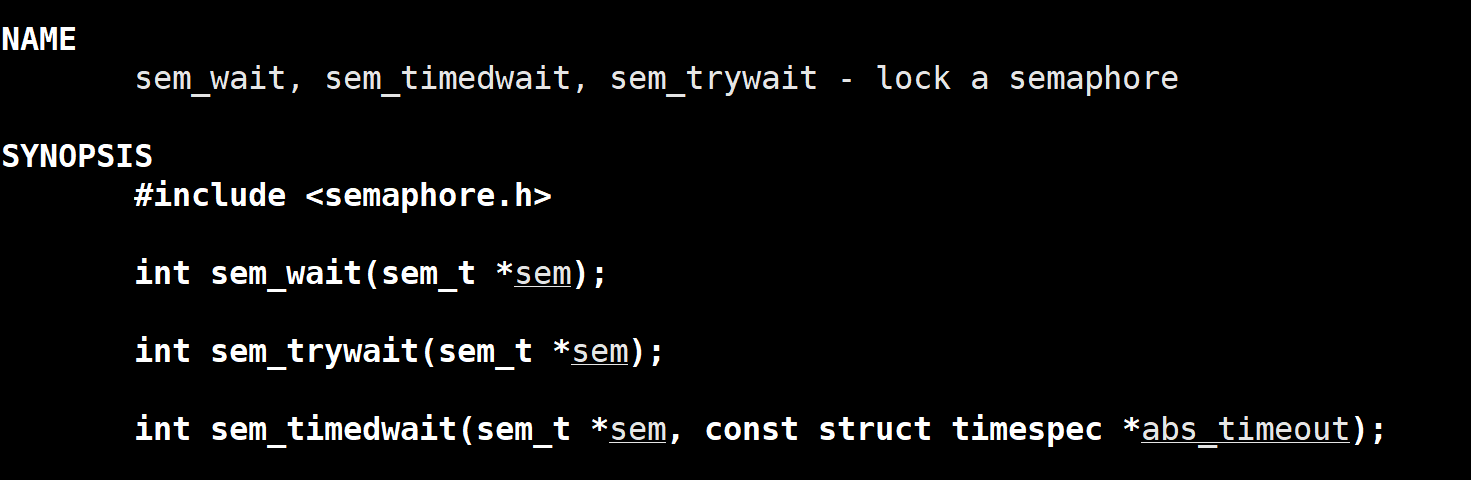
2.3 sem_wait()函数
该函数用于对信号量执行 P 操作(Wait 操作)。它会将信号量的值减 1,如果信号量的值小于 0,则调用该函数的线程或进程会阻塞,直到信号量的值变为非负。
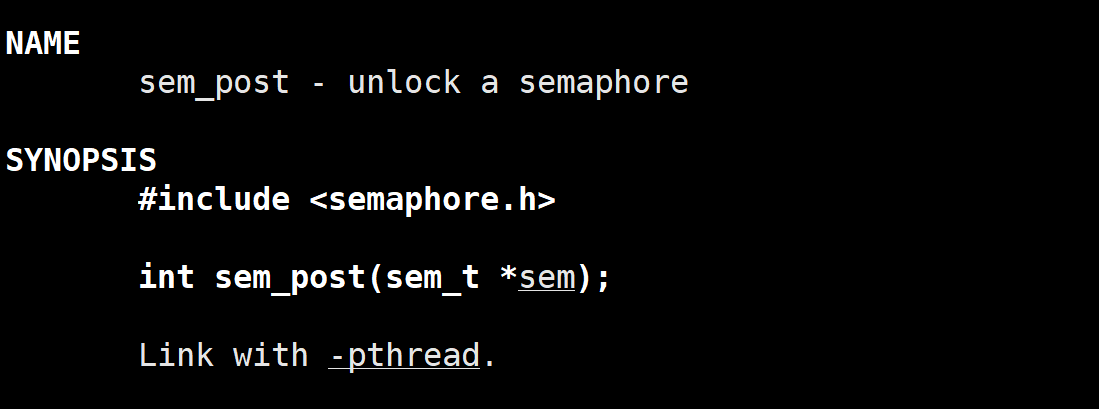
2.4 sem_post()函数
该函数用于对信号量执行 V 操作(Signal 操作)。它会将信号量的值加 1,如果信号量的值大于 0,则会唤醒一个等待该信号量的线程或进程。
3.环形队列
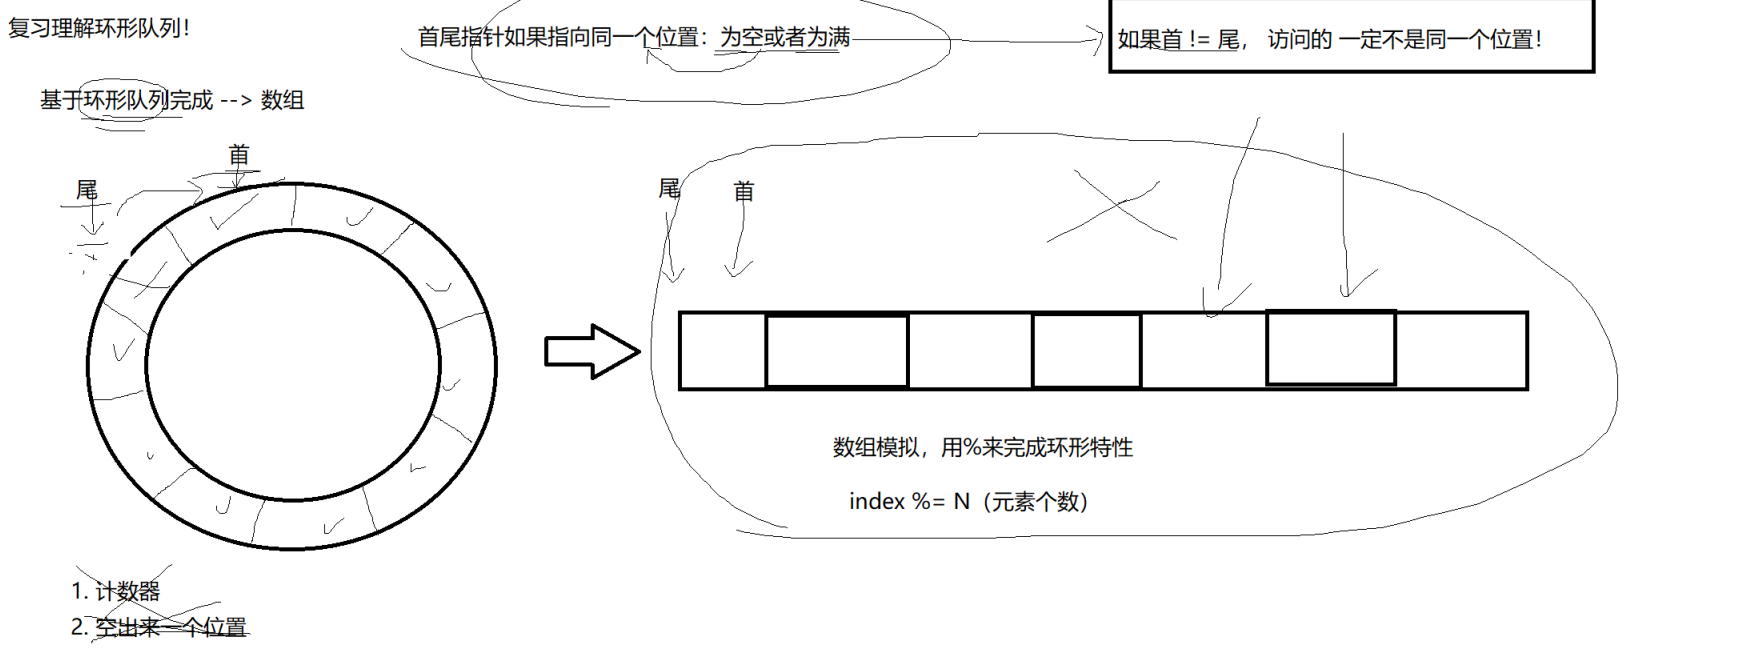
3.1 环形队列复习
这里仅列出一张老师的板书图片作为复习~
3.2 321CP场景
简单来说就是三种情况:
首先假设生产者消费者此时处于同一位置上
1)当队列为空的时候,必须让生产者先运行,要不然消费者访问不到数据
2)当队列为满的时候,必须让消费者先运行,否则会造成数据的丢失,因为新生产的数据会覆盖 原有数据
3)当队列不为满并且不为空的时候,并且如果此时队首!=队尾,那么此时访问的一定不是同一个 位置,此时,就可以并发执行了
4.代码练习(环形队列实现PC模型)
思路梳理:
要实现环形队列,并且让生产者消费者都在上面跑,那么我们就要首先保证生产者在前,消费者在后,这样才能保证线程不会崩溃,而且二者不能有"扣圈“现象的出现,之后在访问时,还要保证生产者和消费者在访问时,队列有足够的空间以及数据,这里就要用到信号量的PV操作了,在确定有足够位置的时候,就可以加锁解锁进行数据交换了~,因此我们代码将分为如下几个文件进行封装!
4.1 Mutex.hpp
这个就是之前互斥锁那里的封装,不多说了~
#pragma once
#include <iostream>
#include <mutex>
#include <pthread.h>class Mutex
{
public:Mutex(){pthread_mutex_init(&_lock, nullptr);}void Lock(){pthread_mutex_lock(&_lock);}void Unlock(){pthread_mutex_unlock(&_lock);}pthread_mutex_t *Get(){return &_lock;}~Mutex(){pthread_mutex_destroy(&_lock);}private:pthread_mutex_t _lock;
};class LockGuard
{
public:LockGuard(Mutex *_mutex):_mutexp(_mutex){_mutexp->Lock();}~LockGuard(){_mutexp->Unlock();}
private:Mutex* _mutexp;
};
4.2 Sem.hpp
#pragma once
#include <iostream>
#include <semaphore.h>
class Sem
{
public:Sem(int num):_initnum(num){sem_init(&_sem,0,_initnum);}void P(){int n=sem_wait(&_sem);(void)n;    //防止警报}void V(){int n=sem_post(&_sem);(void)n;}~Sem(){sem_destroy(&_sem);}private:sem_t _sem;int _initnum;
};
4.3 RingQueue.hpp
#pragma once
#include <iostream>
#include "Sem.hpp"
#include "Mutex.hpp"
#include <vector>using namespace std;
static int gcap = 5; // for debug
template <class T>
class RingQueue
{
public:RingQueue(int cap=gcap):_cap(cap),_ring_queue(cap),_space_sem(cap),_data_sem(0),_p_step(0),_c_step(0){}void Pop(T* out)                   //出队列{_data_sem.P();     //调用数据信号量的P操作(等待),确保队列中有足够的数据可以被取出。{LockGuard lockguard(&_c_lock);    //先上锁*out=_ring_queue[_c_step++];    //把要出去的数据给out,之后消费者向后走_c_step%=_cap;             //保证一直在这个环形队列里面}_space_sem.V();     //调用空间信号量的V操作(释放),表示队列中的空间已经释放,可以用于新的元素入队。}void Enqueue(const T&in)            //入队列{_space_sem.P();//调用空间信号量的P操作(等待),确保队列中有足够的空间可以写入新元素。{LockGuard lockguard(&_p_lock);      //先上锁// 生产数据了!有空间,在哪里啊??_ring_queue[_p_step++]=in;         //把当前生产者位置填上,之后让生产者向后走// 维持环形特点_p_step%=_cap;}_data_sem.V();//调用数据信号量的V操作(释放),表示队列中的数据已经增加,可以被取出。}~RingQueue(){}
private:vector<T> _ring_queue; // 临界资源int _cap;Sem _space_sem;Sem _data_sem;// 生产和消费的位置int _p_step;int _c_step;// 两把锁Mutex _p_lock;Mutex _c_lock;
};
4.4 main.cc
#include<pthread.h>
#include<unistd.h>
#include"RingQueue.hpp"
using namespace std;
void* consumer(void* args)
{RingQueue<int> *rt=static_cast<RingQueue<int>*>(args);while(true){int data=0;rt->Pop(&data);        //取出下标为0的元素cout<<"consume a data:"<<data<<endl;}
}
void* prducer(void* args)
{RingQueue<int> *rt=static_cast<RingQueue<int>*>(args);int data=1;while (1){sleep(1);rt->Enqueue(data);     //生产的数据入队列,并且要入在消费者前面cout<<"produce a data"<<endl;data++;}}
int main()
{RingQueue<int> *rq=new RingQueue<int>();pthread_t c[2],p[3];pthread_create(c,nullptr,consumer,(void*)rq);pthread_create(c+1,nullptr,consumer,(void*)rq);pthread_create(p,nullptr,prducer,(void*)rq);pthread_create(p+1,nullptr,prducer,(void*)rq);pthread_create(p+2,nullptr,prducer,(void*)rq);pthread_join(c[0],nullptr);pthread_join(c[1],nullptr);pthread_join(p[0],nullptr);pthread_join(p[1],nullptr);pthread_join(p[2],nullptr);delete rq;return 0;
}
运行:
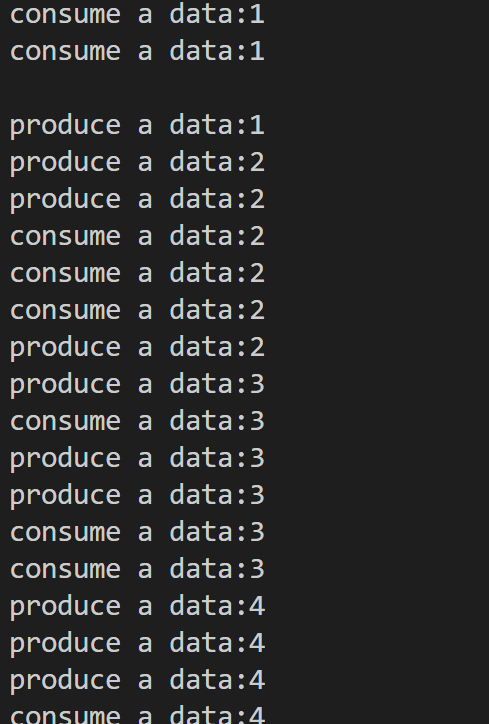
模型完成!!!
5. 日志打印
下面我们进行一组扩展练习,打印一组日志,
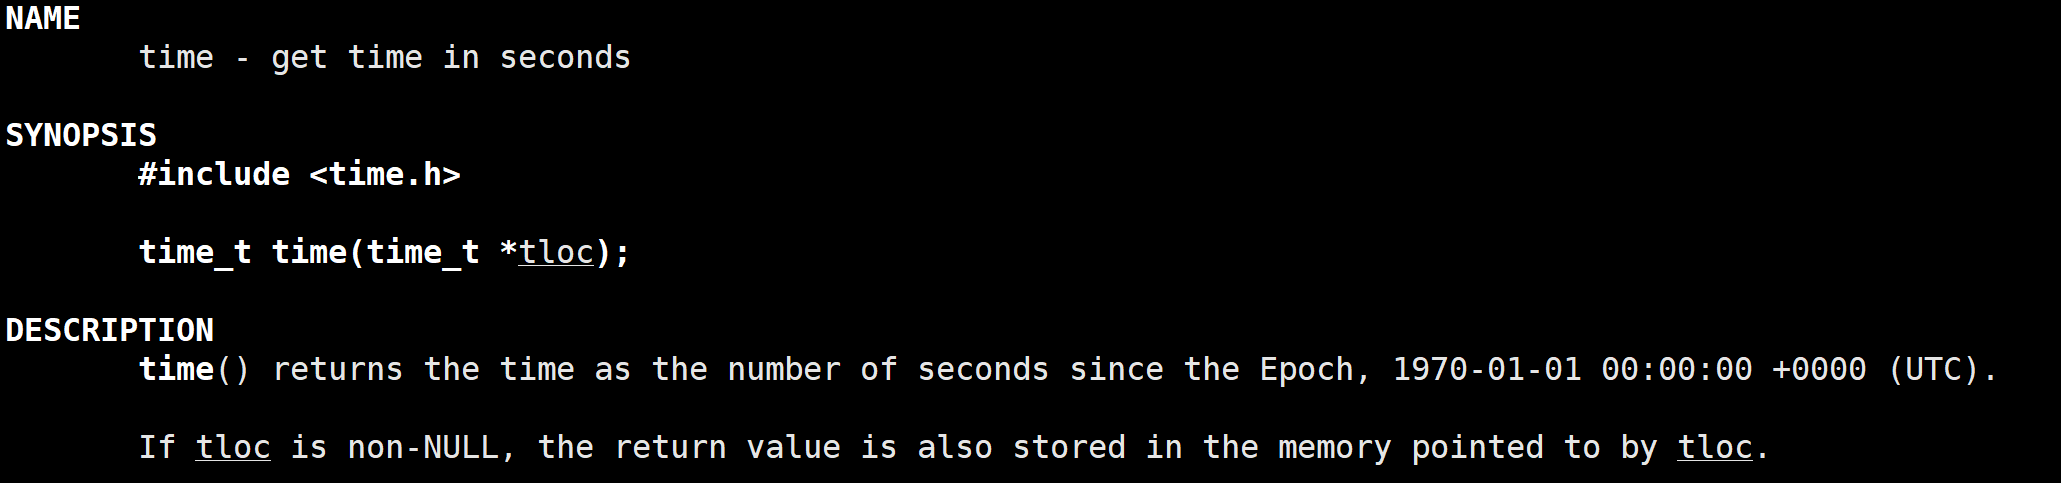
5.1 时间的获取
这里就不得不用到时间戳了,为了获取时间戳我们就要调用一下time函数,函数原型如下:
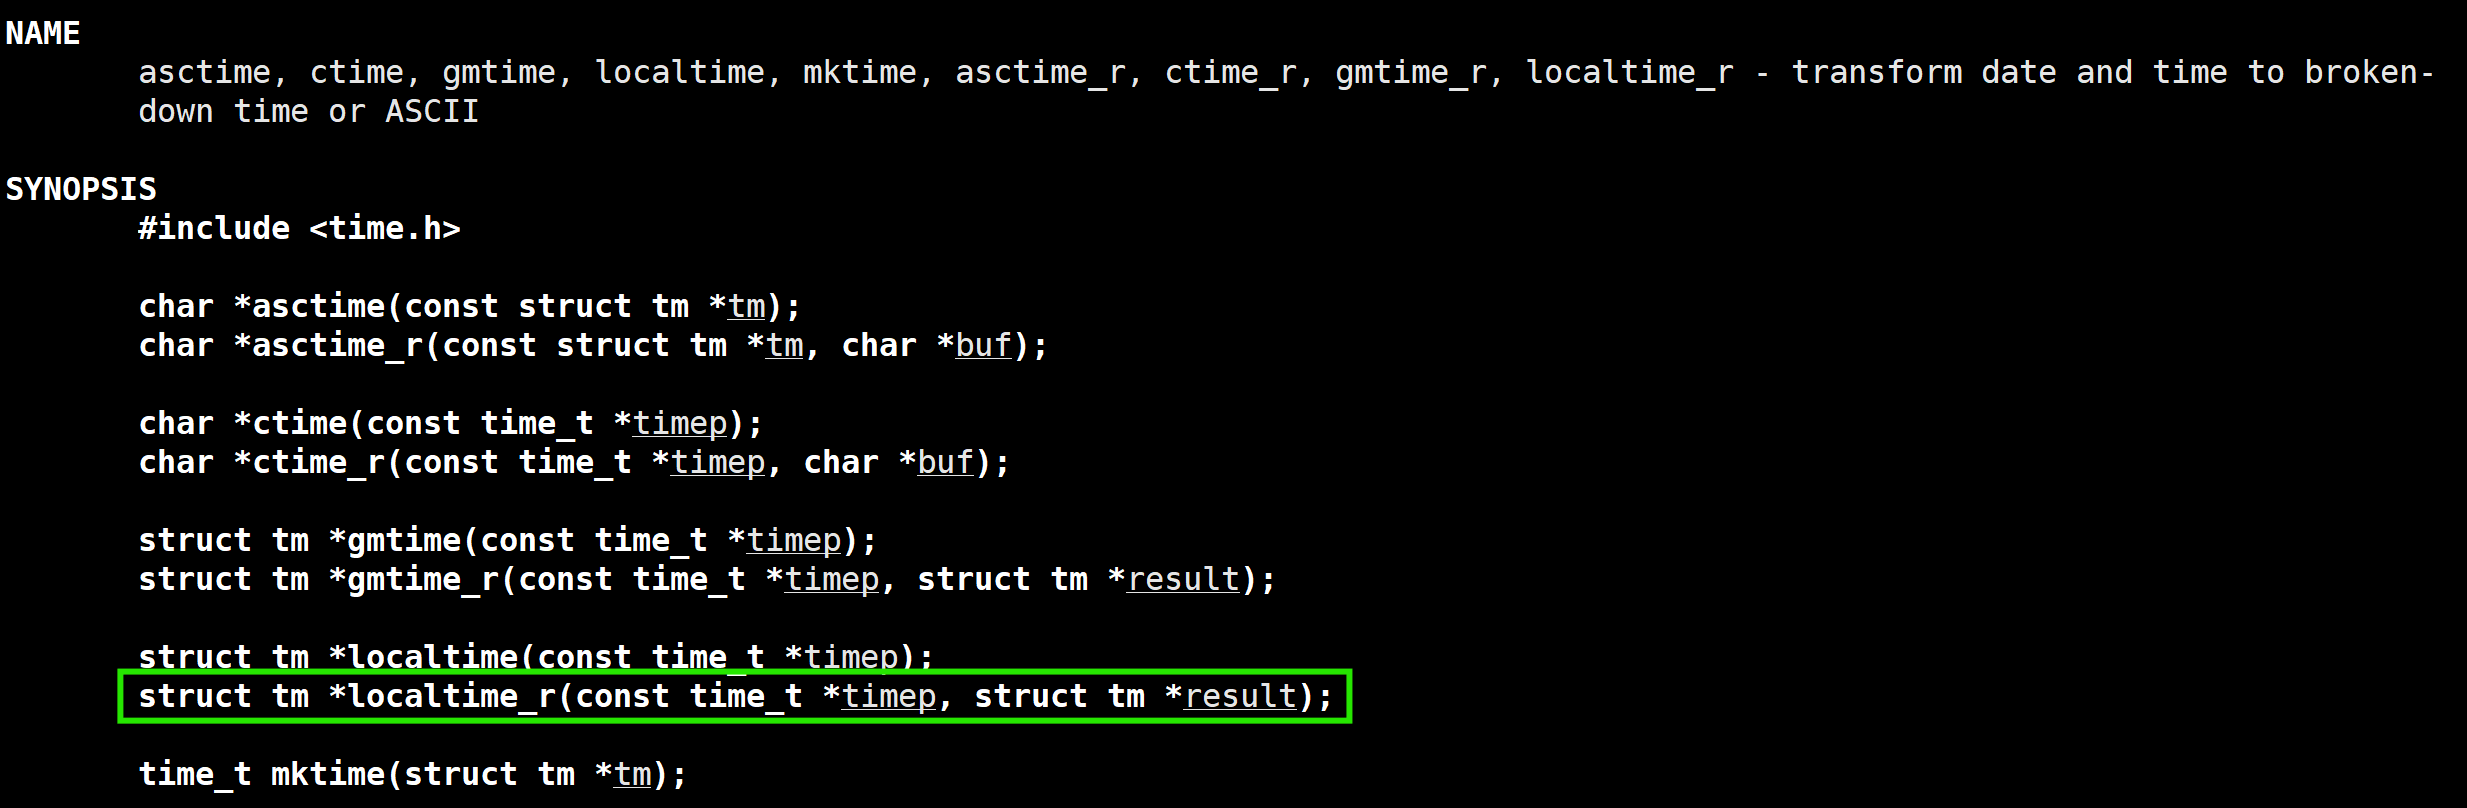
5.2 当地时间的转化
获得时间后,还要转化为当地时间:
5.3 日志的刷新和打印
我们总共又两种刷新方式可以选择,第一种是向显示器文件刷新,第二种是向目标文件中刷新,如果要是构造两个类的话,有点过于麻烦了,因为大多数东西都是相同的啊,因此,我们想到了C++提供了基类和派生类,那么我们可以利用这一点,定义一个“刷新”的基类,之后设置一个刷新的虚函数,之后再派生类中进行函数重写不就可以了吗!!!!因此我们可以分别搞这两个派生类了。
首先是向屏幕输出,这个没啥,就一个cout就完事了,这个就不多说了~
再看一下向目标文件输出,那我首先就要检查一下文件是否存在!存在的话就要返回,不存在就要创建,为此,在创建的时候我们可以尝试用try....catch结构,以防创建失败!创建完成后,就向这个文件里面写入就好了~可以用输出文件流向这个文件中写入,并且以追加的方式向文件中写入,保证写入的数据会被添加到文件的末尾而不是覆盖原有内容。
最后我们再用网络刷新把这两个包括一下,可以定义一个内部类
ps:此想法源于google日志代码!我看到比较好后学习了过来,如果有讲的不到位或者错误的地方欢迎指出~~
参考代码:
这是logger.hpp文件
#pragma once#include <iostream>
#include <string>
#include <filesystem> //C++17 文件操作
#include <fstream>
#include <ctime>
#include <unistd.h>
#include <memory>
#include <sstream>
#include "Mutex.hpp"using namespace std;
// 规定出场景的日志等级
enum class LOGLEVEL
{DEBUG,INFO,WARNING,ERROR,FATAL
};string Level2String(LOGLEVEL level)
{switch (level){case LOGLEVEL::DEBUG:return "DEBUG";case LOGLEVEL::ERROR:return "ERROR";case LOGLEVEL::FATAL:return "FATAL";case LOGLEVEL::INFO:return "IOFO";case LOGLEVEL::WARNING:return "WARNING";default:return "UNKNOWN";}
}// 打印当前日期  20XX-09-25 19:10:20
string GetCurTime()
{// 1. 获取时间戳time_t curtime = time(nullptr);// 2. 如何把时间戳转换成为20XX-08-04 12:27:03struct tm currtm;localtime_r(&curtime, &currtm);// 3. 转换成为字符串 -- dubug?char timebuffer[64];snprintf(timebuffer, sizeof(timebuffer), "%4d-%02d-%02d %02d:%02d:%02d",currtm.tm_year + 1900, // tm_year 成员表示自1900年以来的年数currtm.tm_mon + 1,     // tm_mon 成员表示月份,范围是0到11,currtm.tm_mday,currtm.tm_hour,currtm.tm_min,currtm.tm_sec);return timebuffer;
}
// 1. 刷新的问题 -- 假设我们已经有了一条完整的日志,string->设备(显示器,文件)
// 基类方法
class LogStrategy
{
public:virtual ~LogStrategy() = default;// virtual关键字用于实现多态性,即允许派生类(子类)重写基类(父类)的虚函数。// 虚函数是定义在基类中,并且在派生类中被重写的函数。//= default; 表示这个析构函数将由编译器自动生成默认的实现。virtual void SyncLog(const string &logmessage) = 0;// 这个函数是一个纯虚函数(pure virtual function),它没有具体的实现(即函数体为空),并且被声明为= 0;// 纯虚函数是抽象类的一部分,抽象类是不能被实例化的,具体的实现将由派生类提供.
};// 显示器刷新
class ConsoleLogStrategy : public LogStrategy
{
public:~ConsoleLogStrategy(){}void SyncLog(const string &logmessage) override{LockGuard lockguard(&_lock);cout << logmessage << endl;}private:Mutex _lock;
};const string logdefaultdir = "log";
const static std::string logfilename = "test.log";// 文件刷新
class FileLogStrategy : public LogStrategy
{
public:FileLogStrategy(const string &dir = logdefaultdir, const string &filename = logfilename): _dir_path_name(dir), _filename(filename){LockGuard lockguard(&_lock);if (filesystem::exists(_dir_path_name)){return;}try{filesystem::create_directories(_dir_path_name);}catch (const filesystem::filesystem_error &e){std::cerr << e.what() << "\r\n";}}void SyncLog(const string &logmessage) override{LockGuard lockguard(&_lock);string target = _dir_path_name;target += "/";target += _filename;ofstream out(target.c_str(), ios::app); // appendif (!out.is_open()){return;}out << logmessage << "\n"; // out.writeout.close();}~FileLogStrategy(){}private:string _dir_path_name; // logstring _filename;      // hello.log => log/hello.logMutex _lock;
};// 网络刷新
// 1. 定制刷新策略
// 2. 构建完整的日志
class Logger
{
public:Logger(){}void EnableConsoleLogStrategy(){_strategy = make_unique<ConsoleLogStrategy>();}void EnableFileLogStrategy(){_strategy = std::make_unique<FileLogStrategy>();}// 形成一条完整日志的方式class LogMessage{public:LogMessage(LOGLEVEL level, std::string &filename, int line, Logger &logger): _curr_time(GetCurTime()),_level(level),_pid(getpid()),_filename(filename),_line(line),_logger(logger){std::stringstream ss;ss << "[" << _curr_time << "] "<< "[" << Level2String(_level) << "] "<< "[" << _pid << "] "<< "[" << _filename << "] "<< "[" << _line << "]"<< " - ";_loginfo = ss.str();}template <class T>LogMessage &operator<<(const T &info){std::stringstream ss;ss << info;_loginfo += ss.str();return *this;}~LogMessage(){if (_logger._strategy){_logger._strategy->SyncLog(_loginfo);}}private:string _curr_time; // 日志时间LOGLEVEL _level;   // 日志等级pid_t _pid;        // 进程pidstring _filename;int _line;string _loginfo; // 一条合并完成的,完整的日志信息Logger &_logger; // 提供刷新策略的具体做法};LogMessage operator()(LOGLEVEL level,string filename,int line){return LogMessage(level,filename,line,*this);}~Logger(){}private:unique_ptr<LogStrategy> _strategy;
};Logger logger;#define LOG(level) logger(level, __FILE__, __LINE__)
#define EnableConsoleLogStrategy() logger.EnableConsoleLogStrategy()
#define EnableFileLogStrategy() logger.EnableFileLogStrategy()
这是Mutex.hpp文件
#pragma once
#include <iostream>
#include <mutex>
#include <pthread.h>class Mutex
{
public:Mutex(){pthread_mutex_init(&_lock, nullptr);}void Lock(){pthread_mutex_lock(&_lock);}void Unlock(){pthread_mutex_unlock(&_lock);}pthread_mutex_t *Get(){return &_lock;}~Mutex(){pthread_mutex_destroy(&_lock);}private:pthread_mutex_t _lock;
};class LockGuard
{
public:LockGuard(Mutex *_mutex):_mutexp(_mutex){_mutexp->Lock();}~LockGuard(){_mutexp->Unlock();}
private:Mutex* _mutexp;
};
这是main.cc文件
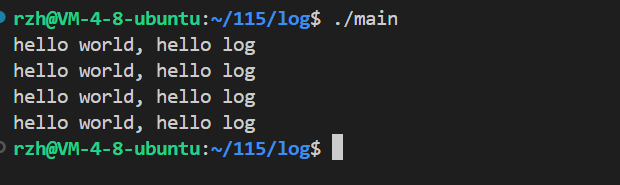
向显示器写入:
#include <unistd.h>
#include "Loger.hpp"int main()
{EnableConsoleLogStrategy();string test = "hello world, hello log";//  测试策略1:显示器写入std::unique_ptr<LogStrategy> logger_ptr = std::make_unique<ConsoleLogStrategy>();logger_ptr->SyncLog(test);logger_ptr->SyncLog(test);logger_ptr->SyncLog(test);logger_ptr->SyncLog(test);return 0;
}
运行结果:
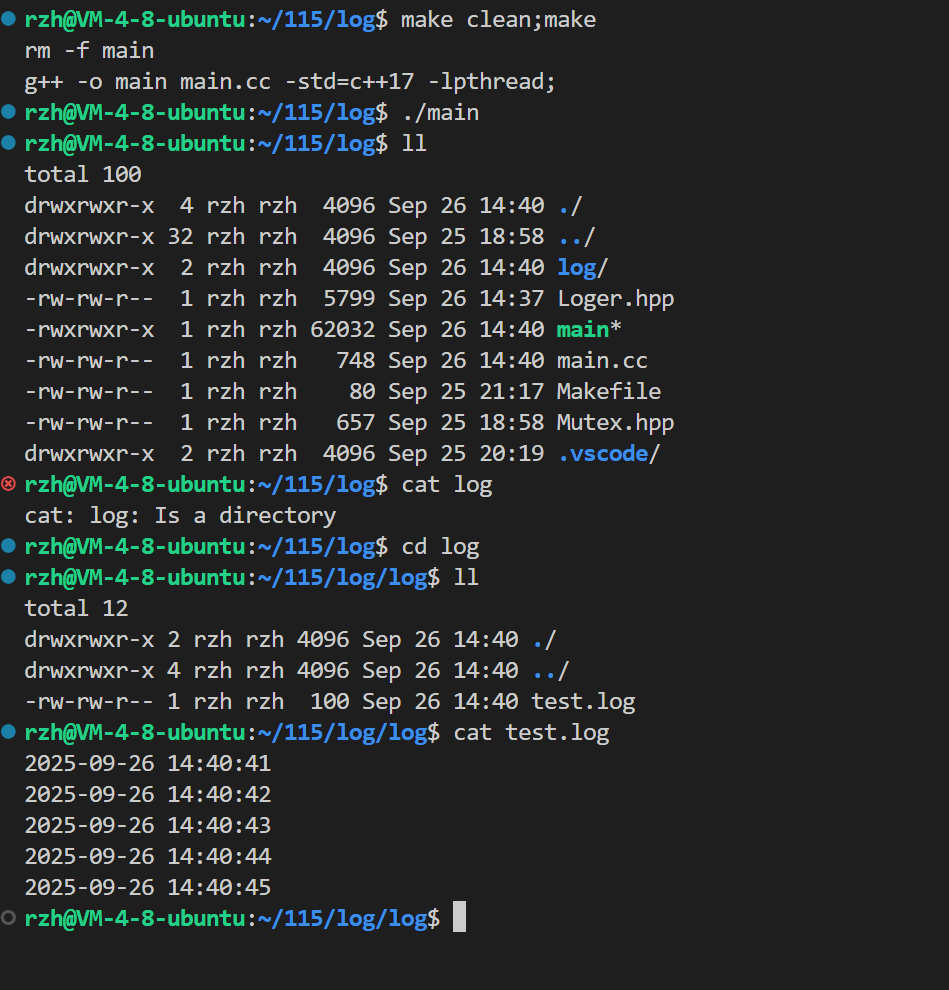
向文件中写入:
#include <unistd.h>
#include "Loger.hpp"int main()
{EnableConsoleLogStrategy();string test = "hello world, hello log";//测试策略2:文件写入unique_ptr<LogStrategy> logger_ptr=make_unique<FileLogStrategy>();logger_ptr->SyncLog(GetCurTime());sleep(1);logger_ptr->SyncLog(GetCurTime());sleep(1);logger_ptr->SyncLog(GetCurTime());sleep(1);logger_ptr->SyncLog(GetCurTime());sleep(1);logger_ptr->SyncLog(GetCurTime());sleep(1);return 0;
}
运行结果:
好,本篇博客到此结束,下一篇博客我们来设计线程池~