Python: 将wxauto发布为接口,并部署为Windows服务
前面写的wxauto的执行,但毕竟不可能让PyCharm 一直运行,包装为能提供webapi的Windows服务才是正道。
1、进入虚拟环境后,执行安装:
pip install flask
2. 新建文件 wxauto_webapi.py,执行
from flask import Flask, request, jsonify
from wxauto import WeChat
import threading# 初始化 Flask 应用
app = Flask(__name__)# 全局初始化 WeChat 实例 (确保只初始化一次)
# 注意:运行此代码前,请确保微信PC客户端已登录并处于前台
wx = WeChat()# 定义一个锁,用于确保多线程环境下对 wxauto 的操作是串行的,避免冲突
wx_lock = threading.Lock()@app.route('/send_private', methods=['POST'])
def send_private_message():"""私聊消息接口接收 JSON 数据格式: {"to": "联系人名称", "message": "消息内容"}"""# 获取 JSON 数据data = request.get_json()if not data:return jsonify({"error": "必须提供 JSON 数据"}), 400to_name = data.get('to')message = data.get('message')# 验证参数if not to_name or not message:return jsonify({"error": "参数 'to' 和 'message' 均不能为空"}), 400# 使用锁确保线程安全地操作 wxautowith wx_lock:try:wx.SendMsg(msg=message, who=to_name)return jsonify({"status": "success", "message": f"消息已发送给 {to_name}"}), 200except Exception as e:return jsonify({"error": f"发送消息失败: {str(e)}"}), 500@app.route('/send_group_at', methods=['POST'])
def send_group_at_message():"""群聊@消息接口接收 JSON 数据格式: {"group": "群名称", "message": "消息内容", "at_list": ["成员1", "成员2"]}"""data = request.get_json()if not data:return jsonify({"error": "必须提供 JSON 数据"}), 400group_name = data.get('group')message = data.get('message')at_list = data.get('at_list', [])  # at_list 是一个列表,默认为空列表# 验证参数if not group_name or not message:return jsonify({"error": "参数 'group' 和 'message' 均不能为空"}), 400if not isinstance(at_list, list):return jsonify({"error": "参数 'at_list' 必须是一个列表"}), 400# 使用锁确保线程安全地操作 wxautowith wx_lock:try:wx.SendMsg(msg=message, who=group_name, at=at_list)return jsonify({"status": "success", "message": f"消息已在群 '{group_name}' 中发送并@{at_list}"}), 200except Exception as e:return jsonify({"error": f"发送消息失败: {str(e)}"}), 500if __name__ == '__main__':# 启动 Flask 开发服务器,监听所有网络接口的 5000 端口# debug=True 仅用于开发环境,生产环境应设置为 Falseapp.run(host='0.0.0.0', port=5000, debug=True)
3. 本机使用 ApiFox 测试:
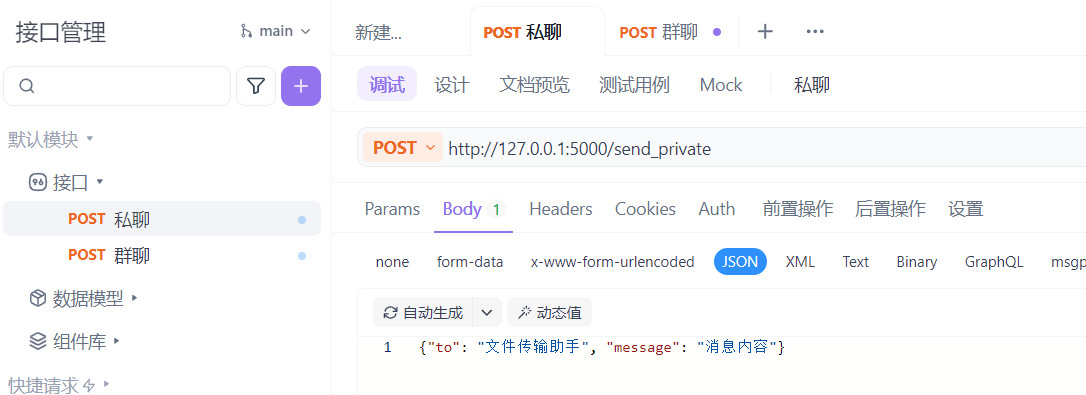
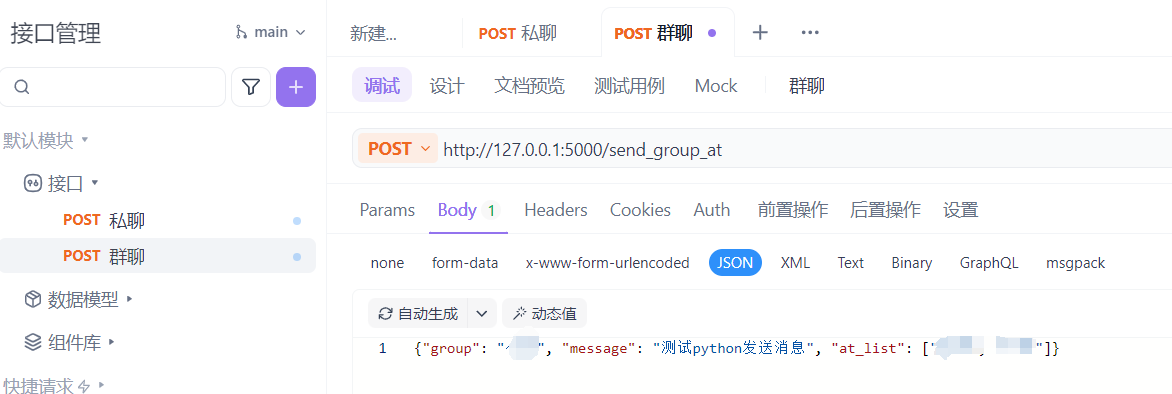
实测可以发出微信消息。
4. 进入虚拟环境,安装 pywin32
![]()
5. 创建服务包装脚本( service_wrapper.py)
import win32serviceutil
import win32service
import win32event
import servicemanager
import subprocess
import sys
import os# 切换到你的项目目录,确保导入和文件路径正确
script_dir = os.path.dirname(os.path.abspath(__file__))
os.chdir(script_dir)class MyPythonService(win32serviceutil.ServiceFramework):_svc_name_ = "AAA_WxAuto"        # 服务内部名称(唯一)_svc_display_name_ = "AAA_WxAuto" # 服务显示名称_svc_description_ = "Runs the wxauto web API as a service." # 服务描述def __init__(self, args):win32serviceutil.ServiceFramework.__init__(self, args)self.hWaitStop = win32event.CreateEvent(None, 0, 0, None)self.process = Nonedef SvcStop(self):self.ReportServiceStatus(win32service.SERVICE_STOP_PENDING)win32event.SetEvent(self.hWaitStop)# 优雅地停止你的 Flask 应用if self.process:self.process.terminate()def SvcDoRun(self):# 服务主逻辑:启动你的原脚本# 使用 Popen 而非 run 以确保非阻塞self.process = subprocess.Popen([sys.executable, "wxauto_webapi.py"])# 等待进程结束或停止事件win32event.WaitForSingleObject(self.hWaitStop, win32event.INFINITE)if __name__ == '__main__':win32serviceutil.HandleCommandLine(MyPythonService)
6. 执行安装:
# 安装服务
python service_wrapper.py install
# 启动服务
python service_wrapper.py start
# 卸载服务
python service_wrapper.py remove
安装为服务没有问题,能成功,但实际运行有问题,后续再写。