MySQL在Centos 7环境下安装
目录
1. 卸载不要的环境
2. 检查系统安装包
3. 卸载这些默认安装包
4. 获取mysql官方yum源
5. 安装mysql yum源,对比前后yum源
6. 看看能不能正常工作
7. 安装mysql服务
8. 查看配置文件和数据存储位置
9. 启动服务
10. 查看启动服务
11. 登录方法一 【不行就下一个】
12. 登录方法二 【不行就下一个】
13. 登录方法三 【应该行了吧】
14. 设置开机自启动【可以不设置】
15. 配置my.cnf
16. 常见问题
说明:
- 安装与卸载中,用户全部切换成root,一旦安装,普通用户能使用的。
- 初期练习,mysql不进行用户管理,全部使用root进行,尽快适应mysql语句,后面学了用户管理,再考虑新建普通用户。
1. 卸载不要的环境
[root@wanghao galaxy]# ps axj | grep mysql  #查看系统是否有正在运行的mysql
13735 14097 14096 28318 pts/0    14096 S+       0   0:00 grep --color=auto mysql1 25683 25683 25683 ?           -1 Ssl     27   4:08 /usr/sbin/mysqld
[root@wanghao galaxy]# ps axj | grep mariadb  #查看系统是否有正在运行的mariadb
13735 14322 14321 28318 pts/0    14321 S+       0   0:00 grep --color=auto mariadb#mariadb是mysql拉出来的一个开源分支,其实是一样的。 [root@wanghao galaxy]# systemctl stop mysqld  #切换成root用户,停止mysql服务,
[root@wanghao galaxy]# ps axj | grep mysql
13735 15244 15243 28318 pts/0    15243 S+       0   0:00 grep --color=auto mysqlstop mariadb.service # 停⽌mariadb 服务命令
2. 检查系统安装包
[root@wanghao galaxy]# rpm -qa | grep mysql #查看所有的mysql的安装包
mysql-community-libs-8.4.6-1.el7.x86_64
mysql-community-server-8.4.6-1.el7.x86_64
mysql-community-client-plugins-8.4.6-1.el7.x86_64
mysql-community-icu-data-files-8.4.6-1.el7.x86_64
mysql-community-client-8.4.6-1.el7.x86_64
mysql84-community-release-el7-2.noarch
mysql-community-libs-compat-8.4.6-1.el7.x86_64
mysql-community-common-8.4.6-1.el7.x86_64
3. 卸载这些默认安装包
[root@wanghao galaxy]# rpm -qa | grep mysql | xargs yum -y remove #卸载
Loaded plugins: fastestmirror, langpacks
Resolving Dependencies
--> Running transaction check
---> Package mysql-community-client.x86_64 0:8.4.6-1.el7 will be erased
---> Package mysql-community-client-plugins.x86_64 0:8.4.6-1.el7 will be erased
#..........
Removed:mysql-community-client.x86_64 0:8.4.6-1.el7           mysql-community-client-plugins.x86_64 0:8.4.6-1.el7          mysql-community-common.x86_64 0:8.4.6-1.el7           mysql-community-icu-data-files.x86_64 0:8.4.6-1.el7          mysql-community-libs.x86_64 0:8.4.6-1.el7             mysql-community-libs-compat.x86_64 0:8.4.6-1.el7             mysql-community-server.x86_64 0:8.4.6-1.el7           mysql84-community-release.noarch 0:el7-2                     Dependency Removed:postfix.x86_64 2:2.10.1-9.el7                                                                                       Complete![root@wanghao galaxy]# rpm -qa | grep mysql #再次查看我们发现没有mysql的安装包了
[root@wanghao galaxy]# ps axj | grep mysql #也没有mysql的进程了
13735 17599 17598 28318 pts/0    17598 S+       0   0:00 grep --color=auto mysql[root@wanghao galaxy]# ls /etc/my.cnf #确认etc下有没有my.cnf文件
ls: cannot access /etc/my.cnf: No such file or directory[root@wanghao galaxy]# ls /var/lib/mysql #查看mysql相关的数据
auto.cnf       ca-key.pem       d1                 ibdata1       mysql.ibd              public_key.pem   undo_001
binlog.000001  ca.pem           #ib_16384_0.dblwr  #innodb_redo  mysql_upgrade_history  server-cert.pem  undo_002
binlog.000002  client-cert.pem  #ib_16384_1.dblwr  #innodb_temp  performance_schema     server-key.pem
binlog.index   client-key.pem   ib_buffer_pool     mysql         private_key.pem        sys
4. 获取mysql官方yum源
http://repo.mysql.com/
⼀定要看下⾯的文字!如果后⾯自己安装不成功,就看看这个
注意:最好安装和自己系统⼀致的mysql版本,否则可能会存在软件兼容性问题
查看自己的系统版本
[root@wanghao galaxy]# cat /etc/redhat-release
CentOS Linux release 7.9.2009 (Core)
可以进⼊ http://repo.mysql.com/,找⼀下和自己版本⼀致的资源下载到你的本地,然后上传到你的Linux服务器。
进入网页,如果网页不完整,我们可以右击点击查看网页源代码。
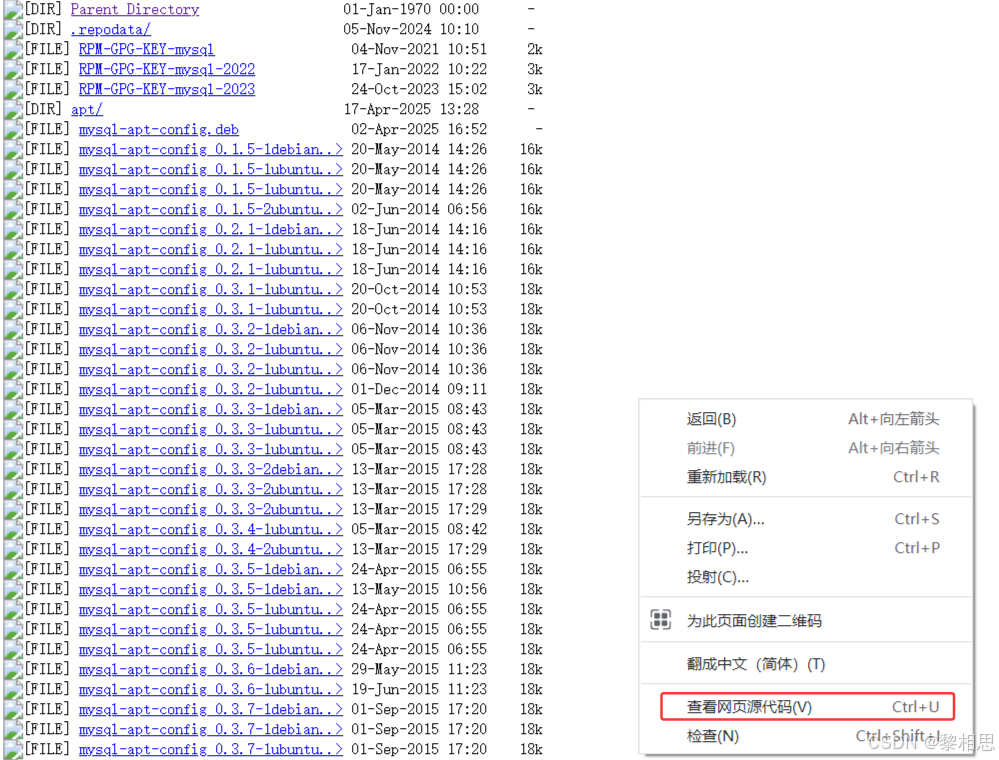
找到与自己版本相匹配的。点击下载,然后上传到Linux机器上。
5. 安装mysql yum源,对比前后yum源
#安装前
[root@wanghao galaxy]# ls /etc/yum.repos.d/ -l  #查看系统当中所支持的yum源
total 48
drwxr-xr-x 2 root root 4096 Jul  5 22:13 backup
-rw-r--r-- 1 root root 1775 Sep  9  2024 CentOS-Base.repo
-rw-r--r-- 1 root root 2523 Jul  5 22:05 CentOS-Base.repo.backup
-rw-r--r-- 1 root root 1059 Sep  9  2024 CentOS-SCLo-scl.repo
-rw-r--r-- 1 root root 1032 Sep  9  2024 CentOS-SCLo-scl-rh.repo
-rw-r--r-- 1 root root 2081 Aug 10 23:14 docker-ce.repo
-rw-r--r-- 1 root root 1355 Jul  9  2024 epel.repo
-rw-r--r-- 1 root root 1358 Sep  5  2021 epel.repo.rpmnew
-rw-r--r-- 1 root root 1454 Jul 10 19:40 epel-testing.repo
-rw-r--r-- 1 root root  669 Jul 10 19:40 ius-archive.repo
-rw-r--r-- 1 root root  591 Jul 10 19:40 ius.repo
-rw-r--r-- 1 root root  669 Jul 10 19:40 ius-testing.repo#安装中
[root@wanghao galaxy]# rpm -ivh mysql57-community-release-el7-9.noarch.rpm
warning: mysql57-community-release-el7-9.noarch.rpm: Header V3 DSA/SHA1 Signature, key ID 5072e1f5: NOKEY
Preparing...                          ################################# [100%]
Updating / installing...1:mysql57-community-release-el7-9  ################################# [100%]#安装后
[root@wanghao galaxy]# ls /etc/yum.repos.d/ -l
total 56
drwxr-xr-x 2 root root 4096 Jul  5 22:13 backup
-rw-r--r-- 1 root root 1775 Sep  9  2024 CentOS-Base.repo
-rw-r--r-- 1 root root 2523 Jul  5 22:05 CentOS-Base.repo.backup
-rw-r--r-- 1 root root 1059 Sep  9  2024 CentOS-SCLo-scl.repo
-rw-r--r-- 1 root root 1032 Sep  9  2024 CentOS-SCLo-scl-rh.repo
-rw-r--r-- 1 root root 2081 Aug 10 23:14 docker-ce.repo
-rw-r--r-- 1 root root 1355 Jul  9  2024 epel.repo
-rw-r--r-- 1 root root 1358 Sep  5  2021 epel.repo.rpmnew
-rw-r--r-- 1 root root 1454 Jul 10 19:40 epel-testing.repo
-rw-r--r-- 1 root root  669 Jul 10 19:40 ius-archive.repo
-rw-r--r-- 1 root root  591 Jul 10 19:40 ius.repo
-rw-r--r-- 1 root root  669 Jul 10 19:40 ius-testing.repo
-rw-r--r-- 1 root root 1416 Sep 12  2016 mysql-community.repo
-rw-r--r-- 1 root root 1440 Sep 12  2016 mysql-community-source.repo[root@wanghao galaxy]# vim /etc/yum.repos.d/mysql-community.repo #查看mysql-community.repo文件
6. 看看能不能正常工作
[root@wanghao galaxy]# yum list | grep mysql #查看
https://repo.ius.io/7/x86_64/repodata/repomd.xml: [Errno 14] HTTPS Error 404 - Not Found
Trying other mirror.
To address this issue please refer to the below wiki article https://wiki.centos.org/yum-errorsIf above article doesn't help to resolve this issue please use https://bugs.centos.org/.mysql57-community-release.noarch           el7-9                  installed
akonadi-mysql.x86_64                       1.9.2-4.el7            base
anope-mysql.x86_64                         2.1.4-1.el7            epel
apr-util-mysql.x86_64                      1.5.2-6.el7_9.1        updates
apr15u-util-mysql.x86_64                   1.5.4-3.ius.el7        ius
calligra-kexi-driver-mysql.x86_64          2.9.10-2.el7           epel
collectd-mysql.x86_64                      5.8.1-2.el7            epel
dmlite-plugins-mysql.x86_64                1.15.2-15.el7          epel
dovecot-mysql.x86_64                       1:2.2.36-8.el7         base
dpm-copy-server-mysql.x86_64               1.13.0-1.el7           epel
dpm-name-server-mysql.x86_64               1.13.0-1.el7           epel
7. 安装mysql服务
[root@wanghao galaxy]# yum install -y mysql-community-server #安装
Loaded plugins: fastestmirror, langpacks
Loading mirror speeds from cached hostfile* base: mirrors.tencent.com* centos-sclo-rh: mirrors.aliyun.com* centos-sclo-sclo: mirrors.aliyun.com* epel: d2lzkl7pfhq30w.cloudfront.net* extras: mirrors.tencent.com
https://repo.ius.io/7/x86_64/repodata/repomd.xml: [Errno 14] HTTPS Error 404 - Not Found
Trying other mirror.
To address this issue please refer to the below wiki article https://wiki.centos.org/yum-errorsIf above article doesn't help to resolve this issue please use https://bugs.centos.org/.Resolving Dependencies
--> Running transaction check
---> Package mysql-community-server.x86_64 0:5.7.44-1.el7 will be installed
--> Processing Dependency: mysql-community-common(x86-64) = 5.7.44-1.el7 for package: mysql-community-server-5.7.44-1.el7.x86_64
--> Processing Dependency: mysql-community-client(x86-64) >= 5.7.9 for package: mysql-community-server-5.7.44-1.el7.x86_64
--> Running transaction check
---> Package mysql-community-client.x86_64 0:5.7.44-1.el7 will be installed
--> Processing Dependency: mysql-community-libs(x86-64) >= 5.7.9 for package: mysql-community-client-5.7.44-1.el7.x86_64
---> Package mysql-community-common.x86_64 0:5.7.44-1.el7 will be installed
--> Running transaction check
---> Package mysql-community-libs.x86_64 0:5.7.44-1.el7 will be installed
--> Finished Dependency ResolutionDependencies Resolved======================================================================================================================Package                            Arch               Version                    Repository                     Size
======================================================================================================================
Installing:mysql-community-server             x86_64             5.7.44-1.el7               mysql57-community             184 M
Installing for dependencies:mysql-community-client             x86_64             5.7.44-1.el7               mysql57-community              31 Mmysql-community-common             x86_64             5.7.44-1.el7               mysql57-community             313 kmysql-community-libs               x86_64             5.7.44-1.el7               mysql57-community             3.0 MTransaction Summary
======================================================================================================================
Install  1 Package (+3 Dependent packages)Total download size: 219 M
Installed size: 930 M
Downloading packages:
warning: /var/cache/yum/x86_64/7/mysql57-community/packages/mysql-community-common-5.7.44-1.el7.x86_64.rpm: Header V4 RSA/SHA256 Signature, key ID 3a79bd29: NOKEY
Public key for mysql-community-common-5.7.44-1.el7.x86_64.rpm is not installed
(1/4): mysql-community-common-5.7.44-1.el7.x86_64.rpm       #公共模块                                   | 313 kB  00:00:02
(2/4): mysql-community-libs-5.7.44-1.el7.x86_64.rpm         #库                                   | 3.0 MB  00:00:02
(3/4): mysql-community-client-5.7.44-1.el7.x86_64.rpm       #客户端                                   |  31 MB  00:00:08
(4/4): mysql-community-server-5.7.44-1.el7.x86_64.rpm       #服务端                                   | 184 MB  00:01:20
----------------------------------------------------------------------------------------------------------------------
Total                                                                                 2.6 MB/s | 219 MB  00:01:25
Retrieving key from file:///etc/pki/rpm-gpg/RPM-GPG-KEY-mysql
Importing GPG key 0x5072E1F5:Userid     : "MySQL Release Engineering <mysql-build@oss.oracle.com>"Fingerprint: a4a9 4068 76fc bd3c 4567 70c8 8c71 8d3b 5072 e1f5Package    : mysql57-community-release-el7-9.noarch (installed)From       : /etc/pki/rpm-gpg/RPM-GPG-KEY-mysqlPublic key for mysql-community-server-5.7.44-1.el7.x86_64.rpm is not installedFailing package is: mysql-community-server-5.7.44-1.el7.x86_64GPG Keys are configured as: file:///etc/pki/rpm-gpg/RPM-GPG-KEY-mysql
虽然我们安装时输入的是server,可他再安装的过程中把客户端以及其他组件都安装了。
Failing package is: mysql-community-server-5.7.44-1.el7.x86_64GPG Keys are configured as: file:///etc/pki/rpm-gpg/RPM-GPG-KEY-mysql我们可以看到,上面报了这样的一个错误,这是一个密钥过期的问题。
解决方案:
rpm --import https://repo.mysql.com/RPM-GPG-KEY-mysql-2022
#这条命令可以从网络中导入比较新的RPM的GPG-KEY。
输入命令然后再安装mysql就没有问题了。
8. 查看配置文件和数据存储位置
[root@wanghao galaxy]# ls /etc/my.cnf #查看是否有my.cnf文件
/etc/my.cnf
[root@wanghao galaxy]# which mysqld #查看是否有服务端
/usr/sbin/mysqld #sbin,s代表超级用户执行
[root@wanghao galaxy]# which mysql #查看是否有客户端
/usr/bin/mysql
9. 启动服务
[root@wanghao galaxy]# systemctl start mysqld #启动服务
[root@wanghao galaxy]# ps ajx | grep mysqld #查看进程1  2655  2654  2654 ?           -1 Sl      27   0:00 /usr/sbin/mysqld --daemonize --pid-file=/var/run/mysqld/mysqld.pid
13735  2817  2816 28318 pts/0     2816 S+       0   0:00 grep --color=auto mysqld
[root@wanghao galaxy]# netstat -nltp #查看mysql端口号
Active Internet connections (only servers)
Proto Recv-Q Send-Q Local Address           Foreign Address         State       PID/Program name
tcp        0      0 0.0.0.0:22              0.0.0.0:*               LISTEN      1353/sshd
tcp6       0      0 :::22                   :::*                    LISTEN      1353/sshd
tcp6       0      0 :::3306                 :::*                    LISTEN      2655/mysqld
10. 查看启动服务
[root@wanghao galaxy]# ps ajx | grep mysqld1  2655  2654  2654 ?           -1 Sl      27   0:00 /usr/sbin/mysqld --daemonize --pid-file=/var/run/mysqld/mysqld.pid
13735  2817  2816 28318 pts/0     2816 S+       0   0:00 grep --color=auto mysqld
11. 登录方法一 【不行就下一个】
#获取临时root密码
[root@wanghao galaxy]# sudo grep 'temporary password' /var/log/mysqld.log
2025-08-10T15:48:09.722278Z 6 [Note] [MY-010454] [Server] A temporary password is generated for root@localhost: :b3pJs!ypZeQ
2025-09-13T07:42:19.907287Z 1 [Note] A temporary password is generated for root@localhost: ZR+bhG4uwieD#使用临时密码登录
[root@wanghao galaxy]# mysql -u root -p
Enter password: #判断修改密码时候新密码是否符合当前的策略,不满⾜报错,不让修改,关闭它
#安全强度,默认为中,即1,要求必须包含 数字、符号、⼤⼩写字⺟,⻓度⾄少为8位
mysql> set global validate_password_policy=0;
Query OK, 0 rows affected (0.00 sec)
#密码最⼩⻓度
mysql> set global validate_password_length=1;
Query OK, 0 rows affected (0.00 sec)
#修改本地登录密码,暂不授权远程登录
mysql> ALTER USER 'root'@'localhost' IDENTIFIED BY 'qwer@wu.888';
Query OK, 0 rows affected (0.00 sec)
mysql> FLUSH PRIVILEGES;
Query OK, 0 rows affected (0.00 sec)
#如果你安装的最新的mysql,没有所谓的临时密码,root默认没有密码
12. 登录方法二 【不行就下一个】
# 如果你安装的最新的mysql,没有所谓的临时密码,root默认没有密码
# 试着直接client登陆⼀下
13. 登录方法三 【应该行了吧】
[root@wanghao galaxy]# vim /etc/my.cnf在[mysqld]最后⼀栏配置(不知道是什么,就放在配置⽂件最后) 加⼊: skip-grant-tables 选项,并保存退出,意思就是跳过鉴权。#配置文件改了,要让配置文件生效,就得重启服务
[root@wanghao galaxy]# systemctl restart mysqld #重启服务[root@wanghao galaxy]# ps axj | grep mysql #查看mysql进程1  6459  6458  6458 ?           -1 Sl      27   0:00 /usr/sbin/mysqld --daemonize --pid-file=/var/run/mysqld/mysqd.pid
13735 13347 13346 28318 pts/0    13346 S+       0   0:00 grep --color=auto mysql[root@wanghao galaxy]# mysql -u root -p #登录数据库
Enter password: #无需输密码,直接按回车
Welcome to the MySQL monitor.  Commands end with ; or \g.
Your MySQL connection id is 5
Server version: 5.7.44 MySQL Community Server (GPL)Copyright (c) 2000, 2023, Oracle and/or its affiliates.Oracle is a registered trademark of Oracle Corporation and/or its
affiliates. Other names may be trademarks of their respective
owners.Type 'help;' or '\h' for help. Type '\c' to clear the current input statement.mysql> show databases;  #查看所有的数据库
+--------------------+
| Database           |
+--------------------+
| information_schema |
| mysql              |
| performance_schema |
| sys                |
+--------------------+
4 rows in set (0.00 sec)mysql>
14. 设置开机自启动【可以不设置】
#开启开机⾃启动
systemctl enable mysqld
systemctl daemon-reload
15. 配置my.cnf
#配置一下my.cnf,主要是数据库客户端和服务器的编码格式# For advice on how to change settings please see
# http://dev.mysql.com/doc/refman/5.7/en/server-configuration-defaults.html
[mysql]
default-character-set=utf8 #mysql有bug,解决汉字不回显问题
[mysqld]
#
# Remove leading # and set to the amount of RAM for the most important data
# cache in MySQL. Start at 70% of total RAM for dedicated server, else 10%.
# innodb_buffer_pool_size = 128M
#
# Remove leading # to turn on a very important data integrity option: logging
# changes to the binary log between backups.
# log_bin
#
# Remove leading # to set options mainly useful for reporting servers.
# The server defaults are faster for transactions and fast SELECTs.
# Adjust sizes as needed, experiment to find the optimal values.
# join_buffer_size = 128M
# sort_buffer_size = 2M
# read_rnd_buffer_size = 2M
#port=3306  #mysql端口号是可以修改的,默认3306
character-set-server=utf8 #server端的编码格式,采用的就是utf-8的格式
datadir=/var/lib/mysql #mysql在建表建库时对应的数据所在的路径
socket=/var/lib/mysql/mysql.sock
# Disabling symbolic-links is recommended to prevent assorted security risks
symbolic-links=0
log-error=/var/log/mysqld.log #错误日志所在的路径
pid-file=/var/run/mysqld/mysqld.pid
skip-grant-tables #跳过鉴权#最后重启mysqld服务
16. 常见问题
mysql 已经配置了客⼾端服务器utf8编码,但是⽆法输⼊中⽂确保您在终端命令⾏中可以输⼊中⽂
[whb@VM-0-3-centos ~]$ env |grep LANG
LANG=en_US.utf8
安装遇到秘钥过期的问题:Failing package is: mysql-community-client-5.7.39-1.el7.x86_64
GPG Keys are configured as: file:///etc/pki/rpm-gpg/RPM-GPG-KEY-mysql
解决⽅案:
rpm --import https://repo.mysql.com/RPM-GPG-KEY-mysql-2022