SpringBoot 集成 MapStruct
目录
- 一、MapStruct 简介
- 1.1 概述
- 1.2 为什么使用 MapStruct?
- 1.3 Maven 依赖
- 二、SpringBoot实战
- 2.1 定义POJO
- 2.2 Mapper接口定义
- 2.3 自动生成 Mapper 代码
- 2.4 测试用例
- 三、其他用法
- 3.1 注入 Spring 组件到 Mapper 中
- 3.2 使用 qualifiedName、expression 自定义字段的转换规则
- 3.3 不同字段名映射
- 3.4 子对象映射
- 3.5 浅克隆问题解决
- 3.6 数据类型映射
- 3.7 使用抽象类自定义映射器
- 3.8 @BeforeMapping 和 @AfterMapping 注解
- 3.9 defaultExpression支持
- 3.10 Map 转 Bean
- 3.11 Condition Mapping,有条件的转换
- 3.12 @MappingTarget 直接使用已有Bean
- 官网地址: https://mapstruct.org/
- 官网文档: https://mapstruct.org/documentation/installation/
- GitHub: https://github.com/mapstruct/mapstruct
一、MapStruct 简介
1.1 概述
MapStruct 是一个 Java Bean mapper,用于 JavaBean 之间的转换。MapStruct 基于约定优于配置的设计思想, 相较于常用的 BeanUtils.copyProperties() 它更高效、优雅。
1.2 为什么使用 MapStruct?
在软件开发中,我们通常使用多层架构设计模式,不同层次的对象模型需要相互转换,例如持久层中的 Entity 与 DTO 之间的转换。
编写此类映射代码是一项繁琐且容易出错的任务。MapStruct 旨在通过尽可能自动化来简化这项工作。
与其他框架相比,MapStruct 在编译时生成 bean 映射代码,从而确保高性能,允许开发人员快速发现并及时解决问题。
1.3 Maven 依赖
将下面依赖添加到 Maven 的 pom.xml 文件中:
<dependency><groupId>org.mapstruct</groupId><artifactId>mapstruct</artifactId><version>1.6.3</version>
</dependency>
<dependency><groupId>org.mapstruct</groupId><artifactId>mapstruct-processor</artifactId><version>1.6.3</version>
</dependency>
mapstruct依赖:核心库,提供 MapStruct 的核心注解(如@Mapper、@Mapping)和运行时支持的类。mapstruct-processor依赖:注解处理器,在编译阶段处理@Mapper等注解,自动生成映射接口的实现类。
二、SpringBoot实战
本节我们通过示例,快速演示 MapStruct 的用法。
2.1 定义POJO
首先,我们定义两个 Java 类,DemoSource 是源类,DemoDestination 是要映射的目标类,他们具有相同的字段。
import lombok.Data;/*** 源类示例*/
@Data
public class DemoSource {private String name;private String description;
}
import lombok.Data;/*** 目标类示例*/
@Data
public class DemoDestination {private String name;private String description;
}
2.2 Mapper接口定义
在 MapStruct 中,我们将类型转换器称为 Mapper,请不要和 Mybatis 中的 Mapper 混淆。下面,我们定义 Mapper 接口。使用 @Mapper 注解,告诉 MapStruct 这是我们的映射器。
import org.mapstruct.Mapper;@Mapper(componentModel = "spring")
public interface DemoSourceDestinationAssembler {/*** 将DemoSource对象转换为DemoDestination对象* @param source 需要转换的源对象* @return 转换后生成的目标对象*/DemoDestination sourceToDestination(DemoSource source);/*** 将DemoDestination对象转换为DemoSource对象* @param destination 需要转换的DemoDestination对象* @return 转换后生成的DemoSource对象*/DemoSource destinationToSource(DemoDestination destination);
}
注意: 我们只需定义接口即可,MapStruct 会自动创建对应的实现类。
2.3 自动生成 Mapper 代码
执行 mvn clean install 触发 MapStruct 插件自动生成代码,生成后的实现类在 /target/generated-sources/annotations 目录下。
下面就是 MapStruct 为我们自动生成的:
import javax.annotation.Generated;
import org.springframework.stereotype.Component;@Generated(value = "org.mapstruct.ap.MappingProcessor",date = "2025-07-22T09:27:07+0800",comments = "version: 1.6.3, compiler: javac, environment: Java 1.8.0_451 (Oracle Corporation)"
)
@Component
public class DemoSourceDestinationAssemblerImpl implements DemoSourceDestinationAssembler {@Overridepublic DemoDestination sourceToDestination(DemoSource source) {if ( source == null ) {return null;}DemoDestination demoDestination = new DemoDestination();demoDestination.setName( source.getName() );demoDestination.setDescription( source.getDescription() );return demoDestination;}@Overridepublic DemoSource destinationToSource(DemoDestination destination) {if ( destination == null ) {return null;}DemoSource dmeoSource = new DemoSource();demoSource.setName( destination.getName() );demoSource.setDescription( destination.getDescription() );return demoSource;}
}
2.4 测试用例
OK,完成配置和代码生成后,我们可以进行转换测试:
import org.junit.jupiter.api.Assertions;
import org.junit.jupiter.api.Test;
import org.springframework.beans.factory.annotation.Autowired;
import org.springframework.boot.test.context.SpringBootTest;@SpringBootTest
public class DemoSourceDestinationAssemblerIntegrationTest {@Autowiredprivate DemoSourceDestinationAssembler demoSourceDestinationAssembler;/*** 测试源对象到目标对象的映射功能是否正确*/@Testpublic void givenSourceToDestination() {// 创建源对象并赋值DemoSource demoSource = new DemoSource();demoSource.setName("SourceName");demoSource.setDescription("SourceDescription");// 拷贝DemoDestination destination = demoSourceDestinationAssembler.sourceToDestination(demoSource);// 比较值是否一样Assertions.assertEquals(demoSource.getName(), destination.getName());Assertions.assertEquals(demoSource.getDescription(), destination.getDescription());}}
三、其他用法
3.1 注入 Spring 组件到 Mapper 中
对于 Spring 应用,如果我们需要在 Mapper 中引用 Spring 容器中的组件该如何实现?这种情况下,我们需要改用抽象类而非接口类了。如下所示:
@Mapper(componentModel = "spring")
public abstract class DemoSourceDestinationAssembler {@Autowiredprotected DemoService demoService;@Mapping(target = "name", expression = "java(demoService.enrichName(source.getName()))")public abstract DemoDestination sourceToDestination(DemoSource source);
}
3.2 使用 qualifiedName、expression 自定义字段的转换规则
如果我们想自定义字段的转换规则,有三种方式:
- 注入 Spring 的 Bean 对象来调用转换方法(参考3.1用法);
- 使用
@Mapping的qualifiedByName属性,配合@Name注解来实现; - 使用
@Mapping的expression属性,通过执行 java 代码调用自定义规则方法。(支持多个字段的合并)
第2、3种方法的代码实现如下:
import org.mapstruct.Mapper;
import org.mapstruct.Mapping;
import org.mapstruct.Named;@Mapper(componentModel = "spring")
public interface DemoSourceDestinationAssembler {/*** 将源对象转换为目标对象并丰富目标对象属性* @param source 源对象,包含需要转换的基础数据* @return 转换后的目标对象,包含经过处理的属性值*/@Mappings({@Mapping(target = "name", source = "name", qualifiedByName = "enrichName"),@Mapping(target = "description", expression = "java(concatenate(source.getName(), source.getDescription()))")})DemoDestination sourceToDestinationEnrich(DemoSource source);@Named("enrichName")default String enrichName(String name) {return name + " enriched";}default String concatenate(String name, String description) {return name + " 的描述是:" + description;}
}
测试代码如下:
/*** 测试源对象到目标对象的映射功能是否正确*/
@Test
public void givenSourceToDestinationEnrich() {// 创建源对象并赋值DemoSource demoSource = new DemoSource();demoSource.setName("SourceName");demoSource.setDescription("SourceDescription");// 拷贝DemoDestination destination = demoSourceDestinationAssembler.sourceToDestinationEnrich(demoSource);// 比较值是否一样System.out.println(demoSource);System.out.println(destination);
}
执行结果:
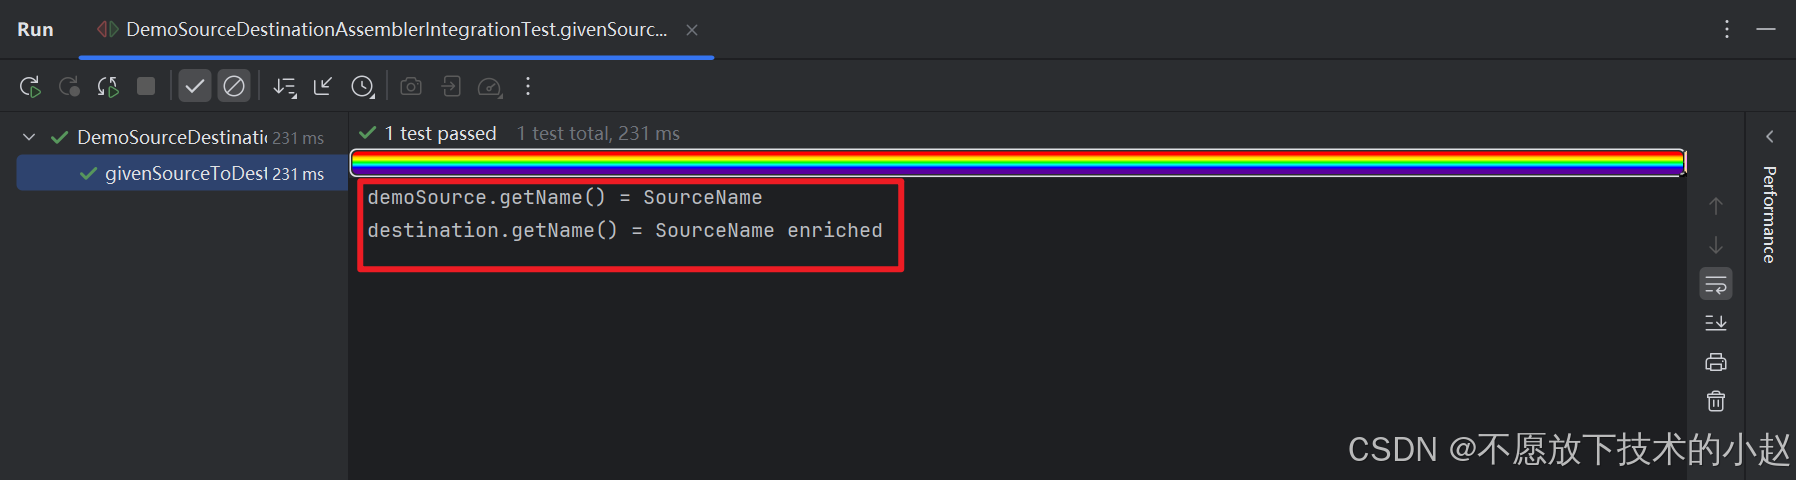
可以看到,name 属性按照我们自定义的规则修改了。
3.3 不同字段名映射
在之前的例子中,我们定义的两个 Bean 具有相同的字段名称,MapStruct 能够自动完成映射。如果字段类型不一样呢?
下面我们创建两个新的员工Bean:Employee 和 EmployeeDTO。
1)新 POJOs
实体类定义:
import lombok.Getter;
import lombok.Setter;@Getter
@Setter
public class Employee {private Integer id;private String name;
}
DTO类:
import lombok.Getter;
import lombok.Setter;@Getter
@Setter
public class EmployeeDTO {private Integer employeeId;private String employeeName;
}
2)Mapper 接口配置
映射字段不同时,我们需要在 @Mapping 注解中指定目标字段名。
在 MapStruct 中,我们还可以使用表达式来定义 Bean 的成员。
import org.mapstruct.Mapper;
import org.mapstruct.Mapping;@Mapper(componentModel = "spring")
public interface EmployeeAssembler {/*** 将Employee实体对象转换为EmployeeDTO数据传输对象* @param entity 要转换的Employee实体对象,包含员工原始数据* @return 转换后的EmployeeDTO对象,包含映射后的员工数据*/@Mapping(target = "employeeId", source = "entity.id")@Mapping(target = "employeeName", source = "entity.name")EmployeeDTO employeeToEmployeeDTO(Employee entity);/*** 将EmployeeDTO对象转换为Employee对象* @param dto 包含员工信息的传输对象,其中employeeId字段将映射为目标对象的id字段* @return 转换后的Employee实体对象,其id字段来源于dto.employeeId*/@Mapping(target = "id", source = "dto.employeeId")@Mapping(target = "name", source = "dto.employeeName")Employee employeeDTOToEmployee(EmployeeDTO dto);}
3)测试用例
下面进行测试:
/*** 测试当EmployeeDTO对象与Employee对象的名称不同时,employeeDTOToEmployee方法的转换功能*/
@Test
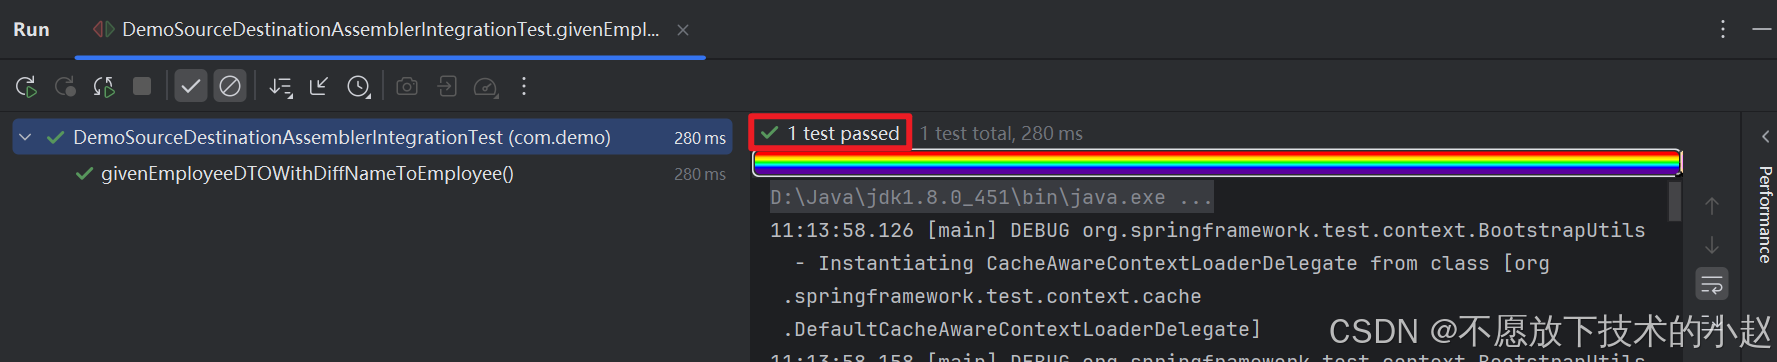
public void givenEmployeeDTOWithDiffNameToEmployee() {EmployeeDTO dto = new EmployeeDTO();dto.setEmployeeId(1);dto.setEmployeeName("John");Employee entity = employeeAssembler.employeeDTOToEmployee(dto);Assertions.assertEquals(dto.getEmployeeId(), entity.getId());Assertions.assertEquals(dto.getEmployeeName(), entity.getName());
}
执行结果:
3.4 子对象映射
POJO 通常中不会只包含基本数据类型,其中往往会包含其它类。下面演示如何映射具有子对象引用的 Bean。
1)修改 POJO
向 Employee 和 EmployeeDTO 中分别新增一个对象引用 Division、DivisionDTO。
实体类定义:
import lombok.AllArgsConstructor;
import lombok.Getter;
import lombok.Setter;@Getter
@Setter
@AllArgsConstructor
public class Division {private int id;private String name;
}
import lombok.Getter;
import lombok.Setter;@Getter
@Setter
public class Employee {private Integer id;private String name;private Division division;
}
DTO类:
import lombok.AllArgsConstructor;
import lombok.Getter;
import lombok.Setter;@Getter
@Setter
@AllArgsConstructor
public class DivisionDTO {private int id;private String name;
}
import lombok.Getter;
import lombok.Setter;@Getter
@Setter
public class EmployeeDTO {private Integer employeeId;private String employeeName;private Division division;
}
2)修改 Mapper
这里我们需要为 Division 与 DivisionDTO 之间的转换添加方法。如果 MapStruct 检测到需要转换对象类型,并且要转换的方法存在于同一个类中,它将自动使用它。
/*** 将Division实体转换为DivisionDTO数据传输对象* @param entity 需要转换的Division实体对象* @return 转换后的DivisionDTO对象*/
DivisionDTO divisionToDivisionDTO(Division entity);/*** 将DivisionDTO对象转换为Division对象* @param dto 需要转换的DivisionDTO数据传输对象* @return 转换后的Division实体对象*/
Division divisionDTOtoDivision(DivisionDTO dto);
3)测试用例
对上面的测试代码稍作修改:
/*** 测试EmployeeDTO到Employee对象的嵌套映射转换是否正确*/
@Test
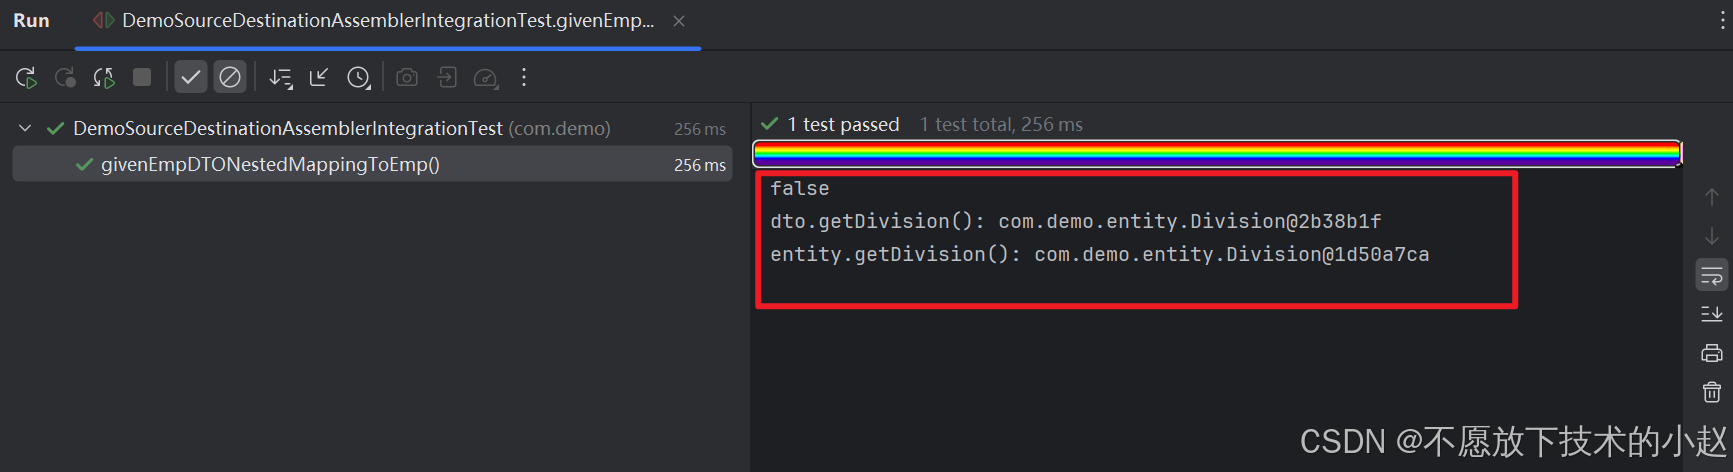
public void givenEmpDTONestedMappingToEmp() {EmployeeDTO dto = new EmployeeDTO();dto.setDivision(new DivisionDTO(1, "Division1"));Employee entity = employeeAssembler.employeeDTOToEmployee(dto);System.out.println(Objects.equals(dto.getDivision(), entity.getDivision()));System.out.println("dto.getDivision(): " + dto.getDivision());System.out.println("entity.getDivision(): " + entity.getDivision());Assertions.assertEquals(dto.getDivision().getId(), entity.getDivision().getId());Assertions.assertEquals(dto.getDivision().getName(), entity.getDivision().getName());
}
执行结果:
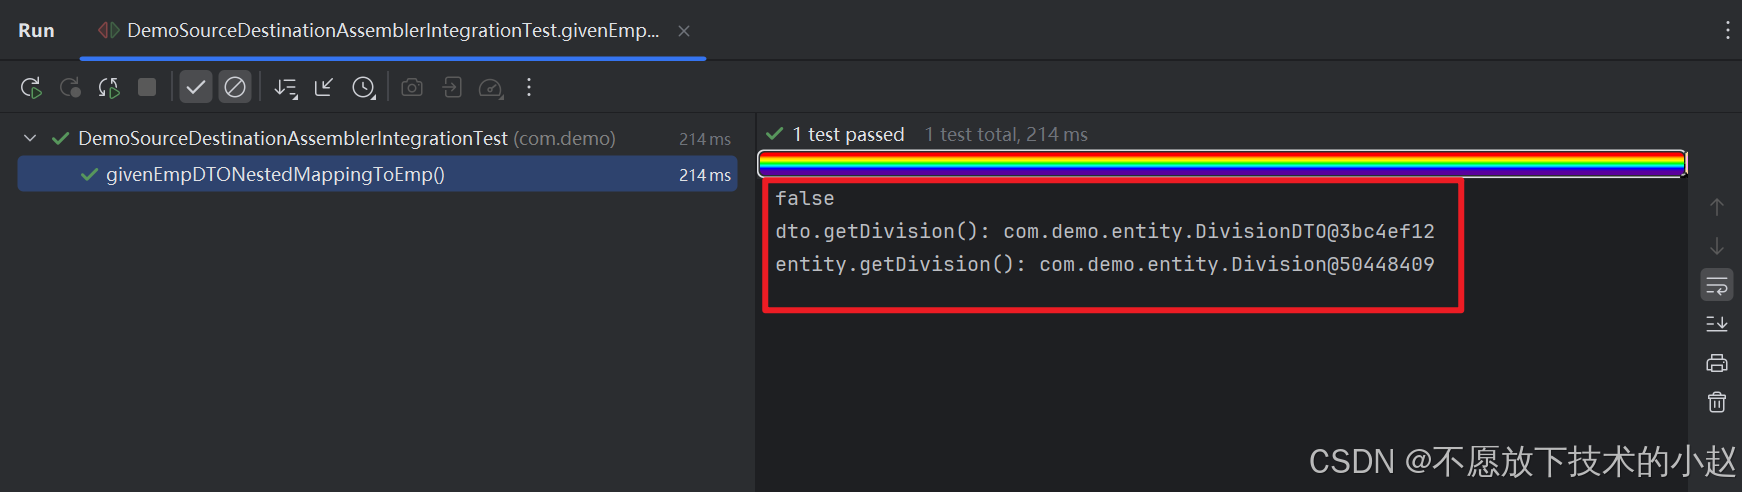
注意: 这一步看似没有问题,但是大家思考一下,如果 Employee 和 EmployeeDTO 中使用的都是 Division 类型,会不会存在浅克隆问题呢?答案是会的!
3.5 浅克隆问题解决
我们先来复现一下浅克隆的问题:
把 EmployeeDTO 中的子对象也改为 Division 类型,然后重新跑一次 3.4 中的测试代码,结果如下:
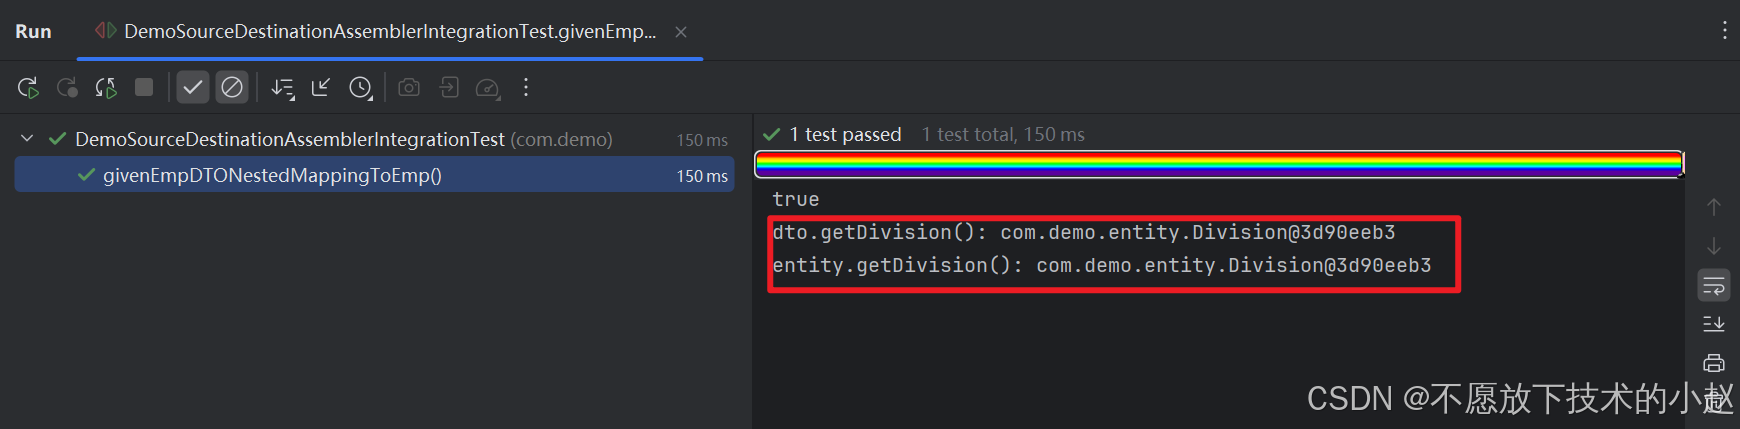
可以看到 Employee 和 EmployeeDTO 这两个对象中的子对象 Division 的句柄是完全一样的,说明是同一个对象,也就证明存在浅克隆问题。
有两种方法可以解决 MapStruct 的浅克隆问题:
- 将子对象声明为两个单独的类,缺点是如果增加字段的话两个类都需要维护。
- 可以在 Mapper 类中增加相同类型的转换来解决这个问题,代码如下:
/*** 将Division数据传输对象转换为Division实体对象* @param dto 需要转换的Division数据传输对象* @return 转换后的Division实体对象*/
Division divisiontoDivision(Division dto);
我们调整一下测试代码的编译错误:
/*** 测试EmployeeDTO到Employee对象的嵌套映射转换是否正确*/
@Test
public void givenEmpDTONestedMappingToEmp() {EmployeeDTO dto = new EmployeeDTO();dto.setDivision(new Division(1, "Division1"));Employee entity = employeeAssembler.employeeDTOToEmployee(dto);System.out.println(Objects.equals(dto.getDivision(), entity.getDivision()));System.out.println("dto.getDivision(): " + dto.getDivision());System.out.println("entity.getDivision(): " + entity.getDivision());Assertions.assertEquals(dto.getDivision().getId(), entity.getDivision().getId());Assertions.assertEquals(dto.getDivision().getName(), entity.getDivision().getName());
}
执行结果:
3.6 数据类型映射
MapStruct 还提供了一些开箱即用的隐式类型转换。本例中,我们希望将 String 类型的日期转换为 Date 对象。
1)修改 POJO
向 Employee 中新增一个 date 字段:
import java.util.Date;@Getter
@Setter
public class Employee {private Integer id;private String name;private Division division;private Date date;
}
import lombok.Getter;
import lombok.Setter;@Getter
@Setter
public class EmployeeDTO {private Integer employeeId;private String employeeName;private DivisionDTO division;private String dateString;
}
2)修改 Mapper
修改 Mapper,设置 @Mapping 注解的 dateFormat 参数,为 date 指定日期转换格式。代码如下所示:
import org.mapstruct.Mapper;
import org.mapstruct.Mapping;@Mapper(componentModel = "spring")
public interface EmployeeAssembler {/*** 将Employee实体对象转换为EmployeeDTO数据传输对象* @param entity 要转换的Employee实体对象,包含员工原始数据* @return 转换后的EmployeeDTO对象,包含映射后的员工数据*/@Mapping(target = "employeeId", source = "entity.id")@Mapping(target = "employeeName", source = "entity.name")@Mapping(target = "dateString", source = "entity.date", dateFormat = "yyyy-MM-dd HH:mm:ss")EmployeeDTO employeeToEmployeeDTO(Employee entity);/*** 将EmployeeDTO对象转换为Employee对象* @param dto 包含员工信息的传输对象,其中employeeId字段将映射为目标对象的id字段* @return 转换后的Employee实体对象,其id字段来源于dto.employeeId*/@Mapping(target = "id", source = "dto.employeeId")@Mapping(target = "name", source = "dto.employeeName")@Mapping(target = "date", source = "dto.dateString", dateFormat = "yyyy-MM-dd HH:mm:ss")Employee employeeDTOToEmployee(EmployeeDTO dto);
}
3)测试用例
对前面的测试代码稍作修改:
/*** 测试将Employee实体映射为EmployeeDTO时日期字段的转换是否正确*/
@Test
public void givenEmpDateMappingToEmpDTO() throws ParseException {Employee entity = new Employee();entity.setDate(new Date());EmployeeDTO dto = employeeAssembler.employeeToEmployeeDTO(entity);SimpleDateFormat format = new SimpleDateFormat(DATE_FORMAT);System.out.println("dto.getDateString(): " + dto.getDateString());System.out.println("format.parse(dto.getDateString()).toString(): " + format.parse(dto.getDateString()).toString());Assertions.assertEquals(format.parse(dto.getDateString()).toString(), entity.getDate().toString());
}/*** 测试EmployeeDTO到Employee对象的日期字段映射是否正确*/
@Test
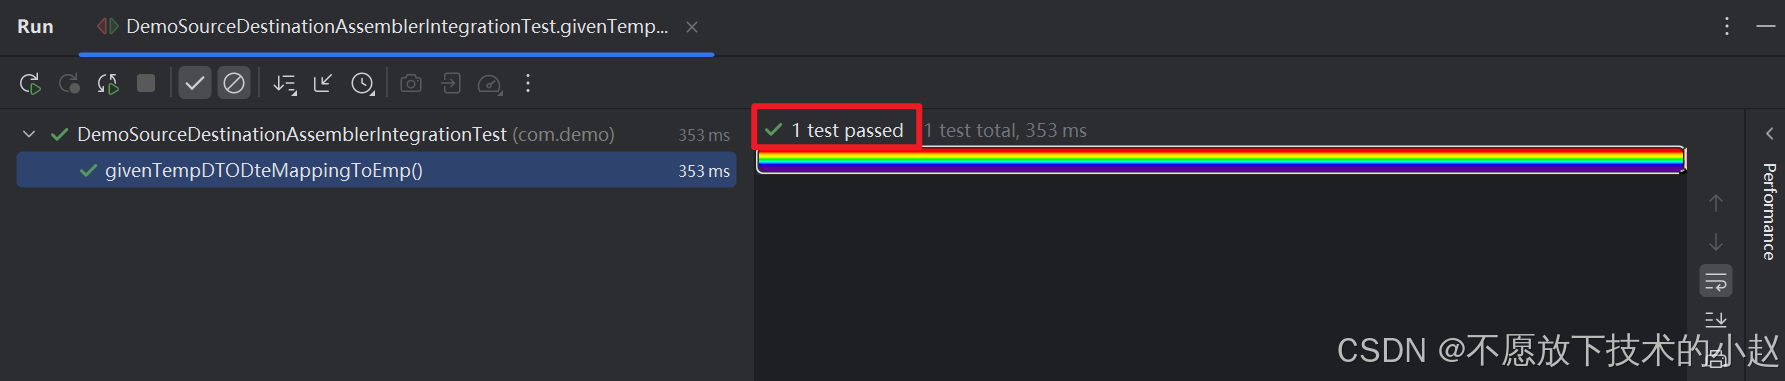
public void givenTempDTODteMappingToEmp() throws ParseException {EmployeeDTO dto = new EmployeeDTO();dto.setDateString("01-04-2016 01:00:00");Employee entity = employeeAssembler.employeeDTOToEmployee(dto);SimpleDateFormat format = new SimpleDateFormat(DATE_FORMAT);Assertions.assertEquals(format.parse(dto.getDateString()).toString(), entity.getDate().toString());
}
执行结果:

3.7 使用抽象类自定义映射器
一些特殊场景 @Mapping 无法满足时,我们需要定制化开发,同时希望保留 MapStruct 自动生成代码的能力。下面我们演示如何通过创建抽象类实现。
1)Bean 定义
实体类定义:
import lombok.Data;import java.math.BigDecimal;
import java.util.UUID;@Data
public class Transaction {private Long id;private String uuid = UUID.randomUUID().toString();private BigDecimal total;}
DTO类:
import lombok.Data;@Data
public class TransactionDTO {private String uuid;private Long totalInCents;}
注意!这里棘手的地方在于将 BigDecimal 类型的 total 美元金额,转换为 Long totalInCents (以美分表示的总金额),这部分我们将使用自定义方法实现。
2)Mapper 定义
import org.mapstruct.Mapper;import java.util.Collection;
import java.util.List;@Mapper
public abstract class TransactionAssembler {/*** 将Transaction实体转换为TransactionDTO数据传输对象* @param entity 要转换的Transaction实体对象* @return 转换后生成的TransactionDTO对象*/public TransactionDTO toTransactionDTO(Transaction entity) {TransactionDTO dto = new TransactionDTO();dto.setUuid(entity.getUuid());dto.setTotalInCents(entity.getTotal().movePointRight(2).longValue());return dto;}/*** 将交易DTO集合转换为交易实体对象集合* @param dto 交易DTO集合,包含待转换的交易数据传输对象* @return 转换后的交易实体对象集合*/public abstract List<TransactionDTO> toTransactionDTO(Collection<Transaction> dto);}
在这里,单个对象之间的转换完全使用我们自定义的映射方法。
而 Collection 与 List 类型之间的转换,仍然交给 MapStruct 完成,我们只需定义接口。
3)生成代码结果
生成代码如下,和我们预想的一样,MapStruct 自动生成了剩余的部分:
import java.util.ArrayList;
import java.util.Collection;
import java.util.List;
import javax.annotation.Generated;
import org.springframework.stereotype.Component;@Generated(value = "org.mapstruct.ap.MappingProcessor",date = "2025-07-22T15:54:59+0800",comments = "version: 1.6.3, compiler: javac, environment: Java 1.8.0_451 (Oracle Corporation)"
)
@Component
public class TransactionAssemblerImpl extends TransactionAssembler {@Overridepublic List<TransactionDTO> toTransactionDTO(Collection<Transaction> dto) {if ( dto == null ) {return null;}List<TransactionDTO> list = new ArrayList<TransactionDTO>( dto.size() );for ( Transaction transaction : dto ) {list.add( toTransactionDTO( transaction ) );}return list;}
}
可以看到在 list.add( toTransactionDTO( transaction ) ) 处,MapStruct 调用了我们自己实现的方法。
3.8 @BeforeMapping 和 @AfterMapping 注解
我们可以通过 @BeforeMapping 和 @AfterMapping 注解定制化需求。显然,这两个方法是在每次映射之前和之后执行的。也就是说,在最终的实现代码中,会在两个对象真正映射之前和之后添加并执行这两个方法。
举个例子,如何将 Car 的子类 ElectricCar 和 BioDieselCar 映射到 CarDTO。
在映射时,我们希望将汽车的类型映射到 DTO 中的 FuelType 枚举字段。然后在映射完成后,我们想 DTO 的 name 字段转为全大写字母。
1)模型定义
import lombok.Data;@Data
public class Car {private Integer id;private String name;
}
Car 具有燃油车和电动车两个子类:
public class BioDieselCar extends Car {
}
public class ElectricCar extends Car {
}
CarDTO 中的 FuelType 为枚举类型,表示汽车能源类型:
import lombok.Data;@Data
public class CarDTO {private Integer id;private String name;private FuelType fuelType;
}
/*** 燃料类型*/
public enum FuelType {ELECTRIC, BIO_DIESEL
}
2)Mapper 定义
编写 Car 到 CarDTO 的 Mapper 映射。
import org.mapstruct.*;@Mapper
public abstract class CarAssembler {@BeforeMappingprotected void enrichDTOWithFuelType(Car car, @MappingTarget CarDTO carDTO) {if (car instanceof ElectricCar) {carDTO.setFuelType(FuelType.ELECTRIC);}if (car instanceof BioDieselCar) {carDTO.setFuelType(FuelType.BIO_DIESEL);}}@AfterMappingprotected void convertNameToUpperCase(@MappingTarget CarDTO carDTO) {carDTO.setName(carDTO.getName().toUpperCase());}public abstract CarDTO toCarDto(Car car);}
@MappingTarget 是一个参数注释,在 @BeforeMapping 的情况下,在执行映射逻辑之前填充目标映射 DTO,在 @AfterMapping 注解方法的情况下在执行之后填充。
3)生成代码结果
生成后的代码如下:
import javax.annotation.Generated;@Generated(value = "org.mapstruct.ap.MappingProcessor",date = "2025-07-22T16:30:53+0800",comments = "version: 1.6.3, compiler: javac, environment: Java 1.8.0_451 (Oracle Corporation)"
)
public class CarAssemblerImpl extends CarAssembler {@Overridepublic CarDTO toCarDto(Car car) {if ( car == null ) {return null;}CarDTO carDTO = new CarDTO();enrichDTOWithFuelType( car, carDTO ); // @BeforeMapping修饰的方法carDTO.setId( car.getId() );carDTO.setName( car.getName() );convertNameToUpperCase( carDTO ); // @AfterMapping修饰的方法return carDTO;}
}
结果与我们定义的行为一致。
3.9 defaultExpression支持
1.3.0 版本开始,我们可以使用 @Mapping 注解的 defaultExpression 参数来指定一个表达式:如果源字段为 null,该表达式将赋予一个默认值。
1)POJO 定义
实体类定义:
import lombok.Data;@Data
public class Person {private String id;private String name;
}
DTO类:
import lombok.Data;@Data
public class PersonDTO {private String id;private String name;
}
2)Mapper 定义
如果源实体的 id 字段为 null,我们希望生成一个随机的 uuid 并将其分配给 id,代码实现如下:
import org.mapstruct.Mapper;
import org.mapstruct.Mapping;@Mapper(componentModel = "spring")
public interface PersonAssembler {/*** 将Person对象转换为PersonDTO对象* @param person 要转换的Person实体对象* @return 转换后的PersonDTO对象,其中id字段若为空则自动生成UUID值*/@Mapping(target = "id", source = "person.id",defaultExpression = "java(java.util.UUID.randomUUID().toString())")PersonDTO personToPersonDTO(Person person);
}
3)测试代码
测试代码如下:
@Autowired
private PersonAssembler personAssembler;@Test
public void givenPersonEntityToPersonWithExpression() {Person person = new Person();person.setName("Micheal");PersonDTO personDTO = personAssembler.personToPersonDTO(person);System.out.println(person);System.out.println(personDTO);Assertions.assertNull(person.getId());Assertions.assertNotNull(personDTO.getId());Assertions.assertEquals(person.getName(), personDTO.getName());
}
执行结果:
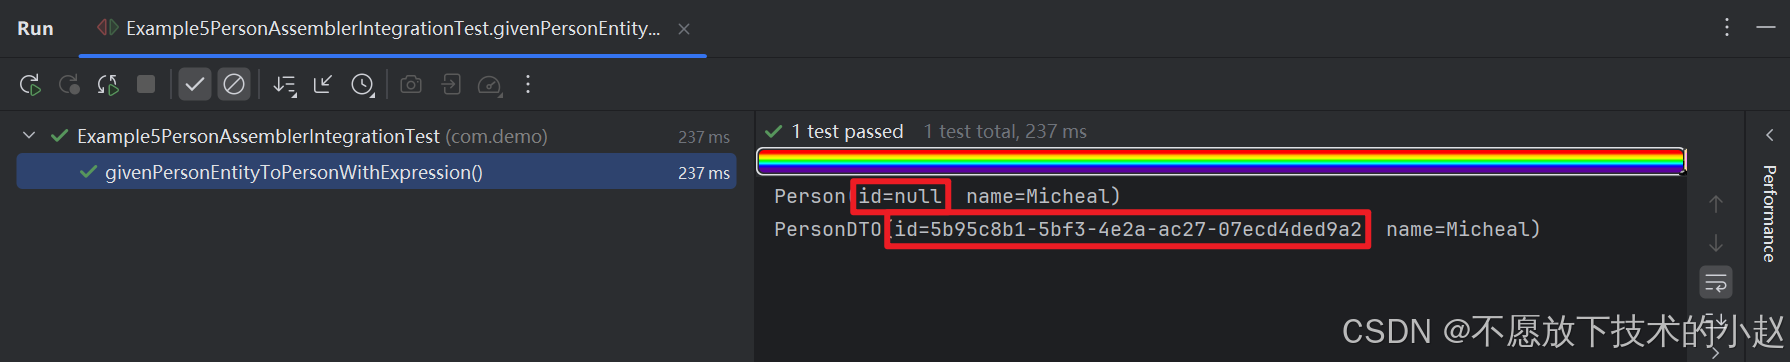
可以看到转换后的 PersonDTO 中,已经生成了 UUID 格式的 id 字段。
3.10 Map 转 Bean
如果我们有以下 Bean:
public class Customer {private Long id;private String name;//getters and setter omitted for brevity
}
我们可以通过以下 Mapper 方法将 Map 转换为 Bean:
@Mapper
public interface CustomerMapper {@Mapping(target = "name", source = "customerName")Customer toCustomer(Map<String, String> map);
}
最终生成的转换代码如下所示:
// GENERATED CODE
public class CustomerMapperImpl implements CustomerMapper {@Overridepublic Customer toCustomer(Map<String, String> map) {// ...if ( map.containsKey( "id" ) ) {customer.setId( Integer.parseInt( map.get( "id" ) ) );}if ( map.containsKey( "customerName" ) ) {customer.setName( source.get( "customerName" ) );}// ...}
}
不过需要注意,转换的 Map 的 key 必须是 String 类型的,否则代码会跳过这个 key。
3.11 Condition Mapping,有条件的转换
从1.5.0 Final 版本之前,如果 Java bean 中含有 hasXXX 或者 isXXX 的这类方法(XXX 是 bean 中的属性名),则MapStruct生成的代码中则会调用这类方法来判断是否在转换后的bean中是否包含原来的属性,但是遗憾的是,大多数情况下,我们并不能直接修改原bean的代码。基于此,1.5.0 Final 版本引入了 org.mapstruct.Condition 注解来实现条件转换。例如我们有如下转换代码:
@Mapper
public interface CarMapper {CarDto carToCarDto(Car car);@Conditiondefault boolean isNotEmpty(String value) {return value != null && !value.isEmpty();}
}
则 Map Struct 1.5.0 Final生成的代码是:
// GENERATED CODE
public class CarMapperImpl implements CarMapper {@Overridepublic CarDto carToCarDto(Car car) {if ( car == null ) {return null;}CarDto carDto = new CarDto();if ( isNotEmpty( car.getOwner() ) ) {carDto.setOwner( car.getOwner() );}// Mapping of other propertiesreturn carDto;}
}
org.mapstruct.Condition除了作用到整个bean外还可以修饰具体的属性值,实现bean属性维度的条件转换。
3.12 @MappingTarget 直接使用已有Bean
如果我们已经初始化了目标 Bean 中非源 Bean 中的一些字段,能不能直接使用呢?答案是可以的。
1)定义 POJO
源实体类定义:
import lombok.Data;@Data
public class DemoSource {private String name;private String description;
}
目标实体类定义:
import lombok.Data;@Data
public class DemoDestination {private String name;private Integer age;private String description;
}
2)定义 Mapper
/*** 使用已有实例进行转换*/
void destinationToSource(@MappingTarget DemoDestination destination, DemoSource source);
不同于以往的示例,这个接口是没有返回值的,通过 @Mapping 注解标识来直接使用目标类的实例。
3)测试代码
测试代码如下:
/*** 测试源对象到目标对象的映射功能是否正确*/
@Test
public void givenSourceToDestinationWithExistingInstance() {// 创建源对象并赋值DemoSource demoSource = new DemoSource();demoSource.setName("SourceName");// 拷贝DemoDestination destination = new DemoDestination();destination.setAge(18);destination.setDescription("DestinationDescription");demoSourceDestinationAssembler.destinationToSource(destination, demoSource);// 比较值是否一样System.out.println(demoSource);System.out.println(destination);
}
执行结果:
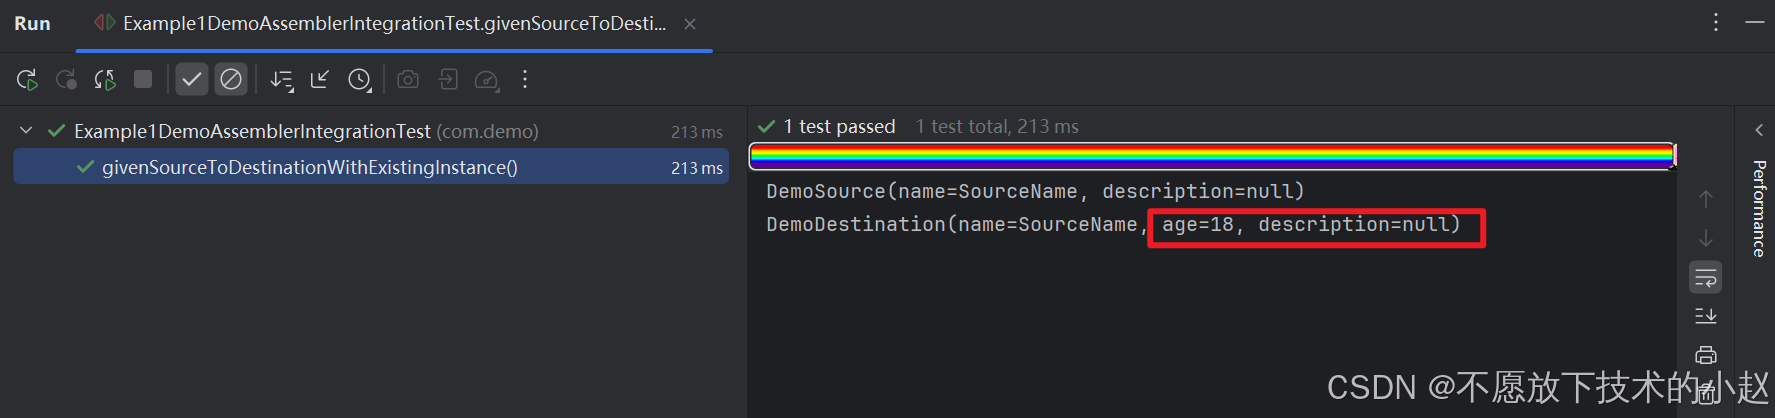
目标类的实例中,3个属性分别对应了3种情况:
name=SourceName:说明成功从源类的实例中获取到了属性值;age=18:说明保留了原本已经赋值的、源类中不存在的属性的值;description=null:丢失了原本已经赋值的内容,这是因为该字段在源类中也存在,发生了覆盖,我们看下生成的代码就明白了:
import javax.annotation.Generated;
import org.springframework.stereotype.Component;@Generated(value = "org.mapstruct.ap.MappingProcessor",date = "2025-07-22T18:32:44+0800",comments = "version: 1.6.3, compiler: javac, environment: Java 1.8.0_451 (Oracle Corporation)"
)
@Component
public class DemoSourceDestinationAssemblerImpl implements DemoSourceDestinationAssembler {@Overridepublic void destinationToSource(DemoDestination destination, DemoSource source) {if ( source == null ) {return;}destination.setName( source.getName() );destination.setDescription( source.getDescription() );}
}
从 destination.setDescription( source.getDescription() ) 可以看出,不管已经存在的目标类的实例中是否有值都会发生强制覆盖。如果需要保留原有字段值,可以使用 @Mapping 的 expression 属性自行单独定义处理逻辑。
整理完毕,完结撒花~ 🌻
参考地址:
1.MapStruct 快速指南,https://www.baeldung-cn.com/mapstruct
2.MapStruct 1.5 发布,终于支持Map转为Bean,https://blog.csdn.net/jj1245_/article/details/149250479