书生浦语第五期-L1G3-LMDeploy 课程
1.安装环境
conda create -n lmdeploy python=3.10
conda activate lmdeploy
pip install lmdeploy
pip install timm==1.0.15 #安装本地推理需要的依赖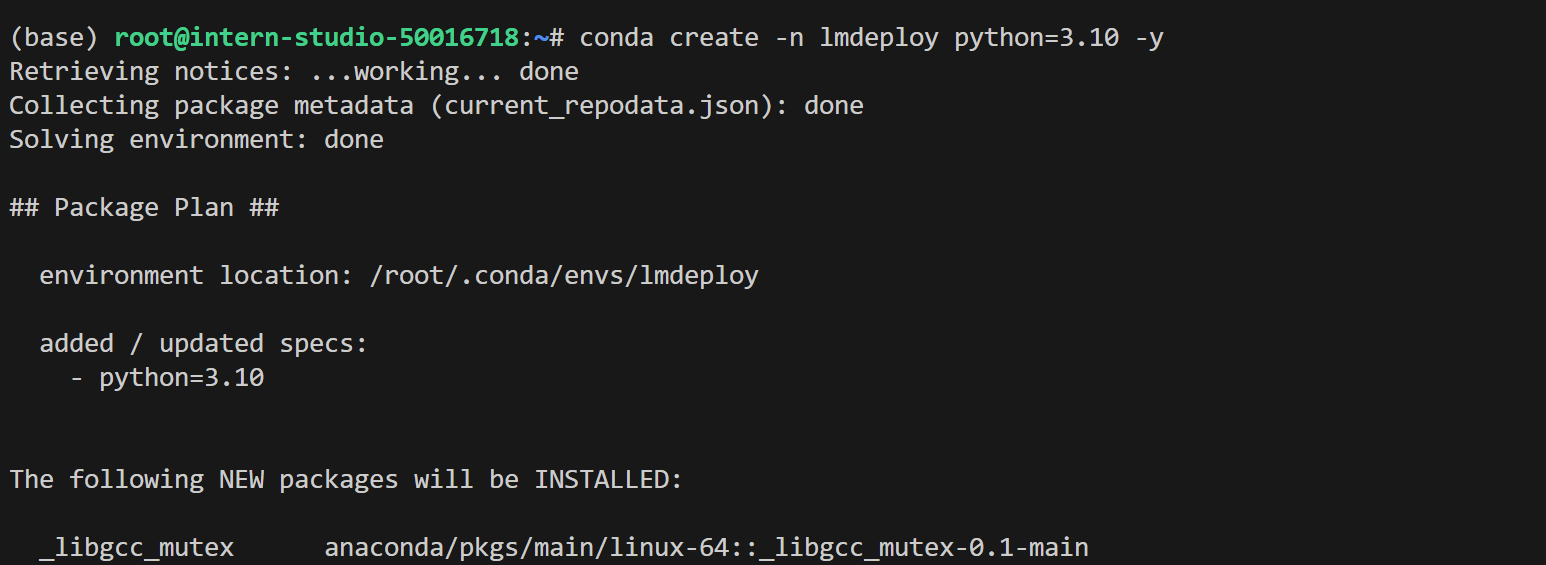

2.本地推理
- 本地推理InternVL3-1B
mkdir test_lmdeploy
cd test_lmdeploy
创建新的文件并输入代码进行本地推理:
利用touch demo.py新建文件,将下面代码输入文件。
import lmdeploy
from lmdeploy import GenerationConfigpipe = lmdeploy.pipeline("/root/share/new_models/InternVL3/InternVL3-1B")
response = pipe(prompts=["Hi, pls intro yourself", "Shanghai is"],gen_config=GenerationConfig(max_new_tokens=1024,top_p=0.8,top_k=40,temperature=0.6))
print(response)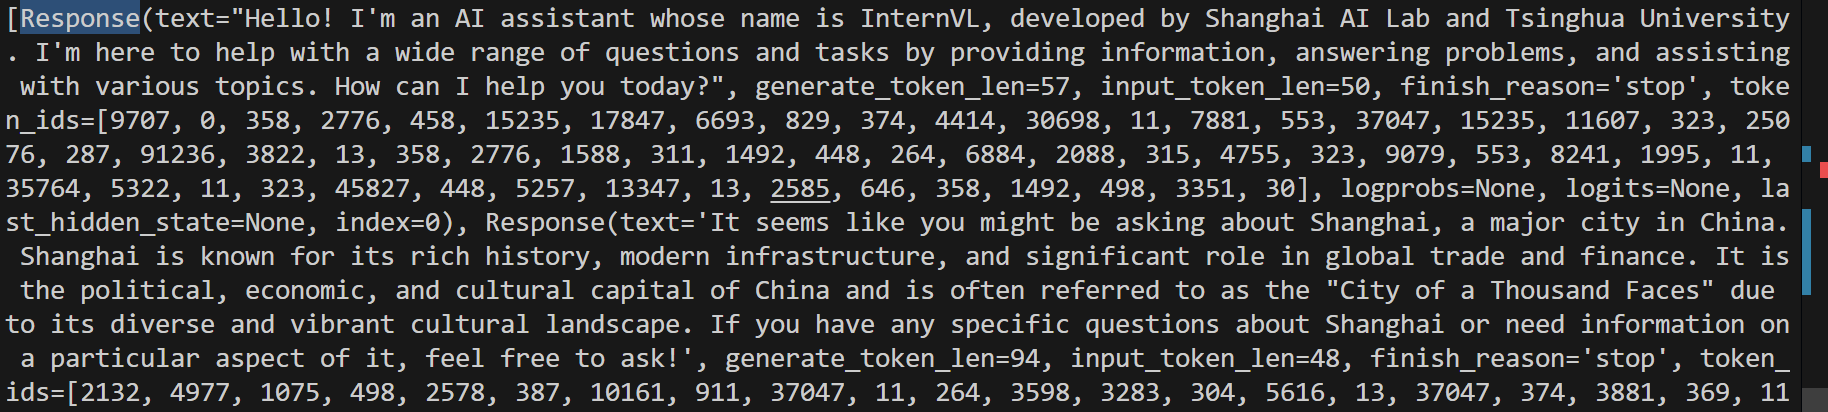
VLM 推理(Visual Language Models)
新建文件并输入代码运行VLM进行推理:
from lmdeploy import pipeline, VisionConfig
from lmdeploy.vl import load_imagepipe = pipeline('/root/share/new_models/InternVL3/InternVL3-1B',vision_config=VisionConfig(max_batch_size=8))image = load_image('https://raw.githubusercontent.com/open-mmlab/mmdeploy/main/tests/data/tiger.jpeg')
response = pipe(('describe this image', image))
print(response)
加载的图片:

输出结果:

3.大语言模型(LLMs)部署
- 离线部署
新建文件并输入代码离线推理:
import lmdeploy
from lmdeploy import GenerationConfig
pipe = lmdeploy.pipeline("/root/share/new_models/internlm3/internlm3-8b-instruct")
response = pipe(prompts=["Hi, pls intro yourself", "Shanghai is"],gen_config=GenerationConfig(max_new_tokens=1024,top_p=0.8,top_k=40,temperature=0.6))
print(response)
LMDeploy的KV cache 策略对显存提出了较高的要求;LMDeploy在服务启动时就会预先一次性分配KV cache空间,如果加载模型出现OOM,可能需要考虑降低 cache_max_entry_count 的值,表示加载模型权重后 K/V 缓存占用的空闲 GPU 内存的比例。
v0.2.0 <= lmdeploy <= v0.2.1,默认比例为 0.5,表示 GPU总显存的 50% 被分配给 k/v cache。lmdeploy > v0.2.1,分配策略改为从空闲显存中按比例为 k/v cache 开辟空间。默认比例值调整为 0.8。
- 生成核心参数介绍
常见解码策略:
贪心解码(Greedy Decoding):直接选择概率最高的单词。这种方法简单高效,但是可能会导致生成的文本过于单调和重复。
随机采样(Random Sampling):按照概率分布随机选择一个单词。这种方法可以增加生成的多样性,但是可能会导致生成的文本不连贯和无意义。
集束搜索(Beam Search):维护一个大小为 k 的候选序列集合,每一步从每个候选序列的概率分布中选择概率最高的 k 个单词,然后保留总概率最高的 k 个候选序列。这种方法可以平衡生成的质量和多样性,但是可能会导致生成的文本过于保守和不自然;由于需要维护k个序列,开销比较大。
以上方法都有各自的问题,而 top-k 采样和 top-p 采样是介于贪心解码和随机采样之间的方法,也是目前大模型解码策略中常用的方法。
- 下面将分别介绍Top-k 采样、 Top-p 采样和Temperature采样的实现代码
- 在使用中我们直接通过 直接用
**lmdeploy**的**GenerationConfig**设置
1. Top-k: 在每一步,只从概率最高的 k 个单词中进行随机采样,而不考虑其他低概率的单词。
缺点:
结果对K参数比较敏感,生成的结果更关注高频词,多样性丢失,可能会导致生成的回复过于简单,趋同性高;
回复可能缺乏个性,更偏向“安全”回复
每一步只关注当前概率高的词,可能会导致生成的文本不符合常识或逻辑;
Top-k实现代码:
import torch
from labml_nn.sampling import Sampler# Top-k Sampler
class TopKSampler(Sampler):# k is the number of tokens to pick# sampler is the sampler to use for the top-k tokens# sampler can be any sampler that takes a logits tensor as input and returns a token tensor; e.g. `TemperatureSampler`.def __init__(self, k: int, sampler: Sampler):self.k = kself.sampler = sampler# Sample from logitsdef __call__(self, logits: torch.Tensor):# New logits filled with −∞; i.e. zero probabilityzeros = logits.new_ones(logits.shape) * float('-inf')# Pick the largest k logits and their indicesvalues, indices = torch.topk(logits, self.k, dim=-1)# Set the values of the top-k selected indices to actual logits.# Logits of other tokens remain −∞zeros.scatter_(-1, indices, values)# Sample from the top-k logits with the specified sampler.return self.sampler(zeros)
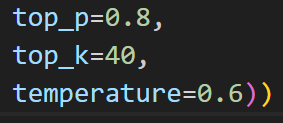
例如例图的Top_k=40,也就是模型关于下一个词的预测是概率最高的前40个词中随机去选择。
2. Top-p: 在每一步,只从累积概率超过某个阈值 p 的最小单词集合中进行随机采样,而不考虑其它低概率的单词。这种方法也被称为核采样(nucleus sampling),因为它只关注概率分布的核心部分,而忽略了尾部部分。
缺点:
参数敏感性,p值调优比较难
Top-p 仅依赖概率分布筛选候选词,但缺乏对已生成内容的显式约束(如重复惩罚机制),可能导致重复片段,倾向于重复高频词
生成结果偏向“安全”选项,牺牲个性。
Top_p实现代码:
import torch
from torch import nnfrom labml_nn.sampling import Samplerclass NucleusSampler(Sampler):"""## Nucleus Sampler"""def __init__(self, p: float, sampler: Sampler):""":param p: is the sum of probabilities of tokens to pick $p$:param sampler: is the sampler to use for the selected tokens"""self.p = pself.sampler = sampler# Softmax to compute $P(x_i | x_{1:i-1})$ from the logitsself.softmax = nn.Softmax(dim=-1)def __call__(self, logits: torch.Tensor):"""Sample from logits with Nucleus Sampling"""# Get probabilities $P(x_i | x_{1:i-1})$probs = self.softmax(logits)# Sort probabilities in descending ordersorted_probs, indices = torch.sort(probs, dim=-1, descending=True)# Get the cumulative sum of probabilities in the sorted ordercum_sum_probs = torch.cumsum(sorted_probs, dim=-1)# Find the cumulative sums less than $p$.nucleus = cum_sum_probs < self.p# Prepend ones so that we add one token after the minimum number# of tokens with cumulative probability less that $p$.nucleus = torch.cat([nucleus.new_ones(nucleus.shape[:-1] + (1,)), nucleus[..., :-1]], dim=-1)# Get log probabilities and mask out the non-nucleussorted_log_probs = torch.log(sorted_probs)sorted_log_probs[~nucleus] = float('-inf')# Sample from the samplersampled_sorted_indexes = self.sampler(sorted_log_probs)# Get the actual indexesres = indices.gather(-1, sampled_sorted_indexes.unsqueeze(-1))#return res.squeeze(-1)
例如例图的Top_p=0.8,也就是模型关于下一个词的预测是将关于下一个词的预测概率中从大到小求和,看计算哪个词时之和大于或等于0.8,之后根据这些词来随机采样。
如果 top-k 和top-p 同时启用,则top-p在 top-k之后起作用。
3.Temperature采样: 调节输出概率分布的参数
高temperature对差异进行平滑,低temperature对差异进行放大
设模型的原始输出 logits(未归一化的预测值)为 , 词汇表大小为
,温度参数为
控制分布的尖锐程度,
接近0,概率分布趋向于贪婪选择(仅最高概率的 token 概率接近 1,其余接近 0)
趋近无穷大,概率分布趋向于均匀分布(所有 token 概率接近相等)。
Temperature实现代码:
import torch
from torch.distributions import Categoricalfrom labml_nn.sampling import Samplerclass TemperatureSampler(Sampler):"""## Sampler with Temperature"""def __init__(self, temperature: float = 1.0):""":param temperature: is the temperature to sample with"""self.temperature = temperaturedef __call__(self, logits: torch.Tensor):"""Sample from logits"""# Create a categorical distribution with temperature adjusted logitsdist = Categorical(logits=logits / self.temperature)# Samplereturn dist.sample()
部署类OpenAI 服务
使用 lmdeploy cli 工具
lmdeploy serve api_server /root/share/new_models/InternVL3/InternVL3-1B --server-port 23333
点开链接查看
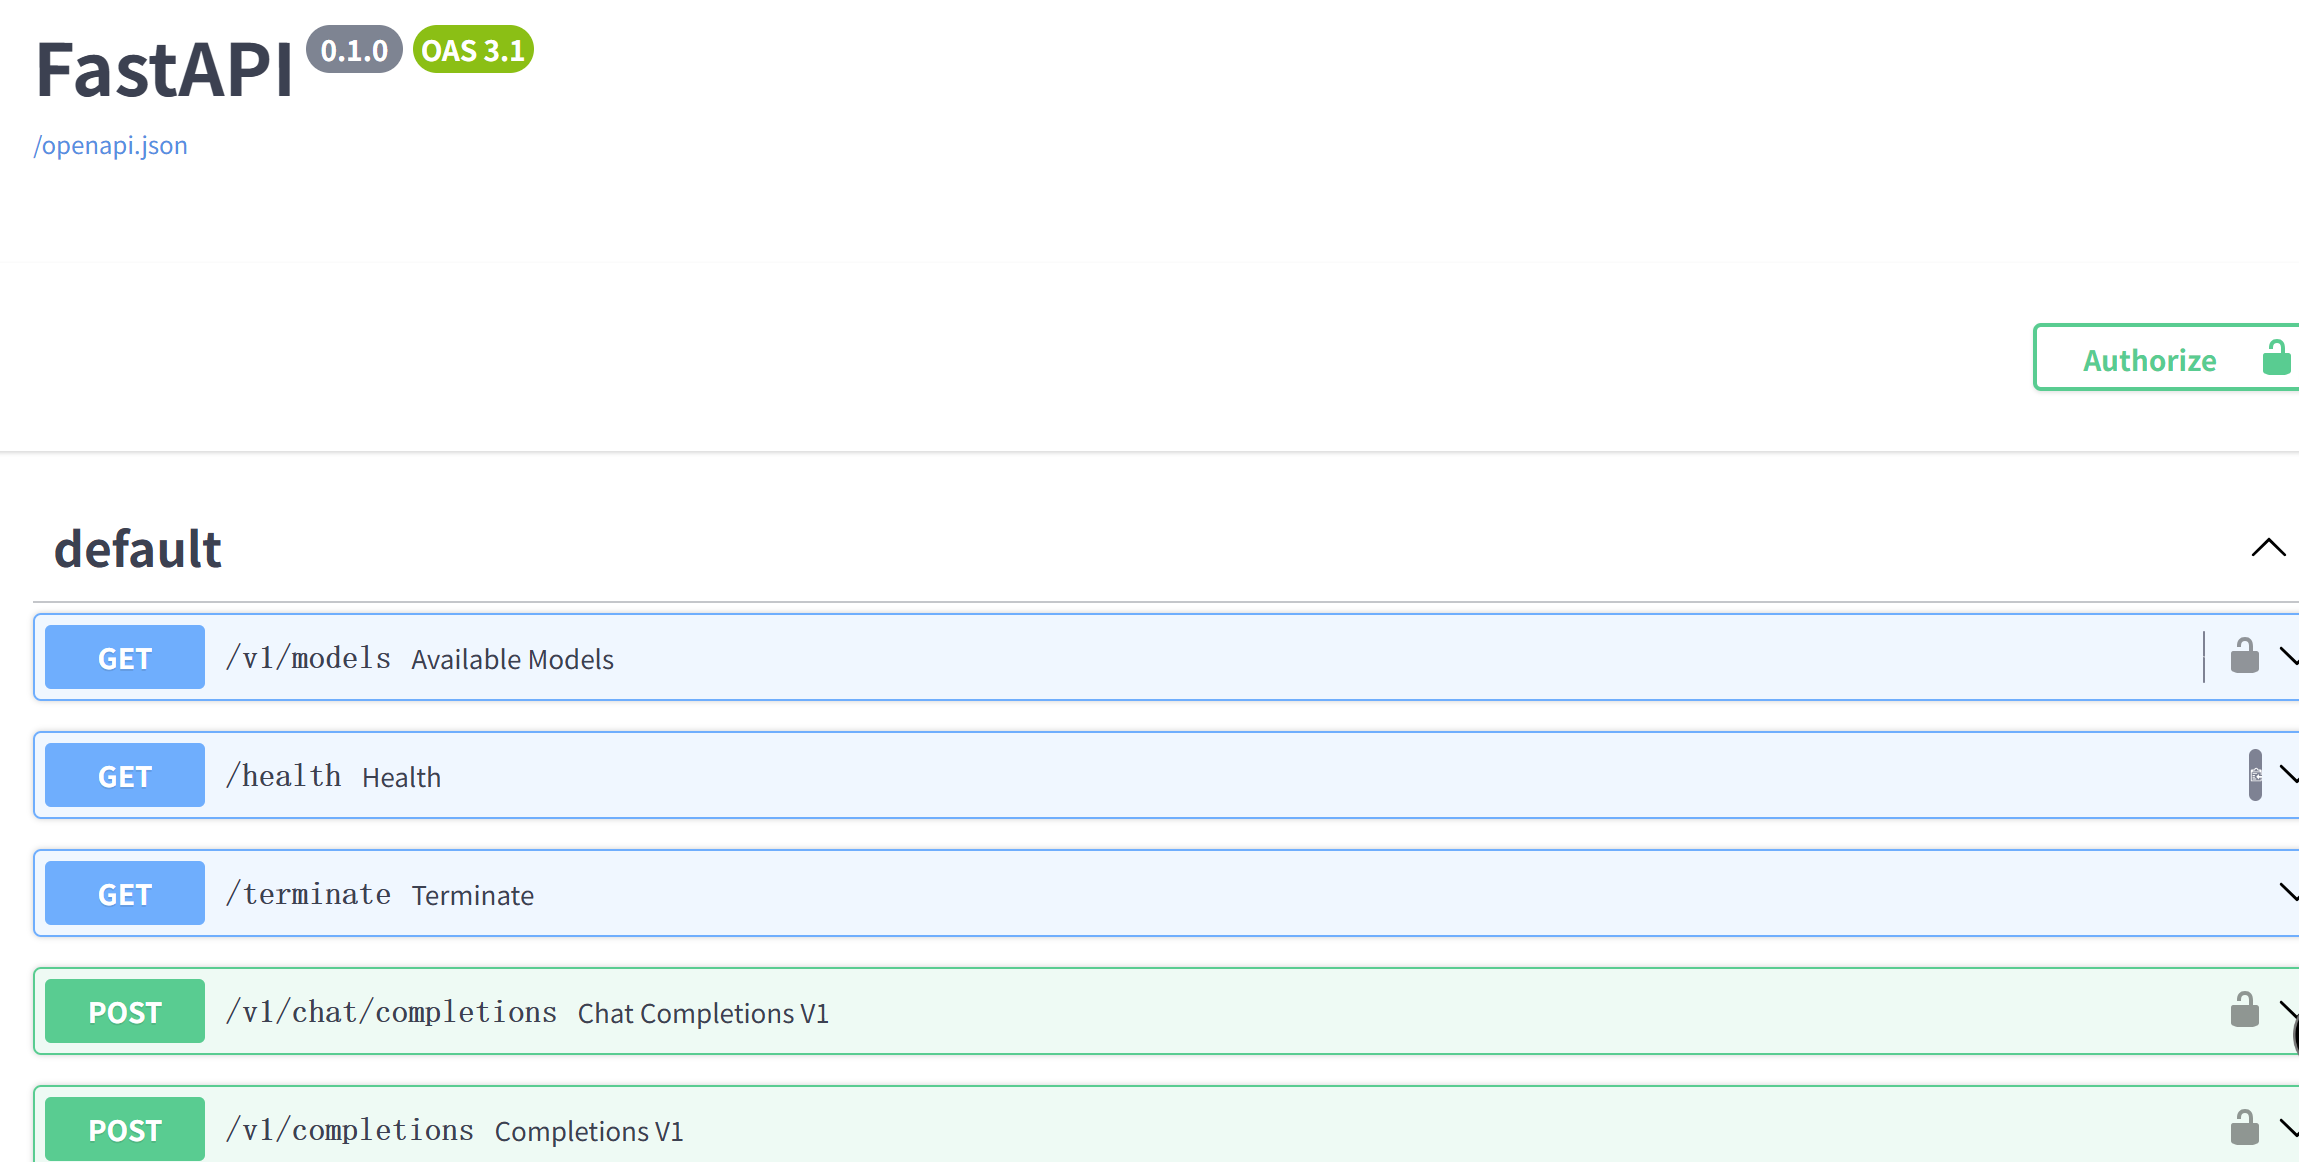
使用类openai方式:
1.不启用权限鉴别(api-key)
from openai import OpenAI
client = OpenAI(api_key='none',# 若未启用鉴权,可填任意值(如 "none")base_url="http://0.0.0.0:23333/v1"
)
model_name = client.models.list().data[0].id
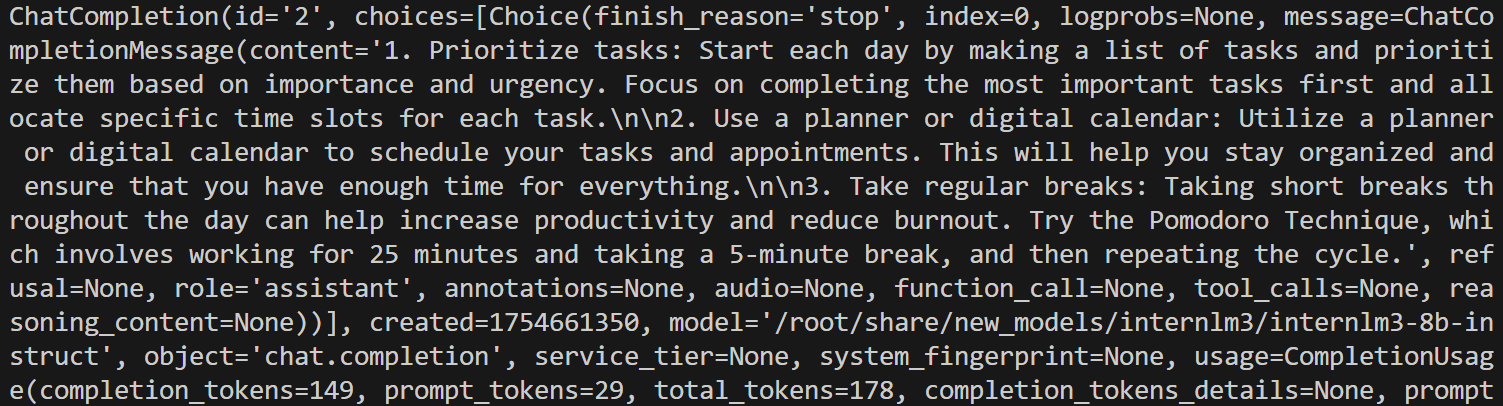
response = client.chat.completions.create(model=model_name,messages=[{"role": "system", "content": "You are a helpful assistant."},{"role": "user", "content": " provide three suggestions about time management"},],temperature=0.8,top_p=0.8
)
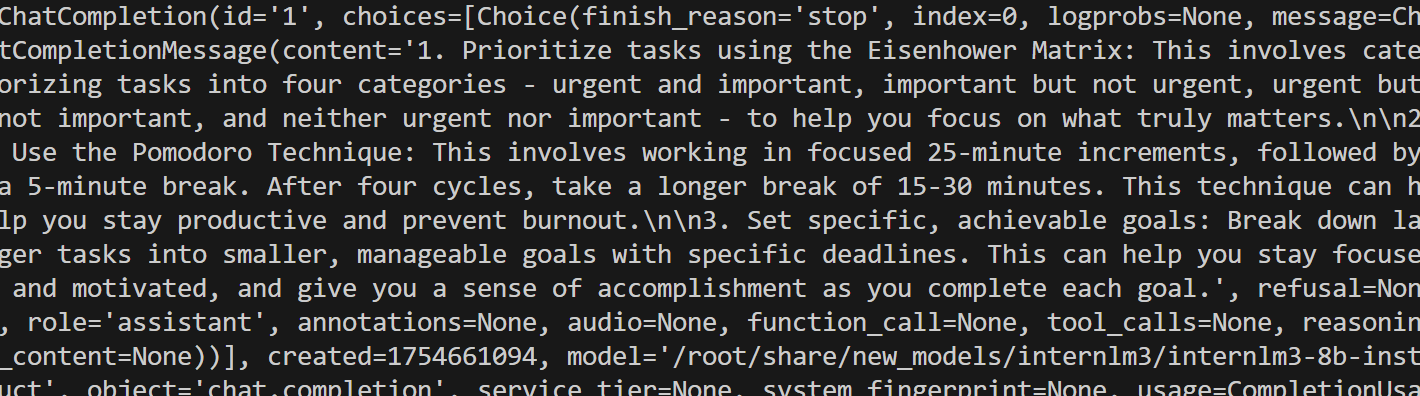
print(response)2.启用权限鉴别(api-key)
2.1启动服务
lmdeploy serve api_server /root/share/new_models/internlm3/internlm3-8b-instruct --server-port 23333 --api-keys "token"2.2授权访问
from openai import OpenAI
client = OpenAI(api_key='token',base_url="http://0.0.0.0:23333/v1"
)
model_name = client.models.list().data[0].id
response = client.chat.completions.create(model=model_name,messages=[{"role": "system", "content": "You are a helpful assistant."},{"role": "user", "content": " provide three suggestions about time management"},],temperature=0.8,top_p=0.8
)
print(response)
文件 "api_key='token' "要和启动服务中的 "--api_keys "token" " 一致。
3.异步访问(api-key)
import asyncio
from openai import AsyncOpenAIasync def main():client = AsyncOpenAI(api_key='token',base_url='http://0.0.0.0:23333/v1')model_cards = await client.models.list()._get_page()response = await client.chat.completions.create(model=model_cards.data[0].id,messages=[{'role': 'system','content': 'You are a helpful assistant.'},{'role': 'user','content': ' provide three suggestions about time management'},],temperature=0.8,top_p=0.8)print(response)asyncio.run(main())
输出:
APIClient 接口
1.启动服务
lmdeploy serve api_server /root/share/new_models/internlm3/internlm3-8b-instruct --server-port 23333 --api-keys "token"2.使用APIClient进行推理
from lmdeploy.serve.openai.api_client import APIClientclient = APIClient(api_server_url="http://localhost:23333",api_key="token"
)
model_name = client.available_models[0]messages = [{"role": "user", "content": "你好"}]
for item in client.chat_completions_v1(model=model_name, messages=messages):print(item)
输出:

4.视觉-语言模型(VLMs)部署
离线部署
from lmdeploy import pipeline
from lmdeploy.vl import load_imagepipe = pipeline('/root/share/new_models/InternVL3/InternVL3-1B')image = load_image('https://raw.githubusercontent.com/open-mmlab/mmdeploy/main/tests/data/tiger.jpeg')response = pipe(('describe this image', image))print(response)
图片token
from lmdeploy import pipeline, VisionConfig
from lmdeploy.vl import load_image
from lmdeploy.vl.constants import IMAGE_TOKENpipe = pipeline('/root/share/new_models/InternVL3/InternVL3-1B',vision_config=VisionConfig(max_batch_size=8))image = load_image('https://raw.githubusercontent.com/open-mmlab/mmdeploy/main/tests/data/tiger.jpeg')
response = pipe((f'describe this image{IMAGE_TOKEN}', image))
print(response)

IMAGE_TOKEN是一个特殊的token,在文本序列中插入 IMAGE_TOKEN 可以明确标注图像的位置,帮助模型区分文本和图像的边界。
对话模板
对话模板(Conversation Template)是一种预设的输入输出格式规则,用于规范用户与模型的交互方式。它的核心作用是通过结构化对话内容,提升模型的响应质量、可控性和适用性。
推理时,LMDeploy 会根据模型路径匹配内置的对话模板,并把对话模板应用到输入的提示词上。如果用户使用的是本地模型,并且模型文件夹名字与官方模型不一致时,需要手动指定对话模版。
from lmdeploy.model import MODELS, BaseChatTemplate@MODELS.register_module(name='customized_model')
class CustomizedModel(BaseChatTemplate):"""A customized chat template."""def __init__(self,system='<|im_start|>system\n',meta_instruction='You are a robot developed by LMDeploy.',user='<|im_start|>user\n',assistant='<|im_start|>assistant\n',eosys='<|im_end|>\n',eoh='<|im_end|>\n',eoa='<|im_end|>',separator='\n',stop_words=['<|im_end|>', '<|action_end|>']):super().__init__(system=system,meta_instruction=meta_instruction,eosys=eosys,user=user,eoh=eoh,assistant=assistant,eoa=eoa,separator=separator,stop_words=stop_words)from lmdeploy import ChatTemplateConfig, pipelinemessages = [{'role': 'user', 'content': 'who are you?'}]
pipe = pipeline('/root/share/new_models/InternVL3/InternVL3-1B',chat_template_config=ChatTemplateConfig('customized_model'))
for response in pipe.stream_infer(messages):print(response.text, end='')
视频模型参数
可通过设置 VisionConfig 修改视觉模型默认参数
from lmdeploy import pipeline, VisionConfig
from lmdeploy.vl import load_image
vision_config=VisionConfig(max_batch_size=16)
pipe = pipeline('/root/share/new_models/InternVL3/InternVL3-1B', vision_config=vision_config)
image = load_image('https://raw.githubusercontent.com/open-mmlab/mmdeploy/main/tests/data/tiger.jpeg')
response = pipe(('describe this image', image))
print(response)###VisionConfig 源码@dataclass
class VisionConfig:"""Vison model configs.Args:max_batch_size (int): the max image size passed to the model, sincesome models will use image patch, the actual running batch couldbe larger than this value.thread_safe (bool): Specifies whether the engine instance isthread-safe. Please set it to True when using the pipelinein a multi-threaded environment."""max_batch_size: int = 1thread_safe: bool = False
还是上面老虎的图。
多图推理
from lmdeploy import pipeline, TurbomindEngineConfig
from lmdeploy.vl import load_imagepipe = pipeline('/root/share/new_models/InternVL3/InternVL3-1B',backend_config=TurbomindEngineConfig(session_len=8192))image_urls=['https://raw.githubusercontent.com/open-mmlab/mmdeploy/main/demo/resources/human-pose.jpg','https://raw.githubusercontent.com/open-mmlab/mmdeploy/main/demo/resources/det.jpg'
]images = [load_image(img_url) for img_url in image_urls]
response = pipe(('describe the two images', images))
print(response)
第一张图片:

第二张图片:


多轮对话
使用pipeline 进行多轮对话有两种方式,一种是按照 openai 的格式来构造 messages,另外一种是使用 pipeline.chat 接口。
from lmdeploy import pipeline, TurbomindEngineConfig, GenerationConfig
from lmdeploy.vl import load_imagepipe = pipeline('/root/share/new_models/InternVL3/InternVL3-1B',  # 注意加了 `/`backend_config=TurbomindEngineConfig(session_len=8192))image = load_image('https://raw.githubusercontent.com/open-mmlab/mmdeploy/main/demo/resources/human-pose.jpg')
gen_config = GenerationConfig(top_k=40, top_p=0.8, temperature=0.6)# 第一句图文对话
sess = pipe.chat(('describe this image', image), gen_config=gen_config)
print(sess.response.text)# 第二轮多轮对话
sess = pipe.chat('What is the woman doing?', session=sess, gen_config=gen_config)
print(sess.response.text)
5.模型量化
LMDeploy 量化模块目前仅支持 AWQ 量化算法。
量化是指将高精度数字转换为低精度数字。低精度实体可以存储在磁盘上很小的空间内,从而减少内存需求。
AWQ量化算法是W4A16,也就是在运算的时候权重量化,激活不量化;而对于存储时,权重和激活都会量化从而节省显存。
安装依赖
conda activate lmdeploy
pip uninstall -y datasets && pip install --no-cache-dir "datasets==2.19.2" 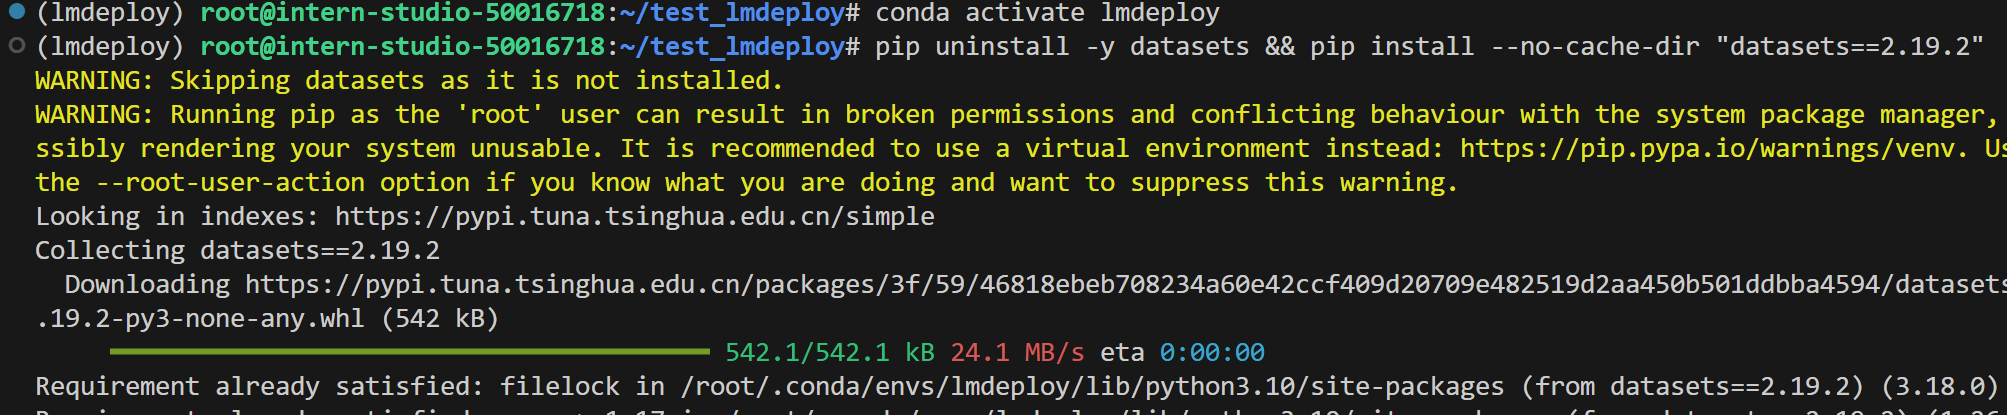
量化
internlm2-chat-7b的命令
export HF_MODEL=/root/share/model_repos/internlm2-chat-7b
export WORK_DIR=/root/internlm2-chat-7b-4bitlmdeploy lite auto_awq \$HF_MODEL \                           # 源模型路径--calib-dataset 'ptb' \               # 量化时使用的校准数据集--calib-samples 128 \                 # 使用多少样本校准--calib-seqlen 2048 \                 # 输入序列最大长度--w-bits 4 \                          # 权重量化为4-bit--w-group-size 128 \                  # 每多少个通道分组使用一个scale--batch-size 1 \                      # 推理批次--work-dir $WORK_DIR                  # 输出路径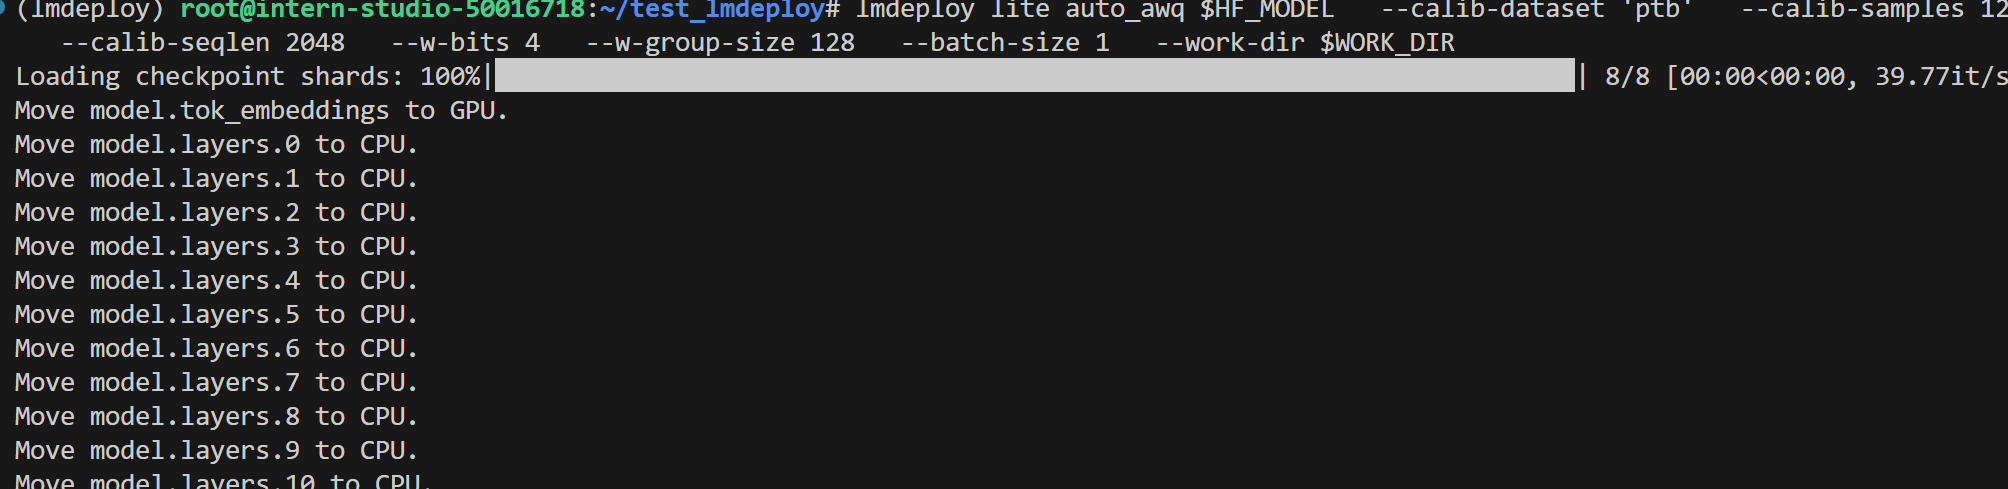
量化
InternVL3-1B的命令:
lmdeploy lite auto_awq /root/share/new_models/InternVL3/InternVL3-1B \--work-dir /root/InternVL3-1B-4bit
W8A8量化
lmdeploy 提供了命令行工具 lmdeploy lite smooth_quant 实现量化功能。并且其中命令行参数 --quant-dtype 可以用来控制是进行8-bit整数还是浮点数类型的量化。更多命令行工具使用方式,请执行 lmdeploy lite smooth_quant --help 查看。
int8量化
export HF_MODEL=/root/share/model_repos/internlm2-chat-7b
export WORK_DIR=/root/internlm2-chat-7b-4bitlmdeploy lite smooth_quant \$HF_MODEL \--work-dir $WORK_DIR \--quant-dtype int8
fp8量化
lmdeploy lite smooth_quant $HF_MODEL --work-dir $WORK_DIR --quant-dtype fp8Key-Value(KV) Cache 量化
自 v0.4.0 起,LMDeploy 支持在线 kv cache int4/int8 量化,量化方式为 per-head per-token 的非对称量化。
通过 LMDeploy 应用 kv 量化非常简单,只需要设定 quant_policy 参数即可
from lmdeploy import pipeline, TurbomindEngineConfig
engine_config = TurbomindEngineConfig(quant_policy=8)
pipe = pipeline("/root/share/model_repos/internlm2-chat-7b", backend_config=engine_config)
response = pipe(["Hi, pls intro yourself", "Shanghai is"])
print(response)
LMDeploy规定quant_policy=4表示kv int4 量化 ,量化quant_policy=8 表示 kv int8 量化。