【Tauri2】046—— tauri_plugin_clipboard_manager(一)
目录
前言
正文
安装
Rust中的使用
对文字的操作
看看write_text的函数签名
看看read_text的函数签名
对图像的操作
对html的操作
总结
前言
这篇就来看看clipboard这个插件。
参考如下
Clipboard | Tauri![]() https://tauri.app/plugin/clipboard/
https://tauri.app/plugin/clipboard/
正文
安装
执行下面的命令
pnpm tauri add clipboard-manager前后端同时安装这个插件,并且注册插件
.plugin(tauri_plugin_clipboard_manager::init())这个插件 的英文意思在这里指的是(计算机上的)剪贴板
CLIPBOARD中文(简体)翻译:剑桥词典![]() https://dictionary.cambridge.org/zhs/%E8%AF%8D%E5%85%B8/%E8%8B%B1%E8%AF%AD-%E6%B1%89%E8%AF%AD-%E7%AE%80%E4%BD%93/clipboard
https://dictionary.cambridge.org/zhs/%E8%AF%8D%E5%85%B8/%E8%8B%B1%E8%AF%AD-%E6%B1%89%E8%AF%AD-%E7%AE%80%E4%BD%93/clipboard
Rust中的使用
要想在Rust中使用,需要导入一个关键的trait
use tauri_plugin_clipboard_manager::ClipboardExt;许多插件都有这个操作,比如Shell、Opener。
剪贴板上面有什么东西——有文本、图片。
对文字的操作
显而易见,需要先写文字在剪贴版上,才能粘贴文字。因此,代码如下
#[command]
fn read_text(app_handle: AppHandle)-> String {app_handle.clipboard().write_text("start").unwrap();app_handle.clipboard().read_text().unwrap()
}
看看write_text的函数签名
 pub fn write_text<'a, T: Into<Cow<'a, str>>>(&self, text: T)
-> crate::Result<()>需要传一个参数text,泛型是T,泛型约束是Into<Cow<'a, str>>
表示接受任何能转换为 Cow<'a, str> 的类型,比如传String、&str、Cow。
use std::borrow::Cow;
app_handle.clipboard().write_text(Cow::Borrowed("start")).unwrap();
声明生命周期'a。返回Result。
看看read_text的函数签名
pub fn read_text(&self) -> crate::Result<String>返回Result<String>。
注册通信并使用,不必细说。
对图像的操作
同理,先要有图像,然后才能粘贴图像。
前面写入文字使用的是write_text,那么粘贴图像——write_image
函数签名如下
pub fn write_image(&self, image: &Image<'_>) -> crate::Result<()> 传入一个&Image
前面读取文字使用的是read_text,那么粘贴图像——read_image
函数签名如下
pub fn read_image(&self) -> crate::Result<Image<'_>> 返回一个Result,其中的类型是Image。
模仿前面,作出一些细微的修改,代码如下
#[command]
fn image(app_handle: AppHandle) -> Result<Image<'static>> {app_handle.clipboard().write_image(&Image::from_path("./icons/icon.png").unwrap()).unwrap();let image=app_handle.clipboard().read_image().unwrap();Ok(image)
}
说起来,还从来没写过在通信函数中返回Image的,还没见过。
上面这段代码,首先需要添加feature ,即在Cargo.toml文件中
tauri= {version = "2.5.1", features = ["image-ico"] }或者
tauri= {version = "2.5.1", features = ["image-png"] }运行,然后报错
error[E0515]: cannot return value referencing function parameter `app_handle`
--> src\main.rs:27:5
|
27 | app_handle.clipboard().read_image().unwrap()
| ----------^^^^^^^^^^^^^^^^^^^^^^^^^^^^^^^^^^
| |
| returns a value referencing data owned by the current function
| `app_handle` is borrowed here
直接翻译,意思是返回了一个引用了当前函数所拥有数据的值,app_handle在此处被借用
所有权问题——返回值依赖于app_handle的内部数据,当函数结束时数据将被释放,但返回值却试图继续引用它们,这会导致悬垂指针(dangling pointer)问题。
因此,获取所有权,即
app_handle.clipboard().read_image().unwrap().to_owned()还有其他类似方法。
后面注册通信函数,又报错了
关键报错如下
16 | pub struct Image<'a> {
| -------------------- doesn't satisfy `tauri::image::Image<'_>: IpcResponse`
|
= note: the following trait bounds were not satisfied:
`tauri::image::Image<'_>: IpcResponse`
which is required by `&tauri::image::Image<'_>: tauri::ipc::private::ResponseKind`
= note: this error originates in the macro `__cmd__image` which comes from the expansion of the macro `tauri::generate_handler` (in Nightly builds, run with -Z macro-backtrace for more info)
意思就是Image没有实现 IpcResponse 这个trait,如果为其实现这个trait
考虑一个关键的东西——孤儿规则
Image 是 tauri 中的类型,IpcResponse 是 tauri 中的 trait。
因为孤儿规则限制,除非在 Tauri 的源代码中修改,否则无法直接为 Image 实现 IpcRespons这个trait
无法直接实现。
Rust: trait 孤儿规则_rust孤儿原则-CSDN博客![]() https://blog.csdn.net/wowotuo/article/details/88594502
https://blog.csdn.net/wowotuo/article/details/88594502
rust学习二十.9、RUST绕过孤儿规则实现特质和包装器缺点 - 正在战斗中 - 博客园![]() https://www.cnblogs.com/lzfhope/p/18807962可以创建一个包装类型(newtype)来绕过孤儿规则,笔者在后续试试,在这篇就不尝试了。
https://www.cnblogs.com/lzfhope/p/18807962可以创建一个包装类型(newtype)来绕过孤儿规则,笔者在后续试试,在这篇就不尝试了。
因此,返回Image可能比较困难,如果将其变成字节数组,比如to_bytes这样的方法。
笔者看到了Image结构体的定义
#[derive(Debug, Clone)]
pub struct Image<'a> {rgba: Cow<'a, [u8]>,width: u32,height: u32,
}这个rgba好像就是字节数组。
因此,重新修改一下,就返回里面东西,代码如下。
#[command]
fn image(app_handle: AppHandle) -> Result<(Vec<u8>, u32, u32)> {app_handle.clipboard().write_image(&Image::from_path("./icons/icon.png").unwrap()).unwrap();let image = app_handle.clipboard().read_image().unwrap();let rgba = image.rgba().to_owned();let w = image.width();let h = image.height();Ok((rgba, w, h))
}
注册通信函数并使用,结果如下
前端结果
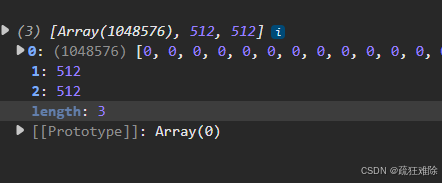
可以发现,第一个参数是一个数组,既然如此,展示一下。
前端代码如下
import { useState } from "react";
import { invoke } from "@tauri-apps/api/core";export default function Home() {const [imageUrl, setImageUrl] = useState("");// 定义后端返回的数据类型type ImageData = [number[], number, number];async function clicked() {setImageUrl("");try {const [rgba, width, height]: ImageData = await invoke("image");// 创建 Canvasconst canvas = document.createElement("canvas");canvas.width = width;canvas.height = height;const ctx = canvas.getContext("2d");if (!ctx) {console.error("无法获取 Canvas 上下文");return;}// 将 RGBA 字节转换为 ImageDataconst imageData = new ImageData(new Uint8ClampedArray(rgba), width, height);ctx.putImageData(imageData, 0, 0);// 转换为 data URLconst url = canvas.toDataURL("image/png");setImageUrl(url);} catch (error) {console.error("错误:", error);}}return (<div><h1>Home</h1><p>首页</p><button onClick={clicked}>点击</button><div>{imageUrl ? (<img src={imageUrl} alt="Generated Image" style={{ maxWidth: "100%" }} />) : (<p>点击按钮加载图像</p>)}</div></div>);
}
结果如下
没问题。
感觉逻辑不是很对,应该是复制了一张图片,然后粘贴就出现图片。
这就要在前端使用这个插件,后面再说。
对html的操作
看了对文字和图片的操作,接下来看看对html文本的操作。
对html的操作,只有一个方法,
pub fn write_html<'a, T: Into<Cow<'a, str>>>(&self,html: T,alt_text: Option<T>,) -> crate::Result<()> 传两个参数,一个是html,另一个是Option,返回Result<()>。没有返回值。
代码如下
#[command]
fn html(app_handle: AppHandle){app_handle.clipboard().write_html("<h1>hello start!</h1>",Some("hello start!"));let a=app_handle.clipboard().read_text().unwrap();println!("a: {}", a);}
或者写
.write_html("<h1>hello start!</h1>", None::<&str>)都行,
注册通信函数并运行。结果如下

可以发现,打印的hello start!,如果是None,
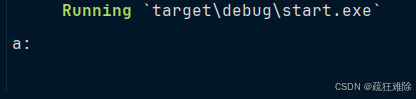
什么都没有。
总结
这个插件在Rust的部分的使用就介绍到这,后续再看看在前端的使用。
逻辑有点怪,应该是复制,然后粘贴,而不是直接写入。