spiderdemo第八题
目录
正文
前置分析
补环境
分析
编写爬虫
题外话——html元素进行截屏
硬解
分析
读取four坐标
matplotlib的简单使用
svg的使用
编写爬虫
正文
这是一道关于关于字体反爬的题

看看是怎么个事情。
T8-字体反爬![]() https://www.spiderdemo.cn/font_anti/font_anti_challenge/?challenge_type=font_anti_challenge
https://www.spiderdemo.cn/font_anti/font_anti_challenge/?challenge_type=font_anti_challenge
前置分析
点击不同的页面,发现请求如下
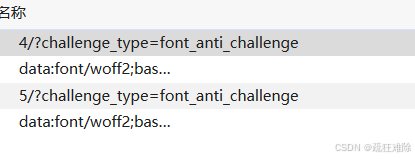
获取第5页,需要一个woff2文件,
获取的输入如下

这个page_dat的第一个元素是0602,
但是显示如下
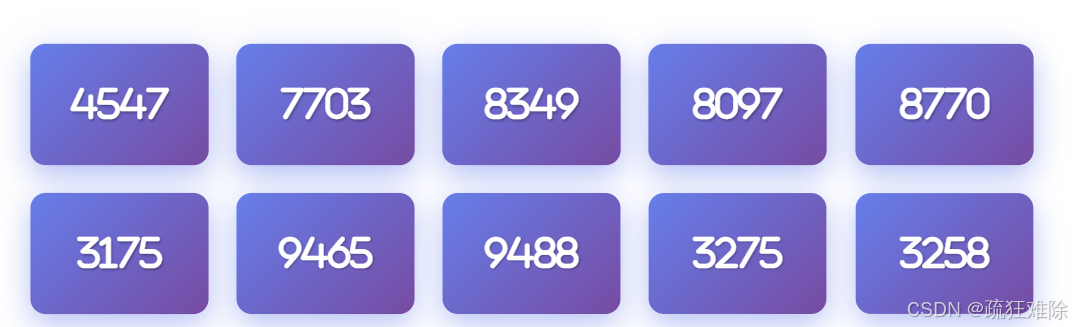
显示的结果是4547,看来这就是所谓的字体反爬,真实的信息被映射成虚假的信息
4547是真实的信息,而0602是虚假的信息。
因为这道题比较简单,所以笔者有两种做法
第一种是补环境——下载对应的文件,展示真实的数据,识别。
第二种是硬解——获取字体文件,展示识别。
总之,需要识别。
对应识别的工具,笔者选择使用ddddocr,看个人需求。
补环境
分析
首先,笔者在某个目录下,新建一个index.html
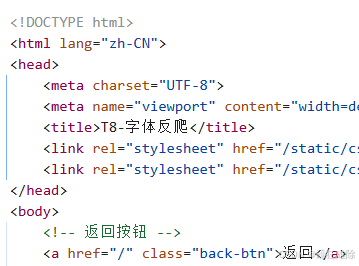
获取网页的html,运行
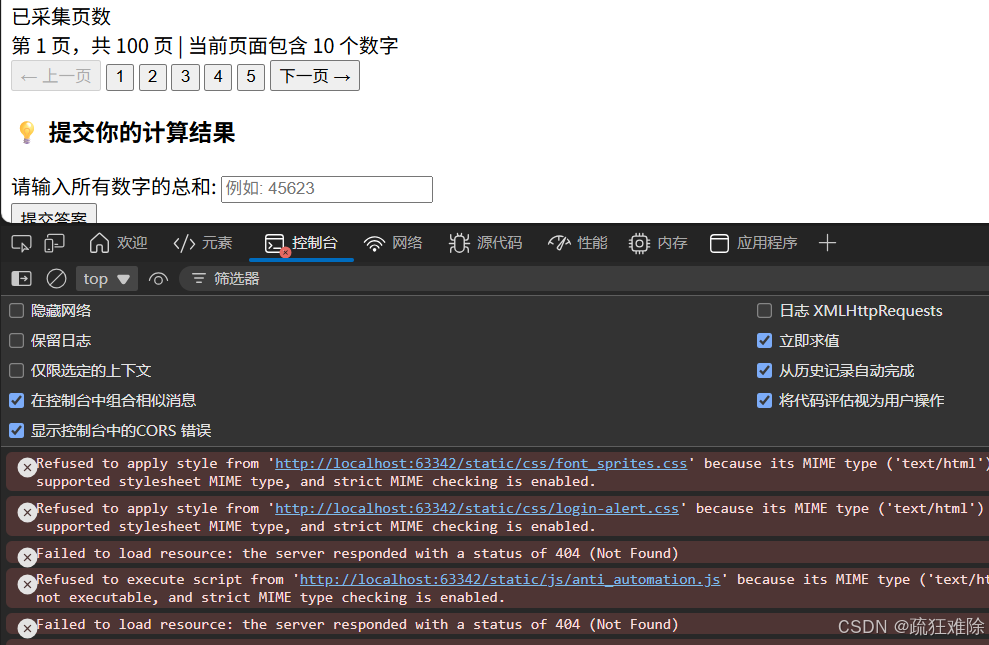
里面有很多报错,笔者删除掉没用的东西,比如什么css,什么anti_automation.js,没有用
这个font_anti.js是很有用的,下载下来
修改之后,出现了新的报错

获取数据失败,有点意思,而且是一个函数generateNumbers函数
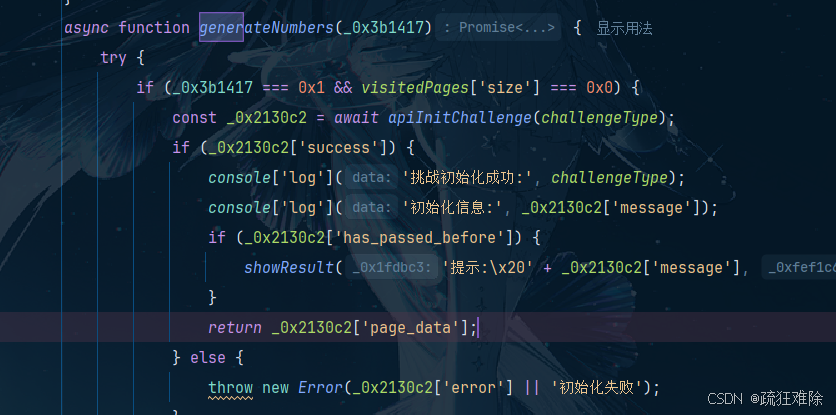
经过分析,可以发现这个函数最后反正page_data,这个虚假的数据。那么直接修改源码
直接返回
async function generateNumbers(_0x3b1417) {return ["0602","2274","8403","8732","8227","4926","3016","3088","4526","4568"]
}
再运行html,可以发现

页面变了,0602之类的虚假信息。
是什么调用了generateNumbers?
搜索发现
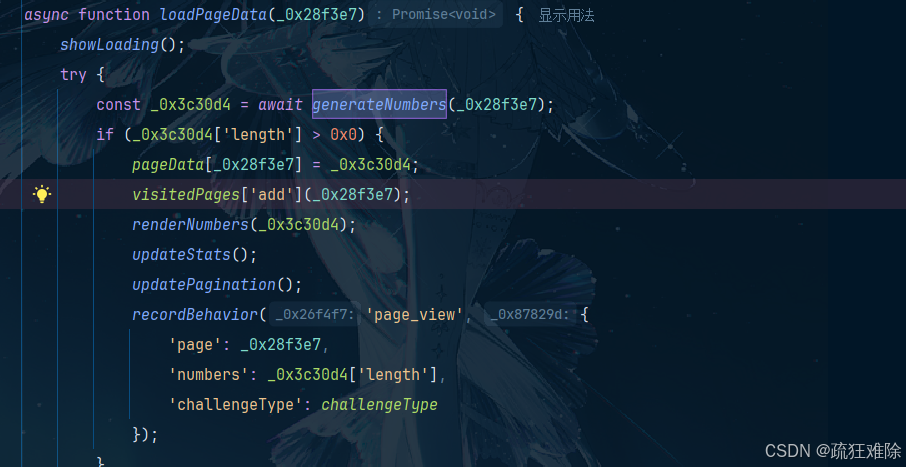
是loadPageData调用了generateNumbers
其中还有什么readerNumbers,进去看看

这是在渲染页面,哦,明白了
最关键的函数是这个readerNumbers。
因此,修改loadPageData源码
async function loadPageData() {let page_data=["0602","2274","8403","8732","8227","4926","3016","3088","4526","4568"]renderNumbers(page_data);
}
页面没什么变化。
没有真实的信息,还缺少了什么东西???
查看返回

发现了一个b64Font,里面是base64字符串,显示就是一个字体文件,
笔者在index.html里面搜索b64Font,发现如下东西
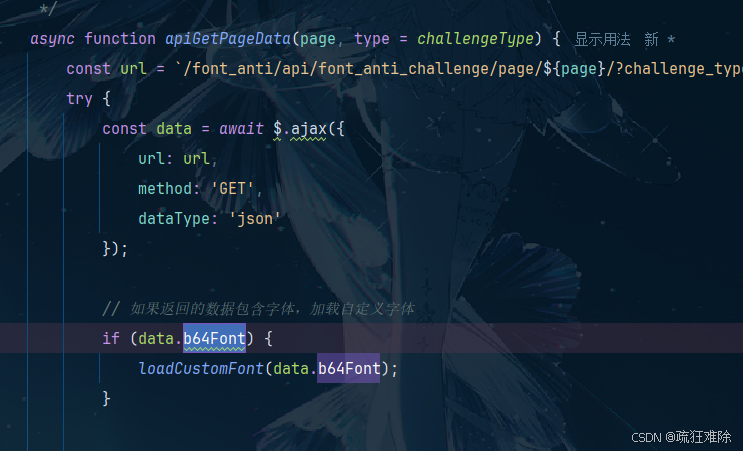
显然,发送请求,获取字体文件,调用loadCustomFont函数。
笔者直接去掉没有用的东西,修改源码
async function apiGetPageData(page, type = challengeType) {let b64Font="aaaaa"loadCustomFont(b64Font);}apiGetPageData()笔者省略了真实的b64Font,因为太长了,意思一下就可以了
此时,发现页面
0602变成了4547,其他的数据也变了,哈哈哈哈哈,可以
暂时做个总结,
- 发送请求,获取page_data里面虚假的数据,和b64Font字符串
- page_data传入到renderNumbers,b64Font传入到loadCustomFont
暂时先写到这。
====新的一天=====
继续操作,获取新的数据,现在可以渲染了,还需要获取的元素,如下

可以发现是class=numbers-grid这个div元素,里面的div子元素
编写爬虫
根据前面的分析,只有两个函数,因此,新建一个index.html文件
笔者修改了一些css
<!DOCTYPE html>
<html lang="zh-CN">
<head><meta charset="UTF-8"><meta name="viewport" content="width=device-width, initial-scale=1.0"><title>T8-字体反爬</title>
</head>
<body>
<div class="numbers-grid" id="numbersGrid">
</div>
<script>function renderNumbers(_0x3bd5f) {const _0x2ba44a = document['getElementById']('numbersGrid');_0x2ba44a['innerHTML'] = _0x3bd5f['map']((_0x27a712, _0x5d9262) => '<div\x20class=\x22number-box\x22\x20style=\x22animation-delay:\x20' + _0x5d9262 * 0.1 + 's\x22>' + _0x27a712 + '</div>')['join']('');}function loadCustomFont(base64Font) {// 移除之前的字体样式(如果存在)const existingStyle = document.getElementById('custom-font-style');if (existingStyle) {existingStyle.remove();}// 创建新的字体样式const style = document.createElement('style');style.id = 'custom-font-style';style.textContent = `@font-face {font-family: 'AntiSpiderFont';src: url(data:font/woff2;base64,${base64Font}) format('woff2');font-weight: normal;font-style: normal;}.numbers-grid {display: inline-flex;  gap: 2px;               font-family: 'AntiSpiderFont', monospace;}.number-box {display: inline-block;min-width: 48px;        height: 20px;line-height: 20px;text-align: center;font-family: 'AntiSpiderFont', monospace;padding: 0 2px;         box-sizing: content-box;}.number-item, .number, .data-item {font-family: 'AntiSpiderFont', monospace !important;font-variant-numeric: normal;font-feature-settings: normal;}.numbers-grid * {font-family: 'AntiSpiderFont', monospace !important;}`;document.head.appendChild(style);}</script>
</body>
</html>
保留上面提到的两个函数。现在使用DP调用这两个函数即可
python代码如下
import requests
import time
import base64
from DrissionPage import ChromiumPage
import json
page=ChromiumPage()
page.get("http://localhost:63342/..../index.html")
url='https://www.spiderdemo.cn/font_anti/api/font_anti_challenge/page/1'
cookie={'sessionid':'xxxxxxx'
}
params={'challenge_type':'font_anti_challenge',
}
headers={'User-Agent':'Mozilla/5.0 (Windows NT 10.0; Win64; x64) AppleWebKit/537.36 (KHTML, like Gecko) Chrome/143.0.0.0 Safari/537.36 Edg/143.0.0.0'
}
res=requests.get(url=url,params=params,cookies=cookie,headers=headers)
data=res.json()
print(data)
b64_font=data['b64Font']
page_data=data['page_data']
page_data_str = json.dumps(page_data)
page.run_js('return renderNumbers(JSON.parse(arguments[0]))',page_data_str)
page.run_js('return loadCustomFont(arguments[0])',b64_font)
其中传入的参数是json字符串,不然会报错,亲自尝试一下就明白。
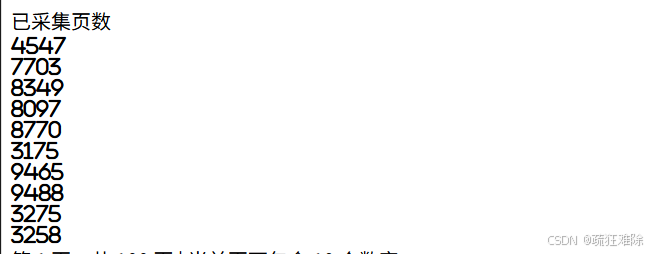
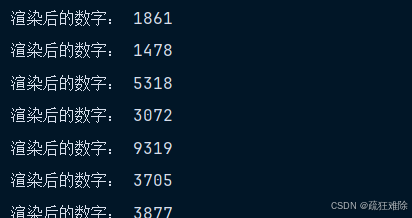
运行,结果如下

可以发现1861这些数字,这些就是真实的信息,现在需要获取这个信息
如何获取???
那就需要使用截屏了,即
🚤 截图和录像 | DrissionPage官网![]() https://drissionpage.cn/dp40docs/ChromiumPage/screen/需要先获取元素,然后截屏,然后识别,即
https://drissionpage.cn/dp40docs/ChromiumPage/screen/需要先获取元素,然后截屏,然后识别,即
import ddddocr
ocr = ddddocr.DdddOcr(show_ad=False)
grid =page.ele("@class=numbers-grid")
children = grid.eles("tag:div")
for child in children:real_number=ocr.classification(child.get_screenshot(as_bytes='png'))print('渲染后的数字:', real_number)
结果如下
可以发现不错,很好,全部的爬虫代码如下
import ddddocr
import requests
import time
import base64
from DrissionPage import ChromiumPage
import json
html=ChromiumPage()
ocr = ddddocr.DdddOcr(show_ad=False,beta=True)
html.get("http://../index.html")cookie={'sessionid':'xxxx'
}
params={'challenge_type':'font_anti_challenge',
}
headers={'User-Agent':'Mozilla/5.0 (Windows NT 10.0; Win64; x64) AppleWebKit/537.36 (KHTML, like Gecko) Chrome/143.0.0.0 Safari/537.36 Edg/143.0.0.0'
}
total=0
for page in range(1,101):url=f'https://www.spiderdemo.cn/font_anti/api/font_anti_challenge/page/{page}'res=requests.get(url=url,params=params,cookies=cookie,headers=headers)data=res.json()b64_font=data['b64Font']page_data=data['page_data']page_data_str = json.dumps(page_data)html.run_js('return renderNumbers(JSON.parse(arguments[0]))',page_data_str)html.run_js('return loadCustomFont(arguments[0])',b64_font)grid =html.ele("@class=numbers-grid")children = grid.eles("tag:div")for child in children:string_result=ocr.classification(child.get_screenshot(as_bytes='png'))total+=int(string_result)print('第'+str(page)+'页获取完成')
print(total)
为什么会加一个bate,这个好像是测试版本,主要是因为出现如下报错
Traceback (most recent call last):
File "F:\code\Python\study-spider\src\spiderDemo\T8\one\main.py", line 33, in <module>
total+=int(ocr.classification(child.get_screenshot(as_bytes='png')))
~~~^^^^^^^^^^^^^^^^^^^^^^^^^^^^^^^^^^^^^^^^^^^^^^^^^^^^^^^^^^
ValueError: invalid literal for int() with base 10: '3O77'
看来是把0识别成了O。然后添加了beta
结果如下
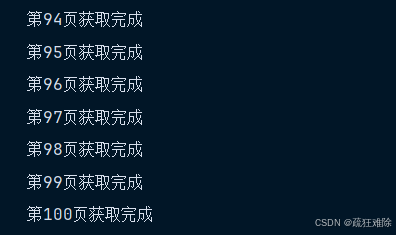

没问题。
====新的一天=====
题外话——html元素进行截屏
额,昨天爬虫虽然成功了,但是,笔者在解决识别的问题上,
刚开始,不知道有bate这个参数,笔者不是这个方面的专家,比较菜。。。。
还以为是DP截屏不清楚,导致识别的错误,
因此,笔者专门搜了搜,如何对html元素进行截屏???
发现了两个工具html2Caves和modern-screenshot
modern-screenshot - npm![]() https://www.npmjs.com/package/modern-screenshot直言的说,笔者都尝试了一下,感觉modern-screenshot更好
https://www.npmjs.com/package/modern-screenshot直言的说,笔者都尝试了一下,感觉modern-screenshot更好
因此,丢掉DP的截屏工具,使用modern-screenshot。
需要安装——pnpm i modern-screenshot
新建一个main.html,关于modern-screenshot部分的代码如下
<script type="module">import {domToBlob} from './node_modules/modern-screenshot/dist/index.mjs'const get_shot = async () => {const bytesArr = [];const grid = document.getElementById('numbersGrid');const boxes = grid.querySelectorAll('.number-box');for (const box of boxes) {const blob = await domToBlob(box, {scale: 4, type: 'image/png'});const buffer = await blob.arrayBuffer();const binStr = String.fromCharCode(...new Uint8Array(buffer));bytesArr.push(binStr);          }return bytesArr;};window.get_shot = get_shot
</script>
返回一个数组,里面是byte字符串。
在python方面,如下
numbers_list=html.run_js('return get_shot()')for number in numbers_list:number_bytes = number.encode('latin1')result=ocr.classification(number_bytes)total+=int(result)当然,还是需要设置beta,不然还是会报错,为什么是latin1
因为 latin1(ISO-8859-1)的编码规则是 “码点 0-255 直接映射为字节 0x00-0xFF”,一对一、无变换、无压缩、无扩展。
可以看看DP和modern-screenshot截屏的效果
number_bytes = numbers_list[0].encode('latin1')grid = html.ele("@class=numbers-grid")child = grid.eles("tag:div")[0]child.get_screenshot(path='dp.png')with open('mod.png','wb') as f:f.write(number_bytes)上面是dp,下面是modern-screenshot

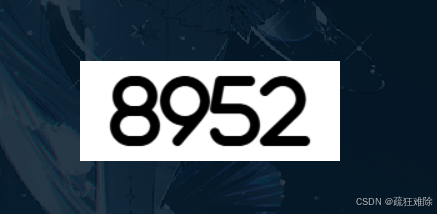
效果还是不错的。
硬解
分析
硬解字体
- 保存字体文件
- 把字体所暗含的映射找到
- 根据映射把虚假的信息变成真实的信息
直言的说,笔者看到下面这位大佬的解答,非常好
SpiderDemo题解系列——第5篇:字体反爬(第8题)-CSDN博客![]() https://blog.csdn.net/xw1680/article/details/153992358慢慢来,不慌。
https://blog.csdn.net/xw1680/article/details/153992358慢慢来,不慌。
首先把字体文件保存下来,关键代码如下
data=res.json()b64_font=data['b64Font']page_data=data['page_data']with open('font.woff2','wb') as f:f.write(base64.b64decode(b64_font))从前面大佬的博客中可以发现是ttf文件。但是,笔者保存为woff2,其实没什么区别。
要操作字体文件,需要Python的一个库——fontTools
fonttools - 操作字体_python fonttools-CSDN博客![]() https://blog.csdn.net/lovechris00/article/details/140892583
https://blog.csdn.net/lovechris00/article/details/140892583
安装了这个库之后,就可以使用里面的 ttx命令了
可以简单使用一下
ttx font.woff

会生成一个font.ttx文件,这个ttx文件就是xml文件,可以指定生成xml
ttx -o font.xml font.woff2
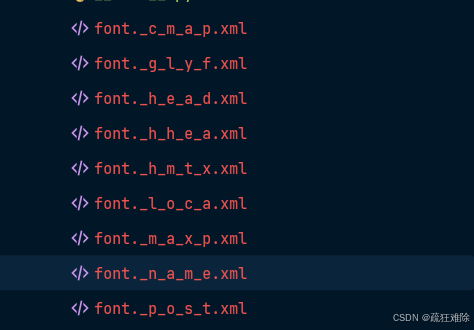
可以生成多个xml文件,即
ttx -o font.xml -s font.woff2
即
直言的说,从语法形式上看, xml文件,和html文件没什么根本性区别,但是还是不同,可以参考如下
XML文件(超详细):XML文件概念、作用、写法、如何用程序解析XML、写入XML、dom4j框架、DTD文档、schema文档-CSDN博客![]() https://blog.csdn.net/rainingCSDN/article/details/143905744实际上有许多东西了,笔者直接说重点
https://blog.csdn.net/rainingCSDN/article/details/143905744实际上有许多东西了,笔者直接说重点
首先生成一个xml文件,即
ttx -o font.xml font.woff2
注意到(attention)
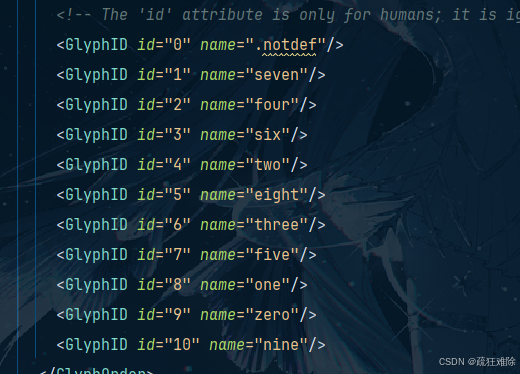
Glyph是字形的意思,那么GlyphID 就是字形的id,什么意思?
在文件中搜索(ctrl+F) ,four这个关键字
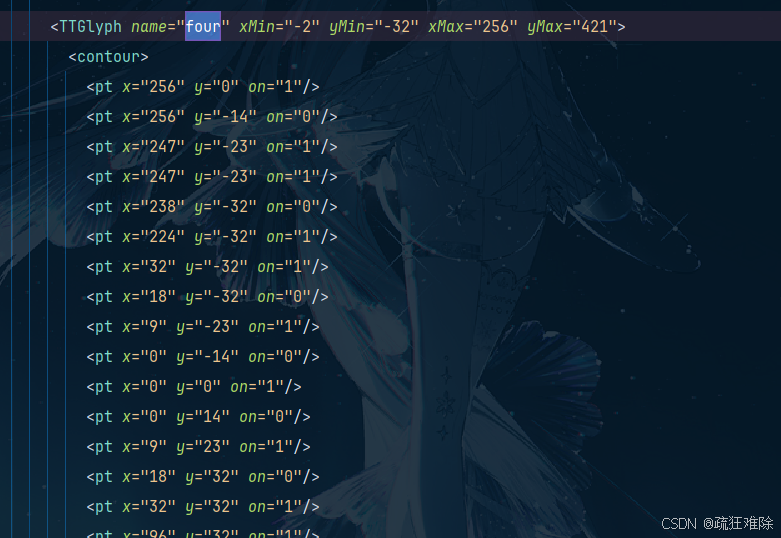
可以发现这样一个东西,这里面有x,y,还有什么xMin之类的东西。说白了,这就是坐标
可以读取全部坐标,显示看看,是什么东西???
读取four坐标
笔者本来还想通过python的matplotlib库 读取里面的东西
但是
但是
但是
笔者突然看到
使用 TTF 字体文件 — Matplotlib 3.10.3 文档 - Matplotlib 绘图库![]() https://matplotlib.net.cn/stable/gallery/text_labels_and_annotations/font_file.html笔者突然发现matplotlib可以使用ttf文件,通过实践发现,也是可以使用woff2文件,
https://matplotlib.net.cn/stable/gallery/text_labels_and_annotations/font_file.html笔者突然发现matplotlib可以使用ttf文件,通过实践发现,也是可以使用woff2文件,
哈哈哈哈哈哈哈哈哈哈哈哈哈哈哈哈哈哈哈,笔者突然有个好玩的想法,哈哈哈哈
算了,先不慌,等一下再说,先把four给画了。
直接给出画图的代码
from fontTools.ttLib import TTFont
from fontTools.pens.basePen import BasePen
import matplotlib.pyplot as plt
from matplotlib.path import Path
import matplotlib.patches as patchesclass MatplotlibPen(BasePen):def __init__(self):super().__init__()self.paths = []self.current_path = []def _moveTo(self, pt):if self.current_path:self.paths.append(self.current_path)self.current_path = [(pt[0], pt[1], Path.MOVETO)]def _lineTo(self, pt):self.current_path.append((pt[0], pt[1], Path.LINETO))def _curveToOne(self, pt1, pt2, pt3):self.current_path.append((pt1[0], pt1[1], Path.CURVE3))self.current_path.append((pt2[0], pt2[1], Path.CURVE3))self.current_path.append((pt3[0], pt3[1], Path.CURVE3))def _closePath(self):if self.current_path:self.current_path.append((0, 0, Path.CLOSEPOLY))self.paths.append(self.current_path)self.current_path = []def get_paths(self):if self.current_path:self.paths.append(self.current_path)return self.paths# 加载字体
font = TTFont('font.woff2')
glyph_set = font.getGlyphSet()
glyph = glyph_set["four"]
pen = MatplotlibPen()
glyph.draw(pen)
paths = pen.get_paths()# 画图
fig, ax = plt.subplots(figsize=(4, 4))
for path_data in paths:if not path_data:continuevertices = [(x, y) for x, y, _ in path_data]codes = [code for _, _, code in path_data]path = Path(vertices, codes)patch = patches.PathPatch(path, fill=True, edgecolor='black', facecolor='lightgray')ax.add_patch(patch)ax.set_aspect('equal')
ax.autoscale_view()
ax.axis('off')
plt.title("four")
plt.show()
结果如下
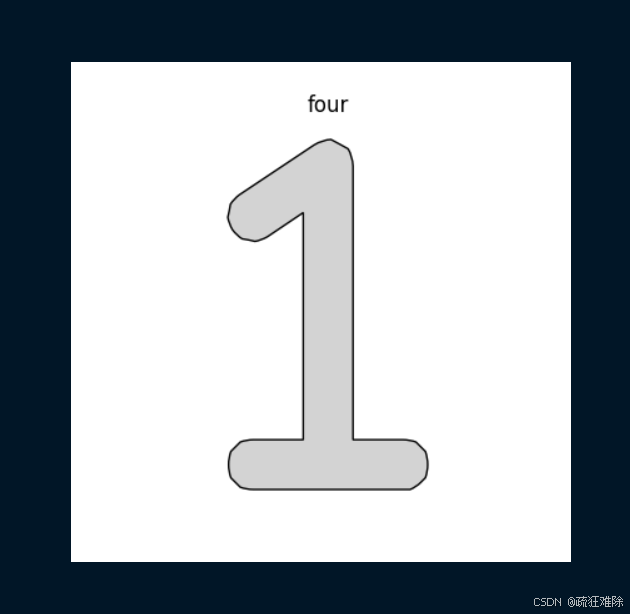
可以发现是1,说明four对应是1
或者说在笔者目前所获取的字体文件是4对应1
再来一张
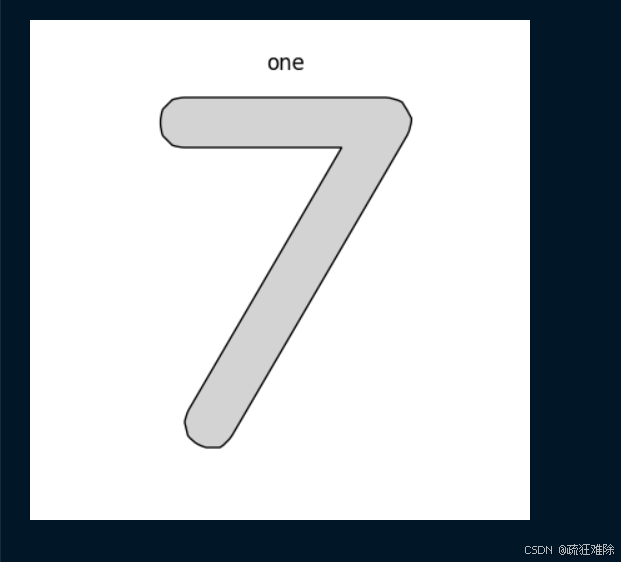
发现1是对应于7
同理可以获取全部的图像。
但是,笔者有更好玩的想法
matplotlib的简单使用
首先,笔者获取新的字体文件。
在前面,笔者说过,matplotlib可以加载woff2文件,那么下面这段代码
使用获取的字体文件
from pathlib import Path
import matplotlib.pyplot as plt
from matplotlib import font_managerfont_path = Path('./font.woff2')
font_prop = font_manager.FontProperties(fname=font_path)fig, ax = plt.subplots()# 1. 背景设为白色
fig.patch.set_facecolor('white')
ax.set_facecolor('white')ax.axis('off')# 2. 文字用黑色
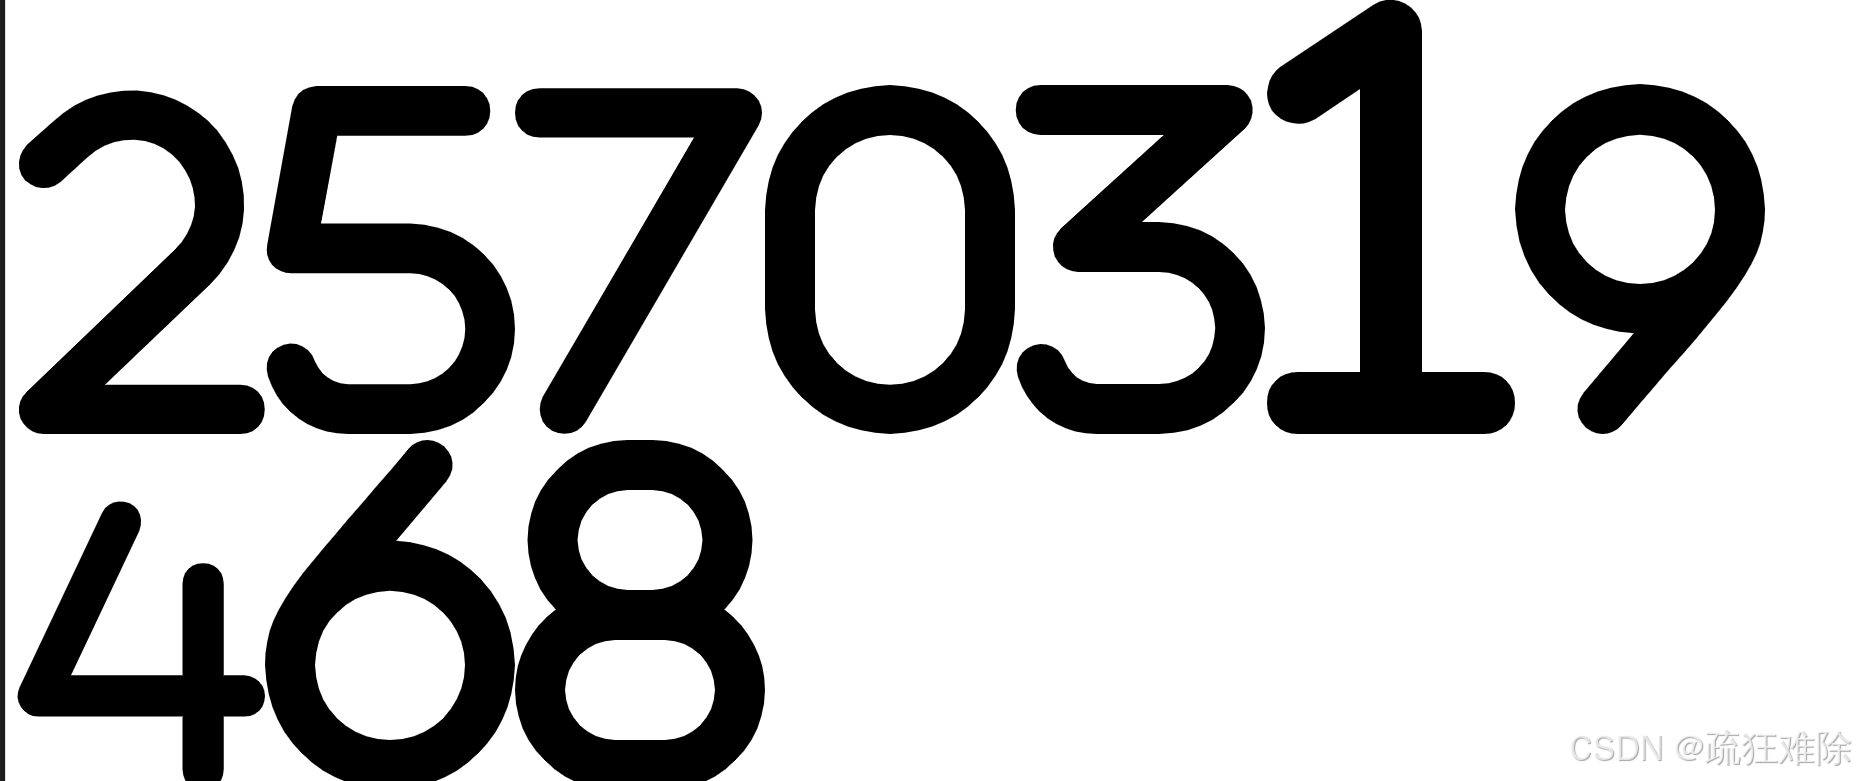
ax.text(0.5, 0.5, '0123456789',fontproperties=font_prop,fontsize=50,color='black',ha='center', va='center')
plt.savefig('digits.png', facecolor='white', dpi=300)
plt.show()0123456789,一般会显示0123456789,但是,运行代码
得到的图片如下
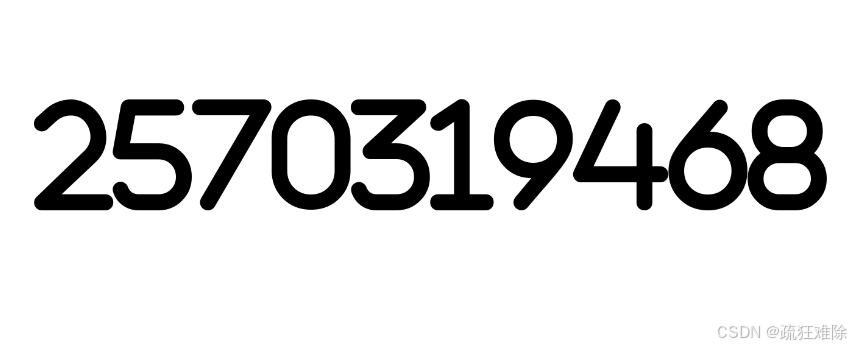
直接说明4对应于3,笔者自信,没问题。
那现在就很简单了,已经找到对应关系。
但是,笔者还有其他想法。
svg的使用
看下面代码
from fontTools.ttLib import TTFont
from fontTools.pens.svgPathPen import SVGPathPenfont = TTFont('font.woff2')
gs   = font.getGlyphSet()
pen  = SVGPathPen(gs)for name in ['zero','one','two','three','four','five','six','seven','eight','nine']:pen.__init__(gs)gs[name].draw(pen)g = font['glyf'][name]w, h = g.xMax - g.xMin, g.yMax - g.yMinsvg_str = f'''<?xml version="1.0" encoding="UTF-8"?>
<svg viewBox="{g.xMin} {-g.yMax} {w} {h}" xmlns="http://www.w3.org/2000/svg"><g transform="scale(1,-1)"><path d="{pen.getCommands()}" fill="#000"/></g>
</svg>'''with open(f'{name}.svg', 'w', encoding='utf-8') as f:f.write(svg_str)
运行,生成10个svg文件,看一下four.svg
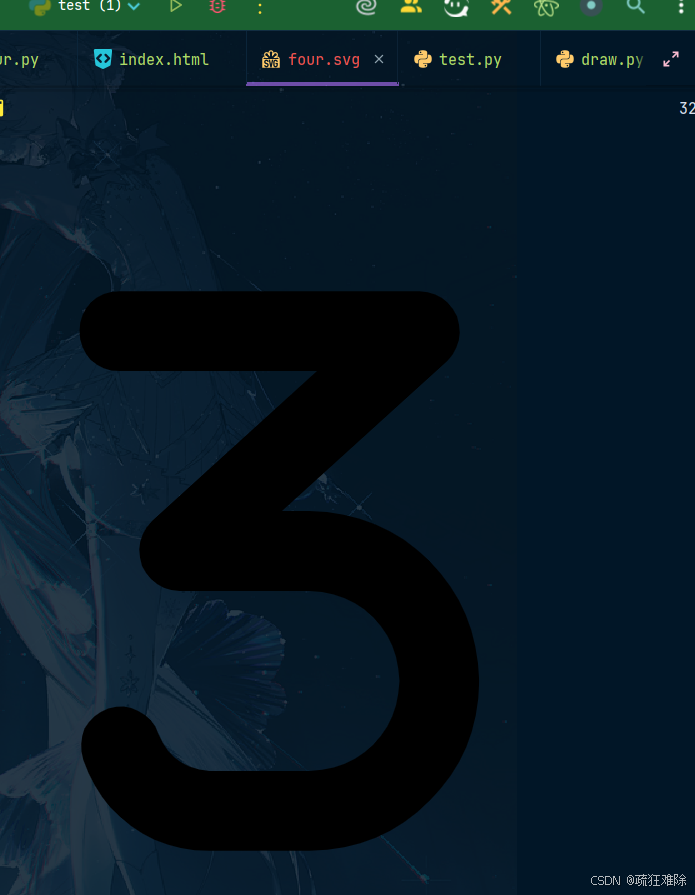
是数字3,没问题。
然后,可以使用html加载svg文件,即新建一个test.html,代码如下
<!doctype html>
<html>
<body>
<script>
const names = ['zero','one','two','three','four','five','six','seven','eight','nine'];
names.forEach((name, i) => {const obj = document.createElement('object');obj.data = name + '.svg';obj.type = 'image/svg+xml';obj.width = 200;document.body.appendChild(obj);
});
</script>
</body>
</html>
显示如下
问题就已经很简单了。
编写爬虫
笔者决定使用maplotlib来搞事情,添加ddddcor 运行代码,发现识别不了
笔者考虑了一下,可能距离太近了。
以及其他细节上的考虑,笔者就不多言了,总之,爬虫代码如下
import time
from io import BytesIO
import base64
import requests
from pathlib import Path
import matplotlib.pyplot as plt
from matplotlib import font_manager
from ddddocr import DdddOcrocr = DdddOcr(show_ad=False,beta=True)
def get_map(page):font_path = Path(f'./font/font_{page}.woff2') font_prop = font_manager.FontProperties(fname=font_path)fig, ax = plt.subplots(figsize=(12, 4))fig.patch.set_facecolor('white')ax.set_facecolor('white')ax.axis('off')text = '0123456789'char_spacing = 0.2for i, char in enumerate(text):x_pos = 0.01 + i * 0.5 * char_spacingax.text(x_pos, 0.5, char,fontproperties=font_prop,fontsize=70,color='black',ha='center', va='center')buf = BytesIO()plt.savefig(buf, format='png', facecolor='white', dpi=300, bbox_inches='tight')buf.seek(0)png_bytes = buf.read()res = ocr.classification(png_bytes)digit_dict = {str(idx): ch for idx, ch in enumerate(res)}buf.close()plt.close()return digit_dictcookie={'sessionid':'xxxx'
}
params={'challenge_type':'font_anti_challenge',
}
headers={'User-Agent':'Mozilla/5.0 (Windows NT 10.0; Win64; x64) AppleWebKit/537.36 (KHTML, like Gecko) Chrome/143.0.0.0 Safari/537.36 Edg/143.0.0.0'
}
total=0
Path('./font').mkdir(exist_ok=True)
for page in range(1,101):url=f'https://www.spiderdemo.cn/font_anti/api/font_anti_challenge/page/{page}'res=requests.get(url=url,params=params,cookies=cookie,headers=headers)data=res.json()b64_font=data['b64Font']page_data=data['page_data']with open(f'./font/font_{page}.woff2','wb') as f:f.write(base64.b64decode(b64_font))mapping=get_map(page)print(mapping)for item in page_data:number_str = ''for ch in item:number_str += str(mapping[ch])print(number_str)total += int(number_str)print("第{}页获取完成".format(page))
print(total)
总之,再次成功

over!!!!!!!!