kubeasz部署过程记录
安装ubuntu server 22.04 ,配置好时间同步,改好各个主机的主机名称,配置好ssh证书登录,以上过程简化记录如下:
sudo hostnamectl set-hostname k8s01   #每一台机器都设置自己的主机名称
sudo nano /etc/netplan/00-installer-config.yaml #每一台都设置好自己的IP地址和网关及dns信息#用xshell的发送命令到所有打开的主机或者MobaxTerm的Multiexec功能对所有打开的主机同时执行编辑命令sudo nano /etc/hosts
172.0.34.141  k8s01
172.0.34.142  k8s02
...
172.0.34.145  k8s05#以上批量对所有主机配置主机名和IP地址的解析关系,以下更换国内的apt源sudo nano /etc/apt/sources.list #注释掉旧的apt源并添加阿里云apt源deb http://mirrors.aliyun.com/ubuntu/ jammy main restricted universe multiverse
deb-src http://mirrors.aliyun.com/ubuntu/ jammy main restricted universe multiverse
deb http://mirrors.aliyun.com/ubuntu/ jammy-security main restricted universe multiverse
deb-src http://mirrors.aliyun.com/ubuntu/ jammy-security main restricted universe multiverse
deb http://mirrors.aliyun.com/ubuntu/ jammy-updates main restricted universe multiverse
deb-src http://mirrors.aliyun.com/ubuntu/ jammy-updates main restricted universe multiverse
deb http://mirrors.aliyun.com/ubuntu/ jammy-proposed main restricted universe multiverse
deb-src http://mirrors.aliyun.com/ubuntu/ jammy-proposed main restricted universe multiverse
deb http://mirrors.aliyun.com/ubuntu/ jammy-backports main restricted universe multiverse
deb-src http://mirrors.aliyun.com/ubuntu/ jammy-backports main restricted universe multiversesudo nano /etc/systemd/timesyncd.conf  #配置时间同步[Time]  #在Time下面添加以下两行内容
NTP=ntp.aliyun.com ntp1.aliyun.com ntp2.aliyun.com ntp3.aliyun.com
FallbackNTP=ntp.tencent.com cn.pool.ntp.orgsudo systemctl restart systemd-timesyncd  #重启时间同步服务sudo timedatectl set-timezone Asia/Shanghai  #设置时区为东八区
date  #看一下时间对不对
sudo apt updatesudo apt install net-tools htop curl wget unzip tar #安装一些基本的工具sudo apt upgrade
sudo reboot #等待更新及重启完成以后,以下开始配置ssh 证书登录#在某一台机器上面单独执行下面的命令:ssh-keygen -t rsa -b 4096 -C "k8s-cluster"   #然后一路回车
#编辑一个shell脚本
nano tmp_install_ssh_key.sh
# 定义节点IP列表
NODES="172.0.34.141 172.0.34.142 172.0.34.143 172.0.34.144 172.0.34.145"# 批量复制公钥
for node in $NODES; do echo "配置节点: $node" ssh-copy-id -i ~/.ssh/id_rsa.pub root@$node
done # 逐个测试每个节点
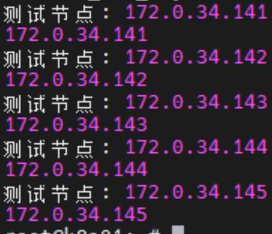
for node in $NODES; doecho "测试节点: $node"ssh root@$node "hostname -I"
donesh tmp_install_ssh_key.sh 执行该脚本进行ssh key安装,需要不断的输入yes以及目标机器的密码,正常情况下应该会显示每一台机器的IP地址:
接下来开始安装kubeasz,我这里使用的是一个较旧的版本3.6.4来进行k8s搭建安装
export release=3.6.4
wget https://github.com/easzlab/kubeasz/releases/download/${release}/ezdown
chmod +x ./ezdown
./ezdown -D 开始安装
我这里安装docker以后报错,拉取镜像失败,需要编辑一下docker的配置增加几个可以用的国内docker代理
sudo nano /etc/docker/daemon.json{"registry-mirrors": ["https://docker.mirrors.ustc.edu.cn","https://docker.1panel.live","https://mirrors.tencent.com","https://crpi-69a1zdaf7pucxvnx.cn-hangzhou.personal.cr.aliyuncs.com"]
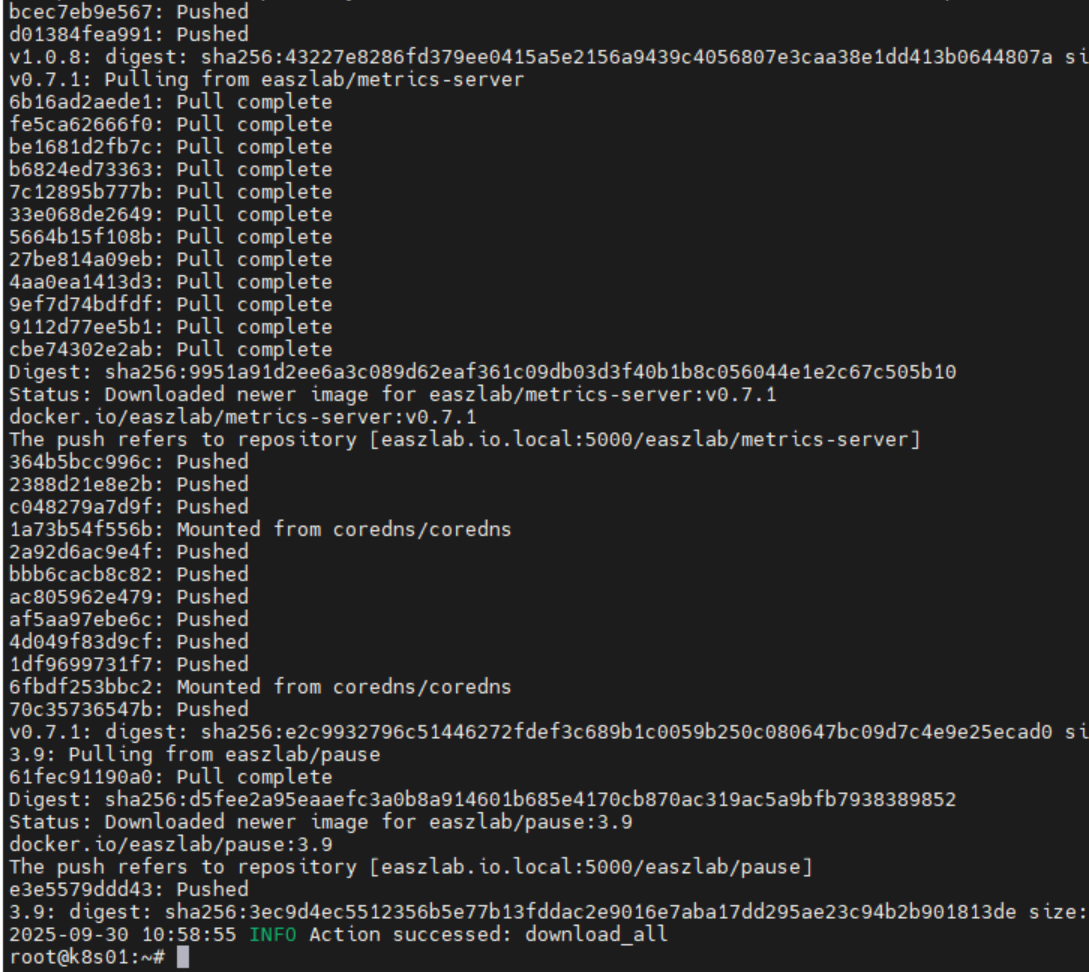
}配置好代理以后再次执行./ezdown -D,耐心等待所有docker镜像下载完成:
接下来开始生成安装配置文件以便我们进行手动编辑修改:
./ezdown -S输出结果:
root@k8s01:~# ./ezdown -S
2025-09-30 11:02:58 INFO Action begin: start_kubeasz_docker
Loaded image: easzlab/kubeasz:3.6.4
2025-09-30 11:03:01 INFO try to run kubeasz in a container
2025-09-30 11:03:01 DEBUG get host IP: 172.0.34.141
6e843856bb1e5c207b1b3cbefc40ba84111ac86b0190e09ad25457a9ed26bcc1
2025-09-30 11:03:01 INFO Action successed: start_kubeasz_docker
root@k8s01:~#
执行下面的命令开始创建一个名称叫做k8stest的集群
# 创建新集群 k8s-01
# docker exec -it kubeasz ezctl new k8stestroot@k8s01:~# docker exec -it kubeasz ezctl new k8stest
2025-09-30 11:05:02 DEBUG generate custom cluster files in /etc/kubeasz/clusters/k8stest
2025-09-30 11:05:02 DEBUG set versions
2025-09-30 11:05:02 DEBUG cluster k8stest: files successfully created.
2025-09-30 11:05:02 INFO next steps 1: to config '/etc/kubeasz/clusters/k8stest/hosts'
2025-09-30 11:05:02 INFO next steps 2: to config '/etc/kubeasz/clusters/k8stest/config.yml'
可以看到最后的提示,stpes 1是需要编辑/etc/kubeasz/clusters/k8stest/hosts ,步骤二是需要编辑/etc/kubeasz/clusters/k8stest/config.yml,编辑这两个文件,改成实际的IP地址。
我规划的k8s节点情况如下:
| 主机IP | 用途 |
|---|---|
| 172.0.34.141 | etcd服务/Master节点 |
| 172.0.34.142 | etcd服务/Master节点 |
| 172.0.34.143 | etcd服务/Master节点 |
| 172.0.34.144 | worker节点 |
| 172.0.34.145 | worker节点 |
| 172.0.34.146 | 高可用虚拟ip |
一共5台机器,6个IP,配置结果如下:
root@k8s01:~# cat  /etc/kubeasz/clusters/k8stest/hosts
# 'etcd' cluster should have odd member(s) (1,3,5,...)
[etcd]
172.0.34.141
172.0.34.142
172.0.34.143# master node(s), set unique 'k8s_nodename' for each node
# CAUTION: 'k8s_nodename' must consist of lower case alphanumeric characters, '-' or '.',
# and must start and end with an alphanumeric character
[kube_master]
172.0.34.141 k8s_nodename='master-01'
172.0.34.142 k8s_nodename='master-02'
172.0.34.143 k8s_nodename='master-03'# work node(s), set unique 'k8s_nodename' for each node
# CAUTION: 'k8s_nodename' must consist of lower case alphanumeric characters, '-' or '.',
# and must start and end with an alphanumeric character
[kube_node]
172.0.34.144 k8s_nodename='worker-01'
172.0.34.145 k8s_nodename='worker-02'# [optional] harbor server, a private docker registry
# 'NEW_INSTALL': 'true' to install a harbor server; 'false' to integrate with existed one
[harbor]
#192.168.1.8 NEW_INSTALL=false# [optional] loadbalance for accessing k8s from outside
[ex_lb]
172.0.34.141 LB_ROLE=backup EX_APISERVER_VIP=172.0.34.146 EX_APISERVER_PORT=8443
172.0.34.142 LB_ROLE=master EX_APISERVER_VIP=172.0.34.146 EX_APISERVER_PORT=8443# [optional] ntp server for the cluster
[chrony]
#192.168.1.1[all:vars]
# --------- Main Variables ---------------
# Secure port for apiservers
SECURE_PORT="6443"# Cluster container-runtime supported: docker, containerd
# if k8s version >= 1.24, docker is not supported
CONTAINER_RUNTIME="containerd"# Network plugins supported: calico, flannel, kube-router, cilium, kube-ovn
CLUSTER_NETWORK="calico"# Service proxy mode of kube-proxy: 'iptables' or 'ipvs'
PROXY_MODE="ipvs"# K8S Service CIDR, not overlap with node(host) networking
SERVICE_CIDR="10.68.0.0/16"# Cluster CIDR (Pod CIDR), not overlap with node(host) networking
CLUSTER_CIDR="172.20.0.0/16"# NodePort Range
NODE_PORT_RANGE="30000-32767"# Cluster DNS Domain
CLUSTER_DNS_DOMAIN="cluster.local"# -------- Additional Variables (don't change the default value right now) ---
# Binaries Directory
bin_dir="/opt/kube/bin"# Deploy Directory (kubeasz workspace)
base_dir="/etc/kubeasz"# Directory for a specific cluster
cluster_dir="{{ base_dir }}/clusters/k8stest"# CA and other components cert/key Directory
ca_dir="/etc/kubernetes/ssl"# Default 'k8s_nodename' is empty
k8s_nodename=''# Default python interpreter
ansible_python_interpreter=/usr/bin/python3
第二个配置/etc/kubeasz/clusters/k8stest/config.yml修改添加可用的docker国内仓库地址,例如:
############################
# role:runtime [containerd,docker]
############################
# [.]启用拉取加速镜像仓库
ENABLE_MIRROR_REGISTRY: true# [.]添加信任的私有仓库
# 必须按照如下示例格式,协议头'http://'和'https://'不能省略
INSECURE_REG:- "http://easzlab.io.local:5000"- "https://harbor.xxx.com.cn"   #你们公司内部的harbor服务器- "https://docker.1ms.run"
我这里第一次没有添加可用的国内镜像仓库地址,造成了安装失败,结果第二次修改了上面的配置以后也不生效,需要手动修改集群里面的每一台机器的/etc/containerd/config.toml文件去正确添加国内可用的docker仓库镜像地址。
设置好镜像仓库信息以后执行下面的命令开始安装
source ~/.bashrcdk ezctl setup k8stest all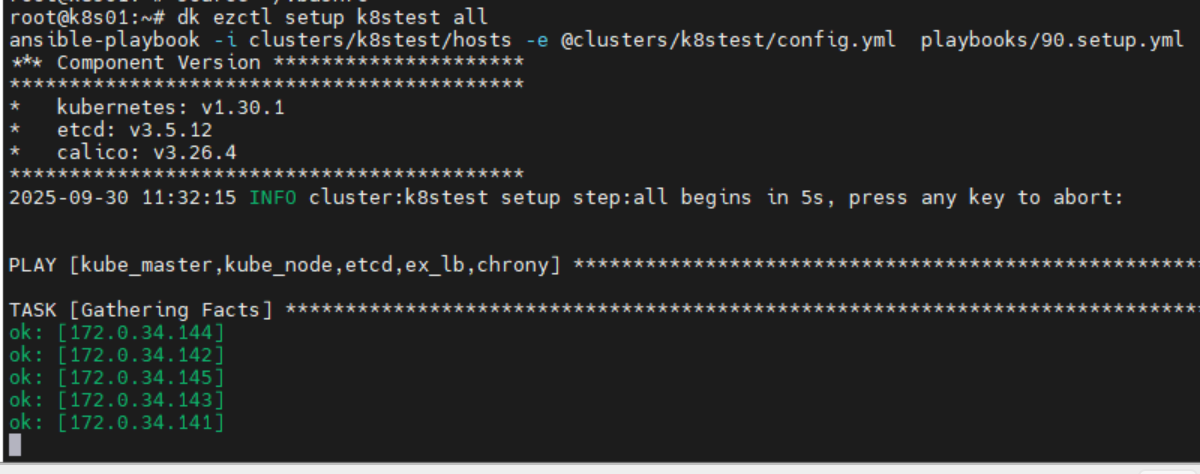
如果一切正常的话应该是下面这样:
root@master-01:~# kubectl get pods -A
NAMESPACE     NAME                                         READY   STATUS    RESTARTS   AGE
kube-system   calico-kube-controllers-6946cb87d6-gzh7r     1/1     Running   0          81m
kube-system   calico-node-2bkqh                            1/1     Running   0          14d
kube-system   calico-node-7dw9v                            1/1     Running   0          14d
kube-system   calico-node-f67dn                            1/1     Running   0          70m
kube-system   calico-node-kqrf7                            1/1     Running   0          45m
kube-system   calico-node-pjxhp                            1/1     Running   0          16m
kube-system   coredns-c5768dcc7-sl2z6                      1/1     Running   0          14d
kube-system   dashboard-metrics-scraper-69b9b44766-7xlpd   1/1     Running   0          14d
kube-system   kubernetes-dashboard-7df74bff86-vncb7        1/1     Running   0          14d
kube-system   metrics-server-65b5b555f5-nw2kj              1/1     Running   0          14d
kube-system   node-local-dns-5stsr                         1/1     Running   0          14d
kube-system   node-local-dns-7gd7n                         1/1     Running   0          14d
kube-system   node-local-dns-xw685                         1/1     Running   0          14d
kube-system   node-local-dns-zvf6t                         1/1     Running   0          14d
kube-system   node-local-dns-zzj5w                         1/1     Running   0          14d
root@master-01:~# kubectl get cs
Warning: v1 ComponentStatus is deprecated in v1.19+
NAME                 STATUS    MESSAGE   ERROR
etcd-0               Healthy   ok
scheduler            Healthy   ok
controller-manager   Healthy   ok
root@master-01:~# kubectl get nodes
NAME        STATUS                     ROLES    AGE   VERSION
master-01   Ready,SchedulingDisabled   master   14d   v1.30.1
master-02   Ready,SchedulingDisabled   master   14d   v1.30.1
master-03   Ready,SchedulingDisabled   master   14d   v1.30.1
worker-01   Ready                      node     14d   v1.30.1
worker-02   Ready                      node     14d   v1.30.1
添加ingress
cd /etc/kubeasz
kubectl apply -f https://raw.githubusercontent.com/kubernetes/ingress-nginx/main/deploy/static/provider/cloud/deploy.yaml#执行过程如下:
root@master-01:~# cd /etc/kubeasz
root@master-01:/etc/kubeasz# kubectl apply -f https://raw.githubusercontent.com/kubernetes/ingress-nginx/main/deploy/static/provider/cloud/deploy.yaml
namespace/ingress-nginx created
serviceaccount/ingress-nginx created
serviceaccount/ingress-nginx-admission created
role.rbac.authorization.k8s.io/ingress-nginx created
role.rbac.authorization.k8s.io/ingress-nginx-admission created
clusterrole.rbac.authorization.k8s.io/ingress-nginx created
clusterrole.rbac.authorization.k8s.io/ingress-nginx-admission created
rolebinding.rbac.authorization.k8s.io/ingress-nginx created
rolebinding.rbac.authorization.k8s.io/ingress-nginx-admission created
clusterrolebinding.rbac.authorization.k8s.io/ingress-nginx created
clusterrolebinding.rbac.authorization.k8s.io/ingress-nginx-admission created
configmap/ingress-nginx-controller created
service/ingress-nginx-controller created
service/ingress-nginx-controller-admission created
deployment.apps/ingress-nginx-controller created
job.batch/ingress-nginx-admission-create created
job.batch/ingress-nginx-admission-patch created
ingressclass.networking.k8s.io/nginx created
validatingwebhookconfiguration.admissionregistration.k8s.io/ingress-nginx-admission created
下面安装helm,准备通过helm部署一个dify到k8s集群里面,
sudo snap install helm --classic    #安装helm#实际执行效果如下
root@master-01:~# sudo snap install helm --classic
helm 3.19.0 from Snapcrafters✪ installed
root@master-01:~# helm version
version.BuildInfo{Version:"v3.19.0", GitCommit:"3d8990f0836691f0229297773f3524598f46bda6", GitTreeState:"clean", GoVersion:"go1.24.7"}
root@master-01:~## 添加稳定版仓库
helm repo add stable https://charts.helm.sh/stable  #这个仓库我这里连不上# 添加douban仓库
helm repo add douban https://douban.github.io/charts/# 添加Bitnami仓库
helm repo add bitnami https://charts.bitnami.com/bitnami# 更新仓库
helm repo update#实际执行效果如下
root@master-01:~# helm repo add bitnami https://charts.bitnami.com/bitnami
"bitnami" has been added to your repositories
root@master-01:~# helm repo add douban https://douban.github.io/charts/
"douban" has been added to your repositories
root@master-01:~# helm repo update
Hang tight while we grab the latest from your chart repositories...
...Successfully got an update from the "douban" chart repository
...Successfully got an update from the "bitnami" chart repository
Update Complete. ⎈Happy Helming!⎈#搜一下哪个仓库里面有dify的安装配置源
root@master-01:~# helm search repo dify
NAME            CHART VERSION   APP VERSION     DESCRIPTION
douban/dify     0.7.0           1.9.1           A Helm chart for Dify#创建一个新的namespace
kubectl create namespace fucking-ai#创建默认的配置文件以便修改
helm show values douban/dify > values.yamlnano values.yaml  #修改values.yaml适应部署环境,如是否使用内置redis,pg数据库等#执行安装
helm upgrade -i dify douban/dify -f values.yaml -n fucking-ai
经过漫长的等待下载docker镜像过程以及反复来回自动重启服务以后最后成功运行:
root@master-01:~/helm/dify# kubectl get pods -n fucking-ai
NAME                                  READY   STATUS    RESTARTS         AGE
dify-api-68ddfb8b7-jchvn              0/1     Running   21 (46s ago)     83m
dify-frontend-76c58d48b-m2vlc         1/1     Running   0                97m
dify-minio-7fff597c9c-62dl2           1/1     Running   0                97m
dify-plugin-daemon-5cb6c4579f-xcrwc   0/1     Pending   0                97m
dify-postgresql-0                     1/1     Running   0                97m
dify-redis-master-0                   1/1     Running   0                97m
dify-sandbox-dc7bd6688-f2l6p          1/1     Running   0                97m
dify-worker-7c6757d6dc-fvspv          1/1     Running   14 (6m16s ago)   66m
root@master-01:~/helm/dify# kubectl get svc -n fucking-ai
NAME                  TYPE        CLUSTER-IP      EXTERNAL-IP   PORT(S)             AGE
dify-api-svc          ClusterIP   10.68.6.220     <none>        80/TCP              98m
dify-frontend         ClusterIP   10.68.59.53     <none>        80/TCP              98m
dify-minio            ClusterIP   10.68.88.84     <none>        9000/TCP,9001/TCP   98m
dify-plugin-daemon    ClusterIP   10.68.143.234   <none>        5002/TCP            98m
dify-postgresql       ClusterIP   10.68.168.70    <none>        5432/TCP            98m
dify-postgresql-hl    ClusterIP   None            <none>        5432/TCP            98m
dify-redis-headless   ClusterIP   None            <none>        6379/TCP            98m
dify-redis-master     ClusterIP   10.68.213.240   <none>        6379/TCP            98m
dify-sandbox          ClusterIP   10.68.217.86    <none>        80/TCP              98m
后记
下面记录的内容是因为我第一次安装的时候没有正确配置可用的国内docker仓库,所以安装完以后k8s工作状态不正常,如下面:
root@master-01:~# kubectl get pods -A
NAMESPACE     NAME                                         READY   STATUS             RESTARTS   AGE
kube-system   calico-kube-controllers-6946cb87d6-gzh7r     0/1     ImagePullBackOff   0          76m
kube-system   calico-node-2bkqh                            1/1     Running            0          14d
kube-system   calico-node-7dw9v                            1/1     Running            0          14d
kube-system   calico-node-f67dn                            1/1     Running            0          65m
kube-system   calico-node-kqrf7                            1/1     Running            0          40m
kube-system   calico-node-pjxhp                            1/1     Running            0          12m
kube-system   coredns-c5768dcc7-sl2z6                      1/1     Running            0          14d
kube-system   dashboard-metrics-scraper-69b9b44766-7xlpd   1/1     Running            0          14d
kube-system   kubernetes-dashboard-7df74bff86-vncb7        1/1     Running            0          14d
kube-system   metrics-server-65b5b555f5-nw2kj              1/1     Running            0          14d
kube-system   node-local-dns-5stsr                         1/1     Running            0          14d
kube-system   node-local-dns-7gd7n                         1/1     Running            0          14d
kube-system   node-local-dns-xw685                         1/1     Running            0          14d
kube-system   node-local-dns-zvf6t                         1/1     Running            0          14d
kube-system   node-local-dns-zzj5w                         1/1     Running            0          14d
root@master-01:~#
执行查看命令看具体要下载的docker镜像是什么:
 kubectl describe pod calico-kube-controllers-6946cb87d6-gzh7r -n kube-systemEvents:Type     Reason            Age                     From               Message----     ------            ----                    ----               -------Warning  FailedScheduling  12m (x13 over 72m)      default-scheduler  0/5 nodes are available: 2 node(s) had untolerated taint {node.kubernetes.io/not-ready: }, 3 node(s) were unschedulable. preemption: 0/5 nodes are available: 5 Preemption is not helpful for scheduling.Normal   Scheduled         8m50s                   default-scheduler  Successfully assigned kube-system/calico-kube-controllers-6946cb87d6-gzh7r to worker-01Normal   Pulling           7m25s (x4 over 8m49s)   kubelet            Pulling image "easzlab.io.local:5000/calico/kube-controllers:v3.26.4"Warning  Failed            7m25s (x4 over 8m49s)   kubelet            Failed to pull image "easzlab.io.local:5000/calico/kube-controllers:v3.26.4": rpc error: code = NotFound desc = failed to pull and unpack image "easzlab.io.local:5000/calico/kube-controllers:v3.26.4": failed to resolve reference "easzlab.io.local:5000/calico/kube-controllers:v3.26.4": easzlab.io.local:5000/calico/kube-controllers:v3.26.4: not foundWarning  Failed            7m25s (x4 over 8m49s)   kubelet            Error: ErrImagePullWarning  Failed            7m12s (x6 over 8m49s)   kubelet            Error: ImagePullBackOffNormal   BackOff           3m35s (x22 over 8m49s)  kubelet            Back-off pulling image "easzlab.io.local:5000/calico/kube-controllers:v3.26.4"
root@master-01:~#
可以看到要下载的镜像是:easzlab.io.local:5000/calico/kube-controllers:v3.26.4
这么下载:
sudo wget https://github.com/containerd/containerd/releases/download/v1.7.7/containerd-1.7.7-linux-amd64.tar.gz
sudo tar -zxvf containerd-1.7.7-linux-amd64.tar.gz
sudo cp ./bin/ctr /usr/bin/sudo ctr -n k8s.io images pull docker.1ms.run/calico/cni:v3.26.4
sudo ctr -n k8s.io images tag docker.1ms.run/calico/cni:v3.26.4 docker.io/calico/cni:v3.26.4sudo ctr -n k8s.io images pull docker.1ms.run/calico/node:v3.26.4
sudo ctr -n k8s.io images tag docker.1ms.run/calico/node:v3.26.4  docker.io/calico/node:v3.26.4sudo ctr -n k8s.io images pull docker.1ms.run/calico/kube-controllers:v3.26.4
sudo ctr -n k8s.io images tag docker.1ms.run/calico/kube-controllers:v3.26.4  docker.io/calico/kube-controllers:v3.26.4sudo ctr -n k8s.io images tag docker.io/calico/cni:v3.26.4 easzlab.io.local:5000/calico/cni:v3.26.4
sudo ctr -n k8s.io images tag docker.io/calico/node:v3.26.4 easzlab.io.local:5000/calico/node:v3.26.4
sudo ctr -n k8s.io images tag docker.io/calico/kube-controllers:v3.26.4 easzlab.io.local:5000/calico/kube-controllers:v3.26.4
要是还不行,可以删除pod(不删service的话会自动创建删掉的pod强制加载镜像)强制重建pod进行尝试。