QML学习笔记(三十一)QML的Flow定位器
前言
本节将介绍一个名叫Flow的定位器,如含义所言,这种布局就像会流动一样,会根据组件数量、尺寸、父容器的大小自动适应布局。
一、代码演示
因为比较简单,我们直接看代码:
Window {visible: truewidth: 640height: 480title: qsTr("QmlFlow")Flow{anchors.fill: parentanchors.margins: 4spacing: 10Rectangle{id: topLeftRectIdwidth: 100height: widthcolor: "magenta"Text {anchors.centerIn: parenttext: "1"font.pointSize: 20}}Rectangle{id: topCenterRectIdwidth: 100height: widthcolor: "yellowgreen"Text {anchors.centerIn: parenttext: "2"font.pointSize: 20}}Rectangle{id: topRightRectIdwidth: 100height: widthcolor: "dodgerblue"Text {anchors.centerIn: parenttext: "3"font.pointSize: 20}}Rectangle{id: centerLeftRectIdwidth: 100height: widthcolor: "red"Text {anchors.centerIn: parenttext: "4"font.pointSize: 20}}Rectangle{id: centerCenterRectIdwidth: 100height: widthcolor: "green"Text {anchors.centerIn: parenttext: "5"font.pointSize: 20}}Rectangle{id: centerRightRectIdwidth: 100height: widthcolor: "blue"Text {anchors.centerIn: parenttext: "6"font.pointSize: 20}}Rectangle{id: bottomLeftRectIdwidth: 100height: widthcolor: "royalblue"Text {anchors.centerIn: parenttext: "7"font.pointSize: 20}}Rectangle{id: bottomCenterRectIdwidth: 100height: widthcolor: "yellow"Text {anchors.centerIn: parenttext: "8"font.pointSize: 20}}Rectangle{id: bottomRightRectIdwidth: 100height: widthcolor: "pink"Text {anchors.centerIn: parenttext: "9"font.pointSize: 20}}}
}
代码很长,但也只是九宫格矩形而已。
我们聚焦在这几句:
    Flow{anchors.fill: parentanchors.margins: 4spacing: 10
//...}
它的使用非常简单,甚至不需要设置什么复杂的属性,这里只简单给了间距。
当然,Flow生效的前提是每一个组件都已经写了固定尺寸。
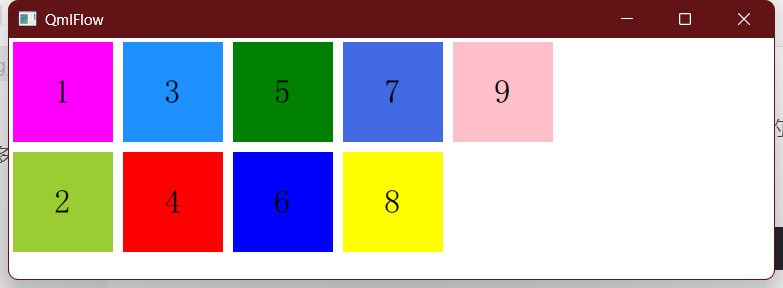
我们运行代码看看:
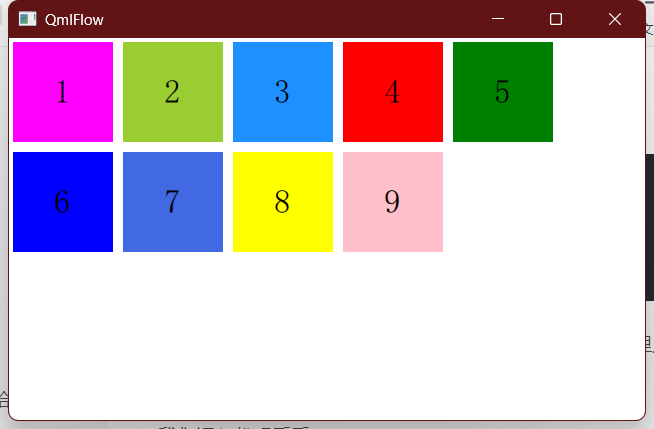
拖拽一下窗口:
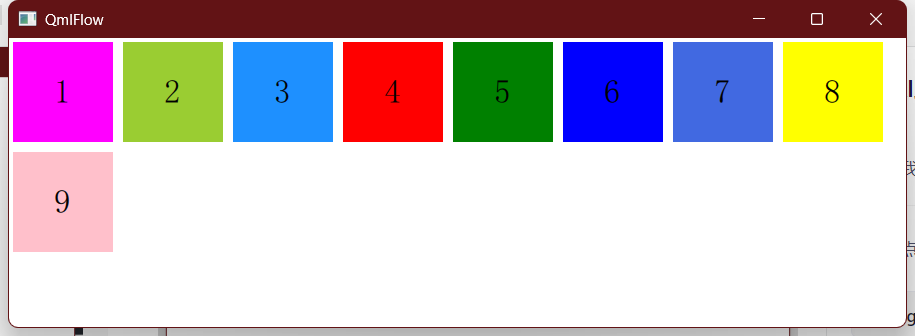
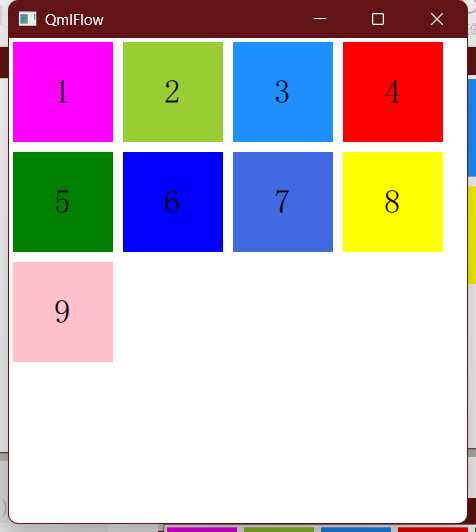
自动换行的效果非常丝滑,且在某种场合当中非常好用。
比如我们需要自己手搓一个文件管理器,需要在一个窗口内部实现多文件的排布,此时就可以用这种方式,就比较灵活了。
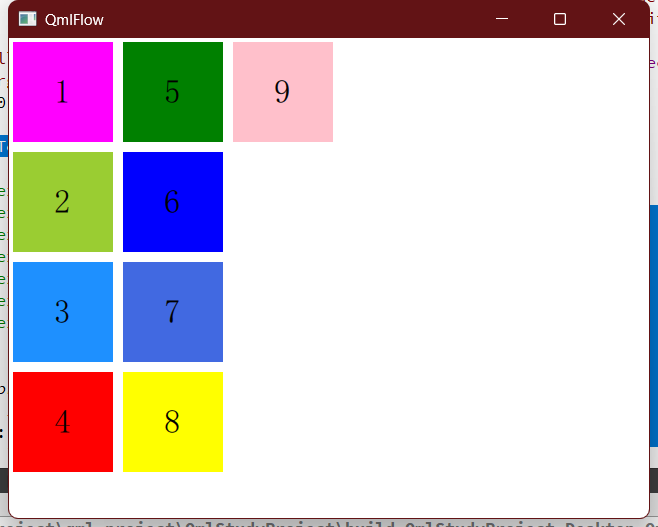
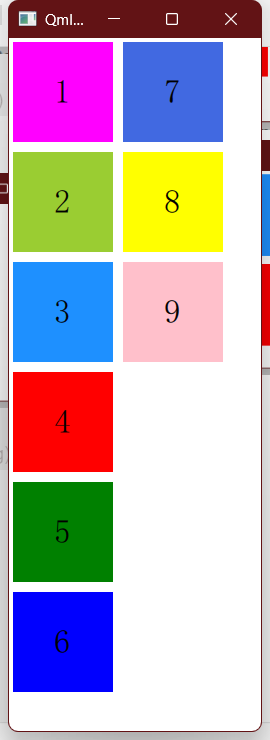
另外就是还有一个换行方向的问题,我们可以指定:
flow:Flow.TopToBottom
效果就会变成这样:
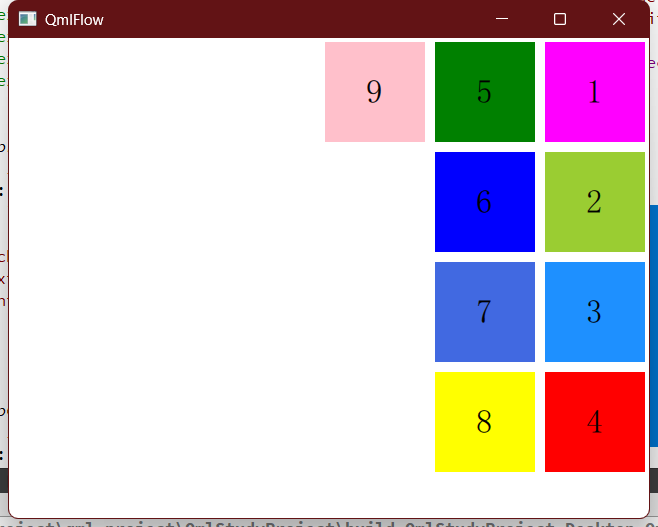
如果再加上:
layoutDirection: Qt.RightToLeft
二、总结
Flow的定位方式虽然没那么常用,但在某种场合下可能是一种更优的选择。至此,我们应该已经掌握了比较丰富的定位和布局方式了。