@uiw/react-md-editor渲染的markdown如何跳转至指定地方?我来助你
@uiw/react-md-editor渲染的markdown如何跳转至指定地方?我来助你
背景
🚩🚩🚩首先套个马甲,本文不涉及复杂实现,仅作个人思路分享的同时也给部分有需要的同学增加摸鱼时间,文章内容请勿上升到作者。
首先得确定一下需求,只有知道自己做什么才能针对性的去思考对应的解决方案。首先目前在做的一个小功能是关于大模型生成的markdown字符串渲染,这里我们采用的库是**@uiw/react-md-editor**。现在后端给我们的东西有两个,一个是目录的树状结构,一个markdown字符串。我们现在要实现的功能是:点击目录的时候,makedown渲染的文本能跳转至指定段落。
首先解决渲染:
目录可以用antd的tree组件去渲染,markdown的渲染我们用下面的方式:
import MDEditor, { commands } from '@uiw/react-md-editor';<MDEditor.Markdownsource={value}remarkPlugins={[remarkGfm, remarkMath]}rehypePlugins={[rehypeHighlight,rehypeKatex,]}
/>;
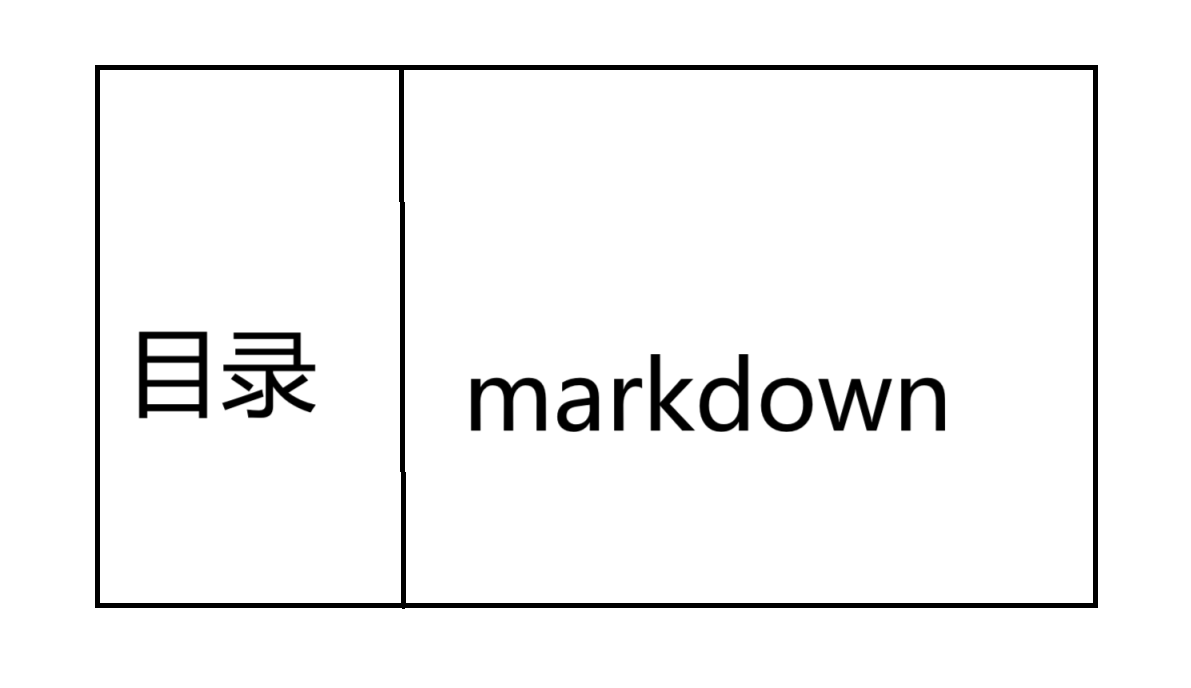
页面结构大概如下所示:

渲染完毕以后我们可以考虑接下来的实现了。
思路
到这里肯定有人说:“你这个也太简单了,用a标签的href属性完事,多大点事。“
好吧,其实这个也没有很难,不过还是比你想象的稍微复杂一点点(PS:上面那句话很像我们的架构师说的话”这个功能有啥难的,前端加个icon就好了,一小时都不需要“)
为什么我说比较复杂呢,这个得跟大模型返回的数据结构有关系,首先我们看看目录的数据:
{"document_id": "8c83193c-ce55-4192-b35b-3c94ad9fbea1","title": "第一章 你好","markdown": "# 第一章 你好  \n","children": ["3e72f168-38ad-4683-aed2-77aae49e293c","4503d6f0-47a1-4330-b48a-954b76f5ae91","a0689110-772a-4d80-8f61-1f065da877fa","5285bf5e-9c2f-400a-96fb-d029b5227074","52a072f3-7d00-44cc-8ace-c5d051fd5469","f6cbb0b0-6263-4a25-9b01-8481ad6d2f03","bf895ee6-640a-4e1c-bff3-28b74dc8e7fe","9342edb5-aee9-425e-b41f-5cc20394c9f8"]
}
这里前端拿到的是一个一维数组,我们需要根据children属性去自己创建一个树状结构,至于唯一标识很明显就是这个document_id。
接下来我们看看markdown渲染的html结构:
<h1 id="第一章你好"><a class="anchor" aria-hidden="true" tabindex="-1" href="#第一章你好"><svg class="octicon octicon-link" viewBox="0 0 16 16" version="1.1" width="16" height="16" aria-hidden="true"><path fill-rule="evenodd" d="M7.775 3.275a.75.75 0 001.06 1.06l1.25-1.25a2 2 0 112.83 2.83l-2.5 2.5a2 2 0 01-2.83 0 .75.75 0 00-1.06 1.06 3.5 3.5 0 004.95 0l2.5-2.5a3.5 3.5 0 00-4.95-4.95l-1.25 1.25zm-4.69 9.64a2 2 0 010-2.83l2.5-2.5a2 2 0 012.83 0 .75.75 0 001.06-1.06 3.5 3.5 0 00-4.95 0l-2.5 2.5a3.5 3.5 0 004.95 4.95l1.25-1.25a.75.75 0 00-1.06-1.06l-1.25 1.25a2 2 0 01-2.83 0z"></path></svg></a>第一章 你好</h1>
可以看到这里渲染标题的时候也给定了一个id,同时标题前面会有一个icon(链接标志),用来实现将段落定位到顶部。
那么问题来了,我们要如何将目录跟渲染的文本联系起来呢?这里有三个思路:
- 根据内容去匹配对应的段落
- 在渲染标题的时候将id改为document_id,根据唯一id匹配
- 根据组件的id命名规则和文本内容去获取对应的id,根据唯一id匹配
实现
方案一:根据文本内容匹配
方案一看起来是最简单的,所以我们先来试试方案一。
根据上面的目录数据我们可以看到有一个title字段,这个字段是一个普通的字符串,markdown才是html字符串。那我们直接根据元素内部的字符串然后跟这个title匹配上不就得了?非常不错的想法,接下来试一下:
const findElementIdByText = (textContent: string, options: {exactMatch?: boolean;        // 是否精确匹配caseSensitive?: boolean;     // 是否区分大小写searchInAttributes?: boolean; // 是否在属性中搜索tagName?: string;            // 限定标签类型} = {}
): string | null => {const {exactMatch = true,caseSensitive = false,searchInAttributes = false,tagName = ''} = options;// 标准化比较文本const normalizeText = (text: string): string => {if (!caseSensitive) {return text.toLowerCase();}return text;};const normalizedSearchText = normalizeText(textContent.trim());// 构建选择器let selector = '*';if (tagName) {selector = tagName;}// 获取所有元素const allElements = Array.from(document.querySelectorAll(selector));for (const element of allElements) {const elementText = element.textContent?.trim() || '';const normalizedElementText = normalizeText(elementText);let isMatch = false;if (exactMatch) {// 精确匹配isMatch = normalizedElementText === normalizedSearchText;} else {// 模糊匹配isMatch = normalizedElementText.includes(normalizedSearchText);}// 如果文本内容不匹配,检查属性if (!isMatch && searchInAttributes) {const attributes = element.attributes;for (let i = 0; i < attributes.length; i++) {const attrValue = attributes[i].value;const normalizedAttrValue = normalizeText(attrValue);if (exactMatch) {isMatch = normalizedAttrValue === normalizedSearchText;} else {isMatch = normalizedAttrValue.includes(normalizedSearchText);}if (isMatch) break;}}if (isMatch && element.id) {return element.id;}}return null;
};
上面的方法我是用ai生成的哈,因为这个方法行不通,所以我就随便找ai写了个方法做展示用。为什么行不通?大家来看看下面这段代码:
'第一章 你好'==='第一章 你好'
你们觉得上面的结果是啥,true?其实是false。
因为前面一个字符串中的空格的UTF-16 码元是160而后面一个字符串中的空格的UTF-16 码元是32,所以他们根本就匹配不上,这是最关键的一点。
另外还有两个原因就是:
- 要遍历所有的dom节点,这点虽然可以优化成指定内容区域的元素,但是对于很长内容例如几万字的markdown来说,如果频繁点击是非常消耗性能的
- 如果标题重名了呢?这样点击较后的同名标题时会导致滚动到的是前面的,这里当然可以添加自定义属性或者别的方式来判断,但是考虑到这个点使用文本内容匹配的方式就已经不合适了。
所以该方案pass
方案二:渲染markdown的标题时给定id
这种方式我们可以借助markdown组件的components属性来实现。
<MDEditor.Markdownsource={value}remarkPlugins={[remarkGfm, remarkMath]}rehypePlugins={[rehypeHighlight,rehypeKatex,]}components={{h1: (props) => <CustomHeading level={1} {...props} />,h2: (props) => <CustomHeading level={2} {...props} />h3: (props) => <CustomHeading level={3} {...props} />h4: (props) => <CustomHeading level={4} {...props} />,h5: (props) => <CustomHeading level={5} {...props} />,h6: (props) => <CustomHeading level={6} {...props} />,}}
/>;
我们使用自定义的标题组件来代替@uiw/react-md-editor默认的标题渲染。
CustomHeading组件的核心点当然是id属性的传递,这里因为目录已经给定了唯一id,所以id就不需要生成了。但是现在的问题是,我们怎么知道这个标题要给定哪个document_id?内容匹配的方案我们上面已经试过了,行不通,那现在该怎么办?
其实这里跟浏览器渲染dom树是一样的,因为markdown组件的渲染逻辑也是解析生成ast语法树来生成对应的dom结构的,所以我们可以根据渲染顺序来从数组中取值然后给定对应的document_id。
因为这里目录给定的其实就只有两层,标题和子标题,所以我们的components只设置h1和h2就行,不过也不排除后面可能会有更深层级,所以这里全写了,接下来我们看看CustomHeading组件如何实现
// const directoryTree = [...]  目录树状数据,目前就两层// const flatNodes = flattenTree(directoryTree) flattenTree是一个拍平工具函数,flatNodes这个数组就是拍平后的数据const CustomHeading = ({ level, children, ids, indexRef, ...props }) => {const node = ids[indexRef.current]; // 取出当前节点indexRef.current += 1; // 移动指针const HeadingTag = `h${level}` as keyof JSX.IntrinsicElements;const customProps = Object.assign(props, node?.documen_id ? { id: node.documen_id } : {});return (<HeadingTag {...customProps}>{children}</HeadingTag>);
};const flatNodes = flattenTree(tocTree);
const indexRef = useRef(0);<MDEditor.Markdownsource={value}remarkPlugins={[remarkGfm, remarkMath]}rehypePlugins={[rehypeHighlight,rehypeKatex,]}components={{h1: (props) => <CustomHeading level={1} ids={flatNodes} indexRef={indexRef} {...props} />,h2: (props) => <CustomHeading level={2} ids={flatNodes} indexRef={indexRef} {...props} />,h3: (props) => <CustomHeading level={3} ids={flatNodes} indexRef={indexRef} {...props} />,h4: (props) => <CustomHeading level={4} ids={flatNodes} indexRef={indexRef} {...props} />,h5: (props) => <CustomHeading level={5} ids={flatNodes} indexRef={indexRef} {...props} />,h6: (props) => <CustomHeading level={6} ids={flatNodes} indexRef={indexRef} {...props} />,}}
/>;
上面的代码因为是我现写的,所以准确性不保证,不过大致意思就是这么个意思。到这里肯定有聪明的朋友会说,你这都是现写的那你肯定不是用的这种方法。是的,我并没有使用这种方法,为啥呢?因为目录的数据结构其实跟页面的结构其实并不能一一对应,这也是用数组遍历去取值最大的问题,非常依赖数据来源的准确性,如果数据无法完美对应,那么用下标的方式很容易出现内容对不上的问题。
这个时候还会有同学问:“你不是说这个目录和markdown字符串都是大模型给的吗?为啥现在又对不上了?你是不是鸡蛋里挑骨头?”。非也非也,相信我,我比你更想早点解决好下班,毕竟架构师说的一小时期限已经超时很久了,再慢一点不仅拖累我下班的速度还可能会被领导质疑能力和态度问题从而没饭吃(虽然也没几个钱,正好问问有人招前端吗?可以看看我),这里我贴一下components属性中h1对应的方法传入的props列表你们就知道了。
h1: (props) => {console.log('h1:', props);<CustomHeading level={1} ids={flatNodes} indexRef={indexRef} {...props} />
}// 以下是打印内容,内容做了脱敏处理
h1: {id: '目录', node: {…}, children: Array(2)}
content.tsx:515 h1: {id: '第一章你好', node: {…}, children: Array(2)}
content.tsx:515 h1: {id: '质疑和投诉', node: {…}, children: Array(2)}
content.tsx:515 h1: {id: '888电子交易系统咨询', node: {…}, children: Array(2)}
content.tsx:515 h1: {id: '第二章需求', node: {…}, children: Array(2)}
我嘞个豆,说好的按目录结构来的,这第一章和第二章中的两个一级标题是哪来的?大模型整我呢?不管如何,这个方法肯定是用不了了,又做了一个无用功。接下来我们试试最后一个方法,也是最保险的方法——根据@uiw/react-md-editor的id命名规则去创建对应的然后匹配。
方案三:根据id命名规则去构建数据结构作匹配
首先我们得知道@uiw/react-md-editor的命名规则是什么。这里不看源码了,我选择相信gpt,给出的答案是rehype-slug组件的功劳。
规则大致如下:
1.小写化
所有字母会转成小写。
# Hello World
=> id="hello-world"
2.去掉无效字符
非字母数字(如 ?, !, ,, . 等)会被移除,只保留字母、数字、空格和 -。
# What's New?
=> id="whats-new"
3.空格转连字符
连续空格会转成单个 -。
# Hello   World
=> id="hello-world"
4.重复标题会追加数字后缀
如果同一页有重复标题,第二个开始会自动加上 -1、-2……
# Hello
=> id="hello"
# Hello
=> id="hello-1"
# Hello
=> id="hello-2"
5.非英文字符(中文/日文/韩文等)
默认会直接保留原始字符,不会转拼音或编码。
# 标题测试
=> id="标题测试"
6.Markdown 内联格式化会被忽略
粗体、斜体等不会影响 id。
# **Bold** Title
=> id="bold-title"
这里我发现我这边渲染的时候是空格直接被去掉了,而不是用‘-’代替。问了一下gpt才知道是rehype-slug的内部用的是github-slugger来生成的id,github-slugger的规则是直接去掉空格,除非你用的处理器里又额外加了 rehype-autolink-headings 并做了 className/behavior 定制。
不过按理来说上面的第三个规则应该直接是去掉空格才是,不知道为啥是替换为“-”。
回到正题,这里我们就直接写一个简单的工具方法来实现相同的逻辑,根据传入的文本去生成对应的id。同时将树状结构拍平,这样方便后面匹配使用。
const flatDirectory = useRef<any[]>([]);const getCustomId = (text: string) => {return text.toLowerCase().replace(/[^a-z0-9\u4e00-\u9fa5\s]/g, '') // 保留英文数字和中文.replace(/\s+/g, ''); // 删除所有空格};// flatDirectory的实现方法const cb = (list: any[], hashMap?: any) => {const map = hashMap || new Map();const arr: any[] = [];list.forEach((item) => {const textId = getCustomId(item.title);let renderId;if (!map.has(textId)) {map.set(textId, 0);renderId = textId;} else {const count = map.get(textId) + 1;map.set(textId, count);renderId = `${textId}-${count}`;}arr.push({document_id: item.document_id,title: item.title,renderId,});if (item.children) {arr.push(...cb(item.children, map));}});return arr;};useEffect(() => {flatDirectory.current = cb(directoryTree);}, [directoryTree]);
上面做了一个递归来将树状结构拍平,同时用一个map保存了对应id的次数,这样就可以做到根据树状的顺序来给定对应的id,这也恰好能跟渲染的顺序对上。其实仔细看看这个方法很多地方都有之前方法的影子,只能说正确的道路确实是试出来的。
到这里我们就可以通过点击事件拿到树状结构点击的选项的document_id在flatDirectory数组中匹配对应选项的renderid,然后我们根据id去滚动即可
const scrollTopById = (id: string) => {const element = document.getElementById(id);if (element) {element.scrollIntoView({ behavior: 'smooth', block: 'start' });}};
到这里就大功告成了,虽然没有加班就完成了,但是这个任务还是花费了我三个多小时,跟架构师给出的一小时的期限足足相差了三四倍,这波还是我太菜了。架构师说的前端这么简单的东西我却花了这么久,太对不起架构师的期望跟公司的栽培了。最后也是希望有人招前端的话能把我带走,算是帮了我们公司一个大忙了,非常感谢❤️。
