搭建nginx的高性能web集群
搭建nginx的高性能web集群
- 一、项目介绍
- 1.1 拓扑图
- 1.2 详细介绍
- 二、项目步骤
- 2.1 初始化网络配置
- 2.1.1 进入网络连接配置目录
- 2.1.2 更改静态配置的ip地址
- 2.1.3 重启ens33网络连接,加载新的配置
- 2.1.4 关闭selinux和firewalld
- 2.2 部署 NFS 服务器
- 2.2.1 在nfs服务器上安装nfs-utils软件包
- 2.2.2 web集群安装nfs-utils软件部
- 2.2.3 设置共享目录
- 2.2.4 挂载nfs共享目录
- 2.3 在web服务器上安装nginx
- 2.4 配置虚拟主机的域名,并开启https功能
- 2.5 部署 Ansible
- 2.5.1 配置epel源
- 2.5.2 配置免密通道
- 2.5.3 配置主机清单
- 2.6 部署 Prometheus 监控服务
- 2.6.1 上传下载的源码包到linux服务器
- 2.6.2 把prometheus做成一个服务来进行管理
- 2.6.3 启动Prometheus服务并设置开机自启
- 2.7 在节点上部署 exporter
- 2.7.1 在集群所有节点部署 node_exporter
- 2.7.2 在其他的服务器上查看是否安装node_exporter成功
- 2.7.3 在 MySQL 服务器部署 mysqld_exporter
- 2.7.4 添加被监控的服务器
- 2.7.5 在浏览器访问http://192.168.168.139:9090/targets
- 2.8 安装 Grafana 配置监控图表
- 2.8.1 安装
- 2.8.2 在浏览器里访问 http://192.168.168.139:3000
- 2.8.3 出图前需先添加 Prometheus 数据源
- 2.9 部署基于 BIND 的 DNS 服务器
- 2.9.1 安装软件bind
- 2.9.2 修改配置文件
- 2.9.3 在其他机器上测试DNS服务器
- 2.10 在 Web 服务器的 Nginx 中均部署 VTS 模块
- 2.10.1 上传vts模块包nginx-module-vts-master.zip到家目录下
- 2.10.2 启动新的nginx
- 2.10.3 修改nginx.conf主配置文件,添加支持vts的功能
- 2.11 部署 Nginx 负载均衡器
- 2.12 整合 Keepalived 与 Nginx
- 2.12.1 部署和配置keepalived
- 2.12.2 keepalived.conf配置文件的解析
- 2.12.3 查看vip地址在LB1上
- 2.12.4 双vip架构
- 2.12.5 验证一下vip漂移,停止一台keepalived服务查看
- 2.13 使用压力测试软件(ab)开展集群综合压力测试
- 2.13.1 安装
- 2.13.2 测试
- 三、项目心得
一、项目介绍
1.1 拓扑图

1.2 详细介绍
项目名称:搭建 nginx 的高性能 web 集群
项目环境:rocky Linux 9.6,nginx 1.28,ansible 2.14.18,prometheus 3.6.0,keepalived 2.2.8,grafana等
项目背景: 在测试环境中,目的是构建一个高可用高性能的 web 集群系统,部署 nginx 负载均衡系统+keeplived 高可用软件,后端使用 nginx 做 web 服务器,同时搭建一套基于 Pometheus+grafana 监控系统。使用 ansible 实现整个集群系统的自动化运维工作,融入了 nfs,dns,mysql 等功能
- 安装部署6台Linux虚拟机服务器,并初始化网络配置(含 IP、网关、DNS 等基础网络参数设置)
- 在两台 Web 服务器上,通过一键安装脚本部署 Nginx 服务;完成 Nginx 的快速部署。使用基于域名的虚拟主机功能,配置2个虚拟主机对应2个网站(www.huang.com和www.hz.com)同时配置https功能
- 部署 NFS 服务器并配置网页目录共享,实现多 Web 节点数据同步
- 部署 Ansible 控制节点,完成主机清单配置与免密登录通道搭建,支撑后续批量自动化运维操作
- 部署 Prometheus 监控服务:在集群所有节点部署 node_exporter 以采集主机资源数据,在 MySQL 服务器部署 mysqld_exporter 采集数据库指标;同时安装 Grafana 配置监控图表,实现监控数据可视化
- 部署基于 BIND 的 DNS 服务器,为整个 Web 集群提供稳定的域名解析服务
- 在 Web 服务器的 Nginx 中均部署 VTS模块,以实时监测 Nginx 的访问状态、请求量及负载情况
- 部署 Nginx 负载均衡器,采用 7 层负载均衡架构,搭配轮询调度算法,实现 Web 访问请求的均衡分发
- 整合 Keepalived 与 Nginx,使用7 层 Nginx 负载均衡,实现支持单VIP与双VIP两种模式的高可用负载均衡能力,避免单点故障,使用压力测试软件(ab)开展集群综合压力测试,验证整体服务性能与稳定性
二、项目步骤
2.1 初始化网络配置
2.1.1 进入网络连接配置目录
[root@web-1 ~]# cd /etc/NetworkManager/system-connections/
[root@localhost system-connections]# ls
ens33.nmconnection
2.1.2 更改静态配置的ip地址
[root@web-1 system-connections]# vim ens33.nmconnection
[connection]
id=ens33
uuid=8821a626-ccef-311c-9292-9170759181f5
type=ethernet
autoconnect-priority=-999
interface-name=ens33
timestamp=1754637831[ethernet][ipv4]	# 更改ip,dns,网关
address1=192.168.100.136/24
dns=114.114.114.114;
gateway=192.168.100.2
method=manual[ipv6]
addr-gen-mode=eui64
method=auto[proxy]
2.1.3 重启ens33网络连接,加载新的配置
重新加载配置文件
[root@web-1 system-connections]#nmcli c reload
重启指定连接
[root@web-1 system-connections]# nmcli c down ens33 && nmcli c up ens33
连接断开,重新用新的ip地址连接即可,其他机器同理
2.1.4 关闭selinux和firewalld
setenforce 0
sed -i ‘/^SELINUX=/ s/enforcing/disabled/’ /etc/selinux/config
systemctl stop firewalld
systemctl disable firewalld
2.2 部署 NFS 服务器
2.2.1 在nfs服务器上安装nfs-utils软件包
[root@dns-nfs ~]# yum install nfs-utils -y
建议web集群内的在web1和web2上也需要安装nfs-utils软件,因为节点服务器里需要支持nfs网络文件系统,需要挂载共享目录
在web1和web2上都安装nfs-utils软件,不需要启动nfs服务,主要是使用nfs服务器共享的文件夹,需要去挂载nfs文件系统
如果web服务器不安装nfs-utils软件,在mount挂载服务器的共享目录的时候,不能识别nfs文件系统,导致挂载不成功
2.2.2 web集群安装nfs-utils软件部
[root@web-1 ~]# yum install nfs-utils -y
[root@web-2 ~]# yum install nfs-utils -y
启动并设置开机自启
[root@dns-nfs ~]# service nfs-server start
[root@dns-nfs named]# systemctl enable nfs-server
2.2.3 设置共享目录
新建提供web网页的目录/web/html文件夹
[root@dns-nfs ~]# mkdir /web/html -p
创建首页文件index.html,然后上传feng.jpg图片
[root@dns-nfs html]# ls
feng.jpg index.html
配置共享文件夹,允许其他人过来读写,/etc/exports文件是nfs共享目录的配置文件
[root@nfs-server ~]# vim /etc/exports
/web/html 192.168.168.0/24(rw,sync,all_squash)
刷新服务,输出共享目录
[root@nfs-server ~]# exportfs -rv
exporting 192.168.168.0/24:/web/html
2.2.4 挂载nfs共享目录
[root@web-1 ~]# mount  192.168.168.139:/web/html   /usr/local/nginx1/html/
# 查看linux系统里的磁盘分区使用情况
[root@web-1 ~]# df -Th
文件系统                  类型      容量  已用  可用 已用% 挂载点
devtmpfs                  devtmpfs  4.0M     0  4.0M    0% /dev
tmpfs                     tmpfs     1.8G     0  1.8G    0% /dev/shm
tmpfs                     tmpfs     725M  9.0M  716M    2% /run
/dev/mapper/rl-root       xfs        17G  2.2G   15G   13% /
/dev/sda1                 xfs       960M  242M  719M   26% /boot
tmpfs                     tmpfs     363M     0  363M    0% /run/user/0
192.168.168.139:/web/html nfs4       17G  1.5G   16G    9% /usr/local/nginx1/html# 进入查看,发现能看nfs服务器共享的文件夹里的内容
[root@web-1 ~]# cd /usr/local/nginx1/html/
[root@web-1 html]# ls
feng.jpg  index.html
web-2 同理
2.3 在web服务器上安装nginx
在两台 Web 服务器上,通过一键安装脚本部署 Nginx 服务;完成 Nginx 的快速部署
使用源码编译安装
[root@web-1 ~]# vim install_nginx.sh
#!/bin/bashset -e
#修改主机名
hostnamectl set-hostname $1#禁用firewalld和selinux
systemctl stop firewalld
systemctl disable firewalldsetenforce 0
sed -i '/^SELINUX=/ s/enforcing/disabled/' /etc/selinux/config#配置国内源
#创建pip配置目录
mkdir -p ~/.pip# 编辑 pip 配置文件
cat > ~/.pip/pip.conf <<EOF
[global]
index-url = https://pypi.tuna.tsinghua.edu.cn/simple
trusted-host = pypi.tuna.tsinghua.edu.cn
EOF#下载nginx
mkdir -p /nginx
cd /nginx
curl -O https://nginx.org/download/nginx-1.28.0.tar.gz
echo "下载nginx成功"#解压nginx源码包
tar xf nginx-1.28.0.tar.gz
cd nginx-1.28.0#解决nginx软件依赖
yum install pcre-devel openssl-devel zlib-devel gcc vim -y#编译前的配置工作
./configure  --prefix=/usr/local/nginx1    --with-http_ssl_module  --with-http_v2_module  --with-http_v3_module   --with-http_stub_status_module  --with-stream   --with-stream_ssl_module   --with-threads
#编译
make -j 2
#编译安装
make install
echo "安装nginx成功"#修改PATH环境变量
echo 'PATH=/usr/local/nginx1/sbin/:$PATH' >>/etc/bashrc
source /etc/bashrc#设置nginx开机自启
echo '/usr/local/nginx1/sbin/nginx' >>/etc/rc.local
chmod +x /etc/rc.d/rc.local#开启nginx
nginx
#/usr/local/nginx1/sbin/nginx
2.4 配置虚拟主机的域名,并开启https功能
修改nignx.conf配置文件
    server {listen       8080;server_name www.huang.com;access_log  logs/huang.com.access.log  main;error_log  logs/huang.com.error.log;location / {root html/huang.com;index  index.html index.htm;}error_page  404              /404.html;error_page   500 502 503 504  /50x.html;location = /50x.html {root   html;}}	server {listen       80;server_name  www.hz.com;access_log  logs/hz.com.access.log  main;error_log  logs/hz.com.error.log;location / {root   html/hz.com;index  index.html index.htm;}}# HTTPS serverserver {listen       443 ssl;http2 on;server_name  www.huang.com;ssl_certificate      nginx.crt;ssl_certificate_key  ca.key;ssl_session_cache    shared:SSL:1m;ssl_session_timeout  5m;ssl_ciphers  HIGH:!aNULL:!MD5;ssl_prefer_server_ciphers  on;location / {#root   html;root html/huang.com;index  index.html index.htm;}}
}
2.5 部署 Ansible
2.5.1 配置epel源
Ansible安装包在epel源中,需先配置epel源
yum install epel-release -y
yum install ansible -y
2.5.2 配置免密通道
ssh-keygen
ssh-copy-id -i /root/.ssh/id_rsa.pub root@192.168.168.136
2.5.3 配置主机清单
[root@dns-nfs-prom-ansible ansible]# vim /etc/ansible/hosts
[web]
192.168.168.136
192.168.168.137[LB]
192.168.168.133:2233
192.168.168.132[db]
192.168.168.140:2233
2.6 部署 Prometheus 监控服务
2.6.1 上传下载的源码包到linux服务器
[root@nfs-ansible-prom prom]# ls
grafana-enterprise_12.1.1_16903967602_linux_amd64.rpm
prometheus-3.6.0-rc.0.linux-amd64.tar.gz
node_exporter-1.9.1.linux-amd64.tar.gz
mysqld_exporter-0.17.2.linux-amd64.tar.gz
解压源码包并修改名字为prometheus
[root@nfs-ansible-prom prom]# tar xf prometheus-3.6.0-rc.0.linux-amd64.tar.gz
[root@nfs-ansible-prom prom]# mv prometheus-3.6.0-rc.0.linux-amd64 prometheus
2.6.2 把prometheus做成一个服务来进行管理
非常方便日后维护和使用
[root@nfs-ansible-prom prom]# vim /usr/lib/systemd/system/prometheus.service
[Unit]
Description=prometheus
[Service]
ExecStart=/prom/prometheus/prometheus --config.file=/prom/prometheus/prometheus.yml
ExecReload=/bin/kill -HUP $MAINPID
KillMode=process
Restart=on-failure
[Install]
WantedBy=multi-user.target
重新加载systemd相关的服务,识别Prometheus服务的配置文件
[root@nfs-ansible-prom prom]# systemctl daemon-reload
2.6.3 启动Prometheus服务并设置开机自启
[root@nfs-ansible-prom prom]# systemctl start prometheus
[root@nfs-ansible-prom prom]# systemctl enable prometheus
访问9090端口
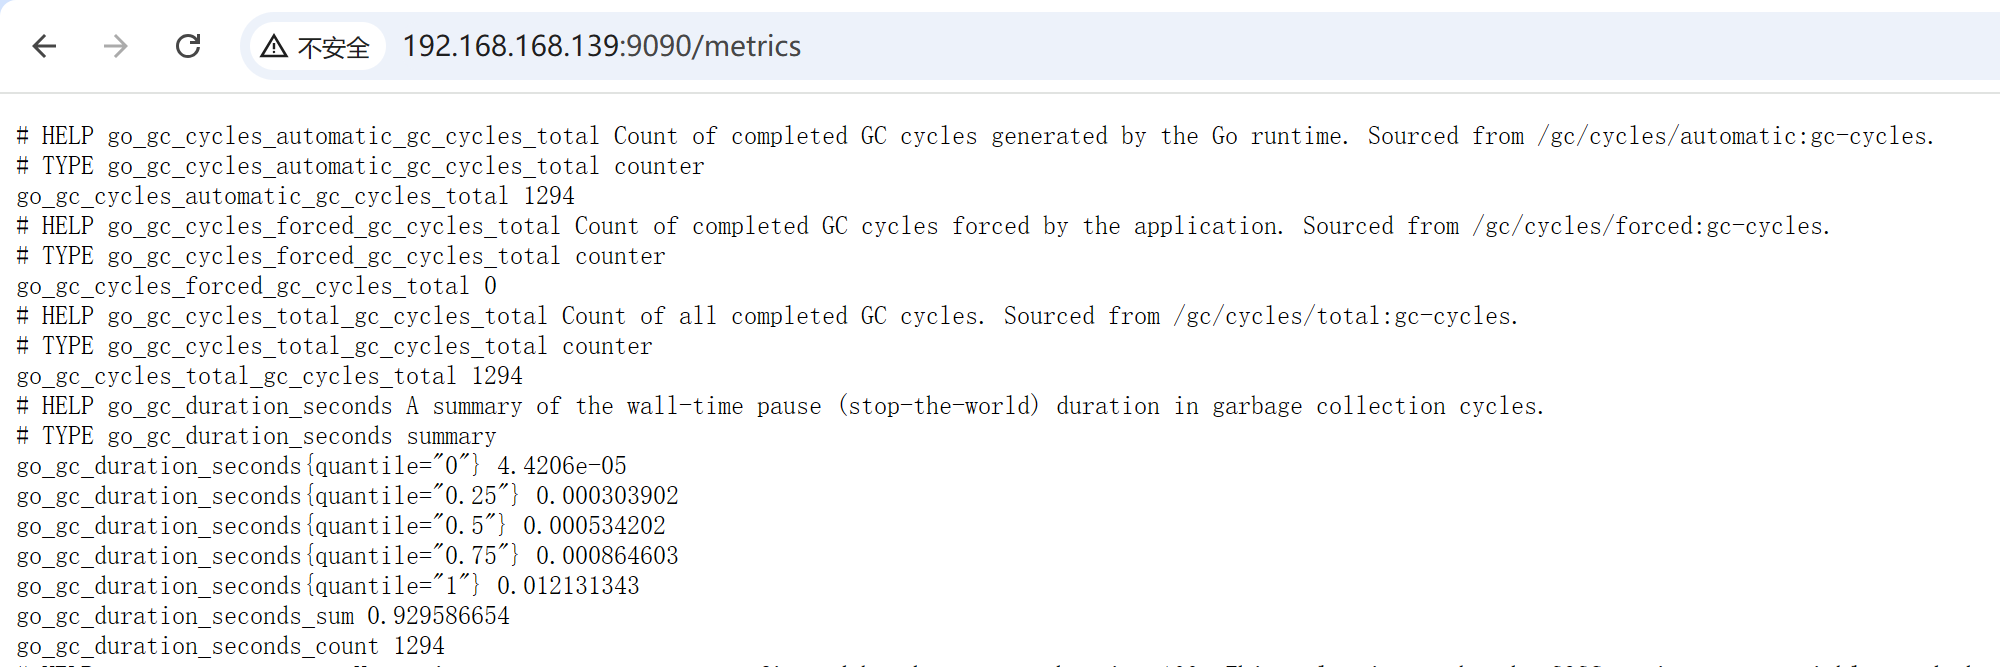
查看Prometheus 自身的运行指标 -> 9090/metrics
2.7 在节点上部署 exporter
2.7.1 在集群所有节点部署 node_exporter
用来采集主机资源数据
编写安装node_exporter的脚本
[root@nfs-ansible-prom ~]# cat install_node_exporter.sh
#!/bin/bash
set -e
tar xf node_exporter-1.9.1.linux-amd64.tar.gz
mv node_exporter-1.9.1.linux-amd64 /node_exporter
cd /node_exporter/ echo 'PATH=/node_exporter/:$PATH' >> /etc/bashrccat > /usr/lib/systemd/system/node_exporter.service << EOF
[Unit]
Description=node_exporter
[Service]
ExecStart=/node_exporter/node_exporter --web.listen-address 0.0.0.0:8090
ExecReload=/bin/kill -HUP $MAINPID
KillMode=process
Restart=on-failure
[Install]
WantedBy=multi-user.target
EOFsystemctl daemon-reload
systemctl start node_exporter
systemctl enable node_exporter
2.7.2 在其他的服务器上查看是否安装node_exporter成功
[root@web-1 ~]# ps aux|grep node
root        2377  0.4  3.4 1242284 25808 ?       Ssl  9月06   7:28 /node_exporter/node_exporter --web.listen-address 0.0.0.0:8090
root        5844  0.0  0.3   6636  2304 pts/1    S+   17:16   0:00 grep --color=auto node
[root@web-1 ~]# netstat -anplut|grep node
tcp6       0      0 :::8090                 :::*                    LISTEN      2377/node_exporter
tcp6       0      0 192.168.168.136:8090    192.168.168.139:54582   ESTABLISHED 2377/node_exporter
2.7.3 在 MySQL 服务器部署 mysqld_exporter
采集数据库指标
[root@rocky ~]# cat install_mysqld_exporter.sh
#!/bin/bash
set -etar xf mysqld_exporter-0.17.2.linux-amd64.tar.gz
mv mysqld_exporter-0.17.2.linux-amd64 /mysqld_exporter# .my.cnf是mysqld_exporter用于登录mysqld进程的配置文件
cat > /mysqld_exporter/.my.cnf << EOF
[client]
user=export		# "username"
password="your_pawssword"
EOFcat > /usr/lib/systemd/system/mysqld_exporter.service << EOF
[Unit]
Description=mysqld_exporter[Service]
Environment=DATA_SOURCE_NAME=exporter:"your_password"@(localhost:3308)/
ExecStart=/mysqld_exporter/mysqld_exporter --config.my-cnf=/mysqld_exporter/.my.cnf --web.listen-address=:9104
Restart=on-failure
[Install]
WantedBy=multi-user.target
EOFsystemctl daemon-reload
systemctl start mysqld_exporter
systemctl enable mysqld_exporter
2.7.4 添加被监控的服务器
在prometheus服务器上添加抓取数据的配置,添加node节点服务器,将抓取的数据存储到时序数据库里
[root@dns-nfs-prom-ansible prometheus]# cat prometheus.yml # 添加- job_name: "prometheus"static_configs:- targets: ["192.168.168.139:9090"]labels:app: "prometheus"- job_name: "web-1"static_configs:- targets: ["192.168.168.136:8090"]labels:app: "web-1"- job_name: "web-2"static_configs:- targets: ["192.168.168.137:8090"]labels:app: "web-2"- job_name: "LB-1"static_configs:- targets: ["192.168.168.133:8090"]labels:app: "LB-1"- job_name: "LB-2"static_configs:- targets: ["192.168.168.132:8090"]labels:app: "LB-2"- job_name: "Mysql"static_configs:- targets: ["192.168.168.140:8090"]labels:app: "Mysql"- job_name: "mysqld_exporter"static_configs:- targets: ["192.168.168.140:9104"]labels:app: "mysqld_exporter"
重启Prometheus服务
[root@dns-nfs-prom-ansible prometheus]# systemctl restart prometheus
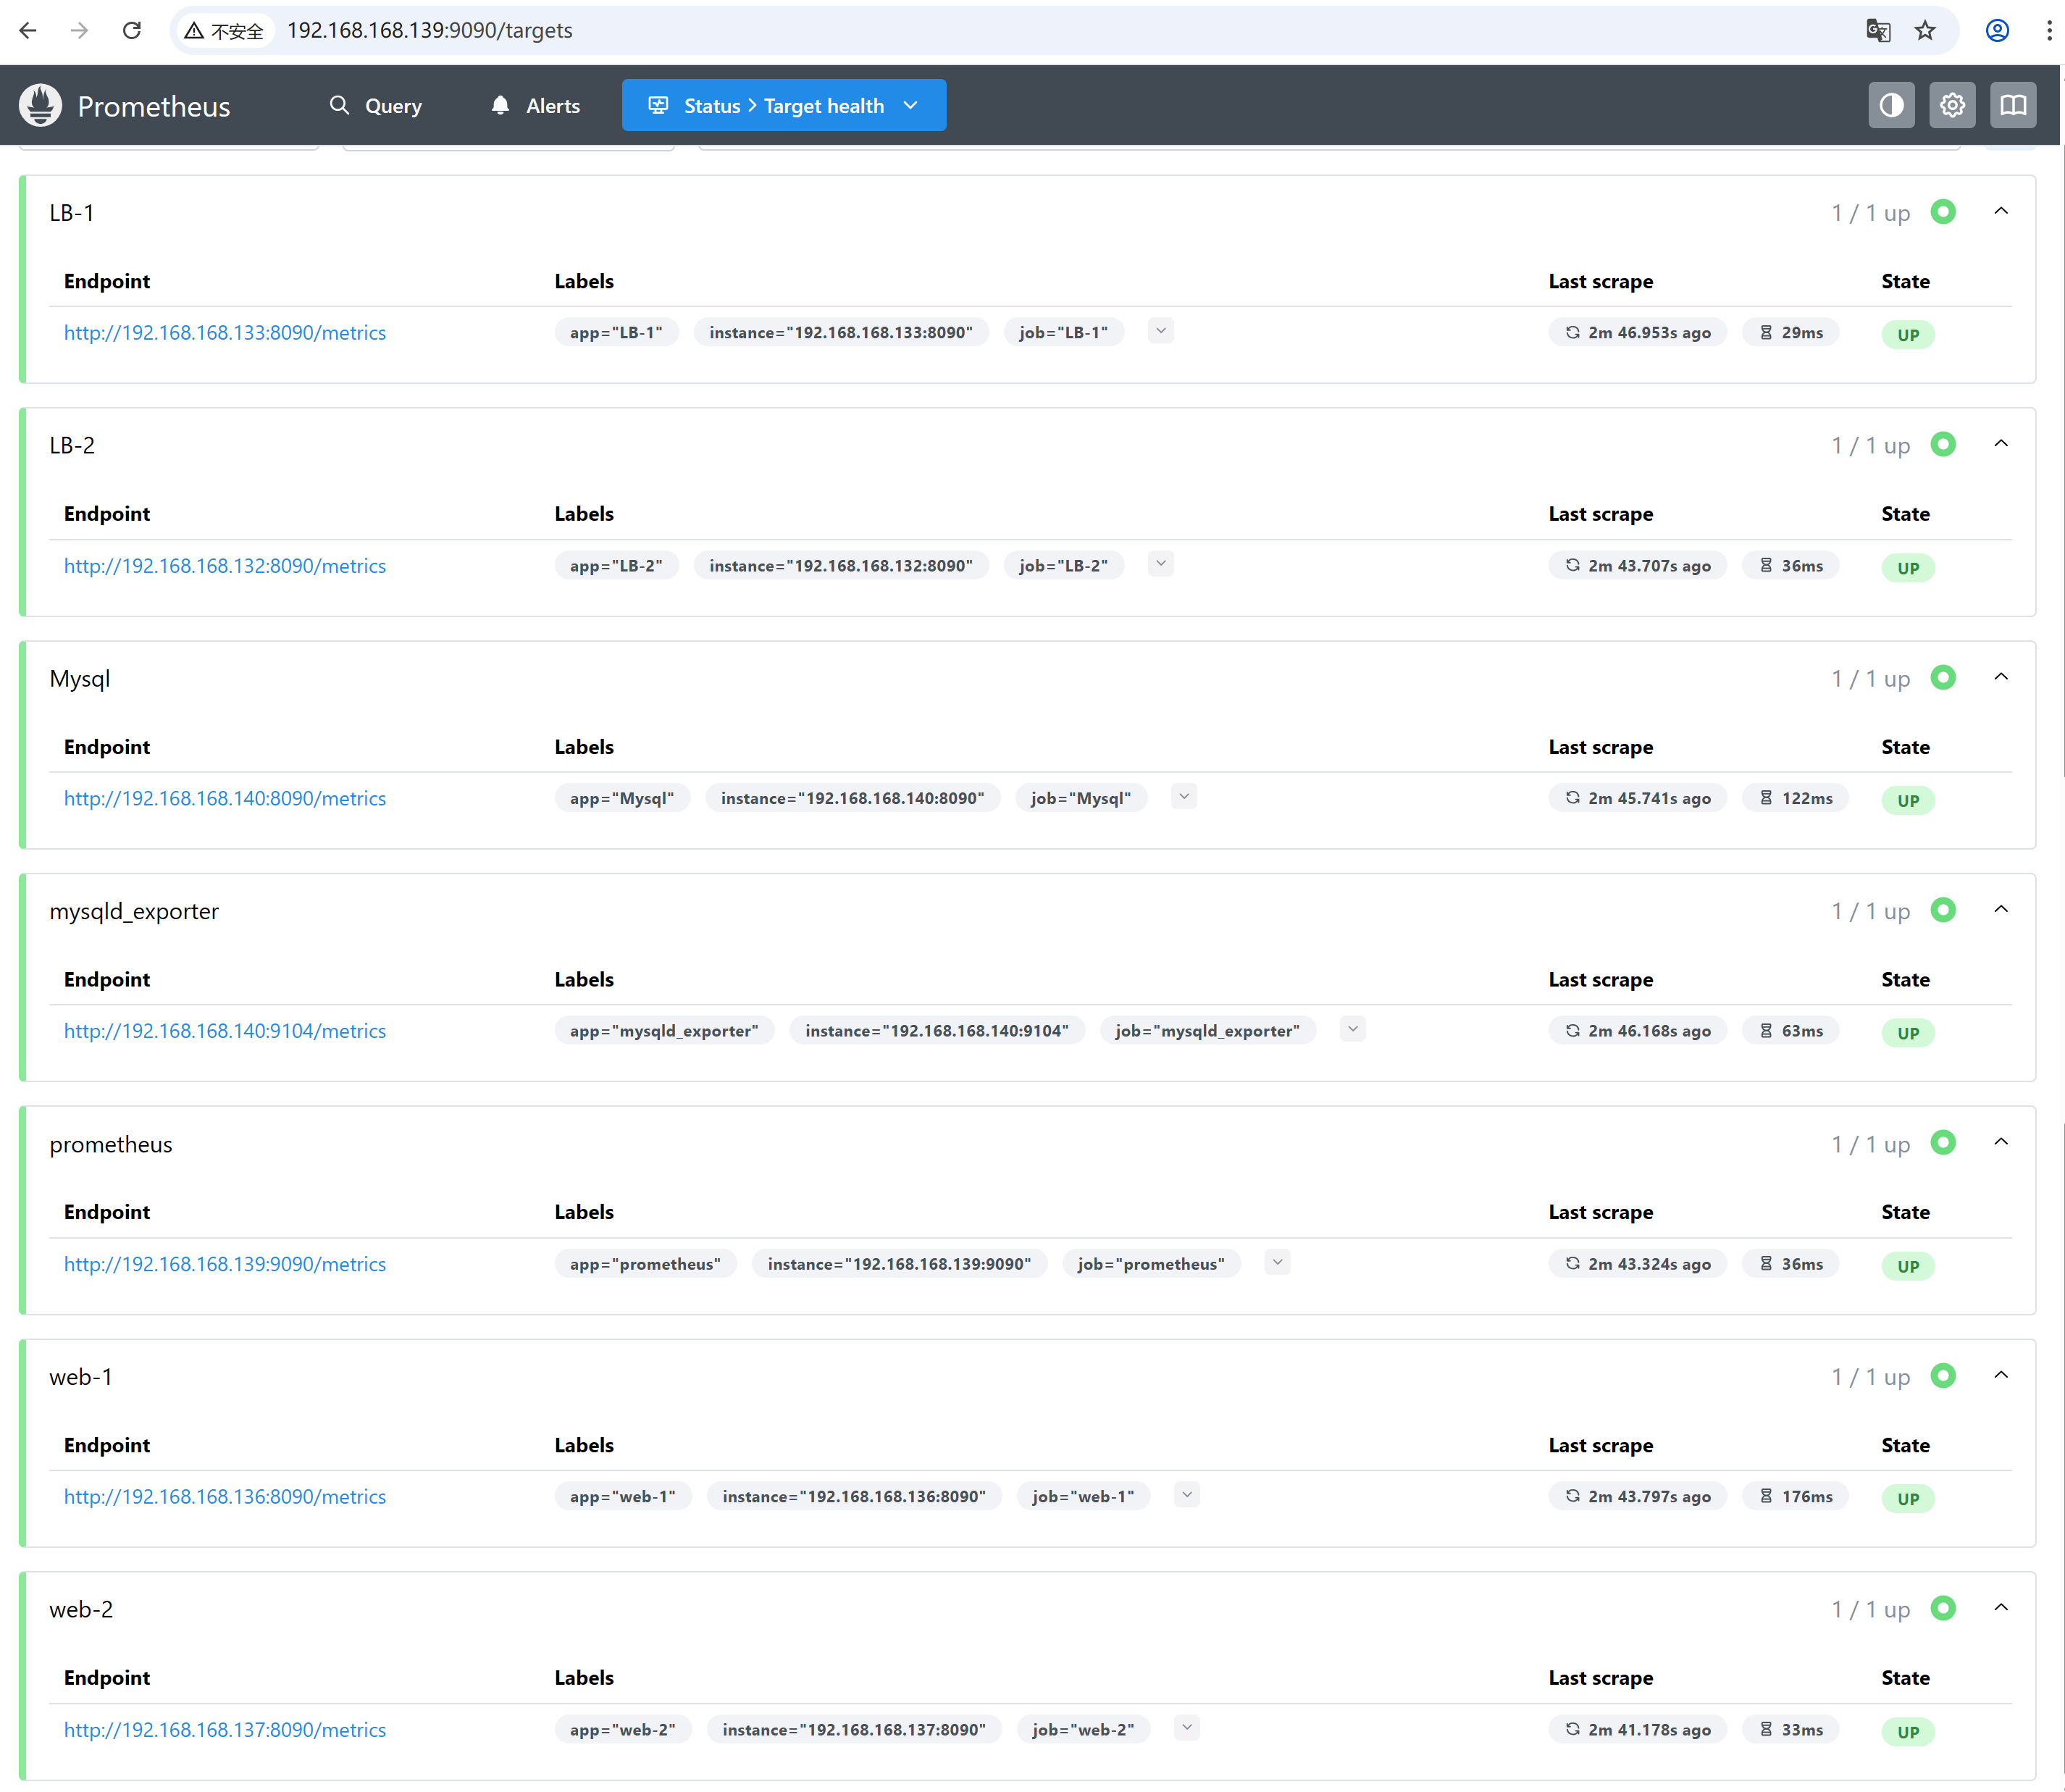
2.7.5 在浏览器访问http://192.168.168.139:9090/targets
2.8 安装 Grafana 配置监控图表
实现监控数据可视化展示
2.8.1 安装
[root@nfs-ansible-prom prom]# yum install grafana-enterprise_12.1.1_16903967602_linux_amd64.rpm -y
启动grafana并设置开机启动
[root@nfs-ansible-prom prom]# systemctl start grafana-server
[root@nfs-ansible-prom prom]# systemctl enable grafana-server
查看grafana是否启动
[root@nfs-ansible-prom prom]# ps aux|grep grafana
grafana    3386  2.1  1.9 1129724 76372 ?       Ssl  15:39   0:01 /usr/sbin/grafana-server --config=/etc/grafana/grafana.ini --pidfile=/var/run/grafana/grafana-server.pid --packaging=rpm cfg:default.paths.logs=/var/log/grafana cfg:default.paths.data=/var/lib/grafana cfg:default.paths.plugins=/var/lib/grafana/plugins cfg:default.paths.provisioning=/etc/grafana/provisioning
root       3414  0.0  0.0 112824   980 pts/0    S+   15:40   0:00 grep --color=auto grafana
[root@dns-nfs-prom-ansible prome]# netstat -anplut|grep grafana
tcp        0      0 192.168.168.139:40544   34.120.177.193:443      ESTABLISHED 29903/grafana
tcp6       0      0 :::3000                 :::*                    LISTEN      29903/grafana
监听3000端口
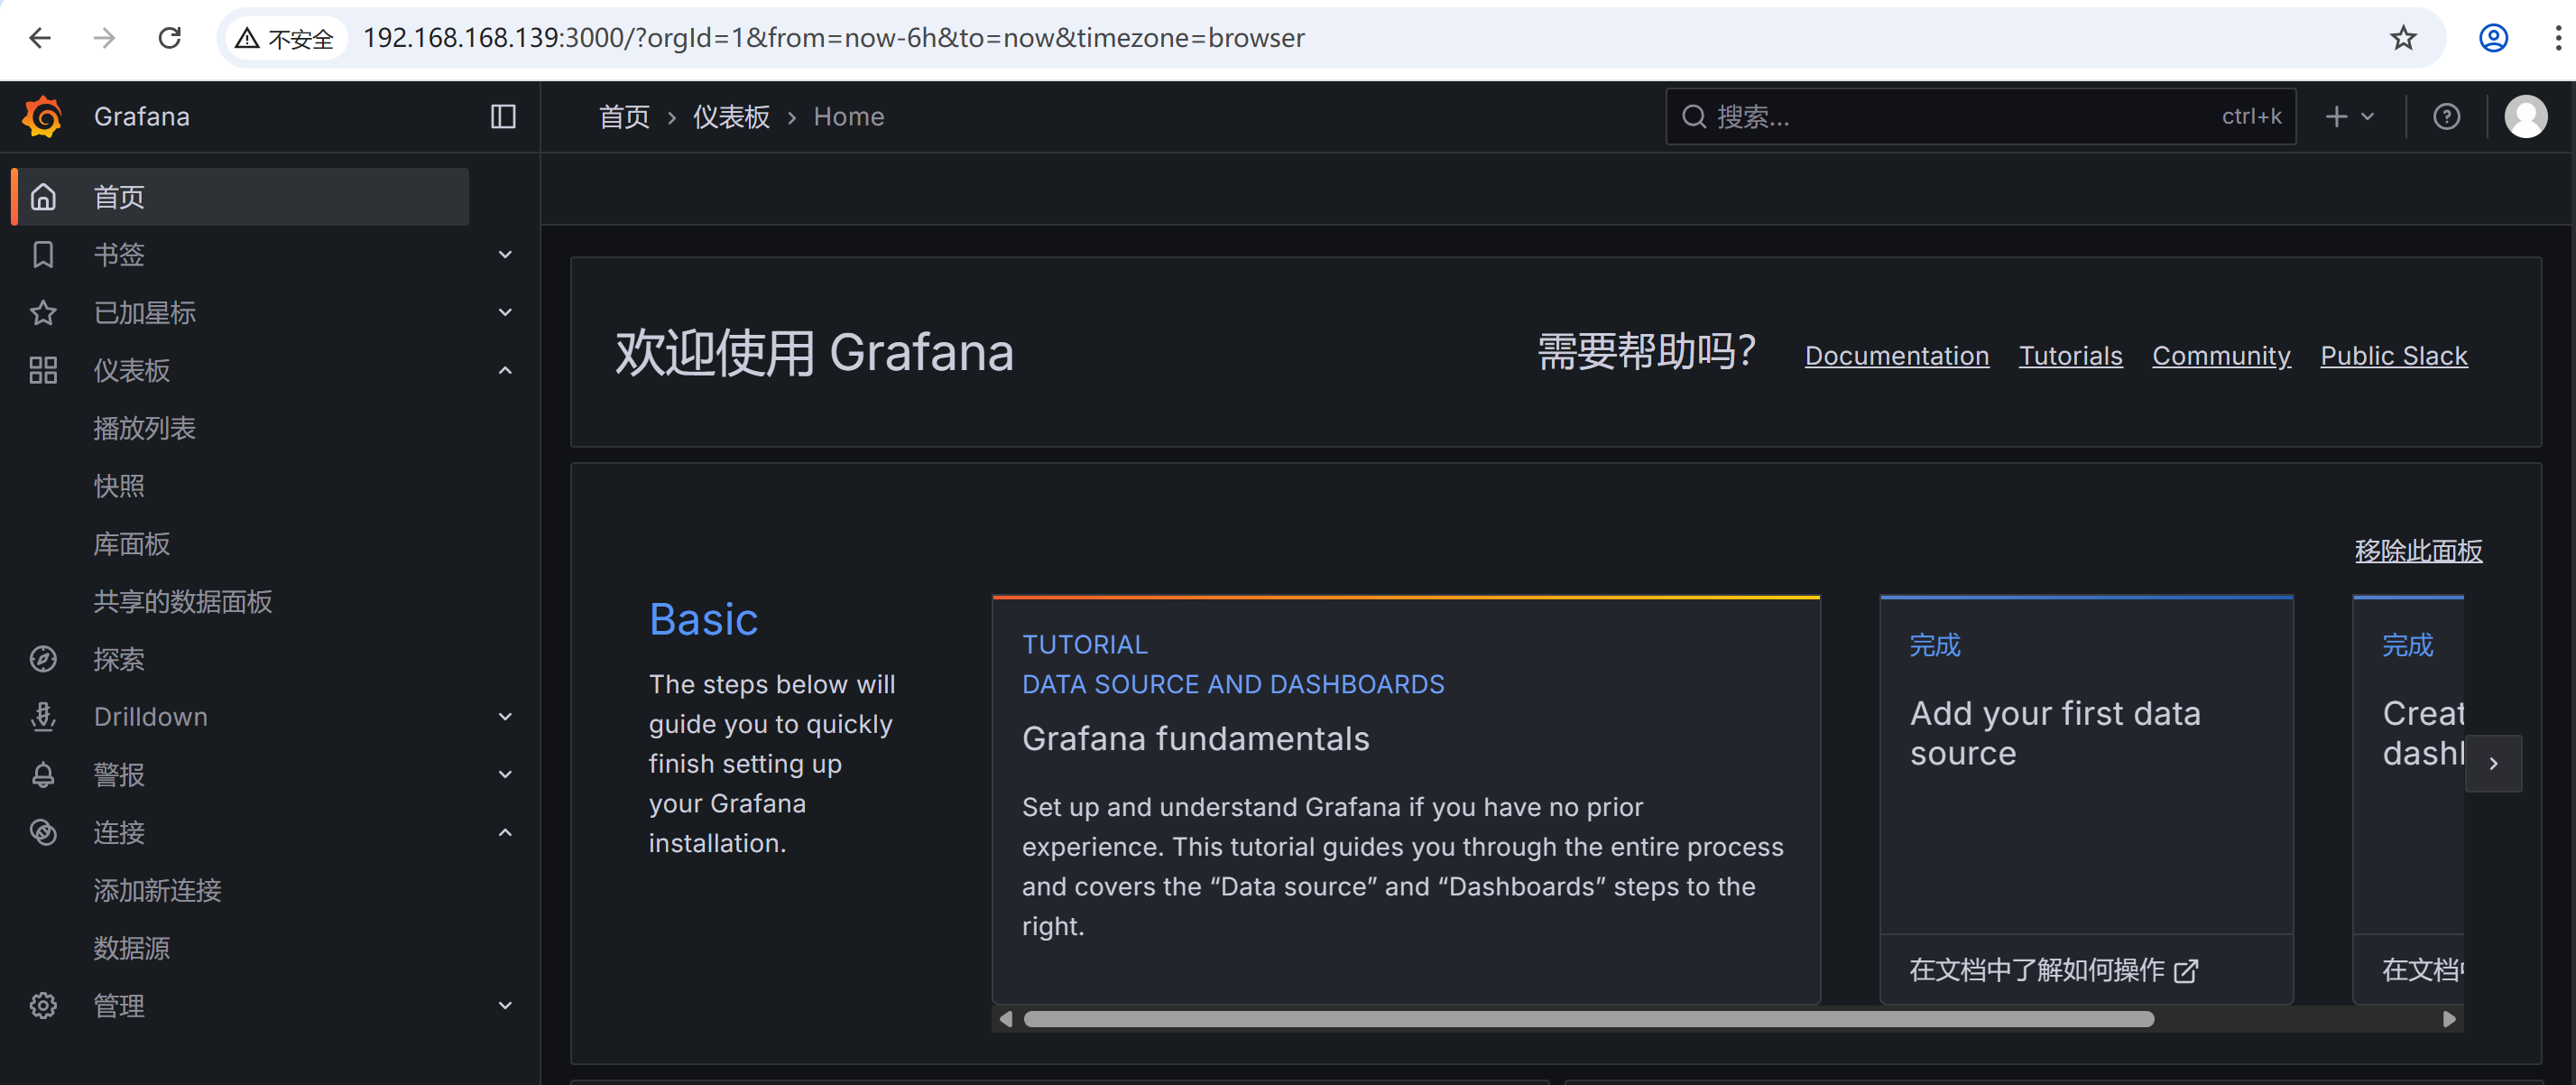
2.8.2 在浏览器里访问 http://192.168.168.139:3000
默认的用户名和密码都是admin
修改一个新密码,然后会进入下面的图形
2.8.3 出图前需先添加 Prometheus 数据源
左侧菜单 Configuration → Data Sources → Add data source,选择 Prometheus
创建仪表盘(Dashboard),可以直接导入模版
grafana模版:https://grafana.com/grafana/dashboards/
1860:Node Exporter Full
8919 -->推荐使用,因为是中文版的字符
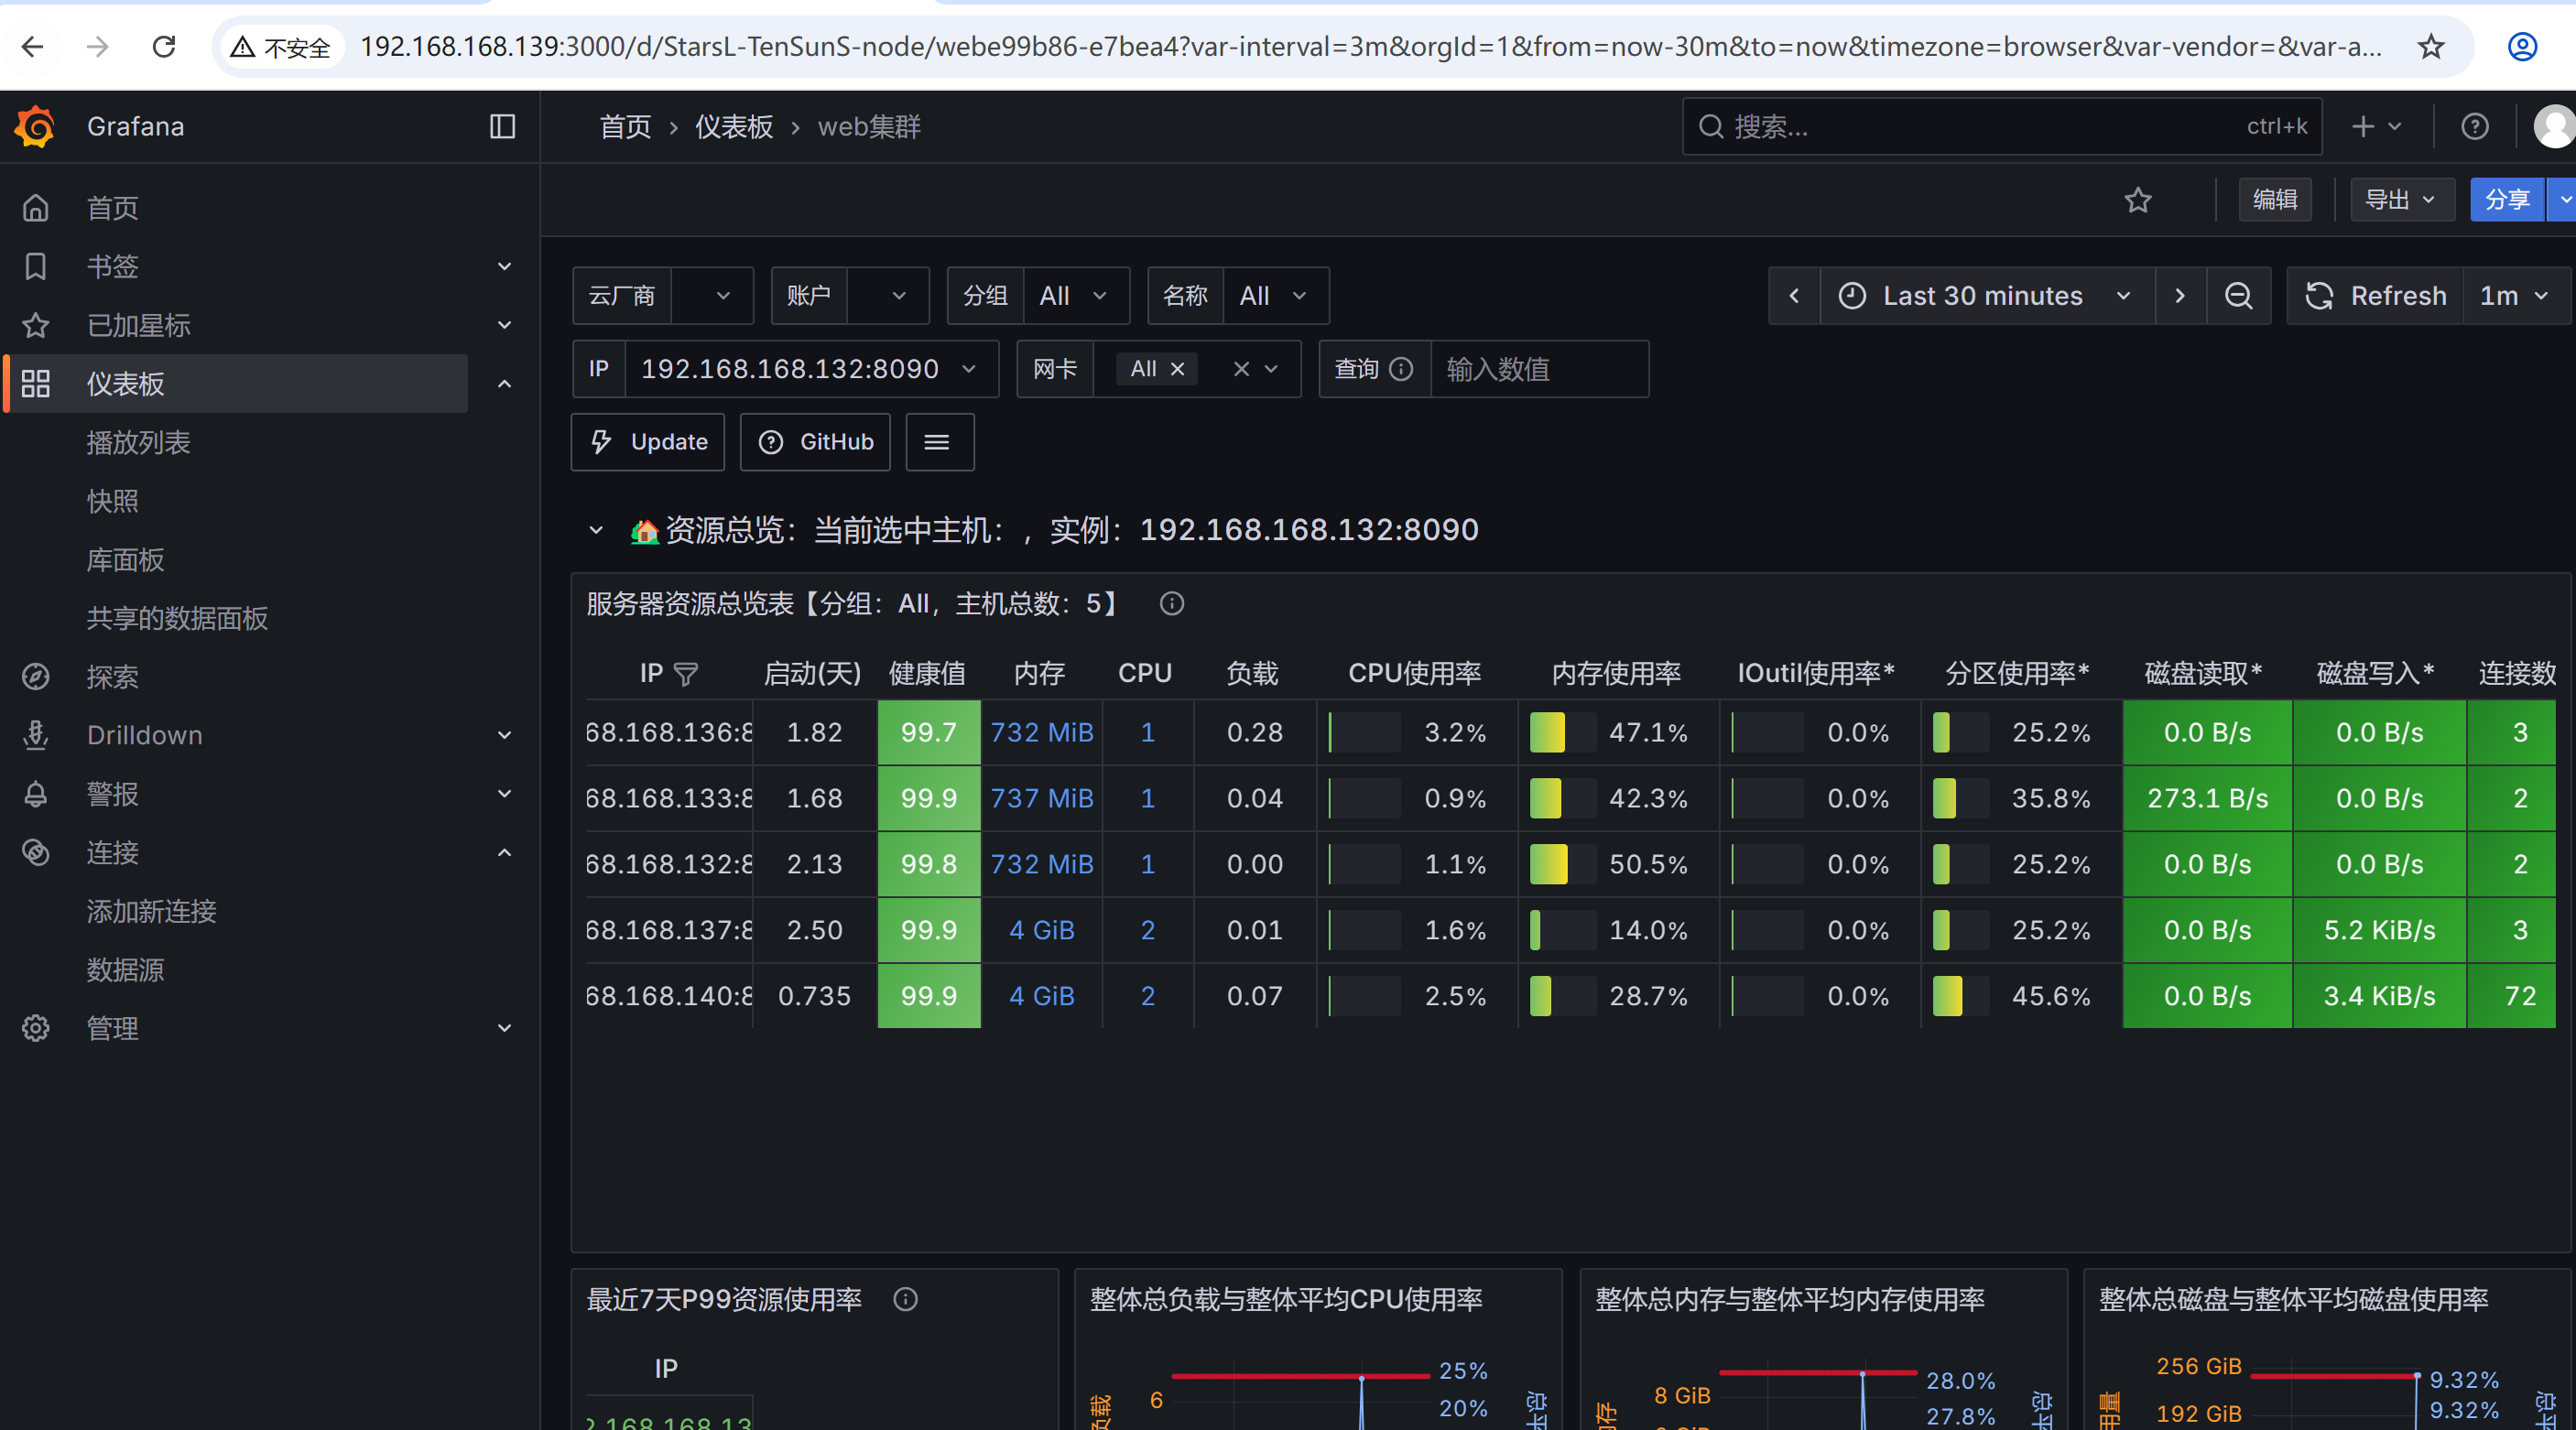
Grafana 中点击 Dashboards → Import,输入模板 ID,点击 Load
选择数据源(Prometheus),点击 Import,即可生成完整的监控仪表盘
效果图
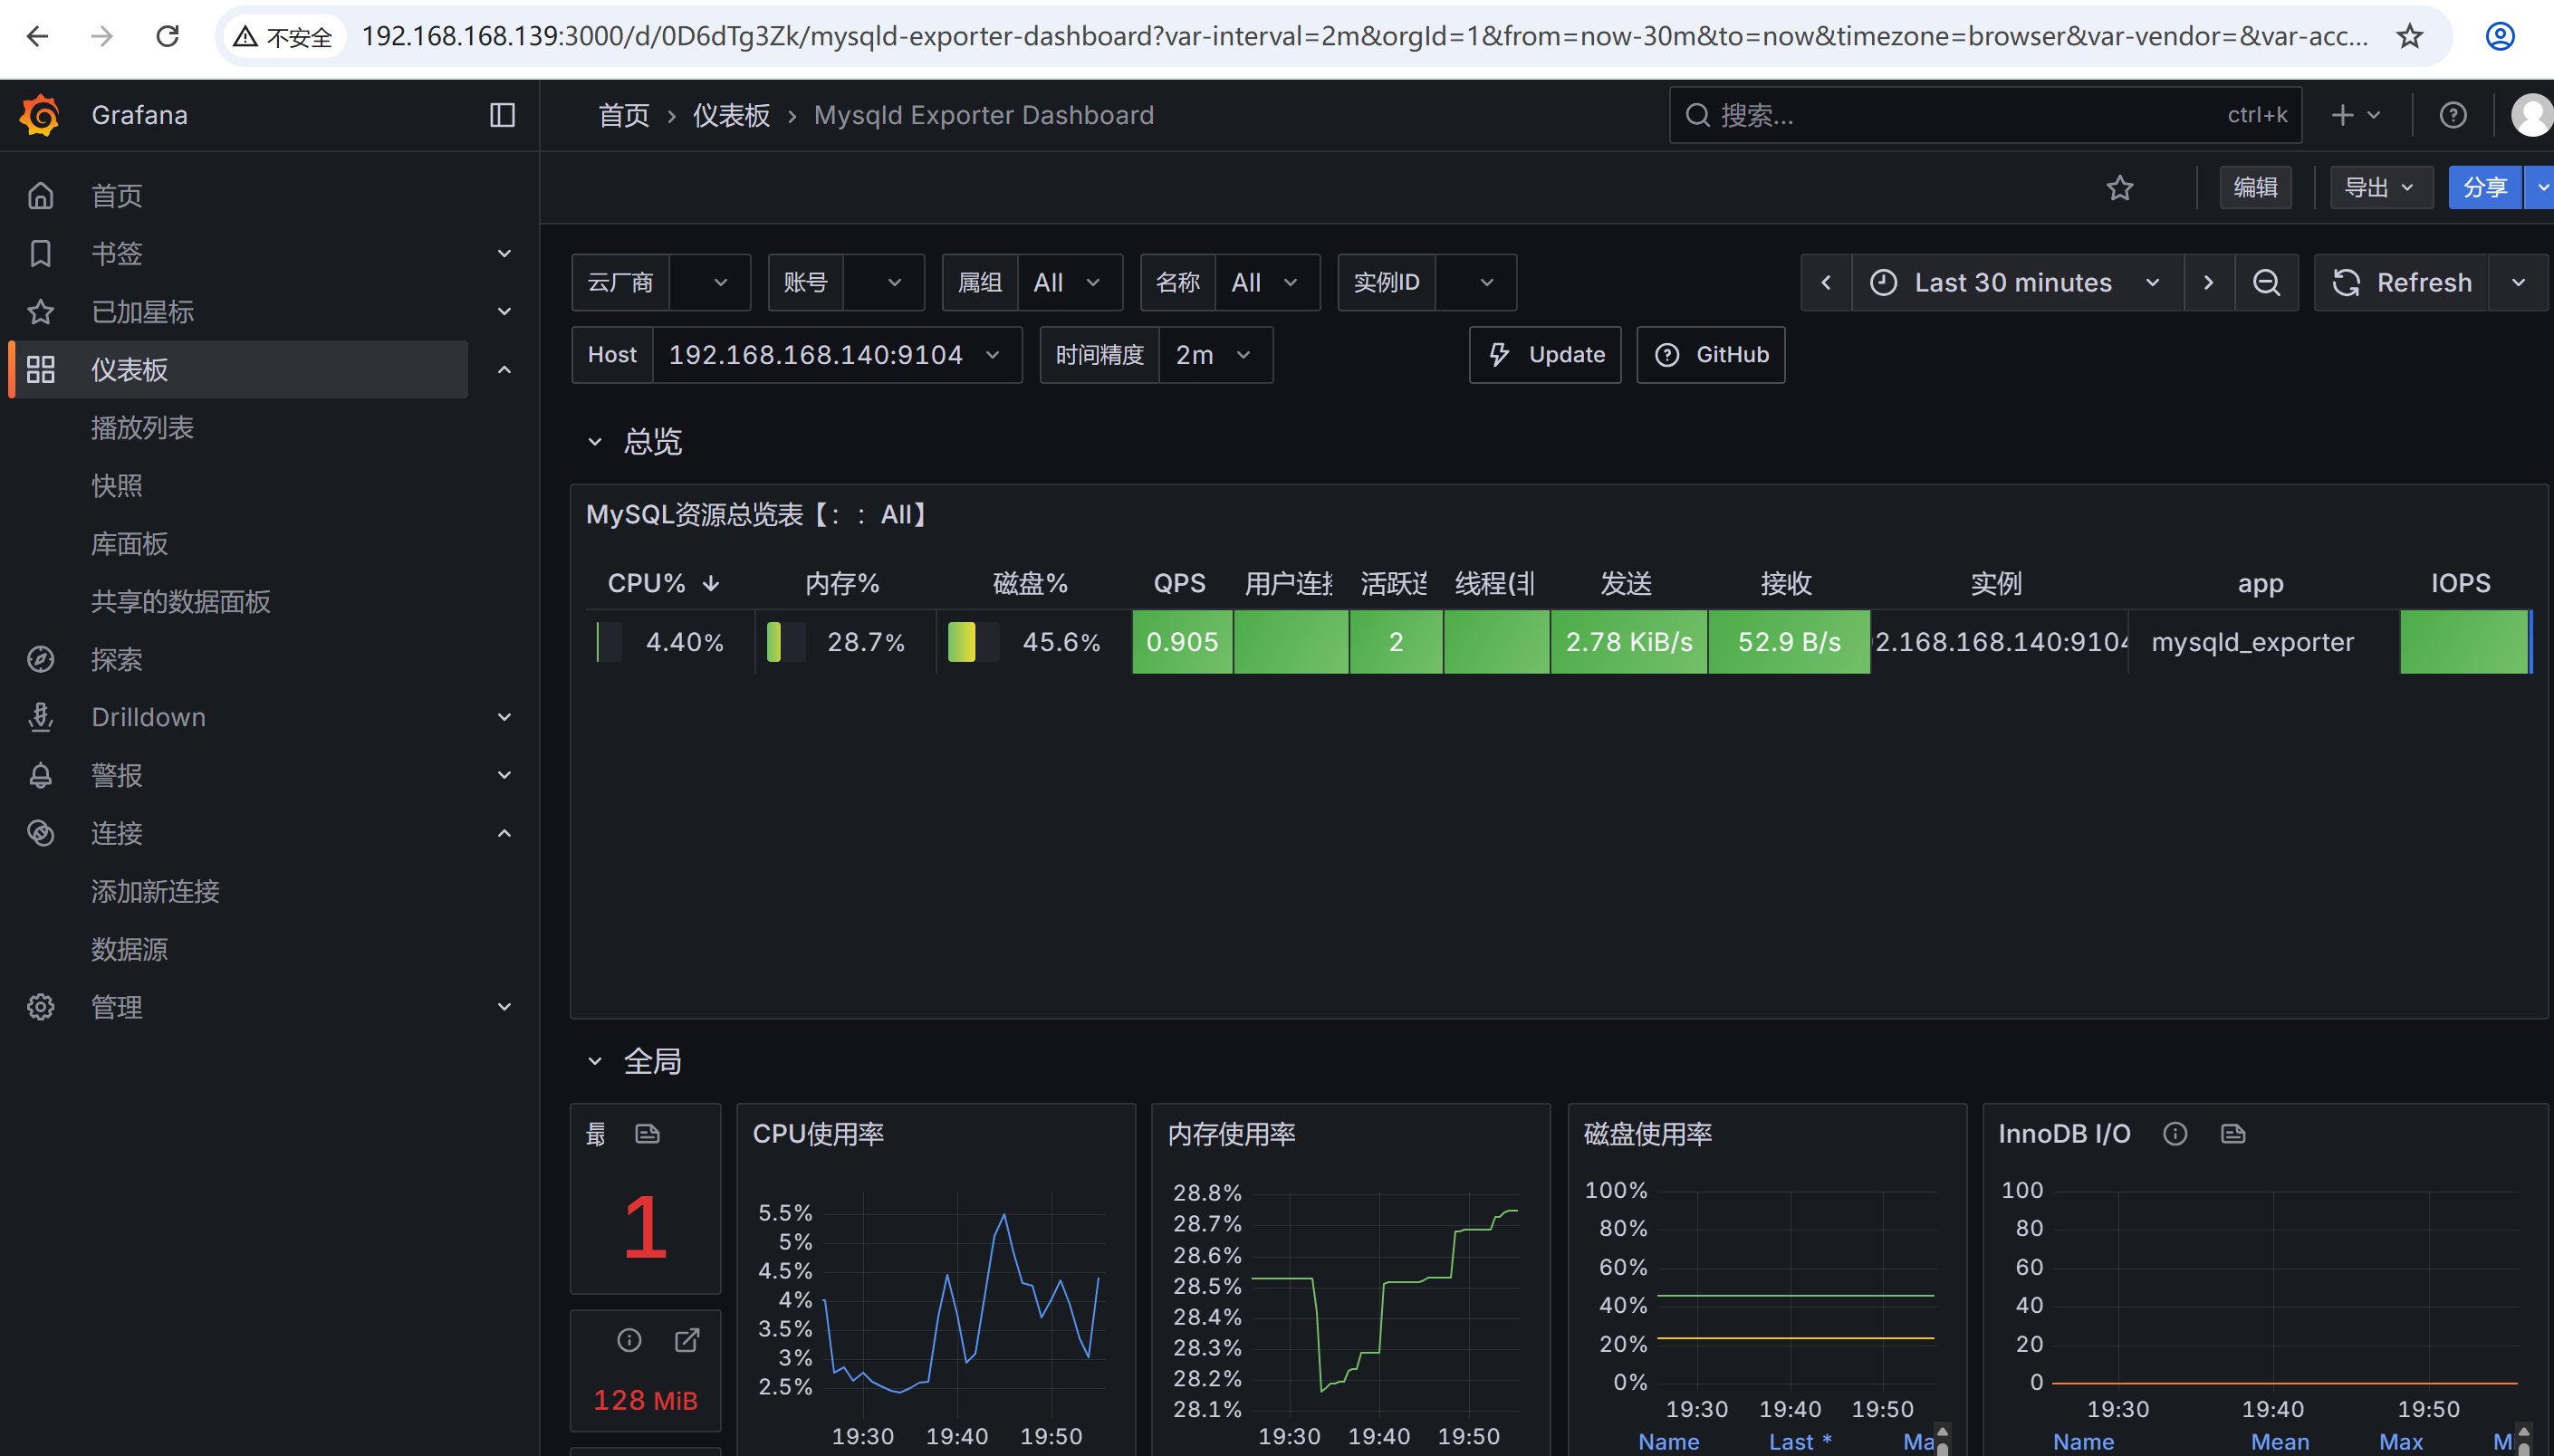
17320:Mysqld Exporter Dashboard CN 20221102-StarsL.cn
2.9 部署基于 BIND 的 DNS 服务器
为整个 Web 集群提供稳定的域名解析服务
bind是历史非常悠久,而且性能非常好的dns域名系统的软件
2.9.1 安装软件bind
[root@dns-server ~]# yum install bind bind-utils -y
启动named服务并设置named服务开机启动
[root@dns-server ~]# service named start
[root@dns-server ~]# systemctl enable named
查看进程
[root@dns-server ~]# ps aux|grep named
named      14903  0.1  0.9 294348 33448 ?        Ssl  11:40   0:00 /usr/sbin/named -u named -c /etc/named.conf
root       14913  0.0  0.0   6636  2304 pts/0    S+   11:40   0:00 grep --color=auto named
查看开放udp 53号端口
[root@dns-server ~]# netstat -anplut|grep named
tcp        0      0 127.0.0.1:53            0.0.0.0:*               LISTEN      14125/named
tcp        0      0 127.0.0.1:953           0.0.0.0:*               LISTEN      14125/named
tcp6       0      0 ::1:53                  :::*                    LISTEN      14125/named
tcp6       0      0 ::1:953                 :::*                    LISTEN      14125/named
udp        0      0 127.0.0.1:53            0.0.0.0:*                           14125/named
udp6       0      0 ::1:53                  :::*                                14125/named
客户机向dns服务器进行域名查询的时候,访问的是udp的53号端口
从域名服务器和主域名服务器之间复制数据的时候,访问tcp的53号端口
2.9.2 修改配置文件
允许其他电脑能过来查询dns域名
[root@dns-server ~]# vim /etc/named.conf
options {listen-on port 53 { any; };  # 修改listen-on-v6 port 53 { any; }; # 修改directory       "/var/named";dump-file       "/var/named/data/cache_dump.db";statistics-file "/var/named/data/named_stats.txt";memstatistics-file "/var/named/data/named_mem_stats.txt";recursing-file  "/var/named/data/named.recursing";secroots-file   "/var/named/data/named.secroots";allow-query     { any; };  # 修改
重新启动named服务
[root@dns-server ~]# service named restart
2.9.3 在其他机器上测试DNS服务器
修改网卡配置文件里的dns,增加dns服务器的ip地址
[root@web-1 ~]# cat /etc/NetworkManager/system-
[ipv4]
addresses1=192.168.168.136/24
dns=192.168.168.139;114.114.114.114
gateway=192.168.168.2
method=manual
修改/etc/resolv.conf里的dns服务器地址
[root@web-2 ~]# vim /etc/resolv.conf
# Generated by NetworkManager
nameserver 192.168.168.139
nameserver 114.114.114.114
使用nslooku命令进行dns域名查询的测试
[root@web-1 ~]# nslookup www.qq.com
Server:		192.168.168.139
Address:	192.168.168.139#53Non-authoritative answer:
www.qq.com	canonical name = ins-r23tsuuf.ias.tencent-cloud.net.
Name:	ins-r23tsuuf.ias.tencent-cloud.net
Address: 121.14.77.221
Name:	ins-r23tsuuf.ias.tencent-cloud.net
Address: 121.14.77.201
Name:	ins-r23tsuuf.ias.tencent-cloud.net
Address: 240e:97c:2f:1::5c
Name:	ins-r23tsuuf.ias.tencent-cloud.net
Address: 240e:97c:2f:2::4c
2.10 在 Web 服务器的 Nginx 中均部署 VTS 模块
以实时监测 Nginx 的访问状态、请求量及负载情况
2.10.1 上传vts模块包nginx-module-vts-master.zip到家目录下
下载与当前 Nginx 版本一致的源码和 VTS 模块源码
执行./configure时,在复制的原有参数后追加--add-module=path/nginx-module-vts
[root@web-2 ~]# vim install_nginx.sh
#!/bin/bash
set -e#下载nginx
mkdir  -p   /nginx9
cd  /nginx9
curl  -O  https://nginx.org/download/nginx-1.28.0.tar.gz
echo   "下载nginx成功"#解压nginx源码包
tar  xf  nginx-1.28.0.tar.gz
cd  nginx-1.28.0#解决nginx依赖的软件
yum  install gcc pcre-devel  openssl-devel zlib-devel  vim  net-tools unzip -y#解压vts模块包 nginx-module-vts-master.zip
cp /root/nginx-module-vts-master.zip .
unzip nginx-module-vts-master.zip#编译前的配置工作
./configure  --prefix=/usr/local/nginx9 --with-http_ssl_module
--with-http_v2_module --with-http_v3_module --with-http_stub_status_module
--with-stream --with-stream_ssl_module --with-threads
--add-module=/nginx9/nginx-1.28.0/nginx-module-vts-master#编译
make  -j  2
#编译安装
make  install#修改PATH环境变量
echo 'PATH=/usr/local/nginx9/sbin:$PATH' >> /etc/bashrc
echo "安装nginx成功,请使用nginx"#考虑nginx开机自启
echo  '/usr/local/nginx9/sbin/nginx' >>/etc/rc.local
chmod +x /etc/rc.d/rc.localsu
执行脚本
[root@web2 ~]# bash install_nginx.sh
如需给原来的nginx增加则需替换二进制文件,且参数要–prefix要一致,用objs/nginx替换sbin/nginx
目前有多个版本的nginx了,如何启动指定版本的nginx?
-> 使用绝对路径去启动nginx
/usr/local/nginx1/sbin/nginx
/usr/local/nginx1/sbin/nginx -s stop
/usr/local/nginx1/sbin/nginx -s reload
直接输入nginx会启动最新版本的nginx,因为PATH变量里的最左边的路径是最新的nginx的安装路径
[root@web2 sbin]# /usr/local/nginx1/sbin/nginx -s stop
[root@web2 sbin]# which nginx
/usr/local/nginx9/sbin/nginx
2.10.2 启动新的nginx
[root@web2 sbin]# nginx
[root@web2 sbin]# ps aux|grep nginx
root        5435  0.0  0.0  12220  2464 ?        Ss   16:35   0:00 nginx: master process nginx
sc          5436  0.0  0.1  16632  5536 ?        S    16:35   0:00 nginx: worker process
root        5438  0.0  0.0   6636  2176 pts/0    S+   16:35   0:00 grep --color=auto nginx
[root@web2 sbin]# nginx -V
nginx version: nginx/1.28.0
built by gcc 11.5.0 20240719 (Red Hat 11.5.0-5) (GCC)
built with OpenSSL 3.2.2 4 Jun 2024
TLS SNI support enabled
configure arguments: --prefix=/usr/local/nginx9 --user=sc --group=sc --with-http_ssl_module --with-http_v2_module --with-http_v3_module --with-http_stub_status_module --with-stream --with-stream_ssl_module --with-threads --add-module=/nginx9/nginx-1.28.0/nginx-module-vts-master
2.10.3 修改nginx.conf主配置文件,添加支持vts的功能
[root@web2 sbin]# cd /usr/local/nginx9/conf/
[root@web2 conf]# vim  nginx.conf
http {include       mime.types;default_type  application/octet-stream;log_format  main  '$remote_addr - $remote_user [$time_local] "$request" ''$status $body_bytes_sent "$http_referer" ''"$http_user_agent" "$http_x_forwarded_for"';#添加vts功能的配置vhost_traffic_status_zone;vhost_traffic_status_filter_by_host on;access_log  logs/access.log  main;sendfile        on;#tcp_nopush     on;#keepalive_timeout  0;keepalive_timeout  65;#gzip  on;server {listen       80;server_name  www.feng.com;#charset koi8-r;access_log  logs/feng.com.access.log  main;location / {root   html;index  index.html index.htm;}#添加vts功能的配置location /status {vhost_traffic_status_display;vhost_traffic_status_display_format html;	}}..... 省略部分配置
刷新配置
[root@web2 conf]# nginx -t
nginx: the configuration file /usr/local/nginx9/conf/nginx.conf syntax is ok
nginx: configuration file /usr/local/nginx9/conf/nginx.conf test is successful
[root@web2 conf]# nginx -s reload
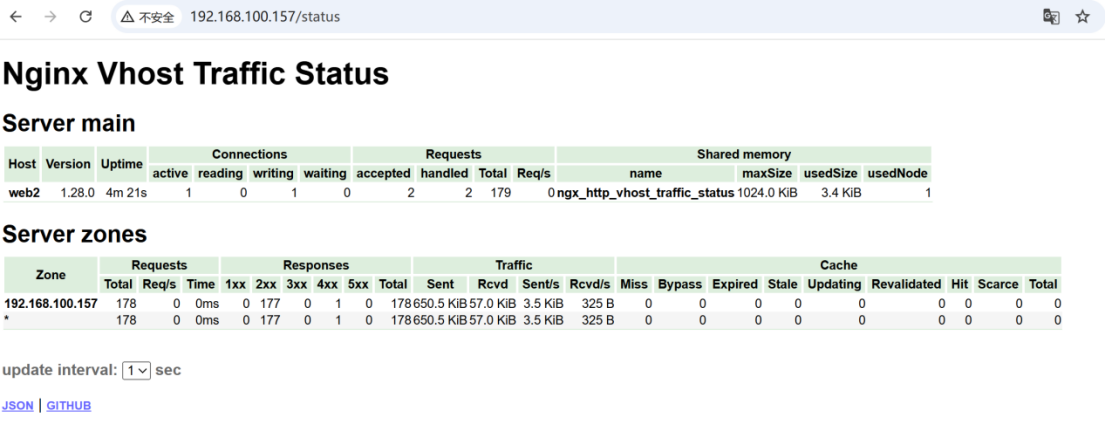
最后去访问web服务器
访问效果
2.11 部署 Nginx 负载均衡器
采用 7 层负载均衡架构,搭配轮询调度算法,实现 Web 访问请求的均衡分发
在负载均衡器上加载upstream配置
默认是轮询调度
# http块中添加
http {upstream myweb1 {#ip_hash;#least_conn;#server 192.168.168.136 weight=3;server 192.168.168.136;	server 192.168.168.137;}server {# server块中添加location / {#root   html;#index  index.html index.htm;# 转发给负载均衡器proxy_pass http://myweb1;}}
}
2.12 整合 Keepalived 与 Nginx
使用 7 层 Nginx 负载均衡,实现支持单 VIP 与双 VIP 两种模式的高可用负载均衡能力,避免单点故障
2.12.1 部署和配置keepalived
在LB1和LB2上安装部署keepalived软件
yum install keepalived -y
启动并且设置开机自启
systemctl start keepalived
systemctl enable keepalived
2.12.2 keepalived.conf配置文件的解析
[root@lb1 ~]# cd /etc/keepalived/
[root@lb1 keepalived]# ls
keepalived.conf
[root@lb1 keepalived]#  vim keepalived.conf
# 负载均衡器LB1上的配置#vrrp_strict  注释掉,遵守最严格的vrrp协议# 实现高可用的配置
# 启动一个vrrp的实例 VI_1 实例名,可以自定义,一个实例背后就是一个keepalived相关的进程提供服务,我们给进程传递参数。
vrrp_instance VI_1 {       state MASTER        # 角色是masterinterface ens33     # 在哪个接口上监听vrrp协议,同时绑定vip到那个接口virtual_router_id 80 # 虚拟路由id(帮派) 0~255范围priority 120    # 优先级  0~255advert_int 1  # advert interval 宣告消息 时间间隔 1秒authentication {   auth_type PASS   # 认证的类型是密码认证auth_pass 123456  # 具体的密码,可以修改}# vip的配置,vip可以是多个ip,也可以是一个vipvirtual_ipaddress {   192.168.168.180}
}[root@lb2 keepalived]# vim keepalived.conf
# 负载均衡器LB2上的配置#  vrrp_strictvrrp_instance VI_1 {state BACKUPinterface ens33virtual_router_id 80priority 100advert_int 1authentication {auth_type PASSauth_pass 123456}virtual_ipaddress {192.168.168.180}
}
2.12.3 查看vip地址在LB1上
[root@lb1 ~]# ip add
1: lo: <LOOPBACK,UP,LOWER_UP> mtu 65536 qdisc noqueue state UNKNOWN group default qlen 1000link/loopback 00:00:00:00:00:00 brd 00:00:00:00:00:00inet 127.0.0.1/8 scope host lovalid_lft forever preferred_lft foreverinet6 ::1/128 scope host valid_lft forever preferred_lft forever
2: ens33: <BROADCAST,MULTICAST,UP,LOWER_UP> mtu 1500 qdisc fq_codel state UP group default qlen 1000link/ether 00:0c:29:25:d8:36 brd ff:ff:ff:ff:ff:ffaltname enp2s1inet 192.168.168.132/24 brd 192.168.168.255 scope global noprefixroute ens33valid_lft forever preferred_lft foreverinet 192.168.168.180/32 scope global ens33valid_lft forever preferred_lft foreverinet6 fe80::20c:29ff:fe25:d836/64 scope link noprefixroute valid_lft forever preferred_lft forever
vip绑定到LB1的ens33网卡,就使用这块网卡的mac地址
然后可以正常访问192.168.168.180
2.12.4 双vip架构
keepalived的架构:
- 单vip 架构: 只有master上有vip,backup上没有vip,这个时候master会比较忙,backup机器会比较闲,设备使用率比较低
- 双vip 架构: 启动2个vrrp实例,每台机器上都启用2个vrrp实例,一个做master,一个做backup,启用2个vip,每台机器上都会有一个vip,这2个vip都对外提供服务,这样就可以避免单vip的情况下,一个很忙一个很闲。 可以提升设备的使用率
在每个机器上启用2个vrrp实例
[root@lb1 keepalived]# vim keepalived.conf
vrrp_instance VI_1 {state MASTERinterface ens33virtual_router_id 60priority 100advert_int 1authentication {auth_type PASSauth_pass 123456}virtual_ipaddress {192.168.168.180}
}vrrp_instance VI_2 {state BACKUPinterface ens33virtual_router_id 70priority 120advert_int 1authentication {auth_type PASSauth_pass 123456}virtual_ipaddress {192.168.168.190}
}
第2台机器上的配置
[root@lb2 keepalived]# vim keepalived.conf
vrrp_instance VI_1 {state BACKUPinterface ens33virtual_router_id 60priority 120advert_int 1authentication {auth_type PASSauth_pass 123456}virtual_ipaddress {192.168.168.180}
}vrrp_instance VI_2 {state MASTERinterface ens33virtual_router_id 70priority 100advert_int 1authentication {auth_type PASSauth_pass 123456}virtual_ipaddress {192.168.168.190}
}
180和190都能正常访问
2.12.5 验证一下vip漂移,停止一台keepalived服务查看
[root@lb2 keepalived]# service keepalived stop
Redirecting to /bin/systemctl stop keepalived.service
[root@LB-1 keepalived]# ip add
1: lo: <LOOPBACK,UP,LOWER_UP> mtu 65536 qdisc noqueue state UNKNOWN group default qlen 1000link/loopback 00:00:00:00:00:00 brd 00:00:00:00:00:00inet 127.0.0.1/8 scope host lovalid_lft forever preferred_lft foreverinet6 ::1/128 scope host valid_lft forever preferred_lft forever
2: ens33: <BROADCAST,MULTICAST,UP,LOWER_UP> mtu 1500 qdisc fq_codel state UP group default qlen 1000link/ether 00:0c:29:25:d8:36 brd ff:ff:ff:ff:ff:ffaltname enp2s1inet 192.168.168.132/24 brd 192.168.168.255 scope global noprefixroute ens33valid_lft forever preferred_lft foreverinet 192.168.168.180/32 scope global ens33valid_lft forever preferred_lft foreverinet 192.168.168.190/32 scope global ens33valid_lft forever preferred_lft foreverinet6 fe80::20c:29ff:fe76:a68/64 scope link noprefixroute valid_lft forever preferred_lft forever
2.13 使用压力测试软件(ab)开展集群综合压力测试
验证整体服务性能与稳定性
2.13.1 安装
在别的机器上安装ab软件,进行测试
[root@web-1 ~]# yum install httpd-tools -y
ab的常见选项
-n:总请求数(例如 -n 1000 表示发送 1000 个请求)
-n requests Number of requests to perform
-c:并发数(例如 -c 10 表示同时发送 10 个请求)
-c concurrency Number of multiple requests to make at a time
报告里的重要数据
Requests per second: 859.94 [#/sec] (mean)
Time per request: 116.288 [ms] (mean)
Time per request: 1.163 [ms] (mean, across all concurrent requests)
2.13.2 测试
逐渐增大连接,看是否有失败的请求
[root@web-1 ~]# ab -n 1000 -c 10 http://192.168.168.137/
This is ApacheBench, Version 2.3 <$Revision: 1913912 $>
Copyright 1996 Adam Twiss, Zeus Technology Ltd, http://www.zeustech.net/
Licensed to The Apache Software Foundation, http://www.apache.org/Benchmarking 192.168.168.137 (be patient)
Completed 100 requests
Completed 200 requests
Completed 300 requests
Completed 400 requests
Completed 500 requests
Completed 600 requests
Completed 700 requests
Completed 800 requests
Completed 900 requests
Completed 1000 requests
Finished 1000 requestsServer Software:        nginx/1.28.0
Server Hostname:        192.168.168.137
Server Port:            80Document Path:          /
Document Length:        615 bytesConcurrency Level:      10
Time taken for tests:   0.192 seconds
Complete requests:      1000
Failed requests:        0
Total transferred:      848000 bytes
HTML transferred:       615000 bytes
Requests per second:    5197.40 [#/sec] (mean)
Time per request:       1.924 [ms] (mean)
Time per request:       0.192 [ms] (mean, across all concurrent requests)
Transfer rate:          4304.09 [Kbytes/sec] receivedConnection Times (ms)min  mean[+/-sd] median   max
Connect:        0    1   0.7      1       4
Processing:     0    1   1.8      1      41
Waiting:        0    1   1.2      1      29
Total:          1    2   2.1      1      42Percentage of the requests served within a certain time (ms)50%      166%      175%      280%      290%      495%      598%      799%      8100%     42 (longest request)
当请求数为10000,并发数为1850已经有失败的请求了,说明服务器在该并发下未达到 “零失败稳定状态”。需要进一步缩小范围,找到真正的 “安全极限”,同时可结合配置优化排除潜在瓶颈
[root@web-1 ~]# ab -n 10000 -c 1850 http://192.168.168.137/
This is ApacheBench, Version 2.3 <$Revision: 1913912 $>
Copyright 1996 Adam Twiss, Zeus Technology Ltd, http://www.zeustech.net/
Licensed to The Apache Software Foundation, http://www.apache.org/Benchmarking 192.168.168.137 (be patient)
Completed 1000 requests
Completed 2000 requests
Completed 3000 requests
Completed 4000 requests
Completed 5000 requests
Completed 6000 requests
Completed 7000 requests
Completed 8000 requests
Completed 9000 requests
Completed 10000 requests
Finished 10000 requestsServer Software:        nginx/1.28.0
Server Hostname:        192.168.168.137
Server Port:            80Document Path:          /
Document Length:        615 bytesConcurrency Level:      1850
Time taken for tests:   4.403 seconds
Complete requests:      10000
Failed requests:        2(Connect: 0, Receive: 0, Length: 2, Exceptions: 0)
Non-2xx responses:      2
Total transferred:      8478982 bytes
HTML transferred:       6149124 bytes
Requests per second:    2271.41 [#/sec] (mean)
Time per request:       814.472 [ms] (mean)
Time per request:       0.440 [ms] (mean, across all concurrent requests)
Transfer rate:          1880.79 [Kbytes/sec] receivedConnection Times (ms)min  mean[+/-sd] median   max
Connect:        1  367  43.3    374     443
Processing:    74  386  79.7    408     463
Waiting:        1  179 100.0    173     457
Total:        246  752  84.7    782     830Percentage of the requests served within a certain time (ms)50%    78266%    79175%    79580%    79990%    81995%    82198%    82499%    827100%    830 (longest request)
从 1800 并发的测试结果来看,服务器已达到零失败的稳定状态(Failed requests: 0),且核心性能指标(吞吐量、响应时间)表现平稳。这说明 1800 并发是当前硬件和 Nginx 配置下的实用稳定极限(即可靠承载的最大并发量)
[root@web-1 ~]# ab -n 10000 -c 1800 http://192.168.168.137/
This is ApacheBench, Version 2.3 <$Revision: 1913912 $>
Copyright 1996 Adam Twiss, Zeus Technology Ltd, http://www.zeustech.net/
Licensed to The Apache Software Foundation, http://www.apache.org/Benchmarking 192.168.168.137 (be patient)
Completed 1000 requests
Completed 2000 requests
Completed 3000 requests
Completed 4000 requests
Completed 5000 requests
Completed 6000 requests
Completed 7000 requests
Completed 8000 requests
Completed 9000 requests
Completed 10000 requests
Finished 10000 requestsServer Software:        nginx/1.28.0
Server Hostname:        192.168.168.137
Server Port:            80Document Path:          /
Document Length:        615 bytesConcurrency Level:      1800
Time taken for tests:   4.339 seconds
Complete requests:      10000
Failed requests:        0
Total transferred:      8480000 bytes
HTML transferred:       6150000 bytes
Requests per second:    2304.84 [#/sec] (mean)
Time per request:       780.966 [ms] (mean)
Time per request:       0.434 [ms] (mean, across all concurrent requests)
Transfer rate:          1908.69 [Kbytes/sec] receivedConnection Times (ms)min  mean[+/-sd] median   max
Connect:        0  351  42.6    355     453
Processing:   128  369  72.8    386     470
Waiting:        0  162  91.9    155     467
Total:        246  720  72.3    739     815Percentage of the requests served within a certain time (ms)50%    73966%    76175%    77580%    77990%    79195%    79598%    80299%    810100%    815 (longest request)
最终确定服务器稳定并发上限为 1800(10000 请求零失败,平均响应时间 0.78s,99% 请求延迟≤0.81s),吞吐量达 2304 请求 / 秒
三、项目心得
1.对 Linux 系统各类服务的应用场景与整合逻辑更加熟悉,实操过程中服务配置与协同能力显著提升,对整个集群有了一定的认知,对监控部署、压力测试有了了解,对负载均衡和高可用有了深入的了解
2.故障排除的能力得到了提升,实战化的故障定位与排查能力得到有效锻炼