【学习K230-例程43】GT6700-AI视觉-人体关键点检测
B站视频
人体关键点检测
人体关键点检测(Human Keypoints Detection)又称为人体姿态估计,是计算机视觉中一个相对基础的任务,是人体动作识别、行为分析、人机交互等的前置任务。一般情况下可以将人体关键点检测细分为单人/多人关键点检测、2D/3D关键点检测,同时有算法在完成关键点检测之后还会进行关键点的跟踪,也被称为人体姿态跟踪。
人体关键点检测技术广泛应用于多个领域,包括:
运动分析:用于分析运动员的动作和姿态,帮助提高运动表现。
健康监测:用于监测老年人或病人的活动状态,提供健康管理支持。
人机交互:在虚拟现实和增强现实中,通过识别用户的姿态实现更自然的交互体验。
娱乐互动:在游戏和动画制作中,通过捕捉用户的动作来增强互动性。
代码展示
from libs.PipeLine import PipeLine, ScopedTiming        #导入PipeLine, ScopedTiming模块
from libs.AIBase import AIBase                          #导入AIBase模块
from libs.AI2D import Ai2d                              #导入Ai2d模块
from media.media import *                               #导入media模块
from time import *                                      #导入time模块
import nncase_runtime as nn                             #导入nncase_runtime模块
import ulab.numpy as np                                 #导入numpy模块
import time, os, gc, sys, ujson                         #导入time, os, gc, sys, ujson模块
import image, aidemo, random, utime                     #导入image, aidemo, random, utime模块#自定义人体关键点检测类
class PersonKeyPointApp(AIBase):def __init__(self,kmodel_path,model_input_size,confidence_threshold=0.2,nms_threshold=0.5,rgb888p_size=[1280,720],display_size=[1920,1080],debug_mode=0):super().__init__(kmodel_path,model_input_size,rgb888p_size,debug_mode)self.kmodel_path=kmodel_pathself.model_input_size=model_input_size          #模型输入分辨率self.confidence_threshold=confidence_threshold  #置信度阈值设置self.nms_threshold=nms_threshold                #nms阈值设置self.rgb888p_size=[ALIGN_UP(rgb888p_size[0],16),#sensor给到AI的图像分辨率rgb888p_size[1]]self.display_size=[ALIGN_UP(display_size[0],16),#显示分辨率display_size[1]]self.debug_mode=debug_modeself.SKELETON = [(16, 14),(14, 12),(17, 15),    #骨骼信息(15, 13),(12, 13),(6,  12),(7,  13),(6,  7),(6,  8),(7,  9),(8,  10),(9,  11),(2,  3),(1,  2),(1,  3),(2,  4),(3,  5),(4,  6),(5,  7)]self.LIMB_COLORS = [(255, 51,  153, 255),       #肢体颜色(255, 51,  153, 255),(255, 51,  153, 255),(255, 51,  153, 255),(255, 255, 51,  255),(255, 255, 51,  255),(255, 255, 51,  255),(255, 255, 128, 0),(255, 255, 128, 0),(255, 255, 128, 0),(255, 255, 128, 0),(255, 255, 128, 0),(255, 0,   255, 0),(255, 0,   255, 0),(255, 0,   255, 0),(255, 0,   255, 0),(255, 0,   255, 0),(255, 0,   255, 0),(255, 0,   255, 0)]self.KPS_COLORS = [(255, 0,   255, 0),          #关键点颜色,共17个(255, 0,   255, 0),(255, 0,   255, 0),(255, 0,   255, 0),(255, 0,   255, 0),(255, 255, 128, 0),(255, 255, 128, 0),(255, 255, 128, 0),(255, 255, 128, 0),(255, 255, 128, 0),(255, 255, 128, 0),(255, 51,  153, 255),(255, 51,  153, 255),(255, 51,  153, 255),(255, 51,  153, 255),(255, 51,  153, 255),(255, 51,  153, 255)]self.ai2d=Ai2d(debug_mode)                      #Ai2d实例,用于实现模型预处理self.ai2d.set_ai2d_dtype(nn.ai2d_format.NCHW_FMT,#设置Ai2d的输入输出格式和类型nn.ai2d_format.NCHW_FMT,np.uint8, np.uint8)#配置预处理操作,这里使用了pad和resize,Ai2d支持crop/shift/pad/resize/affine,具体代码请打开/sdcard/app/libs/AI2D.py查看def config_preprocess(self,input_image_size=None):with ScopedTiming("set preprocess config",self.debug_mode > 0):#初始化ai2d预处理配置,默认为sensor给到AI的尺寸,您可以通过设置input_image_size自行修改输入尺寸ai2d_input_size=input_image_size if input_image_size else self.rgb888p_sizetop,bottom,left,right=self.get_padding_param()self.ai2d.pad([0,0,0,0,top,bottom,left,right], 0, [0,0,0])self.ai2d.resize(nn.interp_method.tf_bilinear, nn.interp_mode.half_pixel)self.ai2d.build([1,3,ai2d_input_size[1],ai2d_input_size[0]],[1,3,self.model_input_size[1],self.model_input_size[0]])#自定义当前任务的后处理def postprocess(self,results):with ScopedTiming("postprocess",self.debug_mode > 0):#这里使用了aidemo库的person_kp_postprocess接口results = aidemo.person_kp_postprocess(results[0],[self.rgb888p_size[1],self.rgb888p_size[0]],self.model_input_size,self.confidence_threshold,self.nms_threshold)return results#绘制结果,绘制人体关键点def draw_result(self,pl,res):with ScopedTiming("display_draw",self.debug_mode >0):if res[0]:pl.osd_img.clear()kpses = res[1]for i in range(len(res[0])):for k in range(17+2):if (k < 17):kps_x,kps_y,kps_s = round(kpses[i][k][0]),round(kpses[i][k][1]),kpses[i][k][2]kps_x1 = int(float(kps_x) * self.display_size[0] // self.rgb888p_size[0])kps_y1 = int(float(kps_y) * self.display_size[1] // self.rgb888p_size[1])if (kps_s > 0):pl.osd_img.draw_circle(kps_x1,kps_y1,5,self.KPS_COLORS[k],4)ske = self.SKELETON[k]pos1_x,pos1_y= round(kpses[i][ske[0]-1][0]),round(kpses[i][ske[0]-1][1])pos1_x_ = int(float(pos1_x) * self.display_size[0] // self.rgb888p_size[0])pos1_y_ = int(float(pos1_y) * self.display_size[1] // self.rgb888p_size[1])pos2_x,pos2_y = round(kpses[i][(ske[1] -1)][0]),round(kpses[i][(ske[1] -1)][1])pos2_x_ = int(float(pos2_x) * self.display_size[0] // self.rgb888p_size[0])pos2_y_ = int(float(pos2_y) * self.display_size[1] // self.rgb888p_size[1])pos1_s,pos2_s = kpses[i][(ske[0] -1)][2],kpses[i][(ske[1] -1)][2]if (pos1_s > 0.0 and pos2_s >0.0):pl.osd_img.draw_line(pos1_x_,pos1_y_,pos2_x_,pos2_y_,self.LIMB_COLORS[k],4)gc.collect()else:pl.osd_img.clear()#计算padding参数def get_padding_param(self):dst_w = self.model_input_size[0]dst_h = self.model_input_size[1]input_width = self.rgb888p_size[0]input_high = self.rgb888p_size[1]ratio_w = dst_w / input_widthratio_h = dst_h / input_highif ratio_w < ratio_h:ratio = ratio_welse:ratio = ratio_hnew_w = (int)(ratio * input_width)new_h = (int)(ratio * input_high)dw = (dst_w - new_w) / 2dh = (dst_h - new_h) / 2top = int(round(dh - 0.1))bottom = int(round(dh + 0.1))left = int(round(dw - 0.1))right = int(round(dw - 0.1))return  top, bottom, left, rightif __name__=="__main__":display_mode="lcd"                                      #显示模式,可以选择"hdmi"和"lcd"rgb888p_size = [1920, 1080]if display_mode=="hdmi":display_size=[1920,1080]else:display_size=[800,480]kmodel_path="/sdcard/examples/kmodel/yolov8n-pose.kmodel"#模型路径confidence_threshold = 0.2                              #其它参数设置nms_threshold = 0.5pl=PipeLine(rgb888p_size=rgb888p_size,                  #初始化PipeLinedisplay_size=display_size,display_mode=display_mode)pl.create()#初始化自定义人体关键点检测实例person_kp=PersonKeyPointApp(kmodel_path,model_input_size=[320,320],confidence_threshold=confidence_threshold,nms_threshold=nms_threshold,rgb888p_size=rgb888p_size,display_size=display_size,debug_mode=0)person_kp.config_preprocess()try:while True:os.exitpoint()with ScopedTiming("total",1):img=pl.get_frame()              #获取当前帧数据res=person_kp.run(img)          #推理当前帧person_kp.draw_result(pl,res)   #绘制结果到PipeLine的osd图像pl.show_image()                 #显示当前的绘制结果gc.collect()except Exception as e:sys.print_exception(e)finally:person_kp.deinit()pl.destroy()
代码讲解
- 采集图像:从摄像头获得原始图像。
- 预处理:对图像进行resize、pad、normalize等操作,让输入满足模型的格式要求。
- 模型推理:将图像输入到训练好的人体关键点检测模型(本例程里面是“yolov8n-pose”)得到模型输出。
- 后处理:根据模型输出获取关键点坐标、得分等信息。
- 可视化:将检测到的关键点和人体骨架连线画到屏幕或图像上,方便调试或演示。
PersonKeyPointApp类:定义了骨骼连线SKELETON与颜色LIMB_COLORS,指定关键点直接连线。KPS_COLORS是每个关键点的颜色,用于区分。
draw_result()结果的展现:res[0]表示是否存在检测到的人体,若不存在,就直接清空图像。kpses = res[1]里面存放了当前帧所有检测到的人体关键点坐标与置信度,每个人对应一个17关键点的列表。
效果展示
运行代码将下图对准摄像头进行人体关键点检测

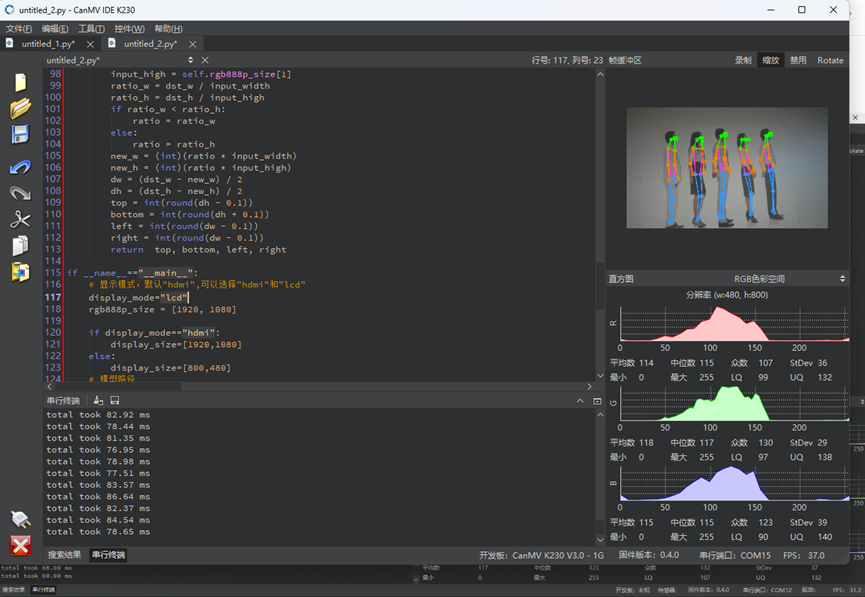
识别结果:
【学习k230 - 例程43】人体关键点检测