【项目】基于Spring全家桶的论坛系统 【下】
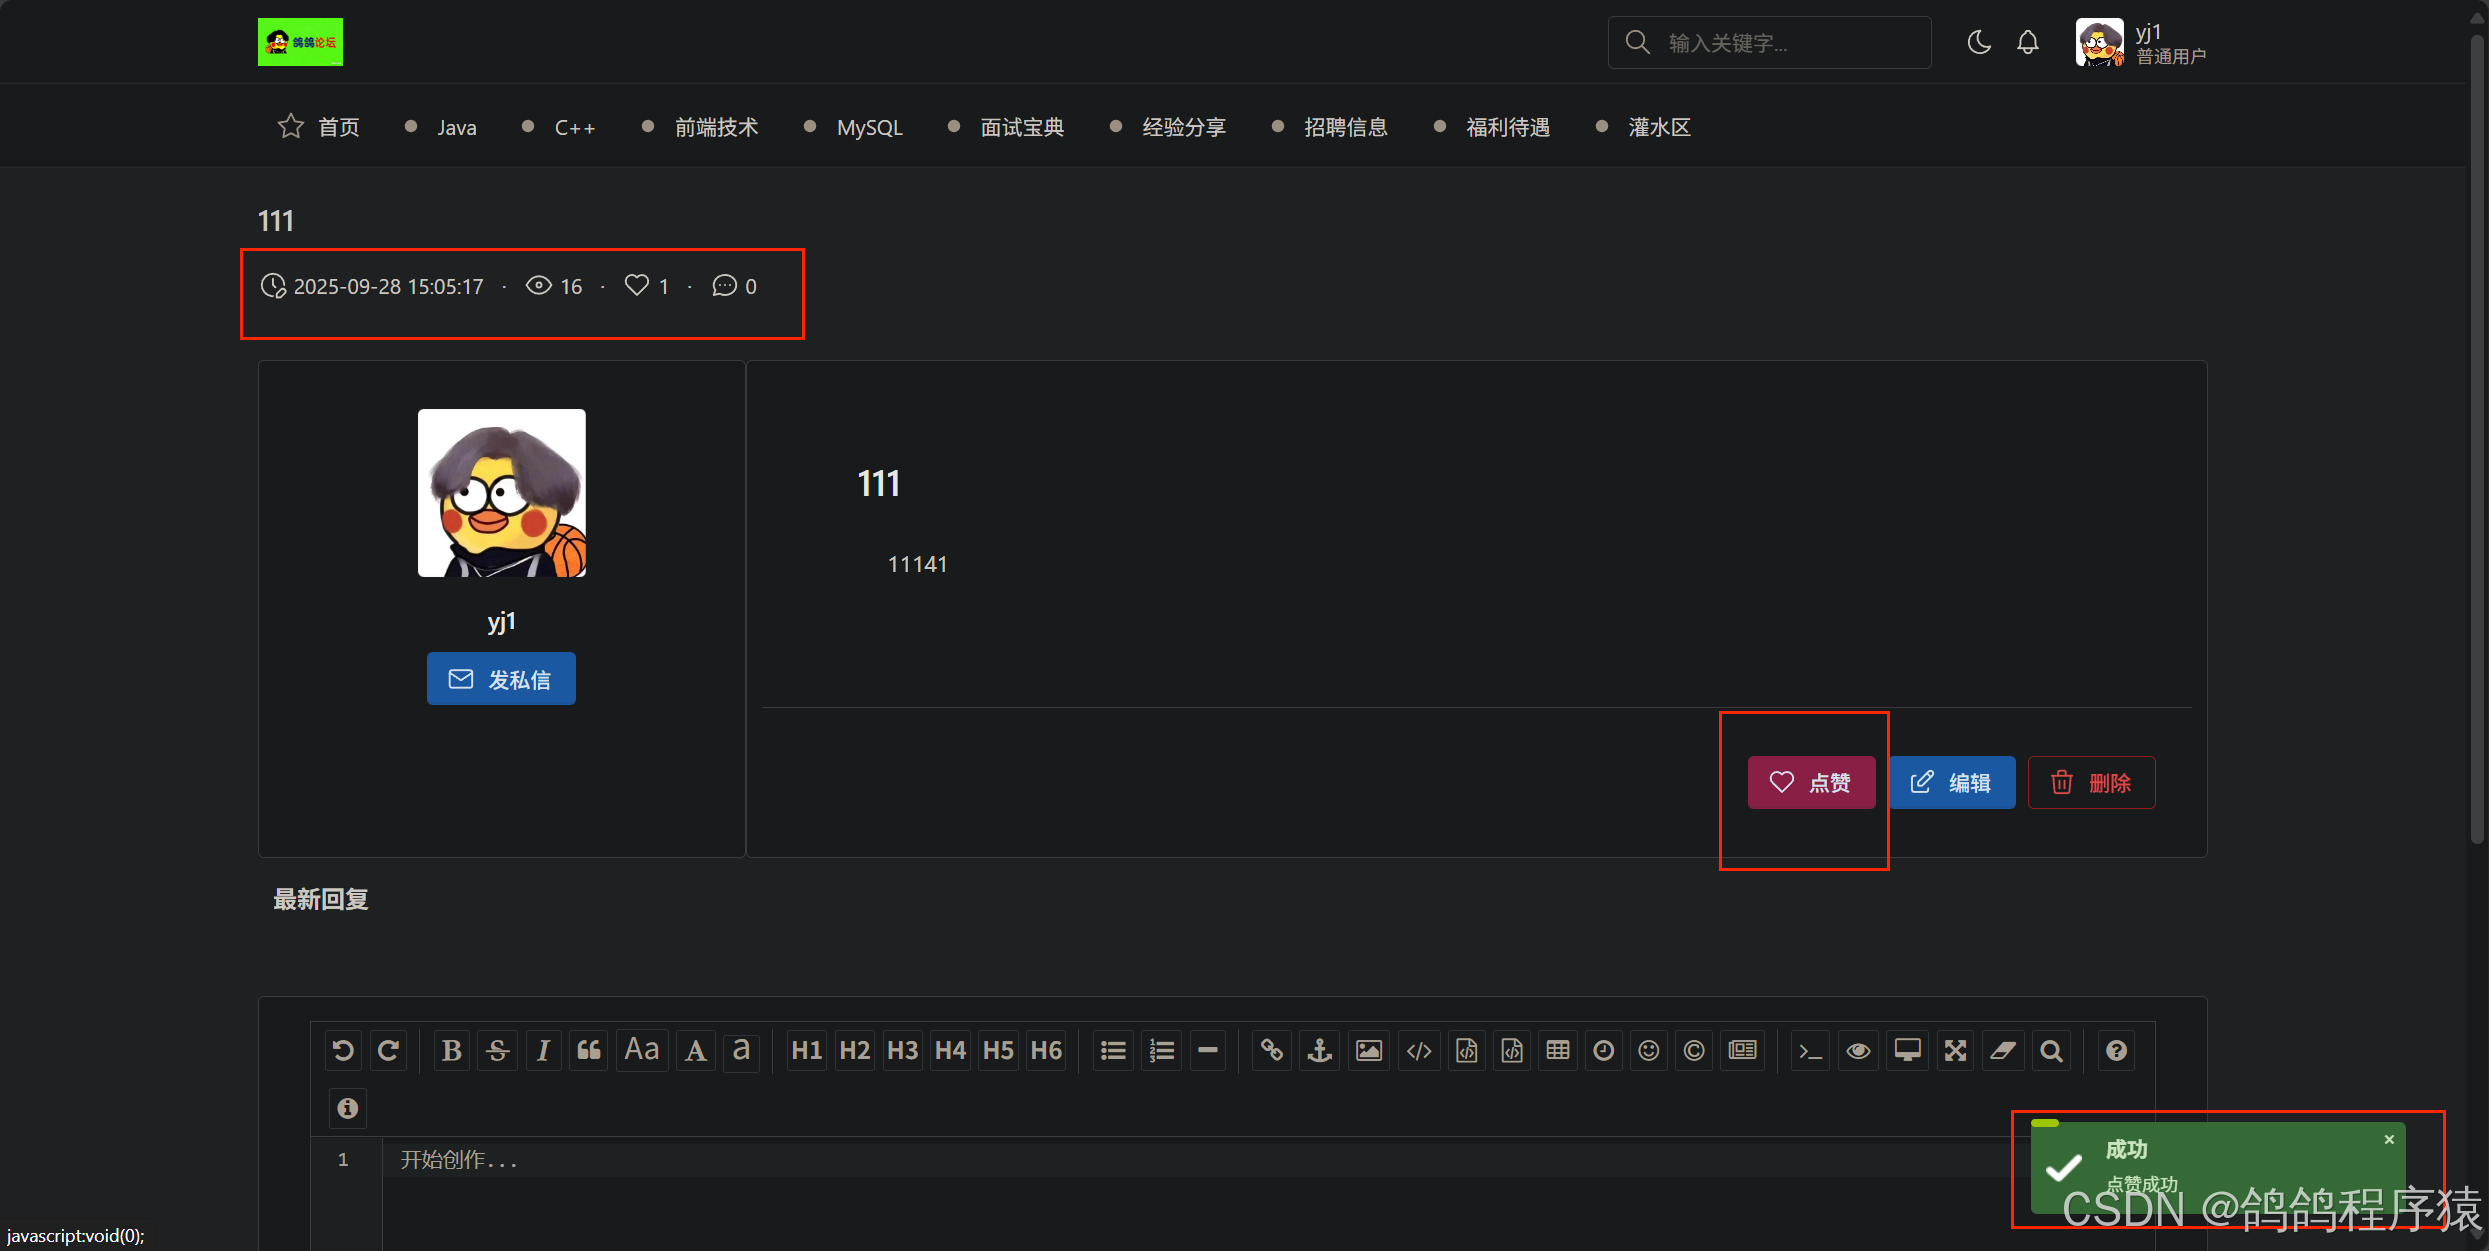
3.7.12 点赞
这个点赞功能并没有实现点赞数与用户绑定,一个用户可以无限点赞。
3.7.12.1 参数要求
| 参数名 | 描述 | 类型 | 默认值 | 条件 |
|---|---|---|---|---|
| id | 帖⼦Id | long | 必须 |
3.7.12.2 接口规范
// 请求
POST http://127.0.0.1:58080/article/thumbsUp HTTP/1.1
Content-Type: application/x-www-form-urlencoded
id=1
// 响应
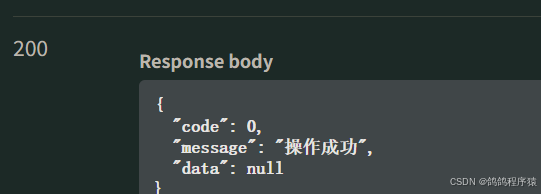
HTTP/1.1 200
Content-Type: application/json
{"code": 0,"message": "成功","data": null
}
3.7.12.3 创建Service接⼝
不用写mapper和dao的数据,直接使用自动生成的动态更新即可。
com/yj/forum/services/IArticleService.java 创建接口:
/*** 点赞* @param id 帖⼦Id*/void thumbsUpById (Long id);3.7.12.4 实现Service接⼝
com/yj/forum/services/impl/ArticleServiceImpl.java中实现:
逻辑:
- 非空校验
- 根据id拿取文章
- 检验文章是否为空,文章状态
- 构造更新数据
- 更新
- 判断更新影响行数
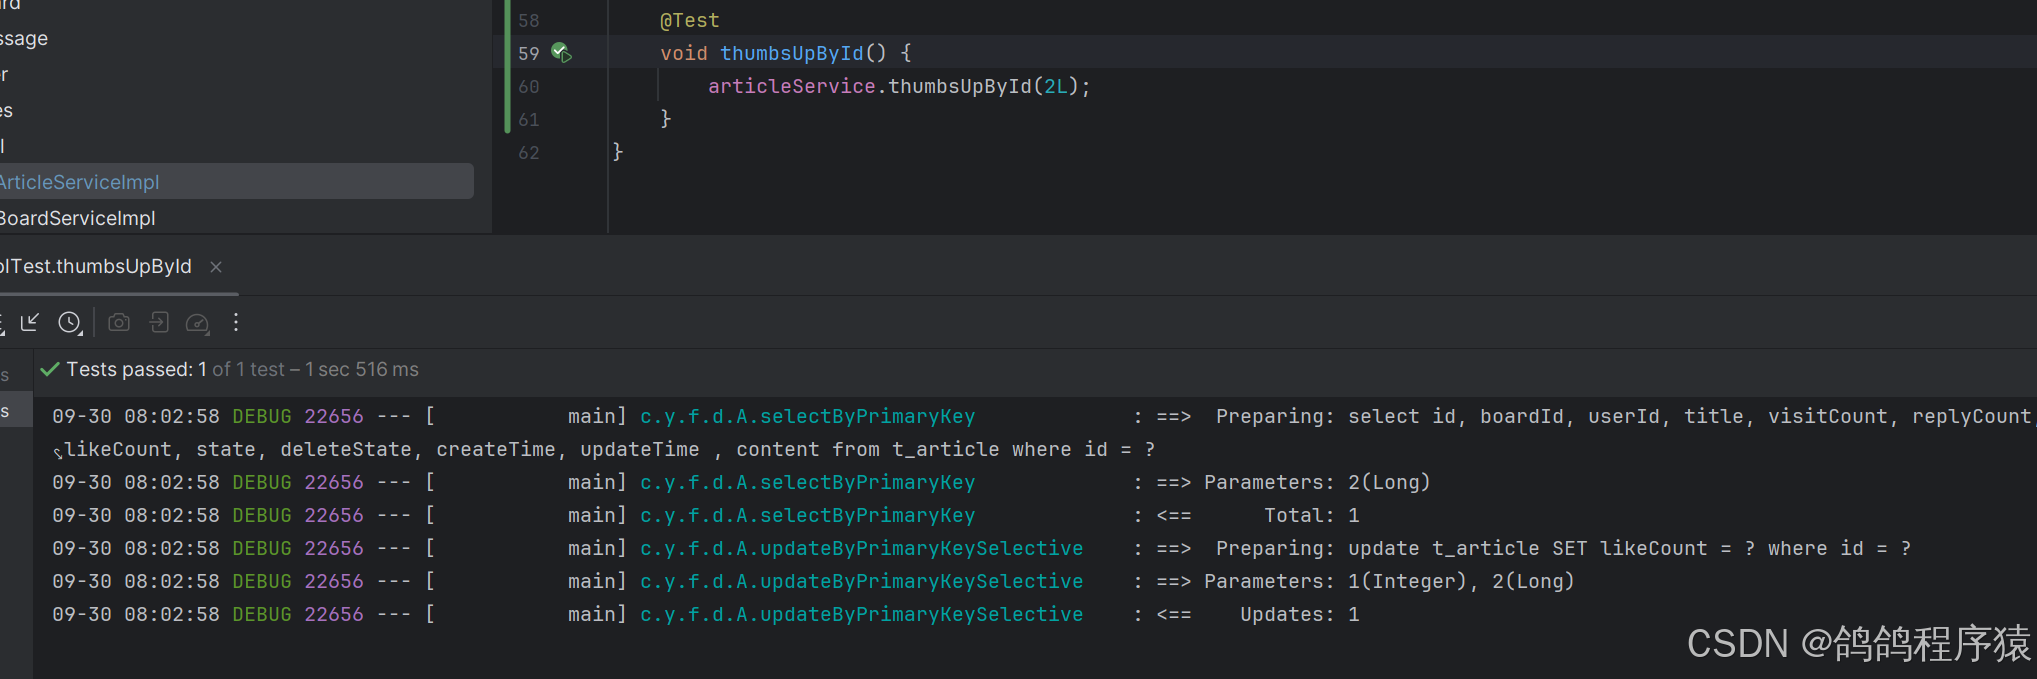
/*** 点赞* @param id 帖⼦Id*/@Overridepublic void thumbsUpById(Long id) {//非空校验if(id == null || id <= 0) {log.warn(ResultCode.FAILED_PARAMS_VALIDATE.toString());throw new ApplicationException(AppResult.failed(ResultCode.FAILED_PARAMS_VALIDATE));}//调用dao,拿取文章Article article = articleMapper.selectByPrimaryKey(id);if(article == null || article.getDeleteState() == 1) {log.warn(ResultCode.FAILED_ARTICLE_IS_NOT_EXISTS.toString());throw new ApplicationException(AppResult.failed(ResultCode.FAILED_ARTICLE_IS_NOT_EXISTS));}//校验文章状态if(article.getState() == 1) {log.warn(ResultCode.FAILED_ARTICLE_BANNED.toString());throw new ApplicationException(AppResult.failed(ResultCode.FAILED_ARTICLE_BANNED));}//构造更新数据Article updateArticle = new Article();updateArticle.setId(article.getId());updateArticle.setLikeCount(article.getLikeCount() == null ? 1 : article.getLikeCount()+1);//调用dao 更新数据库int row = articleMapper.updateByPrimaryKeySelective(updateArticle);//校验结果if(row != 1) {log.error(ResultCode.ERROR_SERVICES.toString());throw new ApplicationException(AppResult.failed(ResultCode.ERROR_SERVICES));}}
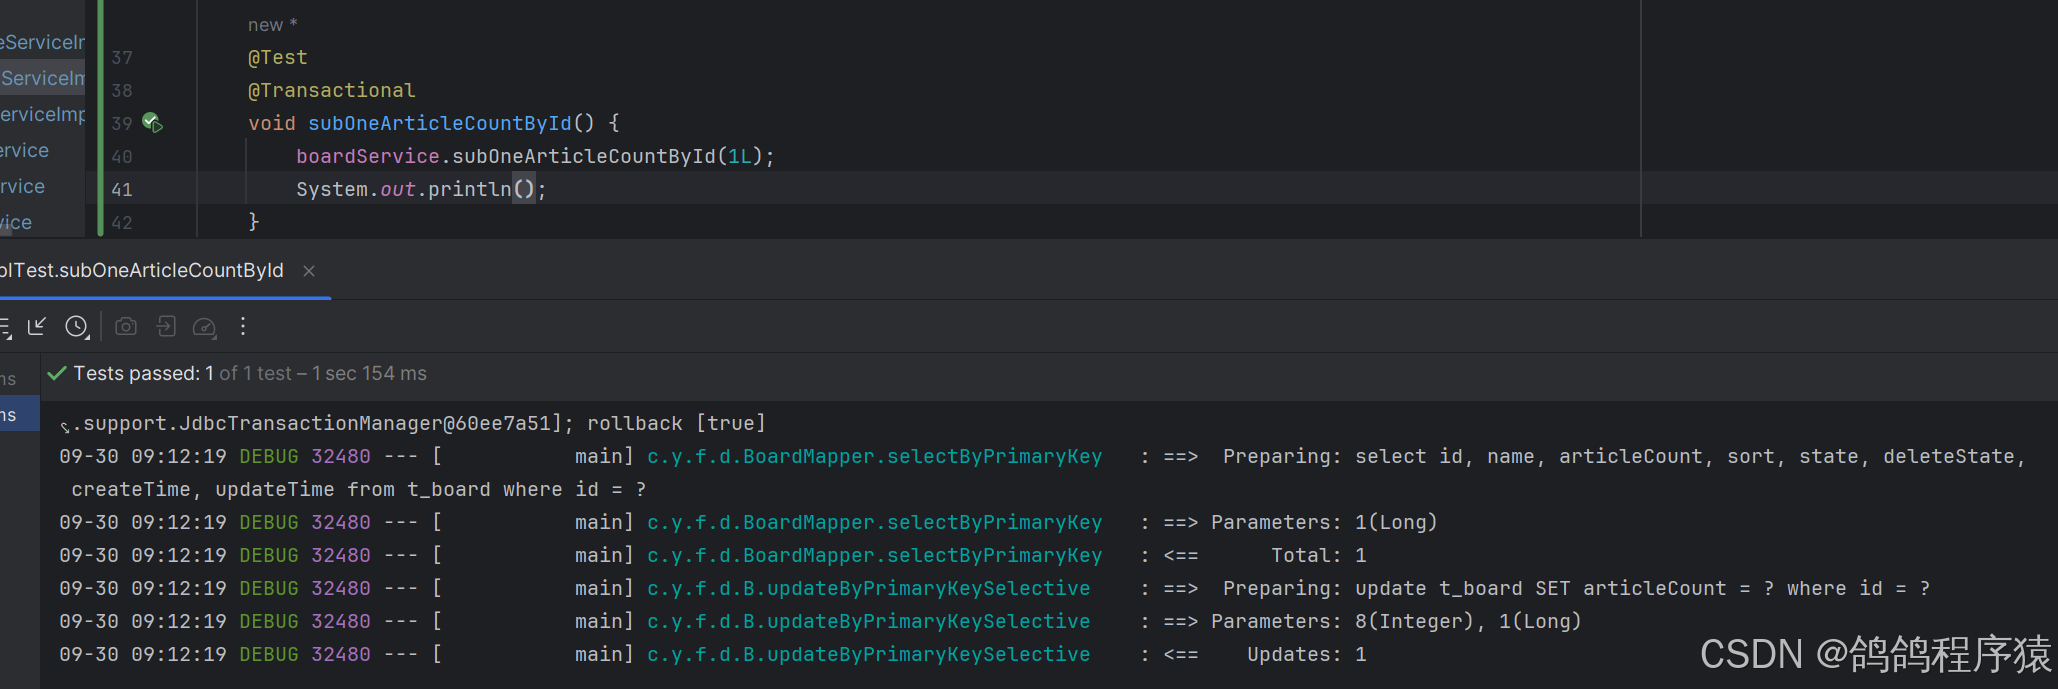
3.7.12.5 单元测试
3.7.12.6 实现Controller
com/yj/forum/controller/ArticleController.java实现:
逻辑:
- 非空校验
- 拿取当前用户
- 判断是否禁言
- 调用service
/*** 点赞* @param id 帖⼦Id*/@ApiOperation("点赞")@PostMapping("/thumbsUp")public AppResult thumbsUp(HttpServletRequest request,@ApiParam("帖⼦Id") @RequestParam("id") Long id) {//非空校验if(id == null || id <= 0) {log.warn(ResultCode.FAILED_PARAMS_VALIDATE.toString());return AppResult.failed(ResultCode.FAILED_PARAMS_VALIDATE);}//拿取用户信息HttpSession session = request.getSession();User user = (User) session.getAttribute(AppConfig.USER_SESSION);//判断是否禁言if(user.getState() != 0) {log.warn(ResultCode.FAILED_USER_BANNED.toString()+ ", userId = " + user.getId());return AppResult.failed(ResultCode.FAILED_USER_BANNED);}//调用servicearticleService.thumbsUpById(id);return AppResult.success();}
3.7.11.7 测试API
在http://127.0.0.1:58080/swagger-ui/index.html或者Postman中测试接口,记得登录。
3.7.11.8 前端
static/details.html: 修改
// ====================== 处理点赞 ======================// url: '/article/thumbsUp?id=' + currentArticle.id// 成功后,修改点赞个数 currentArticle.likeCount = currentArticle.likeCount + 1;$('#details_btn_like_count').click(function () {$.ajax({type : 'post',url: '/article/thumbsUp?id=' + currentArticle.id,success : function (respData){if(respData.code == 0) {//提示信息$.toast({heading : '成功',text: '点赞成功',icon: 'success'});currentArticle.likeCount = currentArticle.likeCount + 1;$('#details_article_likeCount').html(currentArticle.likeCount);}else {//提示信息$.toast({heading : '警告',text: respData.message,icon: 'warning'});}},error : function () {//提示信息$.toast({heading : '错误',text: '访问出现错误,请于管理员联系',icon: 'error'});}});});
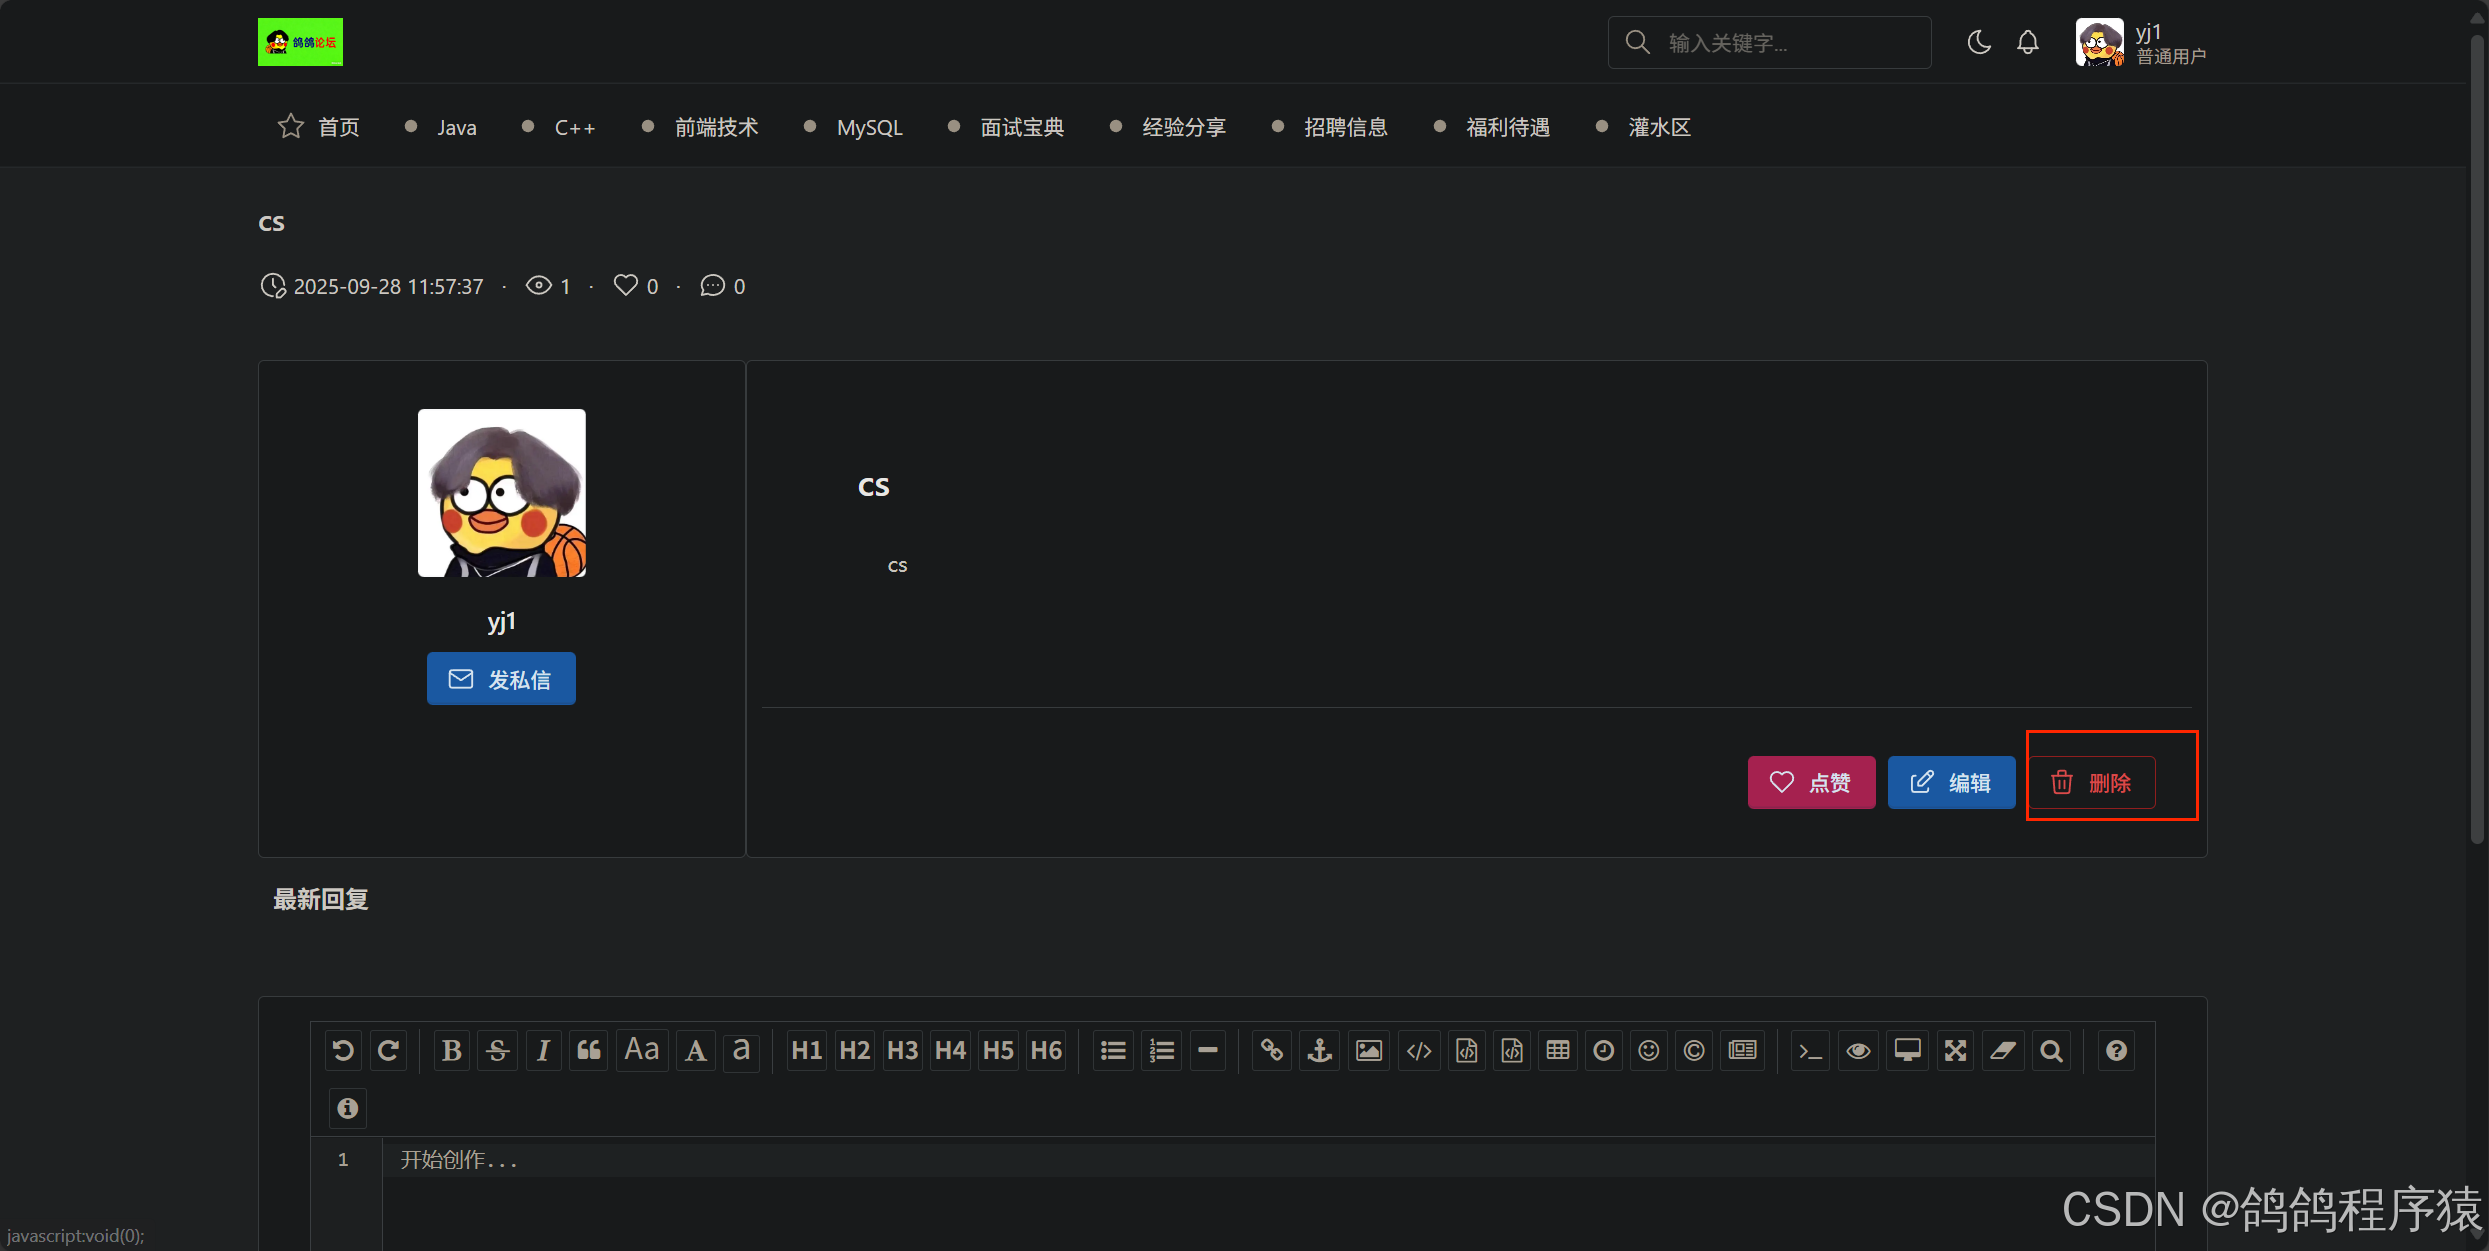
3.7.13 删除帖子
- ⽤⼾点击删除帖⼦按钮,并进⾏确定
- 服务器校验⽤⼾状态,帖⼦状态,当前⽤⼾是否为作者
- 更新⽤⼾发帖数与版块帖⼦数
- 返回结果
3.7.13.1 参数要求
| 参数名 | 描述 | 类型 | 默认值 | 条件 |
|---|---|---|---|---|
| id | 帖⼦Id | long | 必须 |
3.7.13.2 接⼝规范
1 // 请求
POST http://127.0.0.1:58080/article/delete?id=11 HTTP/1.1
// 响应
HTTP/1.1 200
Content-Type: application/json
{"code": 0,"message": "成功","data": null
}
3.7.13.3 创建Service接⼝
com/yj/forum/services/IBoardService.java:
/*** 版块中的帖⼦数量 -1 * @param id 版块Id */
void subOneArticleCountById (Long id);
com/yj/forum/services/IUserService.java :
/*** ⽤⼾发帖数 -1 * @param id 版块Id */
void subOneArticleCountById (Long id);
com/yj/forum/services/IArticleService.java :
/*** 根据Id删除帖⼦ * @param id 帖⼦Id */
@Transactional // 事务管理
void deleteById (Long id);
3.7.13.3 实现Service接⼝
com/yj/forum/services/impl/BoardServiceImpl.java:
逻辑:
- 非空校验
- 拿板块
- 校验板块
- 构造数据
- 更新
- 校验影响行数
/*** 版块中的帖⼦数量 -1* @param id 版块Id*/@Overridepublic void subOneArticleCountById(Long id) {//非空校验if(id == null || id <= 0) {log.warn(ResultCode.FAILED_PARAMS_VALIDATE.toString());throw new ApplicationException(AppResult.failed(ResultCode.FAILED_PARAMS_VALIDATE));}//调用dao 拿板块Board board = boardMapper.selectByPrimaryKey(id);//校验if(board == null || board.getState() != 0) {log.warn(ResultCode.FAILED_BOARD_IS_NOT_EXISTS.toString());throw new ApplicationException(AppResult.failed(ResultCode.FAILED_BOARD_IS_NOT_EXISTS));}if(board.getDeleteState() != 0) {log.warn(ResultCode.FAILED_BOARD_BANNED.toString());throw new ApplicationException(AppResult.failed(ResultCode.FAILED_BOARD_BANNED));}//构造更新对象Board updateBoard = new Board();updateBoard.setId(board.getId());updateBoard.setArticleCount((board.getArticleCount() == null || board.getArticleCount() == 0) ? 0 : board.getArticleCount()-1);//调用dao,更新数据库int row = boardMapper.updateByPrimaryKeySelective(updateBoard);//校验if(row != 1) {log.error(ResultCode.ERROR_SERVICES.toString()+ ", 受影响的⾏数不等于 1 为 " + row);throw new ApplicationException(AppResult.failed(ResultCode.ERROR_SERVICES));}}
com/yj/forum/services/impl/UserServiceImpl.java :
/*** ⽤⼾发帖数 -1* @param id 版块Id*/@Overridepublic void subOneArticleCountById(Long id) {//非空校验if(id == null || id <= 0) {log.warn(ResultCode.FAILED_PARAMS_VALIDATE.toString());throw new ApplicationException(AppResult.failed(ResultCode.FAILED_PARAMS_VALIDATE));}//调用dao 拿板块User user = userMapper.selectByPrimaryKey(id);//校验if(user == null) {log.warn(ResultCode.FAILED_USER_NOT_EXISTS.toString());throw new ApplicationException(AppResult.failed(ResultCode.FAILED_USER_NOT_EXISTS));}//构造更新对象User updateUser = new User();updateUser.setId(user.getId());updateUser.setArticleCount((user.getArticleCount() == null || user.getArticleCount() == 0)? 0 : user.getArticleCount()-1);//调用dao,更新数据库int row = userMapper.updateByPrimaryKeySelective(updateUser);//校验if(row != 1) {log.error(ResultCode.ERROR_SERVICES.toString()+ ", 受影响的⾏数不等于 1 为 " + row);throw new ApplicationException(AppResult.failed(ResultCode.ERROR_SERVICES));}}
com/yj/forum/services/impl/ArticleServiceImpl.java :
逻辑
- 非空校验
- 调用dao拿文章
- 验证文章
- 构造数据
- 更新数据
- 更新用户与板块信息
/*** 根据Id删除帖⼦* @param id 帖⼦Id*/@Overridepublic void deleteById(Long id) {//非空校验if(id == null || id <= 0) {log.warn(ResultCode.FAILED_PARAMS_VALIDATE.toString());throw new ApplicationException(AppResult.failed(ResultCode.FAILED_PARAMS_VALIDATE));}//拿文章Article article = articleMapper.selectByPrimaryKey(id);//校验if(article == null || article.getState() != 0) {log.warn(ResultCode.FAILED_ARTICLE_IS_NOT_EXISTS.toString()+" article id "+id);throw new ApplicationException(AppResult.failed(ResultCode.FAILED_ARTICLE_IS_NOT_EXISTS));}if(article.getDeleteState() != 0) {log.warn(ResultCode.FAILED_ARTICLE_BANNED.toString()+" article id "+id);throw new ApplicationException(AppResult.failed(ResultCode.FAILED_ARTICLE_BANNED));}//删除,构造数据Article updateArticle = new Article();updateArticle.setId(article.getId());updateArticle.setDeleteState((byte)1);updateArticle.setState((byte)1);//调用daoint row = articleMapper.updateByPrimaryKeySelective(updateArticle);//校验if(row != 1) {log.error(ResultCode.ERROR_SERVICES.toString()+ ", 受影响的⾏数不等于 1 为 " + row);throw new ApplicationException(AppResult.failed(ResultCode.ERROR_SERVICES));}//更新用户与板块userService.subOneArticleCountById(article.getUserId());boardService.subOneArticleCountById(article.getBoardId());log.info("删除帖子成功,article id" + id);}
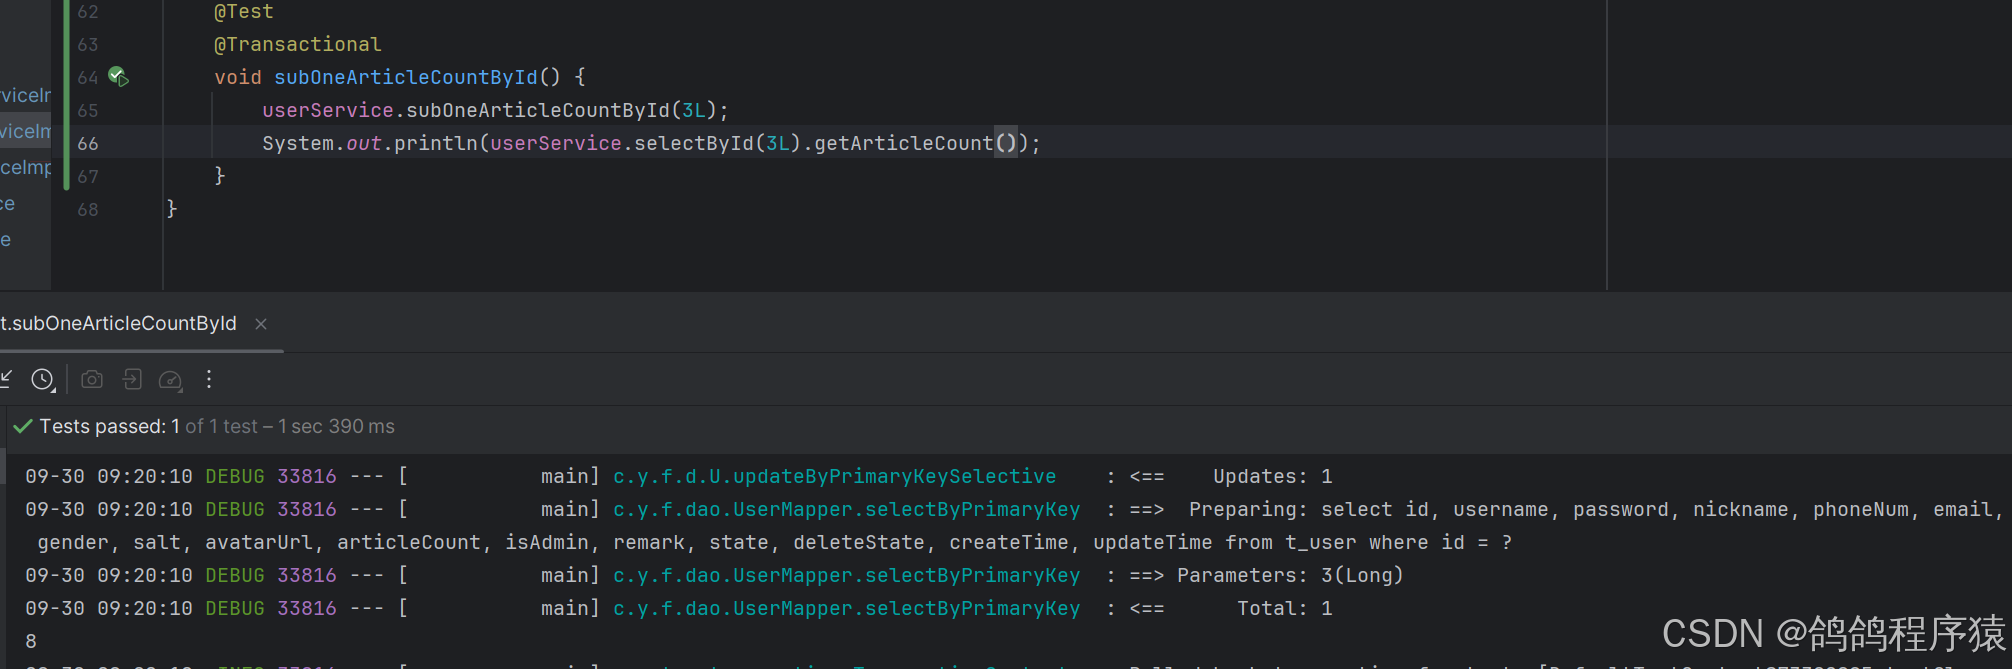
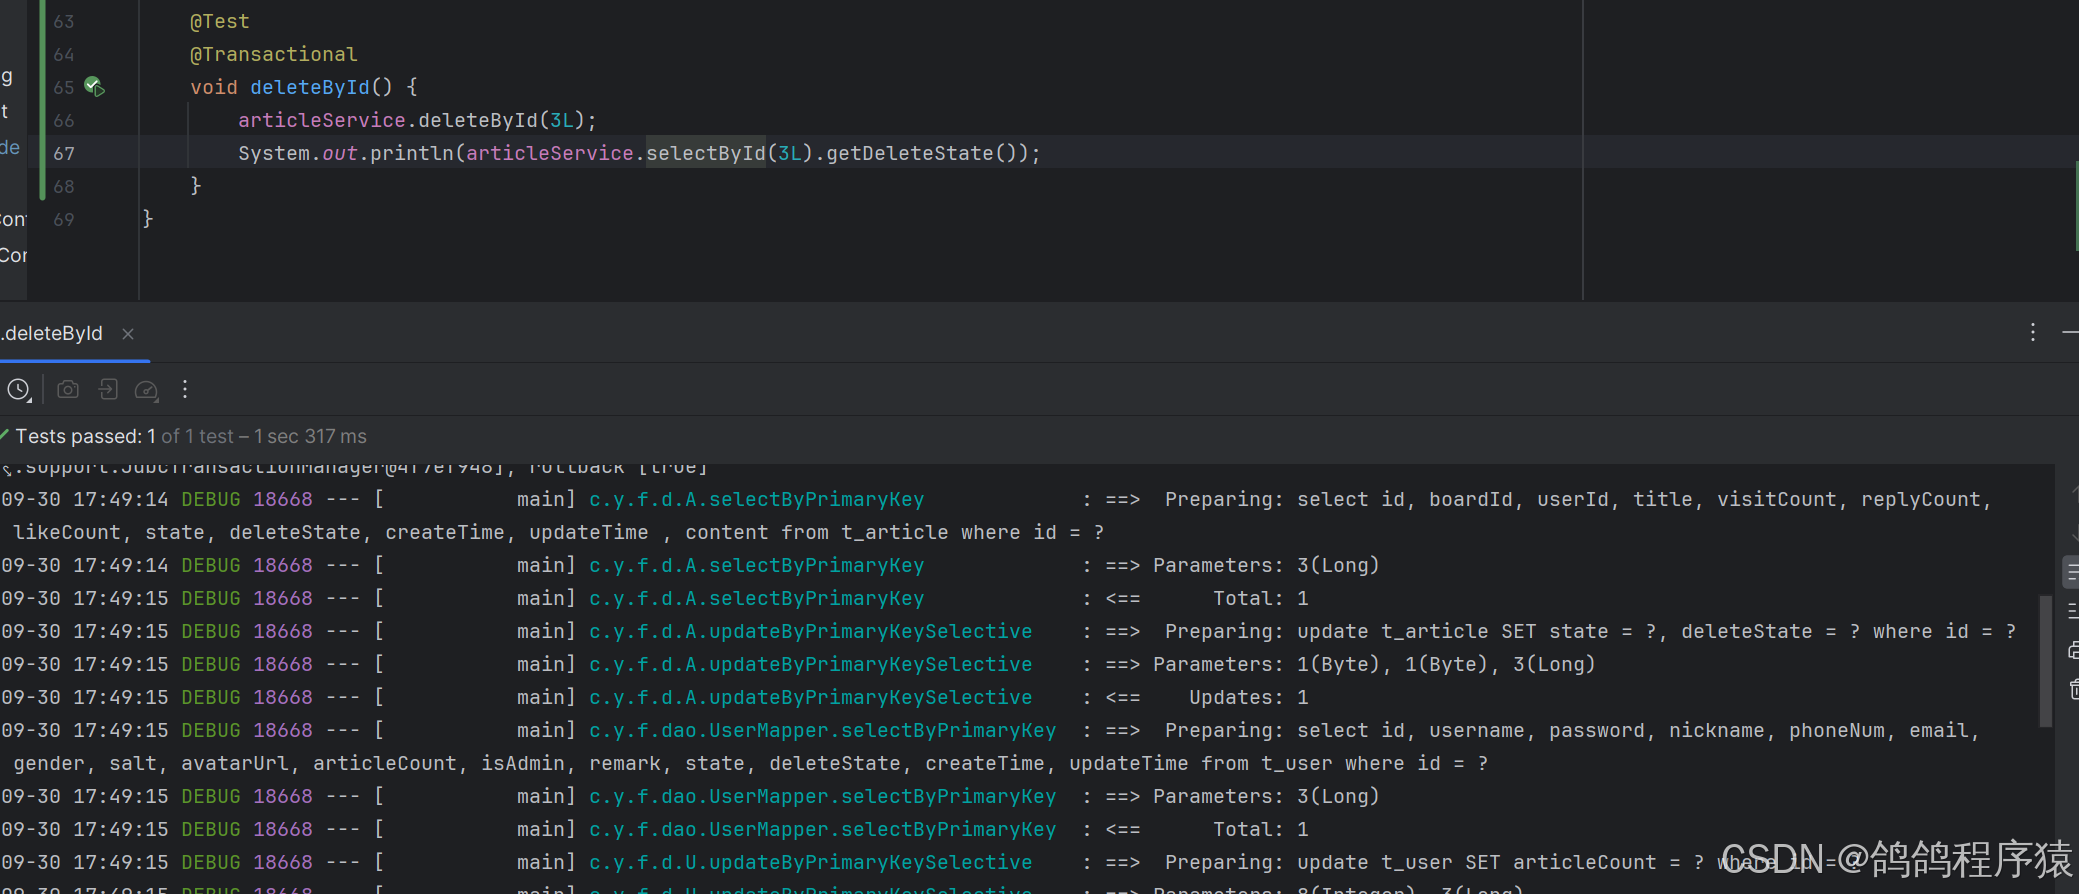
3.7.13.4 单元测试
3.7.13.5 实现controller
com/yj/forum/controller/ArticleController.java 实现:
逻辑:
- 非空校验
- 判断当前用户是否禁言
- 拿取文章
- 校验
- 判断是不是作者
- 调用service’
/*** 根据Id删除帖⼦** @param id 帖⼦Id* @return*/@ApiOperation("删除帖⼦")@PostMapping("/delete")public AppResult deleteById(HttpServletRequest request,@ApiParam("帖⼦Id")@RequestParam("id") Long id) {//非空校验if(id == null || id <= 0) {return AppResult.failed(ResultCode.FAILED_PARAMS_VALIDATE);}//拿用户HttpSession session = request.getSession();User user = (User) session.getAttribute(AppConfig.USER_SESSION);//判断是否禁言if(user.getState() != 0) {return AppResult.failed(ResultCode.FAILED_USER_BANNED);}//拿取文章Article article = articleService.selectById(id);//校验if(article == null || article.getState() != 0 || article.getDeleteState() != 0) {return AppResult.failed(ResultCode.FAILED_ARTICLE_IS_NOT_EXISTS);}//判断是不是作者if(!article.getUserId().equals(user.getId())) {return AppResult.failed(ResultCode.FAILED_FORBIDDEN);}//调用servicearticleService.deleteById(id);return AppResult.success();}
3.7.13.6 测试API
在http://127.0.0.1:58080/swagger-ui/index.html或者Postman中测试接口,记得登录。
3.7.13.7 前端
static/details.html 中修改
// ====================== 处理删除事件 ======================// 成功后,调用changeNavActive($('#nav-link-title')); 回到首页// url: 'article/delete?id=' + $('#details_article_id').val()$('#details_artile_delete').click(function () {$.ajax({type : 'post',url: 'article/delete?id=' + $('#details_article_id').val(),success : function (respData){if(respData.code == 0) {//提示信息$.toast({heading : '成功',text: '删除成功',icon: 'success'});//跳转主页changeNavActive($('#nav-link-title'));}else {//提示信息$.toast({heading : '警告',text: respData.message,icon: 'warning'});}},error : function () {//提示信息$.toast({heading : '错误',text: '访问出现错误,请于管理员联系',icon: 'error'});}});});
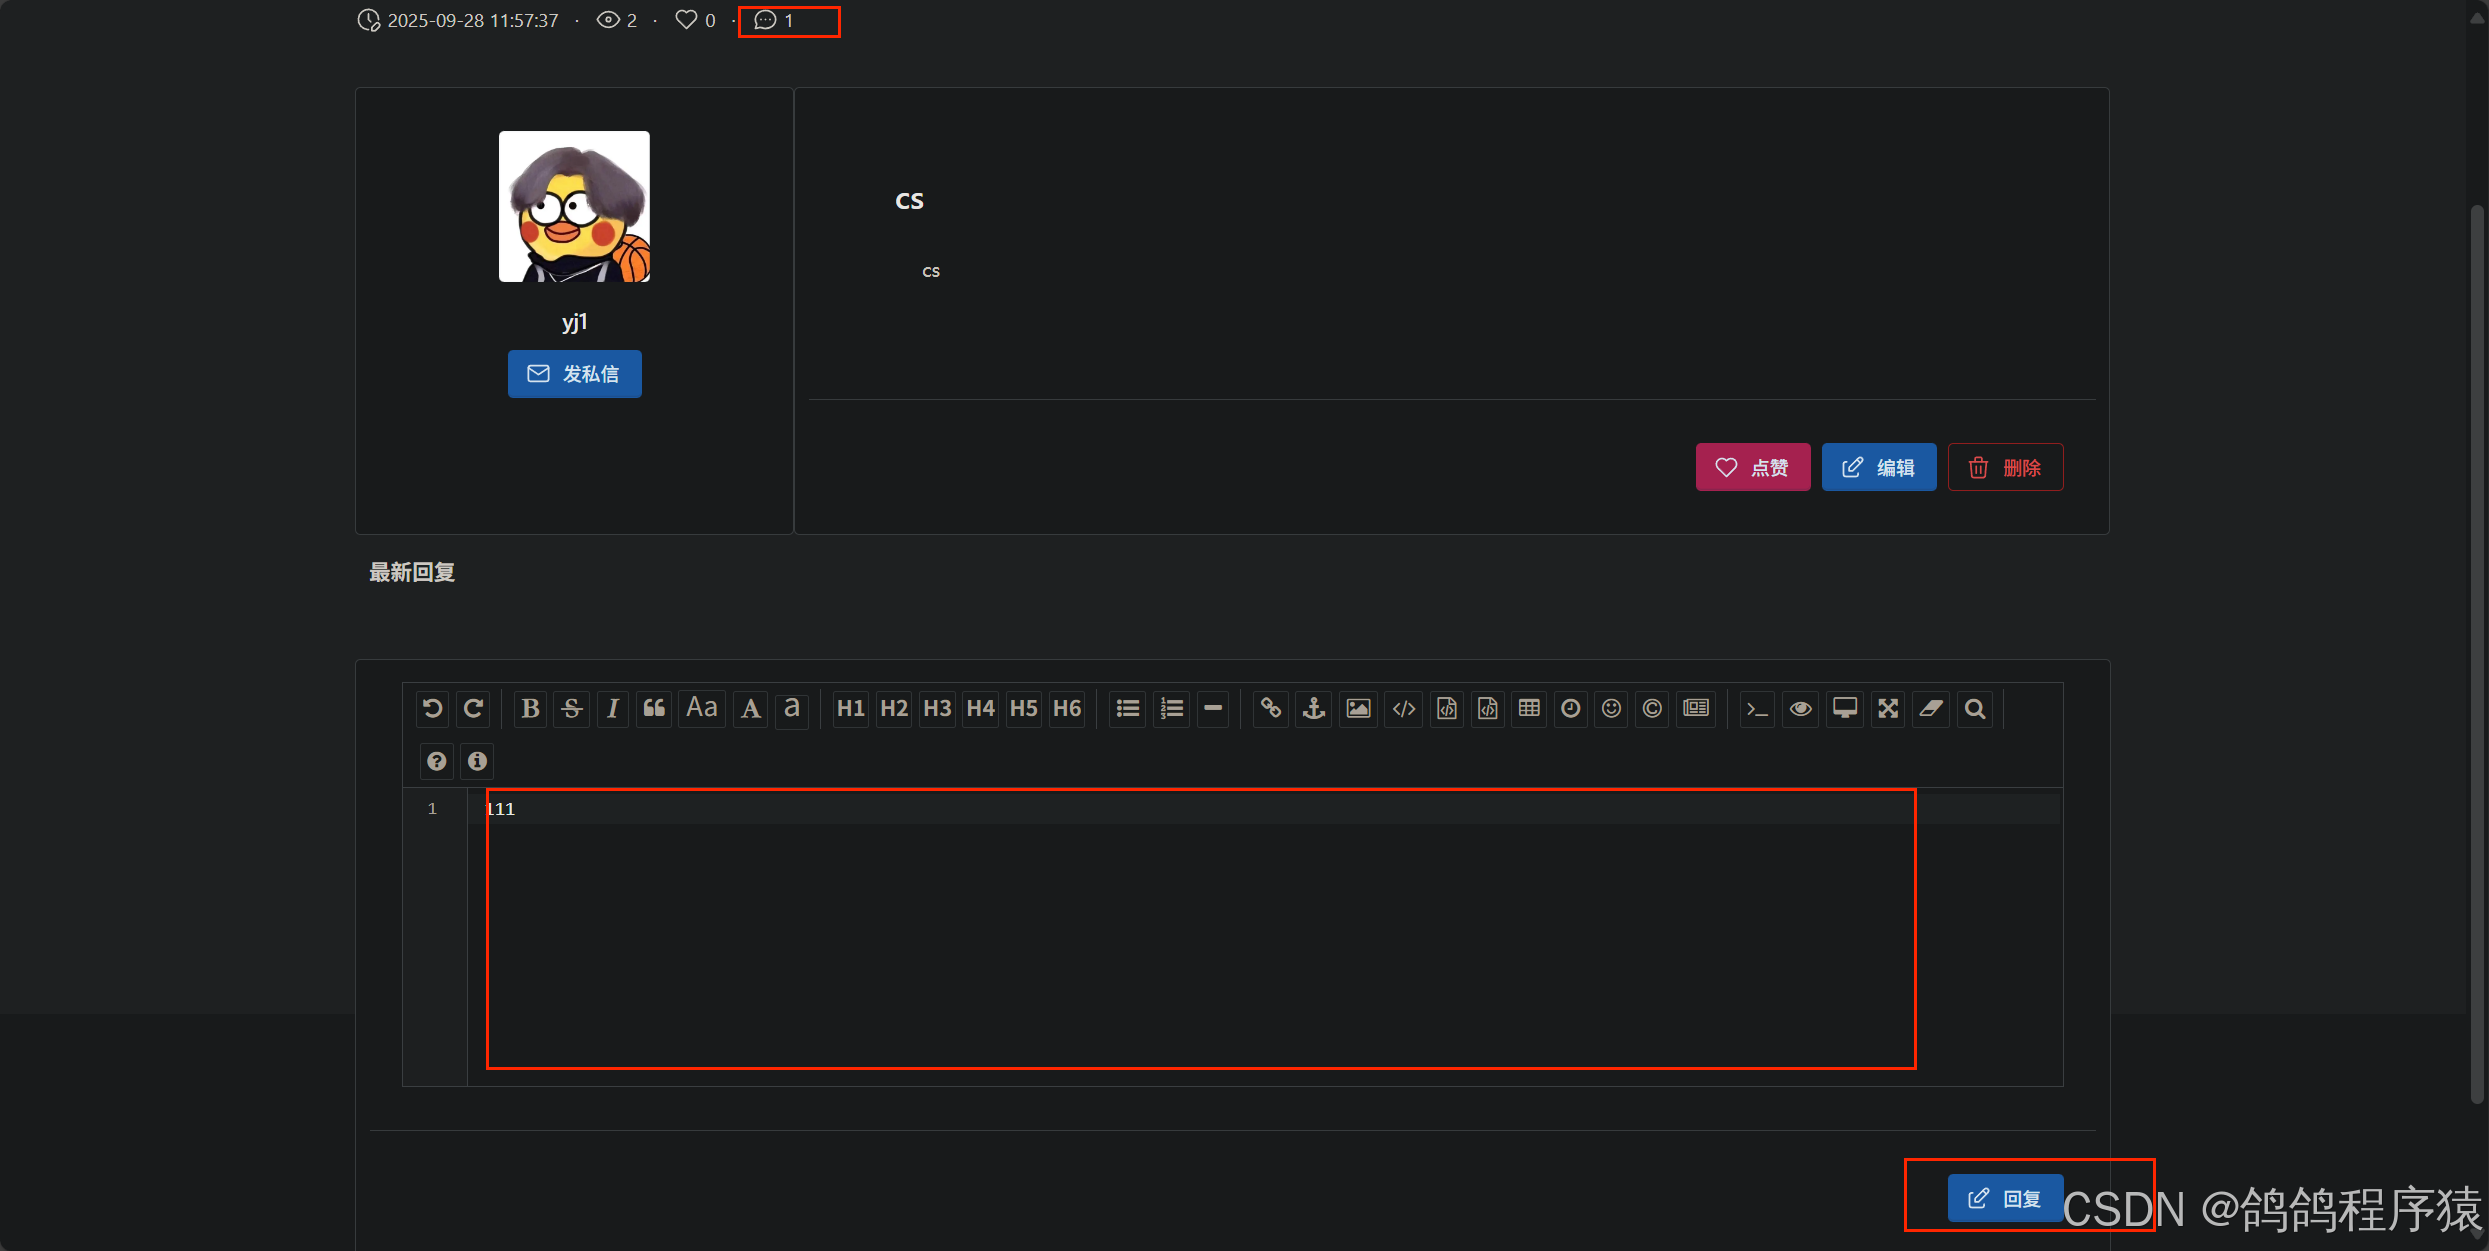
3.7.14 提交回复内容(回复帖子)
在帖⼦详情⻚⾯⽤⼾可以发表回复
实现逻辑
- 帖⼦在正常状态下允许⽤⼾回复
- 填写回复内容,点击提交按钮后发送请求到服务器
- 服务器校验回复内容、帖⼦与⽤⼾状态,通过后写⼊数据库
- 帖⼦回复数量加1
- 返回结果
3.7.14.1 参数要求
| 参数名 | 描述 | 类型 | 默认值 | 条件 |
|---|---|---|---|---|
| articleId | 帖⼦Id | Long | 必须 | |
| content | 回复内容 | String | 必须 |
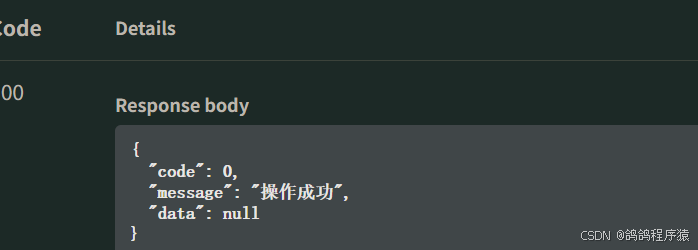
3.7.14.2 接⼝规范
// 请求
POST http://127.0.0.1:58080/reply/create HTTP/1.1
Content-Type: application/x-www-form-urlencoded
articleId=1&content=%E5%9B%9E%E5%A4%8D%E6%B2%A1%E8%AF%95
// 响应
HTTP/1.1 200
Content-Type: application/json
{"code": 0,"message": "成功","data": null
}
3.7.14.3 创建Service接⼝
mapper和dao层直接使用自动生成的即可。
com/yj/forum/services/IArticleReplyService.java 中定义:
package com.yj.forum.services;import com.yj.forum.model.ArticleReply;
import org.springframework.transaction.annotation.Transactional;public interface IArticleReplyService {/*** 新增回复 * @param articleReply 回复信息 */// 事务管理@Transactionalvoid create(ArticleReply articleReply);}
com/yj/forum/services/IArticleService.java 中定义:
/*** 根据帖⼦Id更新帖⼦回复数* @param id 帖⼦Id*/void addOneReplyCountById(Long id);
3.7.14.4 实现service接口
com/yj/forum/services/impl/ArticleServiceImpl.java 实现:
逻辑:
- 非空校验
- 拿文章
- 校验
- 构造数据
- 更新
- 校验影响行数
/*** 根据帖⼦Id更新帖⼦回复数* @param id 帖⼦Id*/@Overridepublic void addOneReplyCountById(Long id) {//非空校验if(id == null || id <= 0) {log.warn(ResultCode.FAILED_PARAMS_VALIDATE.toString());throw new ApplicationException(AppResult.failed(ResultCode.FAILED_PARAMS_VALIDATE));}//拿文章Article article = articleMapper.selectByPrimaryKey(id);//校验if(article == null || article.getDeleteState() != 0) {log.warn(ResultCode.FAILED_ARTICLE_IS_NOT_EXISTS.toString()+" 帖子已封贴 article id "+id);throw new ApplicationException(AppResult.failed(ResultCode.FAILED_ARTICLE_IS_NOT_EXISTS));}if( article.getState() != 0) {log.warn(ResultCode.FAILED_ARTICLE_BANNED.toString()+" article id "+id);throw new ApplicationException(AppResult.failed(ResultCode.FAILED_ARTICLE_BANNED));}// 更新帖⼦回复数Article updateArticle = new Article();updateArticle.setId(article.getId());updateArticle.setReplyCount(article.getReplyCount() == null ? 1 : article.getReplyCount()+1);//调用daoint row = articleMapper.updateByPrimaryKeySelective(updateArticle);//校验if(row != 1) {log.info("新增帖⼦回复数量失败, userId = " + article.getUserId() + ", articleId = " + article.getId());// 抛出异常throw new ApplicationException(AppResult.failed(ResultCode.FAILED_CREATE));}}
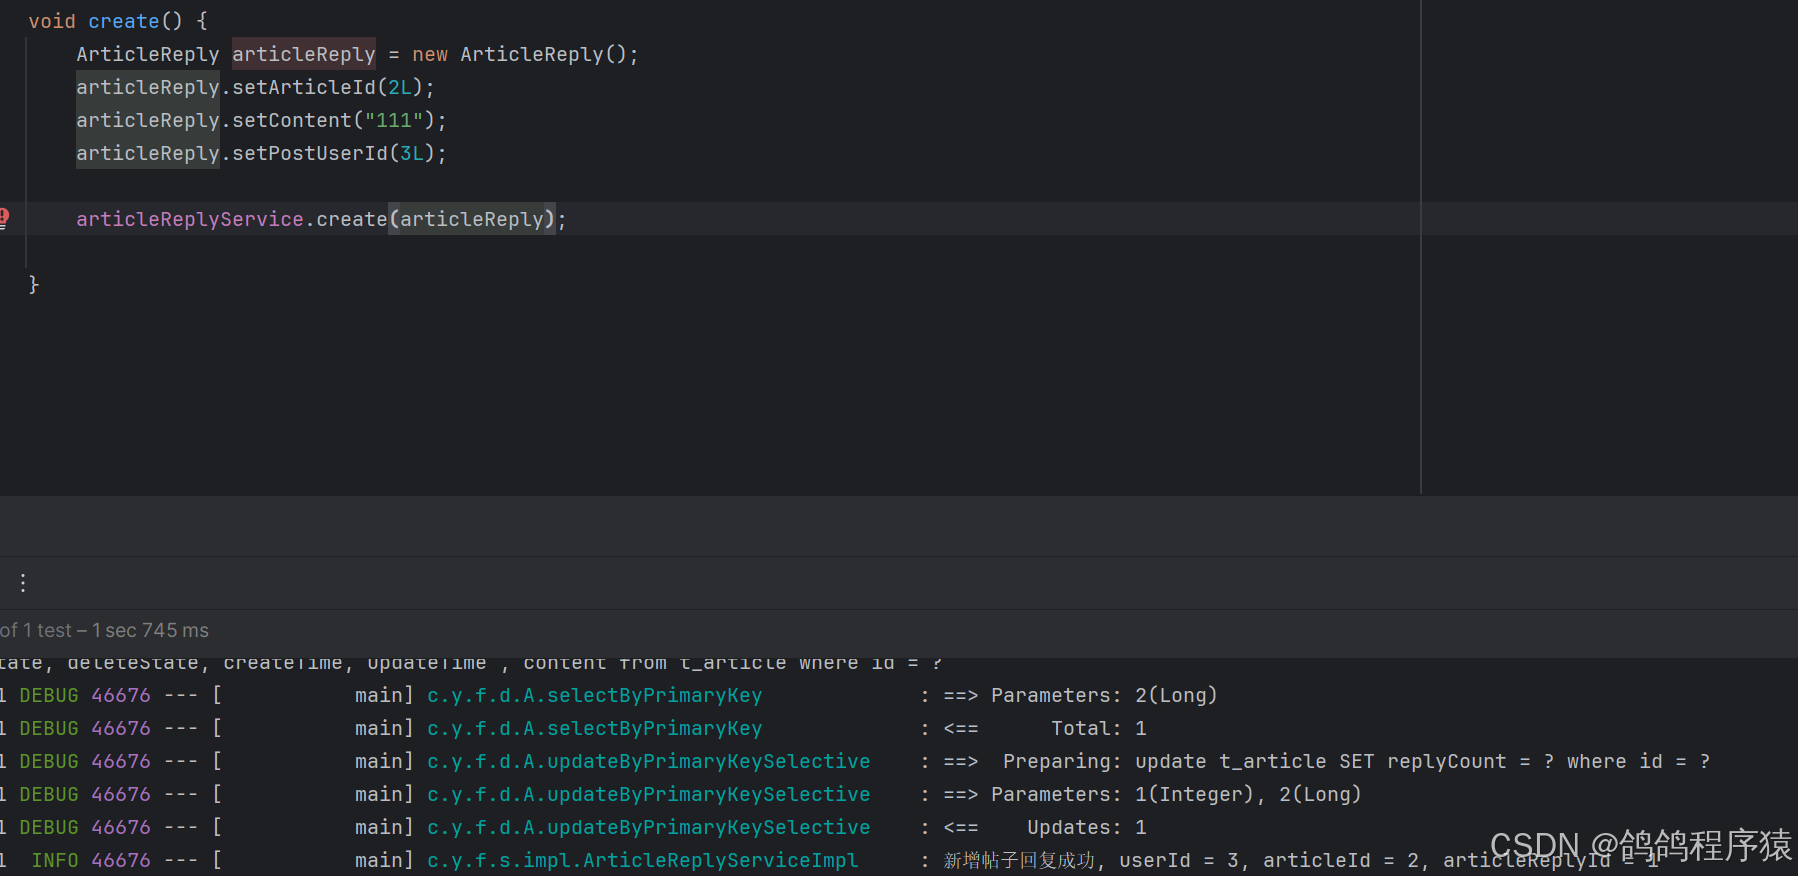
com/yj/forum/services/impl/ArticleReplyServiceImpl.java 实现
逻辑:
- 校验帖子回复内容是否为空,当前回复的帖子是否为空,帖子发布者是否为空
- 构造数据,
- 写入数据库
- 更新帖子回复数
package com.yj.forum.services.impl;import com.yj.forum.common.AppResult;
import com.yj.forum.common.ResultCode;
import com.yj.forum.dao.ArticleReplyMapper;
import com.yj.forum.exception.ApplicationException;
import com.yj.forum.model.ArticleReply;
import com.yj.forum.services.IArticleReplyService;
import com.yj.forum.services.IArticleService;
import com.yj.forum.utils.StringUtil;
import lombok.extern.slf4j.Slf4j;
import org.springframework.stereotype.Service;import javax.annotation.Resource;
import java.util.Date;@Slf4j
@Service
public class ArticleReplyServiceImpl implements IArticleReplyService {//注入dao@ResourceArticleReplyMapper articleReplyMapper;@ResourceIArticleService articleService;/*** 新增回复* @param articleReply 回复信息*/@Overridepublic void create(ArticleReply articleReply) {//非空校验if(articleReply == null ||articleReply.getArticleId() == null|| StringUtil.isEmpty(articleReply.getContent())|| articleReply.getPostUserId() == null) {log.warn(ResultCode.FAILED_PARAMS_VALIDATE.toString()+" 回复内容不能为空或者该文章不存在 ");throw new ApplicationException(AppResult.failed(ResultCode.FAILED_PARAMS_VALIDATE));}// 填充默认数据articleReply.setState((byte) 0); // 状态articleReply.setDeleteState((byte) 0); // 是否状态articleReply.setLikeCount(0); // 点赞数量// 时间Date date = new Date();articleReply.setCreateTime(date); // 创建时间articleReply.setUpdateTime(date); // 更新时间// 写⼊回复数据int row = articleReplyMapper.insertSelective(articleReply);//校验if(row != 1) {log.info("新增帖⼦回复失败, userId = " + articleReply.getPostUserId() + ", articleId = " + articleReply.getArticleId());// 抛出异常throw new ApplicationException(AppResult.failed(ResultCode.FAILED_CREATE));}//更新帖子回复数articleService.addOneReplyCountById(articleReply.getArticleId());log.info("新增帖⼦回复成功, userId = " + articleReply.getPostUserId() +", articleId = " +  articleReply.getArticleId() + ", articleReplyId = " + articleReply.getId());}
}
3.7.14.5 单元测试

3.7.14.6 实现controller
com/yj/forum/controller/ArticleReplyController.java 实现:
逻辑:
- 非空校验
- 获取用户
- 判断用户 是否禁言
- 构造数据
- 调用dao
package com.yj.forum.controller;import com.yj.forum.common.AppConfig;
import com.yj.forum.common.AppResult;
import com.yj.forum.common.ResultCode;
import com.yj.forum.model.Article;
import com.yj.forum.model.ArticleReply;
import com.yj.forum.model.User;
import com.yj.forum.services.IArticleReplyService;
import com.yj.forum.services.IArticleService;
import com.yj.forum.utils.StringUtil;
import io.swagger.annotations.Api;
import io.swagger.annotations.ApiOperation;
import io.swagger.annotations.ApiParam;
import lombok.extern.slf4j.Slf4j;
import org.springframework.web.bind.annotation.PostMapping;
import org.springframework.web.bind.annotation.RequestMapping;
import org.springframework.web.bind.annotation.RequestParam;
import org.springframework.web.bind.annotation.RestController;import javax.annotation.Resource;
import javax.servlet.http.HttpServletRequest;
import javax.servlet.http.HttpSession;@Api(tags = "回复接⼝")
@Slf4j
@RequestMapping("/reply")
@RestController
public class ArticleReplyController {@Resourceprivate IArticleService articleService;@Resourceprivate IArticleReplyService articleReplyService;/*** 回复帖⼦* @param articleId 帖⼦Id* @param content 回复内容* @return AppResult*/@ApiOperation("回复帖⼦")@PostMapping("/create")public AppResult create(HttpServletRequest request,@ApiParam("帖⼦Id")@RequestParam("articleId") Long articleId,@ApiParam("回复内容")@RequestParam("content") String content) {//非空校验if(articleId == null || articleId <= 0 || StringUtil.isEmpty(content)) {return AppResult.failed(ResultCode.FAILED_PARAMS_VALIDATE);}//获取用户信息HttpSession session = request.getSession();User user = (User) session.getAttribute(AppConfig.USER_SESSION);//用户是否禁言if (user.getState() != 0) {log.warn(ResultCode.FAILED_USER_BANNED.toString() + ", userId = " + user.getId());return AppResult.failed(ResultCode.FAILED_USER_BANNED);}//获取帖子信息Article article = articleService.selectById(articleId);// 校验帖⼦信息if (article == null) {log.warn("修改的帖⼦不存在. articleId = " + articleId);return AppResult.failed(ResultCode.FAILED_ARTICLE_BANNED);}if (article.getState() != 0 || article.getDeleteState() != 0) {log.warn("帖⼦状态异常. articleId = " + articleId + ", state = " +article.getState() + ", delete state = " + article.getDeleteState());return AppResult.failed(ResultCode.FAILED_PARAMS_VALIDATE);}// 构造数据ArticleReply articleReply = new ArticleReply();articleReply.setArticleId(articleId);articleReply.setPostUserId(user.getId());articleReply.setContent(content);// 调⽤daoarticleReplyService.create(articleReply);// 返回结果return AppResult.success();}
}
3.7.14.7 测试API
在http://127.0.0.1:58080/swagger-ui/index.html或者Postman中测试接口,记得登录。
3.7.14.8 前端
static/details.html 中修改:
// ====================== 回复帖子 ======================$('#details_btn_article_reply').click(function () {let articleIdEl = $('#details_article_id');let replyContentEl = $('#details_article_reply_content');// 非空校验if (!replyContentEl.val()) {// 提示$.toast({heading: '提示',text: '请输入回复内容',icon: 'warning'});return;}// 构造帖子对象let postData = {articleId : articleIdEl.val(),content : replyContentEl.val()};// 发送请求,成功后 // 1. 清空回复区域// 2. 更新回贴数 currentArticle.replyCount = currentArticle.replyCount + 1;// 3. 调用loadArticleDetailsReply()方法,重新构建回贴列表$.ajax({type : 'post',url : 'reply/create',contentType: 'application/x-www-form-urlencoded',data : postData,success : function (respData) {if(respData.code == 0) {// 提示$.toast({heading: '提示',text: '回复成功',icon: 'success'});//更新全局变量的值currentArticle.replyCount = currentArticle.replyCount + 1;//更新页面的回复数量$('#details_article_replyCount').html(currentArticle.replyCount);//重构回复列表loadArticleDetailsReply();} else {// 提示$.toast({heading: '提示',text: respData.message,icon: 'warning'});}},error : function (){// 提示$.toast({heading: '错误',text: respData.message,icon: 'error'});}});});
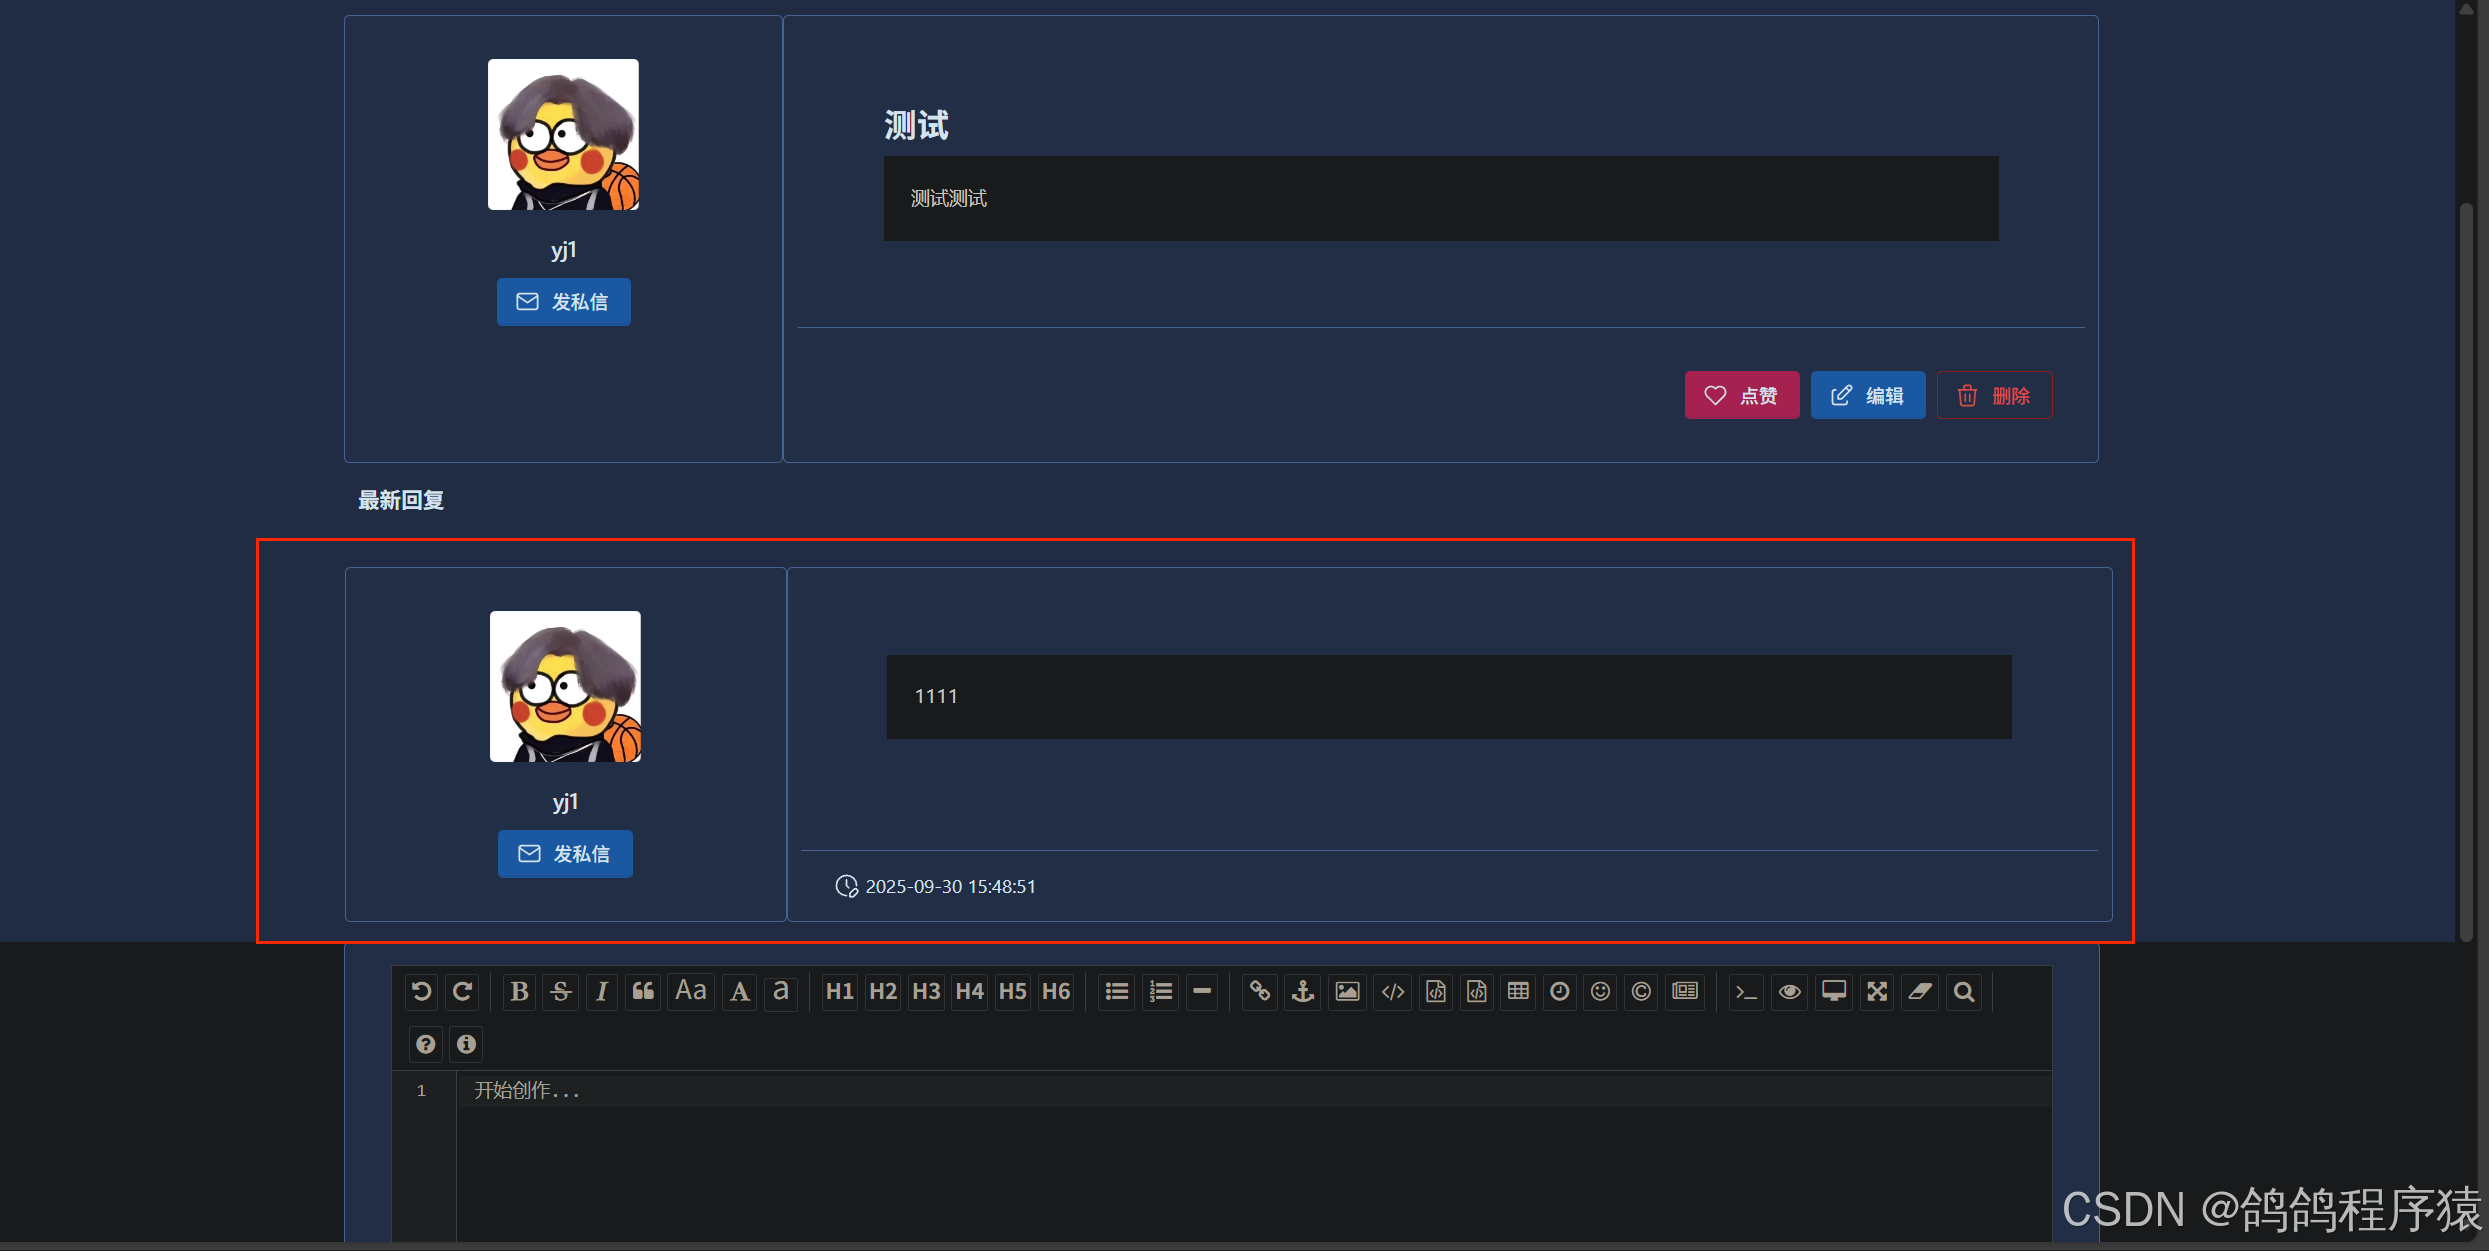
3.7.15 帖⼦回复列表
在帖⼦详情⻚显⽰当前帖⼦下的回复列表以发布时间降序排列
3.7.15.1 参数要求
| 参数名 | 描述 | 类型 | 默认值 | 条件 |
|---|---|---|---|---|
| articleId | 帖⼦Id | Long | 必须 |
3.7.15.2 接口规范
// 请求
GET http://127.0.0.1:58080/reply/getReplies?articleId=1 HTTP/1.1
// 响应
HTTP/1.1 200
Content-Type: application/json
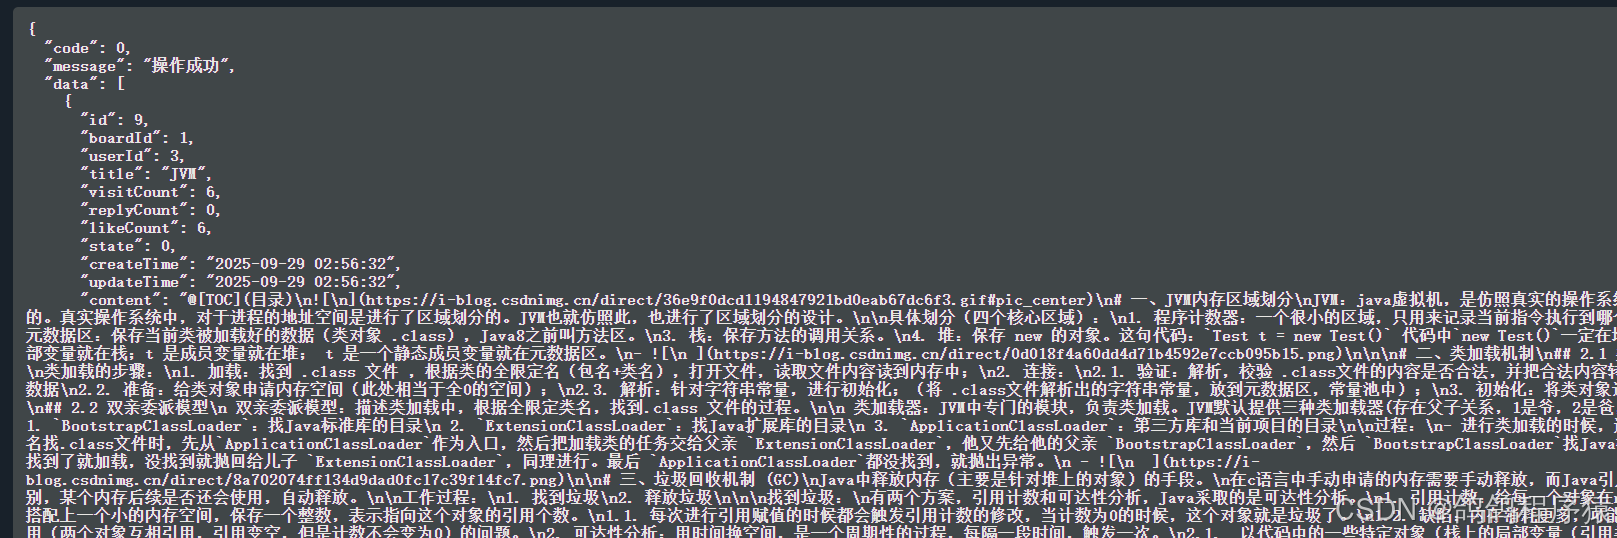
{"code": 0,"message": "成功","data": [{"id": 9,"articleId": 1,"postUserId": 2,"content": "回复没试","likeCount": 0,"state": 0,"createTime": "2023-07-09 06:39:45","updateTime": "2023-07-09 06:39:45","user": {"id": 2,"nickname": "bitgirl","phoneNum": null,"email": null,"gender": 2,"avatarUrl": null}},{"id": 8,"articleId": 1,"postUserId": 1,"content": "测试回复","likeCount": 0,"state": 0,"createTime": "2023-07-09 06:38:49","updateTime": "2023-07-09 06:38:49","user": {"id": 1,"nickname": "bitboy","phoneNum": null,"email": null,"gender": 1,"avatarUrl": null}},{"id": 5,"articleId": 1,"postUserId": 1,"content": "单元测试回复","likeCount": 0,"state": 0,"createTime": "2023-07-05 10:16:43","updateTime": "2023-07-05 10:16:43","user": {"id": 1,"nickname": "bitboy","phoneNum": null,"email": null,"gender": 1,"avatarUrl": null}}]
}
3.7.15.3 创建扩展Mapper.xml
在ArticleReply类中加上关联对象User,跟前面查询文章详情一样。
SQL 语句:
select
u.id as u_id,
u.avatarUrl as u_avatarUrl,
u.nickname as u_nickname,
ar.id as ar_id,
ar.articleId as ar_articleId,
ar.postUserId as ar_postUserId,
ar.replyId as ar_replyId,
ar.replyUserId as ar_replyUserId,
ar.content as ar_content,
ar.likeCount as ar_likeCount,
ar.state as ar_state,
ar.deleteState as ar_deleteState,
ar.createTime as ar_createTime,
ar.updateTime as ar_updateTime
from t_article_reply as ar, t_user as u
where ar.postUserId = u.id
and ar.articleId = 2
and ar.deleteState = 0;
order by ar.createTime desc
mapper/extension/ArticleReplyExtMapper.xml 中:
<?xml version="1.0" encoding="UTF-8"?>
<!DOCTYPE mapper PUBLIC "-//mybatis.org//DTD Mapper 3.0//EN" "http://mybatis.org/dtd/mybatis-3-mapper.dtd">
<mapper namespace="com.yj.forum.dao.ArticleReplyMapper"><!-- 自定义结果集 --><resultMap id="AllInfoResultMap" type="com.yj.forum.model.ArticleReply" extends="BaseResultMap"><!-- 关联的用户对象的映射 --><association property="user" resultMap="com.yj.forum.dao.UserMapper.BaseResultMap" columnPrefix="u_"/></resultMap><!-- 根据帖子id查询回复列表 --><select id = "selectByArticleId" parameterType="java.lang.Long" resultMap="AllInfoResultMap">selectu.id as u_id,u.avatarUrl as u_avatarUrl,u.nickname as u_nickname,ar.id,ar.articleId,ar.postUserId,ar.replyId,ar.replyUserId ,ar.content,ar.likeCount,ar.state,ar.deleteState ,ar.createTime,ar.updateTimefrom t_article_reply as ar, t_user as uwhere ar.postUserId = u.idand ar.articleId = #{articleId,jdbcType=BIGINT}and ar.deleteState = 0order by ar.createTime desc</select></mapper>
3.7.15.4 修改DAO
com/yj/forum/dao/ArticleReplyMapper.java 加上:
/*** 查询帖⼦对应的回复* @param articleId 帖⼦Id* @return "*/List<ArticleReply> selectByArticleId(@Param("articleId") Long articleId);
3.7.15.5 创建Service接⼝
com/yj/forum/services/IArticleReplyService.java 中:
/*** 查询帖⼦对应的回复* @param articleId 帖⼦Id* @return "*/List<ArticleReply> selectByArticleId(Long articleId);
3.7.15.6 实现Service接⼝
com/yj/forum/services/impl/ArticleReplyServiceImpl.java 中实现:
逻辑:只需要非空校验即可
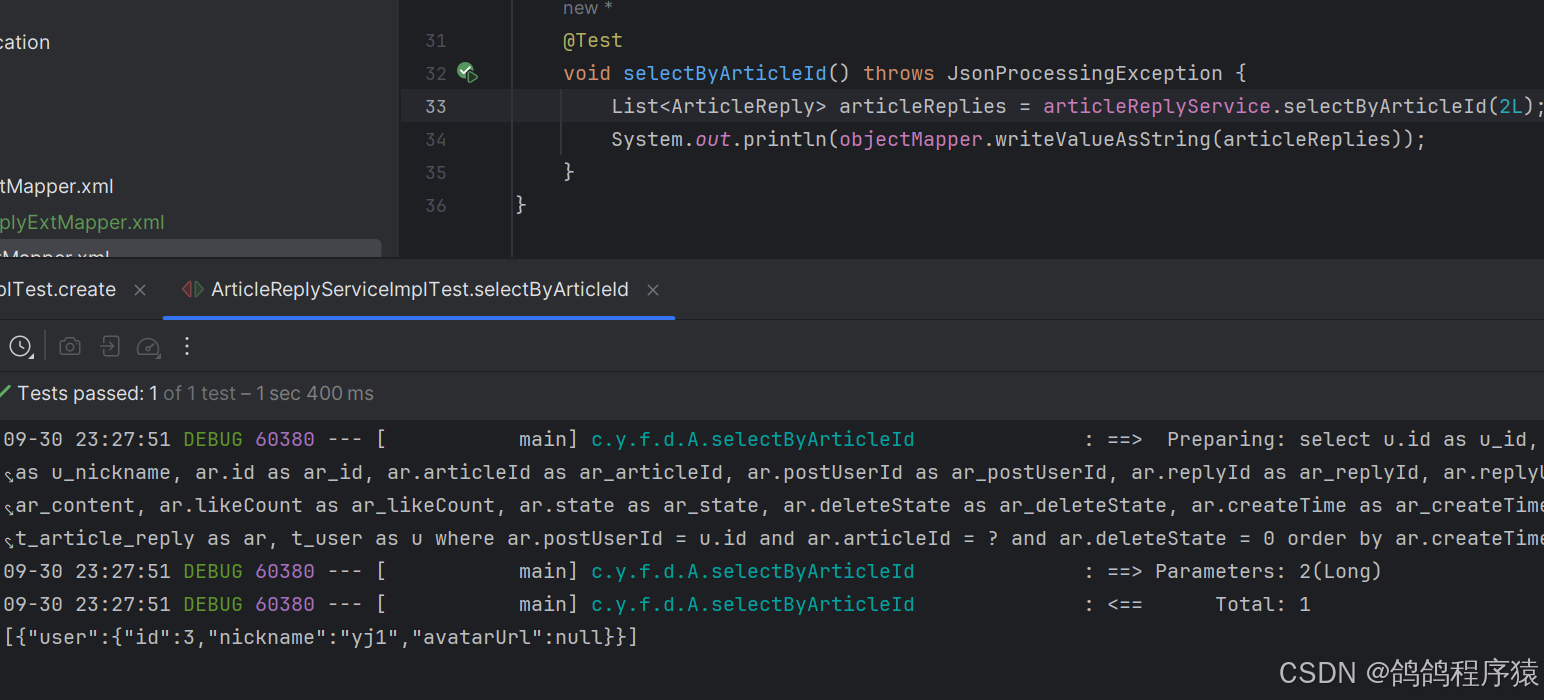
/*** 查询帖⼦对应的回复* @param articleId 帖⼦Id* @return "*/@Overridepublic List<ArticleReply> selectByArticleId(Long articleId) {//非空校验if(articleId == null || articleId <= 0) {log.warn(ResultCode.FAILED_PARAMS_VALIDATE.toString()+" 该文章不存在 articleId: "+articleId);throw new ApplicationException(AppResult.failed(ResultCode.FAILED_PARAMS_VALIDATE));}//调用daoList<ArticleReply> articleReplies = articleReplyMapper.selectByArticleId(articleId);return articleReplies;}
3.7.15.7 单元测试
3.7.15.8 实现Controller
com/yj/forum/controller/ArticleReplyController.java 实现:
逻辑:
- 非空校验
- 拿取文章
- 判断文章存在与否
- 调用service
/*** 回复帖⼦* @param articleId 帖⼦Id* @return AppResult*/@ApiOperation("回复帖⼦")@GetMapping("/getReplies")public AppResult<List<ArticleReply>> getRepliesByArticleId(@ApiParam("帖⼦Id") @RequestParam("articleId") Long articleId) {//非空校验if(articleId == null || articleId <= 0) {log.warn(ResultCode.FAILED_PARAMS_VALIDATE.toString()+" 该文章不存在 articleId: "+articleId);throw new ApplicationException(AppResult.failed(ResultCode.FAILED_PARAMS_VALIDATE));}// 查询帖⼦是否存在Article article = articleService.selectById(articleId);if(article == null || article.getState() != 0 || article.getDeleteState() != 0) {log.warn(ResultCode.FAILED_ARTICLE_IS_NOT_EXISTS.toString());throw new ApplicationException(AppResult.failed(ResultCode.FAILED_ARTICLE_IS_NOT_EXISTS));}//查询结果List<ArticleReply> articleReplies = articleReplyService.selectByArticleId(articleId);return AppResult.success(articleReplies);}
3.7.15.9 测试API
在http://127.0.0.1:58080/swagger-ui/index.html或者Postman中测试接口,记得登录。

3.7.15.10 前端
static/details.html 中修改:
// ====================== 加载回复列表 ======================// url: 'reply/getReplies?articleId=' + currentArticle.id// 成功后,调用buildArticleReply()方法构建回复列表function loadArticleDetailsReply() {$.ajax({type : 'get',url : 'reply/getReplies?articleId='+ currentArticle.id,success : function (respData){if(respData.code == 0) {buildArticleReply(respData.data);}else {//提示信息$.toast({heading : '警告',text: respData.message,icon: 'warning'});}},error : function () {//提示信息$.toast({heading : '错误',text: '访问出现错误,请于管理员联系',icon: 'error'});}});}
3.7.16 ⽤⼾帖⼦列表
在⽤⼾详情⻚显⽰当前⽤⼾发布的帖⼦列表以发布时间降序排列
3.7.16.1 实现逻辑
- ⽤⼾访问⽤⼾详情⻚时发送请求到服务器
- 服务器按发帖时间降序排列返回帖⼦列表
3.7.16.2 参数要求
| 参数名 | 描述 | 类型 | 默认值 | 条件 |
|---|---|---|---|---|
| userId | ⽤⼾Id | long | 可以为空 |
3.7.16.3 接口规范
// 请求
GET http://127.0.0.1:58080/article/getAllByUserId HTTP/1.1
GET http://127.0.0.1:58080/article/getAllByUserId?userId=1 HTTP/1.1
// 响应
HTTP/1.1 200
Content-Type: application/json
{"code": 0,"message": "成功","data": [{"id": 17,"boardId": 1,"userId": 1,"title": "测试删除","visitCount": 8,"replyCount": 1,"likeCount": 1,"state": 0,"createTime": "2023-07-05 04:10:46","updateTime": "2023-07-05 11:22:43","board": {"id": 1,"name": "Java"}"own": true},{"id": 11,"boardId": 1,"userId": 1,"title": "testtest222","visitCount": 4,"replyCount": 0,"likeCount": 0,"state": 0,"createTime": "2023-07-02 09:19:00","updateTime": "2023-07-02 09:19:00","board": {id": 1,"name": "Java"}"own": true}]
}
3.7.16.4 创建扩展Mapper.xml
SQL语句是:
select
b.id as b_id,
b.name as b_name,
a.id,
a.boardId,
a.userId,
a.title,
a.content,
a.visitCount,
a.replyCount,
a.likeCount,
a.state,
a.createTime,
a.updateTimefrom t_article as a, t_board as b where a.boardId = b.id and a.deleteState = 0  and a.userId = 3 order by a.createTime desc
mapper/extension/ArticleExtMapper.xml 中创建:
<!-- 根据用户id查询帖子列表 --><select id="selectByUserId" resultMap="AllInfoResultMap" parameterType="java.lang.Long">selectb.id as b_id,b.name as b_name,a.id,a.boardId,a.userId,a.title,a.content,a.visitCount,a.replyCount,a.likeCount,a.state,a.createTime,a.updateTimefromt_article as a,t_board as bwhere a.boardId = b.idand a.deleteState = 0and a.userId = #{userId,jdbcType=BIGINT}order by a.createTime desc</select>
3.7.16.5 修改DAO
com/yj/forum/dao/ArticleMapper.java 中修改
/*** 根据用户Id 查询帖子列表* @param userId 用户Id* @return 帖子列表*/List<Article> selectByUserId(@Param("userId") Long userId);3.7.16.6 创建Service接⼝
com/yj/forum/services/IArticleService.java 中创建
/*** 根据用户Id 查询帖子列表* @param userId 用户Id* @return 帖子列表*/List<Article> selectByUserId( Long userId);
3.7.16.7 实现Service接⼝
com/yj/forum/services/impl/ArticleServiceImpl.java 实现:
逻辑:
- 非空校验
- 拿用户信息
- 校验用户存不存在
- 调用dao
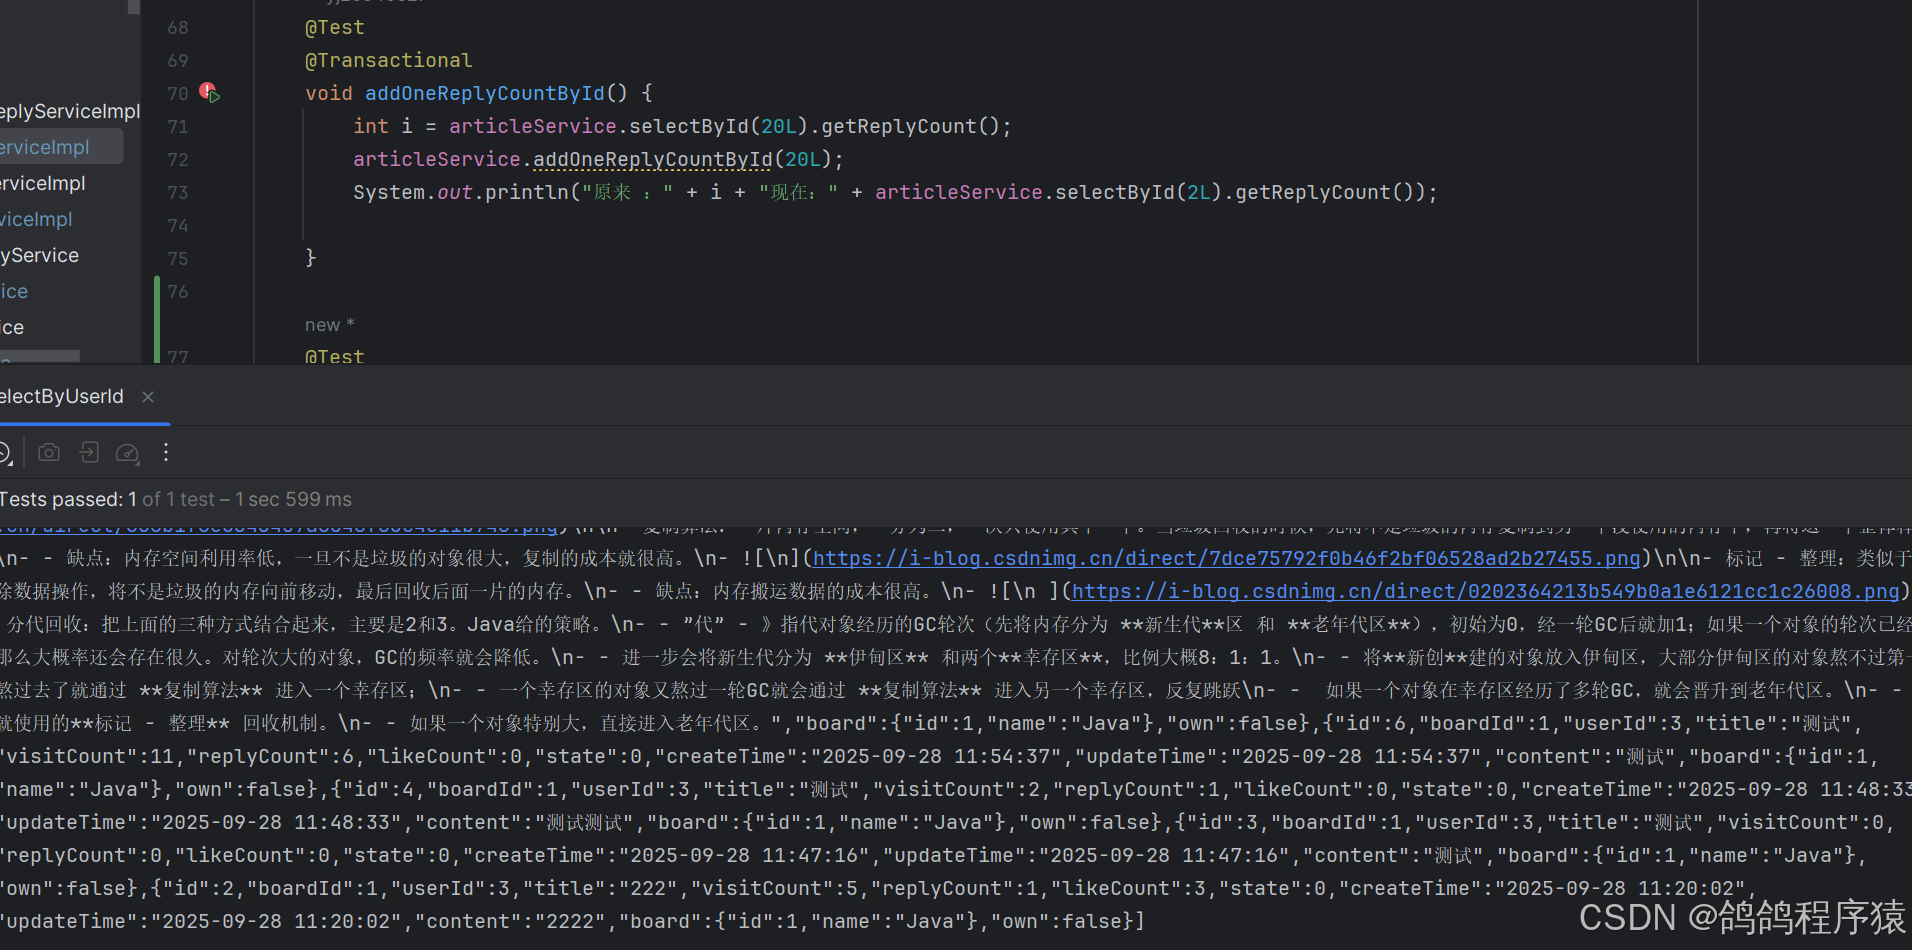
/*** 根据用户Id 查询帖子列表* @param userId 用户Id* @return 帖子列表*/@Overridepublic List<Article> selectByUserId(Long userId) {//非空校验if(userId == null || userId <= 0) {log.warn(ResultCode.FAILED_PARAMS_VALIDATE.toString());throw new ApplicationException(AppResult.failed(ResultCode.FAILED_PARAMS_VALIDATE));}//拿用户User user = userService.selectById(userId);if(user == null || user.getDeleteState() != 0) {log.warn(ResultCode.FAILED_USER_NOT_EXISTS.toString()+" article id "+userId);throw new ApplicationException(AppResult.failed(ResultCode.FAILED_USER_NOT_EXISTS));}//调用daoList<Article> articles = articleMapper.selectByUserId(userId);return articles;}
3.7.16.8 单元测试
3.7.16.9 实现controller
com/yj/forum/controller/ArticleController.java 实现:
/*** 根据⽤⼾Id查询帖⼦列表* @param userId ⽤⼾Id* @return 指定版块的帖⼦列表*/@ApiOperation("根据⽤⼾Id查询帖⼦列表")@GetMapping("/getAllByUserId")public AppResult<List<Article>> getAllByUserId(HttpServletRequest request,@ApiParam("⽤⼾Id")@RequestParam(value = "userId", required = false) Long userId) {if(userId == null) {//获取用户HttpSession session = request.getSession();User user = (User) session.getAttribute(AppConfig.USER_SESSION);userId = user.getId();}//调用serviceList<Article> articles = articleService.selectByUserId(userId);return AppResult.success(articles);}
3.7.16.10 测试API
在http://127.0.0.1:58080/swagger-ui/index.html或者Postman中测试接口,记得登录。
3.7.16.11 前端
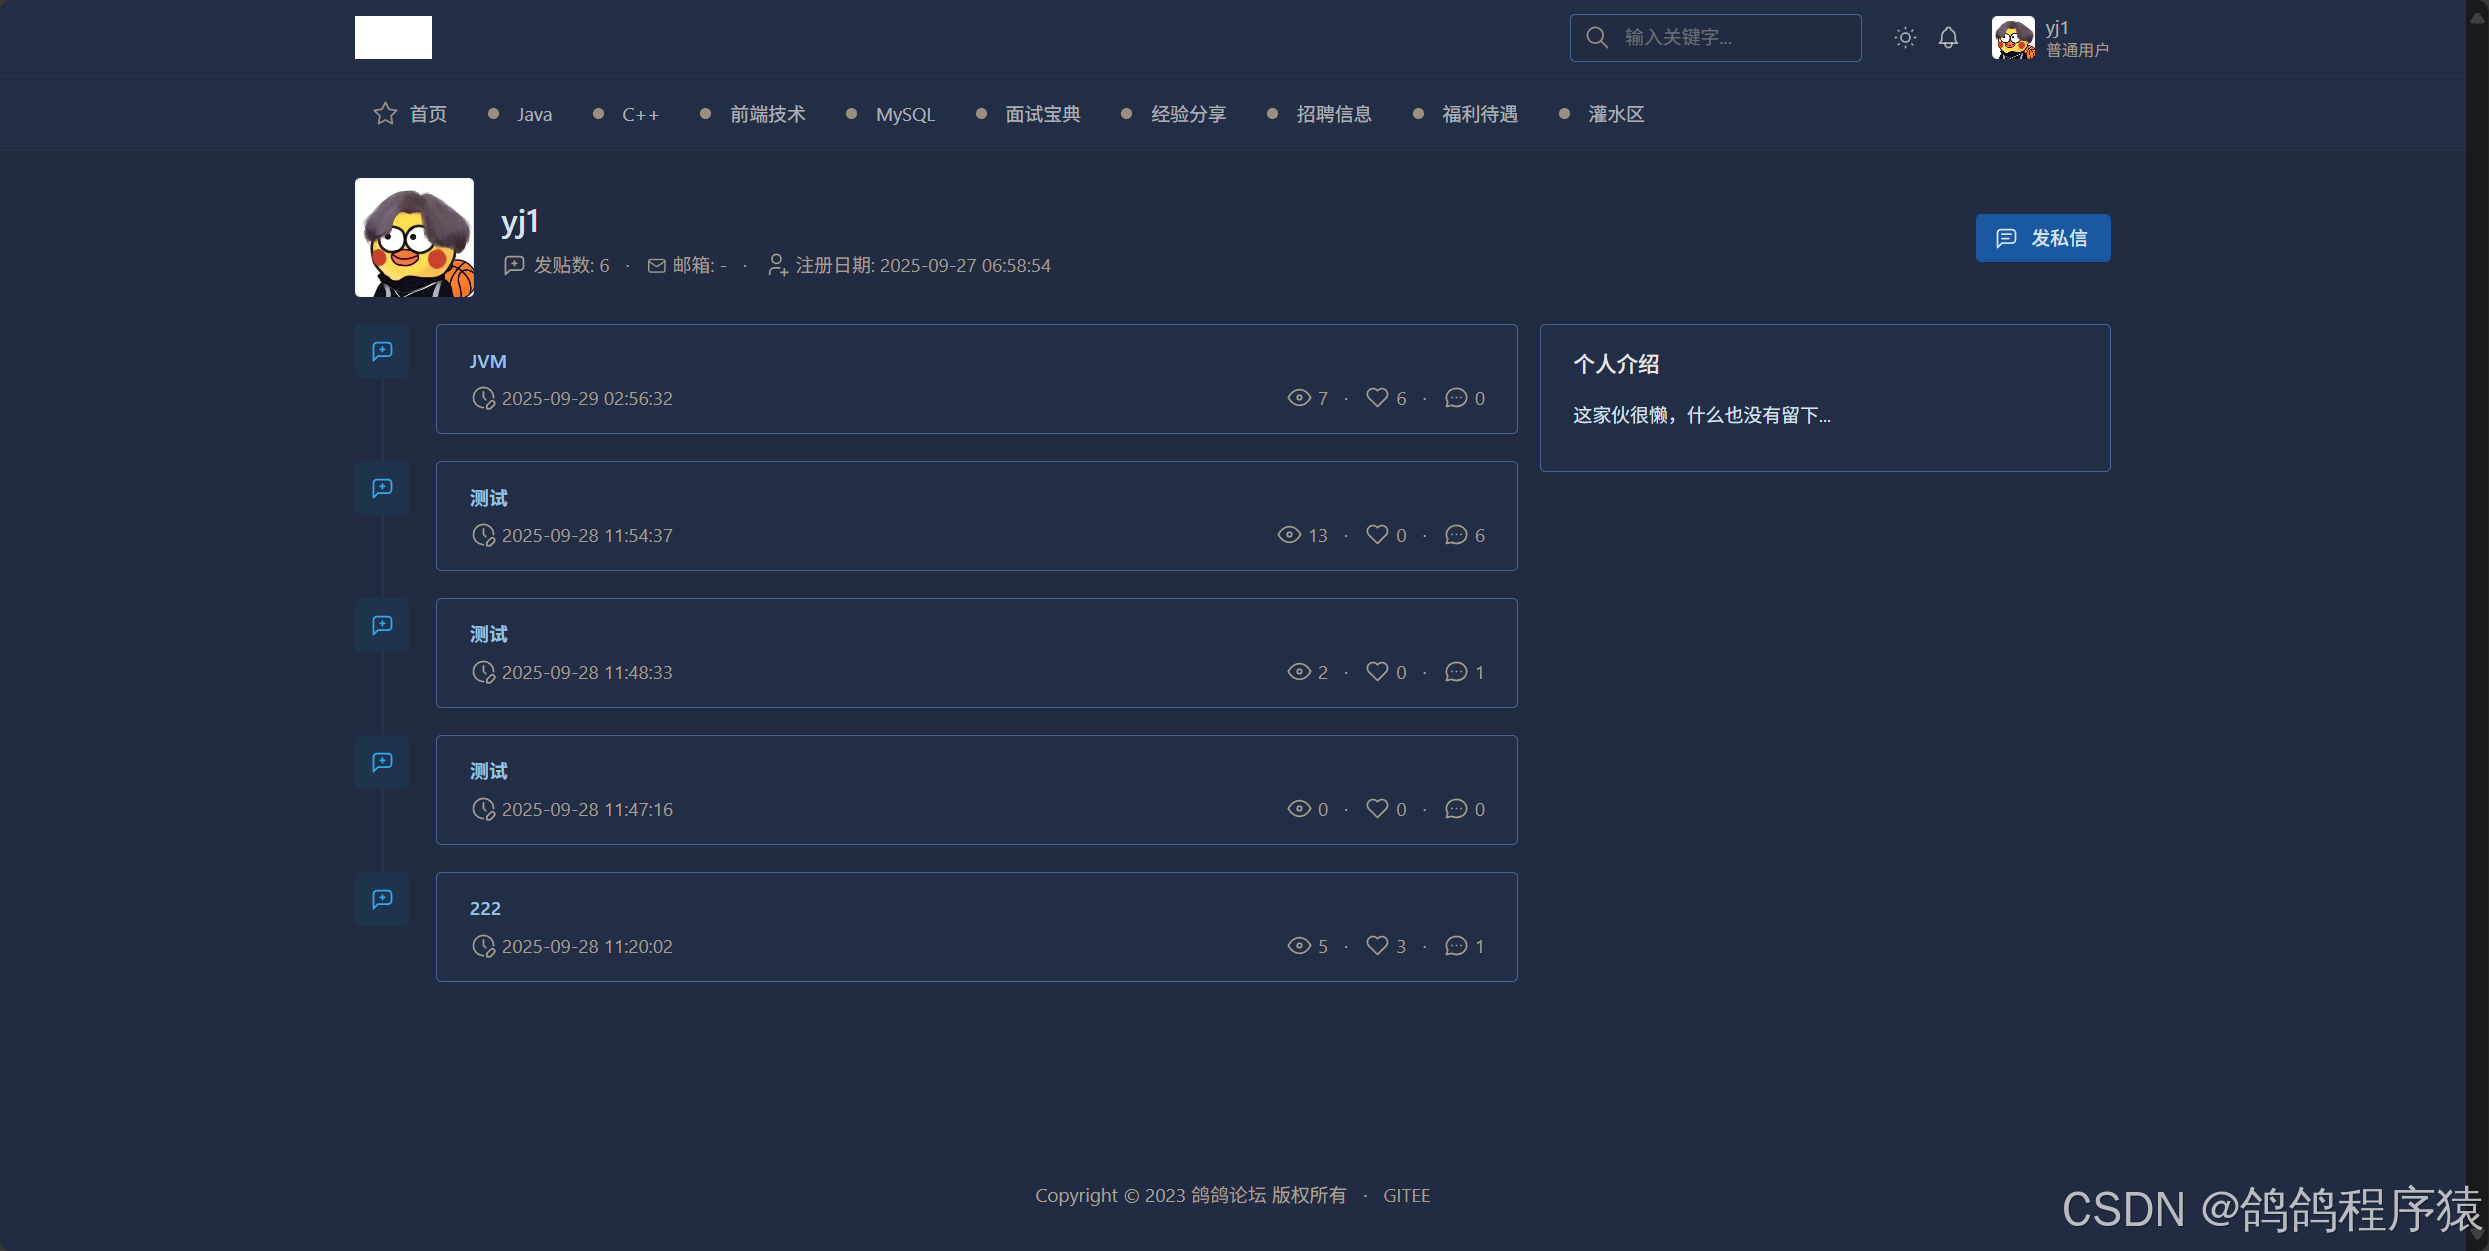
static/profile.html :
<!-- Page header -->
<div class="page-header d-print-none"><div class="container-xl"><div class="row align-items-center"><input type="text" style="display: none;" id="profile_user_id"><div class="col-auto"><span id="profile_avatar" class="avatar avatar-lg rounded"style="background-image: url(./image/avatar02.jpeg)"></span></div><div class="col"><h1 id="profile_nickname" class="fw-bold"></h1><!-- <div class="my-2">描述信息</div> --><div class="list-inline list-inline-dots text-muted"><div class="list-inline-item"><svg xmlns="http://www.w3.org/2000/svg" class="icon icon-tabler icon-tabler-message-plus" width="24"height="24" viewBox="0 0 24 24" stroke-width="2" stroke="currentColor" fill="none" stroke-linecap="round"stroke-linejoin="round"><path stroke="none" d="M0 0h24v24H0z" fill="none"></path><path d="M4 21v-13a3 3 0 0 1 3 -3h10a3 3 0 0 1 3 3v6a3 3 0 0 1 -3 3h-9l-4 4"></path><path d="M10 11l4 0"></path><path d="M12 9l0 4"></path></svg>发贴数: <span id="profile_articleCount">666</span></div><div class="list-inline-item"><svg xmlns="http://www.w3.org/2000/svg" class="icon icon-inline" width="24" height="24" viewBox="0 0 24 24"stroke-width="2" stroke="currentColor" fill="none" stroke-linecap="round" stroke-linejoin="round"><path stroke="none" d="M0 0h24v24H0z" fill="none" /><path d="M3 5m0 2a2 2 0 0 1 2 -2h14a2 2 0 0 1 2 2v10a2 2 0 0 1 -2 2h-14a2 2 0 0 1 -2 -2z" /><path d="M3 7l9 6l9 -6" /></svg>邮箱: <a id="profile_email" href="javascript:void(0);" class="text-reset"> - </a></div><div class="list-inline-item"><svg xmlns="http://www.w3.org/2000/svg" class="icon icon-tabler icon-tabler-user-plus" width="24"height="24" viewBox="0 0 24 24" stroke-width="2" stroke="currentColor" fill="none" stroke-linecap="round"stroke-linejoin="round"><path stroke="none" d="M0 0h24v24H0z" fill="none"></path><path d="M8 7a4 4 0 1 0 8 0a4 4 0 0 0 -8 0"></path><path d="M6 21v-2a4 4 0 0 1 4 -4h4c.374 0 .735 .051 1.079 .147"></path><path d="M16 19h6"></path><path d="M19 16v6"></path></svg>注册日期: <span id="profile_createTime"></span></div></div></div><div class="col-auto ms-auto" style="display: none;" id="div_profile_send_message"><div class="btn-list"><a href="javascript:void(0);" class="btn btn-primary" id="btn_profile_send_message" data-bs-toggle="modal" data-bs-target="#index_message_modal"><!-- Download SVG icon from http://tabler-icons.io/i/check --><svg xmlns="http://www.w3.org/2000/svg" class="icon" width="24" height="24" viewBox="0 0 24 24"stroke-width="2" stroke="currentColor" fill="none" stroke-linecap="round" stroke-linejoin="round"><path stroke="none" d="M0 0h24v24H0z" fill="none" /><path d="M4 21v-13a3 3 0 0 1 3 -3h10a3 3 0 0 1 3 3v6a3 3 0 0 1 -3 3h-9l-4 4" /><path d="M8 9l8 0" /><path d="M8 13l6 0" /></svg>发私信</a></div></div></div></div>
</div>
<!-- Page body -->
<div class="page-body"><div class="container-xl"><div class="row g-3"><div class="col"><ul id="profile_article_body" class="timeline"><!-- 动态构建帖子列表 --></ul></div><!-- 右侧部分 --><div class="col-lg-4"><div class="row row-cards"><!-- 个人介绍 --><div class="col-12"><div class="card"><div class="card-body"><h2 class="card-title">个人介绍</h2><div id="profile_remark"><p>这家伙很懒,什么也没有留下...</p></div></div></div></div></div></div></div></div>
</div><script>$(function () {// 构造查询用户信息的queryStringlet userInfoQueryString = '';if (profileUserId) {userInfoQueryString = '?id=' + profileUserId}// ============= 获取用户信息 =============// 成功时调用initProfileUserInfo()方法,初始化用户数据$.ajax({type : 'get',url : 'user/info'+userInfoQueryString,success : function (respData){if(respData.code == 0) {initProfileUserInfo(respData.data);}else {//提示信息$.toast({heading : '警告',text: respData.message,icon: 'warning'});}},error : function () {//提示信息$.toast({heading : '错误',text: '访问出现错误,请于管理员联系',icon: 'error'});}});// ============= 设置Profile页面用户信息 ================function initProfileUserInfo(user) {console.log(user);// 默认头像路径if (!user.avatarUrl) {user.avatarUrl = avatarUrl;}console.log('currentUserId = '+currentUserId);// 站内信按钮if (user.id != currentUserId) {// 显示站内信按钮$('#div_profile_send_message').show();// 设置站内信目标用户信息$('#btn_profile_send_message').click(function() {setMessageReceiveUserInfo(user.id, user.nickname);});}// 设置用户ID$('#profile_user_id').val(user.id);// 设置头像$('#profile_avatar').css('background-image', 'url(' + user.avatarUrl + ')');// 用户昵称$('#profile_nickname').html(user.nickname);// 发贴数$('#profile_articleCount').html(user.articleCount);// 邮箱if (user.email) {$('#profile_email').html(user.email);}// 注册日期$('#profile_createTime').html(user.createTime);// 个人介绍if (user.remark) {$('#profile_remark').html(user.remark);}}// 构造查询用户信息的queryStringlet articleListQueryString = '';if (profileUserId) {articleListQueryString = '?userId=' + profileUserId}// ============= 获取当前用户发贴 =============// url: 'article/getAllByUserId' + articleListQueryString// 成功后,调用buildProfileUserArticle()方法,构造帖子列表$.ajax({type : 'get',url: 'article/getAllByUserId' + articleListQueryString,success : function (respData){if(respData.code == 0) {buildProfileUserArticle(respData.data);}else {//提示信息$.toast({heading : '警告',text: respData.message,icon: 'warning'});}},error : function () {//提示信息$.toast({heading : '错误',text: '访问出现错误,请于管理员联系',icon: 'error'});}});// ============= 构建用户帖子列表 =============function buildProfileUserArticle(data) {// 没有帖子if(data.length == 0) {$('#profile_article_body').html('还没有帖子');return;}// 构建帖子列表data.forEach(article => {let articleHtmlStr = ' <li class="timeline-event">'+ ' <div class="timeline-event-icon bg-twitter-lt">'+ ' <svg xmlns="http://www.w3.org/2000/svg" class="icon icon-tabler icon-tabler-message-plus" width="24"'+ ' height="24" viewBox="0 0 24 24" stroke-width="2" stroke="currentColor" fill="none"'+ ' stroke-linecap="round" stroke-linejoin="round">'+ ' <path stroke="none" d="M0 0h24v24H0z" fill="none"></path>'+ ' <path d="M4 21v-13a3 3 0 0 1 3 -3h10a3 3 0 0 1 3 3v6a3 3 0 0 1 -3 3h-9l-4 4"></path>'+ ' <path d="M10 11l4 0"></path>'+ ' <path d="M12 9l0 4"></path>'+ ' </svg>'+ ' </div>'+ ' <div class="card timeline-event-card">'+ ' <div class="card-body">'+ ' <div>'+ ' <div class="row">'+ ' <div class="col">'+ ' <div class="text-truncate">'+ ' <a href="javascript:void(0);"  class="profile_article_list_a_title">'+ ' <strong>' + article.title + '</strong>'+ ' </a>'+ ' </div>'+ ' <div class="text-muted mt-2">'+ ' <div class="row">'+ ' <div class="col">'+ ' <ul class="list-inline list-inline-dots mb-0">'+ ' <li class="list-inline-item">'+ ' <svg xmlns="http://www.w3.org/2000/svg" class="icon icon-tabler icon-tabler-clock-edit"'+ ' width="24" height="24" viewBox="0 0 24 24" stroke-width="2" stroke="currentColor"'+ ' fill="none" stroke-linecap="round" stroke-linejoin="round">'+ ' <path stroke="none" d="M0 0h24v24H0z" fill="none"></path>'+ ' <path d="M21 12a9 9 0 1 0 -9.972 8.948c.32 .034 .644 .052 .972 .052"></path>'+ ' <path d="M12 7v5l2 2"></path>'+ ' <path d="M18.42 15.61a2.1 2.1 0 0 1 2.97 2.97l-3.39 3.42h-3v-3l3.42 -3.39z"></path>'+ ' </svg> '+ article.createTime+ ' </li>'+ ' </ul>'+ ' </div>'+ ' <div class="col-auto d-none d-md-inline">'+ ' <ul class="list-inline list-inline-dots mb-0">'+ ' <li class="list-inline-item">'+ ' <svg xmlns="http://www.w3.org/2000/svg" class="icon icon-tabler icon-tabler-eye"'+ ' width="24" height="24" viewBox="0 0 24 24" stroke-width="2" stroke="currentColor"'+ ' fill="none" stroke-linecap="round" stroke-linejoin="round">'+ ' <path stroke="none" d="M0 0h24v24H0z" fill="none"></path>'+ ' <path d="M12 12m-2 0a2 2 0 1 0 4 0a2 2 0 1 0 -4 0"></path>'+ ' <path'+ ' d="M22 12c-2.667 4.667 -6 7 -10 7s-7.333 -2.333 -10 -7c2.667 -4.667 6 -7 10 -7s7.333 2.333 10 7">'+ ' </path>'+ ' </svg> '+ article.visitCount+ ' </li>'+ ' <li class="list-inline-item">'+ ' <svg xmlns="http://www.w3.org/2000/svg" class="icon icon-tabler icon-tabler-heart"'+ ' width="24" height="24" viewBox="0 0 24 24" stroke-width="2" stroke="currentColor"'+ ' fill="none" stroke-linecap="round" stroke-linejoin="round">'+ ' <path stroke="none" d="M0 0h24v24H0z" fill="none"></path>'+ ' <path'+ ' d="M19.5 12.572l-7.5 7.428l-7.5 -7.428a5 5 0 1 1 7.5 -6.566a5 5 0 1 1 7.5 6.572">'+ ' </path>'+ ' </svg> '+ article.likeCount+ ' </li>'+ ' <li class="list-inline-item">'+ ' <svg xmlns="http://www.w3.org/2000/svg"'+ ' class="icon icon-tabler icon-tabler-message-circle" width="24" height="24"'+ ' viewBox="0 0 24 24" stroke-width="2" stroke="currentColor" fill="none"'+ ' stroke-linecap="round" stroke-linejoin="round">'+ ' <path stroke="none" d="M0 0h24v24H0z" fill="none"></path>'+ ' <path d="M3 20l1.3 -3.9a9 8 0 1 1 3.4 2.9l-4.7 1"></path>'+ ' <path d="M12 12l0 .01"></path>'+ ' <path d="M8 12l0 .01"></path>'+ ' <path d="M16 12l0 .01"></path>'+ ' </svg> '+ article.replyCount+ ' </li>'+ ' </ul>'+ ' </div>'+ ' </div>'+ ' </div>'+ ' </div>'+ ' </div>'+ ' </div>'+ ' </div>'+ ' </div>'+ ' </li>';// 追加到父标签let profileArtilceItem = $(articleHtmlStr);// 获取标题的 a 标签let articleTitle = profileArtilceItem.find('.profile_article_list_a_title');// 处理标题点击事件articleTitle.click(function() {// 通过全局变量保存当前访问的帖子信息currentArticle = article;$('#bit-forum-content').load('details.html');});// 追加到父标签$('#profile_article_body').append(profileArtilceItem);});}});
</script>
3.7.17 获取用户信息

3.7.17.1 实现逻辑
⽤⼾提交请求,服务器根据是否传⼊Id参数决定返回哪个⽤⼾的详情
- 不传⽤⼾Id,返回当前登录⽤⼾的详情
- 传⼊⽤⼾Id,返回指定Id的⽤⼾详情
3.7.17.2 参数要求
| 参数名 | 描述 | 类型 | 默认值 | 条件 |
|---|---|---|---|---|
| id | ⽤⼾Id | long | 可以为空 |
3.7.17.3 接⼝规范
// 请求
GET /user/info HTTP/1.1// 响应
HTTP/1.1 200
Content-type: applicatin/json
{"code": 0,"message": "成功","data": {"id": 25,"username": "user223","nickname": "user223","phoneNum": null,"email": null,"gender": 1,"avatarUrl": null,"articleCount": 0,"isAdmin": 0,"state": 0,"createTime": "2023-04-08 15:06:10","updateTime": "2023-04-08 15:06:10"}
}
3.7.17.4 前端
因为我们前面已经在个人中心的时候已经实现了后端代码,调用的是一个API,只需要修改一下前端:
static/settings.html :
// ================= 获取用户详情,初始化页面内容 =================// 发送AJAX请求,成功时 调用initUserInfo方法,完成页面数据初始化$.ajax({type : 'get',url: 'user/info',success : function (respData){if(respData.code == 0) {initUserInfo(respData.data);}else {//提示信息$.toast({heading : '警告',text: respData.message,icon: 'warning'});}},error : function () {//提示信息$.toast({heading : '错误',text: '访问出现错误,请于管理员联系',icon: 'error'});}});
3.7.18 修改个人信息
只对⽤⼾的基本信息做修改,不包括密码与头像,修改密码与修改头像提供单独的修改接⼝
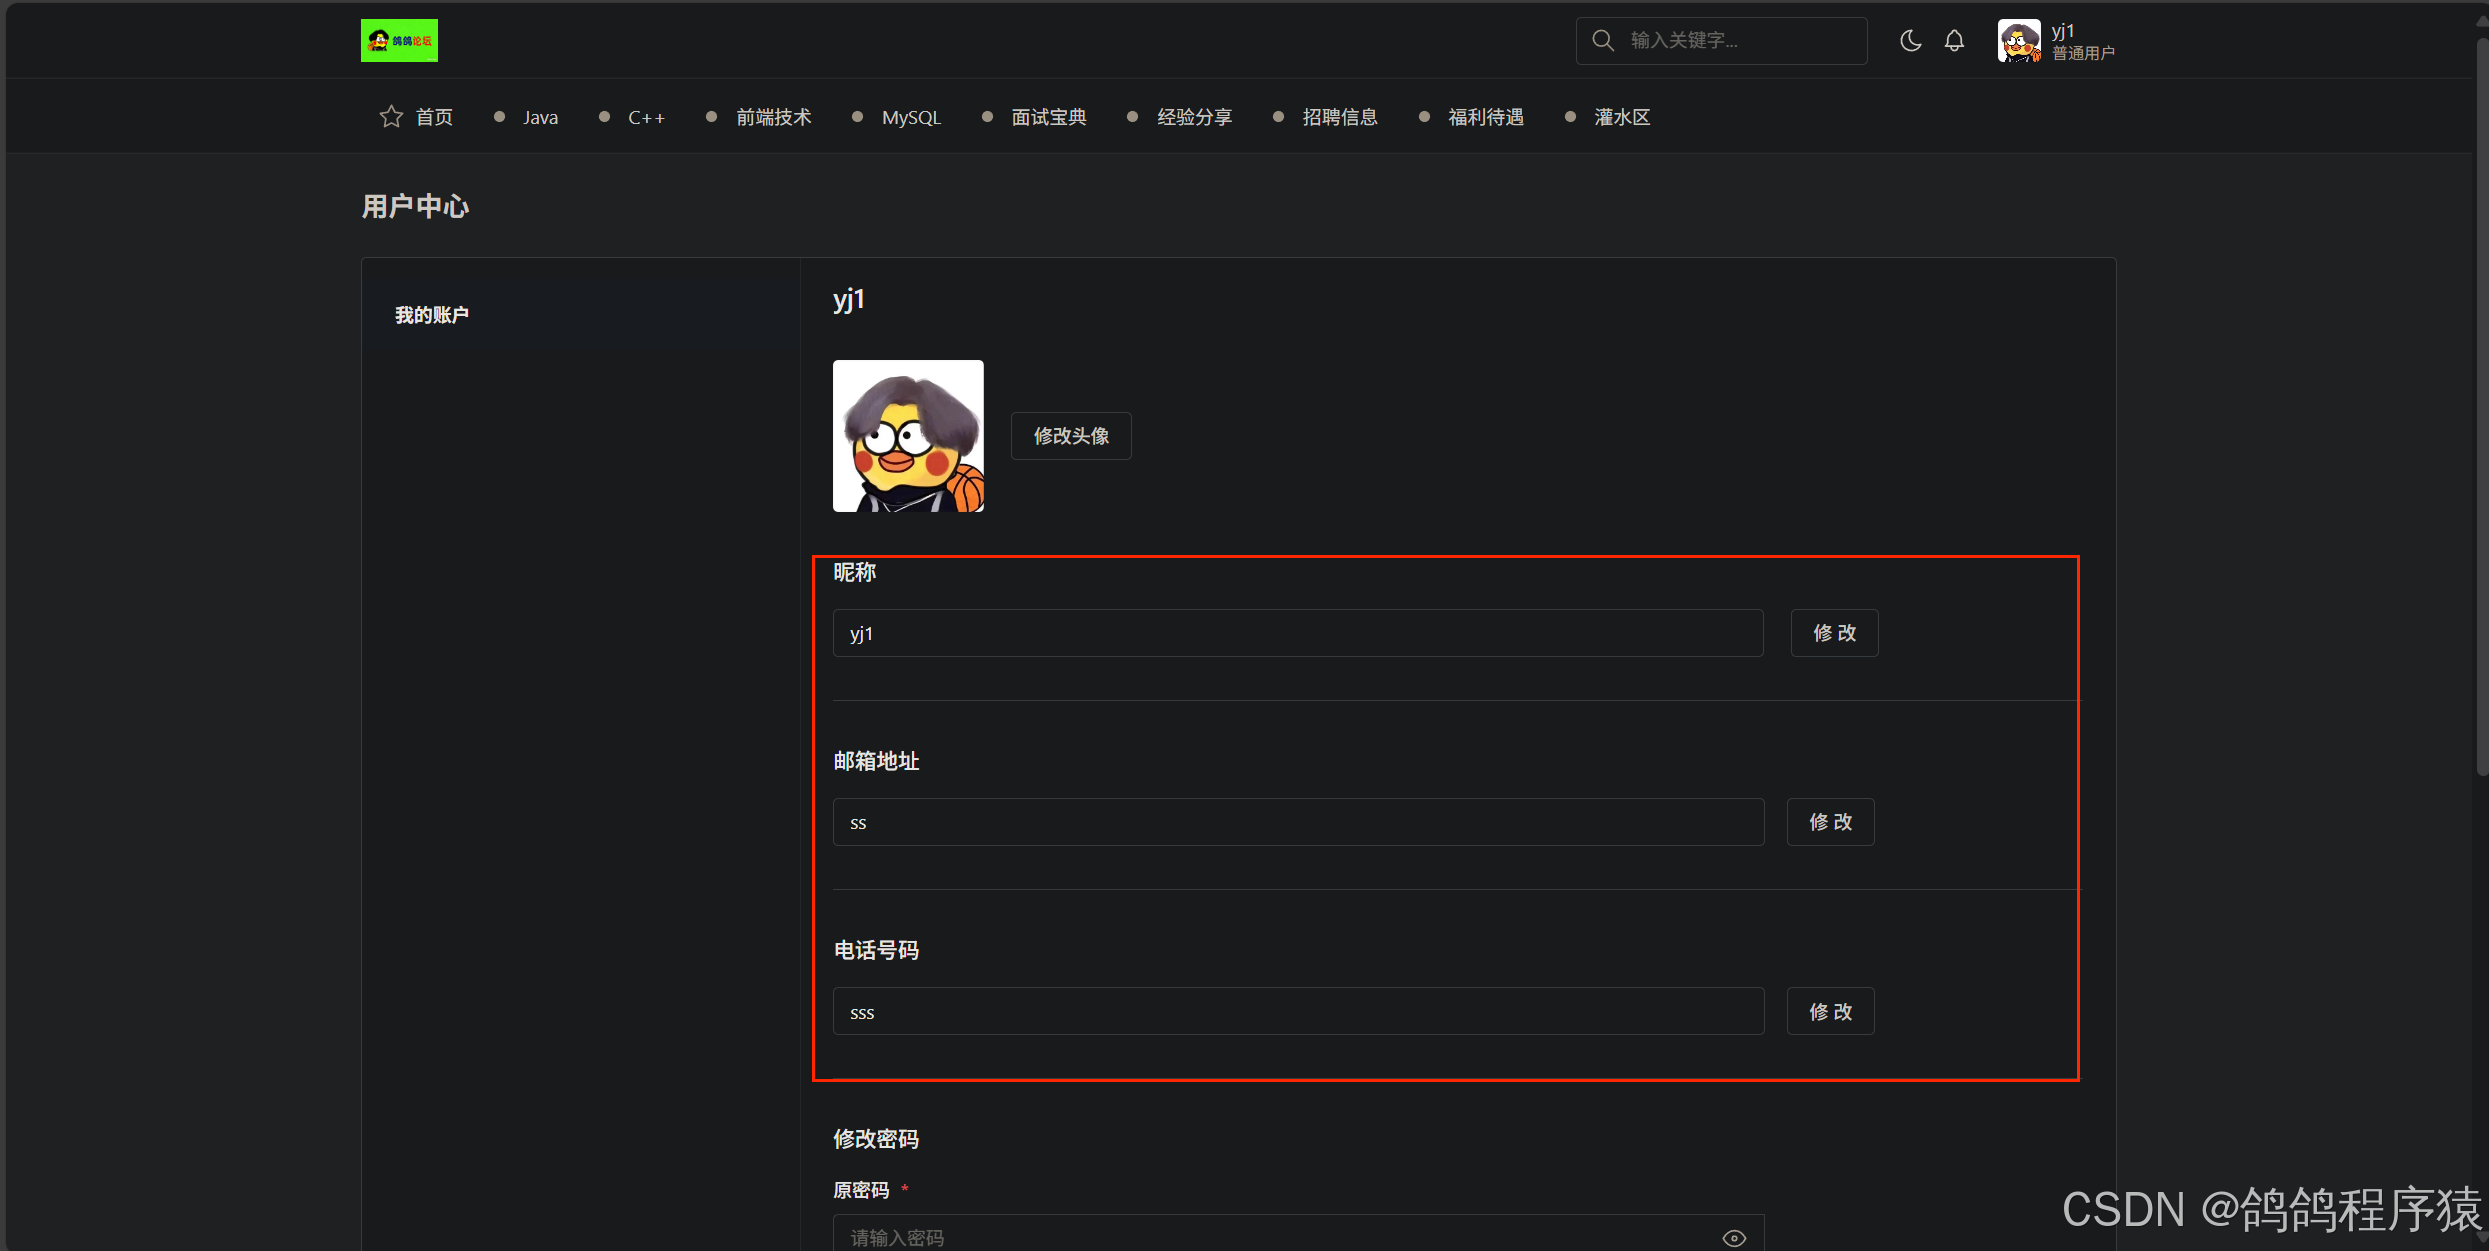
3.7.18.1 实现逻辑
- ⽤⼾打开找修改个⼈信息⻚⾯
- 填⼊要修改的内容并提交服务器
- 服务器获取登录⽤⼾的Id,并根据提交的内容修改数据
- 返回成功或失败,如果成功返回更新后的个⼈信息
- 浏览器刷新个⼈信息
3.7.18.2 参数要求
注册时需要⽤⼾提交的参数:
| 参数名 | 描述 | 类型 | 默认值 | 条件 |
|---|---|---|---|---|
| username | ⽤⼾名(⽤于登录) | String | 可选,唯⼀,校验是否存在 | |
| nickname | 昵称 | String | 可选, | |
| gender | 性别 | Byte | 可选,0⼥, 1男,2保密 | |
| 邮箱 | String | 可选 | ||
| phoneNum | 电话 | String | 可选 | |
| remark | 个⼈简介 | String | 可选 |
3.7.18.3 接口规范
// 请求
POST http://127.0.0.1:58080/user/modifyInfo HTTP/1.1
Content-Type: application/x-www-form-urlencoded
id=1&nickname=bitboy&gender=1&email=bitboy%40bit.com&phoneNum=18888888888&remar
k=%E6%88%91%E6%98%AF%E4%B8%80%E4%B8%AA%E4%BC%98%E7%A7%80%E7%9A%84%E5%A5%BD%E9%9
D%92%E5%B9%B4
// 响应
HTTP/1.1 200
Content-Type: application/json
{"code": 0,"message": "成功","data": {"id": 1,"username": "bitboy","nickname": "bitboy","phoneNum": "18888888888","email": "bitboy@bit.com","gender": 1,"avatarUrl": null,"articleCount": 1,"isAdmin": 1,"remark": "我是⼀个优秀的好⻘年","state": 0,"createTime": "2023-06-24 11:59:15","updateTime": "2023-07-09 03:05:23"}
}
3.7.18.4 创建Service接⼝
mapper和dao直接使用自动生成的动态SQL即可
com/yj/forum/services/IUserService.java 添加:
/*** 修改个⼈信息* @param user 要更新的对象*/void modifyInfo(User user);3.7.18.5 实现 Service接⼝
com/yj/forum/services/impl/UserServiceImpl.java 实现:
逻辑:
- 非空校验,校验参数user也要校验user的id
- 检验这个id对应的用户是否还在
- 校验上面的参数有没有修改,使用标志位来标记
- 校验每一个参数
- 根据标志位确定最后是否修改数据库
/*** 修改个⼈信息* @param user 要更新的对象*/@Overridepublic void modifyInfo(User user) {//非空校验if(user == null || user.getId() == null || user.getId() <= 0) {log.warn(ResultCode.FAILED_USER_NOT_EXISTS.toString());throw new ApplicationException(AppResult.failed(ResultCode.FAILED_USER_NOT_EXISTS));}//校验⽤⼾是否存在User existsUser = userMapper.selectByPrimaryKey(user.getId());if(existsUser == null || existsUser.getDeleteState() != 0) {log.warn(ResultCode.FAILED_USER_NOT_EXISTS.toString());throw new ApplicationException(AppResult.failed(ResultCode.FAILED_USER_NOT_EXISTS));}//校验修改参数,使用标志位记录有修改参数吗,false代表没有boolean flag = false;//对每个⼀个参数进⾏校验并赋值User updateUser = new User();updateUser.setId(user.getId());//⽤⼾名if(!StringUtil.isEmpty(user.getUsername())) {//需要更新⽤⼾名(登录名)时,进⾏唯⼀性的校验User checkUser = userMapper.selectByUserName(user.getUsername());if(checkUser != null) {log.warn(ResultCode.FAILED_USER_EXISTS.toString());throw new ApplicationException(AppResult.failed(ResultCode.FAILED_USER_EXISTS));}//没有 赋值updateUser.setUsername(user.getUsername());//更新标志位flag = true;}// 校验昵称if(!StringUtil.isEmpty(user.getNickname()) && !user.getNickname().equals(existsUser.getNickname())) {//设置昵称updateUser.setNickname(user.getNickname());//更新标志位flag = true;}//校验性别if(user.getGender() != null && !user.getGender().equals(existsUser.getGender())) {// 设置性别updateUser.setGender(user.getGender());// 合法性校验if (updateUser.getGender() > 2 || updateUser.getGender() < 0) {updateUser.setGender((byte) 2);}// 更新标志位flag = true;}//校验邮箱if(!StringUtil.isEmpty(user.getEmail()) && !user.getEmail().equals(existsUser.getEmail())) {//设置邮箱updateUser.setEmail(user.getEmail());//更新标志位flag = true;}//校验电话号码if(!StringUtil.isEmpty(user.getPhoneNum()) && !user.getPhoneNum().equals(existsUser.getPhoneNum())) {//设置电话号码updateUser.setPhoneNum(user.getPhoneNum());//更新标志位flag = true;}//校验个⼈简介if(!StringUtil.isEmpty(user.getRemark()) && !user.getRemark().equals(existsUser.getRemark())) {//设置个人简介updateUser.setRemark(user.getRemark());//更新标志位flag = true;}//根据标志位来决定是否可以执⾏更新if(!flag) {log.warn(ResultCode.FAILED_USER_UPDATE_INFO.toString());throw new ApplicationException(AppResult.failed(ResultCode.FAILED_USER_UPDATE_INFO));}//调用daoint row = userMapper.updateByPrimaryKeySelective(updateUser);if(row != 1) {log.warn(ResultCode.FAILED.toString() + ", 受影响的⾏数不等于 1 .");throw new ApplicationException(AppResult.failed(ResultCode.ERROR_SERVICES));}}
3.7.18.6 单元测试

3.7.18.7 实现controller
com/yj/forum/controller/UserController.java 实现:
逻辑:
- 非空校验
- 获取对象并校验
- 构造对象
- 调用service
/*** 修改个⼈信息* @param username ⽤⼾名* @param nickname 昵称* @param gender 性别* @param email 邮箱* @param phoneNum 电话号* @param remark 个⼈简介* @return AppResult*/@ApiOperation("修改个⼈信息")@PostMapping("/modifyInfo")public AppResult modifyInfo(HttpServletRequest request,@ApiParam("⽤⼾名") @RequestParam(value = "username", required = false) String username,@ApiParam("昵称") @RequestParam(value = "nickname", required = false) String nickname,@ApiParam("昵称") @RequestParam(value = "gender", required = false) Byte gender,@ApiParam("昵称") @RequestParam(value = "email", required = false) String email,@ApiParam("昵称") @RequestParam(value = "phoneNum", required = false) String phoneNum,@ApiParam("昵称") @RequestParam(value = "remark", required = false) String remark) {//获取对象HttpSession session = request.getSession();User user = (User) session.getAttribute(AppConfig.USER_SESSION);//对参数做⾮空校验(全部都为空,则返回错误描述)if (StringUtil.isEmpty(username) && StringUtil.isEmpty(nickname) && gender == null&& StringUtil.isEmpty(email) && StringUtil.isEmpty(phoneNum) && StringUtil.isEmpty(remark) ) {// 返回错误信息return AppResult.failed("请输⼊要修改的内容");}// 封装对象User updateUser = new User();updateUser.setId(user.getId()); // ⽤⼾IdupdateUser.setUsername(username); // ⽤⼾名updateUser.setNickname(nickname); // 昵称updateUser.setGender(gender); // 性别updateUser.setEmail(email); // 邮箱updateUser.setPhoneNum(phoneNum); // 电话updateUser.setRemark(remark); // 个⼈简介//调用serviceuserService.modifyInfo(updateUser);//更新sessionuser = userService.selectById(user.getId());session.setAttribute(AppConfig.USER_SESSION, user);return AppResult.success(user);}
3.7.18.8 测试API
在http://127.0.0.1:58080/swagger-ui/index.html或者Postman中测试接口,记得登录。

3.7.18.9 前端
static/settings.html 中修改:
// ================= 封装ajax请求 =================function changeUserInfo(userInfo, type) {// 校验用户信息if (!userInfo) {$.toast({heading: '提示',text: '请检查要修改的内容是否正确或联系管理员',icon: 'info'});return;}// 定义接口路径let userURL = 'user/modifyInfo';if (type == 1) {userURL = 'user/modifyInfo';} else if (type == 2) {userURL = 'user/modifyPwd';}// 发送请求,提示响应结果$.ajax({type : 'post',url : userURL,icon : 'application/x-www-form-urlencoded',data : userInfo,success : function (respData){//判断返回状态吗if(respData.code == 0) {let user = respData.data;if(user && user.nickname) {$('#settings_nickname').html(user.nickname);$('#index_nav_nickname').html(user.nickname);}//提示信息$.toast({heading : '修改成功',text: respData.message,icon: 'success'});}else {//提示信息$.toast({heading : '警告',text: respData.message,icon: 'warning'});}},error : function () {//提示信息$.toast({heading : '错误',text: '访问出现错误,请于管理员联系',icon: 'error'});}});}3.7.19 修改密码
为修改密码提供⼀个单独的接⼝及操作⻚⾯
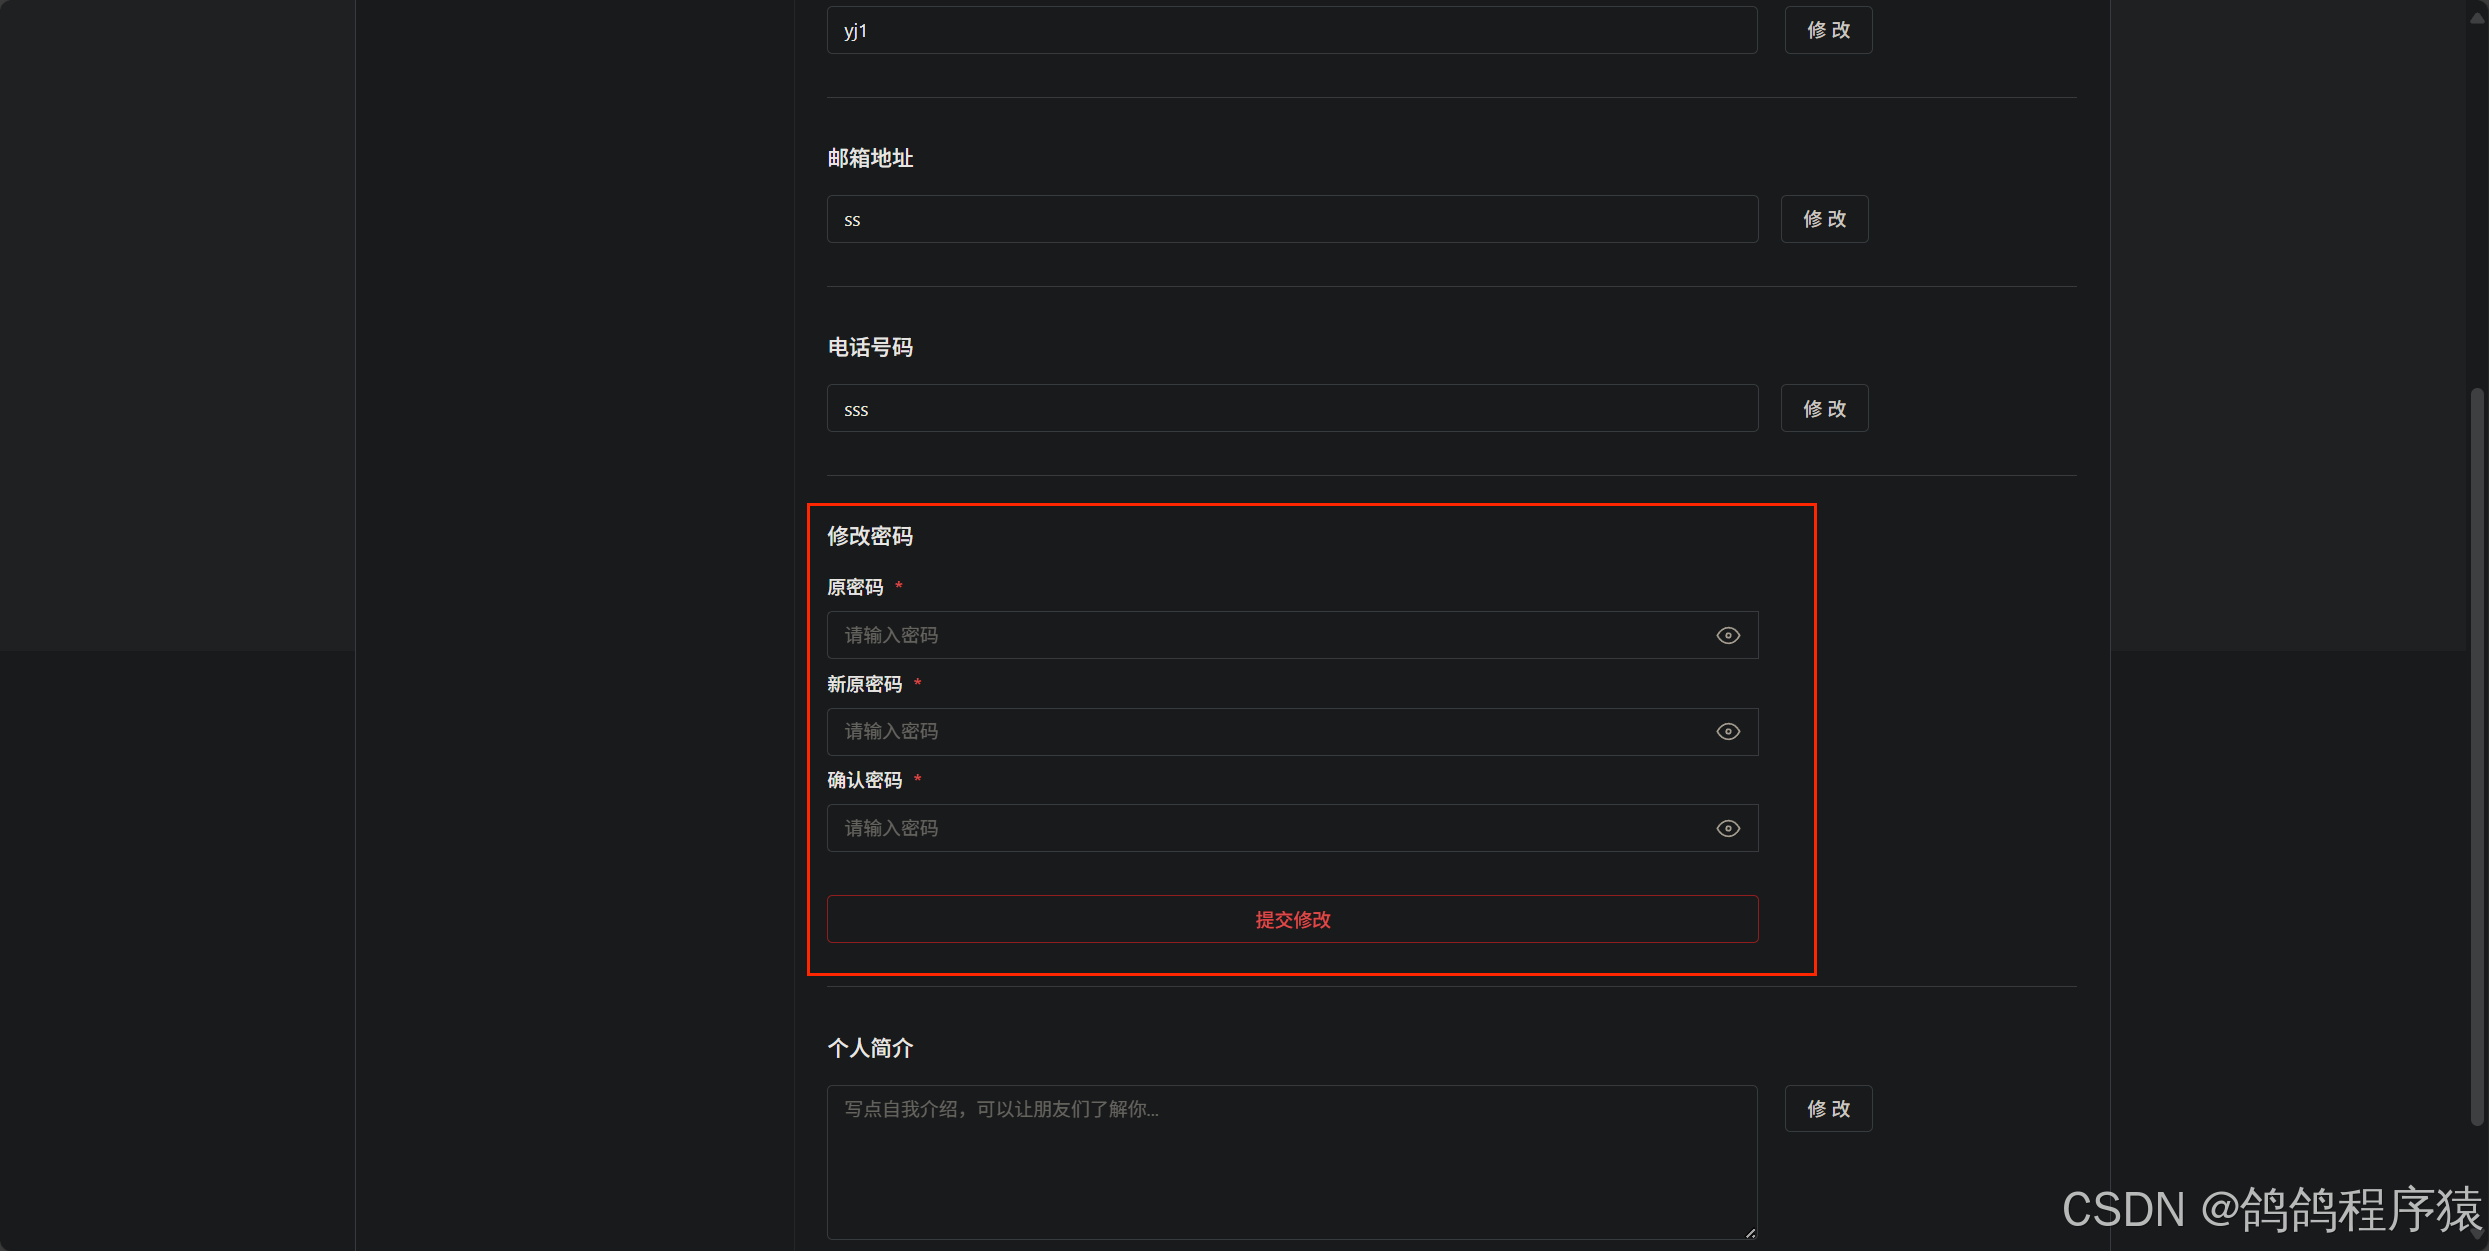
3.7.19.1 实现逻辑
- ⽤⼾打开修改密码⻚⾯
- 输⼊原密码、新密码、重复新密码并提交服务器
- 服务器校验原密码是否正确
- 原密码校验通过更新密码
- 返回成功或失败
3.7.19.2 参数要求
| 参数名 | 描述 | 类型 | 默认值 | 条件 |
|---|---|---|---|---|
| oldPassword | 原密码 | String | 必须 | |
| newPassword | 新密码 | String | 必须 | |
| passwordRepeat | 确认新密码 | String | 必须,与新密码相同 |
3.7.19.3 接口规范
// 请求
POST http://127.0.0.1:58080/user/modifyPwd HTTP/1.1
Content-Type: application/x-www-form-urlencoded
id=1&oldPassword=123456&newPassword=123456&passwordRepeat=123456
// 响应
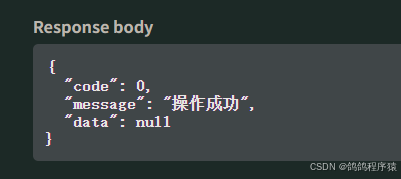
HTTP/1.1 200
Content-Type: application/json
{"code": 0,"message": "成功","data": null
}
3.7.19.4 创建service接口
不用修改 mapper和dao,直接使用自动生成的动态更新即可。
com/yj/forum/services/IUserService.java 创建
/*** 修改⽤⼾密码 * @param id ⽤⼾Id * @param newPassword 新密码 * @param oldPassword ⽼密码 */void modifyPassword (Long id, String newPassword, String oldPassword);
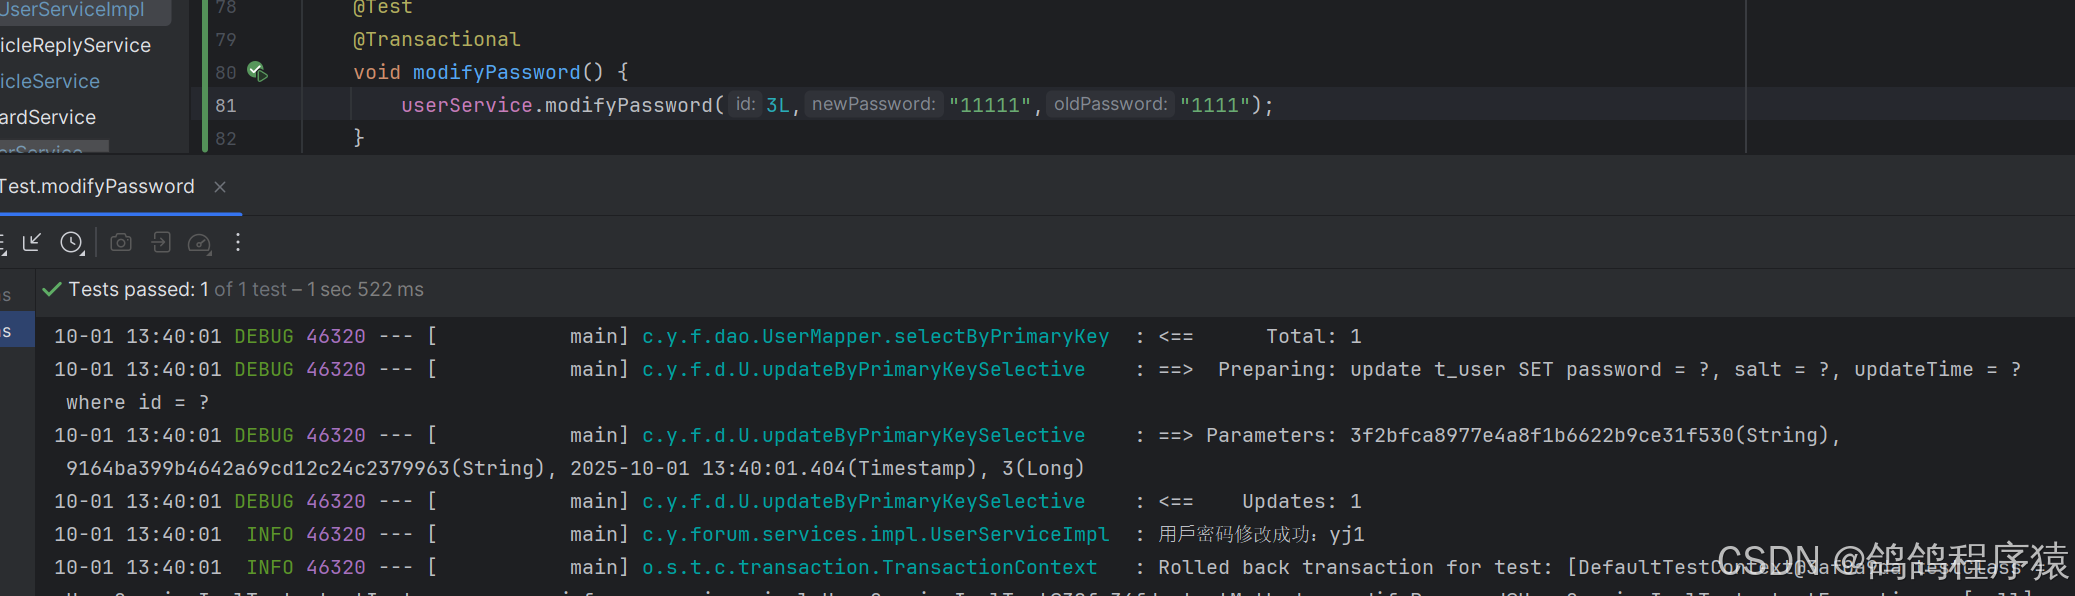
3.7.19.5 实现service接口
com/yj/forum/services/impl/UserServiceImpl.java 实现:
逻辑:
- 非空校验
- 拿取用户
- 校验用户是否存在
- 校验原密码是否正确
- 生成新密码
- 更新
/*** 修改⽤⼾密码* @param id ⽤⼾Id* @param newPassword 新密码* @param oldPassword ⽼密码*/@Overridepublic void modifyPassword(Long id, String newPassword, String oldPassword) {//非空校验if(id == null || id <= 0 || StringUtil.isEmpty(newPassword) || StringUtil.isEmpty(oldPassword)) {log.warn(ResultCode.FAILED_PARAMS_VALIDATE.toString());throw new ApplicationException(AppResult.failed(ResultCode.FAILED_PARAMS_VALIDATE));}//拿取用户User user = userMapper.selectByPrimaryKey(id);//校验if(user == null || user.getDeleteState() != 0) {log.warn(ResultCode.FAILED_USER_NOT_EXISTS.toString());throw new ApplicationException(AppResult.failed(ResultCode.FAILED_USER_NOT_EXISTS));}//校验老密码是否正确if(!MD5Util.verifyOriginalAndCiphertext(oldPassword, user.getSalt(), user.getPassword())) {log.info(ResultCode.FAILED_LOGIN.toString() + " 密码错误:username = " + user.getUsername() );throw new ApplicationException(AppResult.failed(ResultCode.FAILED_LOGIN));}//修改密码User updateUser = new User();updateUser.setId(user.getId());updateUser.setSalt(UUIDUtil.UUID_32());updateUser.setPassword( MD5Util.md5Salt( newPassword, updateUser.getSalt() ) );updateUser.setUpdateTime(new Date());//更新int row = userMapper.updateByPrimaryKeySelective(updateUser);//校验if(row != 1) {log.error(ResultCode.ERROR_SERVICES.toString()+ ", 受影响的⾏数不等于 1 为 " + row);throw new ApplicationException(AppResult.failed(ResultCode.ERROR_SERVICES));}// 打印⽇志log.info("⽤⼾密码修改成功:" + user.getUsername());}
3.7.19.3 单元测试
3.7.19.3 实现controller
com/yj/forum/controller/UserController.java 实现
/***修改密码* @param oldPassword 原密码* @param newPassword 新密码* @param passwordRepeat 确认密码* @return AppResult*/@ApiOperation("修改密码")@PostMapping("/modifyPwd")public AppResult modifyPassword(HttpServletRequest request,@ApiParam("原密码")@RequestParam("oldPassword") String oldPassword,@ApiParam("新密码")@RequestParam("newPassword") String newPassword,@ApiParam("确认密码")@RequestParam("passwordRepeat") String passwordRepeat) {//非空校验if(StringUtil.isEmpty(oldPassword) || StringUtil.isEmpty(newPassword) || StringUtil.isEmpty(passwordRepeat)) {return AppResult.failed(ResultCode.FAILED_PARAMS_VALIDATE);}//新密码与确认密码是否相同if(!newPassword.equals(passwordRepeat)) {return AppResult.failed(ResultCode.FAILED_TWO_PWD_NOT_SAME);}//拿取用户HttpSession session = request.getSession();User user = (User) session.getAttribute(AppConfig.USER_SESSION);//调用serviceuserService.modifyPassword(user.getId(), newPassword, oldPassword);//销毁session,让用户重新登录if (session != null) {session.invalidate();}return AppResult.success();}
3.7.19.3 测试API
在http://127.0.0.1:58080/swagger-ui/index.html或者Postman中测试接口,记得登录。
3.7.19.3 前端
static/settings.html 中修改
// ================= 修改密码 =================$('#settings_submit_password').click(function() {// 获取值let oldPasswordEl = $('#settings_input_oldPassword');// 校验if(!oldPasswordEl.val()) {oldPasswordEl.focus();return false;}// 获取值let newPasswordEl = $('#settings_input_newPassword');// 校验if(!newPasswordEl.val()) {newPasswordEl.focus();return false;}// 获取值let passwordRepeatEl = $('#settings_input_passwordRepeat');// 校验if(!passwordRepeatEl.val()) {passwordRepeatEl.focus();return false;}// 两次输入的密码是否相同if (newPasswordEl.val() != passwordRepeatEl.val()) {$.toast({heading: '提示',text: '两次输入的密码不相同',icon: 'warning'});// 获取焦点passwordRepeatEl.focus();return false;}// 构造数据let passwrodObj = {id : $('#settings_user_id').val(),oldPassword : oldPasswordEl.val(),newPassword : newPasswordEl.val(),passwordRepeat : passwordRepeatEl.val()}// 发送请求changeUserInfo(passwrodObj, 2);// 清空输入框oldPasswordEl.val('');newPasswordEl.val('');passwordRepeatEl.val('');location.assign('/index.html');});
3.7.20 发送站内信
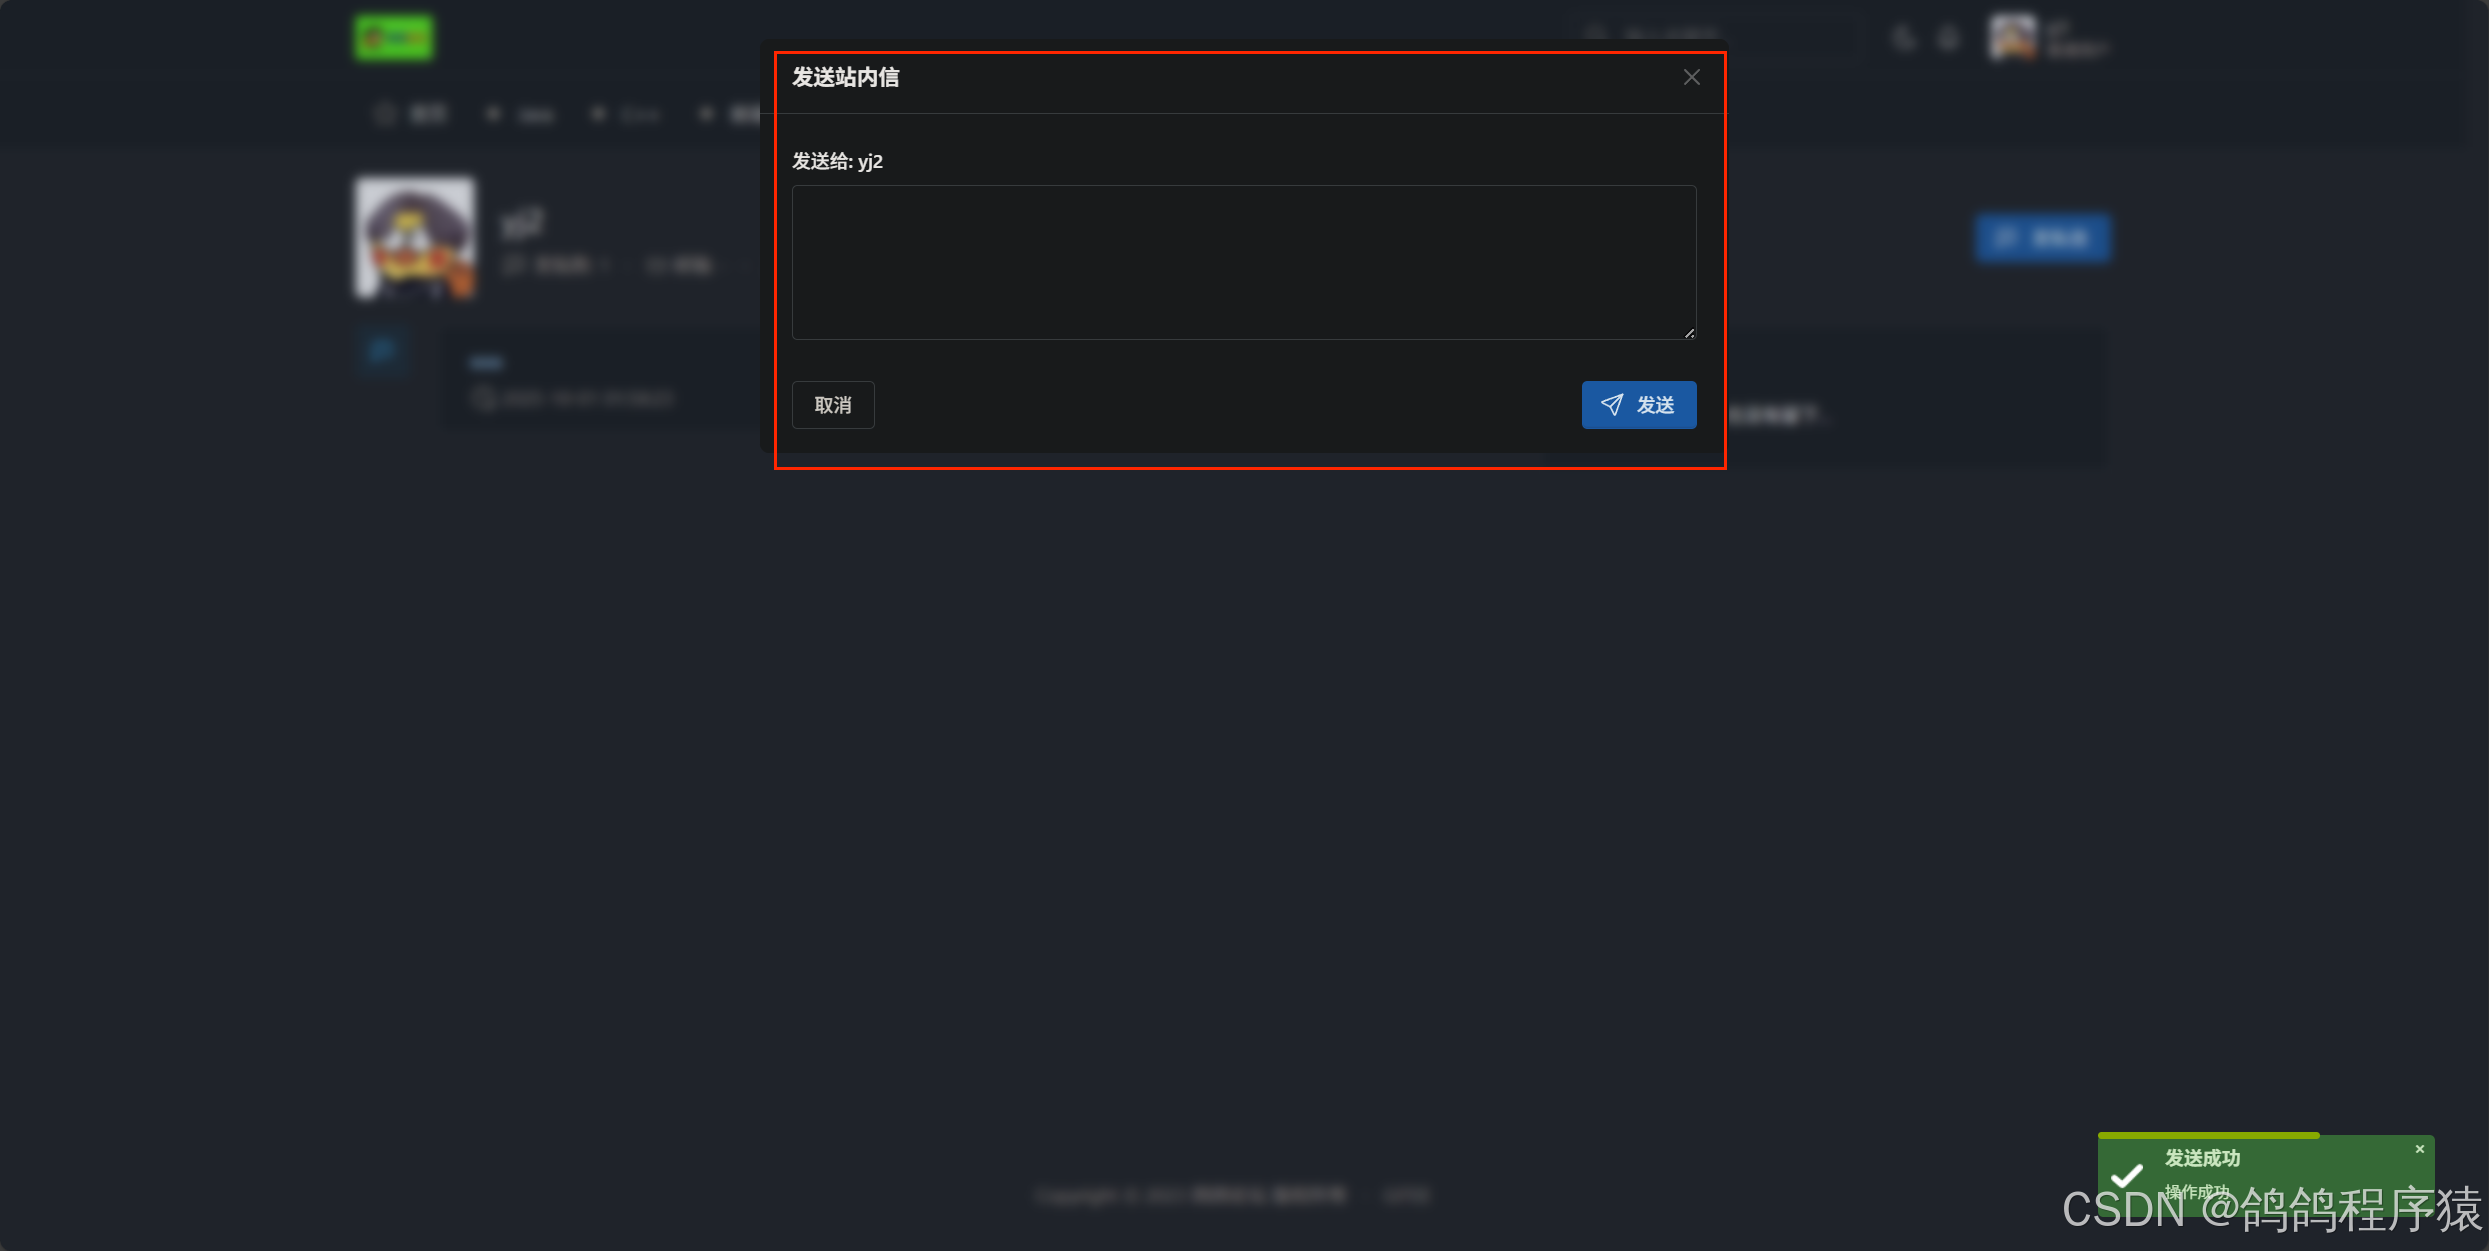
3.7.20.1 实现逻辑
- 在⽬录⽤⼾详情界⾯,点击发送站内信接钮,进⼊编辑⻚⾯
- 编写站内信内容,点击发送按钮
- 提⽰发送结果
3.7.20.2 参数要求
| 参数名 | 描述 | 类型 | 默认值 | 条件 |
|---|---|---|---|---|
| receiveUserId | 接收⽤⼾Id | Long | 必须 | |
| content | 站内信内容 | String | 必须 |
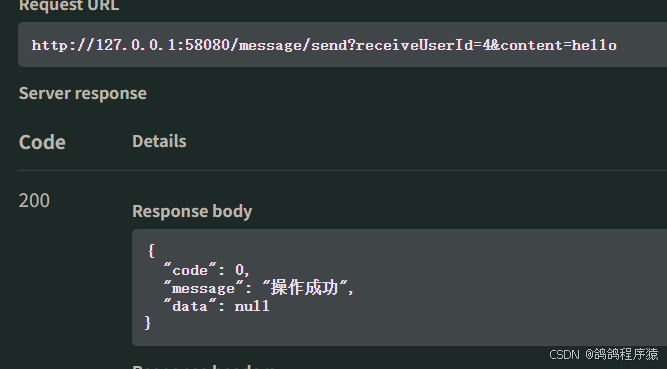
3.7.20.3 接口规范
// 请求
POST http://127.0.0.1:58080/message/send HTTP/1.1
Content-Type: application/x-www-form-urlencoded
receiveUserId=2&content=%E4%BD%A0%E5%A5%BD%E5%95%8A
// 响应
HTTP/1.1 200
Content-Type: application/json
{"code": 0,"message": "成功","data": null
}
3.7.20.4 创建service接口
mapper和dao用自动生成的即可。
com/yj/forum/services/IMessageService.java 定义:
package com.yj.forum.services;import com.yj.forum.model.Message;public interface IMessageService {/*** 发送站内信息* @param message 站内信*/void create (Message message);}3.7.20.5 实现service接口
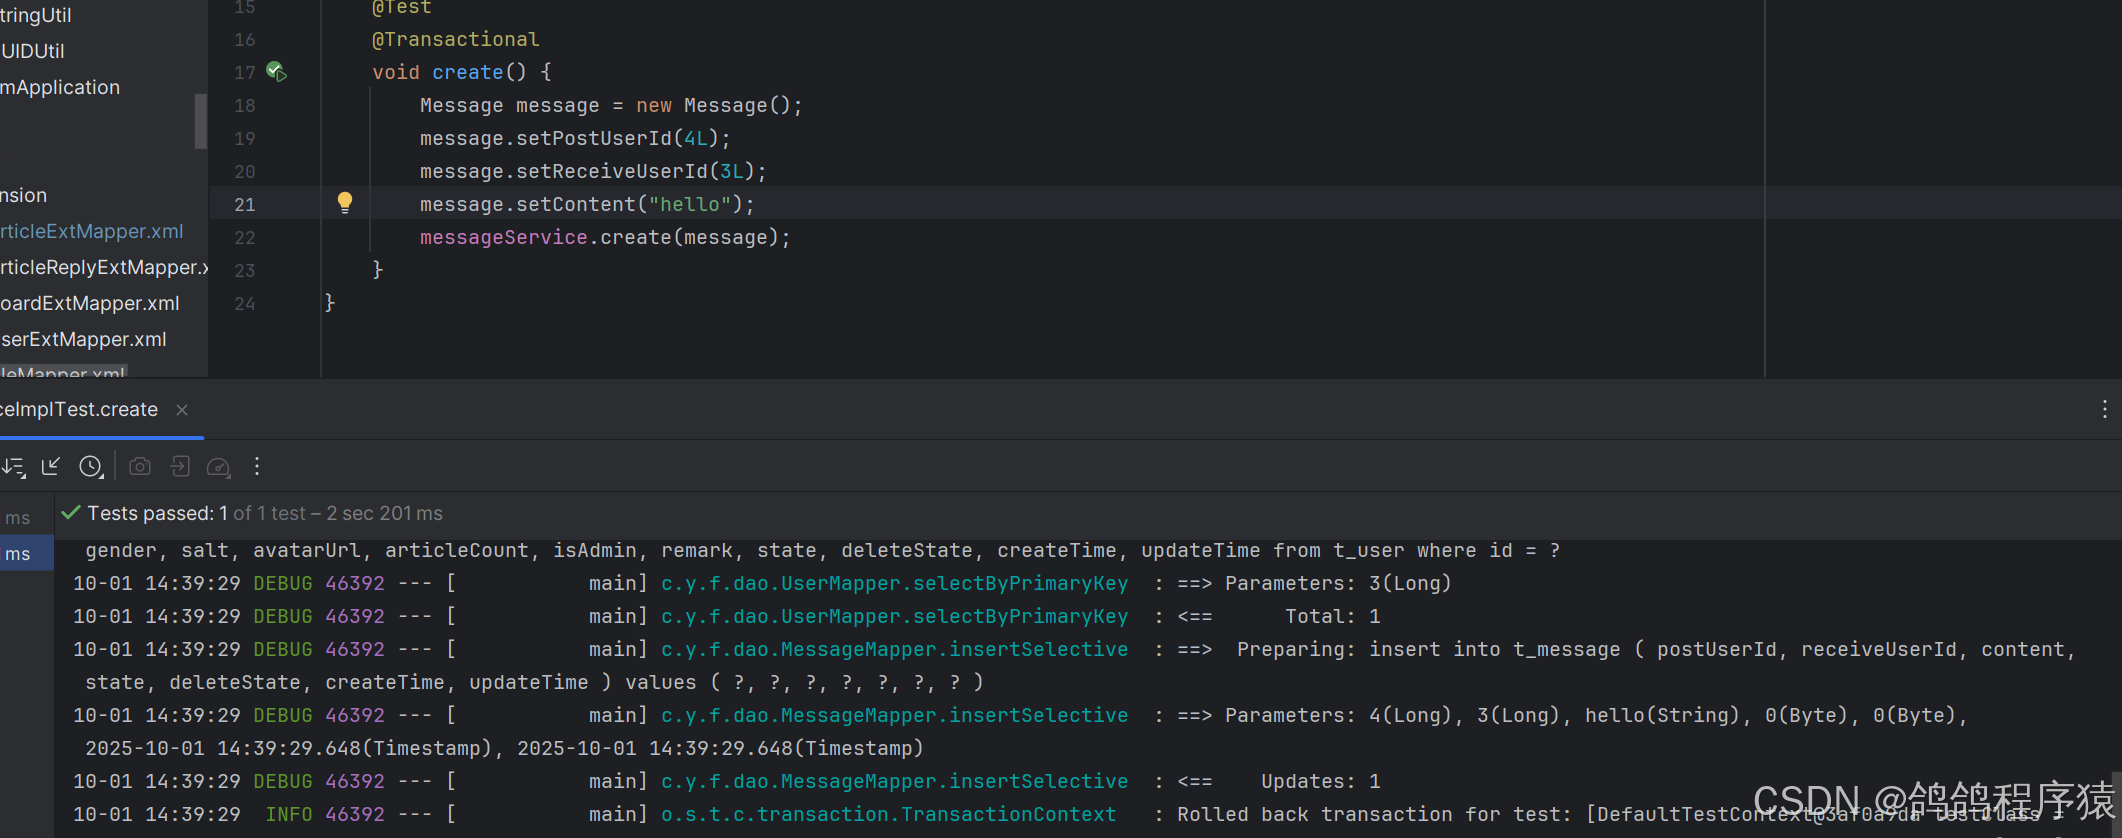
com/yj/forum/services/impl/MessageServiceImpl.java :
逻辑:
- 非空校验,私信内容,接收者发送者的id
- 拿取接收者,验证还存在吗
- 构造默认数据
- 调用dao创建
- 验证影响行数
package com.yj.forum.services.impl;import com.yj.forum.common.AppResult;
import com.yj.forum.common.ResultCode;
import com.yj.forum.dao.MessageMapper;
import com.yj.forum.exception.ApplicationException;
import com.yj.forum.model.Message;
import com.yj.forum.model.User;
import com.yj.forum.services.IMessageService;
import com.yj.forum.services.IUserService;
import com.yj.forum.utils.StringUtil;
import lombok.extern.slf4j.Slf4j;
import org.springframework.stereotype.Service;import javax.annotation.Resource;
import java.util.Date;@Slf4j
@Service
public class MessageServiceImpl implements IMessageService {@Resourceprivate MessageMapper messageMapper;@Resourceprivate IUserService userService;/*** 发送站内信息* @param message 站内信*/@Overridepublic void create(Message message) {//非空校验if(message == null|| StringUtil.isEmpty(message.getContent())|| message.getPostUserId() == null|| message.getPostUserId() <= 0|| message.getReceiveUserId() == null|| message.getReceiveUserId() <= 0) {log.warn(ResultCode.FAILED_PARAMS_VALIDATE.toString());throw new ApplicationException(AppResult.failed(ResultCode.FAILED_PARAMS_VALIDATE));}//校验接收者是否存在User user = userService.selectById(message.getReceiveUserId());if(user == null || user.getDeleteState() != 0) {log.warn(ResultCode.FAILED_USER_NOT_EXISTS.toString());throw new ApplicationException(AppResult.failed(ResultCode.FAILED_USER_NOT_EXISTS));}// 设置默认值message.setState((byte) 0); // 表⽰未读状态message.setDeleteState((byte) 0);// 设置创建与更新时间Date date = new Date();message.setCreateTime(date);message.setUpdateTime(date);//调用daoint row = messageMapper.insertSelective(message);if(row != 1) {log.error(ResultCode.ERROR_SERVICES.toString()+ ", 受影响的⾏数不等于 1 为 " + row);throw new ApplicationException(AppResult.failed(ResultCode.ERROR_SERVICES));}}
}
3.7.20.6 单元测试
3.7.20.7 实现controller
com/yj/forum/controller/MessageController.java 实现:
逻辑:
- 非空校验
- 拿取当前用户
- 判断是否禁言
- 判断接收者与发送者是不是相同,自己不能给自己发私信
- 拿取接收者用户,判断是否存在
- 构造数据
- 调用service
package com.yj.forum.controller;import com.yj.forum.common.AppConfig;
import com.yj.forum.common.AppResult;
import com.yj.forum.common.ResultCode;
import com.yj.forum.model.Message;
import com.yj.forum.model.User;
import com.yj.forum.services.IMessageService;
import com.yj.forum.services.IUserService;
import com.yj.forum.utils.StringUtil;
import io.swagger.annotations.Api;
import io.swagger.annotations.ApiOperation;
import io.swagger.annotations.ApiParam;
import lombok.extern.slf4j.Slf4j;
import org.springframework.web.bind.annotation.PostMapping;
import org.springframework.web.bind.annotation.RequestMapping;
import org.springframework.web.bind.annotation.RequestParam;
import org.springframework.web.bind.annotation.RestController;import javax.annotation.Resource;
import javax.servlet.http.HttpServletRequest;
import javax.servlet.http.HttpSession;@Slf4j
@Api(tags = "站内信接⼝")
@RestController
@RequestMapping("/message")
public class MessageController {@Resourceprivate IMessageService messageService;@Resourceprivate IUserService userService;/*** 发送站内信* @param receiveUserId 接收⽤⼾Id* @param content 内容* @return AppResult*/@ApiOperation("发送站内信")@PostMapping("/send")public AppResult send(HttpServletRequest request,@ApiParam("接收⽤⼾Id")@RequestParam("receiveUserId") Long receiveUserId,@ApiParam("站内信内容")@RequestParam("content") String content) {//非空校验if(receiveUserId == null || receiveUserId <= 0  || StringUtil.isEmpty(content)) {log.warn(ResultCode.FAILED_PARAMS_VALIDATE.toString());return AppResult.failed(ResultCode.FAILED_PARAMS_VALIDATE);}//获取用户HttpSession session = request.getSession();User user = (User) session.getAttribute(AppConfig.USER_SESSION);//校验是否禁言if(user.getState() != 0) {log.warn(ResultCode.FAILED_USER_BANNED.toString());return AppResult.failed(ResultCode.FAILED_USER_BANNED);}//不能给自己发送私信if(receiveUserId.equals(user.getId())) {log.warn("不能给⾃⼰发送站内信. postUserId = " + user.getId() + ", receiveUserId = " + receiveUserId);return AppResult.failed(ResultCode.FAILED_CREATE);}// 查询接收⽤⼾User receiveUser = userService.selectById(receiveUserId);// ⽬标⽤⼾不存在if (receiveUser.getDeleteState() != 0) {log.warn(ResultCode.FAILED_USER_NOT_EXISTS.toString() + ", receiveUserId = " + receiveUserId);return AppResult.failed(ResultCode.FAILED_USER_NOT_EXISTS);}//构造数据Message message = new Message();message.setContent(content);message.setReceiveUserId(receiveUserId);message.setPostUserId(user.getId());//调用servicemessageService.create(message);return AppResult.success();}
}
3.7.20.8 测试API
在http://127.0.0.1:58080/swagger-ui/index.html或者Postman中测试接口,记得登录。
3.7.20.9 前端
static/index.html 中修改:
// ============ 发送站内信 ==============$('#btn_index_send_message').click(function() {// 获取输入内容let receiveUserIdEl = $('#index_message_receive_user_id');let messageContentEl = $('#index_message_receive_content');// 校验if (!receiveUserIdEl.val()) {$.toast({heading: '警告',text: '出错了,请联系管理员',icon: 'warning'});return;}if (!messageContentEl.val()) {$.toast({heading: '警告',text: '请输入要发送的内容',icon: 'warning'});// 输入框messageContentEl.focus();return;}// 构造发送数据let postData = {receiveUserId : receiveUserIdEl.val(),content : messageContentEl.val()};// 发送站内信请求 url = message/send, 成功与失败都调用cleanMessageForm()方法,清空输入框$.ajax({type : 'post',url: 'message/send',contentType : 'application/x-www-form-urlencoded',data: postData,success : function (respData){if(respData.code == 0) {cleanMessageForm();//提示信息$.toast({heading : '发送成功',text: respData.message,icon: 'success'});}else {//提示信息$.toast({heading : '警告',text: respData.message,icon: 'warning'});}},error : function () {//提示信息$.toast({heading : '错误',text: '访问出现错误,请于管理员联系',icon: 'error'});}});})
3.7.21 站内信未读数

3.7.21.1 实现逻辑
查询当前登录⽤⼾的未读站内信数量
3.7.21.2 参数要求
⽆
3.7.21.3 接⼝规范
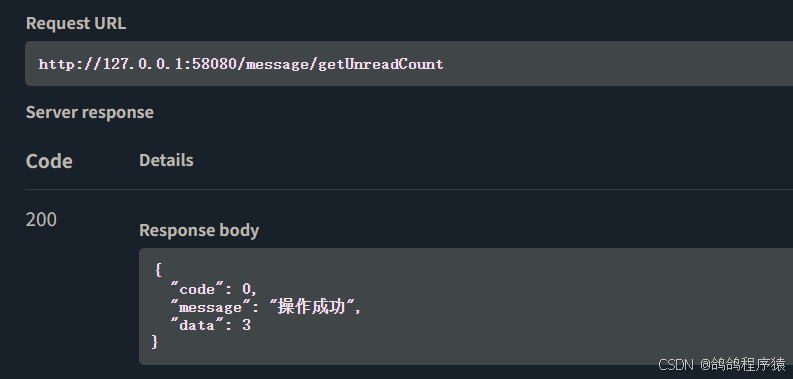
// 请求
GET http://127.0.0.1.41:58080/message/getUnreadCount HTTP/1.1
// 响应
HTTP/1.1 200
Content-Type: application/json
{"code":0,"message":"成功","data":1}
3.7.21.4 创建扩展Mapper.xml
SQL 语句:
select count(*) from t_message where state = 0 and deleteState = 0 and receiveUserId = 4;
mapper/extension/MessageExtMapper.xml 创建:
<?xml version="1.0" encoding="UTF-8"?>
<!DOCTYPE mapper PUBLIC "-//mybatis.org//DTD Mapper 3.0//EN" "http://mybatis.org/dtd/mybatis-3-mapper.dtd">
<mapper namespace="com.yj.forum.dao.MessageMapper">
<!-- 根据用户id查询该用户私信未读数 --><select id="selectUnreadCount" resultType="java.lang.Integer" parameterType="java.lang.Long">selectcount(*)from t_messagewhere state = 0and deleteState = 0and receiveUserId = #{receiveUserId,jdbcType=BIGINT}</select>
</mapper>
3.7.21.5 修改DAO
com/yj/forum/dao/MessageMapper.java 定义接口
/*** 根据用户id查询该用户私信未读数* @param userId 用户id* @return 私信未读数*/Integer selectUnreadCount (@Param("receiveUserId") Long receiveUserId);
3.7.21.6 创建Service接⼝
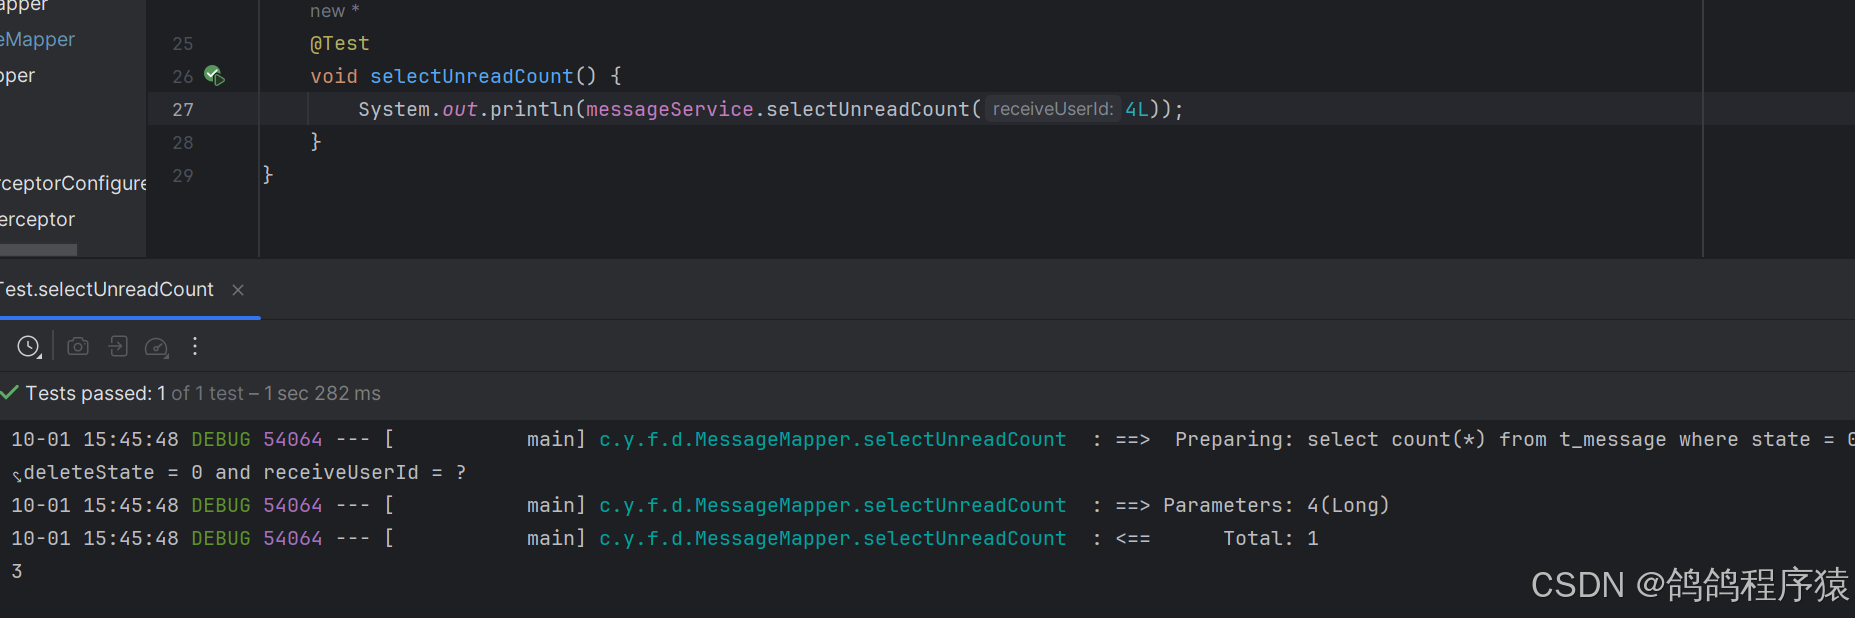
com/yj/forum/services/IMessageService.java 创建:
/*** 根据用户id查询该用户私信未读数* @param receiveUserId 用户id* @return 私信未读数*/Integer selectUnreadCount ( Long receiveUserId);
3.7.21.6 实现Service接⼝
com/yj/forum/services/impl/MessageServiceImpl.java 实现:
/*** 根据用户id查询该用户私信未读数* @param receiveUserId 用户id* @return 私信未读数*/@Overridepublic Integer selectUnreadCount(Long receiveUserId) {//非空校验if(receiveUserId == null || receiveUserId <= 0) {log.warn(ResultCode.FAILED_PARAMS_VALIDATE.toString());throw new ApplicationException(AppResult.failed(ResultCode.FAILED_PARAMS_VALIDATE));}//拿取用户User user = userService.selectById(receiveUserId); if (user == null || user.getDeleteState() != 0) {log.warn(ResultCode.FAILED_USER_NOT_EXISTS.toString());throw new ApplicationException(AppResult.failed(ResultCode.FAILED_USER_NOT_EXISTS));}//调用daoInteger ret = messageMapper.selectUnreadCount(receiveUserId);return ret;}
3.7.21.7 单元测试
3.7.21.8 实现controller
/*** 获取未读消息个数* @return AppResult<Integer>*/@ApiOperation("获取未读消息个数")@GetMapping("/getUnreadCount")public AppResult<Integer> getUnreadCount(HttpServletRequest request) {//获取当前用户HttpSession session = request.getSession();User user = (User) session.getAttribute(AppConfig.USER_SESSION);// 调用serviceInteger result = messageService.selectUnreadCount(user.getId());return AppResult.success(result);}
3.7.21.9 测试API
在http://127.0.0.1:58080/swagger-ui/index.html或者Postman中测试接口,记得登录。
3.7.21.10 前端
static/index.html 中修改:
// ============ 获取用户未读站内信数量 ============// url = message/getUnreadCount// 成功后,处理小红点是否显示 #index_nva_message_badgefunction requestMessageUnreadCount () {$.ajax({type: 'get',url : 'message/getUnreadCount',success : function (respData){//判断返回状态吗if(respData.code == 0) {let messageBadgeEl = $('#index_nva_message_badge');//根据未读数判断是否显示小红点if(respData.data > 0) {messageBadgeEl.show();}else {messageBadgeEl.hide();}}else {//提示信息$.toast({heading : '警告',text: respData.message,icon: 'warning'});}},error : function () {//提示信息$.toast({heading : '错误',text: '访问出现错误,请于管理员联系',icon: 'error'});}});}requestMessageUnreadCount();
3.7.22 站内信列表
3.7.22.1 实现逻辑
⽤⼾访问API,服务器响应当前登录⽤⼾的站内信
3.7.22.2 参数要求
⽆
3.7.22.3 接⼝规范
// 请求
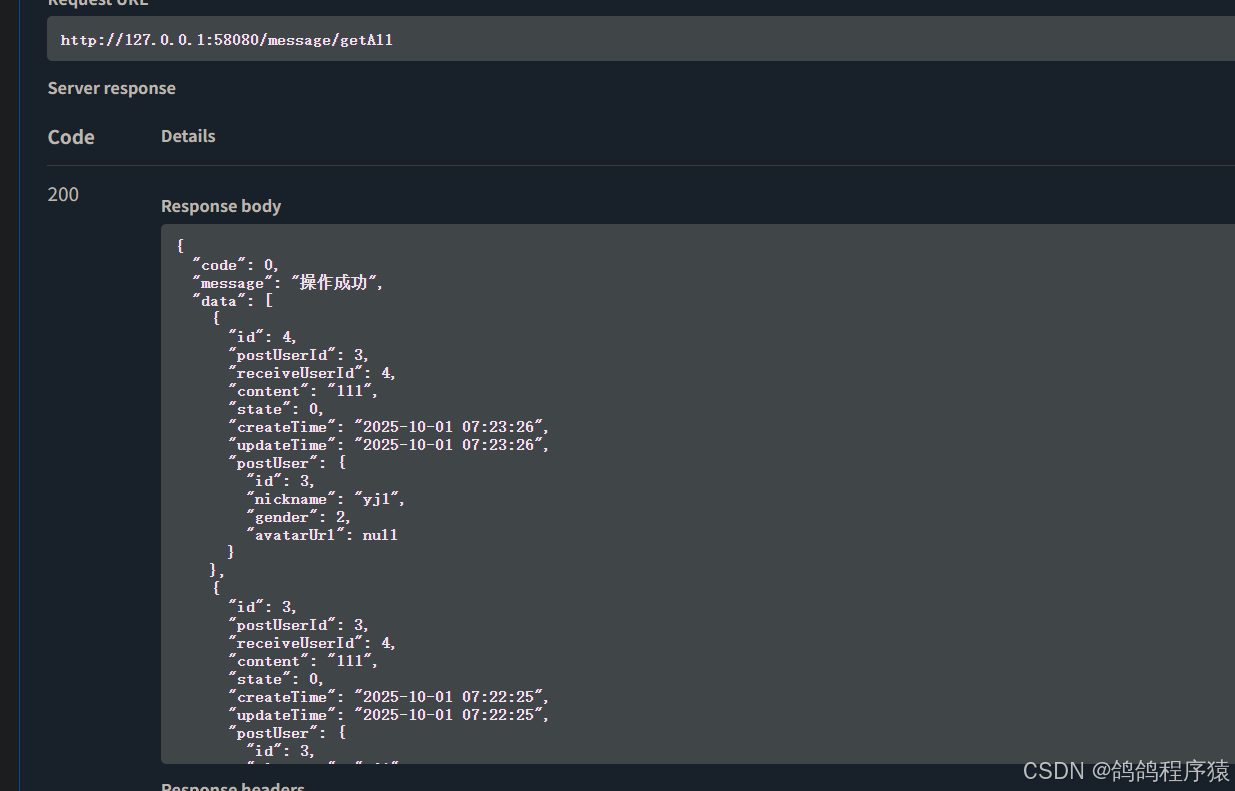
GET http://127.0.0.1:58080/message/getAll HTTP/1.1
// 响应
HTTP/1.1 200
Content-Type: application/json
{"code": 0,"message": "成功","data": [{"id": 11,"postUserId": 32,"receiveUserId": 3,"content": "真的可以发出去吗\n","state": 2,"createTime": "2023-06-20 11:21:09","updateTime": "2023-06-25 11:24:38","postUser": {"id": 32,"nickname": "ljl","phoneNum": null,"email": null,"gender": 2,"avatarUrl": null}}, {"id": 10,"postUserId": 32,"receiveUserId": 3,"content": "nihaoa","state": 2,"createTime": "2023-06-20 11:20:52","updateTime": "2023-06-26 07:18:30","postUser": {"id": 32,"nickname": "ljl","phoneNum": null,"email": null,"gender": 2,"avatarUrl": null}}, {"id": 3,"postUserId": 34,"receiveUserId": 3,"content": "你好啊","state": 2,"createTime": "2023-06-14 08:55:24","updateTime": "2023-06-26 08:12:10","postUser": {"id": 34,"nickname": "bitgirl","phoneNum": null,"email": null,"gender": 2,"avatarUrl": null}}, {"id": 2,"postUserId": 34,"receiveUserId": 3,"content": "可以再发⼏篇帖⼦吗?","state": 0,"createTime": "2023-06-14 08:54:00","updateTime": "2023-06-14 08:54:00","postUser": {"id": 34,"nickname": "bitgirl","phoneNum": null,"email": null,"gender": 2,"avatarUrl": null}}]
}
3.7.22.4 创建扩展Mapper.xml
先在model类中加上private User postUser;
SQL语句:
selectu.id as U_id,u.avatarUrl as u_avatarUrl,u.nickname as u_nickname,u.gender as u_gender, m.id, m.postUserId, m.receiveUserId, m.content, m.state, m.createTime, m.updateTimefrom t_message as m, t_user as u where m.postUserId = u.idand m.deleteState = 0and m.receiveUserId = 4order by m.createTime desc, m.state ascmapper/extension/MessageExtMapper.xml 实现
<!-- 自定义结果集映射 --><resultMap id="AllInfoResultMap" type="com.yj.forum.model.Message" extends="BaseResultMap"><!-- 关联发送者对象 --><association property="postUser" resultMap="com.yj.forum.dao.UserMapper.BaseResultMap" columnPrefix="u_"/></resultMap><!-- 根据接收者id查询该用户私信列表 --><select id="selectByReceiveUserId" resultMap="AllInfoResultMap" parameterType="java.lang.Long">selectu.id as U_id,u.avatarUrl as u_avatarUrl,u.nickname as u_nickname,u.gender as u_gender,m.id,m.postUserId,m.receiveUserId,m.content,m.state,m.createTime,m.updateTimefrom t_message as m, t_user as uwhere m.postUserId = u.idand m.deleteState = 0and m.receiveUserId = #{receiveUserId,jdbcType=BIGINT}order by m.createTime desc, m.state asc</select>
3.7.22.4 修改dao
com/yj/forum/dao/MessageMapper.java :
/*** 根据接收者Id查询所有站内信 * @param receiveUserId 收者Id* @return 站内信列表*/List<Message> selectByReceiveUserId (@Param("receiveUserId") Long receiveUserId);
3.7.22.5 创建service
com/yj/forum/services/IMessageService.java :
/*** 根据接收者Id查询所有站内信 * @param receiveUserId 接收者Id* @return 站内信列表*/List<Message> selectByReceiveUserId (Long receiveUserId);
3.7.22.6 实现service
com/yj/forum/services/impl/MessageServiceImpl.java 实现:
/*** 根据接收者Id查询所有站内信* @param receiveUserId 接收者Id* @return 站内信列表*/@Overridepublic List<Message> selectByReceiveUserId(Long receiveUserId) {//非空校验if(receiveUserId == null || receiveUserId <= 0) {log.warn(ResultCode.FAILED_PARAMS_VALIDATE.toString());throw new ApplicationException(AppResult.failed(ResultCode.FAILED_PARAMS_VALIDATE));}//调用daoList<Message> messages = messageMapper.selectByReceiveUserId(receiveUserId);return messages;}
3.7.22.7 单元测试

3.7.22.8 实现controller
com/yj/forum/controller/MessageController.java 实现
/*** 查询⽤⼾的所有站内信* @return 站内信集合*/@ApiOperation("查询⽤⼾的所有站内信")@GetMapping("/getAll")public AppResult<List<Message>> getAll(HttpServletRequest request) {// 获取当前登录⽤⼾HttpSession session = request.getSession();User user = (User) session.getAttribute(AppConfig.USER_SESSION);// 获取⽤⼾站内信List<Message> result = messageService.selectByReceiveUserId(user.getId());// 返回结果return AppResult.success(result);}
3.7.22.9 测试API
在http://127.0.0.1:58080/swagger-ui/index.html或者Postman中测试接口,记得登录。
3.7.22.10 前端
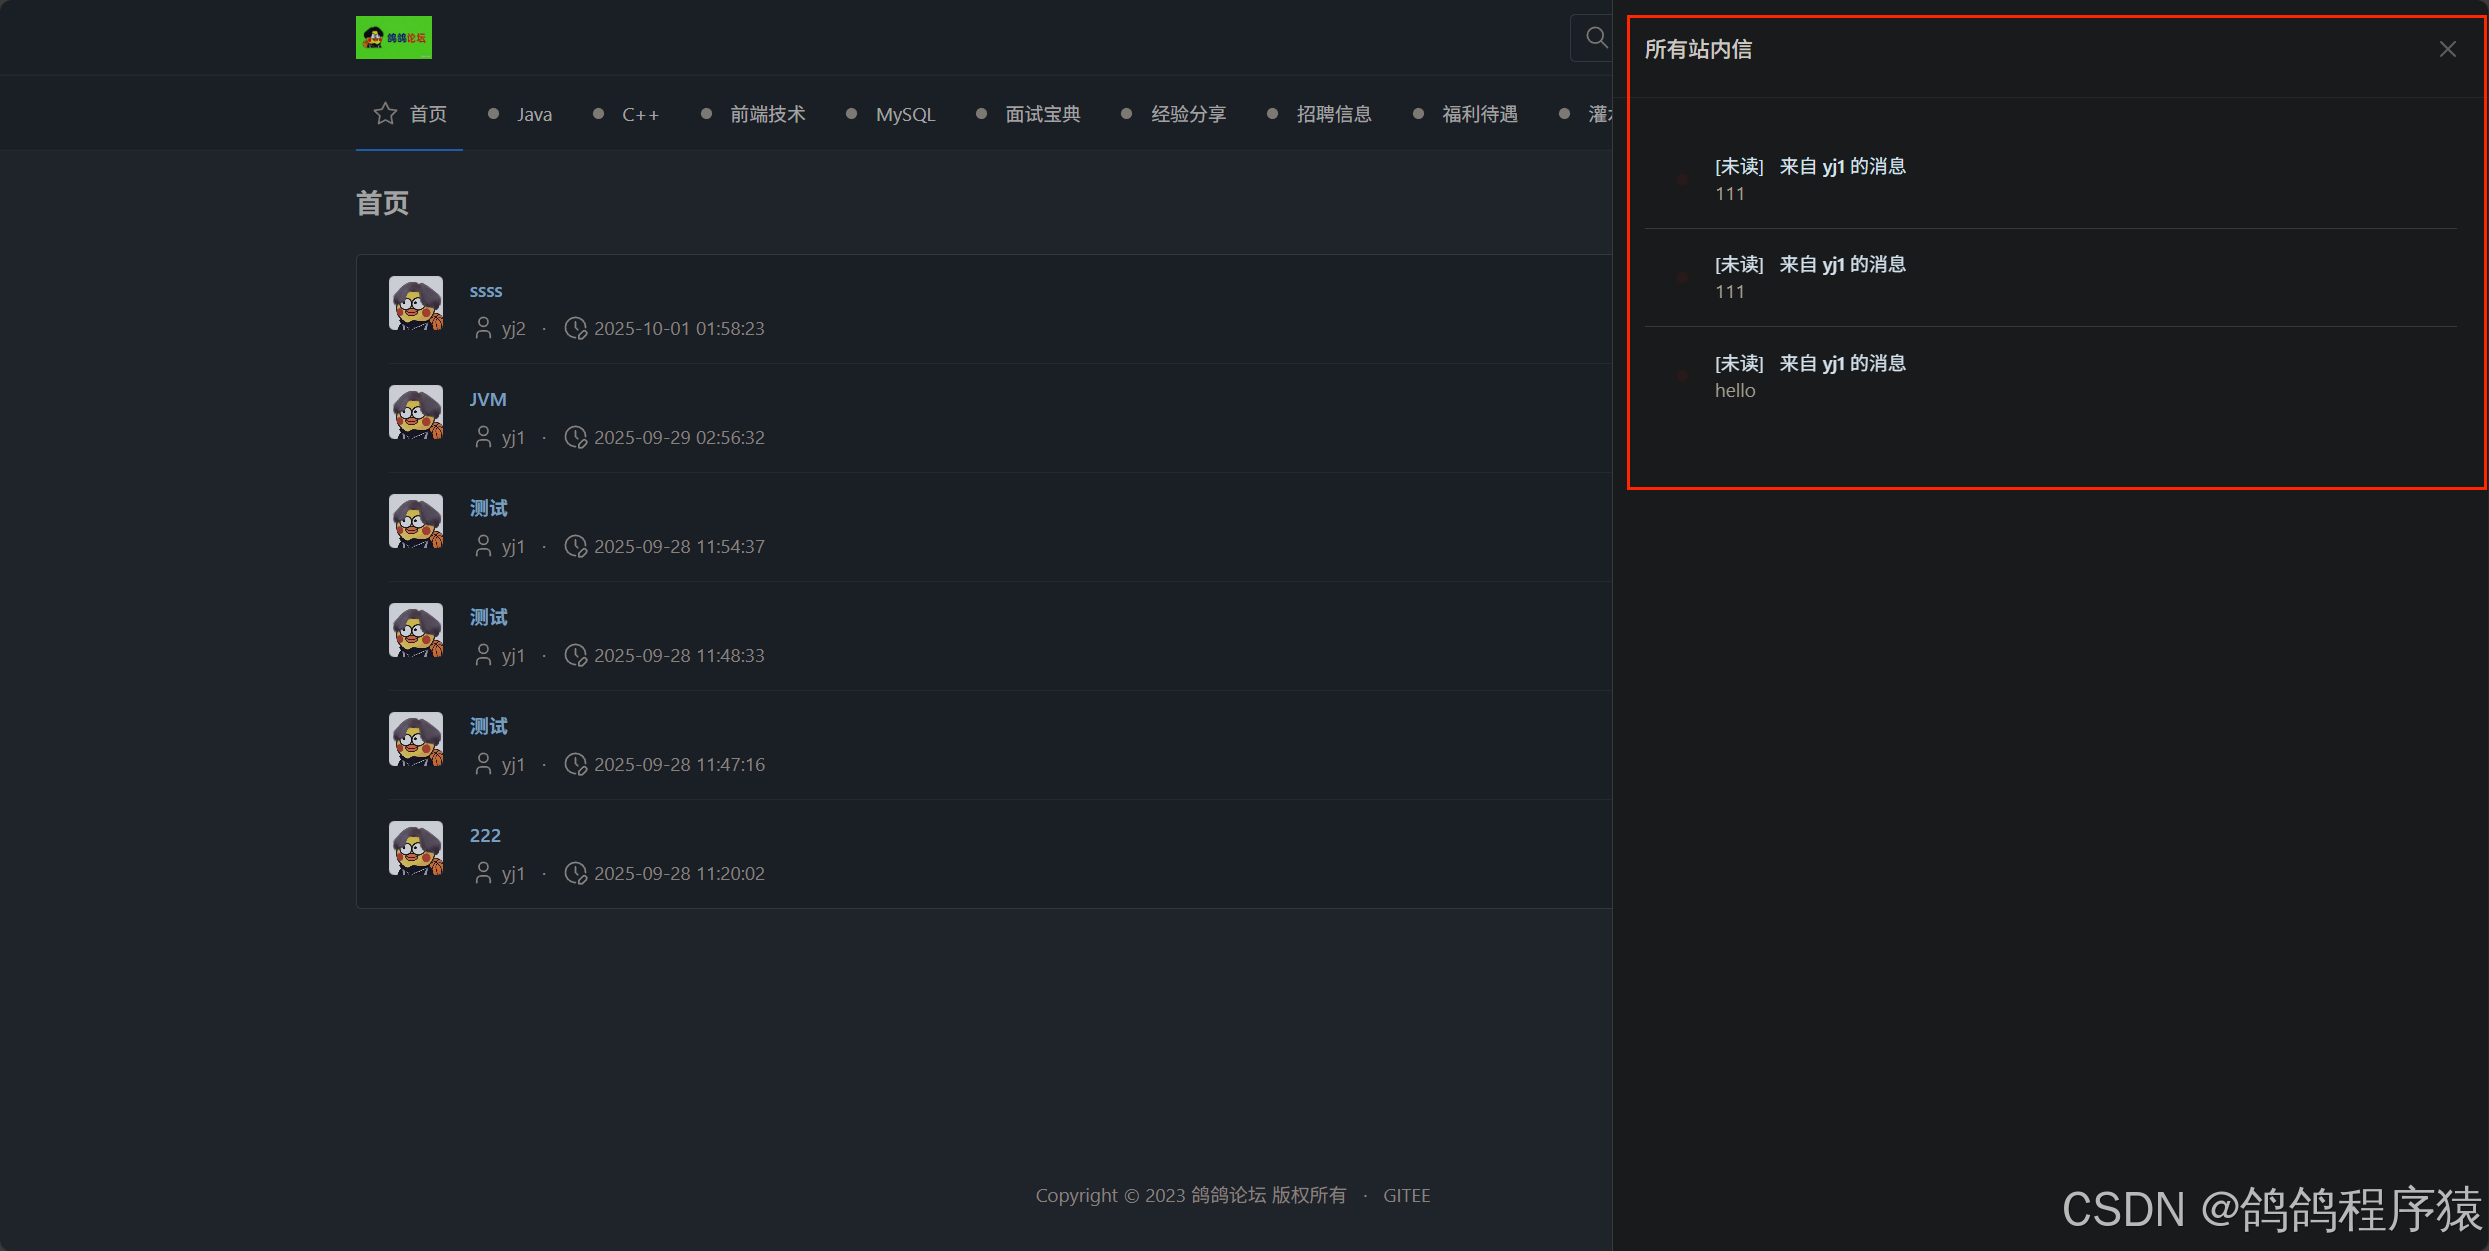
static/index.html:修改
// ============ 获取用户所有站内信 ============// 成功后,调用buildMessageList() 方法构建站内信列表function requestMessageList () {$.ajax({type: 'get',url : 'message/getAll',success : function (respData){//判断返回状态吗if(respData.code == 0) {buildMessageList(respData.data);}else {//提示信息$.toast({heading : '警告',text: respData.message,icon: 'warning'});}},error : function () {//提示信息$.toast({heading : '错误',text: '访问出现错误,请于管理员联系',icon: 'error'});}});}requestMessageList();3.7.22 更新站内信状态
3.7.22.1 实现逻辑
- ⽤⼾点击站内信,显⽰详情⻚⾯
- 更新未读状态的站内信为已读
3.7.22.2 参数要求
| 参数名 | 描述 | 类型 | 默认值 | 条件 |
|---|---|---|---|---|
| id | 站内信Id | long | 必须 |
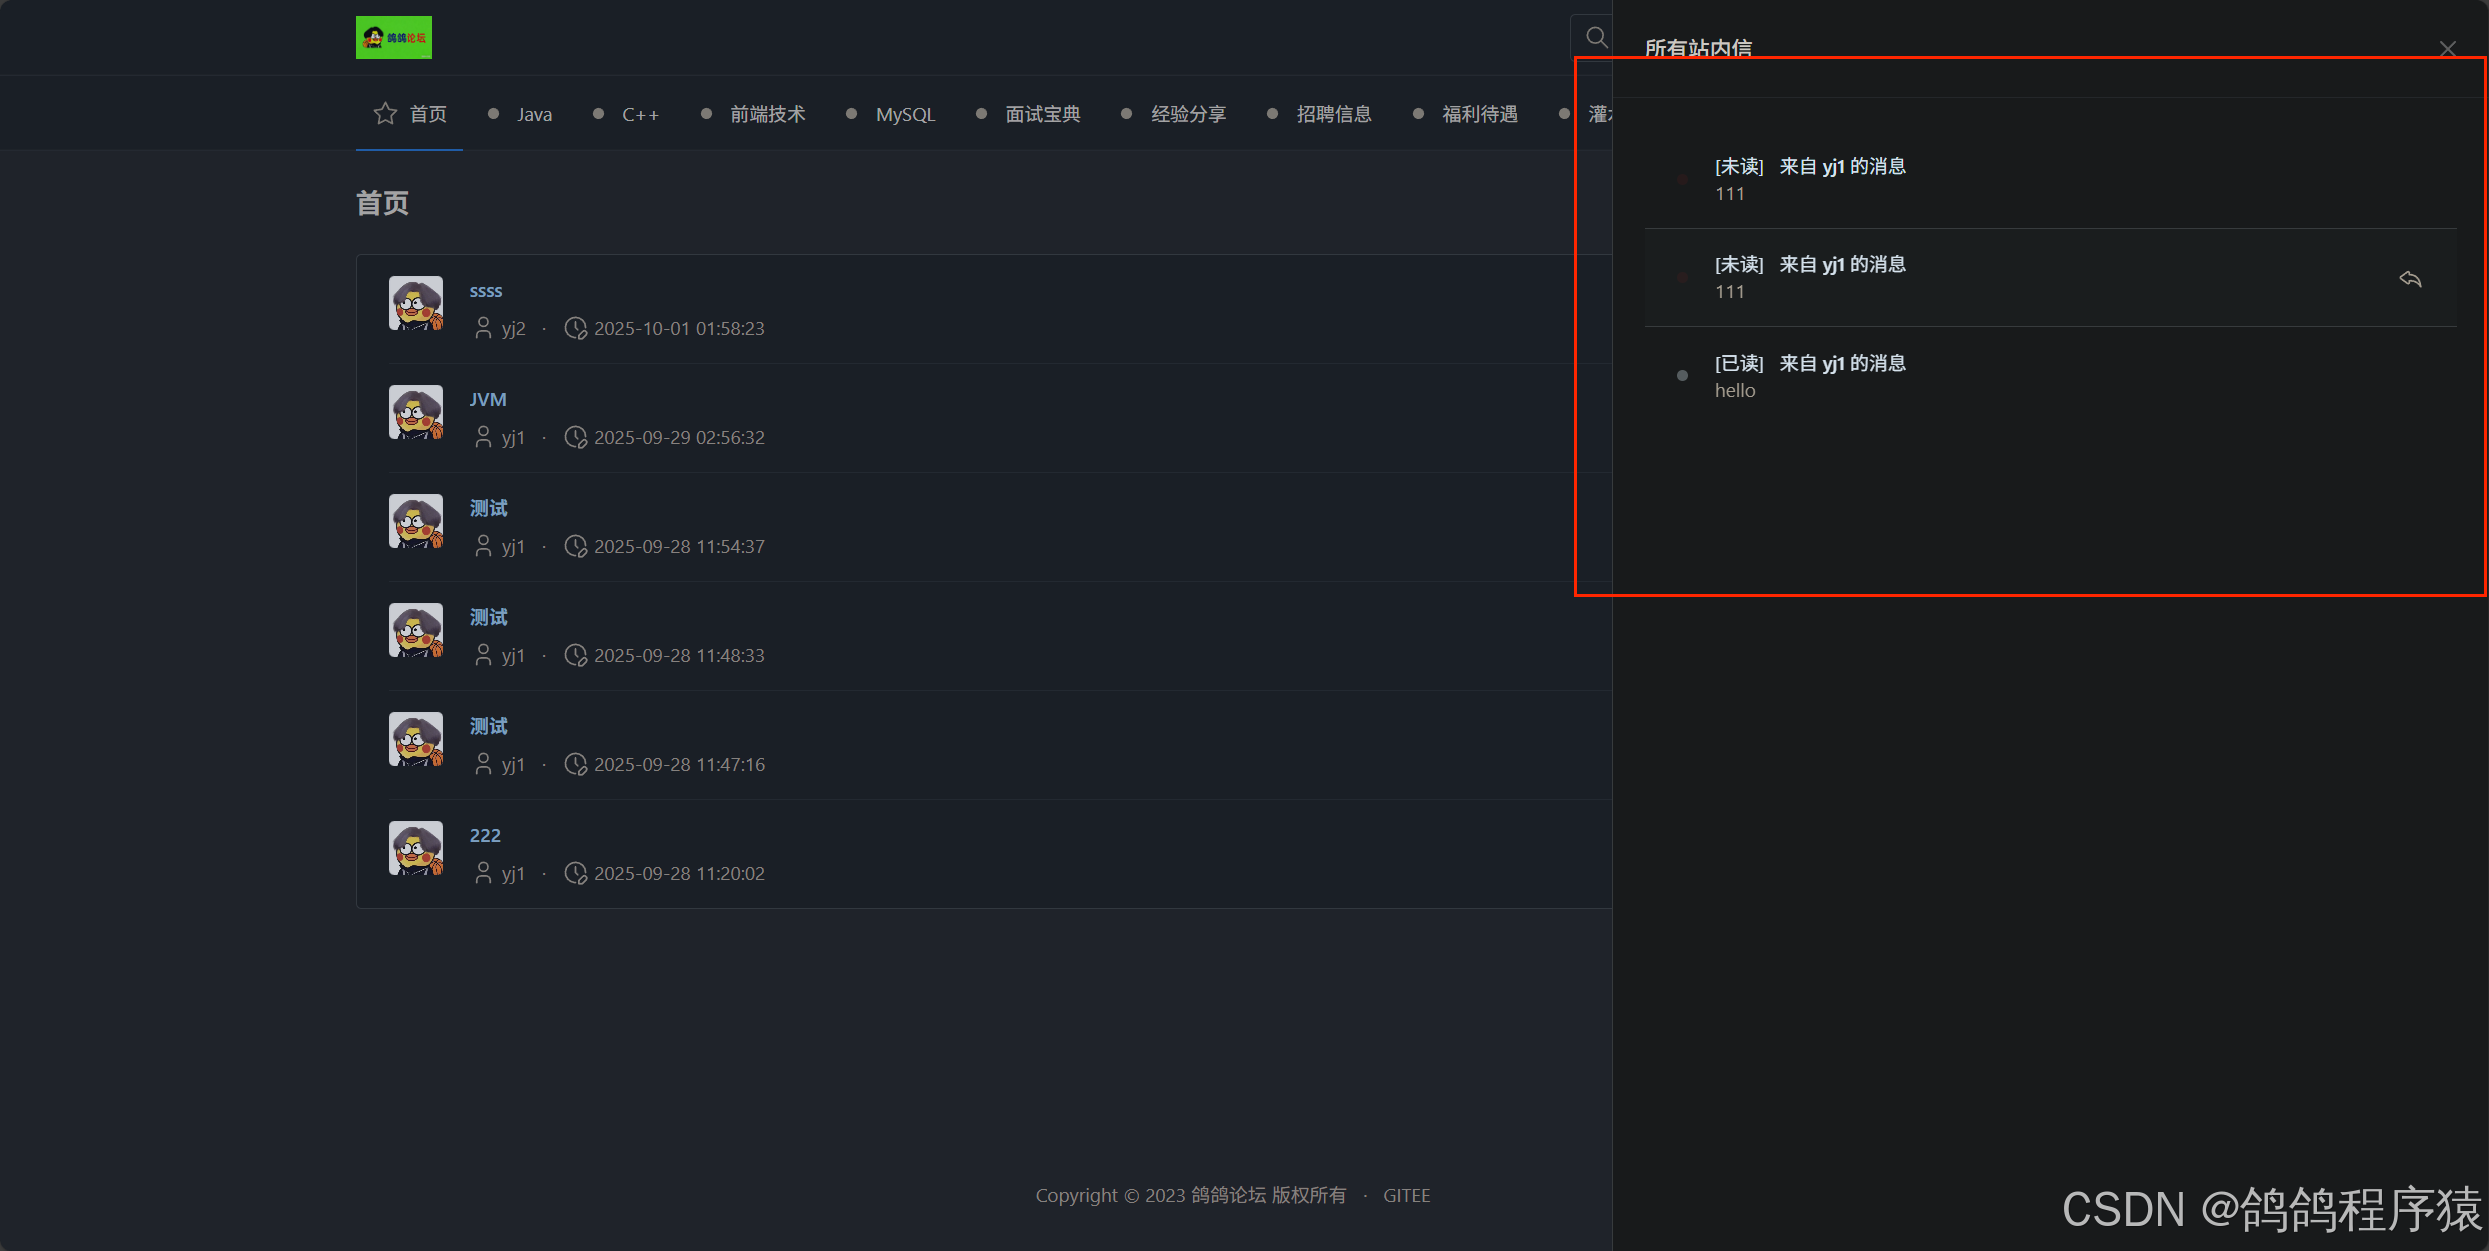
3.7.22.3 接⼝规范
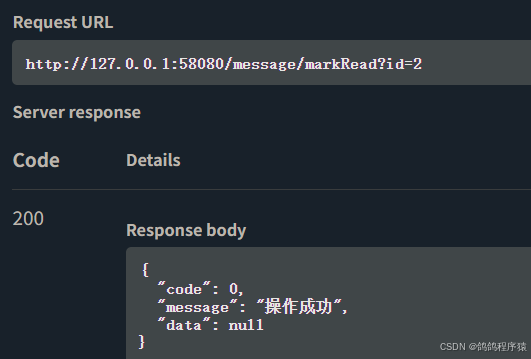
// 请求
POST http://127.0.0.1:58080/message/markRead HTTP/1.1
Content-Type: application/x-www-form-urlencoAded
id=1
// 响应
HTTP/1.1 200
Content-Type: application/json
{"code": 0,"message": "成功","data": null
}
3.7.22.4 创建Service接⼝
mapper和dao使用自动生成的即可
com/yj/forum/services/IMessageService.java :
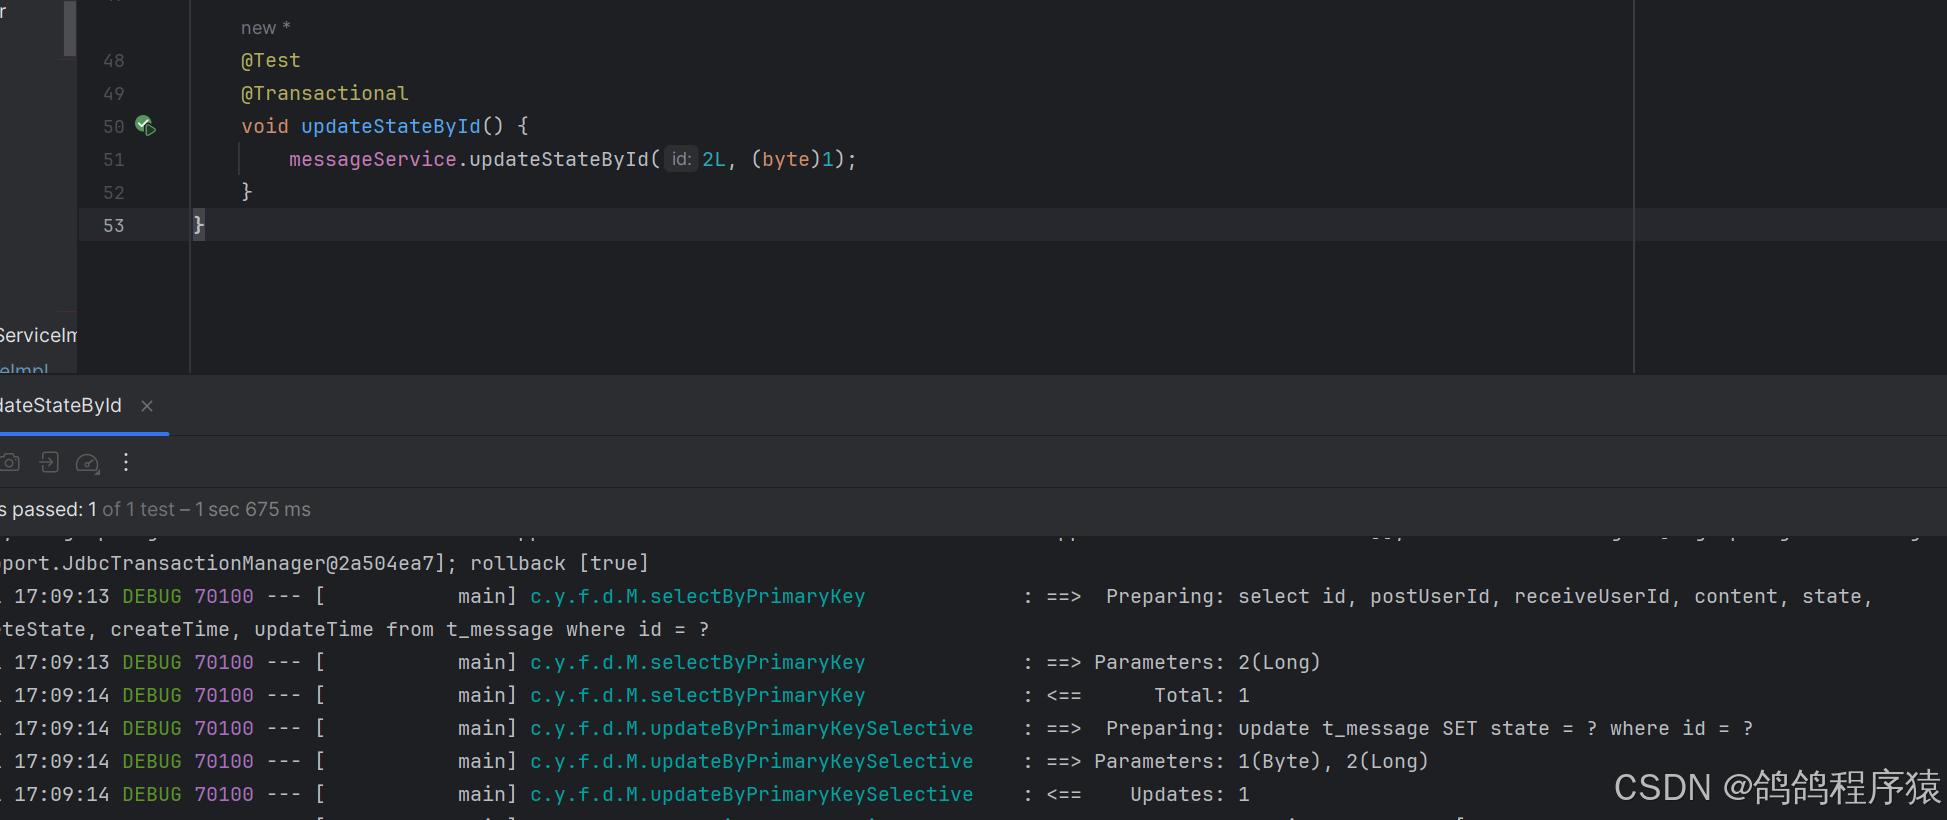
/*** 读取站内信* @param id 站内信Id* @return 站内信*/Message selectById(Long id);/*** 根据Id更新* @param id 站内信id* @param state 已读状态*/void updateStateById(Long id, Byte state);3.7.22.5 实现Service接⼝
com/yj/forum/services/impl/MessageServiceImpl.java :
@Overridepublic Message selectById(Long id) {//非空校验if(id ==null || id <= 0) {log.warn(ResultCode.FAILED_PARAMS_VALIDATE.toString());throw new ApplicationException(AppResult.failed(ResultCode.FAILED_PARAMS_VALIDATE));}//调用daoMessage message = messageMapper.selectByPrimaryKey(id);return message;}
逻辑:
- 非空校验
- 查找站内信,并校验是否存在
- 构造数据
- 调用dao
@Overridepublic void updateStateById(Long id, Byte state) {//非空校验if(id == null || id <= 0 || state < 0 || state > 2) {log.warn(ResultCode.FAILED_PARAMS_VALIDATE.toString());throw new ApplicationException(AppResult.failed(ResultCode.FAILED_PARAMS_VALIDATE));}//拿取站内信Message message = messageMapper.selectByPrimaryKey(id);//校验if(message == null || message.getDeleteState() != 0) {log.warn(ResultCode.FAILED_MESSAGE_IS_NOT_EXISTS.toString());throw new ApplicationException(AppResult.failed(ResultCode.FAILED_MESSAGE_IS_NOT_EXISTS));}//构造数据 更新Message updateMessage = new Message();updateMessage.setId(id);updateMessage.setState(state);//调用daoint row = messageMapper.updateByPrimaryKeySelective(updateMessage);if(row != 1) {log.error(ResultCode.ERROR_SERVICES.toString()+ ", 受影响的⾏数不等于 1 为 " + row);throw new ApplicationException(AppResult.failed(ResultCode.ERROR_SERVICES));}}
3.7.22.6 单元测试

3.7.22.7 实现controller
com/yj/forum/controller/MessageController.java:
逻辑:
- 非空校验
- 拿站内信,校验存在与否
- 获取用户,校验接收方于发送方是否一个用户
- 调用service
/*** 更新状态为已读* @param id 站内信Id* @return AppResult<Message>*/@ApiOperation("更新状态为已读")@PostMapping("/markRead")public AppResult markRead(HttpServletRequest request,@ApiParam("站内信Id")@RequestParam("id") Long id) {//非空校验if(id == null || id <= 0) {log.warn(ResultCode.FAILED_PARAMS_VALIDATE.toString());return AppResult.failed(ResultCode.FAILED_PARAMS_VALIDATE);}//查询站内信Message message = messageService.selectById(id);if(message == null || message.getDeleteState() != 0) {log.warn(ResultCode.FAILED_MESSAGE_IS_NOT_EXISTS.toString());return AppResult.failed(ResultCode.FAILED_MESSAGE_IS_NOT_EXISTS);}//获取用户HttpSession session = request.getSession();User user = (User) session.getAttribute(AppConfig.USER_SESSION);// 站内信不是⾃⼰的if(!user.getId().equals(message.getReceiveUserId())) {log.warn("查询了不属于⾃⼰的站内信:userId = " + user.getId() + ", receiveUserId = " + message.getReceiveUserId());return AppResult.failed(ResultCode.FAILED);}//调用service更新状态messageService.updateStateById(id,(byte)1);return AppResult.success();}
3.7.22.7 测试API
在http://127.0.0.1:58080/swagger-ui/index.html或者Postman中测试接口,记得登录。
3.7.22.8 前端
static/index.html 中实现
// 转为jQuery对象let messageItemEL = $(itemHtml);// 设置状态 bg-green bg-red status-dot-animatedlet statusDotEl = messageItemEL.find('.status-dot');let statusDescEl = messageItemEL.find('.index_message_item_statue');if (messageItem.state == 0) {// 未读statusDotEl.addClass('status-dot-animated bg-red');statusDescEl.html('[未读]');} else if (messageItem.state == 1) {// 已读statusDescEl.html('[已读]');} else if (messageItem.state == 2) {// 已回复statusDotEl.addClass('bg-green');statusDescEl.html('[已回复]');}// 绑定数据messageItemEL.data('message', messageItem);// 绑定点击事件messageItemEL.find('.list-group-item-actions, .index_message_title').click(function () {// 详情与回复页面数据// 站内信Id$('#index_message_detail_id').val(messageItem.id);// 标题$('#index_message_detail_title').html('收到来自 <strong>' + messageItem.postUser.nickname + '</strong> 的新消息');// 内容$('#index_message_detail_content').html(messageItem.content);// 接收者Id$('#index_message_reply_receive_user_id').val(messageItem.postUser.id);// 接收者信息$('#index_message_reply_receive_user_name').html('回复给: ' + messageItem.postUser.nickname);// 复位回复区域$('#index_message_reply_div').hide();// 复位接钮显示$('#btn_index_message_reply').show();$('#btn_index_send_message_reply').hide();//未读 发送请求,更新状态为已读if(messageItem.state == 0 && statusDotEl.hasClass('status-dot-animated bg-red')) {$.ajax ({type : 'post',url : 'message/markRead',contentType : 'application/x-www-form-urlencoded',data : {id : messageItem.id},// 成功回调success : function (respData) {if (respData.code == 0) {// 更新⻚⾯显⽰效果和messageItem.statestatusDotEl.removeClass('status-dot-animated bg-red');// 修改未读为已读statusDescEl.html('[已读]');// 修改本地的对象状态属性messageItem.state = 1;}}});}});// 添加到列表messageListDivEl.append(messageItemEL);});}
3.7.23 回复站内信
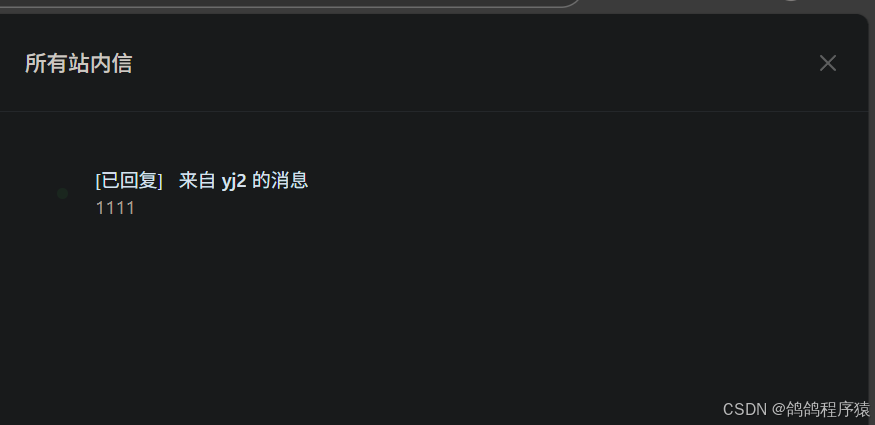
3.7.23.1 实现逻辑
- ⽤⼾在站内信详情⻚⾯点击回复按钮,显⽰回复区
- 填写回复内容并提交到服务器
- ⽤⼾不能回复接收者不是⾃⼰的站内信
- 站内信状态置为已回复
- 数据库中新增一条站内信记录
3.7.23.2 参数要求
| 参数名 | 描述 | 类型 | 默认值 | 条件 |
|---|---|---|---|---|
| repliedId | 站内信Id | Long | 必须 | |
| content | 内容 | String | 必须 |
3.7.23.3 接⼝规范
// 请求
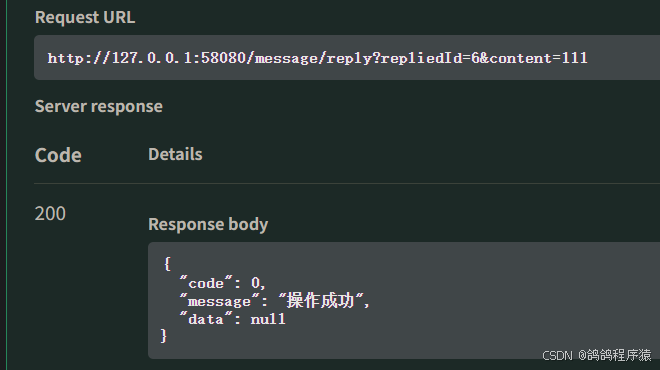
POST http://127.0.0.1:58080/message/reply HTTP/1.1
Content-Type: application/x-www-form-urlencoded
repliedId=1&receiveUserId=2&content=%E4%BD%A0%E5%A5%BD%E5%95%8A
// 响应
HTTP/1.1 200
Content-Type: application/json
{"code": 0,"message": "成功","data": null
}
3.7.23.4 创建Service接⼝
mapper和dao使用自动生成的即可
com/yj/forum/services/IMessageService.java :
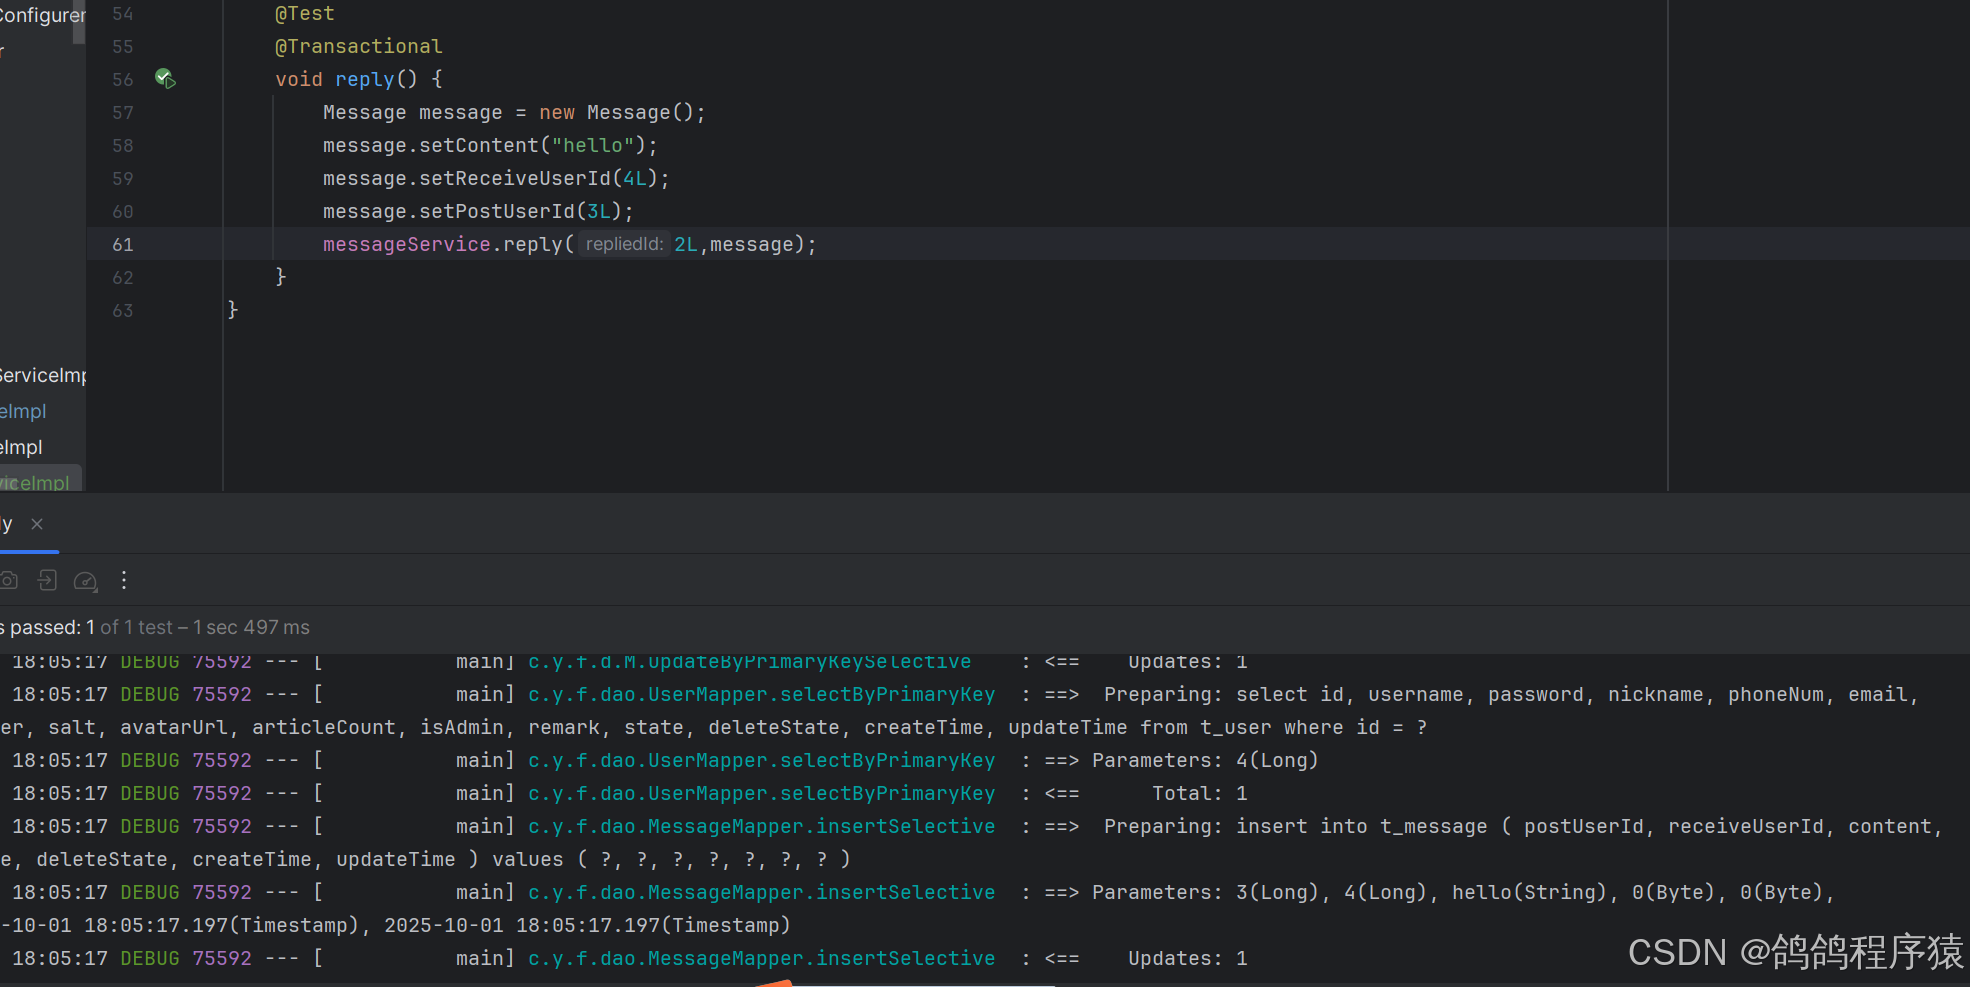
/*** 回复站内信 * @param repliedId 被回复的站内信Id * @param message 回复内容 */@Transactionalvoid reply (Long repliedId, Message message);3.7.23.5 实现Service接⼝
com/yj/forum/services/impl/MessageServiceImpl.java :
逻辑:
- 非空校验
- 检验站内信是否存在
- 更新状态
- 写入数据库
/*** 回复站内信* @param repliedId 被回复的站内信Id* @param message 回复内容*/@Overridepublic void reply(Long repliedId, Message message) {//非空校验if(repliedId == null || repliedId <= 0) {log.warn(ResultCode.FAILED_PARAMS_VALIDATE.toString());throw new ApplicationException(AppResult.failed(ResultCode.FAILED_PARAMS_VALIDATE));}// 校验repliedId对应的站内信状态Message existsMessage = messageMapper.selectByPrimaryKey(repliedId);if (existsMessage == null || existsMessage.getDeleteState() == 1) {log.warn(ResultCode.FAILED_MESSAGE_IS_NOT_EXISTS.toString());throw new ApplicationException(AppResult.failed(ResultCode.FAILED_MESSAGE_IS_NOT_EXISTS));}// 更新状态为已回复updateStateById(repliedId, (byte) 2);// 回复的内容写⼊数据库create(message);}
3.7.23.6 单元测试
3.7.23.7 实现controller
com/yj/forum/controller/MessageController.java :
/*** 回复站内信* @param repliedId 要回复的站内信Id* @param content 站内信的内容* @return AppResult*/@ApiOperation("回复站内信")@PostMapping("/reply")public AppResult reply(HttpServletRequest request,@ApiParam("要回复的站内信Id")@RequestParam("repliedId") Long repliedId,@ApiParam("站内信的内容")@RequestParam("content") String content) {//非空校验if(repliedId == null || repliedId <= 0 || StringUtil.isEmpty(content)) {return AppResult.failed(ResultCode.FAILED_PARAMS_VALIDATE);}//获取用户HttpSession session = request.getSession();User user = (User) session.getAttribute(AppConfig.USER_SESSION);//校验是否禁言if(user.getState() != 0) {return AppResult.failed(ResultCode.FAILED_USER_BANNED);}//获取要回复的站内信Message existsMessage = messageService.selectById(repliedId);//不能给自己发if (user.getId().equals( existsMessage.getPostUserId())) {return AppResult.failed("不能回复⾃⼰的站内信");}// 构造对象Message message = new Message();message.setPostUserId(user.getId()); // 发送者message.setReceiveUserId(existsMessage.getPostUserId()); // 接收者message.setContent(content); // 内容// 调⽤ServicemessageService.reply(repliedId, message);// 返回结果return AppResult.success();}
3.7.23.8 测试API
在http://127.0.0.1:58080/swagger-ui/index.html或者Postman中测试接口,记得登录。
3.7.23.9 前端
static/index.html 修改:
// 构造请求数据let postData = {repliedId: $('#index_message_detail_id').val(),receiveUserId : $('#index_message_reply_receive_user_id').val(),content: replyReceiveContentEl.val()};// 发送请求 message/reply// 回复成功后刷新未读标识和站内信列表// requestMessageUnreadCount();// requestMessageList();// // 清空输入区// cleanMessageReplyForm ();$.ajax ({type : 'post',url : 'message/reply',contentType : 'application/x-www-form-urlencoded',data : postData,// 回调success : function (respData) {if (respData.code == 0) {// 回复成功后刷新未读标识和站内信列表requestMessageUnreadCount();requestMessageList();// 清空输⼊区cleanMessageReplyForm ();// 提⽰信息$.toast({heading: '成功',text: respData.message,icon: 'success'});} else {// 提⽰信息$.toast({heading: '警告',text: respData.message,icon: 'warning'});}},error : function () {// 提⽰信息$.toast({heading: '错误',text: '访问出现问题,请与管理员联系.',icon: 'error'});}});});});
四、发布部署
4.1 服务器环境:
Linux+JDK17+MariaDB(MySQL)+Git+Maven
4.2 发布部署过程
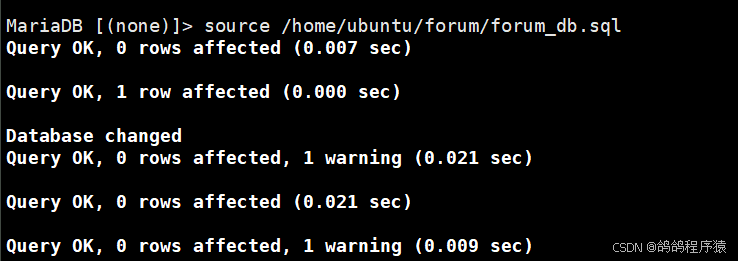
4.2.1 连接数据库,执行SQL
-- 连接数据库
[root@guangchen ~]# mysql -uroot -p
Enter password:
-- 执⾏SQL脚本
MariaDB [(none)]> source /hoom/ubuntu/forum/forum_db.sql
4.2.2 修改代码中数据源配置
确认数据库服务器的地址,数据库名,⽤⼾名,密码,并修改代码
4.2.3 修改配置⽂件中的⽇志级别与⽇志⽂件路径
# ⽇志配置
logging:pattern:dateformat: MM-dd HH:mm:ss # 日期显示格式level:root: info # 默认⽇志级别com.yj.forum: info # 指定包的⽇志级别file:path: /home/ubuntu/forum/log/forum # 生产环境⽇志保存⽬录
4.2.4 打包程序
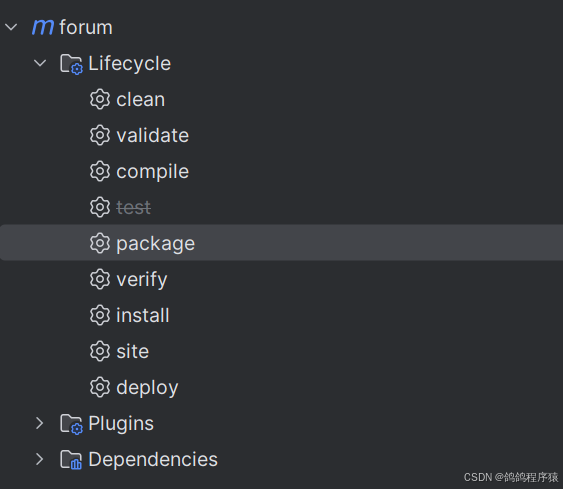

4.2.5 上传到服务器
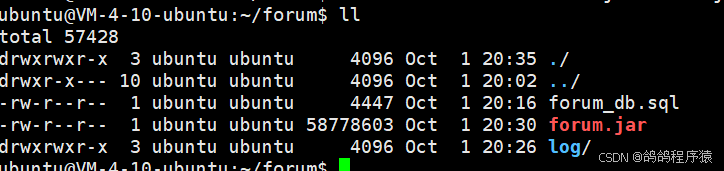
4.2.6 后台运⾏
语法格式
nohup Command [ Arg … ] [ & ]
• nohup 英⽂全称 no hang up(不挂起),⽤于在系统后台不挂断地运⾏命令,退出终端不会影响程序的运⾏。
参数说明:
Command:要执⾏的命令。
Arg:⼀些参数,可以指定输出⽂件。
&:让命令在后台执⾏,终端退出后命令仍旧执⾏。
4.2.7 查看进程与端口号

4.2.8 云服务器控制台放⾏端⼝
