鸿蒙:父组件调用子组件的三种方案
前言:
这篇博客会列举鸿蒙开发中父组件调用子组件的三种方案,相信你在看完以后会有所收获。
还是老样子,我们跟着官方文档学习与实践,链接如下:
https://developer.huawei.com/consumer/cn/doc/best-practices/bpta-ui-component-encapsulation#section1186112410119![]() https://developer.huawei.com/consumer/cn/doc/best-practices/bpta-ui-component-encapsulation#section1186112410119根据官方文档提供的思路,我们便可结合现有的知识与经验动手练一练。
https://developer.huawei.com/consumer/cn/doc/best-practices/bpta-ui-component-encapsulation#section1186112410119根据官方文档提供的思路,我们便可结合现有的知识与经验动手练一练。
本人实践后整理的运行效果图和代码如下:
方案一:
利用装饰器@State 与 @Prop 的状态变量单项绑定特性
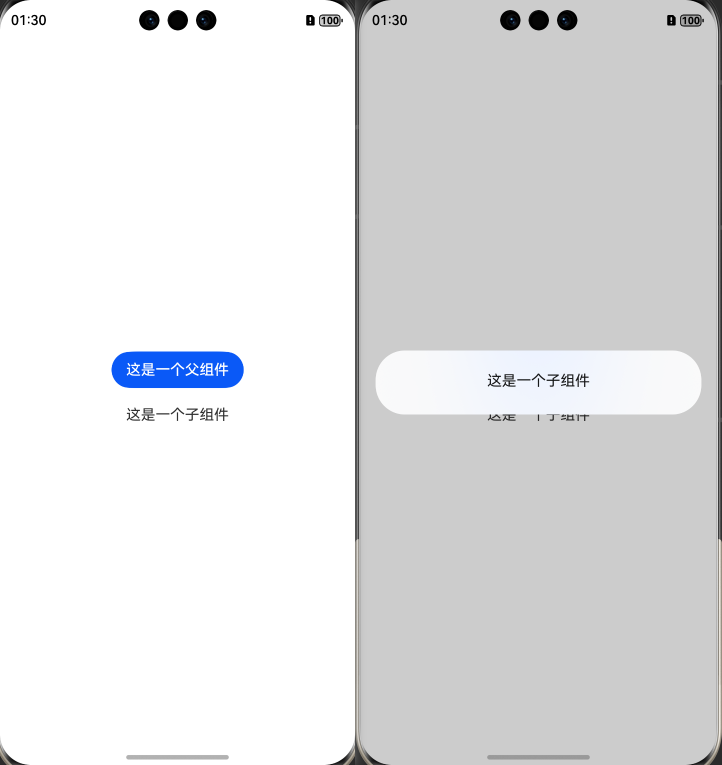
父组件的message传递给子组件,父组件修改父组件的message,子组件监听message,并执行方法。
1、Index.ets
import { Method01 } from "./Method01";@Entry
@Component
export struct Index {build() {Column() {Method01()}}
}
2、Method01.ets
// 方案一:利用装饰器@State 与 @Prop 的状态变量数据绑定特性
// 父组件的message传递给子组件,父组件修改父组件的message,子组件监听message,并执行方法
@Component
export struct Method01 {@State message: string = "这是一个父组件"@State childMessage: string = ""build() {Column({ space: 20 }) {Text("调用子组件方法示例").padding(30)Button(this.message).onClick(() => {const child = "修改"this.childMessage = child})Child({ propMessage: this.childMessage })}.width("100%").height("100%").justifyContent(FlexAlign.Center)}
}// 子组件
@Component
struct Child {@Watch("childClick") @Prop propMessage: string = ""@State message: string = "这是一个子组件"childClick() {this.getUIContext().showAlertDialog({ message: this.message })}build() {Column() {Text(this.message).onClick(() => {console.log("click")})}}
}
方案二:
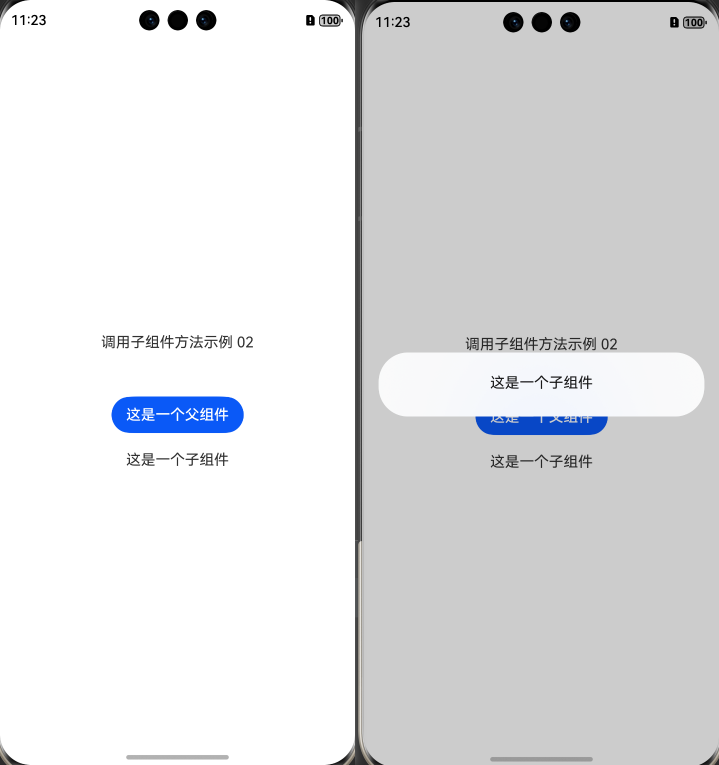
通过 Controller 类实现父组件 与子组件 的通信。
子组件将自身 action 方法赋值给父组件传入的 controller 实例;父组件点击按钮时调用该 controller 的 action 方法,会触发子组件显示包含自身 message 的弹窗。
1、Index.ets
import { Method01 } from "./Method01";
import { Method02 } from "./Method02";@Entry
@Component
export struct Index {build() {Column() {Method02()}}
}
2、Method02.ets
class Controller {action = () => {};
}@Component
export struct Method02 {@State message: string = "这是一个父组件"actionController: Controller = new Controller()build() {Column({ space: 20 }) {Text("调用子组件方法示例 02").padding(30)Button(this.message).onClick(() => {this.actionController?.action()})Child({ controller: this.actionController })}.width("100%").height("100%").justifyContent(FlexAlign.Center)}
}@Component
export struct Child {@State message: string = "这是一个子组件"controller: Controller | undefined = undefined;aboutToAppear(): void {if (this.controller) {this.controller.action = this.action}}action = () => this.getUIContext().showAlertDialog({ message: this.message })build() {Column() {Text(this.message)}}
}
方案三:
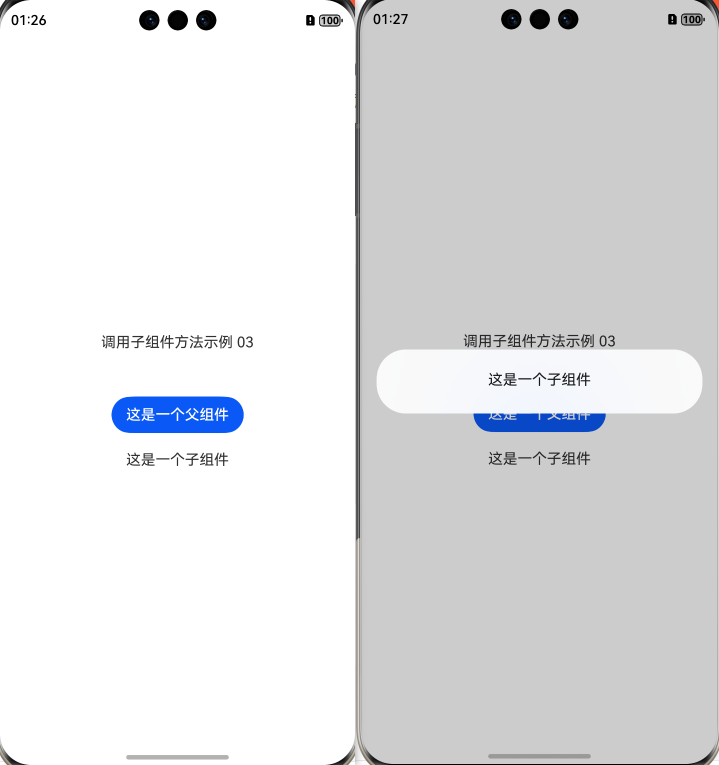
使用emitter通信。
父组件 通过使用 emitter 触发指定 ID 的事件;子组件 监听该事件并触发指定方法,并在销毁时移除事件监听。
1、Index.ets
import { Method01 } from "./Method01";
import { Method02 } from "./Method02";
import { Method03 } from "./Method03";@Entry
@Component
export struct Index {build() {Column() {Method03()}}
}
2、Method03.ets
import { emitter } from "@kit.BasicServicesKit";const EMITTER_ID = "Method03";// 父组件 Method03 通过点击按钮使用 emitter 触发指定 ID 的事件;子组件 Child 监听该事件以显示弹窗,并在销毁时移除事件监听。
@Component
export struct Method03 {@State message: string = "这是一个父组件"build() {Column({ space: 20 }) {Text("调用子组件方法示例 03").padding(30)Button(this.message).onClick(() => {emitter.emit(EMITTER_ID);})Child()}.width("100%").height("100%").justifyContent(FlexAlign.Center)}
}@Component
export struct Child {@State message: string = "这是一个子组件";action = () => {this.getUIContext().showAlertDialog({ message: "这是一个子组件" })}aboutToAppear(): void {emitter.on(EMITTER_ID, this.action);}aboutToDisappear(): void {emitter.off(EMITTER_ID);}build() {Text(this.message)}
}
有帮助就给个关注、收藏或赞吧