OC-动画实现折叠cell
文章目录
- 折叠cell
- 前言
- 准备Model
- 自定义header
- 实现VC
- 折叠关系的判断
- 注册header
- 完整VC代码
- 效果
折叠cell
前言
在阅读学长博客的时候,发现了一个很有意思的且看着很高级的折叠cell的demo,对比我的简陋版,属实天差地别,所以特地学习了一遍
准备Model
我们首先先为每个UItableView准备一个Model,用来存储单元格的内容和展开状态,由于我们只是简单实现效果,因此没有特意准备单元格的内容。这里知识简单存储标题和展开内容以及标志位
#import <Foundation/Foundation.h>NS_ASSUME_NONNULL_BEGIN@interface Model : NSObject
@property (nonatomic, copy)NSString* name;
@property (nonatomic, strong)NSArray<NSString* >* items;
@property (nonatomic, assign)BOOL collapsed;
- (instancetype)initWithName:(NSString* )name withItems:(NSArray<NSString* >* )items andCollapsed:(BOOL)collapased;
@endNS_ASSUME_NONNULL_END
我们对外声明一个接口用来初始化Model对象
//  Created by xiaoli pop on 2025/9/16.
//#import "Model.h"@implementation Model
- (instancetype)initWithName:(NSString* )name withItems:(NSArray<NSString* >* )items andCollapsed:(BOOL)collapased {if (self = [super init]) {self.name = name;self.items = items;self.collapsed = collapased;}return self;
}
@end
在这个方法中完成对Model属性的初始化
自定义header
由于我们的每个单元section的header需要包含标题和按钮的相关属性,所以需要自定义一个UITableViewHeaderFooterView的子类,去实现自定义的header
//  Created by xiaoli pop on 2025/9/16.
//#import <UIKit/UIKit.h>NS_ASSUME_NONNULL_BEGIN@interface Header : UITableViewHeaderFooterView
@property (nonatomic, strong)UILabel* titleLabel;
@property (nonatomic, strong)UIButton* button;
@endNS_ASSUME_NONNULL_END
在实现文件中,需要我们对相关控件进行初始化
//  Created by xiaoli pop on 2025/9/16.
//#import "Header.h"
#import "Masonry.h"
@implementation Header- (instancetype)initWithReuseIdentifier:(NSString *)reuseIdentifier {if (self = [super initWithReuseIdentifier:reuseIdentifier]) {[self setupViews];}return self;
}- (void)setupViews {self.contentView.backgroundColor = [UIColor blueColor];self.titleLabel = [[UILabel alloc] init];self.titleLabel.font = [UIFont boldSystemFontOfSize:16];self.titleLabel.textColor = [UIColor whiteColor];[self.contentView addSubview:self.titleLabel];self.button = [UIButton buttonWithType:UIButtonTypeCustom];[self.button setImage:[[UIImage imageNamed:@"im.png"] imageWithRenderingMode:UIImageRenderingModeAlwaysOriginal] forState:UIControlStateNormal];[self.contentView addSubview:self.button];self.button.userInteractionEnabled = YES;[self.titleLabel mas_makeConstraints:^(MASConstraintMaker *make) {make.left.equalTo(self).offset(15);make.centerY.equalTo(self);make.right.equalTo(self);}];[self.button mas_makeConstraints:^(MASConstraintMaker *make) {make.width.height.equalTo(@25);make.right.equalTo(self.contentView).offset(-15);make.centerY.equalTo(self);}];
}
@end
上面我们就完成了准备工作,接下来该完成UITableView大的具体实现了
实现VC
折叠关系的判断
- (void)reverseCollapase:(UIButton* )button {NSInteger section = button.tag - 101;Model* sectionData = self.models[section];sectionData.collapsed = !sectionData.collapsed;[self.tableView reloadSections:[NSIndexSet indexSetWithIndex:section] withRowAnimation:UITableViewRowAnimationNone];
}- (void)rotateButton:(UIButton* )button withCollapased:(BOOL)collapased {CGFloat angle = collapased ? 0.0 : M_PI_2;button.transform = CGAffineTransformMakeRotation(angle);
}
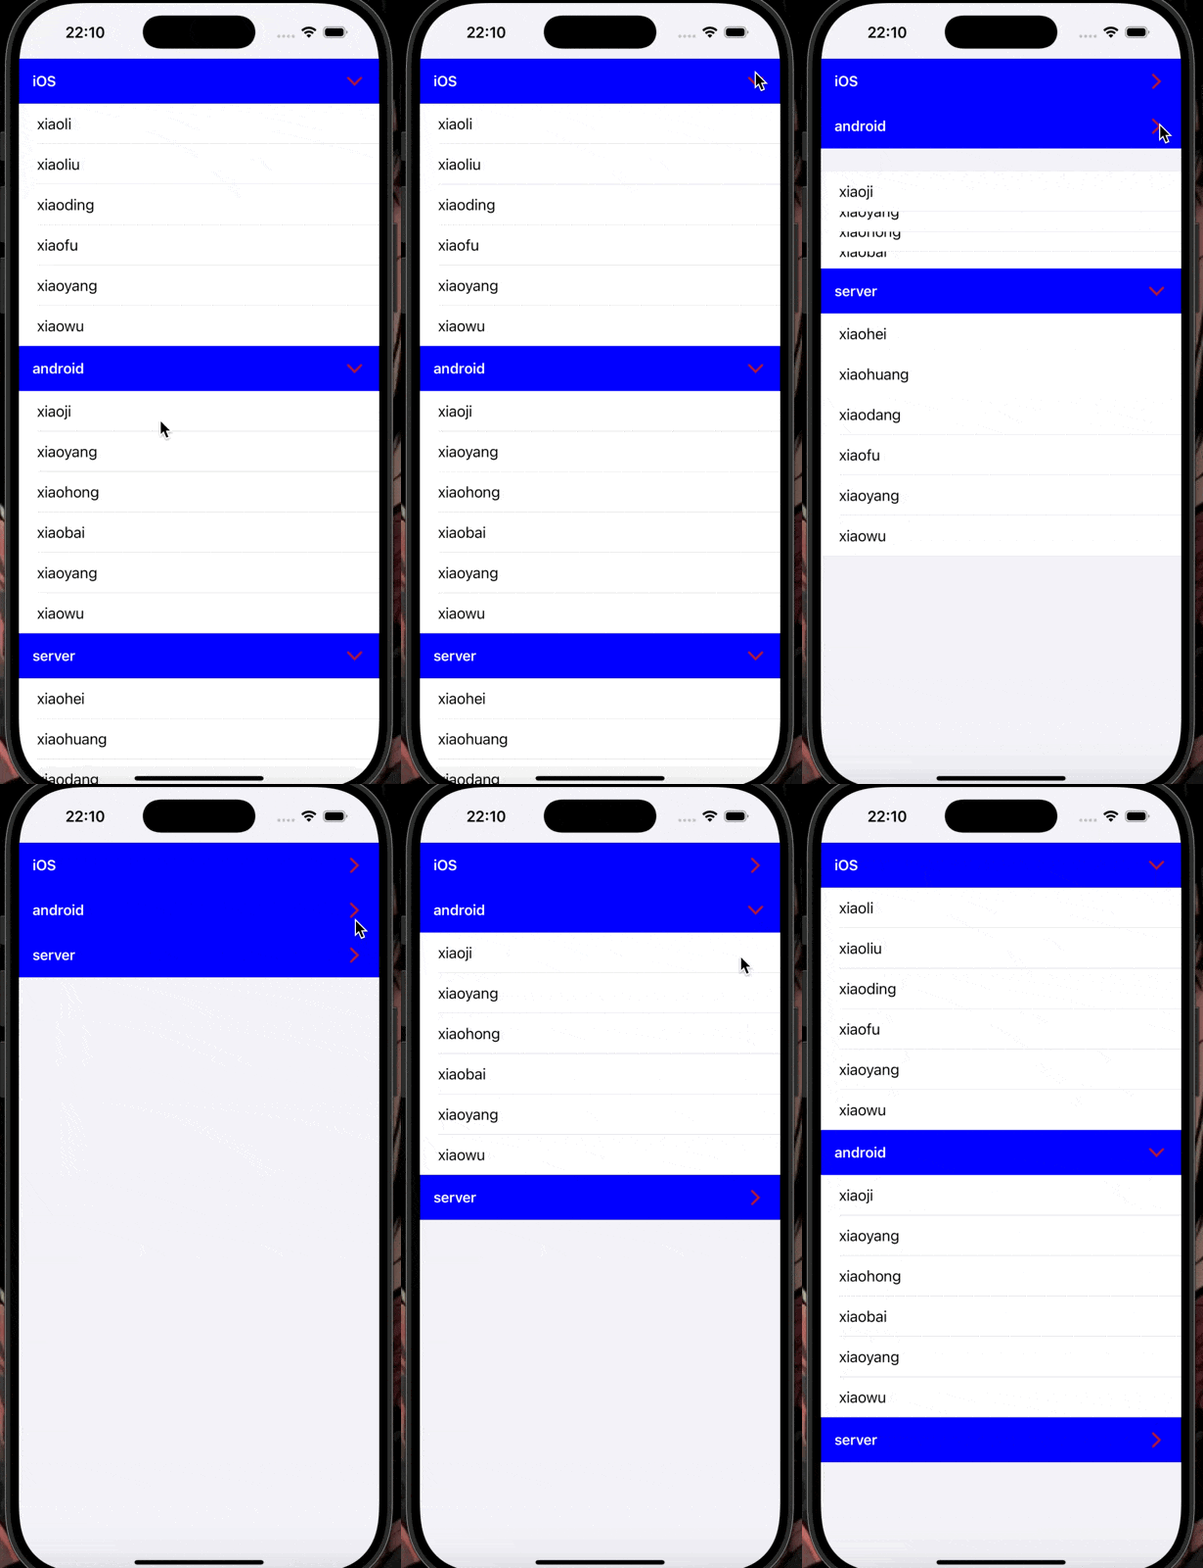
实现折叠关系的转变其实只需要两步,首先为每个section的header中的按钮添加点击事件,其次是在点击实现中按钮的collapase属性转换以判断section的展开与闭合
[self.tableView reloadSections:[NSIndexSet indexSetWithIndex:section] withRowAnimation:UITableViewRowAnimationNone];
这个方法是用来重新加载section的方法,NSIndexSet就是一个用来表示一组索引的类,使用该方法可以创建一个只包含单个索引的集合,UITableViewRowAnimationNone用来设置刷新时的动画效果
注册header
- (UIView *)tableView:(UITableView *)tableView viewForHeaderInSection:(NSInteger)section {Header* header = [tableView dequeueReusableHeaderFooterViewWithIdentifier:@"header"];if (!header) {header = [[Header alloc] initWithReuseIdentifier:@"header"];}Model* sectionData = self.models[section];header.titleLabel.text = sectionData.name;header.button.tag = section + 101;[header.button addTarget:self action:@selector(reverseCollapase:) forControlEvents:UIControlEventTouchUpInside];[self rotateButton:header.button withCollapased:sectionData.collapsed];return header;
}
注意标识符的匹配
完整VC代码
//  Created by xiaoli pop on 2025/9/17.
//#import "MyViewController.h"
#import "Header.h"
#import "Model.h"
@interface MyViewController ()<UITableViewDelegate, UITableViewDataSource>
@property (nonatomic, strong)UITableView* tableView;
@property (nonatomic, strong)NSMutableArray* models;
@end@implementation MyViewController- (void)viewDidLoad {[super viewDidLoad];[self setUpMyData];self.tableView = [[UITableView alloc] initWithFrame:self.view.bounds style:UITableViewStyleGrouped];self.tableView.delegate = self;self.tableView.dataSource = self;[self.view addSubview:self.tableView];[self.tableView registerClass:[Header class] forHeaderFooterViewReuseIdentifier:@"header"];[self.tableView registerClass:[UITableViewCell class] forCellReuseIdentifier:@"cell"];
}- (NSInteger)numberOfSectionsInTableView:(UITableView *)tableView {return self.models.count;
}- (CGFloat)tableView:(UITableView *)tableView heightForFooterInSection:(NSInteger)section {return 0;
}- (UIView *)tableView:(UITableView *)tableView viewForFooterInSection:(NSInteger)section {UIView* view = [[UIView alloc] initWithFrame:CGRectMake(0, 0, 0, 0)];return view;
}- (NSInteger)tableView:(UITableView *)tableView numberOfRowsInSection:(NSInteger)section {Model* sectionData = self.models[section];if (sectionData.collapsed) {return 0;} else {return sectionData.items.count;}
}- (CGFloat)tableView:(UITableView *)tableView heightForHeaderInSection:(NSInteger)section {return 50;
}
- (UITableViewCell *)tableView:(UITableView *)tableView cellForRowAtIndexPath:(NSIndexPath *)indexPath {UITableViewCell* cell = [tableView dequeueReusableCellWithIdentifier:@"cell" forIndexPath:indexPath];Model* sectionData = self.models[indexPath.section];cell.textLabel.text = sectionData.items[indexPath.row];return cell;
}- (UIView *)tableView:(UITableView *)tableView viewForHeaderInSection:(NSInteger)section {Header* header = [tableView dequeueReusableHeaderFooterViewWithIdentifier:@"header"];if (!header) {header = [[Header alloc] initWithReuseIdentifier:@"header"];}Model* sectionData = self.models[section];header.titleLabel.text = sectionData.name;header.button.tag = section + 101;[header.button addTarget:self action:@selector(reverseCollapase:) forControlEvents:UIControlEventTouchUpInside];[self rotateButton:header.button withCollapased:sectionData.collapsed];return header;
}//- (void)tableView:(UITableView *)tableView didSelectRowAtIndexPath:(NSIndexPath *)indexPath {
//    NSInteger section = indexPath.section;
//    Model* sectionData = self.models[section];
//    sectionData.collapsed = !sectionData.collapsed;
//}- (void)reverseCollapase:(UIButton* )button {NSInteger section = button.tag - 101;Model* sectionData = self.models[section];sectionData.collapsed = !sectionData.collapsed;[self.tableView reloadSections:[NSIndexSet indexSetWithIndex:section] withRowAnimation:UITableViewRowAnimationNone];
}- (void)rotateButton:(UIButton* )button withCollapased:(BOOL)collapased {CGFloat angle = collapased ? 0.0 : M_PI_2;button.transform = CGAffineTransformMakeRotation(angle);
}- (void)setUpMyData {self.models = [NSMutableArray array];[self.models addObject:[[Model alloc] initWithName:@"iOS" withItems:@[@"xiaoli", @"xiaoliu", @"xiaoding", @"xiaofu", @"xiaoyang", @"xiaowu"] andCollapsed:NO]];[self.models addObject:[[Model alloc] initWithName:@"android" withItems:@[@"xiaoji", @"xiaoyang", @"xiaohong", @"xiaobai", @"xiaoyang", @"xiaowu"] andCollapsed:NO]];[self.models addObject:[[Model alloc] initWithName:@"server" withItems:@[@"xiaohei", @"xiaohuang", @"xiaodang", @"xiaofu", @"xiaoyang", @"xiaowu"] andCollapsed:NO]];
}
效果

