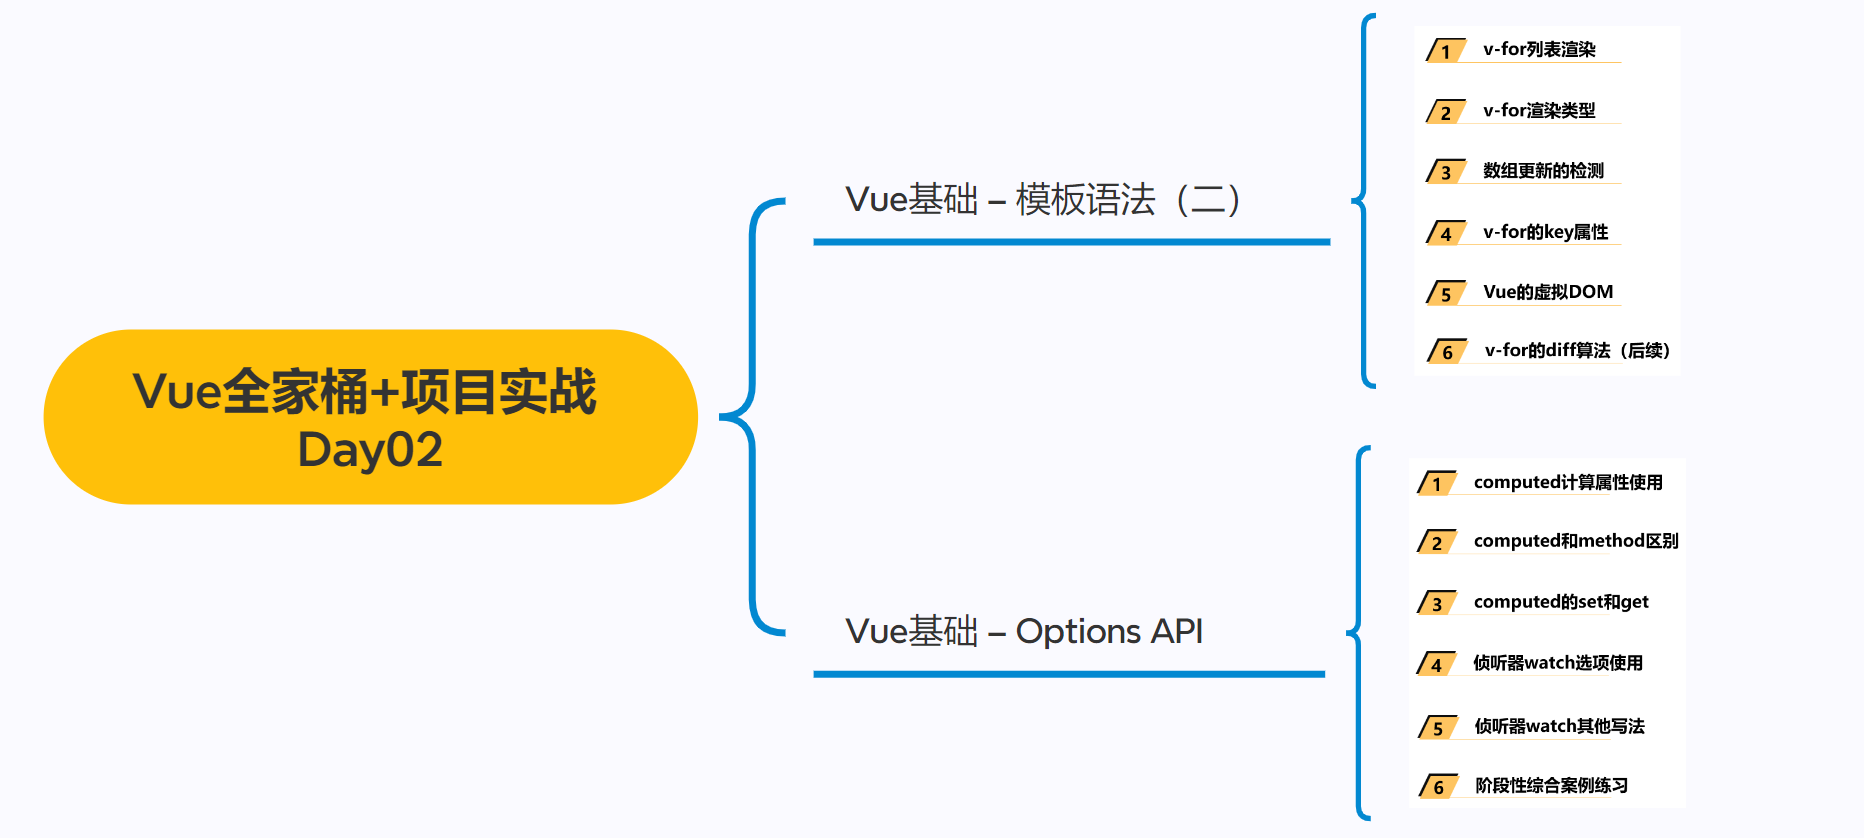
Vue基础 – 模板语法(二)
1 v-for列表渲染
列表渲染

2 v-for渲染类型
v-for基本使用

<html lang="en">
<head><meta charset="UTF-8"><meta http-equiv="X-UA-Compatible" content="IE=edge"><meta name="viewport" content="width=device-width, initial-scale=1.0"><title>Document</title><style>.item {margin-top: 5px;background-color: orange;}.item .title {color: red;}</style>
</head>
<body><div id="app"><!-- 1.电影列表进行渲染 --><h2>电影列表</h2><ul><li v-for="movie in movies">{{ movie }}</li></ul><!-- 2.电影列表同时有索引 --><ul><li v-for="(movie, index) in movies">{{index + 1}} - {{ movie }}</li></ul><!-- 3.遍历数组复杂数据 --><h2>商品列表</h2><div class="item" v-for="item in products"><h3 class="title">商品: {{item.name}}</h3><span>价格: {{item.price}}</span><p>秒杀: {{item.desc}}</p></div></div><script src="../lib/vue.js"></script><script>// 1.创建appconst app = Vue.createApp({// data: option apidata() {return {// 1.moviesmovies: ["星际穿越", "少年派", "大话西游", "哆啦A梦"],// 2.数组: 存放的是对象products: [{ id: 110, name: "Macbook", price: 9.9, desc: "9.9秒杀, 快来抢购!" },{ id: 111, name: "iPhone", price: 8.8, desc: "9.9秒杀, 快来抢购!" },{ id: 112, name: "小米电脑", price: 9.9, desc: "9.9秒杀, 快来抢购!" },]}},})// 2.挂载appapp.mount("#app")</script>
</body>
</html>
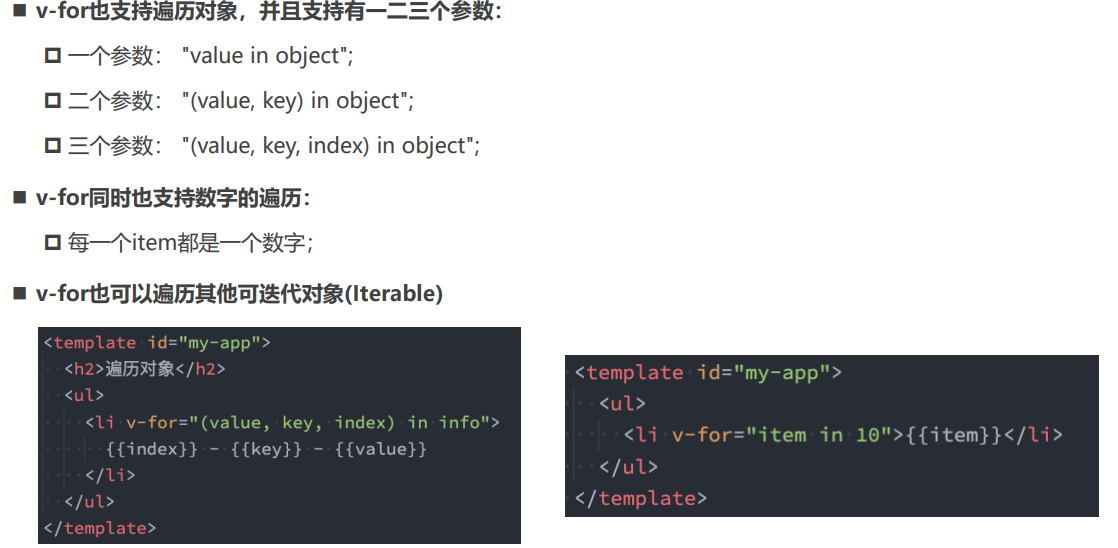
v-for支持的类型
<html lang="en">
<head><meta charset="UTF-8"><meta http-equiv="X-UA-Compatible" content="IE=edge"><meta name="viewport" content="width=device-width, initial-scale=1.0"><title>Document</title>
</head>
<body><div id="app"><!-- 1.遍历数组 --><!-- 2.遍历对象 --><ul><li v-for="(value, key, index) in info">{{value}}-{{key}}-{{index}}</li></ul><!-- 3.遍历字符串(iterable) --><ul><li v-for="item in message">{{item}}</li></ul><!-- 4.遍历数字 --><ul><li v-for="item in 100">{{item}}</li></ul></div><script src="../lib/vue.js"></script><script>// 1.创建appconst app = Vue.createApp({// data: option apidata() {return {message: "Hello Vue",movies: [],info: { name: "why", age: 18, height: 1.88 }}},})// 2.挂载appapp.mount("#app")</script>
</body>
</html>
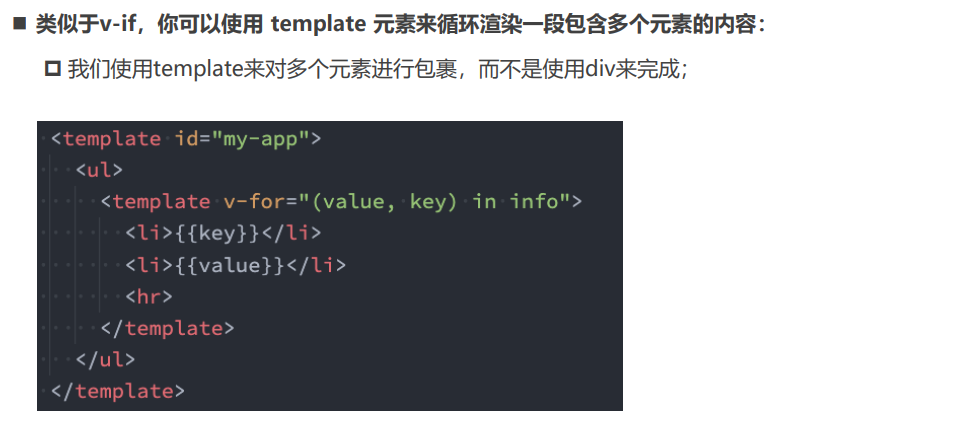
template元素
<html lang="en">
<head><meta charset="UTF-8"><meta http-equiv="X-UA-Compatible" content="IE=edge"><meta name="viewport" content="width=device-width, initial-scale=1.0"><title>Document</title>
</head>
<body><div id="app"><!-- 如果div没有实际的意义, 那么可以使用template替换 --><div v-for="(value, key, index) in infos"><span>{{value}}</span><strong>{{key}}</strong><i>{{index}}</i></div></div><script src="../lib/vue.js"></script><script>// 1.创建appconst app = Vue.createApp({// data: option apidata() {return {infos: { name: "why", age: 18, height: 1.88 }}},})// 2.挂载appapp.mount("#app")</script>
</body>
</html>
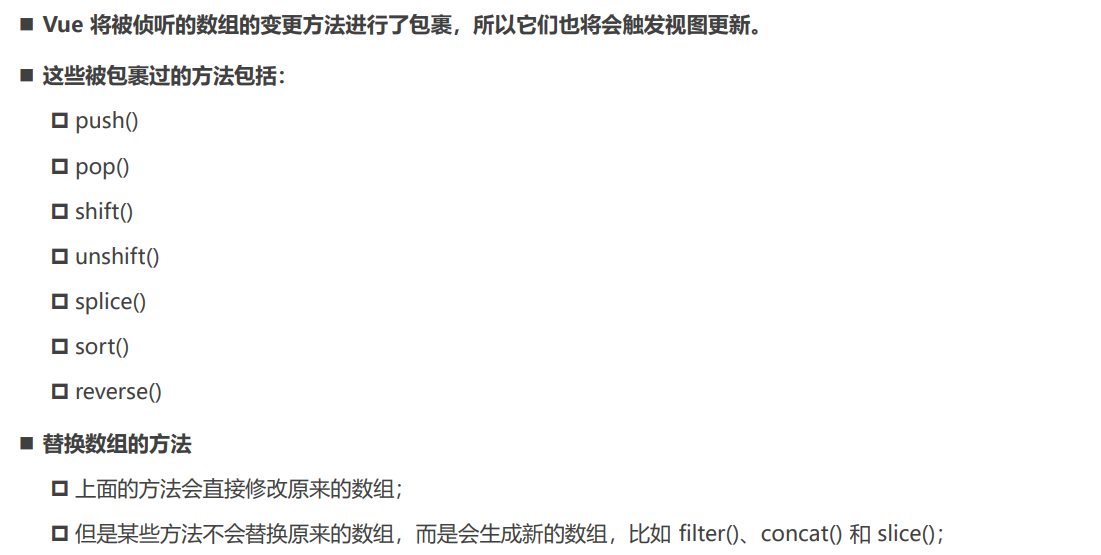
3 数组更新的检测
数组更新检测
<html lang="en">
<head><meta charset="UTF-8"><meta http-equiv="X-UA-Compatible" content="IE=edge"><meta name="viewport" content="width=device-width, initial-scale=1.0"><title>Document</title>
</head>
<body><div id="app"><ul><li v-for="item in names">{{ item }}</li></ul><button @click="changeArray">修改数组</button></div><script src="../lib/vue.js"></script><script>// 1.创建appconst app = Vue.createApp({// data: option apidata() {return {names: ["abc", "cba", "nba", "aaa", "ccc"]}},methods: {changeArray() {// 1.直接将数组修改为一个新的数组// this.names = ["why", "kobe"]// 2.通过一些数组的方法, 修改数组中的元素// this.names.push("why")// this.names.pop()// this.names.splice(2, 1, "why")// this.names.sort()// this.names.reverse()// 3.不修改原数组的方法是不能侦听(watch)const newNames = this.names.map(item => item + "why")this.names = newNames}}})// 2.挂载appapp.mount("#app")</script>
</body>
</html>
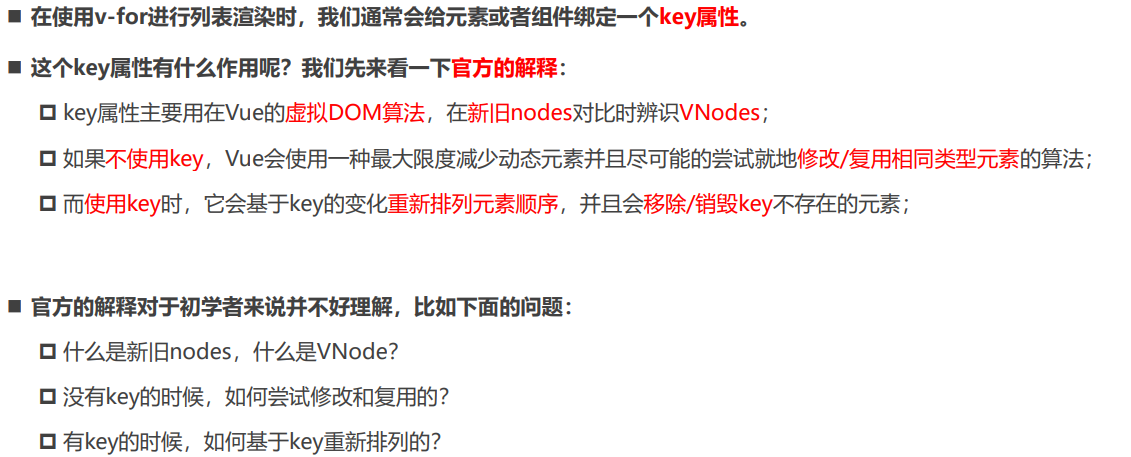
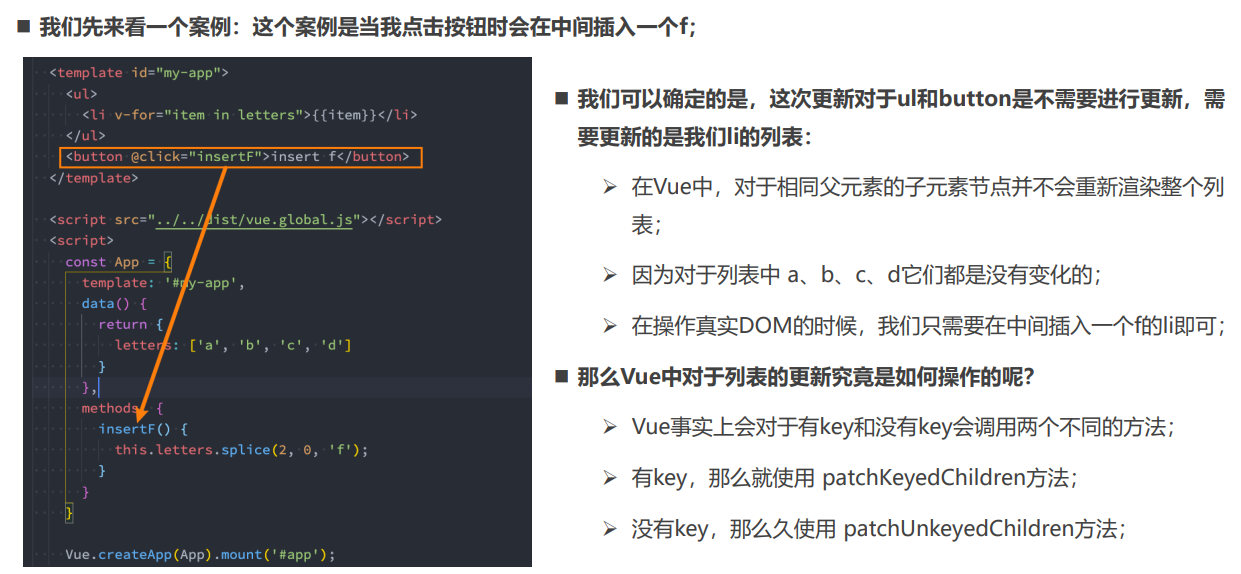
v-for中的key是什么作用?
<html lang="en">
<head><meta charset="UTF-8"><meta http-equiv="X-UA-Compatible" content="IE=edge"><meta name="viewport" content="width=device-width, initial-scale=1.0"><title>Document</title>
</head>
<body><div id="app"><button @click="insertF">插入f</button><ul><!-- key要求是唯一: id --><li v-for="item in letters" :key="item">{{item}}</li></ul></div><script src="../lib/vue.js"></script><script>// 1.创建appconst app = Vue.createApp({// data: option apidata() {return {letters: ["a", "b", "c", "d", "e"]}},methods: {insertF() {this.letters.splice(2, 0, "f")this.letters.splice()}}})// 2.挂载appapp.mount("#app")</script>
</body>
</html>
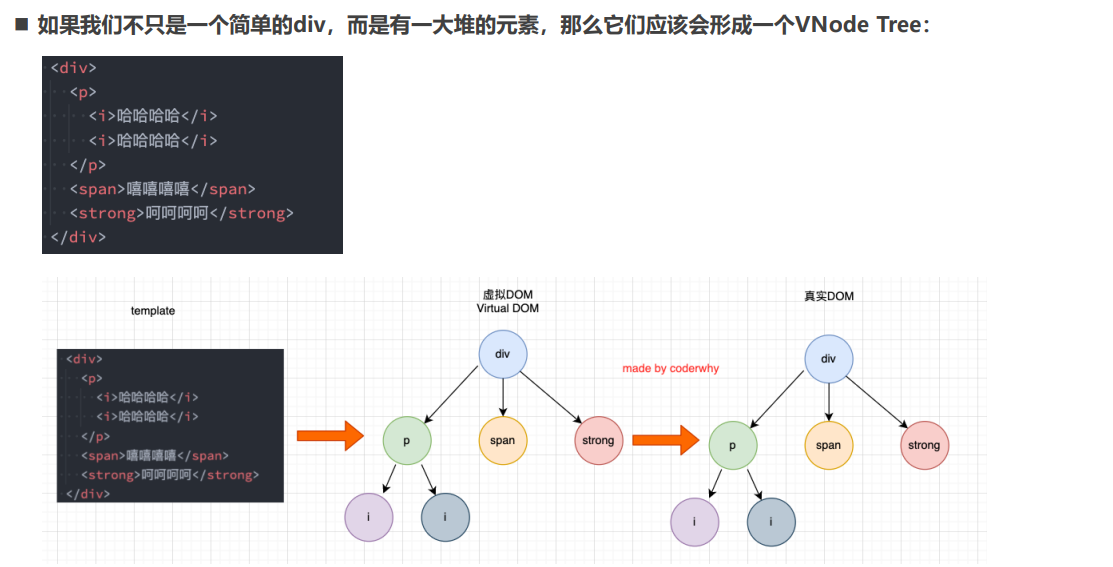
认识VNode
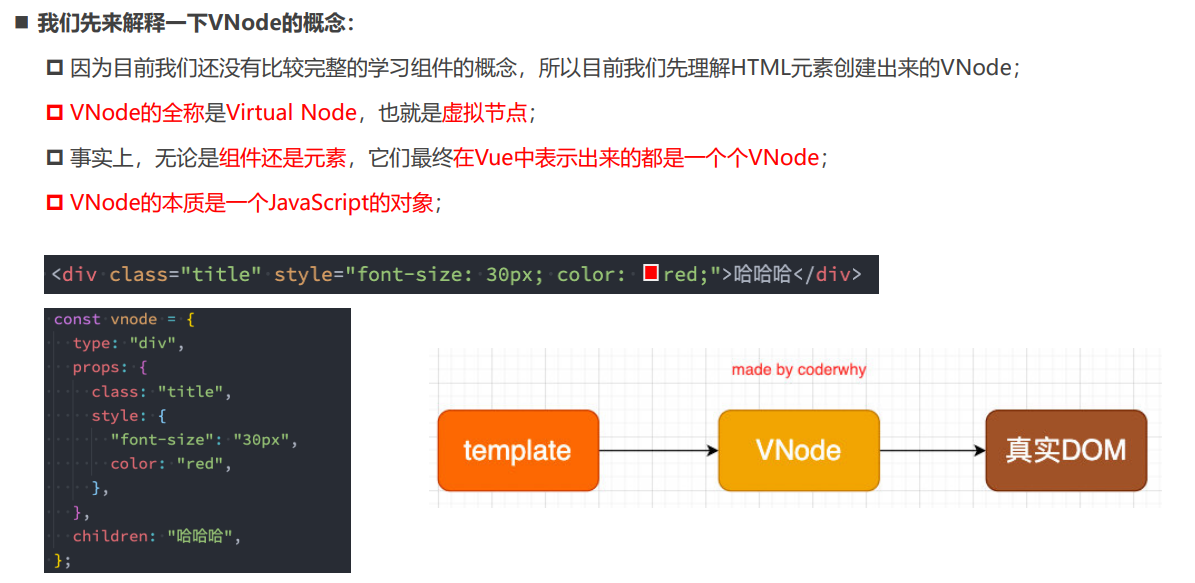
虚拟DOM
插入F的案例
4 v-for的key属性
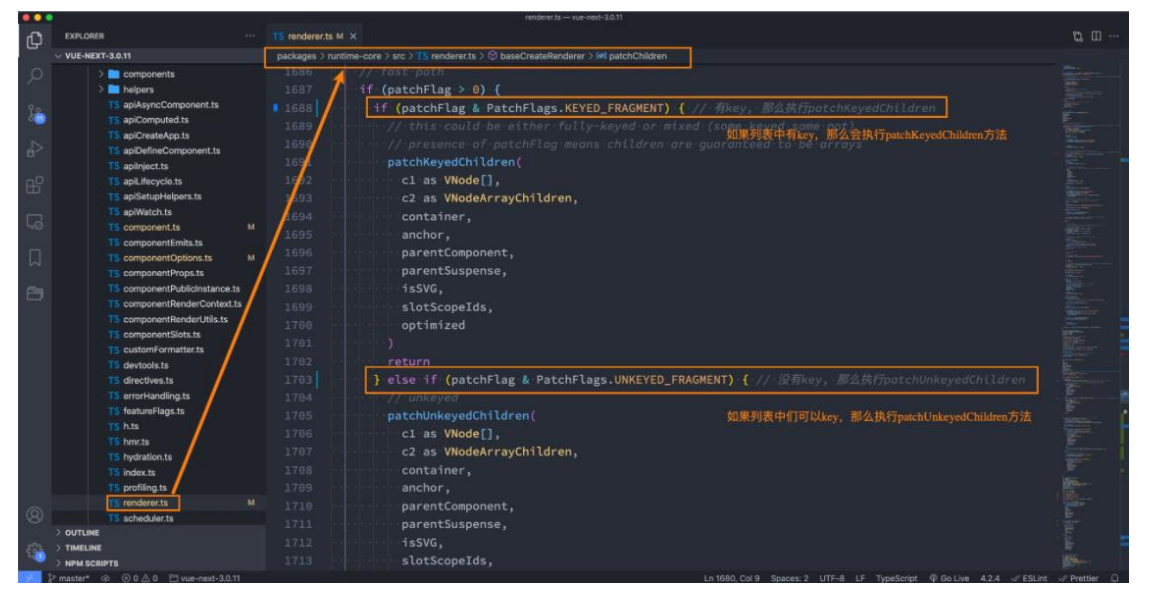
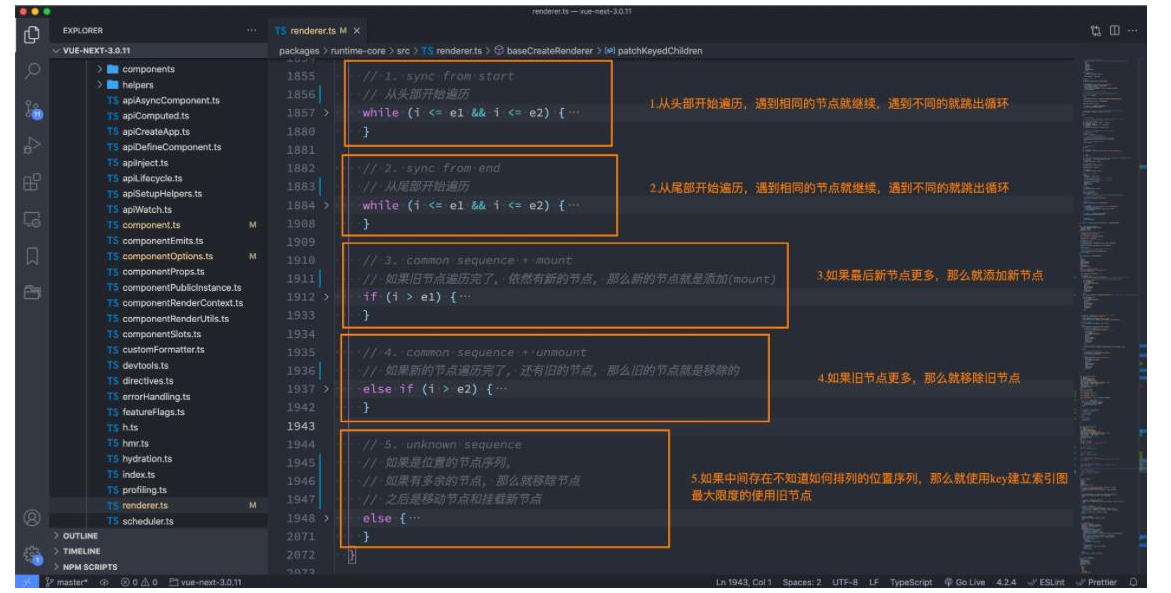
Vue源码对于key的判断
没有key的操作(源码)
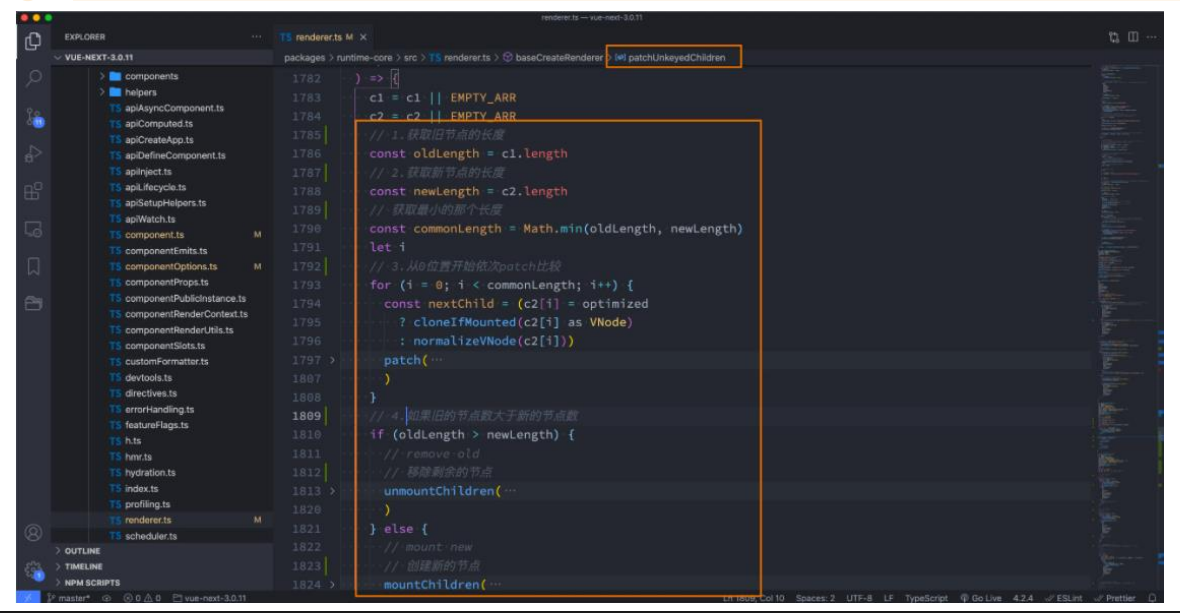
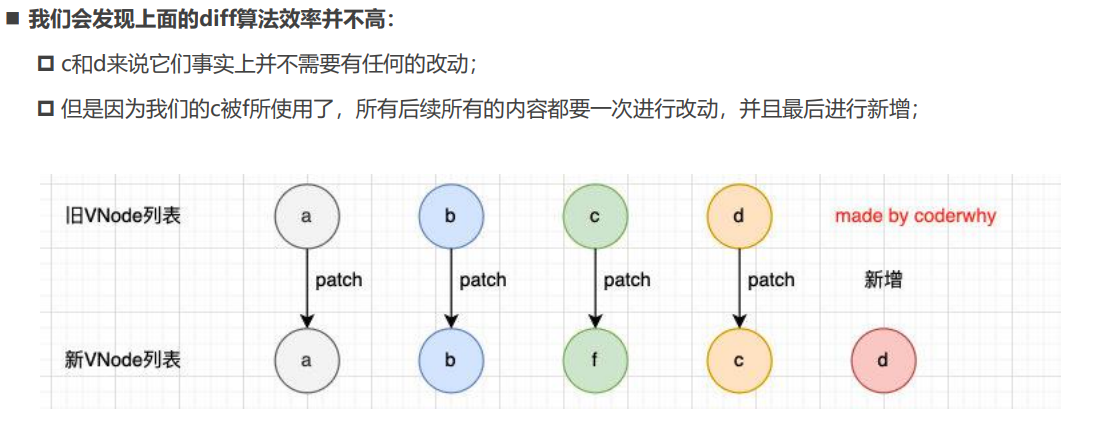
没有key的过程如下
有key执行操作(源码)
5 Vue的虚拟DOM
6 v-for的diff算法(后续)
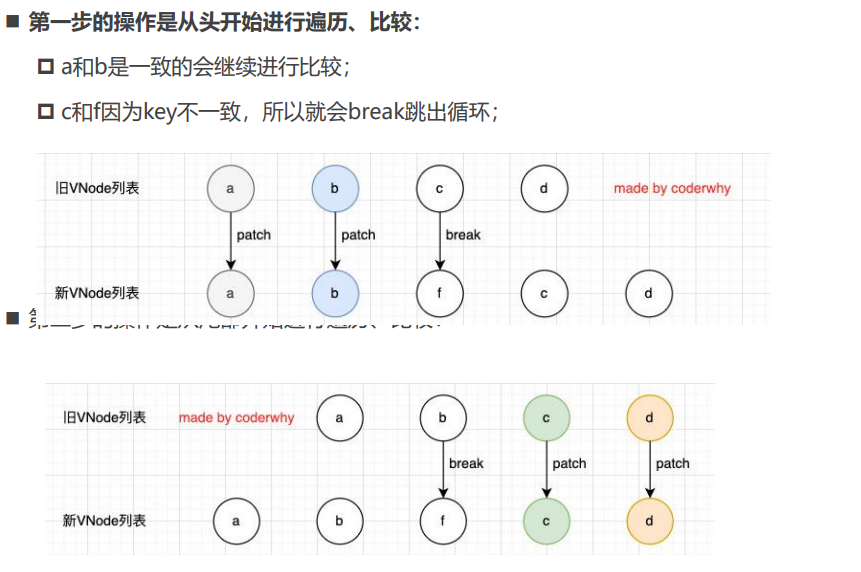
有key的diff算法如下(一)
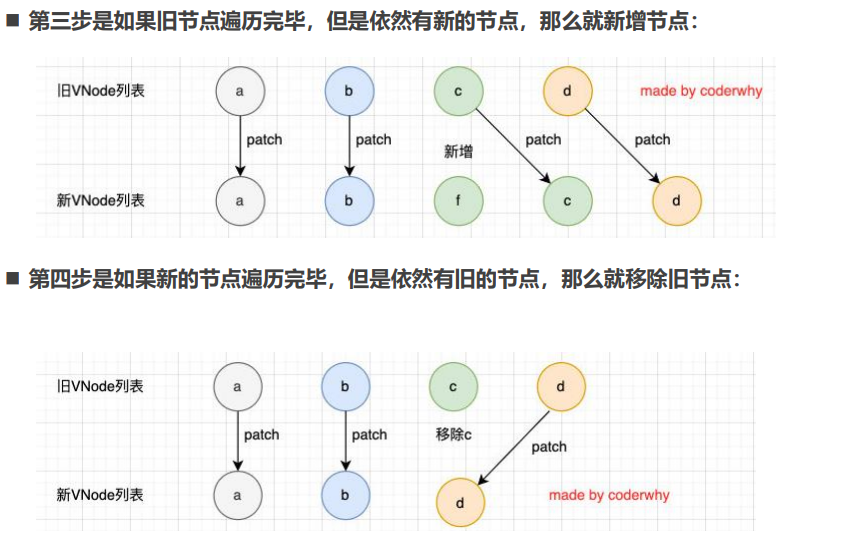
有key的diff算法如下(二)
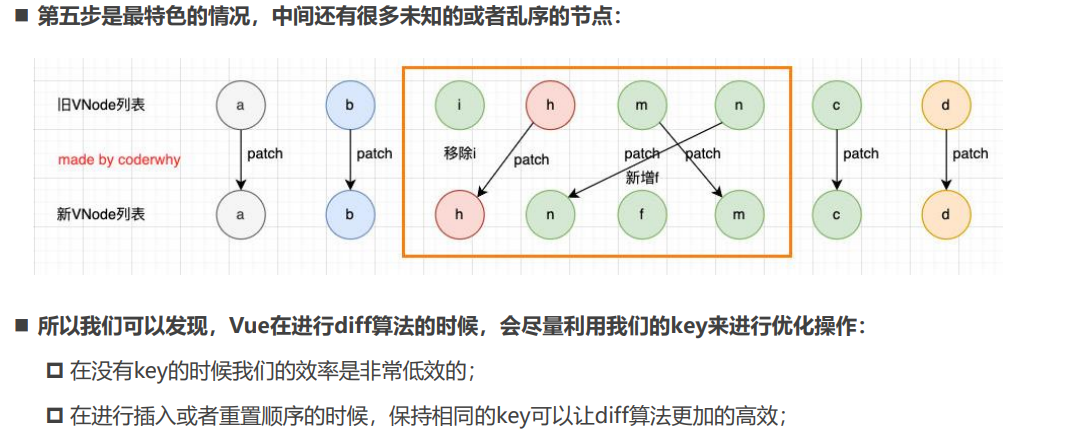
有key的diff算法如下(三)
Vue基础 – Options API
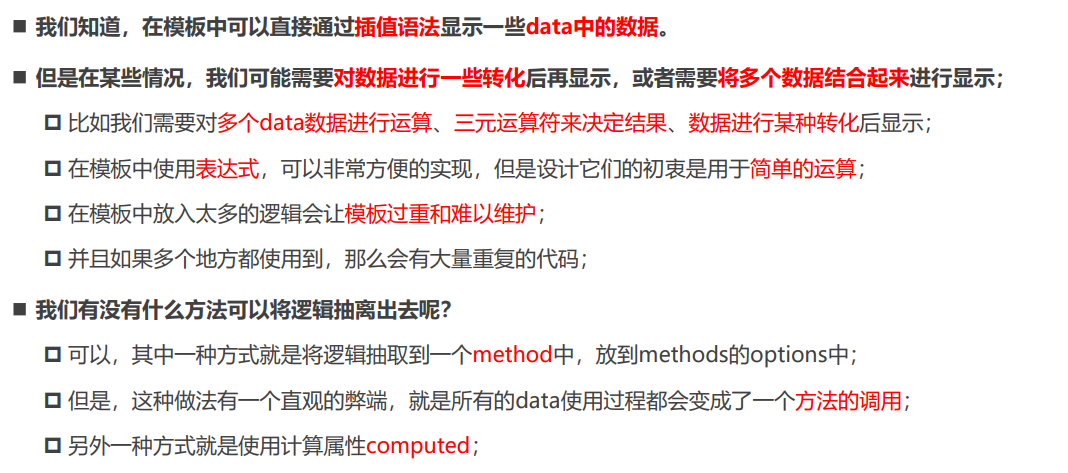
1 computed计算属性使用
复杂data的处理方式
<html lang="en">
<head><meta charset="UTF-8"><meta http-equiv="X-UA-Compatible" content="IE=edge"><meta name="viewport" content="width=device-width, initial-scale=1.0"><title>Document</title>
</head>
<body><div id="app"><!-- 插值语法表达式直接进行拼接 --><!-- 1.拼接名字 --><h2>{{ firstName + " " + lastName }}</h2><h2>{{ firstName + " " + lastName }}</h2><h2>{{ firstName + " " + lastName }}</h2><!-- 2.显示分数等级 --><h2>{{ score >= 60 ? '及格': '不及格' }}</h2><!-- 3.反转单词显示文本 --><h2>{{ message.split(" ").reverse().join(" ") }}</h2></div><script src="../lib/vue.js"></script><script>// 1.创建appconst app = Vue.createApp({// data: option apidata() {return {// 1.姓名firstName: "kobe",lastName: "bryant",// 2.分数: 及格/不及格score: 80,// 3.一串文本: 对文本中的单词进行反转显示message: "my name is why"}},})// 2.挂载appapp.mount("#app")</script>
</body>
</html>
<html lang="en">
<head><meta charset="UTF-8"><meta http-equiv="X-UA-Compatible" content="IE=edge"><meta name="viewport" content="width=device-width, initial-scale=1.0"><title>Document</title>
</head>
<body><div id="app"><!-- 插值语法表达式直接进行拼接 --><!-- 1.拼接名字 --><h2>{{ getFullname() }}</h2><h2>{{ getFullname() }}</h2><h2>{{ getFullname() }}</h2><!-- 2.显示分数等级 --><h2>{{ getScoreLevel() }}</h2><!-- 3.反转单词显示文本 --><h2>{{ reverseMessage() }}</h2></div><script src="../lib/vue.js"></script><script>// 1.创建appconst app = Vue.createApp({// data: option apidata() {return {// 1.姓名firstName: "kobe",lastName: "bryant",// 2.分数: 及格/不及格score: 80,// 3.一串文本: 对文本中的单词进行反转显示message: "my name is why"}},methods: {getFullname() {return this.firstName + " " + this.lastName},getScoreLevel() {return this.score >= 60 ? "及格": "不及格"},reverseMessage() {return this.message.split(" ").reverse().join(" ")}}})// 2.挂载appapp.mount("#app")</script>
</body>
</html>
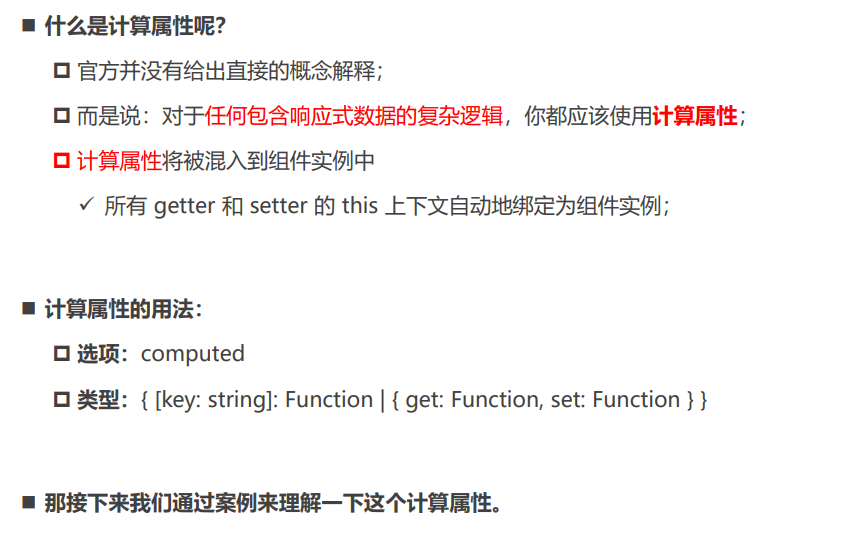
认识计算属性computed
<html lang="en">
<head><meta charset="UTF-8"><meta http-equiv="X-UA-Compatible" content="IE=edge"><meta name="viewport" content="width=device-width, initial-scale=1.0"><title>Document</title>
</head>
<body><div id="app"><!-- 插值语法表达式直接进行拼接 --><!-- 1.拼接名字 --><h2>{{ fullname }}</h2><h2>{{ fullname }}</h2><h2>{{ fullname }}</h2><!-- 2.显示分数等级 --><h2>{{ scoreLevel }}</h2><!-- 3.反转单词显示文本 --><h2>{{ reverseMessage }}</h2></div><script src="../lib/vue.js"></script><script>// 1.创建appconst app = Vue.createApp({// data: option apidata() {return {// 1.姓名firstName: "kobe",lastName: "bryant",// 2.分数: 及格/不及格score: 80,// 3.一串文本: 对文本中的单词进行反转显示message: "my name is why"}},computed: {// 1.计算属性默认对应的是一个函数fullname() {return this.firstName + " " + this.lastName},scoreLevel() {return this.score >= 60 ? "及格": "不及格"},reverseMessage() {return this.message.split(" ").reverse().join(" ")}}})// 2.挂载appapp.mount("#app")</script>
</body>
</html>
<html lang="en">
<head><meta charset="UTF-8"><meta http-equiv="X-UA-Compatible" content="IE=edge"><meta name="viewport" content="width=device-width, initial-scale=1.0"><title>Document</title>
</head>
<body><div id="app"><!-- 1.methods --><h2>{{ getFullname() }}</h2><h2>{{ getFullname() }}</h2><h2>{{ getFullname() }}</h2><!-- 2.computed --><h2>{{ fullname }}</h2><h2>{{ fullname }}</h2><h2>{{ fullname }}</h2><!-- 修改name值 --><button @click="changeLastname">修改lastname</button></div><script src="../lib/vue.js"></script><script>// 1.创建appconst app = Vue.createApp({// data: option apidata() {return {firstName: "kobe",lastName: "bryant"}},methods: {getFullname() {console.log("getFullname-----")return this.firstName + " " + this.lastName},changeLastname() {this.lastName = "why"}},computed: {fullname() {console.log("computed fullname-----")return this.firstName + " " + this.lastName}}})// 2.挂载appapp.mount("#app")</script>
</body>
</html>
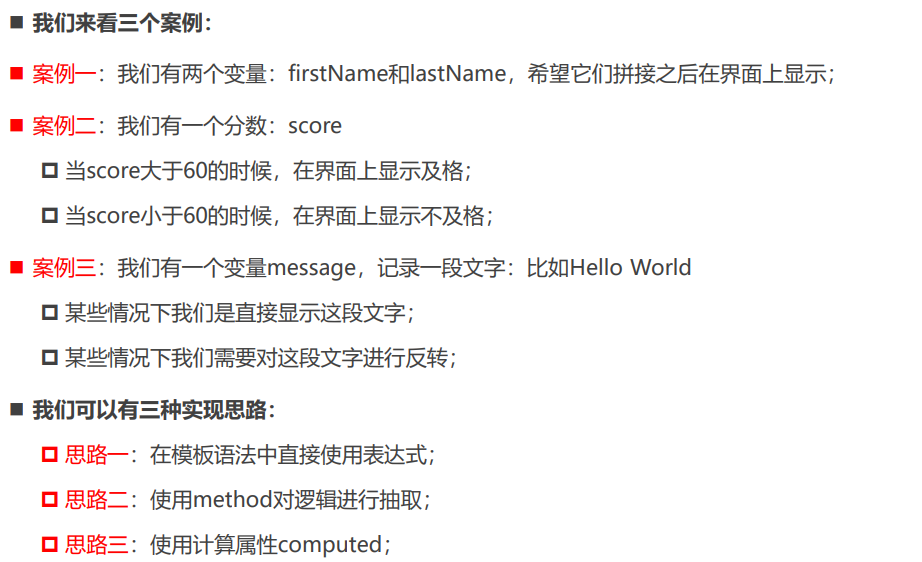
案例实现思路
2 computed和method区别
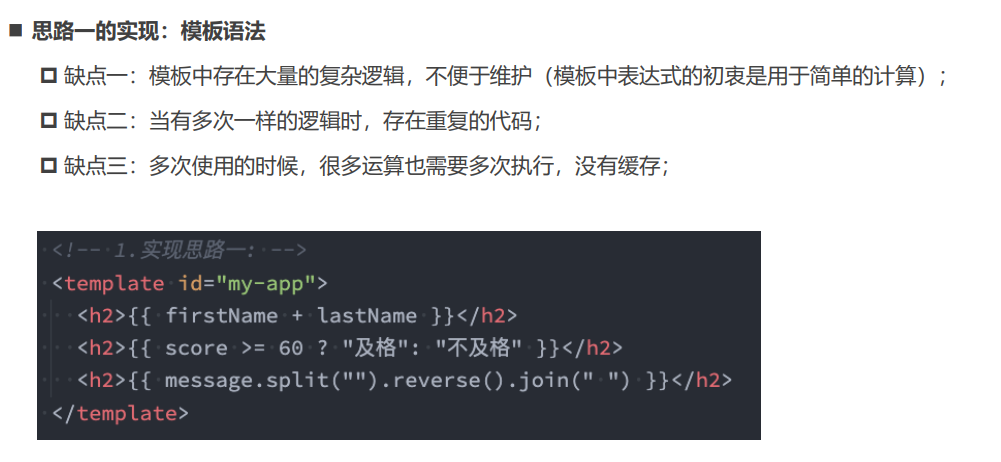
实现思路一:模板语法
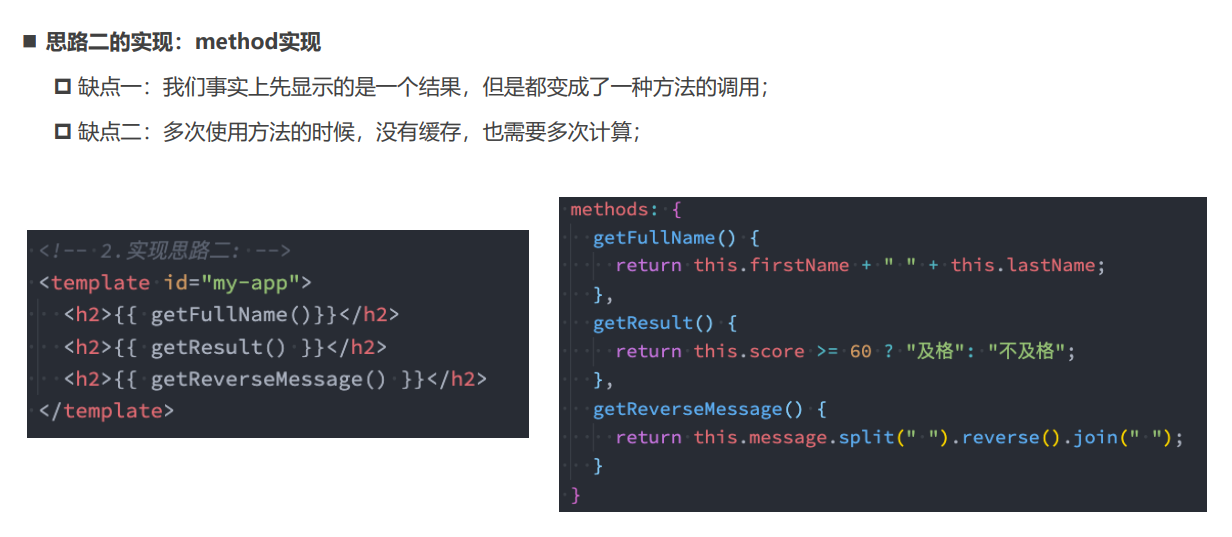
实现思路二:method实现
思路三的实现:computed实现

计算属性 vs methods
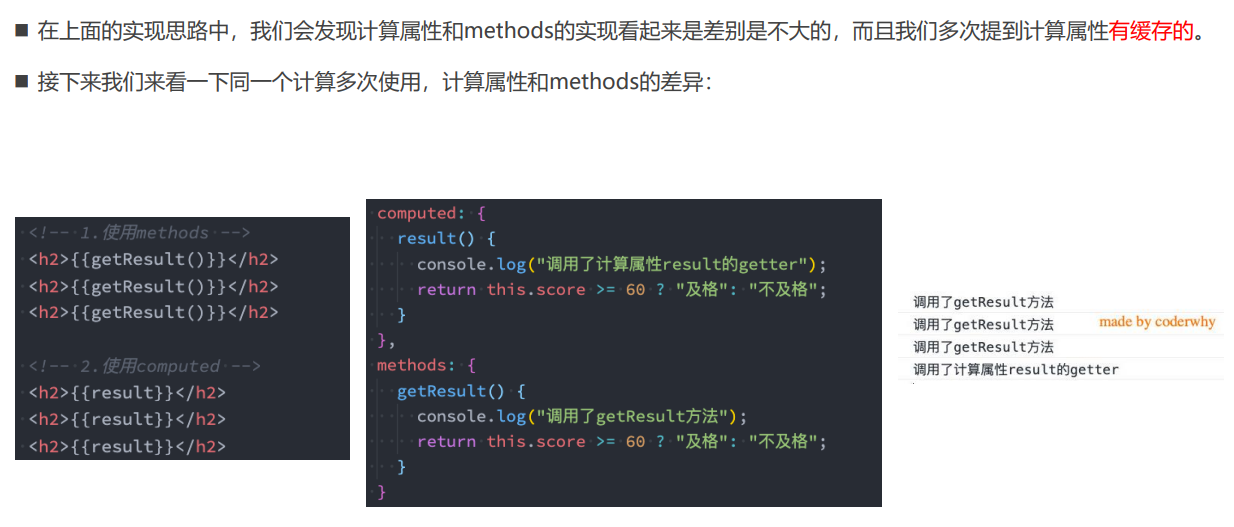
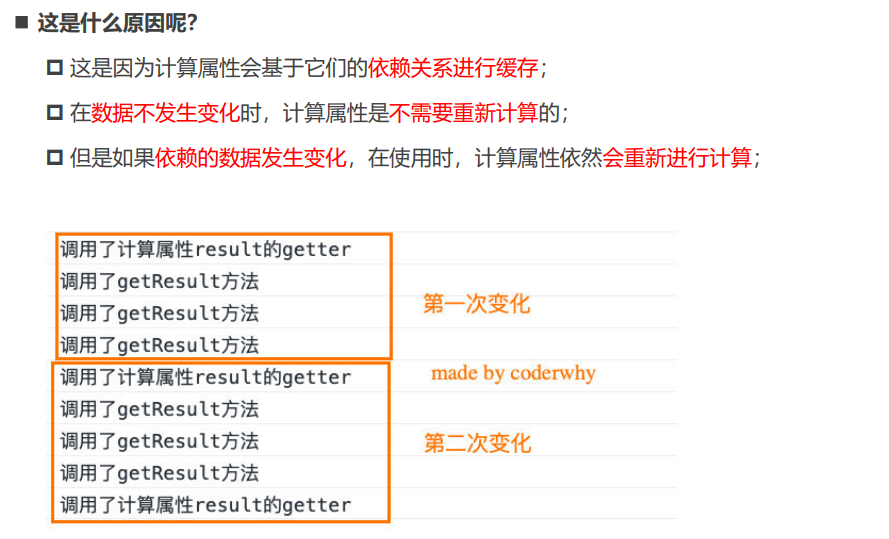
计算属性的缓存
3 computed的set和get
计算属性的setter和getter
<html lang="en">
<head><meta charset="UTF-8"><meta http-equiv="X-UA-Compatible" content="IE=edge"><meta name="viewport" content="width=device-width, initial-scale=1.0"><title>Document</title>
</head>
<body><div id="app"><h2>{{ fullname }}</h2><button @click="setFullname">设置fullname</button></div><script src="../lib/vue.js"></script><script>// 1.创建appconst app = Vue.createApp({// data: option apidata() {return {firstname: "coder",lastname: "why"}},computed: {// 语法糖的写法// fullname() {//   return this.firstname + " " + this.lastname// },// 完整的写法:fullname: {get: function() {return this.firstname + " " + this.lastname},set: function(value) {const names = value.split(" ")this.firstname = names[0]this.lastname = names[1]}}},methods: {setFullname() {this.fullname = "kobe bryant"}}})// 2.挂载appapp.mount("#app")</script>
</body>
</html>
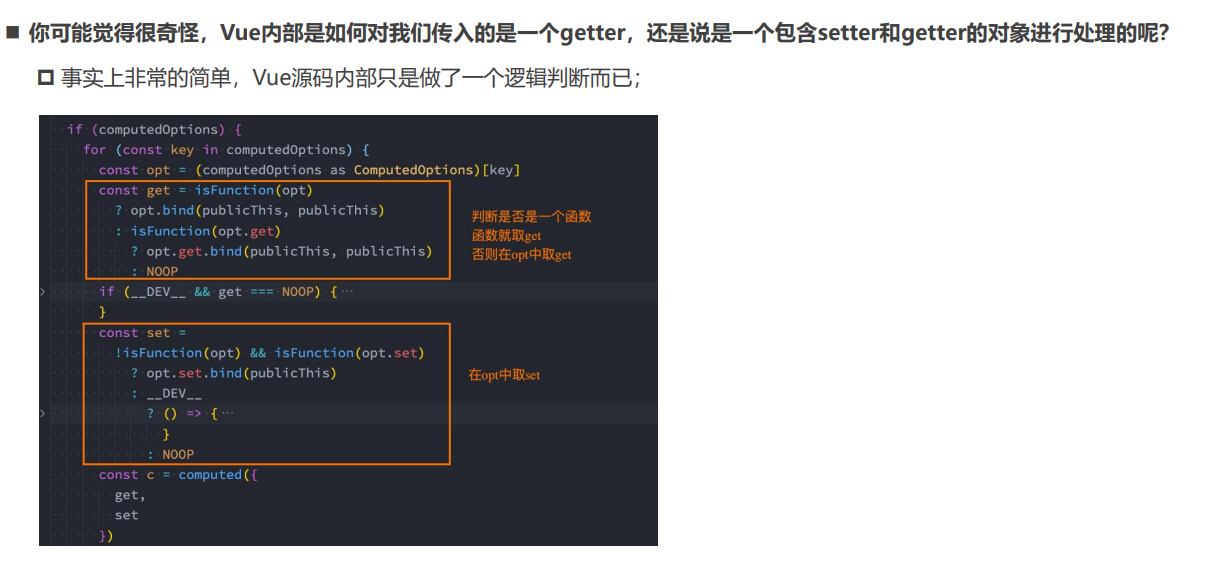
源码如何对setter和getter处理呢?(了解)
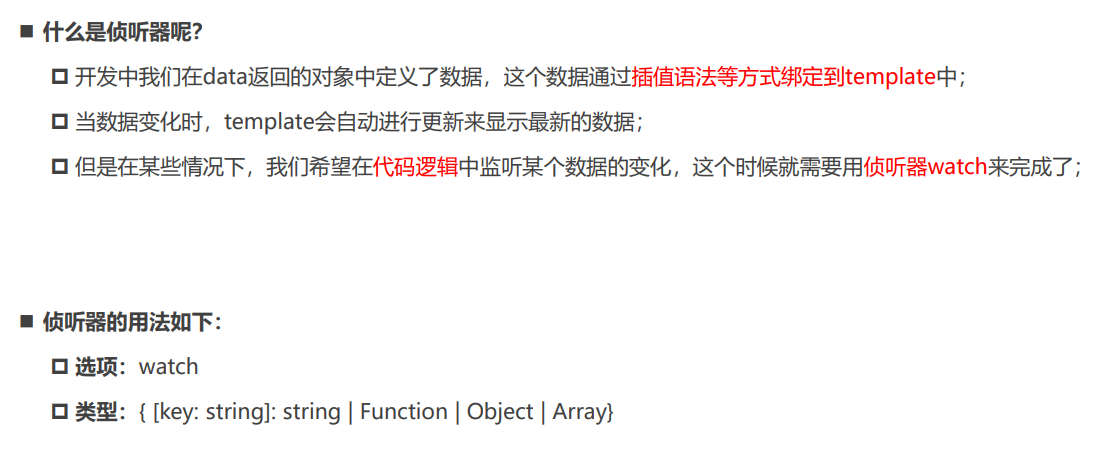
4 侦听器watch选项使用
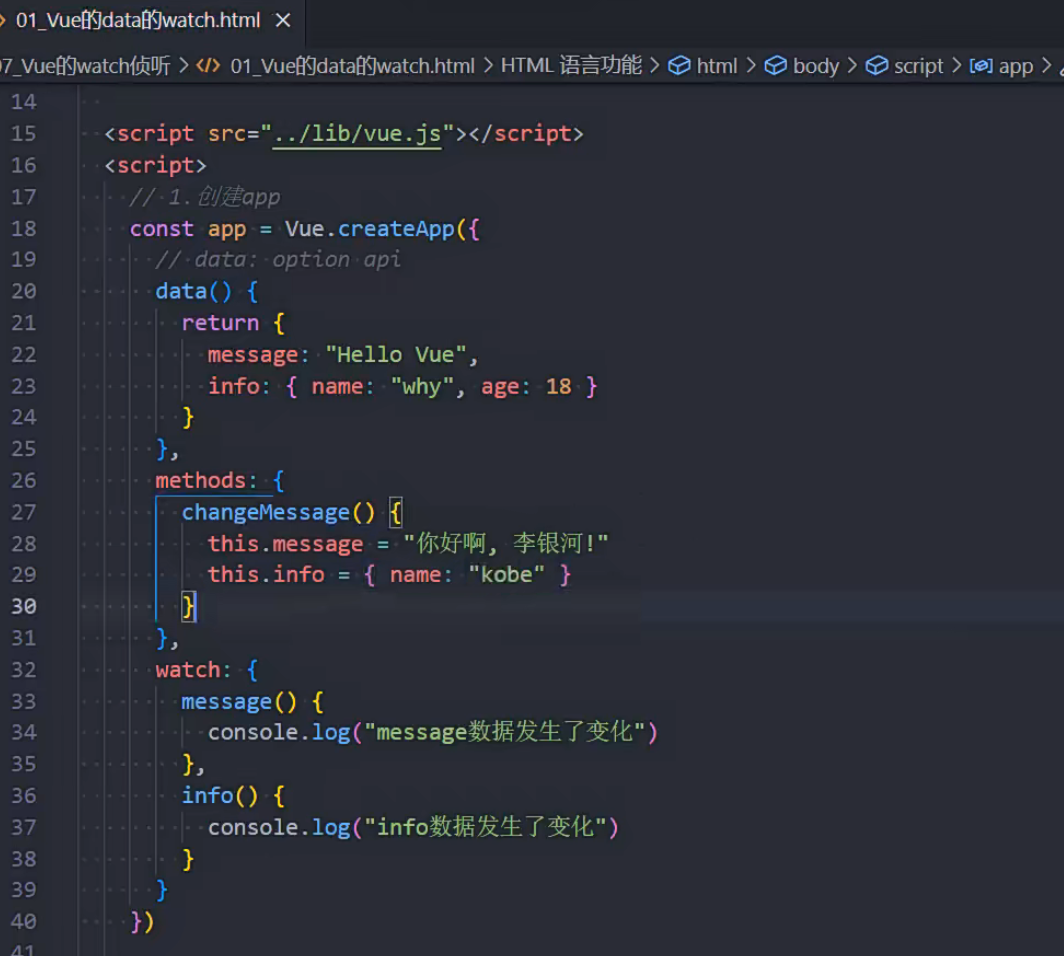
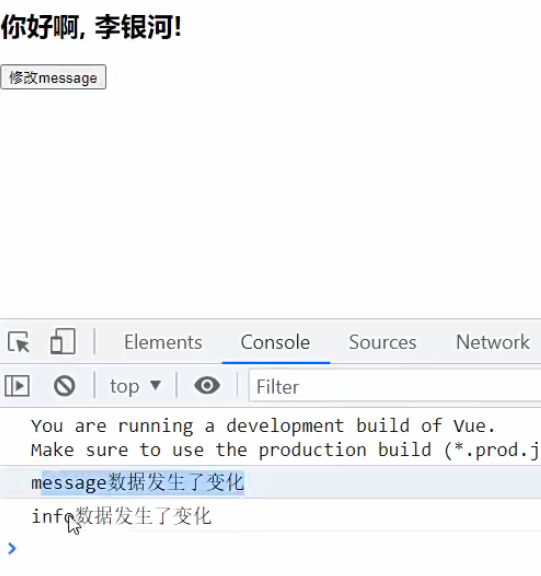
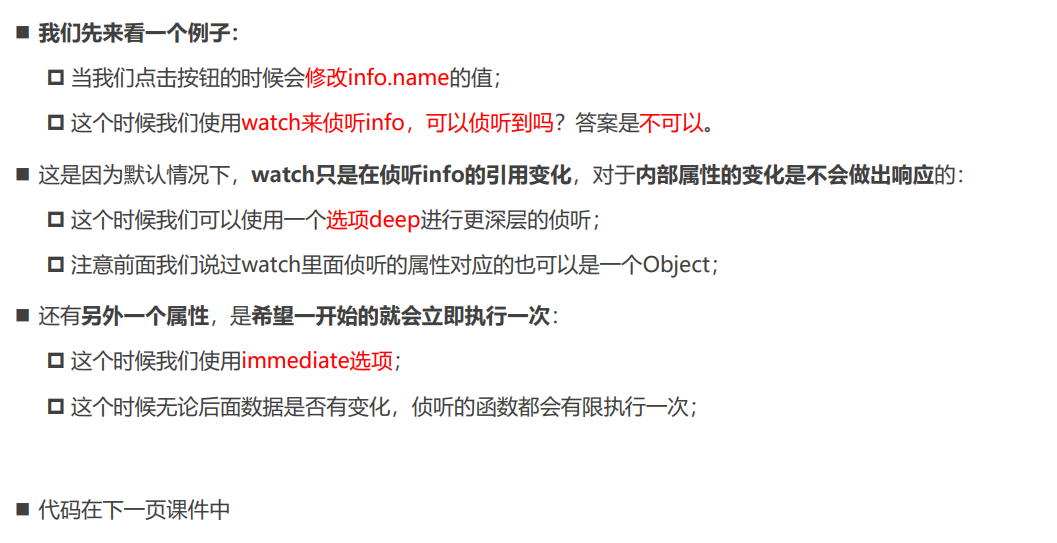
认识侦听器watch
<html lang="en">
<head><meta charset="UTF-8"><meta http-equiv="X-UA-Compatible" content="IE=edge"><meta name="viewport" content="width=device-width, initial-scale=1.0"><title>Document</title>
</head>
<body><div id="app"><h2>{{message}}</h2><button @click="changeMessage">修改message</button></div><script src="../lib/vue.js"></script><script>// Proxy -> Reflect// 1.创建appconst app = Vue.createApp({// data: option apidata() {return {message: "Hello Vue",info: { name: "why", age: 18 }}},methods: {changeMessage() {this.message = "你好啊, 李银河!"this.info = { name: "kobe" }}},watch: {// 1.默认有两个参数: newValue/oldValuemessage(newValue, oldValue) {console.log("message数据发生了变化:", newValue, oldValue)},info(newValue, oldValue) {// 2.如果是对象类型, 那么拿到的是代理对象// console.log("info数据发生了变化:", newValue, oldValue)// console.log(newValue.name, oldValue.name)// 3.获取原生对象// console.log({ ...newValue })console.log(Vue.toRaw(newValue))}}})// 2.挂载appapp.mount("#app")</script>
</body>
</html>
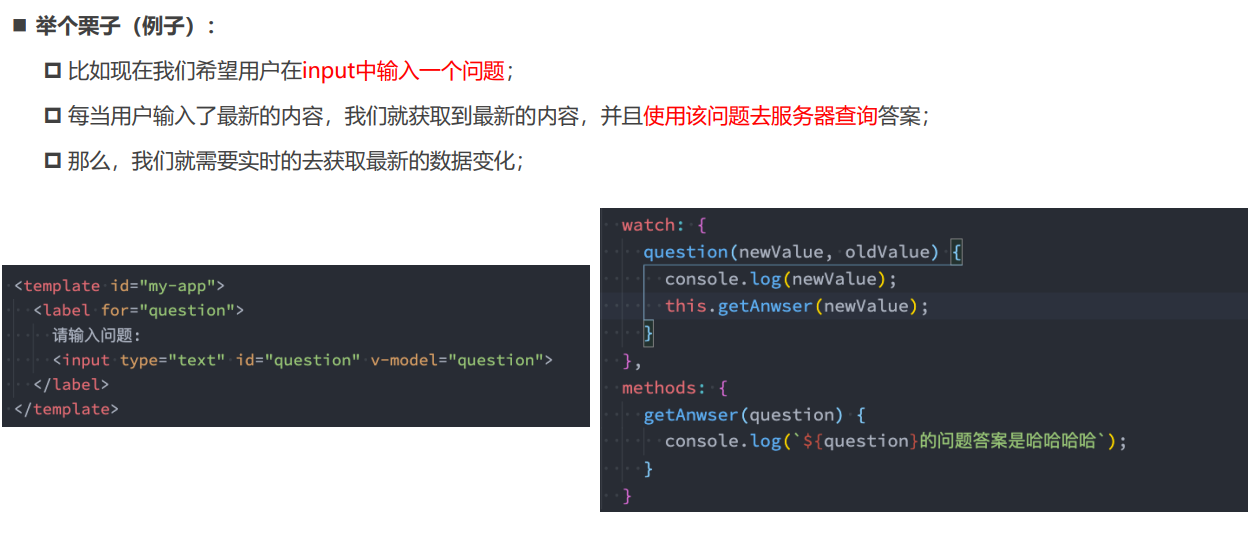
侦听器案例
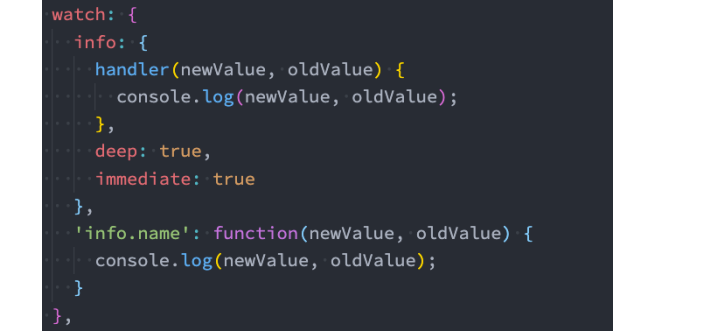
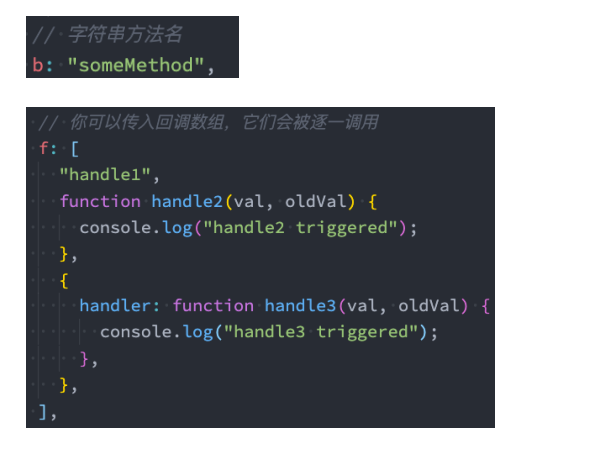
侦听器watch的配置选项
<html lang="en">
<head><meta charset="UTF-8"><meta http-equiv="X-UA-Compatible" content="IE=edge"><meta name="viewport" content="width=device-width, initial-scale=1.0"><title>Document</title>
</head>
<body><div id="app"><h2>{{ info.name }}</h2><button @click="changeInfo">修改info</button></div><script src="../lib/vue.js"></script><script>// 1.创建appconst app = Vue.createApp({// data: option apidata() {return {info: { name: "why", age: 18 }}},methods: {changeInfo() {// 1.创建一个新对象, 赋值给info// this.info = { name: "kobe" }// 2.直接修改原对象某一个属性this.info.name = "kobe"}},watch: {// 默认watch监听不会进行深度监听// info(newValue, oldValue) {//   console.log("侦听到info改变:", newValue, oldValue)// }// 进行深度监听info: {handler(newValue, oldValue) {console.log("侦听到info改变:", newValue, oldValue)console.log(newValue === oldValue)},// 监听器选项:// info进行深度监听deep: true,// 第一次渲染直接执行一次监听器immediate: true},"info.name": function(newValue, oldValue) {console.log("name发生改变:", newValue, oldValue)}}})// 2.挂载appapp.mount("#app")</script>
</body>
</html>
侦听器watch的配置选项(代码)
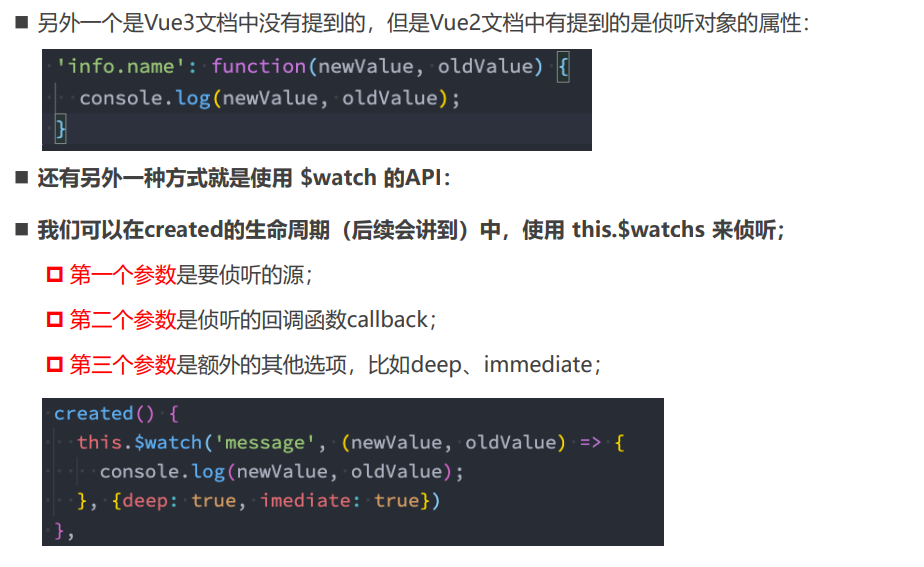
5 侦听器watch其他写法
侦听器watch的其他方式(一)
<html lang="en">
<head><meta charset="UTF-8"><meta http-equiv="X-UA-Compatible" content="IE=edge"><meta name="viewport" content="width=device-width, initial-scale=1.0"><title>Document</title>
</head>
<body><div id="app"><h2>{{message}}</h2><button @click="changeMessage">修改message</button></div><script src="../lib/vue.js"></script><script>// 1.创建appconst app = Vue.createApp({// data: option apidata() {return {message: "Hello Vue"}},methods: {changeMessage() {this.message = "你好啊, 李银河!"}},// 生命周期回调函数: 当前的组件被创建时自动执行// 一般在该函数中, 会进行网络请求created() {// ajax/fetch/axiosconsole.log("created")this.$watch("message", (newValue, oldValue) => {console.log("message数据变化:", newValue, oldValue)}, { deep: true })}})// 2.挂载appapp.mount("#app")</script>
</body>
</html>
侦听器watch的其他方式(二)
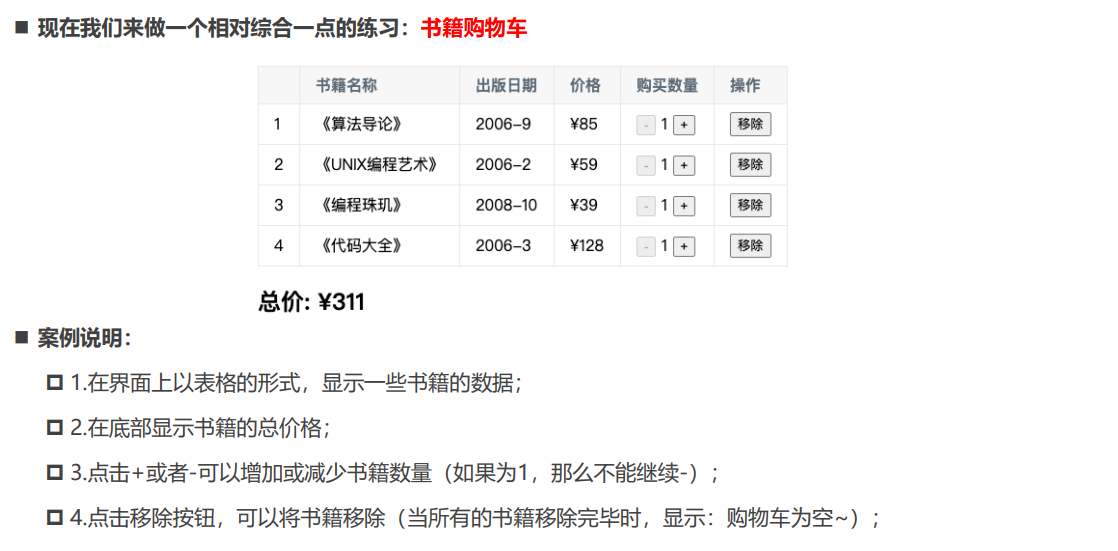
6 阶段性综合案例练习
综合案例