项目实战——“微商城”前后台【005】之前台项目首页编写
上一篇说到,我们把必须用的路由、UI组件库给安装,试用OK。这一篇,我们直接编写组件写静态页面。
第一篇提到的分析首页结构,页面底部有个固定的导航栏。我来先来解决这个导航栏。

固定导航栏
因为很多页面都有这个导航栏,所以我们把他封装成一个公共组件,然后在多个地方引用。
现在有两种方式,如下:
1,在每个需要用到的地方都引用一遍,当前选中的索引,手动匹配。
2,在 APP.vue 中统一使用,路由配置控制当前页面是否需要显示组件。(推荐 :good)
综合比较,我们选择第二种。
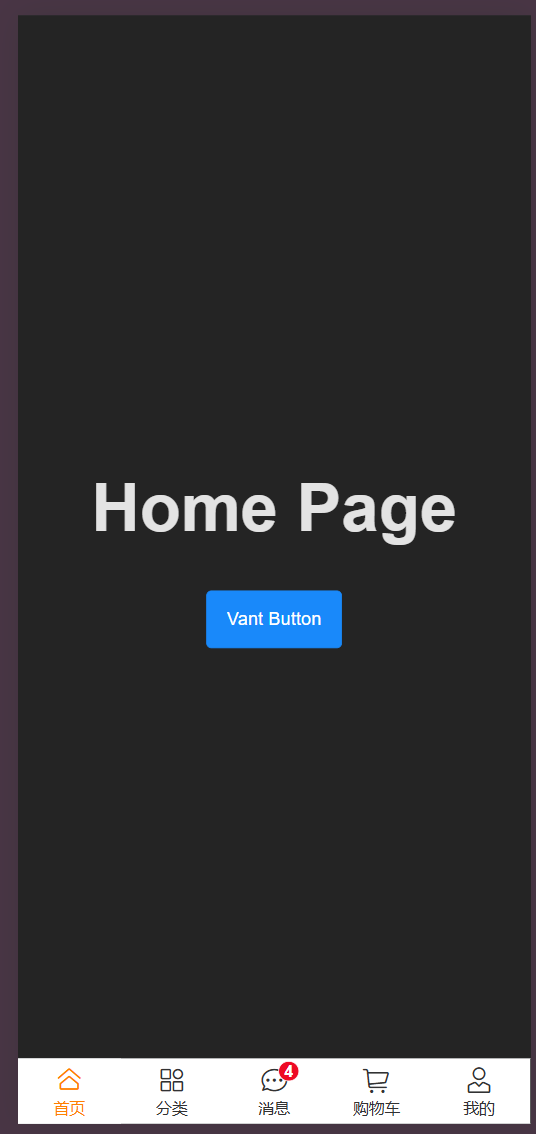
新建 src/components/TabBar.vue ,使用 vant 的 van-tabbar 组件编写导航栏。
<template><van-tabbar route fixed placeholder border><van-tabbar-item replace :to="{ name: 'Home' }" icon="home-o">首页</van-tabbar-item><van-tabbar-item replace :to="{ name: 'Category' }" icon="apps-o">分类</van-tabbar-item><van-tabbar-item replace :to="{ name: 'Message' }" icon="chat-o" badge="4">消息</van-tabbar-item><van-tabbar-item replace :to="{ name: 'Cart' }" icon="shopping-cart-o" >购物车</van-tabbar-item><van-tabbar-item replace :to="{ name: 'User' }" icon="user-o">我的</van-tabbar-item></van-tabbar>
</template><script setup></script><style scoped>
.van-tabbar-item {--van-tabbar-item-active-color: #FF8000;
}
</style>
修改文件路径为 src/App.vue , 引入并且使用 TabBar组件。编写逻辑:监听路由中的isTab是否为true,如果为true,展示底部TabBar。
<script setup>
import TabBar from './components/TabBar.vue';
import { useRoute } from 'vue-router';
import { ref , watch } from 'vue';const route = useRoute();
const isShowTabbar = ref(true)// 监听路由中的isTab是否为true,如果为true,展示底部TabBar
watch(() => route.meta,(meta) => {isShowTabbar.value = meta.isTab;},{ immediate: true }
)</script><template><router-view></router-view><tab-bar v-if="isShowTabbar"></tab-bar></template><style scoped>
/* 全局样式预留 */
</style>
需要效果生效,还需要在路由里面 meta 属性,我们来配置 home 页面的路由配置,并且查看效果。
{path: '/',name: 'Home',component: () => import('../views/Home.vue'),meta: { title: '首页', isTab: true }},
查看效果,已经能显示出来了,并且自动匹配到索引,显示高亮: