xtuner安装及微调大模型
官方文档:https://xtuner.readthedocs.io/zh-cn/latest/index.html
1、新建虚拟环境
conda create --name xtuner-env python=3.10 -y
conda activate xtuner-env
2、下载并安装 xtuner
git clone https://github.com/InternLM/xtuner.git
cd xtuner
pip install -e '.[all]'
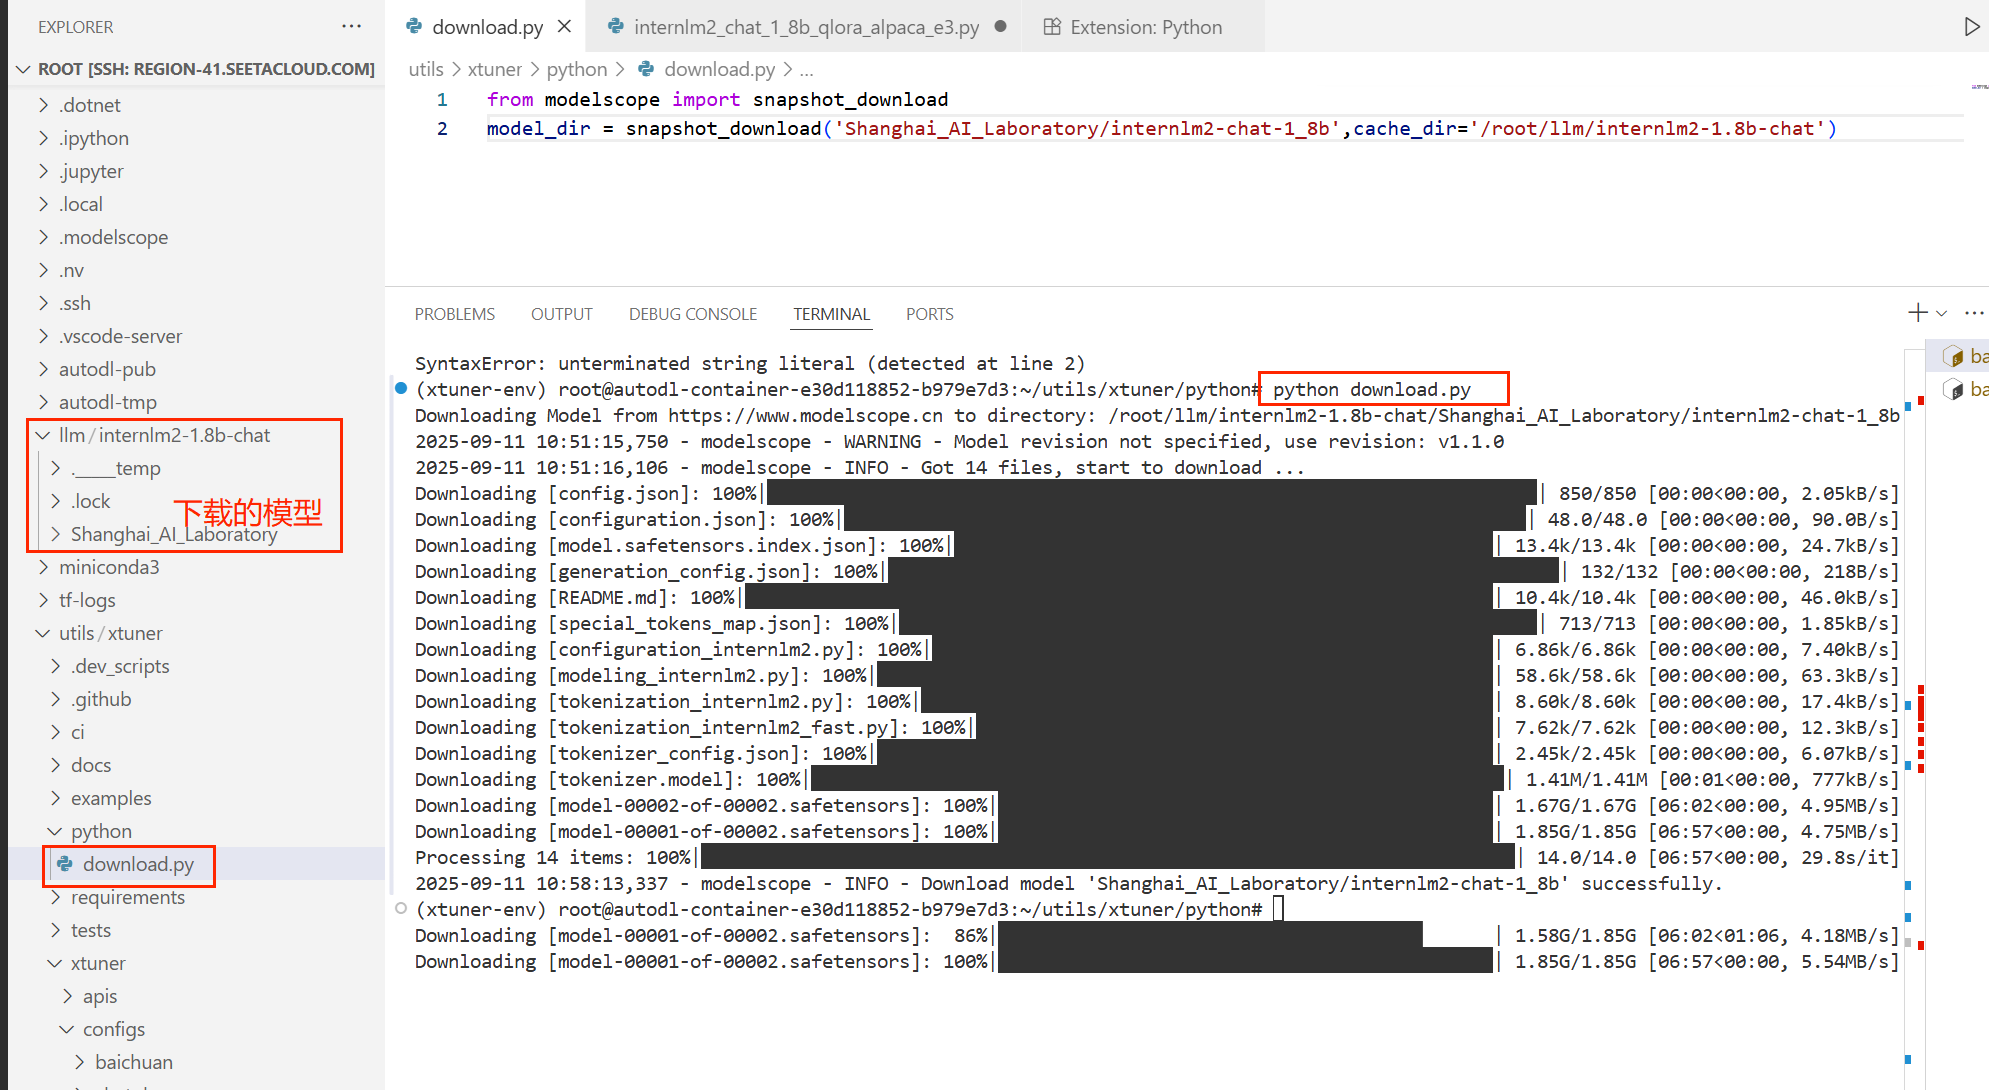
3、下载魔塔大模型
新建python文件,写入以下内容,通过python 运行这个文件
from modelscope import snapshot_download
model_dir = snapshot_download('Shanghai_AI_Laboratory/internlm2-chat-
1_8b',cache_dir='/root/llm/internlm2-1.8b-chat')
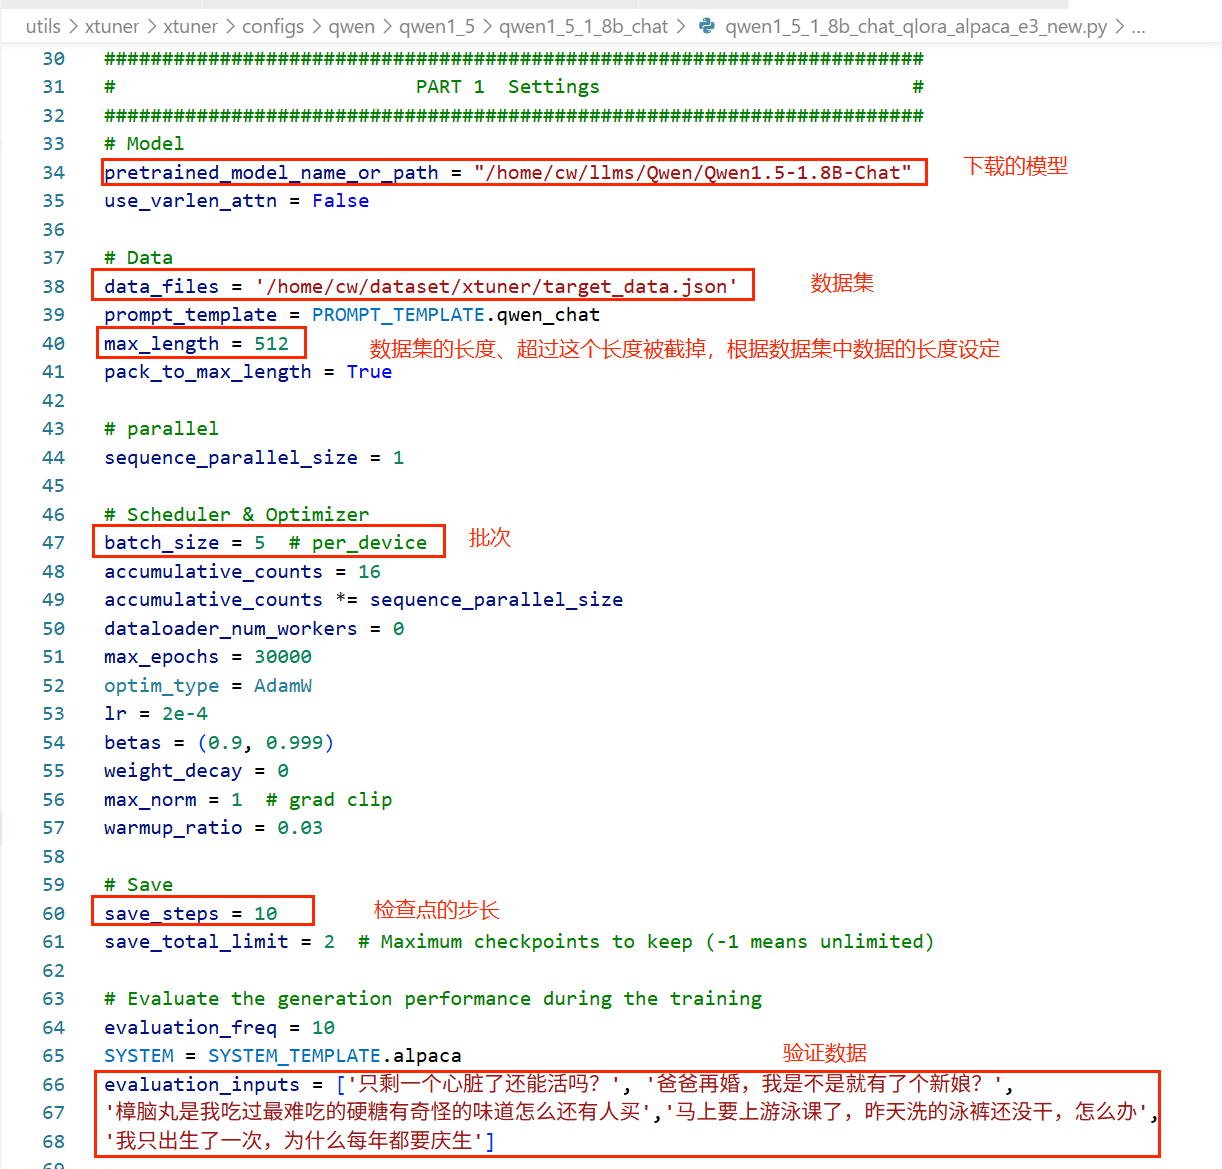
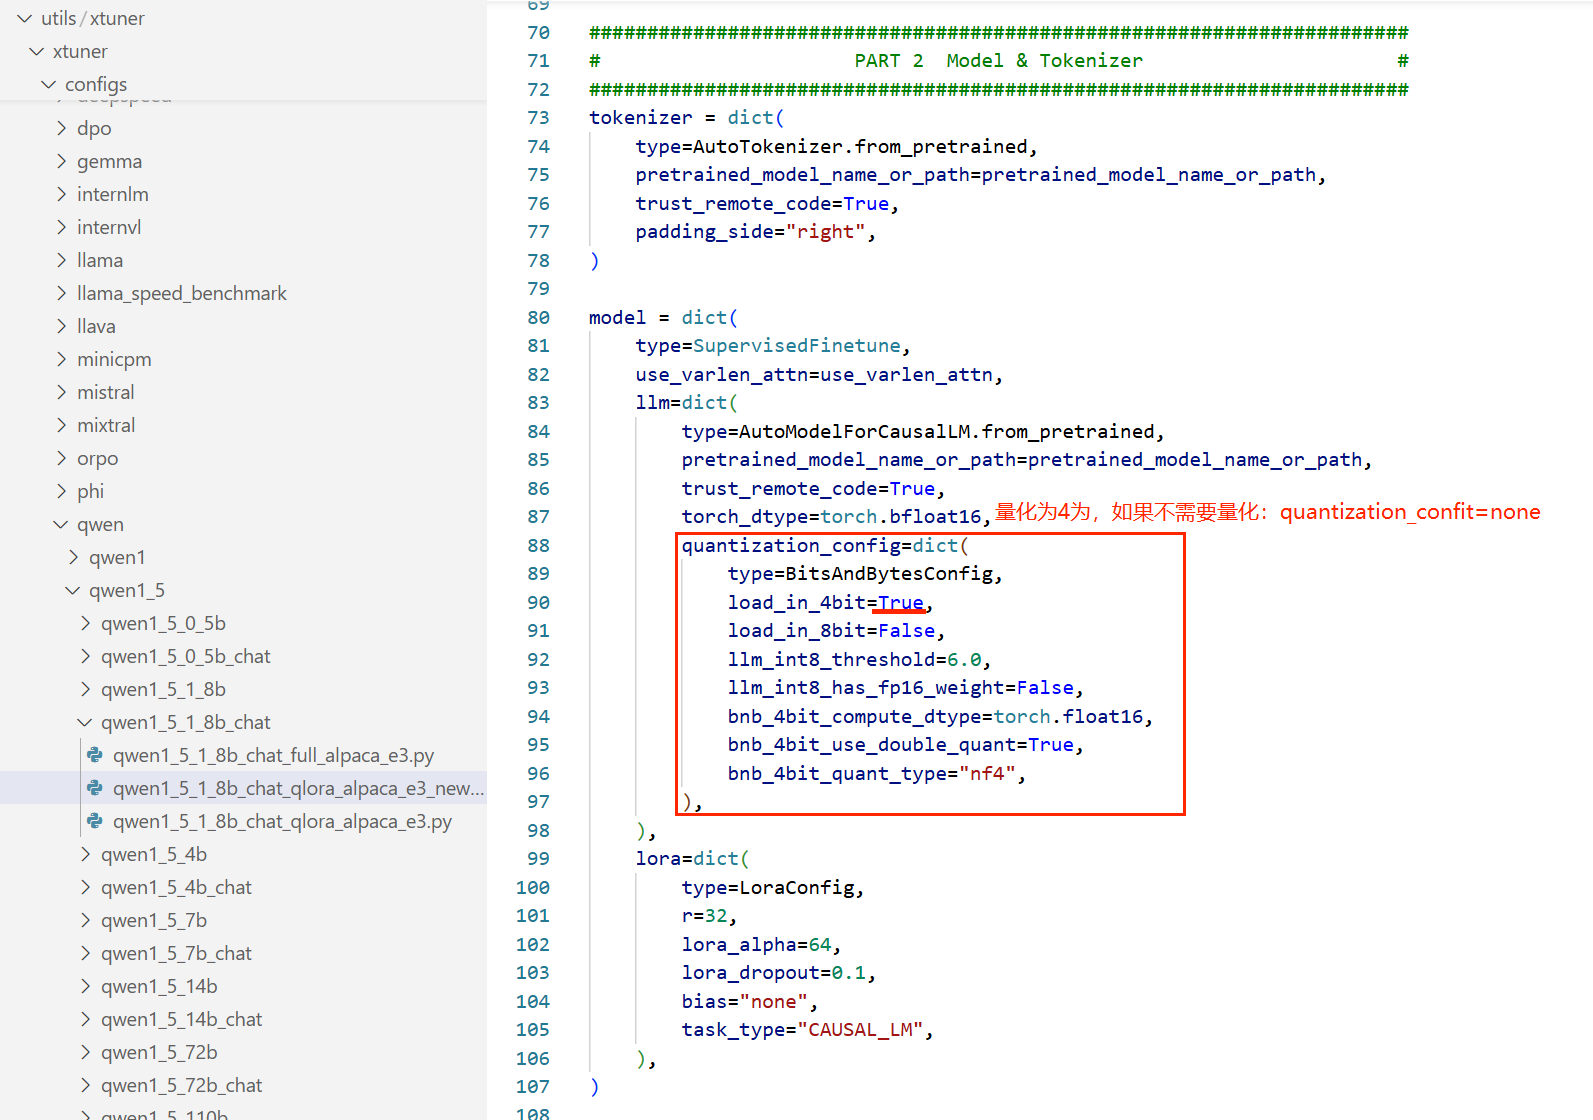
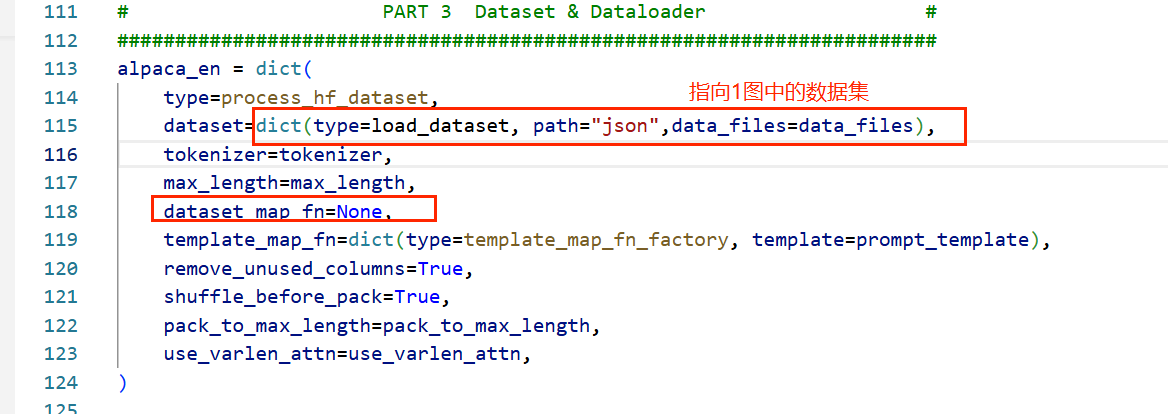
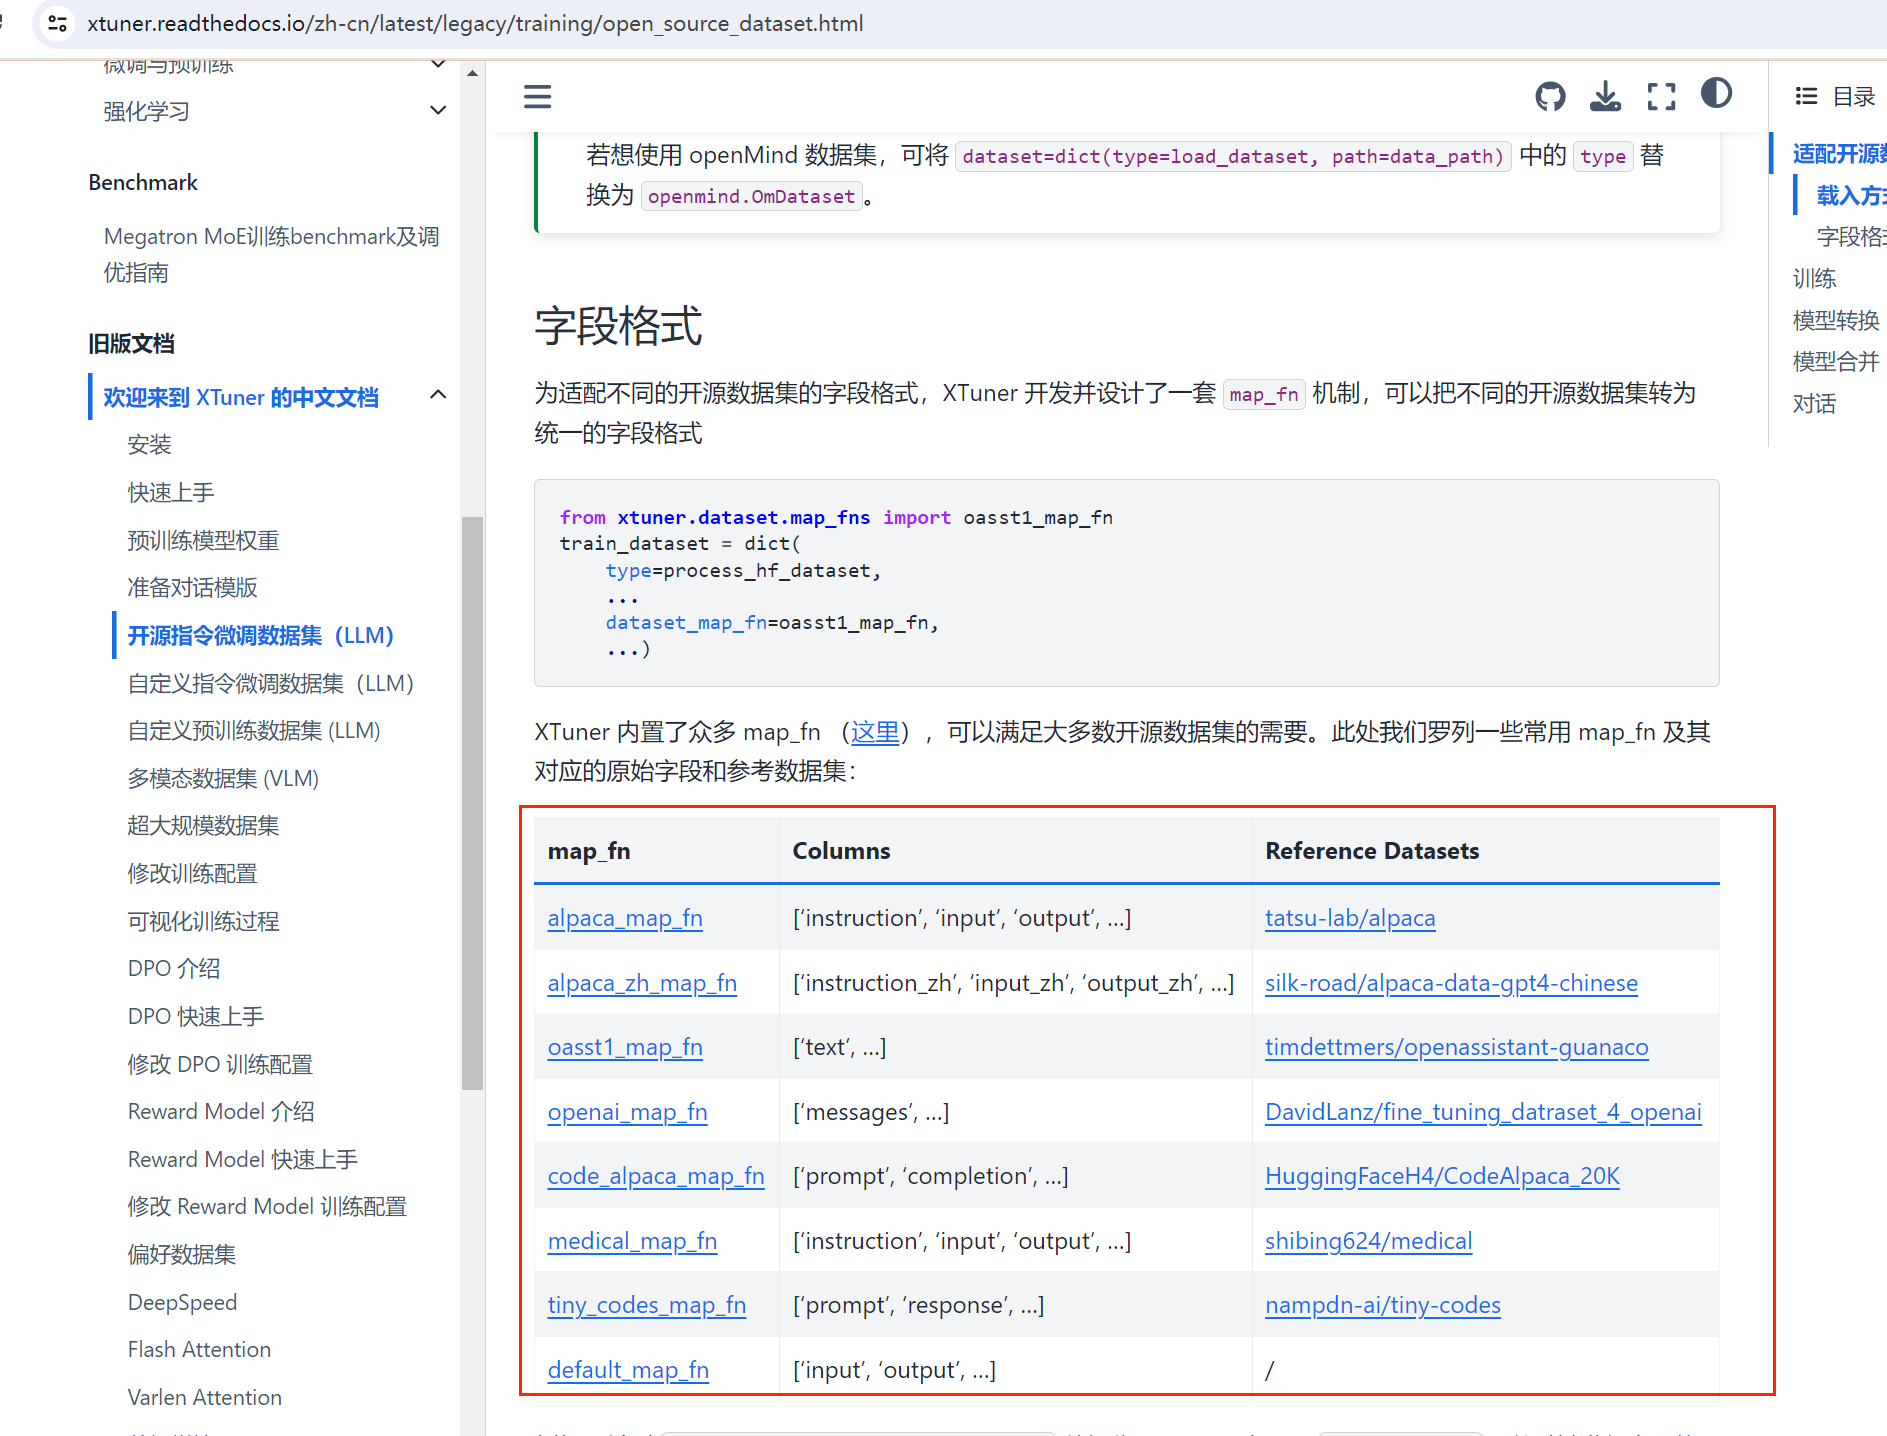
4、配置微调参数
xtuner和llamaFactory不同,xtuner没有提供可视化的ui页面,对模型的配置参数全部在配置文件中进行
5、微调
单卡微调
xtuner train /root/utils/xtuner/xtuner/configs/qwen/qwen1_5/qwen1_5_1_8b_chat/qwen1_5_1_8b_chat_qlora_alpaca_e3_new.py
多卡微调
NPROC_PER_NODE=2 xtuner train /root/utils/xtuner/xtuner/configs/qwen/qwen1_5/qwen1_5_1_8b_chat/qwen1_5_1_8b_chat_qlora_alpaca_e3_new.py --deepspeed deepspeed_zero2
指定第一、三两张显卡微调
CUDA_VISIBLE_DEVICES=0,2 NPROC_PER_NODE=2 xtuner train /root/utils/xtuner/xtuner/configs/qwen/qwen1_5/qwen1_5_1_8b_chat/qwen1_5_1_8b_chat_qlora_alpaca_e3_new.py --deepspeed deepspeed_zero2
tips : deepspeed_zero2是将参数、梯度等在多个GPU上分片存储,如果没有设置deepspeed 则每个GPU存放模型的完整副本
6、模型转换
xtuner训练出的模型后缀是 pth、如果使用了 deepspeed 训练出的模型是一个文件夹,将xtuner训练出的模型转成 huggingface 模型
xtuner convert pth_to_hf /root/utils/xtuner/xtuner/configs/qwen/qwen1_5/qwen1_5_1_8b_chat/qwen1_5_1_8b_chat_qlora_alpaca_e3_new.py ./iter_200.pth ./iter_200_
7、模型合并
xtuner convert merge 基础模型 适配器路径-也就是训练出来的文件 合并后文件保存路径 --max-shard-size 2GB \ # 分片大小 --device cuda:0 # 使用GPU加速
xtuner convert merge /root/models/modelscope /root/models/out/iter_500.pth /root/models/merge
xtuner和 llamafactory 的对比,建议使用xtuner
1、xtuner 数据集类型更加丰富
2、可以指定哪些显卡参与训练,见步骤5