Python--OCR(2)
一、明确 OCR 任务边界
首先定义 OCR 系统的核心目标:
- 场景:印刷体(如文档、发票)/ 手写体(如笔记)/ 特定场景(如车牌、身份证)
- 输入:图像格式(JPG/PNG)、分辨率(建议≥320x320)、是否含复杂背景
- 输出:文本内容(字符串)、位置信息(边界框坐标)、置信度
本文以 “通用印刷体 OCR” 为例(覆盖检测 + 识别),技术栈采用 PyTorch(灵活性强)+ OpenCV(图像处理)。
二、数据准备(最关键环节,占比 60% 工作量)
1. 数据集收集
需满足 “多样性”(字体、背景、光照、倾斜角度)和 “规模”(建议≥10 万样本):
- 公开数据集:
- 检测:ICDAR2015(自然场景文本)、COCO-Text(图像中的文本)
- 识别:MJSynth(合成文本,1000 万样本)、SynthText(复杂背景合成文本)
- 综合:PaddleOCR 提供的通用数据集(含 18 万标注样本,可直接下载)
- 自建数据集:
- 工具:用 Python 脚本生成合成数据(推荐
TextRecognitionDataGenerator库)
- 工具:用 Python 脚本生成合成数据(推荐
代码:
import os
import uuid
import argparse
import shutil
import random
import string
import math
from typing import Optional, Tuple, List
from PIL import Image, ImageDraw, ImageFont, ImageFilter# 确保中文显示正常
try:# 尝试加载系统字体import matplotlib.font_manager as fmsystem_fonts = fm.findSystemFonts()# 优先选择中文字体chinese_fonts = [f for f in system_fonts if 'sim' in f.lower() or 'hei' in f.lower() or 'song' in f.lower()]
except ImportError:system_fonts = []chinese_fonts = []
except Exception:system_fonts = []chinese_fonts = []def check_dependencies():"""检查必要的依赖是否安装"""try:import PILfrom PIL import Image, ImageDraw, ImageFontexcept ImportError as e:print(f"错误: 缺少必要的依赖项 - {e}")print("请先安装所需依赖:")print("pip install pillow matplotlib")exit(1)def create_directories(output_dir: str) -> bool:"""创建输出目录,如果目录已存在则询问是否清空:param output_dir: 输出目录路径:return: 目录准备完成返回True,否则返回False"""try:if os.path.exists(output_dir):response = input(f"目录 {output_dir} 已存在,是否清空? (y/n): ")if response.lower() == 'y':# 清空目录for filename in os.listdir(output_dir):file_path = os.path.join(output_dir, filename)try:if os.path.isfile(file_path) or os.path.islink(file_path):os.unlink(file_path)elif os.path.isdir(file_path):shutil.rmtree(file_path)except Exception as e:print(f"清空目录时出错: {e}")return Falseelse:# 创建目录(包括所有父目录)os.makedirs(output_dir, exist_ok=True)return Trueexcept Exception as e:print(f"创建目录时出错: {e}")return Falsedef get_available_fonts(font_dir: str) -> List[str]:"""检查字体目录并返回可用字体列表,若没有则返回系统字体:param font_dir: 字体目录路径:return: 字体文件路径列表"""font_extensions = ['.ttf', '.otf', '.ttc']fonts = []# 先检查用户提供的字体目录if os.path.exists(font_dir):for file in os.listdir(font_dir):file_ext = os.path.splitext(file)[1].lower()if file_ext in font_extensions:fonts.append(os.path.join(font_dir, file))# 如果没有找到字体,使用系统字体if not fonts:if chinese_fonts:fonts = chinese_fontselif system_fonts:fonts = system_fonts[:10]  # 限制系统字体数量else:# 如果没有找到任何字体,返回空列表而不是包含None的列表print("警告: 未找到任何字体文件,将使用Pillow默认字体")return []  # 返回空列表表示没有可用字体print(f"找到 {len(fonts)} 种可用字体")return fontsdef generate_random_text(length: int, include_chinese: bool = False) -> str:"""生成随机文本"""# 基本字符集:字母+数字chars = string.ascii_letters + string.digits# 如果需要中文,添加一些常用中文字符if include_chinese and random.random() < 0.3:  # 30%概率生成中文chinese_chars = "的一是在不了有和人这中大为上个国我以要他时来用们生到作地于出就分对成会可主发年动同工也能下过子说产种面而方后多定行学法所民得经十三之进着等部度家电力里如水化高自二理起小物现实加量都两体制机当使点从业本去把性好应开它合还因由其些然前外天政四日那社义事平形相全表间样与关各重新线内数正心反你明看原又么利比或但质气第向道命此变条只没结解问意建月公无系军很情者最立代想已通并提直题党程展五果料象员革位入常文总次品式活设及管特件长求老头基资边流路级少图山统接知较将组见计别她手角期根论运农指几九区强放决西被干做必战先回则任取据处队南给色光门即保治北造百规热领七海口东导器压志世金增争济阶油思术极交受联什认六共权收证改清己美再采转更单风切打白教速花带安场身车例真务具万每目至达走积示议声报斗完类八离华名确才科张信马节话米整空元况今集温传土许步群广石记需段研界拉林律叫且究观越织装影算低持音众书布复容儿须际商非验连断深难近矿千周委素技备半办青省列习响约支般史感劳便团往酸历市克何除消构府称太准精值号率族维划选标写存候毛亲快效斯院查江型眼王按格养易置派层片始却专状育厂京识适属圆包火住调满县局照参红细引听该铁价严首底液官德调随病苏失尔死讲配女黄推显谈罪神艺呢席含企望密批营项防举球英氧势告李台落木帮轮破亚师围注远字材排供河态封另施减树溶怎止案言士均武固叶鱼波视仅费紧爱左章早朝害续轻服试食充兵源判护司足某练差致板田降黑犯负击范继兴似余坚曲输修的故城夫够送笔船占右财吃富春职觉汉画功巴跟虽杂飞检吸助升阳互初创抗考投坏策古径换未跑留钢曾端责站简述钱副尽帝射草冲承独令限阿宣环双请超微让控州良轴找否纪益依优顶础载倒房突坐粉敌略客袁冷胜绝析块剂测丝协重诉念陈仍罗盐友洋错苦夜刑移频逐靠混母短皮终聚汽村云哪既距卫停烈央察烧行迅境若印洲刻括激孔搞甚室待核校散侵吧甲游久菜味旧模湖货损预阻毫普稳乙妈植息扩银语挥酒守拿序纸医缺雨吗针刘啊急唱误训愿审附获茶鲜粮斤孩脱硫肥善龙演父渐血欢械掌歌沙著刚攻谓盾讨晚粒乱燃矛乎杀药宁鲁贵钟煤读班伯香介迫句丰培握兰担弦蛋沉假穿执答乐谁顺烟缩征脸喜松脚困异免背星福买染井概慢怕磁倍祖皇促静补评翻肉践尼衣宽扬棉希伤操垂秋宜氢套笔督振架亮末宪庆编牛触映雷销诗座居抓裂胞呼娘景威绿晶厚盟衡鸡孙凤秀么宋禁氧球岸键租弱吸炼顾佣袁穿苗宝旬"# 随机选择一些中文字符text = ''.join(random.choice(chinese_chars) for _ in range(length))return text# 生成字母数字组合return ''.join(random.choice(chars) for _ in range(length))def create_background(width: int, height: int, background_type: int) -> Image.Image:"""创建不同类型的背景"""if background_type == 0:  # 白色背景return Image.new('RGB', (width, height), color='white')elif background_type == 1:  # 灰色背景return Image.new('RGB', (width, height), color=(random.randint(200, 250),random.randint(200, 250),random.randint(200, 250)))elif background_type == 2:  # 渐变背景bg = Image.new('RGB', (width, height), color='white')draw = ImageDraw.Draw(bg)for i in range(height):color = (int(255 - i * 255 / height),int(255 - i * 200 / height),int(255 - i * 150 / height))draw.line([(0, i), (width, i)], fill=color)return bgelif background_type == 3:  # 有噪声的背景bg = Image.new('RGB', (width, height), color=(240, 240, 240))draw = ImageDraw.Draw(bg)for _ in range(width * height // 100):  # 噪声点数量x = random.randint(0, width - 1)y = random.randint(0, height - 1)size = random.randint(1, 2)color = (random.randint(0, 200), random.randint(0, 200), random.randint(0, 200))draw.rectangle([(x, y), (x + size, y + size)], fill=color)return bgelif background_type == 4:  # 网格背景bg = Image.new('RGB', (width, height), color='white')draw = ImageDraw.Draw(bg)step = random.randint(10, 30)color = (200, 200, 200)for x in range(0, width, step):draw.line([(x, 0), (x, height)], fill=color, width=1)for y in range(0, height, step):draw.line([(0, y), (width, y)], fill=color, width=1)return bgelse:  # 默认白色背景return Image.new('RGB', (width, height), color='white')def add_distortion(image: Image.Image, distortion_type: int) -> Image.Image:"""为图像添加不同类型的扭曲效果"""if distortion_type == 0:  # 无扭曲return imageelif distortion_type == 1:  # 轻微模糊return image.filter(ImageFilter.GaussianBlur(radius=0.5))elif distortion_type == 2:  # 中等模糊return image.filter(ImageFilter.GaussianBlur(radius=1))elif distortion_type == 3:  # 轻微旋转angle = random.randint(-5, 5)return image.rotate(angle, expand=True)elif distortion_type == 4:  # 透视变换(简化版)# 简单的上下偏移来模拟透视效果width, height = image.sizeshift = random.randint(5, 15)new_width = width + shiftnew_img = Image.new('RGB', (new_width, height), color='white')for x in range(width):for y in range(height):pixel = image.getpixel((x, y))# 计算偏移量,形成透视效果x_shift = int((x / width) * shift)if x + x_shift < new_width:new_img.putpixel((x + x_shift, y), pixel)return new_imgelif distortion_type == 5:  # 波浪效果(简化版)width, height = image.sizenew_img = Image.new('RGB', (width, height), color='white')for x in range(width):# 波浪效果的y偏移y_offset = int(3 * math.sin(x * 0.1))for y in range(height):if 0 <= y + y_offset < height:pixel = image.getpixel((x, y))new_img.putpixel((x, y + y_offset), pixel)return new_imgelse:  # 默认无扭曲return imagedef get_text_size(text: str, font: ImageFont.FreeTypeFont) -> Tuple[int, int]:"""替代textsize()方法,获取文本的宽度和高度:param text: 文本内容:param font: 字体对象:return: 文本的宽度和高度"""# 创建一个临时图像和绘图对象temp_img = Image.new('RGB', (1, 1))draw = ImageDraw.Draw(temp_img)# 对于较新的Pillow版本,使用textbbox方法try:# 获取文本边界框 (left, top, right, bottom)bbox = draw.textbbox((0, 0), text, font=font)return (bbox[2] - bbox[0], bbox[3] - bbox[1])except AttributeError:# 对于较旧的Pillow版本,回退到textsize方法return draw.textsize(text, font=font)def generate_text_image(text: str,font_path: Optional[str],background_type: int = 0,distortion_type: int = 0,image_width: Optional[int] = None,image_height: Optional[int] = None
) -> Image.Image:"""生成单张文本图像"""# 设置字体和大小font_size = 64try:if font_path:font = ImageFont.truetype(font_path, font_size)else:# 使用默认字体font = ImageFont.load_default()except Exception as e:print(f"字体加载失败,使用默认字体: {e}")font = ImageFont.load_default()# 计算文本大小 - 使用我们自己实现的方法兼容新旧版本text_width, text_height = get_text_size(text, font)# 确定图像大小if image_width is None:image_width = text_width + 40  # 左右边距if image_height is None:image_height = max(text_height + 20, 80)  # 上下边距,最小高度80# 创建背景bg = create_background(image_width, image_height, background_type)# 在背景上绘制文本draw = ImageDraw.Draw(bg)text_x = (image_width - text_width) // 2  # 水平居中text_y = (image_height - text_height) // 2  # 垂直居中# 随机文本颜色(深色为主,确保与背景对比)text_color = (random.randint(0, 100),random.randint(0, 100),random.randint(0, 100))draw.text((text_x, text_y), text, font=font, fill=text_color)# 添加扭曲效果result = add_distortion(bg, distortion_type)# 随机添加轻微噪声if random.random() < 0.3:  # 30%概率添加噪声draw = ImageDraw.Draw(result)width, height = result.sizefor _ in range(width * height // 500):  # 噪声点数量x = random.randint(0, width - 1)y = random.randint(0, height - 1)color = (random.randint(0, 255), random.randint(0, 255), random.randint(0, 255))draw.point((x, y), fill=color)return resultdef generate_text_images(output_dir: str = "dataset/rec/train",count: int = 1000,length: int = 5,font_dir: str = "fonts/",background_type: int = 2,distortion_type: int = 1,image_width: int = None,image_height: int = None
):"""生成合成文本图像并保存到指定目录:param output_dir: 图像保存目录:param count: 生成图像数量:param length: 每个图像中的文本长度:param font_dir: 字体文件目录:param background_type: 背景类型 (0-4):param distortion_type: 扭曲类型 (0-5):param image_width: 图像宽度,None为自动:param image_height: 图像高度,None为自动"""# 检查并准备输出目录if not create_directories(output_dir):print("无法准备输出目录,程序退出")return# 获取可用字体fonts = get_available_fonts(font_dir)try:print(f"开始生成 {count} 张文本图像...")# 生成并保存图像for i in range(1, count + 1):# 生成随机文本text = generate_random_text(length, include_chinese=True)# 随机选择字体(处理没有可用字体的情况)font_path = Noneif fonts:  # 只有当字体列表非空时才进行随机选择font_path = random.choice(fonts)# 随机变化一些参数增加多样性current_bg_type = background_type if background_type != -1 else random.randint(0, 4)current_distortion_type = distortion_type if distortion_type != -1 else random.randint(0, 5)# 生成图像img = generate_text_image(text=text,font_path=font_path,background_type=current_bg_type,distortion_type=current_distortion_type,image_width=image_width,image_height=image_height)# 生成唯一文件名filename = f"{text}_{uuid.uuid4()}.jpg"file_path = os.path.join(output_dir, filename)# 保存图像img.save(file_path)# 显示进度if i % 100 == 0 or i == count:print(f"已生成 {i}/{count} 张图像")print(f"所有图像已成功生成并保存到 {output_dir}")except Exception as e:print(f"生成图像时出错: {e}")exit(1)def main():# 解析命令行参数parser = argparse.ArgumentParser(description='生成合成文本图像用于OCR训练')parser.add_argument('--output-dir', type=str, default='dataset/rec/train',help='图像保存目录')parser.add_argument('--count', type=int, default=1000,help='生成图像数量')parser.add_argument('--length', type=int, default=5,help='每个图像中的文本长度')parser.add_argument('--font-dir', type=str, default='fonts/',help='字体文件目录')parser.add_argument('--background-type', type=int, default=-1,help='背景类型 (0-4,-1表示随机)')parser.add_argument('--distortion-type', type=int, default=-1,help='扭曲类型 (0-5,-1表示随机)')args = parser.parse_args()# 检查依赖check_dependencies()# 生成图像generate_text_images(output_dir=args.output_dir,count=args.count,length=args.length,font_dir=args.font_dir,background_type=args.background_type,distortion_type=args.distortion_type)if __name__ == "__main__":main()
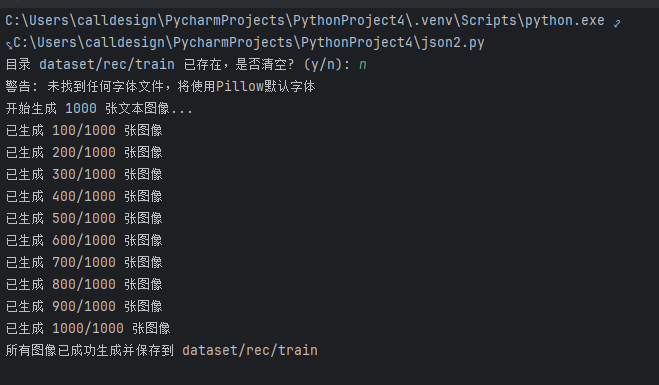
运行结果:
2. 数据预处理与增强
- 预处理:
- 图像归一化:统一尺寸(如检测输入 640x640,识别输入 32x100)
- 灰度化:减少通道数(OCR 对颜色不敏感,单通道可加速训练)
- 去噪:用 OpenCV 的
cv2.medianBlur()去除椒盐噪声
- 增强(关键!提升模型鲁棒性)
代码:
import cv2
import numpy as npdef augment_image(img):# 1. 随机旋转(-15°~15°)angle = np.random.uniform(-15, 15)h, w = img.shape[:2]M = cv2.getRotationMatrix2D((w/2, h/2), angle, 1)img = cv2.warpAffine(img, M, (w, h), borderValue=(255,255,255))  # 白色填充# 2. 随机缩放(0.8~1.2倍)scale = np.random.uniform(0.8, 1.2)img = cv2.resize(img, (int(w*scale), int(h*scale)))# 3. 随机加噪(高斯噪声)if np.random.random() < 0.3:noise = np.random.normal(0, 10, img.shape).astype(np.uint8)img = cv2.add(img, noise)# 4. 随机亮度调整img = cv2.cvtColor(img, cv2.COLOR_BGR2HSV)img[:, :, 2] = img[:, :, 2] * np.random.uniform(0.5, 1.5)img = np.clip(img, 0, 255).astype(np.uint8)img = cv2.cvtColor(img, cv2.COLOR_HSV2BGR)return img
三、模型设计(文本检测 + 文本识别双模块)
1. 文本检测模型(定位图像中的文字区域)
推荐 DB(Differentiable Binarization,可微分二值化) 模型(速度快、精度高,适合实时场景):
- 原理:通过 CNN 生成文本区域的概率图和阈值图,动态计算二值化结果,解决传统二值化阈值固定的问题。
- 网络结构:
- backbone:ResNet-18(轻量)/ResNet-50(高精度)
- 颈部:FPN(特征金字塔网络,融合多尺度特征)
- 头部:输出概率图(文本区域得分)、阈值图(二值化阈值)、近似二值图(最终文本区域)
- 核心代码(PyTorch):
import torch
import torch.nn as nn
from torchvision.models import resnet18class DBHead(nn.Module):def __init__(self, in_channels=256):super().__init__()self.conv1 = nn.Conv2d(in_channels, 64, 3, padding=1)self.relu = nn.ReLU()self.conv_prob = nn.Conv2d(64, 1, 1)  # 概率图(1通道)self.conv_thresh = nn.Conv2d(64, 1, 1)  # 阈值图(1通道)self.sigmoid = nn.Sigmoid()def forward(self, x):x = self.relu(self.conv1(x))prob = self.sigmoid(self.conv_prob(x))  # 概率图(0~1)thresh = self.sigmoid(self.conv_thresh(x))  # 阈值图(0~1)# 计算近似二值图(公式来自DB论文)binary = torch.reciprocal(1 + torch.exp(-50 * (prob - thresh)))return prob, thresh, binary# 完整DB模型
class DBModel(nn.Module):def __init__(self):super().__init__()# 加载ResNet18作为backbone,取前4个stage的输出self.backbone = resnet18(pretrained=True)self.layer1 = self.backbone.layer1  # 1/4分辨率self.layer2 = self.backbone.layer2  # 1/8self.layer3 = self.backbone.layer3  # 1/16self.layer4 = self.backbone.layer4  # 1/32# FPN融合多尺度特征self.fpn = nn.ModuleList([nn.Conv2d(256, 256, 1),  # 融合layer1输出(256通道)nn.Conv2d(512, 256, 1),  # 融合layer2输出(512通道)nn.Conv2d(1024, 256, 1), # 融合layer3输出(1024通道)nn.Conv2d(2048, 256, 1)  # 融合layer4输出(2048通道)])self.db_head = DBHead()def forward(self, x):#  backbone输出x = self.backbone.conv1(x)x = self.backbone.bn1(x)x = self.backbone.relu()x = self.backbone.maxpool(x)c1 = self.layer1(x)  # 1/4c2 = self.layer2(c1) # 1/8c3 = self.layer3(c2) # 1/16c4 = self.layer4(c3) # 1/32# FPN融合(上采样到1/4分辨率)f1 = self.fpn[0](c1)f2 = nn.functional.interpolate(self.fpn[1](c2), size=f1.shape[2:], mode='bilinear')f3 = nn.functional.interpolate(self.fpn[2](c3), size=f1.shape[2:], mode='bilinear')f4 = nn.functional.interpolate(self.fpn[3](c4), size=f1.shape[2:], mode='bilinear')fpn_out = f1 + f2 + f3 + f4  # 融合特征# DB头输出prob, thresh, binary = self.db_head(fpn_out)return prob, thresh, binary
2. 文本识别模型(将文本区域转换为字符串)
推荐 CRNN(Convolutional Recurrent Neural Network) + CTC Loss(适合不定长文本,无需对齐标注):
- 原理:
- CNN 提取文本图像的特征序列(如 32x100 的图像→512x25 的特征序列)
- RNN(LSTM/GRU)建模序列上下文依赖
- CTC Loss 解决输入序列(特征)与输出序列(文本)的对齐问题
代码:
class CRNN(nn.Module):def __init__(self, num_classes=37): # 36个字符(0-9,A-Z)+1个空白符super().__init__()# CNN部分(输入1x32x100的灰度图)self.cnn = nn.Sequential(nn.Conv2d(1, 64, 3, 1, 1), # 64x32x100nn.ReLU(),nn.MaxPool2d(2, 2), # 64x16x50nn.Conv2d(64, 128, 3, 1, 1),# 128x16x50nn.ReLU(),nn.MaxPool2d(2, 2), # 128x8x25nn.Conv2d(128, 256, 3, 1, 1),# 256x8x25nn.BatchNorm2d(256),nn.ReLU(),nn.Conv2d(256, 256, 3, 1, 1),# 256x8x25nn.ReLU(),nn.MaxPool2d((2,2), (2,1), (0,1)), # 256x4x25nn.Conv2d(256, 512, 3, 1, 1),# 512x4x25nn.BatchNorm2d(512),nn.ReLU(),nn.Conv2d(512, 512, 3, 1, 1),# 512x4x25nn.ReLU(),nn.MaxPool2d((2,2), (2,1), (0,1)), # 512x2x25nn.Conv2d(512, 512, 2, 1, 0),# 512x1x25(序列长度25)nn.BatchNorm2d(512),nn.ReLU())# RNN部分(双向LSTM)self.rnn = nn.LSTM(input_size=512,hidden_size=256,num_layers=2,bidirectional=True,batch_first=True)# 输出层(映射到字符类别)self.fc = nn.Linear(512, num_classes) # 双向LSTM输出512(256*2)def forward(self, x):# x: (batch_size, 1, 32, 100)x = self.cnn(x) # (batch_size, 512, 1, 25)x = x.squeeze(2) # (batch_size, 512, 25)x = x.permute(0, 2, 1) # (batch_size, 25, 512),序列长度25# RNNx, _ = self.rnn(x) # (batch_size, 25, 512)# 输出层x = self.fc(x) # (batch_size, 25, 37)return x补充知识:
这里显示一个1D——CNN的处理序列:
代码如下:
import torch #导入PyTorch深度学习框架
import torch.nn as nn #导入PyTorch的神级网络模块#Torch提供了张量计算和GPU加速功能,nn模块包含了构建神经网路的基本组件# 定义1D-CNN处理序列
class SequenceCNN(nn.Module): #定义继承nn.Module的模型类(PyTorch模型的标准写法)def __init__(self, input_dim, hidden_dim, kernel_size=3): #初始化方法,定义模型参数super().__init__() #调用父类nn.Module的初始 方法,必须写# 输入:(batch_size, seq_len, input_dim) → 需转置为 (batch_size, input_dim, seq_len)self.conv1d = nn.Conv1d(in_channels=input_dim, # 输入特征维度(如词嵌入维度)每个序列元素特征数out_channels=hidden_dim, # 输出特征维度 卷积后每个位置特征数kernel_size=kernel_size, # 卷积核长度(局部窗口大小)padding=1 # 保持输出序列长度与输入一致,确保卷积后序列长度不变) # input_dim:输入序列中每个元素特征维度 , hidden_dim:卷积后每个元素特征维度 kernel_size=3表示每次滑动会覆盖序列连续3个元素,提取局部关键特征self.relu = nn.ReLU() #激活函数,引入非线性特征def forward(self, x): #前向传播方法,定义数据流动路径# x shape: (batch_size, seq_len, input_dim) → 转置为1D-CNN要求的格式x = x.transpose(1, 2) # 转置后形状(batch_size, input_dim, seq_len)x = self.conv1d(x) # 经过ID卷积后形状(batch_size, hidden_dim, seq_len)x = self.relu(x) # 应用激活函数,形状不变return x.transpose(1, 2) # 转回原始序列格式 (batch_size, seq_len, hidden_dim)# 测试:处理长度为10的序列,每个元素维度为5
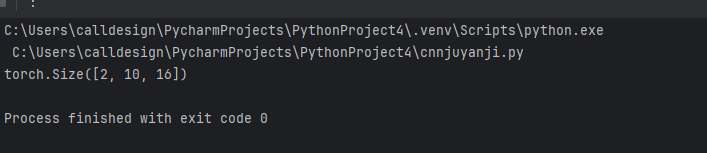
seq = torch.randn(2, 10, 5) # ,形状:(batch_size=2, seq_len=10, input_dim=5)
model = SequenceCNN(input_dim=5, hidden_dim=16) # 实例化模型,参数匹配输入
output = model(seq) #前向传播,得到输出
print(output.shape) # 输出:(2, 10, 16) → 保留序列长度,特征维度变为16运行结果: