Zara和网易云音乐仿写总结
Zara和网易云音乐仿写总结
ZARA仿写
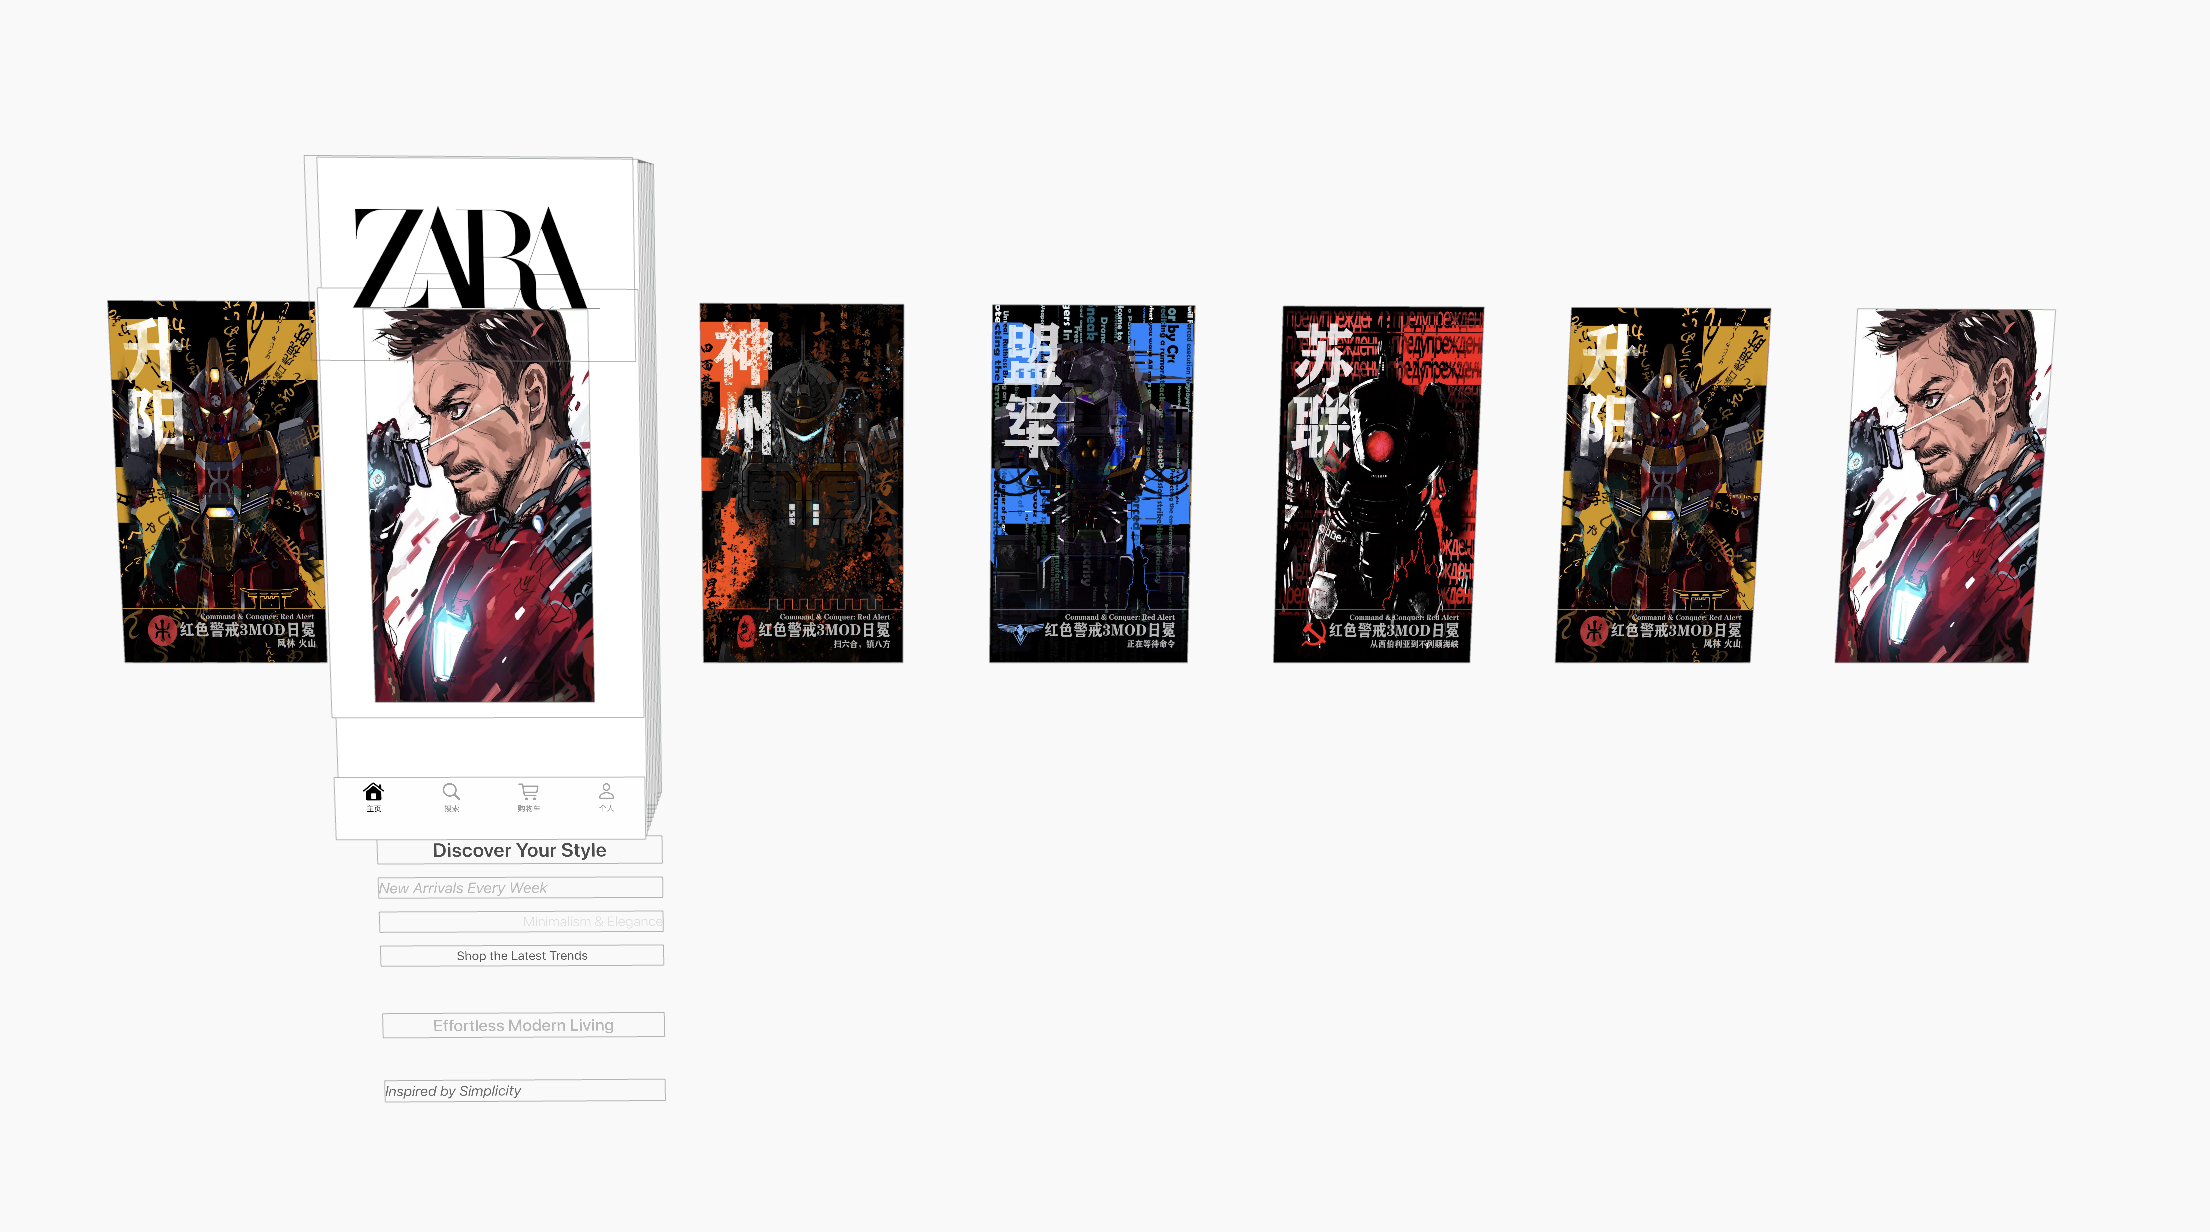
无限轮播视图
无限轮播视图是一个使用中的方法来实现“无限”的假象的方法,并不是真的无限加入视图
我这里使用了五张图片,但实际上在我的ScrollView上有七张图片
在轮播到假的第五张(实际是第六张)的时候,-scrollViewDidScroll:(UIScrollView *)scrollView会自动判断contentOffset.x的值,一旦超过阈值,就会把contentOffset.x调到真的第一张
这样营造出了”下一张是第一张“的假象
同理对实际的第七张也是同样的操作,这样就可以保证不论是向后翻还是向前翻都是连贯的不会有卡顿
给出viewDidLoad中,布局图片的代码
// 创建伪图片,插入到视图中NSString* nameOfImage1 = [NSString stringWithFormat:@"homePageImage 4"];NSString* nameOfImage5 = [NSString stringWithFormat:@"homePageImage 0"];// 加入第一张图片UIImage* homePageImg1 = [UIImage imageNamed:nameOfImage1];UIImageView* homePageImgView1 = [[UIImageView alloc] initWithImage:homePageImg1];// 设置图像位置homePageImgView1.frame = CGRectMake(X * 0 + 10, 10, 280, 500);homePageImgView1.center = CGPointMake(X / 2 + X * 0, 550 / 2);[self.homePageX addSubview:homePageImgView1];// 设置1-5张图片,并加入for (int i = 0; i < 5; i++) {NSString* nameOfImage = [NSString stringWithFormat:@"homePageImage %d", i];// 加入图片名字[self.imageNames addObject:nameOfImage];UIImage* homePageImg = [UIImage imageNamed:nameOfImage];UIImageView* homePageImgView = [[UIImageView alloc] initWithImage:homePageImg];// 设置图像位置homePageImgView.frame = CGRectMake(X * (i + 1) + 10, 10, 280, 500);homePageImgView.center = CGPointMake(X / 2 + X * (i + 1), 550 / 2);[self.homePageX addSubview:homePageImgView];}// 加入第七张图片UIImage* homePageImg5 = [UIImage imageNamed:nameOfImage5];UIImageView* homePageImgView5 = [[UIImageView alloc] initWithImage:homePageImg5];// 设置图像位置homePageImgView5.frame = CGRectMake(X * 6 + 10, 10, 280, 500);homePageImgView5.center = CGPointMake(X / 2 + X * 6, 550 / 2);[self.homePageX addSubview:homePageImgView5];[self.homePageX setContentOffset:CGPointMake(X, 0) animated:NO];self.currentIndex = 0;// 设置x的代理,实现无限滚动homePageX.delegate = self;
自动轮播则需要计时器的辅助,并且还要注意当手指在屏幕上拖动和拖动后惯性还在的时候不能自动翻页~~(体现出我们高贵的人文主义精神)~~
我们需要在- (void)scrollViewDidEndScrollingAnimation:(UIScrollView *)scrollView里和- (void)scrollViewWillBeginDragging:(UIScrollView *)scrollView里开始,暂停计时器
计时器的销毁和创建就是很简单的操作,在这里不过多列出代码
NSUserDefaults:应用偏好设置的“管家”
在写个人主页中,需要用到多界面传值的内容,你需要把从设置界面设置的头像多界面传值传到主页面中
这里我选择的不是五大传值模式的任何一种(当然之后是会写总结的),而是选用了NSUserDefaults
NSUserDefaults相当于应用程序的私人管家,这个管家负责记录并管理一些重要但是体量不大的设置和偏好,比如:
- 你喜欢的主题颜色
- 你的用户名
- 你的新手引导是否看过
这些信息即使你把应用关掉,下次他也会告诉程序,这个地方应该是什么
NSUserDefaults采用键值配对的形式存储数据,但是只能存储属性列表兼容的数据类型:
- NSNumber(用于存储int,float,double,bool等数值类型)
- NSString (字符串)
- NSData (二进制数据,但是不推荐存储大尺寸数据,如大图片和视频)
- NSArrar(数组,但是数组中所有的元素也必须是属性列表兼容类型)
- NSUserDefaults不能直接存储自定义对象,当然你可以把它们变成NSData,但是数据量不能过大,一些头像可能会因为图片过大而无法加载(NSUserDefaults对单次写入数据有限制,但是没有精确值,如果尝试写入过大数据,会导致崩溃)
NSUserDefaults存储的数据在应用程序关闭后,依然存在
NSUserDefaults是一个单例对象,这意味着在程序的任何一个地方获取到的NSUserDefaults实例都是同一个
大多数情况下,系统会自动将内存中的数据同步,当然也可以手动使用synchronize来同步
基本操作:
// 获取标准的用户默认设置实例
NSUserDefaults *defaults = [NSUserDefaults standardUserDefaults];// 存储字符串
[defaults setObject:@"Tim Cook" forKey:@"username"];// 存储整数
[defaults setInteger:5 forKey:@"deathCount"];// 存储布尔值
[defaults setBool:YES forKey:@"notificationsEnabled"];// 存储浮点数
[defaults setFloat:0.75f forKey:@"double"];// 存储日期
NSDate *now = [NSDate date];
[defaults setObject:now forKey:@"lastActiveDate"];// 存储数组
NSArray *favoriteColors = @[@"Red", @"Green", @"Blue"];
[defaults setObject:favoriteColors forKey:@"userFavoriteColors"];// 存储字典
NSDictionary *appConfig = @{@"theme": @"dark", @"language": @"en"};
[defaults setObject:appConfig forKey:@"appConfiguration"];// (不推荐用于大文件) 存储 NSData 即我使用的头像加载
// NSData *smallIconData = UIImagePNGRepresentation([UIImage systemImageNamed:@"star.fill"]);
// [defaults setObject:smallIconData forKey:@"smallIconCache"];// 读取操作// 读取字符串
NSString *username = [defaults stringForKey:@"username"];
NSLog(@"用户名: %@", username ?: @"未设置"); // 使用三元运算符处理 nil 情况// 读取整数
NSInteger count = [defaults integerForKey:@"launchCount"];
NSLog(@"启动次数: %ld", (long)count); // 如果键不存在,返回 0// 读取布尔值
BOOL notifications = [defaults boolForKey:@"notificationsEnabled"];
NSLog(@"通知是否开启: %@", notifications ? @"是" : @"否"); // 如果键不存在,返回 NO// 读取数组
NSArray *colors = [defaults arrayForKey:@"userFavoriteColors"];
NSLog(@"喜欢的颜色: %@", colors);// 读取字典
NSDictionary *config = [defaults dictionaryForKey:@"appConfiguration"];
NSLog(@"应用配置: %@", config);// 读取通用对象 (需要手动类型转换)
NSObject *anyObject = [defaults objectForKey:@"someKey"];
if ([anyObject isKindOfClass:[NSString class]]) {NSString *str = (NSString *)anyObject;NSLog(@"通用对象是字符串: %@", str);
}// 强制同步
[defaults synchronize];
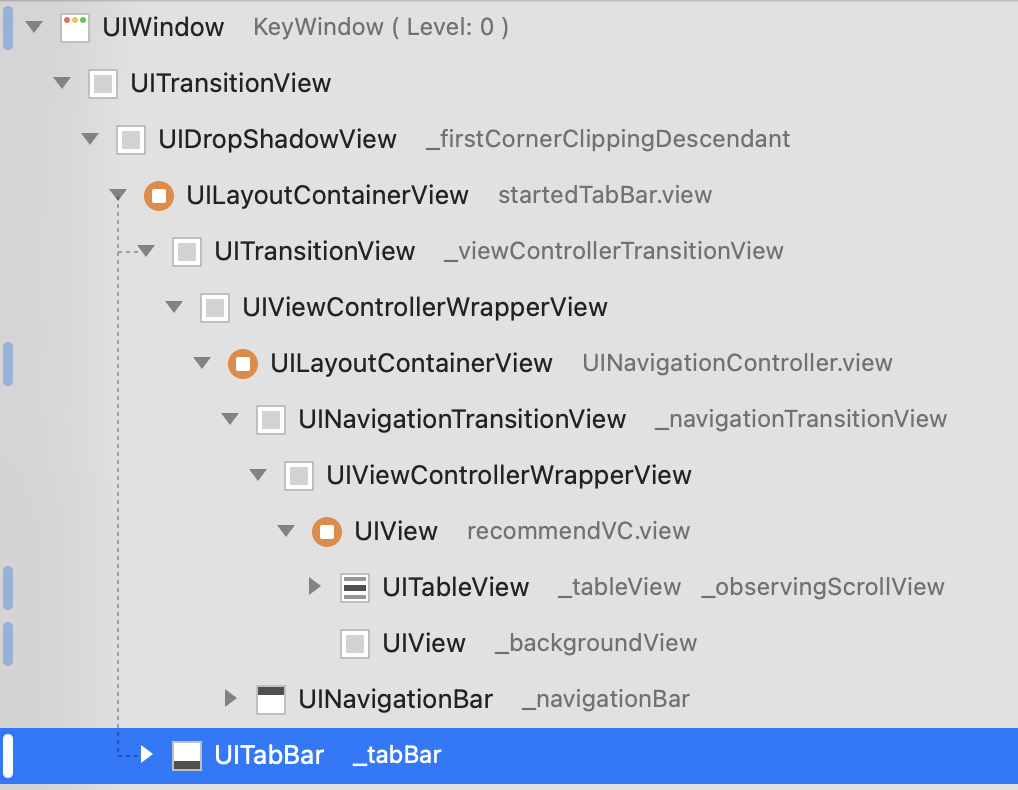
在ZARA中的应用
// 使用系统的相册来选择头像
- (void)imagePickerController:(UIImagePickerController *)picker didFinishPickingMediaWithInfo:(NSDictionary<NSString *,id> *)info {// 获取选中的图片UIImage *image = info[UIImagePickerControllerOriginalImage];self.headImageView.image = image;// 这个地方应该使用协议或者属性来进行多界面传值// 这里使用了NSUserDefaults来进行传值// 将图片转换为NSDataNSData *imageData = UIImagePNGRepresentation(image);// 将图片保存到NSUserDefaults[[NSUserDefaults standardUserDefaults] setObject:imageData forKey:@"userHeadImage"];// 同步NSUserDefaults[[NSUserDefaults standardUserDefaults] synchronize];// 刷新tableView[self.tableView reloadData];[picker dismissViewControllerAnimated:YES completion:nil];
}
// 存储用户名
- (void)textFieldDidEndEditing:(UITextField *)textField {self.name = textField.text;[[NSUserDefaults standardUserDefaults] setObject:self.name forKey:@"userName"];[[NSUserDefaults standardUserDefaults] synchronize];
}// 外部界面访问
// 这里只给出读取数据并把数据交给cell的地方// 昵称NSString *name = [[NSUserDefaults standardUserDefaults] objectForKey:@"userName"];cell.mainLabel.text = name.length > 0 ? name : @"昵称";// 头像NSData *imageData = [[NSUserDefaults standardUserDefaults] objectForKey:@"userHeadImage"];if (imageData) {cell.personalPhoto.image = [UIImage imageWithData:imageData];} else {cell.personalPhoto.image = [UIImage imageNamed:@"head.PNG"];}
网易云音乐仿写
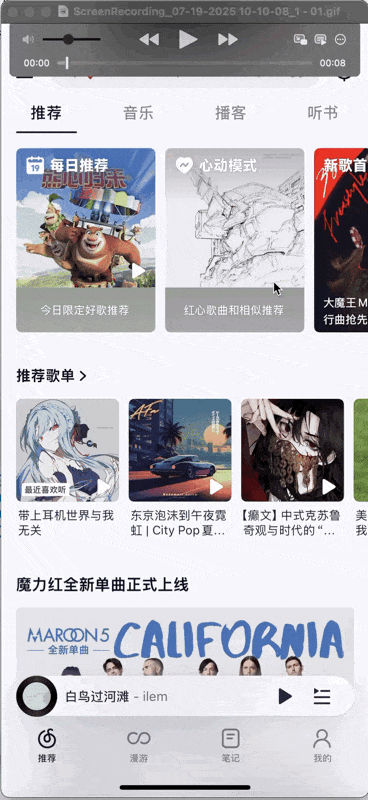
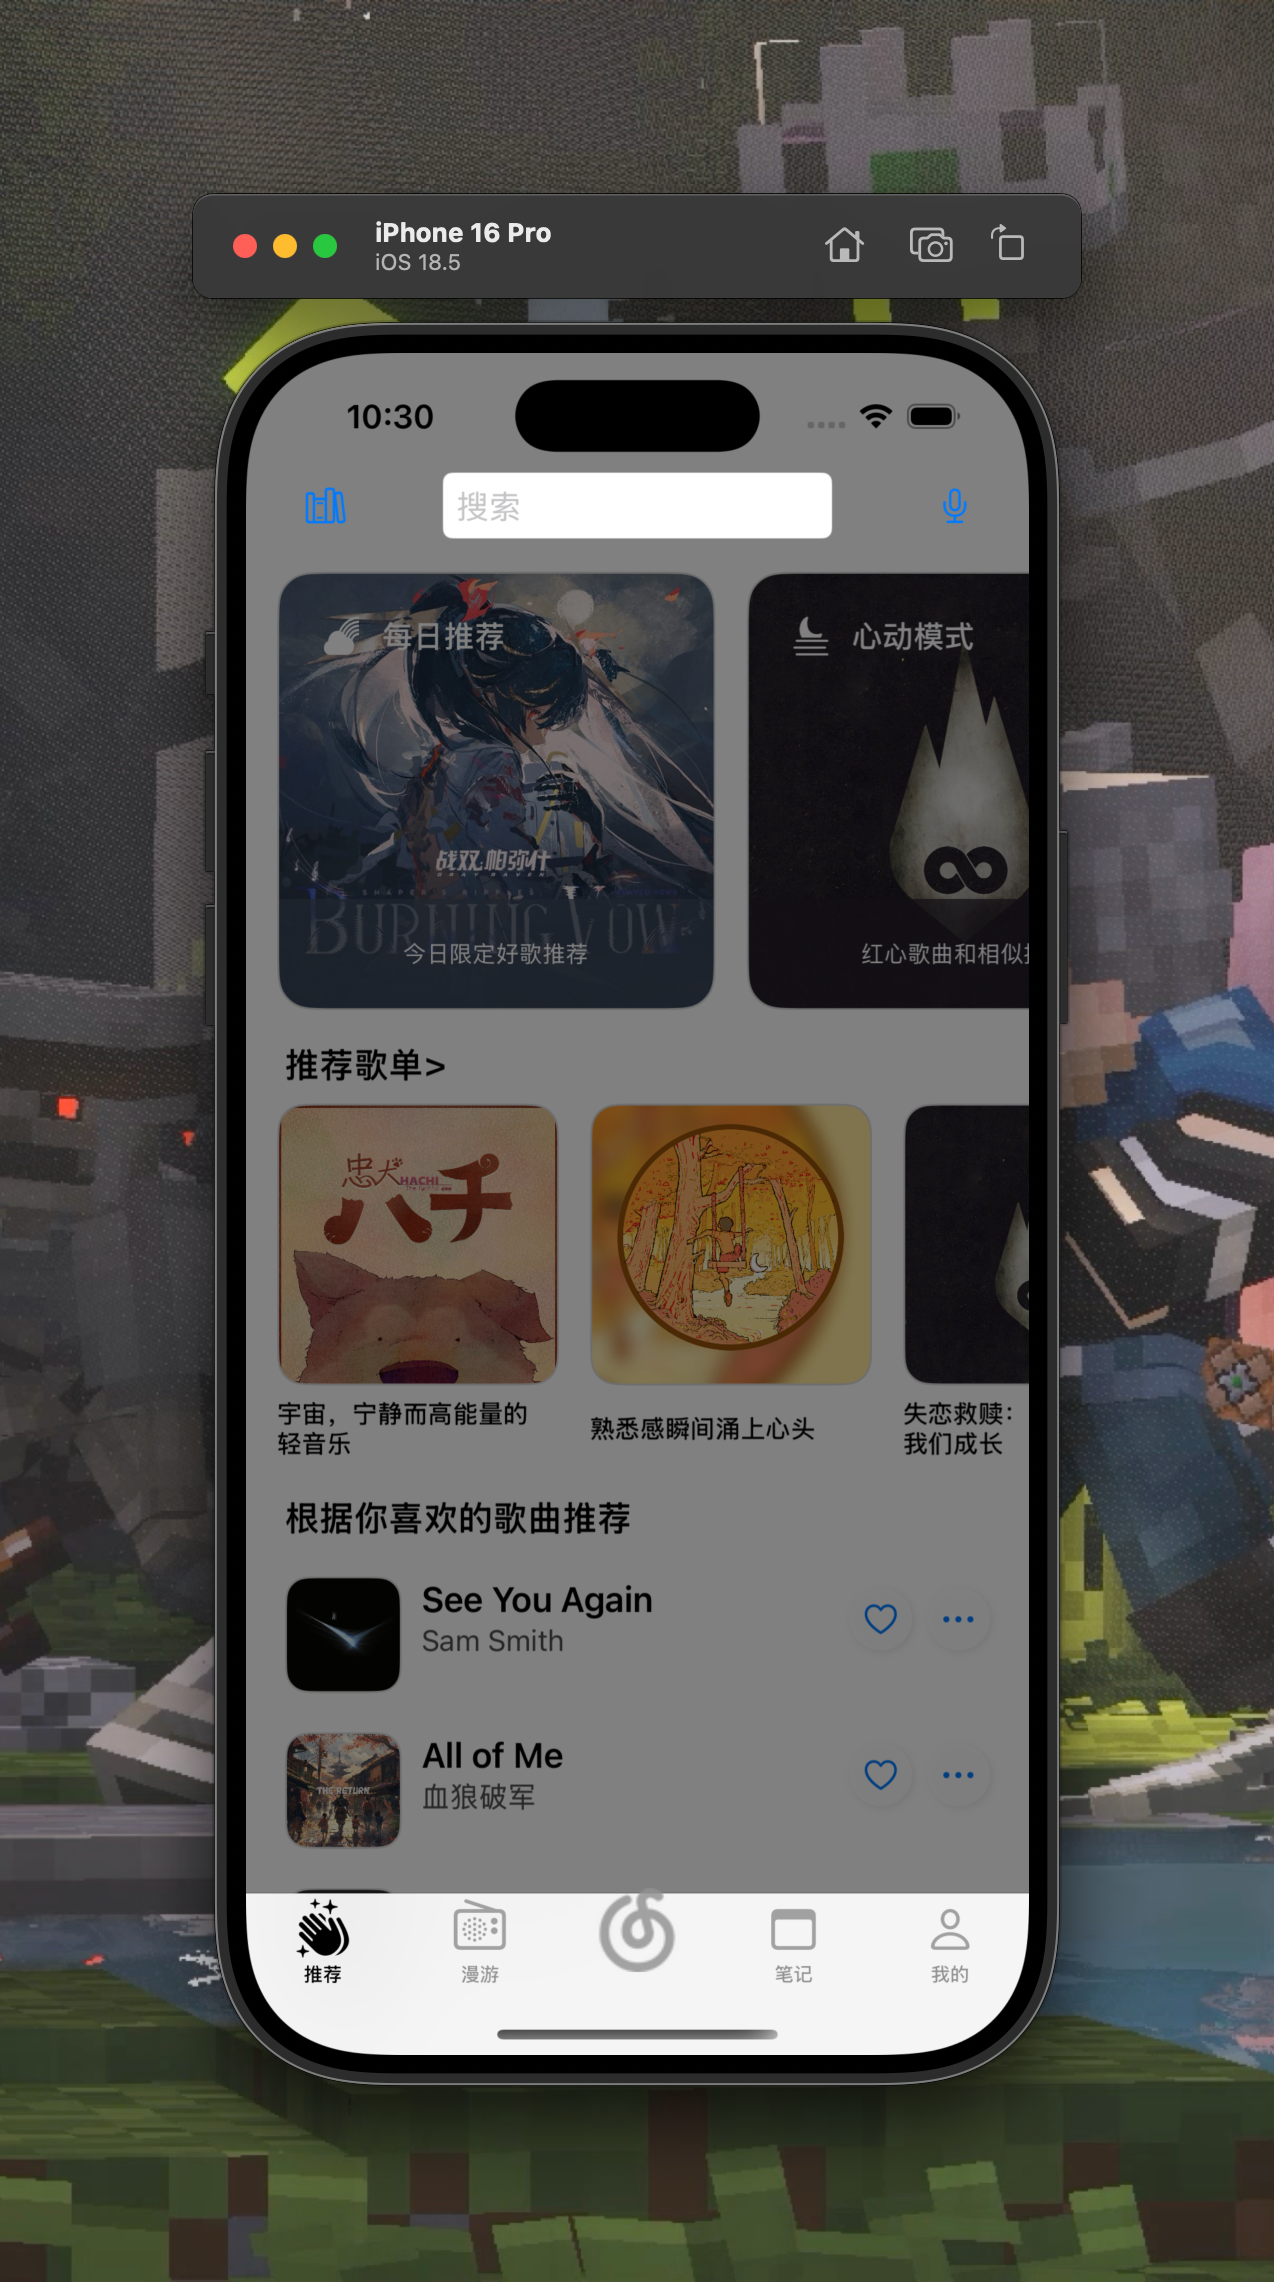
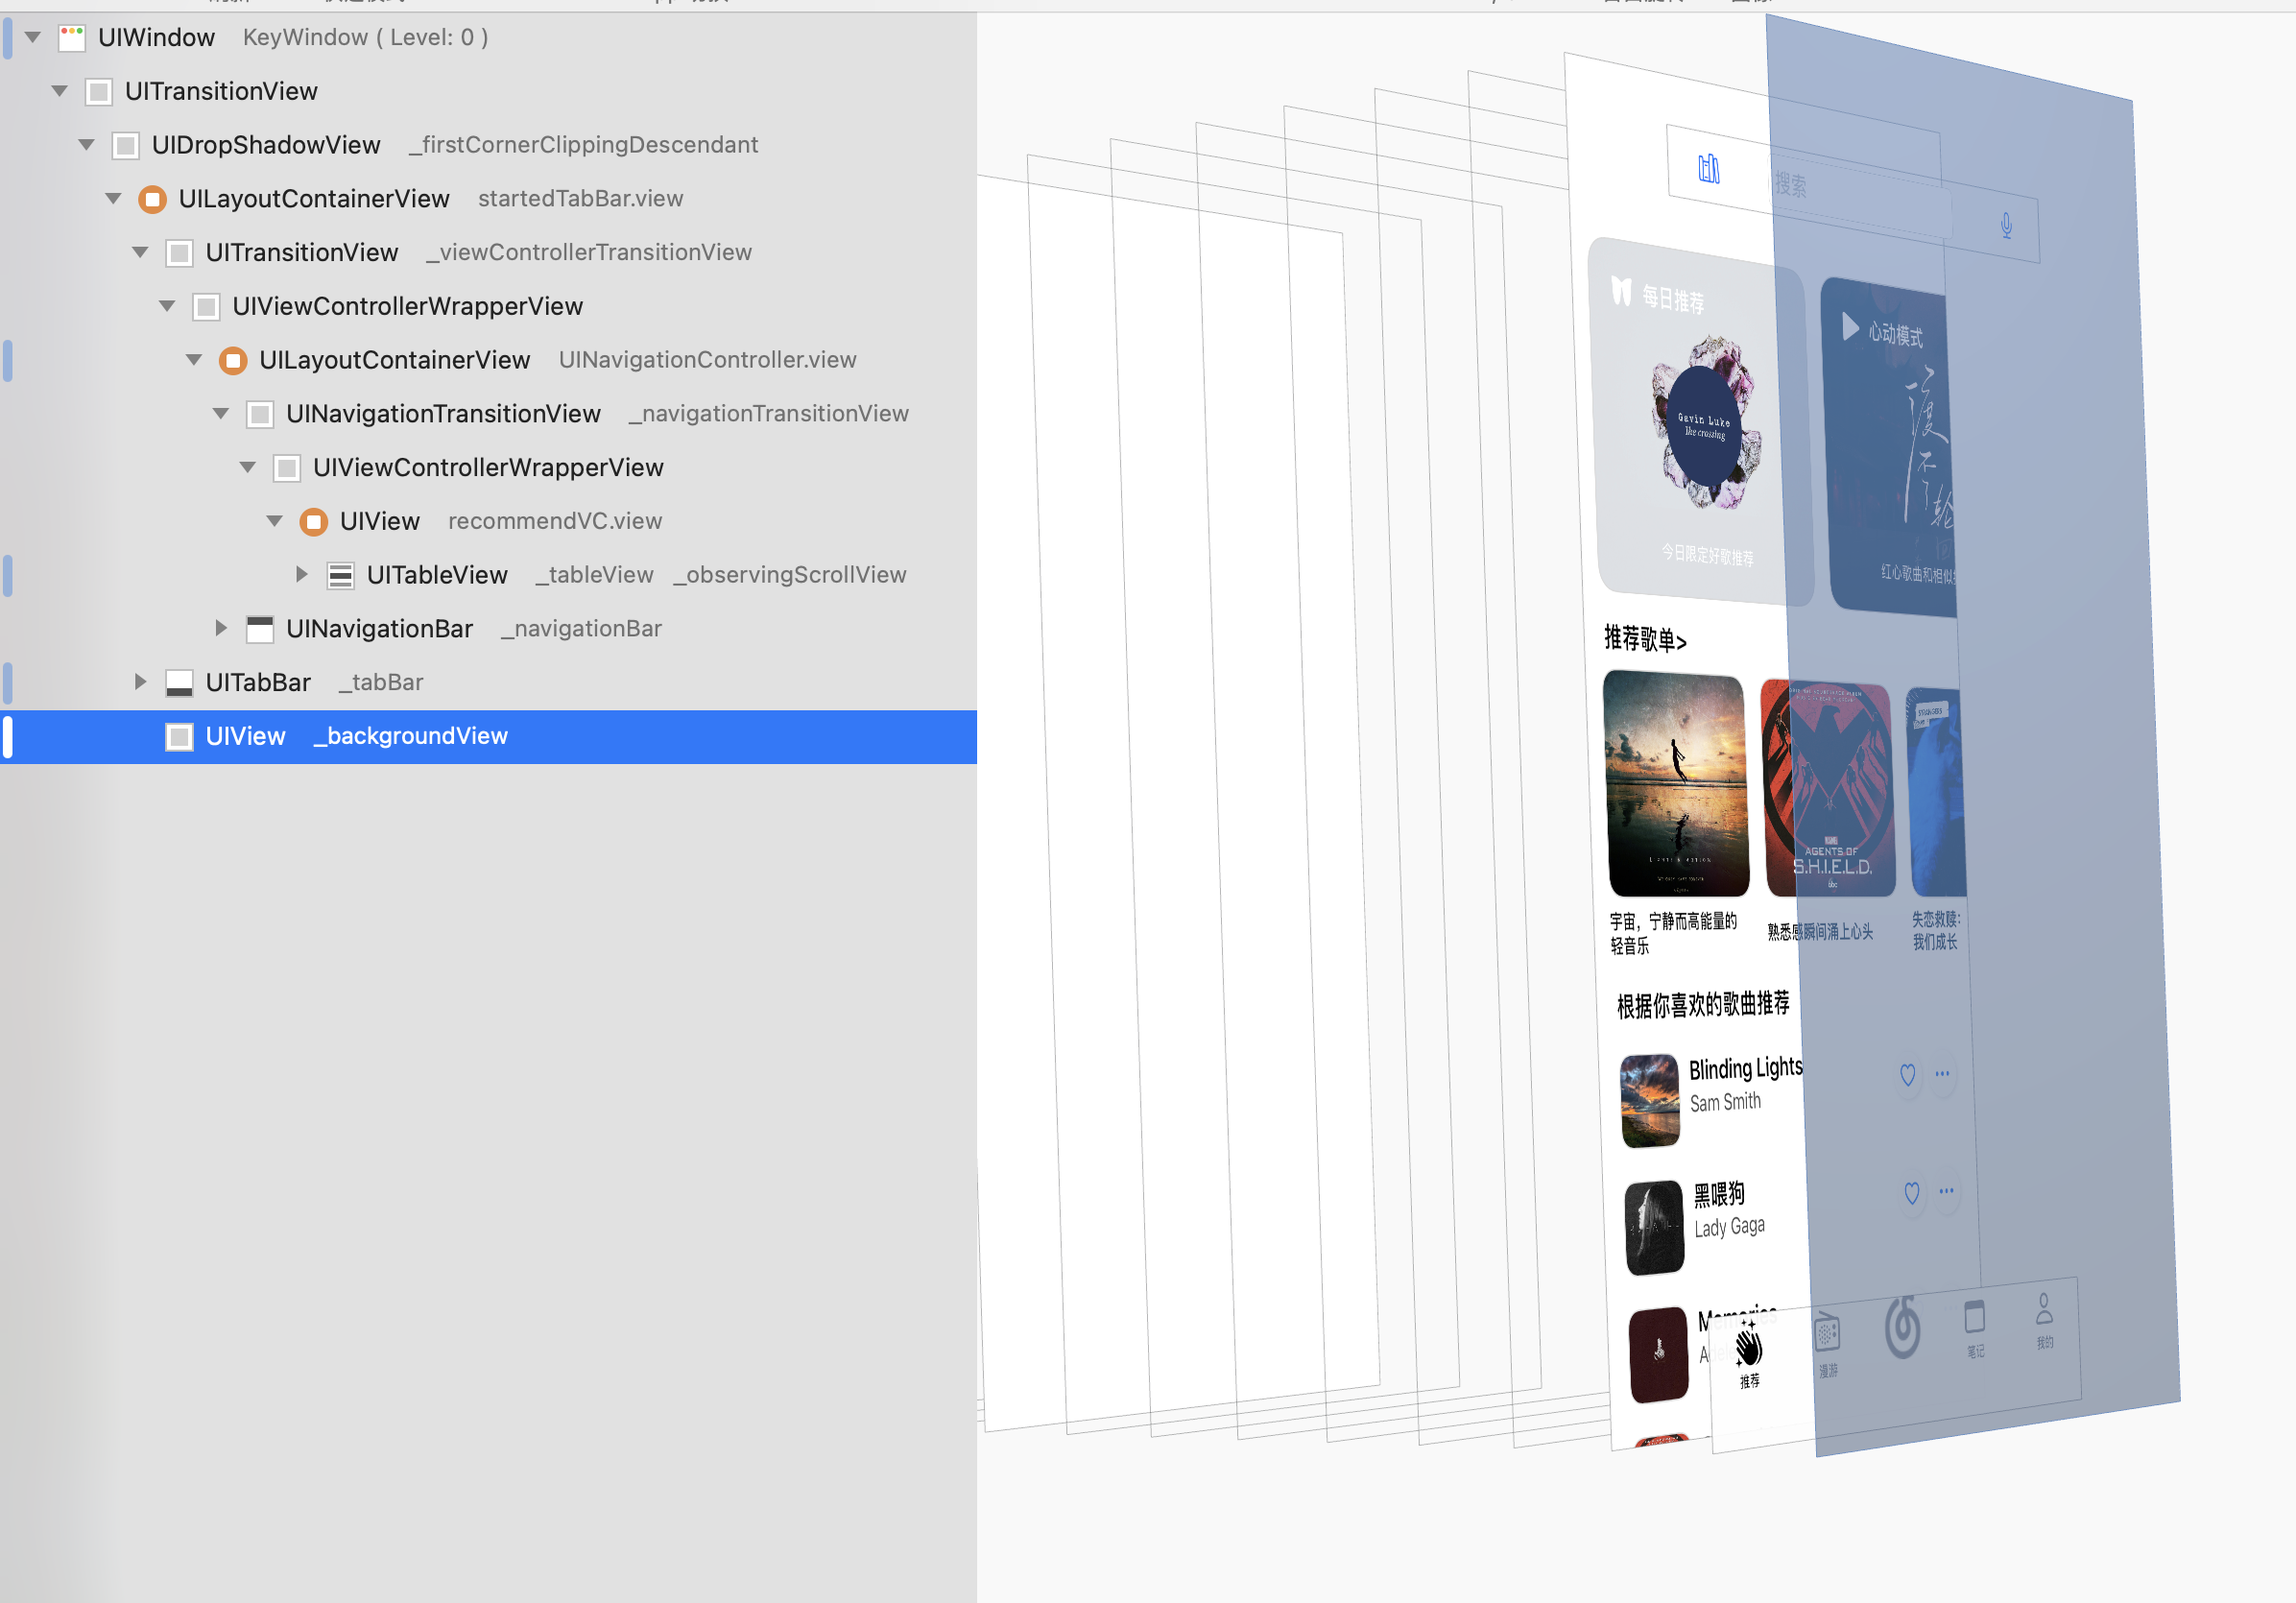
推荐页面
ScrollView和TableView
一开始写推荐页面的时候,使用的是ScrollView之间的嵌套关系来写的
即在一个大的竖向滚动的视图上增加横向滚动的视图,来达到左右滚动的效果
经学长提醒后,理解弊端
UIScrollView就像一个空白的画卷,你可以在上面随便画画
UITableView像一个自动排版的相册(如果说相册的话不如UICollectionView更像吧啊喂),它会把你画的画(自定义cell)整齐的放好,并且自动帮你管理照片的摆放和回收,不会像UIScrollView一样一次性把相册都摆在桌子上
当你的内容是大量重复的列表数据的时候,用UIScrollView来布局就会很累,而且之后如果要增加视图,或者是修改原有的视图,都会很麻烦(尤其是当前使用手动布局视图,在换一个设备之后布局就会全面崩盘)
放一张首个版本的ScrollView
所以在大多数需要滚动显示列表的场景下,优先使用UITableView,只有当你需要实现非常规的,非列表样式的滚动内容的时候,再考虑UIScrollView
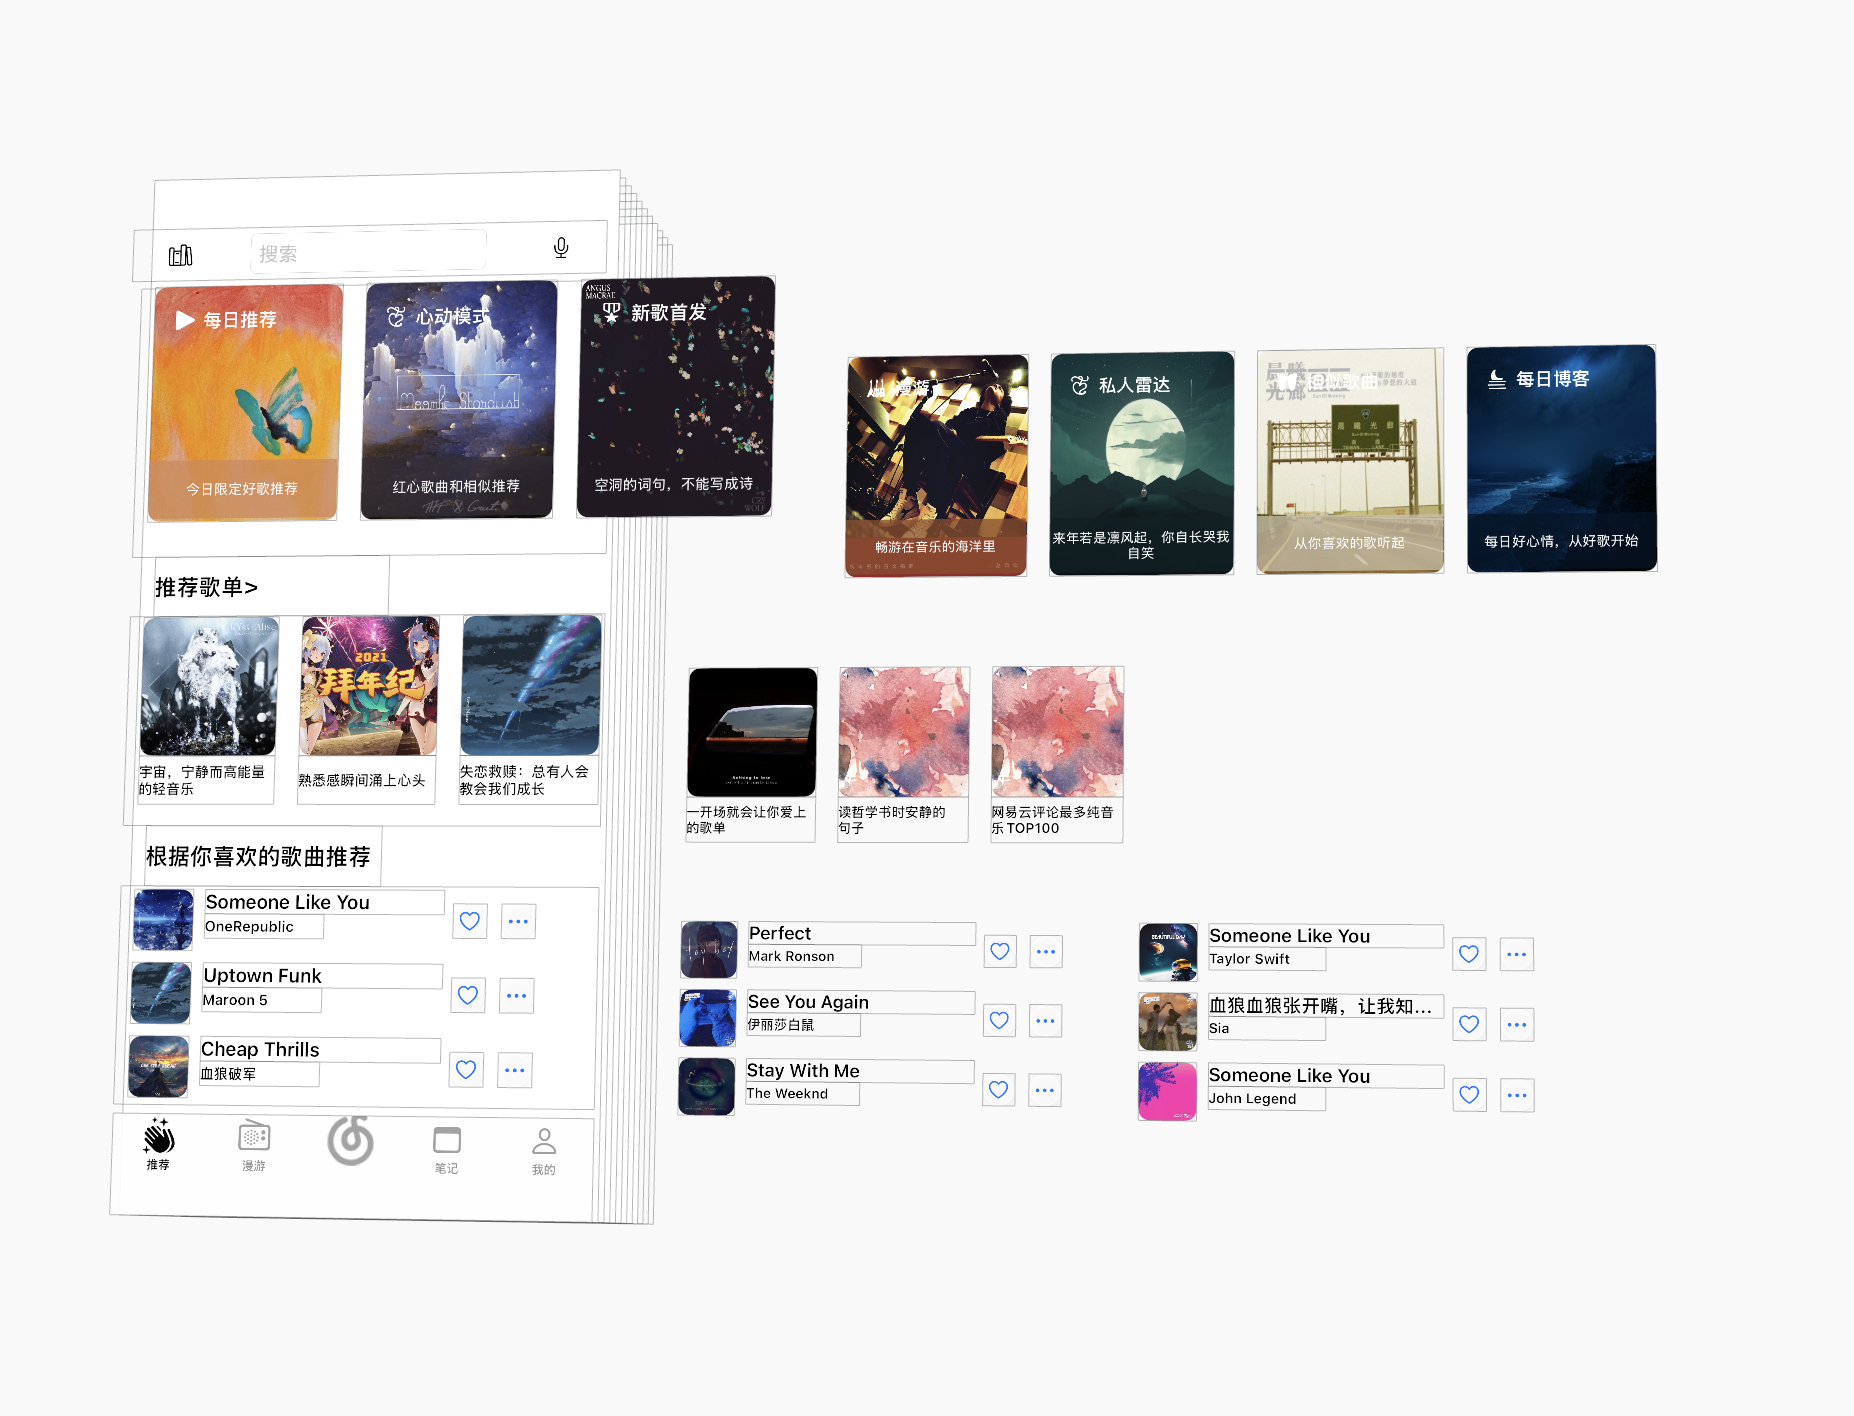
在这个推荐页面中,我们需要自定义三个cell来实现分别的三个视图
其中第三个cell里有一个ScrollView,这个ScrollView里还套了三个TableView,并且一共四个TableView委托都是推荐页面视图控制器
所以在实现委托方法的时候,注意一定要针对不同的tag值,来判断方法作用的TableView
这里给出实现委托的代码
#pragma mark - UITableViewDataSource
- (NSInteger)numberOfSectionsInTableView:(UITableView *)tableView {return 3; // 推荐卡片区、推荐歌单区、猜你喜欢区
}- (NSInteger)tableView:(UITableView *)tableView numberOfRowsInSection:(NSInteger)section {if (tableView.tag >= 200 && tableView.tag <= 202) {return 3;}// 原有主table逻辑if (tableView == self.tableView) {if (section == 2) return 1;return 1;}return 1;
}- (UITableViewCell *)tableView:(UITableView *)tableView cellForRowAtIndexPath:(NSIndexPath *)indexPath {if (tableView.tag >= 200 && tableView.tag <= 202) {static NSString *cellId = @"likeSongCell";UITableViewCell *cell = [tableView dequeueReusableCellWithIdentifier:cellId];if (!cell) {cell = [[UITableViewCell alloc] initWithStyle:UITableViewCellStyleDefault reuseIdentifier:cellId];cell.selectionStyle = UITableViewCellSelectionStyleNone;}for (UIView *sub in cell.contentView.subviews) [sub removeFromSuperview];CGFloat imgX = 20, imgY = 10, cardW = 60, cardH = 60;NSInteger randomIndex = arc4random() % 100;UIImageView* img = [[UIImageView alloc] initWithImage:[UIImage imageNamed:[NSString stringWithFormat:@"%ld.JPG",(long)randomIndex]]];img.frame = CGRectMake(imgX, imgY, cardW, cardH);img.layer.cornerRadius = 12;img.layer.masksToBounds = YES;img.layer.borderColor = [UIColor colorWithWhite:0.88 alpha:1].CGColor;img.layer.borderWidth = 1.0;[cell.contentView addSubview:img];NSUInteger songIdx = arc4random() % songNames.count;NSUInteger authorIdx = arc4random() % authors.count;NSString *song = songNames[songIdx];NSString *author = authors[authorIdx];UILabel* label = [[UILabel alloc] initWithFrame:CGRectMake(imgX+cardW+10, imgY, 120, 24)];label.text = song;label.textColor = [UIColor blackColor];label.font = [UIFont boldSystemFontOfSize:18];label.textAlignment = NSTextAlignmentLeft;label.adjustsFontSizeToFitWidth = YES;[cell.contentView addSubview:label];UILabel* label2 = [[UILabel alloc] initWithFrame:CGRectMake(imgX+cardW+10, imgY+24, 120, 18)];label2.text = author;label2.textColor = [UIColor colorWithWhite:0.3 alpha:1];label2.font = [UIFont systemFontOfSize:15];label2.textAlignment = NSTextAlignmentLeft;[cell.contentView addSubview:label2];UIButton* button1 = [[UIButton alloc] initWithFrame:CGRectMake(imgX+cardW+230, imgY+6, 32, 32)];[button1 setImage:[UIImage systemImageNamed:@"heart"] forState:UIControlStateNormal];[button1 setImage:[UIImage systemImageNamed:@"heart.fill"] forState:UIControlStateHighlighted];button1.layer.cornerRadius = 16;button1.backgroundColor = [UIColor colorWithWhite:1 alpha:0.85];button1.layer.shadowColor = [UIColor blackColor].CGColor;button1.layer.shadowOpacity = 0.10;button1.layer.shadowOffset = CGSizeMake(1, 1);button1.layer.shadowRadius = 2;[cell.contentView addSubview:button1];UIButton* button2 = [[UIButton alloc] initWithFrame:CGRectMake(imgX+cardW+270, imgY+6, 32, 32)];[button2 setImage:[UIImage systemImageNamed:@"ellipsis"] forState:UIControlStateNormal];button2.layer.cornerRadius = 16;button2.backgroundColor = [UIColor colorWithWhite:1 alpha:0.85];button2.layer.shadowColor = [UIColor blackColor].CGColor;button2.layer.shadowOpacity = 0.10;button2.layer.shadowOffset = CGSizeMake(1, 1);button2.layer.shadowRadius = 2;[cell.contentView addSubview:button2];return cell;}// 原有主table逻辑static NSString *cellId = @"recommendCell";UITableViewCell *cell = [tableView dequeueReusableCellWithIdentifier:cellId];if (!cell) {cell = [[UITableViewCell alloc] initWithStyle:UITableViewCellStyleDefault reuseIdentifier:cellId];cell.selectionStyle = UITableViewCellSelectionStyleNone;}// 清空cell内容,防止复用导致内容叠加for (UIView *sub in cell.contentView.subviews) {[sub removeFromSuperview];}CGFloat xbound = self.view.frame.size.width;
//    CGFloat ybound = self.view.frame.size.height;if (indexPath.section == 0) {// 推荐卡片区,横向滚动viewBig// 改为正方形或合适长方形比例CGFloat cardW = xbound * 0.56;CGFloat cardH = xbound * 0.56; // 正方形CGFloat cardGap = 16;UIScrollView *scroll = [[UIScrollView alloc] initWithFrame:CGRectMake(0, 12, xbound, cardH+8)];scroll.backgroundColor = [UIColor clearColor];scroll.contentSize = CGSizeMake((cardW+cardGap)*7+cardGap, cardH+8);scroll.showsHorizontalScrollIndicator = NO;NSArray* mainText = @[@"每日推荐",@"心动模式",@"新歌首发 ",@"漫游",@"私人雷达",@"相似歌曲",@"每日博客 "];NSArray* introduceText = @[@"今日限定好歌推荐",@"红心歌曲和相似推荐",@"空洞的词句,不能写成诗",@"畅游在音乐的海洋里",@"来年若是凛风起,你自长哭我自笑",@"从你喜欢的歌听起",@"每日好心情,从好歌开始"];NSArray* viewArray = [self getViewArrayfornumber:7 andSize:CGSizeMake(cardW, cardH) forType:1];for (int i = 0; i < 7; i++) {viewBig *view = viewArray[i];view.maintext = mainText[i];view.textIntrduce = introduceText[i];[view loadView];view.frame = CGRectMake(cardGap + i * (cardW + cardGap), 0, cardW, cardH);view.layer.cornerRadius = 18;view.layer.shadowColor = [UIColor blackColor].CGColor;view.layer.shadowOpacity = 0.13;view.layer.shadowOffset = CGSizeMake(0, 2);view.layer.shadowRadius = 8;view.layer.borderColor = [UIColor colorWithWhite:0.85 alpha:1].CGColor;view.layer.borderWidth = 1.0;view.layer.masksToBounds = YES; // 裁切圆角外内容[scroll addSubview:view];}[cell.contentView addSubview:scroll];} else if (indexPath.section == 1) {// 推荐歌单区,横向滚动歌单卡片UILabel* label = [[UILabel alloc] initWithFrame:CGRectMake(20, 0, 200, 32)];label.text = @"推荐歌单>";label.textColor = [UIColor labelColor];label.font = [UIFont boldSystemFontOfSize:18];[cell.contentView addSubview:label];CGFloat cardW = xbound * 0.36;CGFloat cardH = xbound * 0.36;CGFloat cardGap = 16;UIScrollView *scroll = [[UIScrollView alloc] initWithFrame:CGRectMake(0, 36, xbound, cardH+8+32)];scroll.backgroundColor = [UIColor clearColor];scroll.contentSize = CGSizeMake((cardW+cardGap)*6+cardGap, cardH+8);scroll.showsHorizontalScrollIndicator = NO;NSArray* textArray = @[@"宇宙,宁静而高能量的轻音乐",@"熟悉感瞬间涌上心头",@"失恋救赎:总有人会教会我们成长",@"一开场就会让你爱上的歌单 ",@"读哲学书时安静的句子",@"网易云评论最多纯音乐TOP100"];NSArray* viewArray2 = [self getViewArrayfornumber:6 andSize:CGSizeMake(cardW, cardH) forType:2];for (int i = 0; i < 6; i ++) {viewBig *view = viewArray2[i];view.mainColor = [UIColor clearColor];[view loadView];view.colorView.hidden = YES;view.frame = CGRectMake(cardGap + i * (cardW + cardGap), 0, cardW, cardH);view.layer.cornerRadius = 14;view.layer.shadowColor = [UIColor blackColor].CGColor;view.layer.shadowOpacity = 0.10;view.layer.shadowOffset = CGSizeMake(0, 2);view.layer.shadowRadius = 4;view.layer.borderColor = [UIColor colorWithWhite:0.85 alpha:1].CGColor;view.layer.borderWidth = 1.0;view.layer.masksToBounds = YES; // 裁切圆角外内容[scroll addSubview:view];UILabel* label2 = [[UILabel alloc] initWithFrame:CGRectMake(cardGap + i * (cardW + cardGap), cardH + 4, cardW, 36)];label2.text = textArray[i];label2.textColor = [UIColor labelColor];label2.font = [UIFont systemFontOfSize:13 weight:UIFontWeightMedium];label2.numberOfLines = 2;label2.textAlignment = NSTextAlignmentLeft;[scroll addSubview:label2];}[cell.contentView addSubview:scroll];} else if (indexPath.section == 2) {// 猜你喜欢区,横向Scroll,每屏一个TableView,每屏三首歌UILabel *label3 = [[UILabel alloc] initWithFrame:CGRectMake(20, 0, 260, 32)];label3.text = @"根据你喜欢的歌曲推荐";label3.textColor = [UIColor labelColor];label3.font = [UIFont boldSystemFontOfSize:18];[cell.contentView addSubview:label3];CGFloat top = 36;CGFloat scrollW = xbound;CGFloat scrollH = 3 * 80 + 2 * 24; // 每首歌80高,间距24
#pragma mark -调整位置UIScrollView *scroll = [[UIScrollView alloc] initWithFrame:CGRectMake(0, top, scrollW, scrollH + 500)];scroll.contentSize = CGSizeMake(scrollW * 3, scrollH + 50);scroll.pagingEnabled = YES;scroll.showsHorizontalScrollIndicator = NO;for (int page = 0; page < 3; page++) {UITableView *table = [[UITableView alloc] initWithFrame:CGRectMake(page * scrollW, 0, scrollW, scrollH + 500) style:UITableViewStylePlain];table.tag = 200 + page;table.scrollEnabled = NO;table.separatorStyle = UITableViewCellSeparatorStyleNone;table.dataSource = self;table.delegate = self;[scroll addSubview:table];}[cell.contentView addSubview:scroll];}return cell;
}#pragma mark - 设置高度- (CGFloat)tableView:(UITableView *)tableView heightForRowAtIndexPath:(NSIndexPath *)indexPath {if (tableView.tag >= 200 && tableView.tag <= 202) {return 80;}CGFloat xbound = self.view.frame.size.width;if (indexPath.section == 0) {// 推荐卡片区:卡片高度+上下间距CGFloat cardH = xbound * 0.56;return cardH + 24;}if (indexPath.section == 1) {// 推荐歌单区:标题+卡片+下方文字+间距CGFloat cardH = xbound * 0.36;return 32 + cardH + 56;}if (indexPath.section == 2) {// 猜你喜欢区:标题+scroll高度CGFloat top = 36;CGFloat scrollH = 3 * 80 + 2 * 24;return 32 + top + scrollH + 500;}return 100;
}
UIRefreshControl对推荐页面进行刷新
由于我写的推荐页面增加了推荐页随机功能,所以顺手实现了对推荐页面的刷新功能
如果你的推荐页面是拿TableView写的,那这个刷新功能很好实现,如果使用ScrollView,那实现的复杂度会很超标
iOS10开始,UIScrollView就有了refreshControl属性,用于把设置好的UIRefreshControl赋值给属性,这样UIScrollView就有了下拉刷新功能,因为UITableView和UICollectionView继承自UIScrollView,所以它们也自然继承了这个属性
简单的使用:
- (void)viewDidLoad
{[super viewDidLoad];// 1 先判断系统版本if ([NSProcessInfo.processInfo isOperatingSystemAtLeastVersion:(NSOperatingSystemVersion){10,0,0}]){// 2 初始化UIRefreshControl *refreshControl = [[UIRefreshControl alloc] init];// 3.1 配置刷新控件refreshControl.tintColor = [UIColor brownColor];NSDictionary *attributes = @{NSForegroundColorAttributeName : [UIColor redColor]};refreshControl.attributedTitle = [[NSAttributedString alloc] initWithString:@"Pull To Refresh" attributes:attributes];// 3.2 添加响应事件[refreshControl addTarget:self action:@selector(refresh:) forControlEvents:UIControlEventValueChanged];// 4 把创建的refreshControl赋值给scrollView的refreshControl属性self.scrollView.refreshControl = refreshControl;}
}
基本属性
tintColor:设置进度滚轮指示器颜色
attributedTitle:添加刷新时显示的提示文字
注意,在触发事件的时候使用UIControlEventValueChanged来制指定
给出在ScrollView的刷新代码和TableView的刷新代码
ScrollView版本:
- (void)viewDidLoad {[super viewDidLoad];...// 下拉刷新UIRefreshControl* refreshControl = [[UIRefreshControl alloc] init];refreshControl.tintColor = [UIColor labelColor];[refreshControl addTarget:self action:@selector(refreshPage) forControlEvents:UIControlEventValueChanged];self.mainScrollView.refreshControl = refreshControl;...
}// 下拉刷新
- (void) refreshPage {// 刷新第一个横向滚动视图(firScrollView)中的图片for (UIView *subview in self.firScrollView.subviews) {if ([subview isKindOfClass:[UIImageView class]]) {NSInteger randomIndex = arc4random() % 100;UIImage *newImage = [UIImage imageNamed:[NSString stringWithFormat:@"%ld.JPG", (long)randomIndex]];((UIImageView *)subview).image = newImage;}// 如果是自定义viewBig视图,也尝试刷新其backgroundImaif ([subview isKindOfClass:NSClassFromString(@"viewBig")]) {NSInteger randomIndex = arc4random() % 100;UIImage *newImage = [UIImage imageNamed:[NSString stringWithFormat:@"%ld.JPG", (long)randomIndex]];[subview setValue:newImage forKey:@"backgroundIma"];if ([subview respondsToSelector:@selector(loadView)]) {[subview performSelector:@selector(loadView)];}}}// 刷新第二个横向滚动视图中的图片for (UIView *subview in self.mainScrollView.subviews) {if ([subview isKindOfClass:[UIScrollView class]]) {UIScrollView *scroll = (UIScrollView *)subview;if (scroll != self.firScrollView && scroll != self.secScrollView) {for (UIView *v in scroll.subviews) {if ([v isKindOfClass:[UIImageView class]]) {NSInteger randomIndex = arc4random() % 100;UIImage *newImage = [UIImage imageNamed:[NSString stringWithFormat:@"%ld.JPG", (long)randomIndex]];((UIImageView *)v).image = newImage;}if ([v isKindOfClass:NSClassFromString(@"viewBig")]) {NSInteger randomIndex = arc4random() % 100;UIImage *newImage = [UIImage imageNamed:[NSString stringWithFormat:@"%ld.JPG", (long)randomIndex]];[v setValue:newImage forKey:@"backgroundIma"];if ([v respondsToSelector:@selector(loadView)]) {[v performSelector:@selector(loadView)];viewBig* temp = v;temp.colorView.hidden = YES;}}}}}}// 刷新第三个横向滚动视图(self.secScrollView)中的图片和文本for (UIView *subview in self.secScrollView.subviews) {if ([subview isKindOfClass:[UIImageView class]]) {NSInteger randomIndex = arc4random() % 100;UIImage *newImage = [UIImage imageNamed:[NSString stringWithFormat:@"%ld.JPG", (long)randomIndex]];((UIImageView *)subview).image = newImage;}// 刷新歌曲和作者标签if ([subview isKindOfClass:[UILabel class]]) {UILabel *label = (UILabel *)subview;// 判断字号区分主副labelif (label.font.pointSize == 16) {NSUInteger songIdx = arc4random() % songNames.count;label.text = songNames[songIdx];} else if (label.font.pointSize == 12) {NSUInteger authorIdx = arc4random() % authors.count;label.text = authors[authorIdx];}}}// 停止刷新动画[self.mainScrollView.refreshControl endRefreshing];
}
TableView版本:
- (void)viewDidLoad {[super viewDidLoad];...// 初始化UITableViewself.tableView = [[UITableView alloc] initWithFrame:self.view.bounds style:UITableViewStylePlain];self.tableView.delegate = self;self.tableView.dataSource = self;self.tableView.backgroundColor = [UIColor systemBackgroundColor];self.tableView.separatorStyle = UITableViewCellSeparatorStyleNone;[self.view addSubview:self.tableView];// 下拉刷新UIRefreshControl* refreshControl = [[UIRefreshControl alloc] init];refreshControl.tintColor = [UIColor labelColor];[refreshControl addTarget:self action:@selector(refreshPage) forControlEvents:UIControlEventValueChanged];self.tableView.refreshControl = refreshControl;
}#pragma mark - 下拉刷新
- (void) refreshPage {// 重新加载表格,刷新所有区块内容[self.tableView reloadData];// 停止刷新动画[self.tableView.refreshControl endRefreshing];
}
个人设置页面
抽屉视图的实现
在仿写过程中,发现网易云的个人设置已经使用了侧边抽屉视图来实现了
绞尽脑汁想出了一个邪招并实现了,之后发现也可以通过自定义动画的方式来实现
邪修
观察网易云的拉出页面
可以发现在拉出后的界面可以分成两个部分,个人设置的主页面和一个灰色蒙版视图
其中灰色蒙版视图盖住了之前的界面
那我们先完成这一步
- (void) setUpBackgroundView {self.backgroundView = [[UIView alloc] init];self.backgroundView.frame = self.view.bounds;self.backgroundView.backgroundColor = [UIColor colorWithWhite:0 alpha:0.5];[self.view addSubview:self.backgroundView];self.backgroundView.tag = 101;UITapGestureRecognizer *tapGesture = [[UITapGestureRecognizer alloc] initWithTarget:self action:@selector(removeSettingPage)];[self.backgroundView addGestureRecognizer:tapGesture];
}
然后你就会惊喜的发现
非常好灰色蒙版,使我TabBar露出
这是由于层级关系的问题,TabBar的的视图层级是最高的,你不可能在加到self.view里就指望它能盖过tabBar

那应该怎么办呢?
诶!有了,那我直接把他传到TabBar的视图里不就行了吗
- (void) setUpBackgroundView {// 之前通过属性传值把tabBarController传进来UIView *tabBarControllerView = self.tabBarController.view;self.backgroundView = [[UIView alloc] init];self.backgroundView.frame = tabBarControllerView.bounds;
//    self.backgroundView.frame = self.view.bounds;self.backgroundView.backgroundColor = [UIColor colorWithWhite:0 alpha:0.5];[tabBarControllerView addSubview:self.backgroundView];
//    [self.view addSubview:self.backgroundView];self.backgroundView.tag = 101;UITapGestureRecognizer *tapGesture = [[UITapGestureRecognizer alloc] initWithTarget:self action:@selector(removeSettingPage)];[self.backgroundView addGestureRecognizer:tapGesture];
}
完成背景蒙版后,来实现抽屉视图的侧边滑入效果
做过ppt的同学也许知道,ppt中有平滑移动效果,其中想要做到让一个元素在页面中出现,那就要在上一个页面中把他画到页面外
同理,我们在创建页面的时候,直接设置他的位置为屏幕外
self.view.frame = CGRectMake(-width, 0, width, height); // 初始在屏幕左侧外
然后在用动画效果把他移出来,就可以达到抽屉视图的效果
[tabBarControllerView addSubview:self.personalSetting.view];CGFloat width = [UIScreen mainScreen].bounds.size.width * 0.7;[UIView animateWithDuration:0.3 animations:^{self.personalSetting.view.frame = CGRectMake(0, 0, width, [UIScreen mainScreen].bounds.size.height);}];
收回也是同样的道理,
- (void)removeSettingPage {CGFloat width = [UIScreen mainScreen].bounds.size.width * 0.7;UIView *drawer = [self.tabBarController.view viewWithTag:102];UIView *bg = [self.tabBarController.view viewWithTag:101];[UIView animateWithDuration:0.3 animations:^{if (drawer) {drawer.frame = CGRectMake(-width, 0, width, [UIScreen mainScreen].bounds.size.height);}}];// 延迟移除,保证动画完成后再移除dispatch_after(dispatch_time(DISPATCH_TIME_NOW, (int64_t)(0.3 * NSEC_PER_SEC)), dispatch_get_main_queue(), ^{if (drawer) [drawer removeFromSuperview];if (bg) [bg removeFromSuperview];});
}
正统
在实现这些之后,学到了模态视图…
想象一下你正在看一本书。突然,你需要查一个重要的词语解释。你会从桌上拿起一本字典,把它放在你正在看的书页上,然后开始查找。这本字典就是你的模态视图,它暂时遮住了你正在看的书页
presentViewController:animated:completion: :展示模态视图
dismissViewControllerAnimated:completion: :解除模态视图
参数解释:
- animated: 一个布尔值,表示是否以动画效果来关闭。传 YES 通常会有一个向底部滑出的默认动画。
- completion: 一个可选的 Block,当模态视图的关闭动画完成后会执行这个 Block 里的代码。
| 特性 | present/dismiss (模态视图) | push/pop (导航控制器) |
|---|---|---|
| 关系 | 独立的,新视图控制器与旧视图控制器没有层级关系,只是在它之上显示。 | 层级关系,新视图控制器被添加到导航堆栈的顶部,与前一个视图控制器有明确的父子关系。 |
| 外观 | 通常是全屏覆盖,或带有特定样式(如页状、表单),可以自定义转场动画。 | 通常是左右滑入滑出,导航栏会显示返回按钮,层级清晰。 |
| 导航栏 | 默认不带导航栏(除非你把一个 UINavigationController 作为模态视图来展示)。 | 自带导航栏,方便返回上一个界面。 |
| 用途 | 临时性展示、独立功能、中断用户当前流程(如登录、设置)。 | 线性的流程导航、层级深入的展示(如列表点击进入详情)。 |
| 关闭方式 | 调用 dismissViewControllerAnimated:completion: 方法。 | 调用 popViewControllerAnimated: 或点击导航栏返回按钮。 |
要实现模态视图的进入动画为左边滑入/滑出,你需要利用 UIViewControllerTransitioningDelegate 协议和自定义的动画对象。这听起来可能有点复杂,但别担心,实际做起来会更加的复杂
核心思想
默认情况下,模态视图的进入动画是底部滑入。如果你想改成左边滑入,你需要告诉系统:“别用你自己的默认动画了,用我写的这个!”
这就像你家有一扇门(模态视图),默认是从下往上开的。现在你想让它从左往右开。你需要请一个“装修师傅”(遵循UIViewControllerTransitioningDelegate)来帮你管理门的开关。这个师傅不会自己开门,但他会请一个专门的“开门工人”(id)来执行具体的开门动作(动画),如果你要把门安装在特定的位置,像我们这里要露出原本的界面,你就需要一个“指导员(UIPresentation)”来指导开门工人操作的位置
稍微整理一下我们现在需要的
- 会装修(UIViewControllerTransitioningDelegate)的装修师傅
- 会开门(UIViewControllerAnimatedTransitioning)的开门工人
- “我的眼睛就是尺”的指导员(UIPresentation)
- 外观优雅的木门
第一步,我们需要创建一个门
这个门(视图)只需要外观,以及内部的视图布局,**它不需要自己的位置,**因为指导员会专门给他指定一个位置!
同时,你还需要在门上打上标记——这个门有自己的开门工人!系统你不需要给我指派了!
- (instancetype)init {self = [super init];if (self) {self.modalPresentationStyle = UIModalPresentationCustom;self.transitioningDelegate = self; // 这个是第二步}return self;
}
第二步,创建一个装修师傅
我们一般指派门自己(视图自己)来成为装修工人
self.transitioningDelegate = self;
装修工人需要告诉系统在装门的时候,要使用什么开门工人,和使用什么指导员,即:
#pragma mark - UIViewControllerTransitioningDelegate
// 当要呈现模态视图的时候,要使用哪个动画对象
// 当要呈现(present)模态视图时,请使用哪个动画对象
-(id<UIViewControllerAnimatedTransitioning>)animationControllerForPresentedController:(UIViewController *)presented presentingController:(UIViewController *)presenting sourceController:(UIViewController *)source {LeftSlideInAnimator *animator = [[LeftSlideInAnimator alloc] init];animator.isPresenting = YES; // 标记为呈现动画return animator;
}
// 当要解除(dismiss)模态视图时,使用动画对象
-(id<UIViewControllerAnimatedTransitioning>)animationControllerForDismissedController:(UIViewController *)dismissed {LeftSlideInAnimator *animator = [[LeftSlideInAnimator alloc] init];animator.isPresenting = NO; // 标记为解除动画return animator;
}// 定义布局
- (UIPresentationController *)presentationControllerForPresentedViewController:(UIViewController *)presented presentingViewController:(UIViewController *)presenting sourceViewController:(UIViewController *)source {return [[CustomPresentationController alloc] initWithPresentedViewController:presented presentingViewController:presenting];
}
注意到代码中出现了LeftSlideInAnimator和CustomPresentationController即我们一会要创建的开门工人(动画效果),和指导员
第三部,实现开门工人
创建一个新类,这个新类有一个属性**BOOL** isPresenting; 用来判断是呈现动画还是解除动画,这样我们就可以只要一个工人实现开门和关门的效果了
工人需要掌握的知识包括了:
动画效果怎么呈现 (- (void)animateTransition:(id)transitionContext)
动画效果持续多长时间 (- (NSTimeInterval)transitionDuration:(nullable id)transitionContext)
// 实际执行动画的地方
- (void)animateTransition:(id<UIViewControllerContextTransitioning>)transitionContext {// 获取动画容器视图UIView *containerView = [transitionContext containerView];// 获取要呈现的视图控制器(toVC)和要解除的视图控制器(fromVC)UIViewController *fromVC = [transitionContext viewControllerForKey:UITransitionContextFromViewControllerKey];UIViewController *toVC = [transitionContext viewControllerForKey:UITransitionContextToViewControllerKey];// 获取要呈现的视图(toView)和要解除的视图(fromView)UIView *toView = toVC.view;UIView *fromView = fromVC.view;// 获取目标视图的最终 frame,这个 frame 是由 PresentationController 决定的CGRect finalFrameForToView = [transitionContext finalFrameForViewController:toVC];// Dismiss 时 fromView 的初始 frame 就是其呈现时的最终 frameCGRect initialFrameForFromView = [transitionContext initialFrameForViewController:fromVC];if (self.isPresenting) { // 呈现(进入)动画// 目标视图一开始在屏幕左侧外面,但宽度是它最终的宽度 (70%)// CGRectOffset(rect, dx, dy) 返回一个新矩形, rect.origin.x + dx,rect.origin.y + dy// 所以这里是向左偏移了自身的宽度,使其完全在屏幕外toView.frame = CGRectOffset(finalFrameForToView, -finalFrameForToView.size.width, 0);// 将目标视图添加到容器视图中// 注意:在 CustomPresentationController 的 presentationTransitionWillBegin 方法中// dimmingView 会被插入到 containerView 的 atIndex:0 位置// 而这里 toView 会被添加到 containerView 的最上层,这样它会显示在 dimmingView 之上[containerView addSubview:toView];[UIView animateWithDuration:[self transitionDuration:transitionContext] animations:^{// 目标视图滑入到最终位置toView.frame = finalFrameForToView;// 原始视图(如果需要)可以稍微向左移动,创造视觉差 (可选,根据你的设计决定是否启用)// CGRect screenBounds = [UIScreen mainScreen].bounds;// fromView.frame = CGRectOffset(screenBounds, -screenBounds.size.width * 0.1, 0); // 例如,向左移动10%屏幕宽度} completion:^(BOOL finished) {// 动画完成时调用,非常重要!// 告诉系统转场完成,并传递是否成功完成的信息[transitionContext completeTransition:!transitionContext.transitionWasCancelled];}];} else { // 解除(退出)动画// 目标视图(即fromView)从屏幕中间(其呈现时的最终frame)向左滑出[UIView animateWithDuration:[self transitionDuration:transitionContext] animations:^{fromView.frame = CGRectOffset(initialFrameForFromView, -initialFrameForFromView.size.width, 0); // 滑出到左侧屏幕外// 原始视图(如果需要)可以回到屏幕中央 (可选,根据你的设计决定是否启用)// CGRect screenBounds = [UIScreen mainScreen].bounds;// toView.frame = screenBounds;} completion:^(BOOL finished) {// 动画完成时调用,非常重要!!!!!!!!!!!!!!!!!!!![transitionContext completeTransition:!transitionContext.transitionWasCancelled];}];}
}
// 动画持续时间
- (NSTimeInterval)transitionDuration:(nullable id<UIViewControllerContextTransitioning>)transitionContext { return 0.3;
}
第四步,实现指导员
在这个抽屉视图中,指导员更加复杂,除了要实现指导员本身的功能之后,还需要实现对蒙版的添加
我这里先来写蒙版视图
// 加载蒙版视图
- (UIView *)dimmingView {if (!_dimmingView) {_dimmingView = [[UIView alloc] initWithFrame:CGRectZero]; // 初始frame设为零,后面会根据containerView.bounds设置_dimmingView.backgroundColor = [UIColor colorWithWhite:0.0 alpha:0.4]; // 灰色,40% 透明度_dimmingView.alpha = 0.0; // 初始透明度为0// 添加点击手势,点击蒙版可以 dismiss 模态视图UITapGestureRecognizer *tap = [[UITapGestureRecognizer alloc] initWithTarget:self action:@selector(dimmingViewTapped:)];[_dimmingView addGestureRecognizer:tap];}return _dimmingView;
}// 点击蒙版时的处理
- (void)dimmingViewTapped:(UITapGestureRecognizer *)sender {if (sender.state == UIGestureRecognizerStateEnded) {// 让被呈现的视图控制器自行 dismiss[self.presentedViewController dismissViewControllerAnimated:YES completion:nil];}
}// 返回一个布尔值,指示呈现者视图的视图是否应该在呈现完成后从视图层次结构中移除。
// 通常对于这种半透明或部分覆盖的模态视图,我们不希望移除呈现者视图。
// 默认为 NO。
- (BOOL)shouldRemovePresentersView {return NO;
}
然后是一般情况下的常用方法
#pragma mark - UIPresentationController Overrides// 即将执行呈现动画时调用
- (void)presentationTransitionWillBegin {// 将蒙版视图添加到容器视图的底部self.dimmingView.frame = self.containerView.bounds; // 确保蒙版充满容器视图[self.containerView insertSubview:self.dimmingView atIndex:0]; // 放在最底层// 获取转场协调器,与模态视图的呈现动画同时执行蒙版动画id<UIViewControllerTransitionCoordinator> coordinator = self.presentingViewController.transitionCoordinator;[coordinator animateAlongsideTransition:^(id<UIViewControllerTransitionCoordinatorContext>  _Nonnull context) {self.dimmingView.alpha = 1.0; // 蒙版逐渐显示} completion:nil];
}// 呈现动画完成时调用
- (void)presentationTransitionDidEnd:(BOOL) completed {// 如果动画被取消(例如用户中断),移除蒙版if (!completed) {[self.dimmingView removeFromSuperview];_dimmingView = nil; // 释放蒙版视图}
}// 即将执行解除动画时调用
- (void)dismissalTransitionWillBegin {// 获取转场协调器,与模态视图的解除动画同时执行蒙版动画id<UIViewControllerTransitionCoordinator> coordinator = self.presentingViewController.transitionCoordinator;[coordinator animateAlongsideTransition:^(id<UIViewControllerTransitionCoordinatorContext>  _Nonnull context) {self.dimmingView.alpha = 0.0; // 蒙版逐渐消失} completion:nil];
}// 解除动画完成时调用
- (void)dismissalTransitionDidEnd:(BOOL) completed {// 动画完成时移除蒙版if (completed) {[self.dimmingView removeFromSuperview];_dimmingView = nil; // 释放蒙版视图}
}// 返回被呈现视图控制器(模态视图)的最终大小和位置
- (CGRect)frameOfPresentedViewInContainerView {// 获取容器视图的大小(通常是屏幕大小)CGRect containerBounds = self.containerView.bounds;CGFloat width = containerBounds.size.width * 0.7; // 占据屏幕宽度的70%CGFloat height = containerBounds.size.height;// 模态视图的起点在左侧,宽度为计算出的70%return CGRectMake(0, 0, width, height);
}// 当容器视图的尺寸发生变化时(如设备旋转),调整布局
// 确保蒙版和呈现视图的frame正确更新
- (void)containerViewWillLayoutSubviews {[super containerViewWillLayoutSubviews];self.dimmingView.frame = self.containerView.bounds; // 蒙版始终充满容器视图self.presentedView.frame = [self frameOfPresentedViewInContainerView]; // 重新布局呈现视图
}
深色模式的实现
首先介绍两种颜色
systemBackgroundColor和labelColor 两者都为系统颜色,且系统会根据系统深色模式的不同来自动调整两种模式
应用程序内是否为深色模式由overrideUserInterfaceStyle设置,overrideUserInterfaceStyle 是 UIWindow、UIScene 和 UIViewController 的一个属性,它的类型是 UIUserInterfaceStyle,这是一个枚举,包含以下几个值:
UIUserInterfaceStyleUnspecified(未指定):这是默认值。这意味着这个对象会继承其父级(如果是UIViewController,就是其presentingViewController或parentViewController;如果是UIWindow/UIScene,就是系统设置)的界面风格。UIUserInterfaceStyleLight(浅色模式):强制将界面风格设置为浅色模式。UIUserInterfaceStyleDark(深色模式):强制将界面风格设置为深色模式。
所以在应用内实现深色模式可以直接强制设置属性从而达到变化模式
个人主页
第三方库的简单使用以及安装
在前文中用了很多lookin的内容,在这里给出安装第三方库的管家CocoaPods的教程,以及自己碰到的一些坑
-
安装CocoaPods,可以直接使用终端命令来安装,也可以使用homebrew,如果有homebrew推荐使用homebrew,更快更方便
sudo gem install cocoapods -
初始化项目,创建Podfile
在项目的根目录下,也就是cd
.xcodeproj文件所在的目录,打开终端输入并运行以下命令pod init -
编辑Podfile
打开在目录中多出的Podfile
他的大致内容应该像这样
# Uncomment the next line to define a global platform for your project
# platform :ios, '13.0'target 'YourProjectName' do# Comment the next line if you don't want to use dynamic frameworksuse_frameworks!# Pods for YourProjectNameend
加入第三方库,并保存,关闭当前xcode窗口
# Uncomment the next line to define a global platform for your projectplatform :ios, '12.0'target 'MusicCloud' do# Comment the next line if you don't want to use dynamic frameworks# use_frameworks! pod 'LookinServer', :configurations => ['Debug'] pod 'HMSegmentedControl'# Pods for MusicCloudend -
打开终端,打开文件夹,运行指令
pod install等待下载完毕,提示全为绿色,就可以打开新的
.xcworkspace文件进行工作在使用前,还有一些准备工作如在项目中引入头文件等不在此过多赘述
(lookin的头文件引入在AppDelegate.m中,且不需要引入更多的额外操作)
照片墙的选中以及选中反馈(简单的动画效果)
照片墙的构造在这里不多赘述,我在构建照片墙的过程中发现,单纯的按钮无法很明显的体现出选中图片,所以浅浅使用了一个动画效果来实现
[UIView animateWithDuration:0.1 animations:^{// 设置最终的位置和大小button.transform = CGAffineTransformMakeScale(0.95, 0.95);// 当第一个动画完成后,执行后面的代码} completion:^(BOOL finished) {[UIView animateWithDuration:0.1 animations:^{button.transform = CGAffineTransformIdentity; }];}];
CGAffineTransformMakeScale 这里简单说一下,他是CGAffineTransform的一种,可以对视图进行缩放变化,且他的缩放变化与直接移动frame不同,他造成的缩放变化可以复原,即button.transform = CGAffineTransformIdentity;
所以这段代码的效果就是,点按一个按钮,然后用0.1的时间把这个按钮缩放到原来的95%,之后在复原
与CGAffineTransformMakeScale 类似的还有:
平移CGAffineTransformMakeTranslation
旋转CGAffineTransformMakeRotation