day7--绑定媒资、课程发布
1. 绑定媒资
1.1 需求分析
1.1.1 业务流程
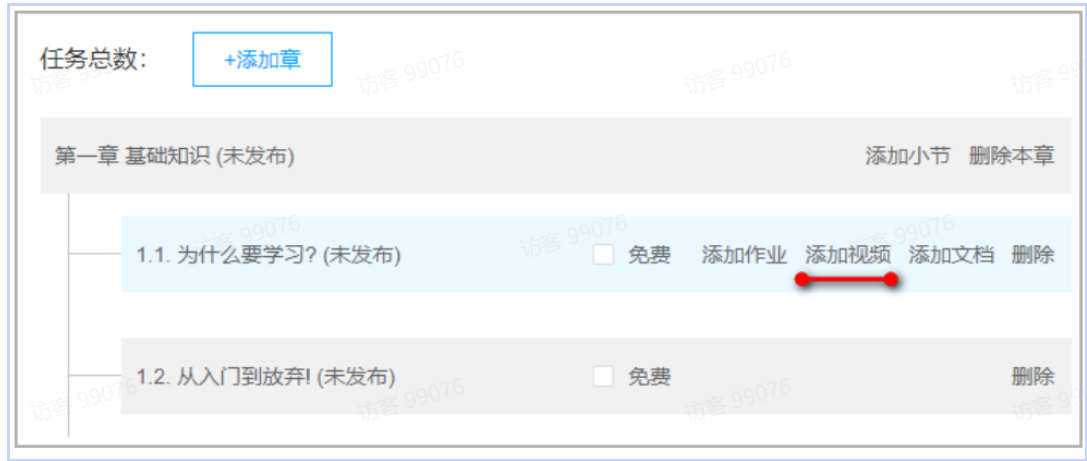
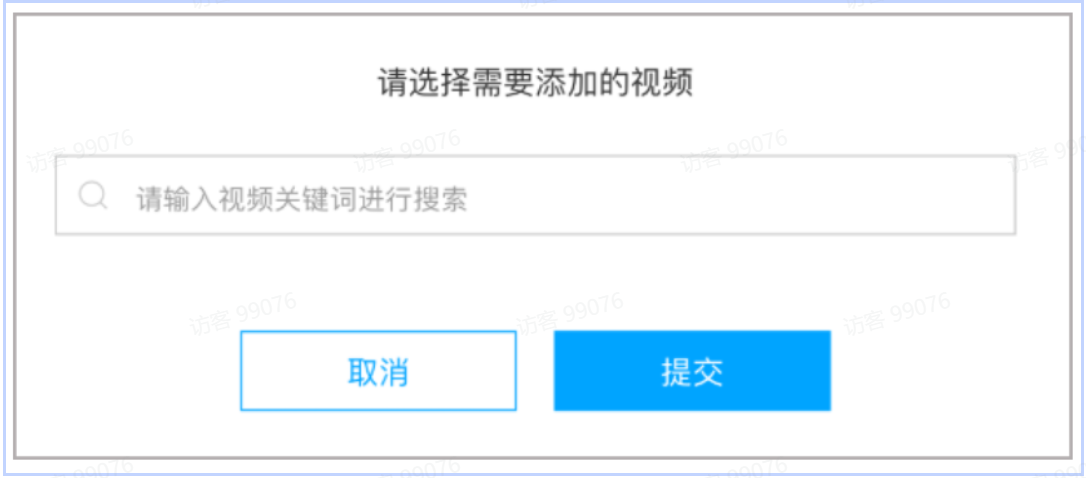
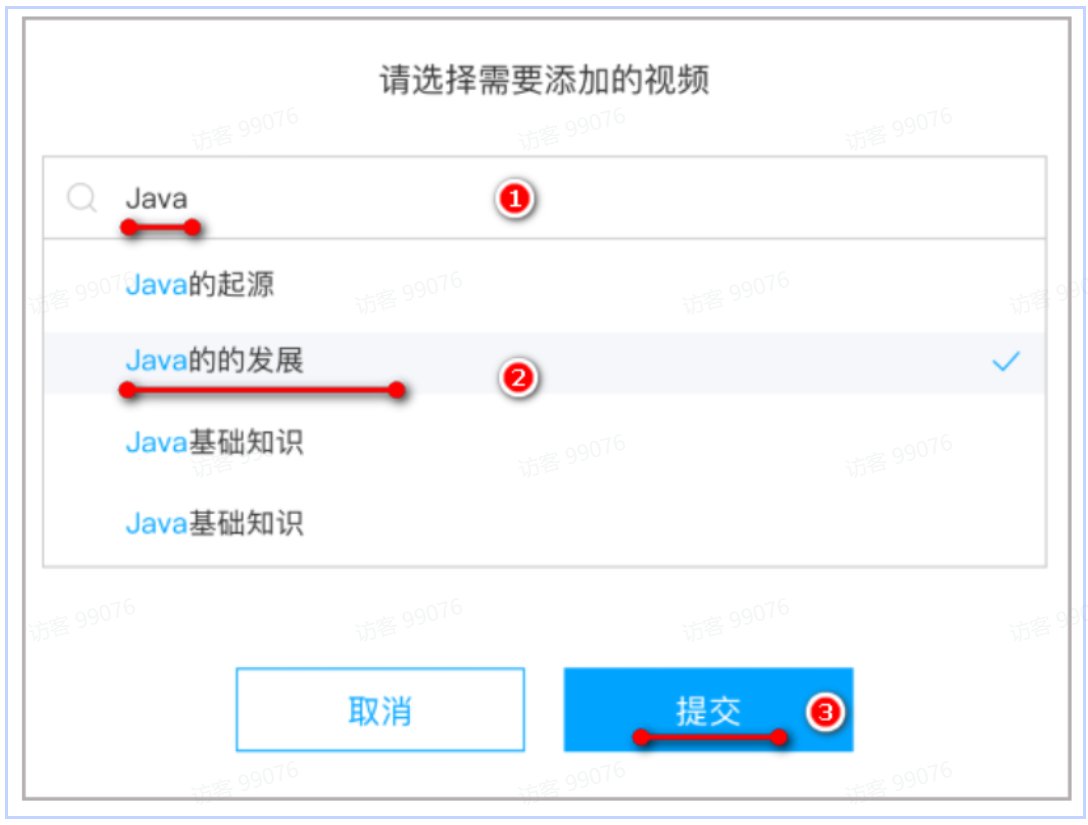
进入课程计划界面,然后选择要绑定的视频进行绑定即可。
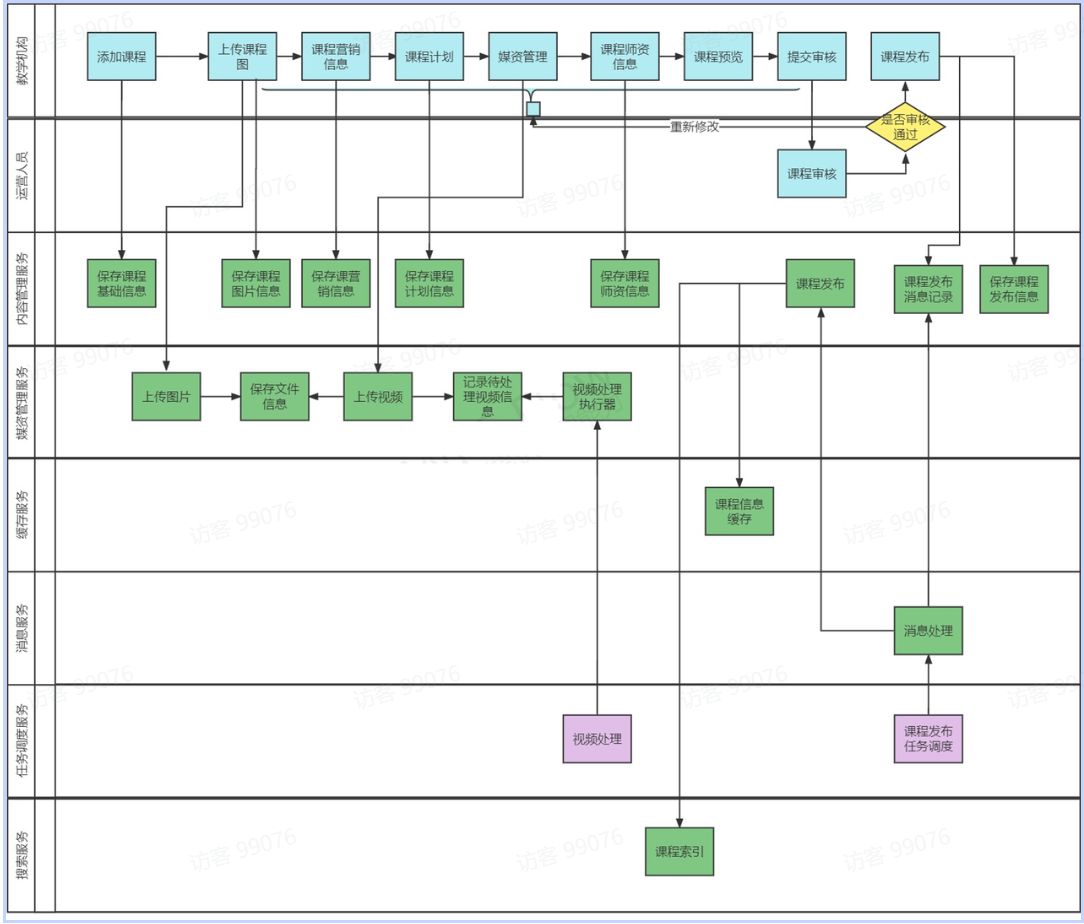
具体的业务流程如下:
课程计划关联视频后如下图:
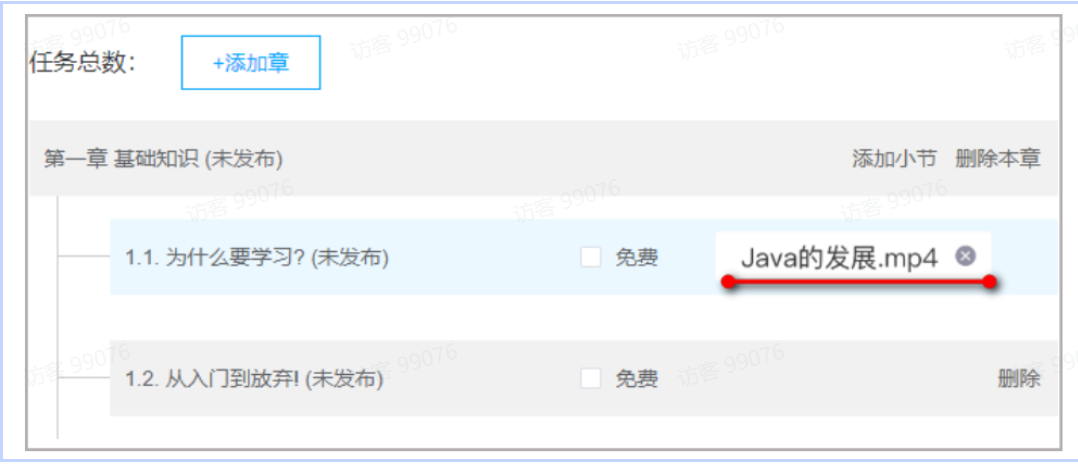
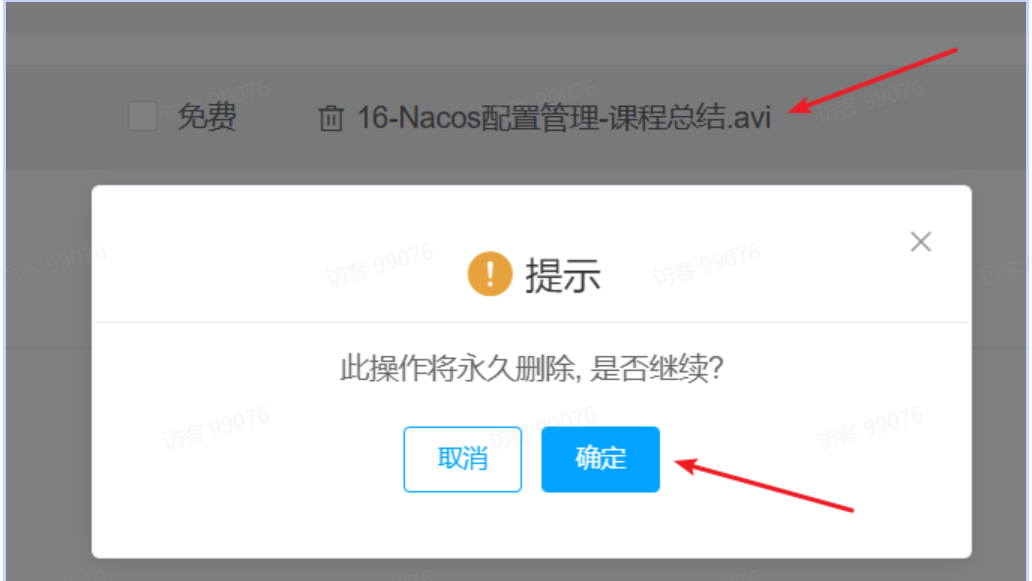
点击已经绑定的视频名称即可解除绑定。
1.1.2 数据模型
课程计划绑定媒资文件后存储至课程计划绑定媒资表
1.2 接口定义
{"mediaId": "70a98b4a2fffc89e50b101f959cc33ca","fileName": "22-Hmily实现TCC事务-开发bank2的confirm方法.avi","teachplanId": 257
}
1.3 代码开发
- 在内容管理模块定义请求参数模型类型:
package com.xuecheng.content.model.dto;import io.swagger.annotations.ApiModel;
import io.swagger.annotations.ApiModelProperty;
import lombok.Data;@Data
@ApiModel(value="BindTeachplanMediaDto", description="教学计划-媒资绑定提交数据")
public class BindTeachplanMediaDto {@ApiModelProperty(value = "媒资文件id", required = true)private String mediaId;@ApiModelProperty(value = "媒资文件名称", required = true)private String fileName;@ApiModelProperty(value = "课程计划标识", required = true)private Long teachplanId;}-
mybatis自动生成mapper接口
package com.xuecheng.content.mapper;import com.baomidou.mybatisplus.core.mapper.BaseMapper;
import com.xuecheng.content.model.dto.TeachplanDto;
import com.xuecheng.content.model.po.Teachplan;import java.util.List;/*** <p>* 课程计划 Mapper 接口* </p>*/
public interface TeachplanMapper extends BaseMapper<Teachplan> {}
-
在TeachplanController类中定义接口如下:
/*** @description 课程计划和媒资信息绑定* @param bindTeachplanMediaDto* @return void*/@ApiOperation(value = "课程计划和媒资信息绑定")@PostMapping("/teachplan/association/media")public void associationMedia(@RequestBody BindTeachplanMediaDto bindTeachplanMediaDto){}-
定义service接口
/*** @description 教学计划绑定媒资* @param bindTeachplanMediaDto* @return com.xuecheng.content.model.po.TeachplanMedia*/public TeachplanMedia associationMedia(BindTeachplanMediaDto bindTeachplanMediaDto);-
实现类实现接口,重写方法
/*** 教学计划绑定媒资* @param bindTeachplanMediaDto* @return*/@Transactional@Overridepublic TeachplanMedia associationMedia(BindTeachplanMediaDto bindTeachplanMediaDto) {//教学计划idLong teachplanId = bindTeachplanMediaDto.getTeachplanId();Teachplan teachplan = teachplanMapper.selectById(teachplanId);if(teachplan==null){XueChengPlusException.cast("教学计划不存在");}Integer grade = teachplan.getGrade();if(grade!=2){XueChengPlusException.cast("只允许第二级教学计划绑定媒资文件");}//课程idLong courseId = teachplan.getCourseId();//先删除原来该教学计划绑定的媒资teachplanMediaMapper.delete(new LambdaQueryWrapper<TeachplanMedia>().eq(TeachplanMedia::getTeachplanId,teachplanId));//再添加教学计划与媒资的绑定关系TeachplanMedia teachplanMedia = new TeachplanMedia();teachplanMedia.setCourseId(courseId);teachplanMedia.setTeachplanId(teachplanId);teachplanMedia.setMediaFilename(bindTeachplanMediaDto.getFileName());teachplanMedia.setMediaId(bindTeachplanMediaDto.getMediaId());teachplanMedia.setCreateDate(LocalDateTime.now());teachplanMediaMapper.insert(teachplanMedia);return teachplanMedia;}2. 课程发布
2.1 模块介绍
课程信息编辑完毕即可发布课程,发布课程相当于一个确认操作,课程发布后学习者在网站可以搜索到课程,然后查看课程的详细信息,进一步选课、支付、在线学习。
下边是课程编辑与发布的整体流程:
为了课程内容没有违规信息、课程内容安排合理,在课程发布之前运营方会进行课程审核,审核通过后课程方可发布。
作为课程制作方即教学机构,在课程发布前通过课程预览功能可以看到课程发布后的效果,哪里的课程信息存在问题方便查看,及时修改。
教学机构确认课程内容无误,提交审核,平台运营人员对课程内容审核,审核通过后教学机构人员发布课程成功。
课程发布模块共包括三块功能:
1、课程预览
2、课程审核
教学机构提交课程审核后,平台运营人员登录运营平台进行课程审核,课程审核包括程序自动审核和人工审核,程序会审核内容的完整性,人员通过课程预览进行审核。
流程如下:
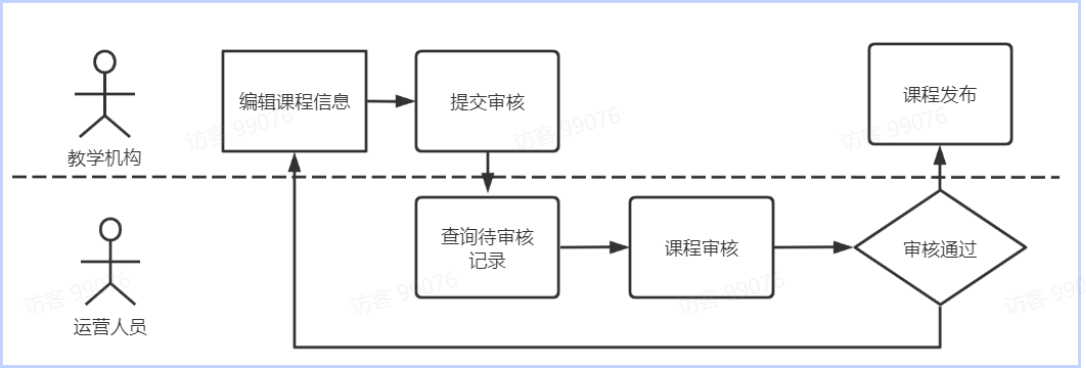
- 首先查询待审核的记录。
- 课程审核
具体审核的过程与课程预览的过程类似,运营人员查看课程信息、课程视频等内容。
如果存在问题则审核不通过,并附上审核不通过的原因供教学机构人员查看。
如果课程内容没有违规信息且课程内容全面则审核通过。
课程审核通过后教学机构发布课程成功。
3、课程发布
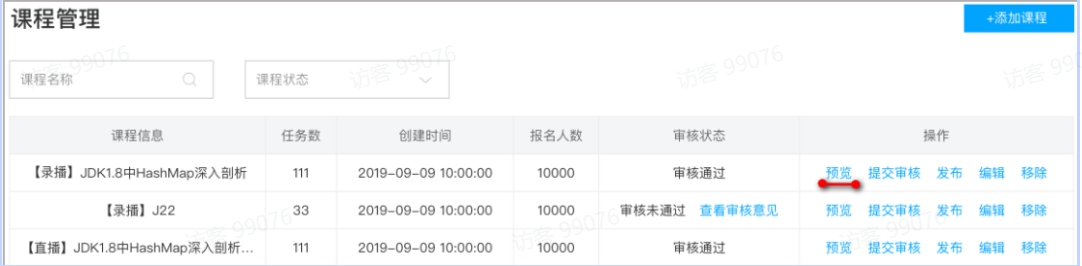
教育机构用户在课程管理中可对机构内课程进行检索
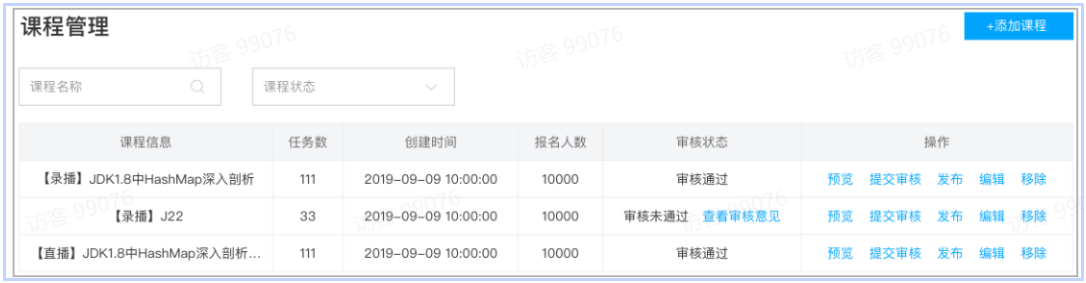
点击某课程数据后的 发布 链接(审核状态为通过),即可对该课程进行发布。
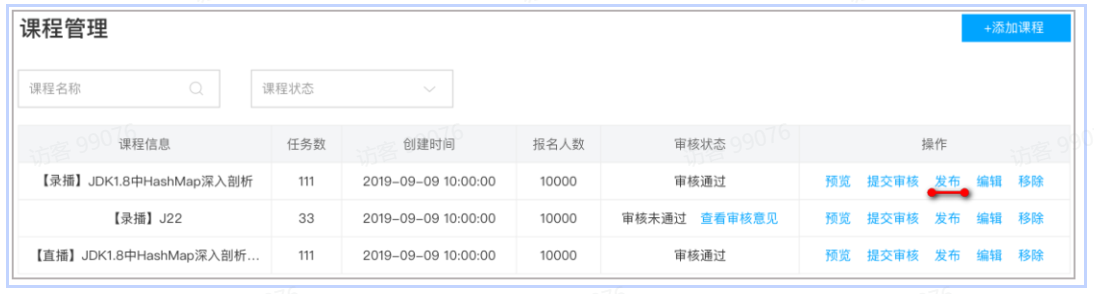
课程发布后可通过课程搜索查询到课程信息,并查看课程的详细信息。
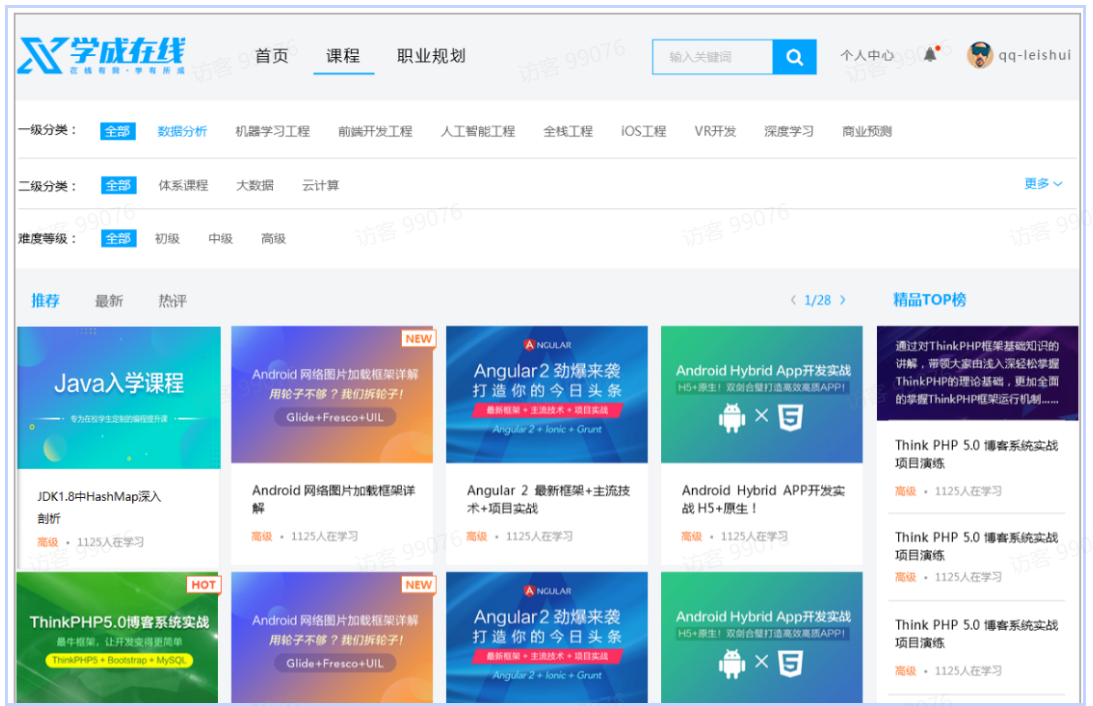
点击课程搜索页中课程列表的某个课程,可进入课程详情页。
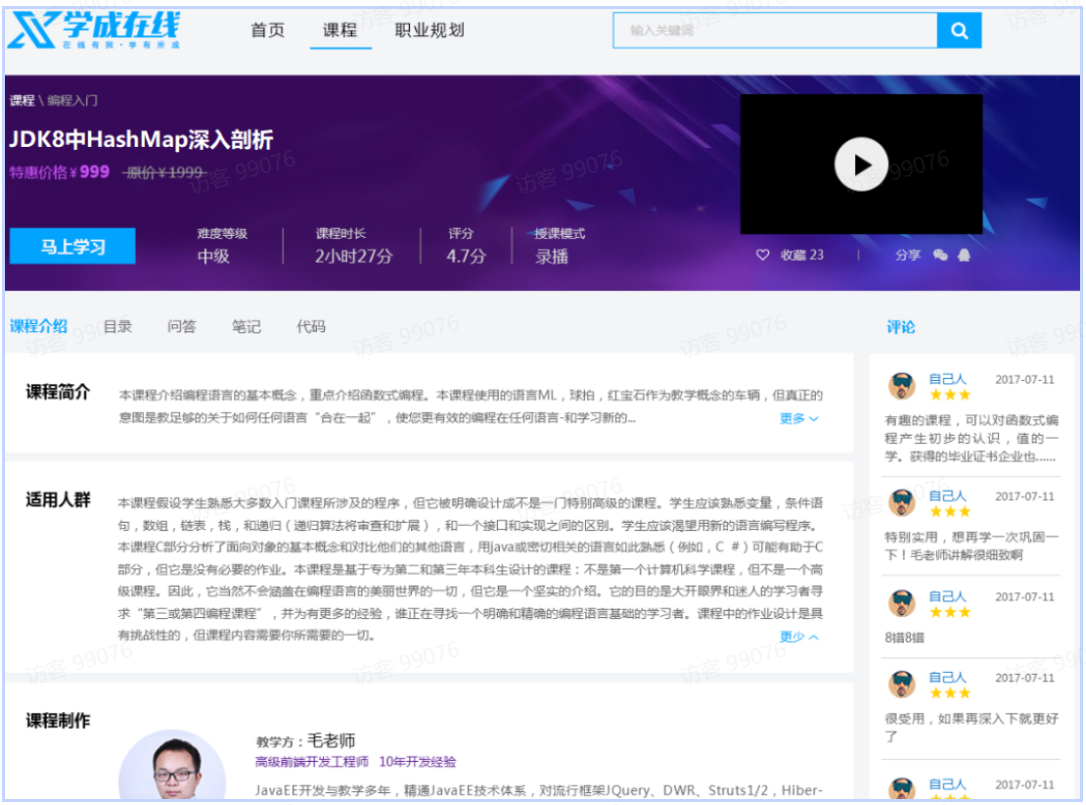
2.2 课程预览
2.2.1 需求分析
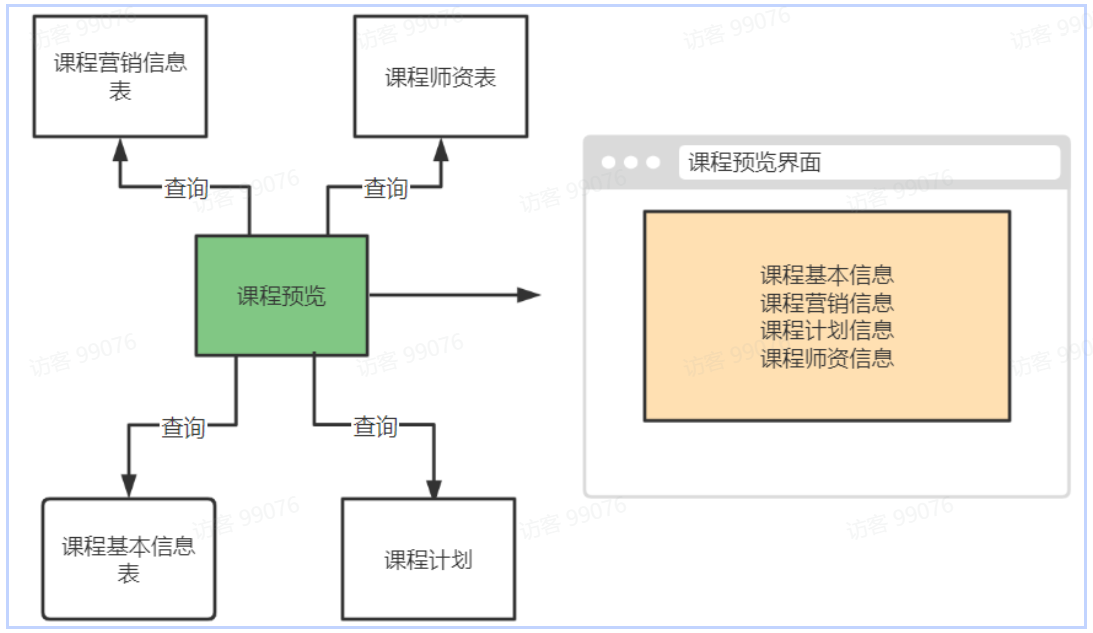
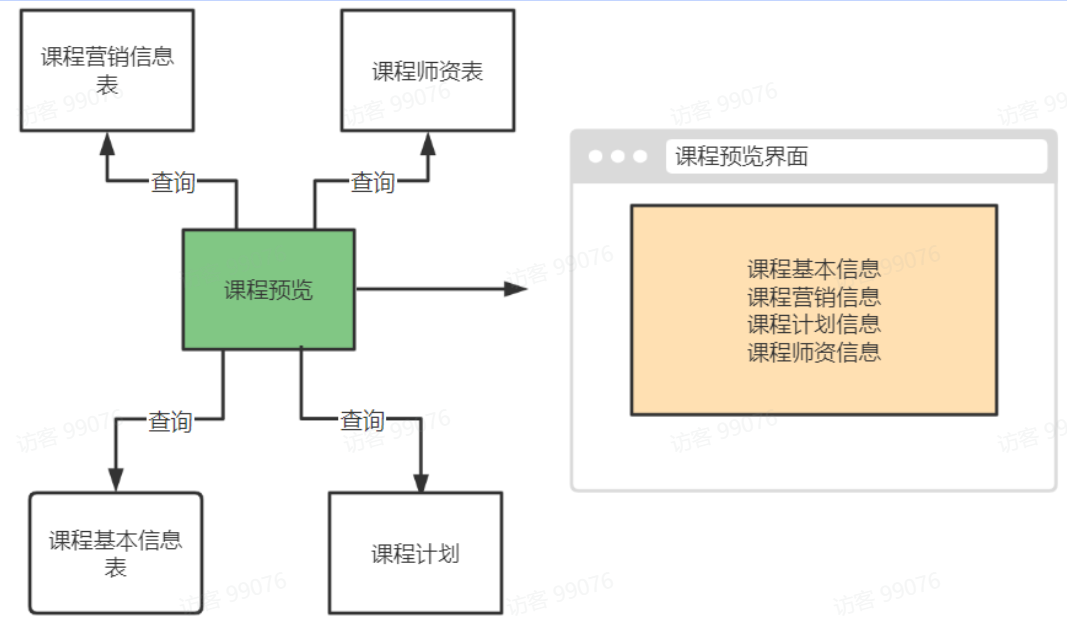
课程预览的数据来源:
课程预览的效果与最终课程发布后查看到的效果是一致的,所以课程预览时会通过网站门户域名地址进行预览,下图显示了整个课程预览的流程图:
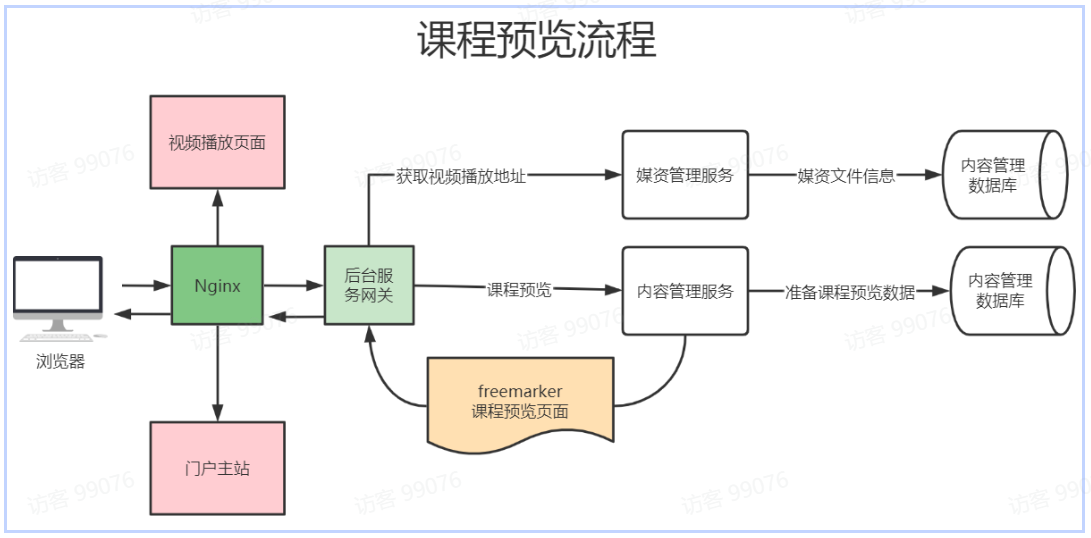
说明如下:
1、点击课程预览,通过Nginx、后台服务网关请求内容管理服务进行课程预览。
2、内容管理服务查询课程相关信息进行整合,并通过模板引擎技术在服务端渲染生成页面,返回给浏览器。
3、通过课程预览页面点击”马上学习“打开视频播放页面。
4、视频播放页面通过Nginx请求后台服务网关,查询课程信息展示课程计划目录,请求媒资服务查询课程计划绑定的视频文件地址,在线浏览播放视频。
2.2.2 模板引擎
2.2.2.1 什么是模板引擎
早期我们采用的jsp技术就是一种模板引擎技术
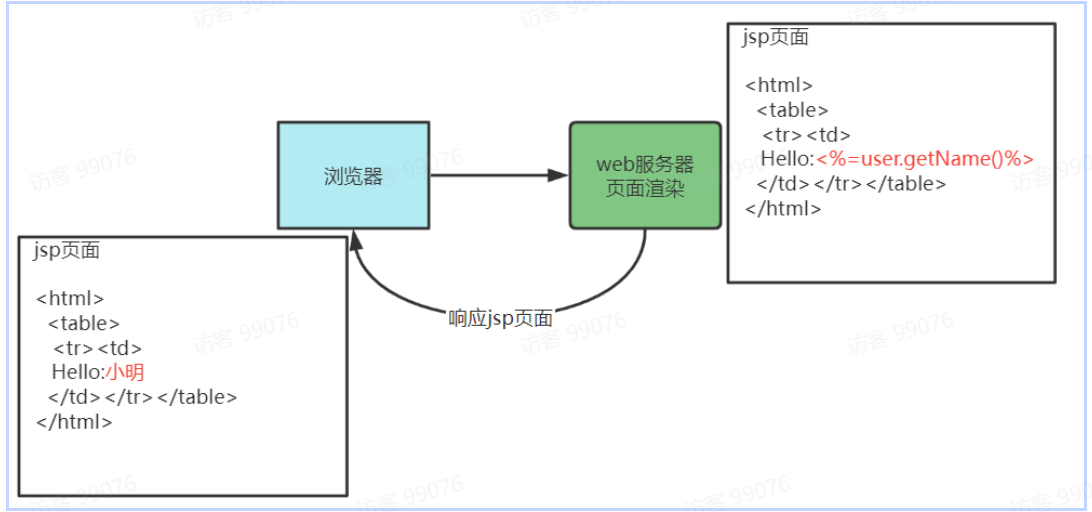
1、浏览器请求web服务器
2、服务器渲染页面,渲染的过程就是向jsp页面(模板)内填充数据(模型)。
3、服务器将渲染生成的页面返回给浏览器。
所以模板引擎就是:模板+数据=输出,Jsp页面就是模板,页面中嵌入的jsp标签就是数据,两者相结合输出html网页。
本项目采用Freemarker作为模板引擎技术。
Freemarker官方地址:http://freemarker.foofun.cn/
FreeMarker 是一款 模板引擎: 即一种基于模板和要改变的数据, 并用来生成输出文本(HTML网页,电子邮件,配置文件,源代码等)的通用工具。 它不是面向最终用户的,而是一个Java类库,是一款程序员可以嵌入他们所开发产品的组件。
2.2.2.2 Freemarker快速入门
- 导入依赖
<!-- Spring Boot 对结果视图 Freemarker 集成 -->
<dependency><groupId>org.springframework.boot</groupId><artifactId>spring-boot-starter-freemarker</artifactId>
</dependency>- 在nacos为内容管理接口层配置freemarker,公用配置组新加一个freemarker-config-dev.yaml
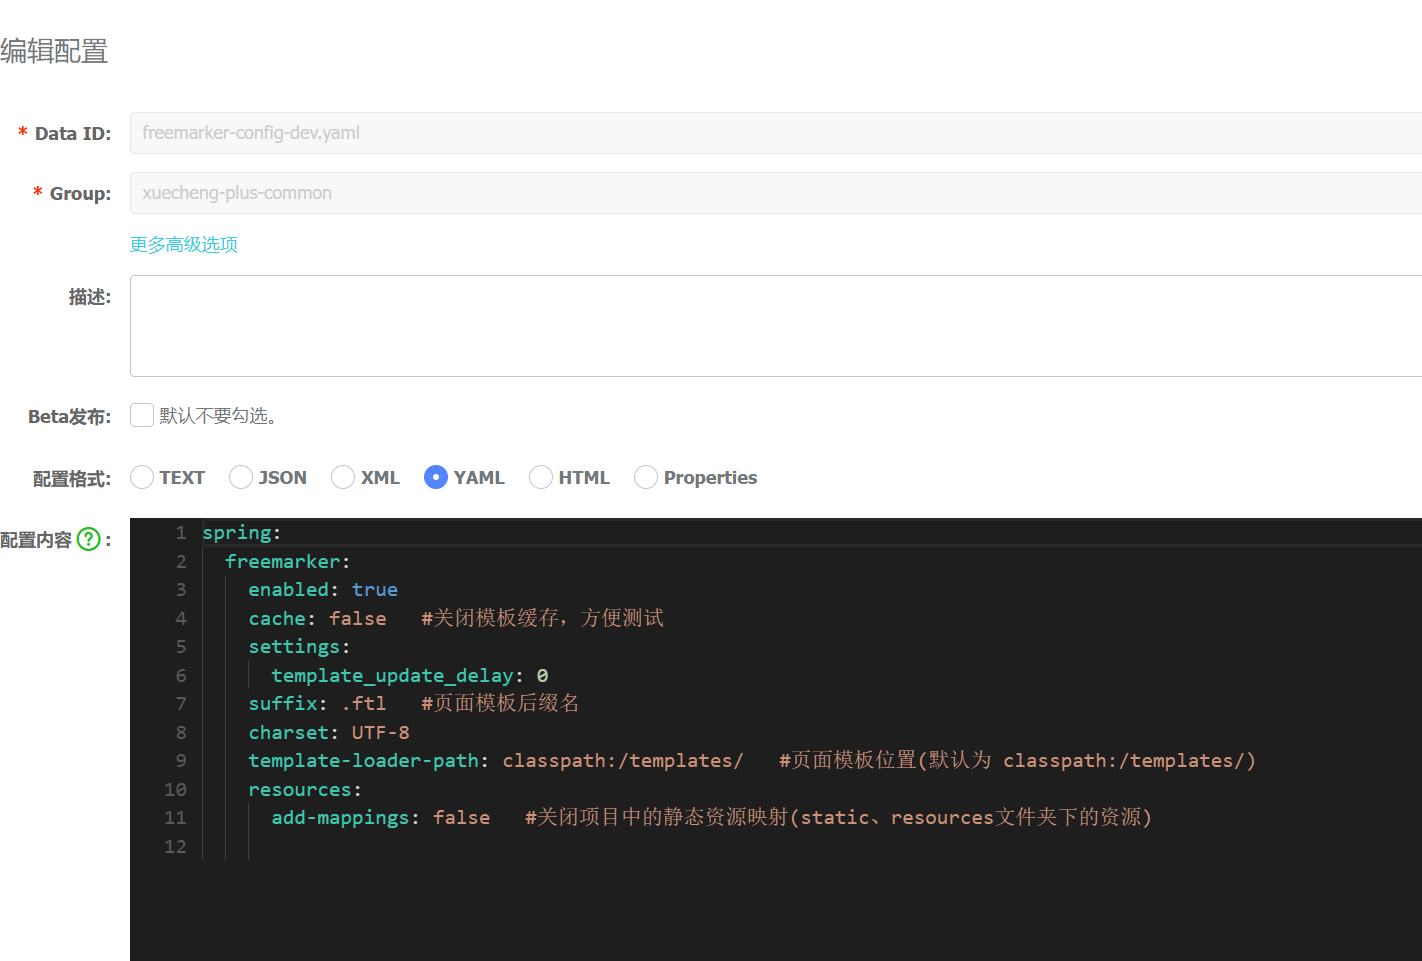
spring:freemarker:enabled: truecache: false #关闭模板缓存,方便测试settings:template_update_delay: 0suffix: .ftl #页面模板后缀名charset: UTF-8template-loader-path: classpath:/templates/ #页面模板位置(默认为 classpath:/templates/)resources:add-mappings: false #关闭项目中的静态资源映射(static、resources文件夹下的资源)- 在内容管理接口工程添加freemarker-config-dev.yaml
spring:application:name: content-api #服务名 content-api-dev.yamlcloud:nacos:server-addr: 192.168.101.65:8848discovery: #服务注册相关配置namespace: dev402group: xuecheng-plus-projectconfig: #配置文件相关配置namespace: dev402group: xuecheng-plus-projectfile-extension: yamlrefresh-enabled: trueextension-configs:- data-id: content-service-${spring.profiles.active}.yamlgroup: xuecheng-plus-projectrefresh: trueshared-configs:- data-id: swagger-${spring.profiles.active}.yamlgroup: xuecheng-plus-commonrefresh: true- data-id: logging-${spring.profiles.active}.yamlgroup: xuecheng-plus-commonrefresh: true- data-id: freemarker-config-dev.yamlgroup: xuecheng-plus-commonefresh: true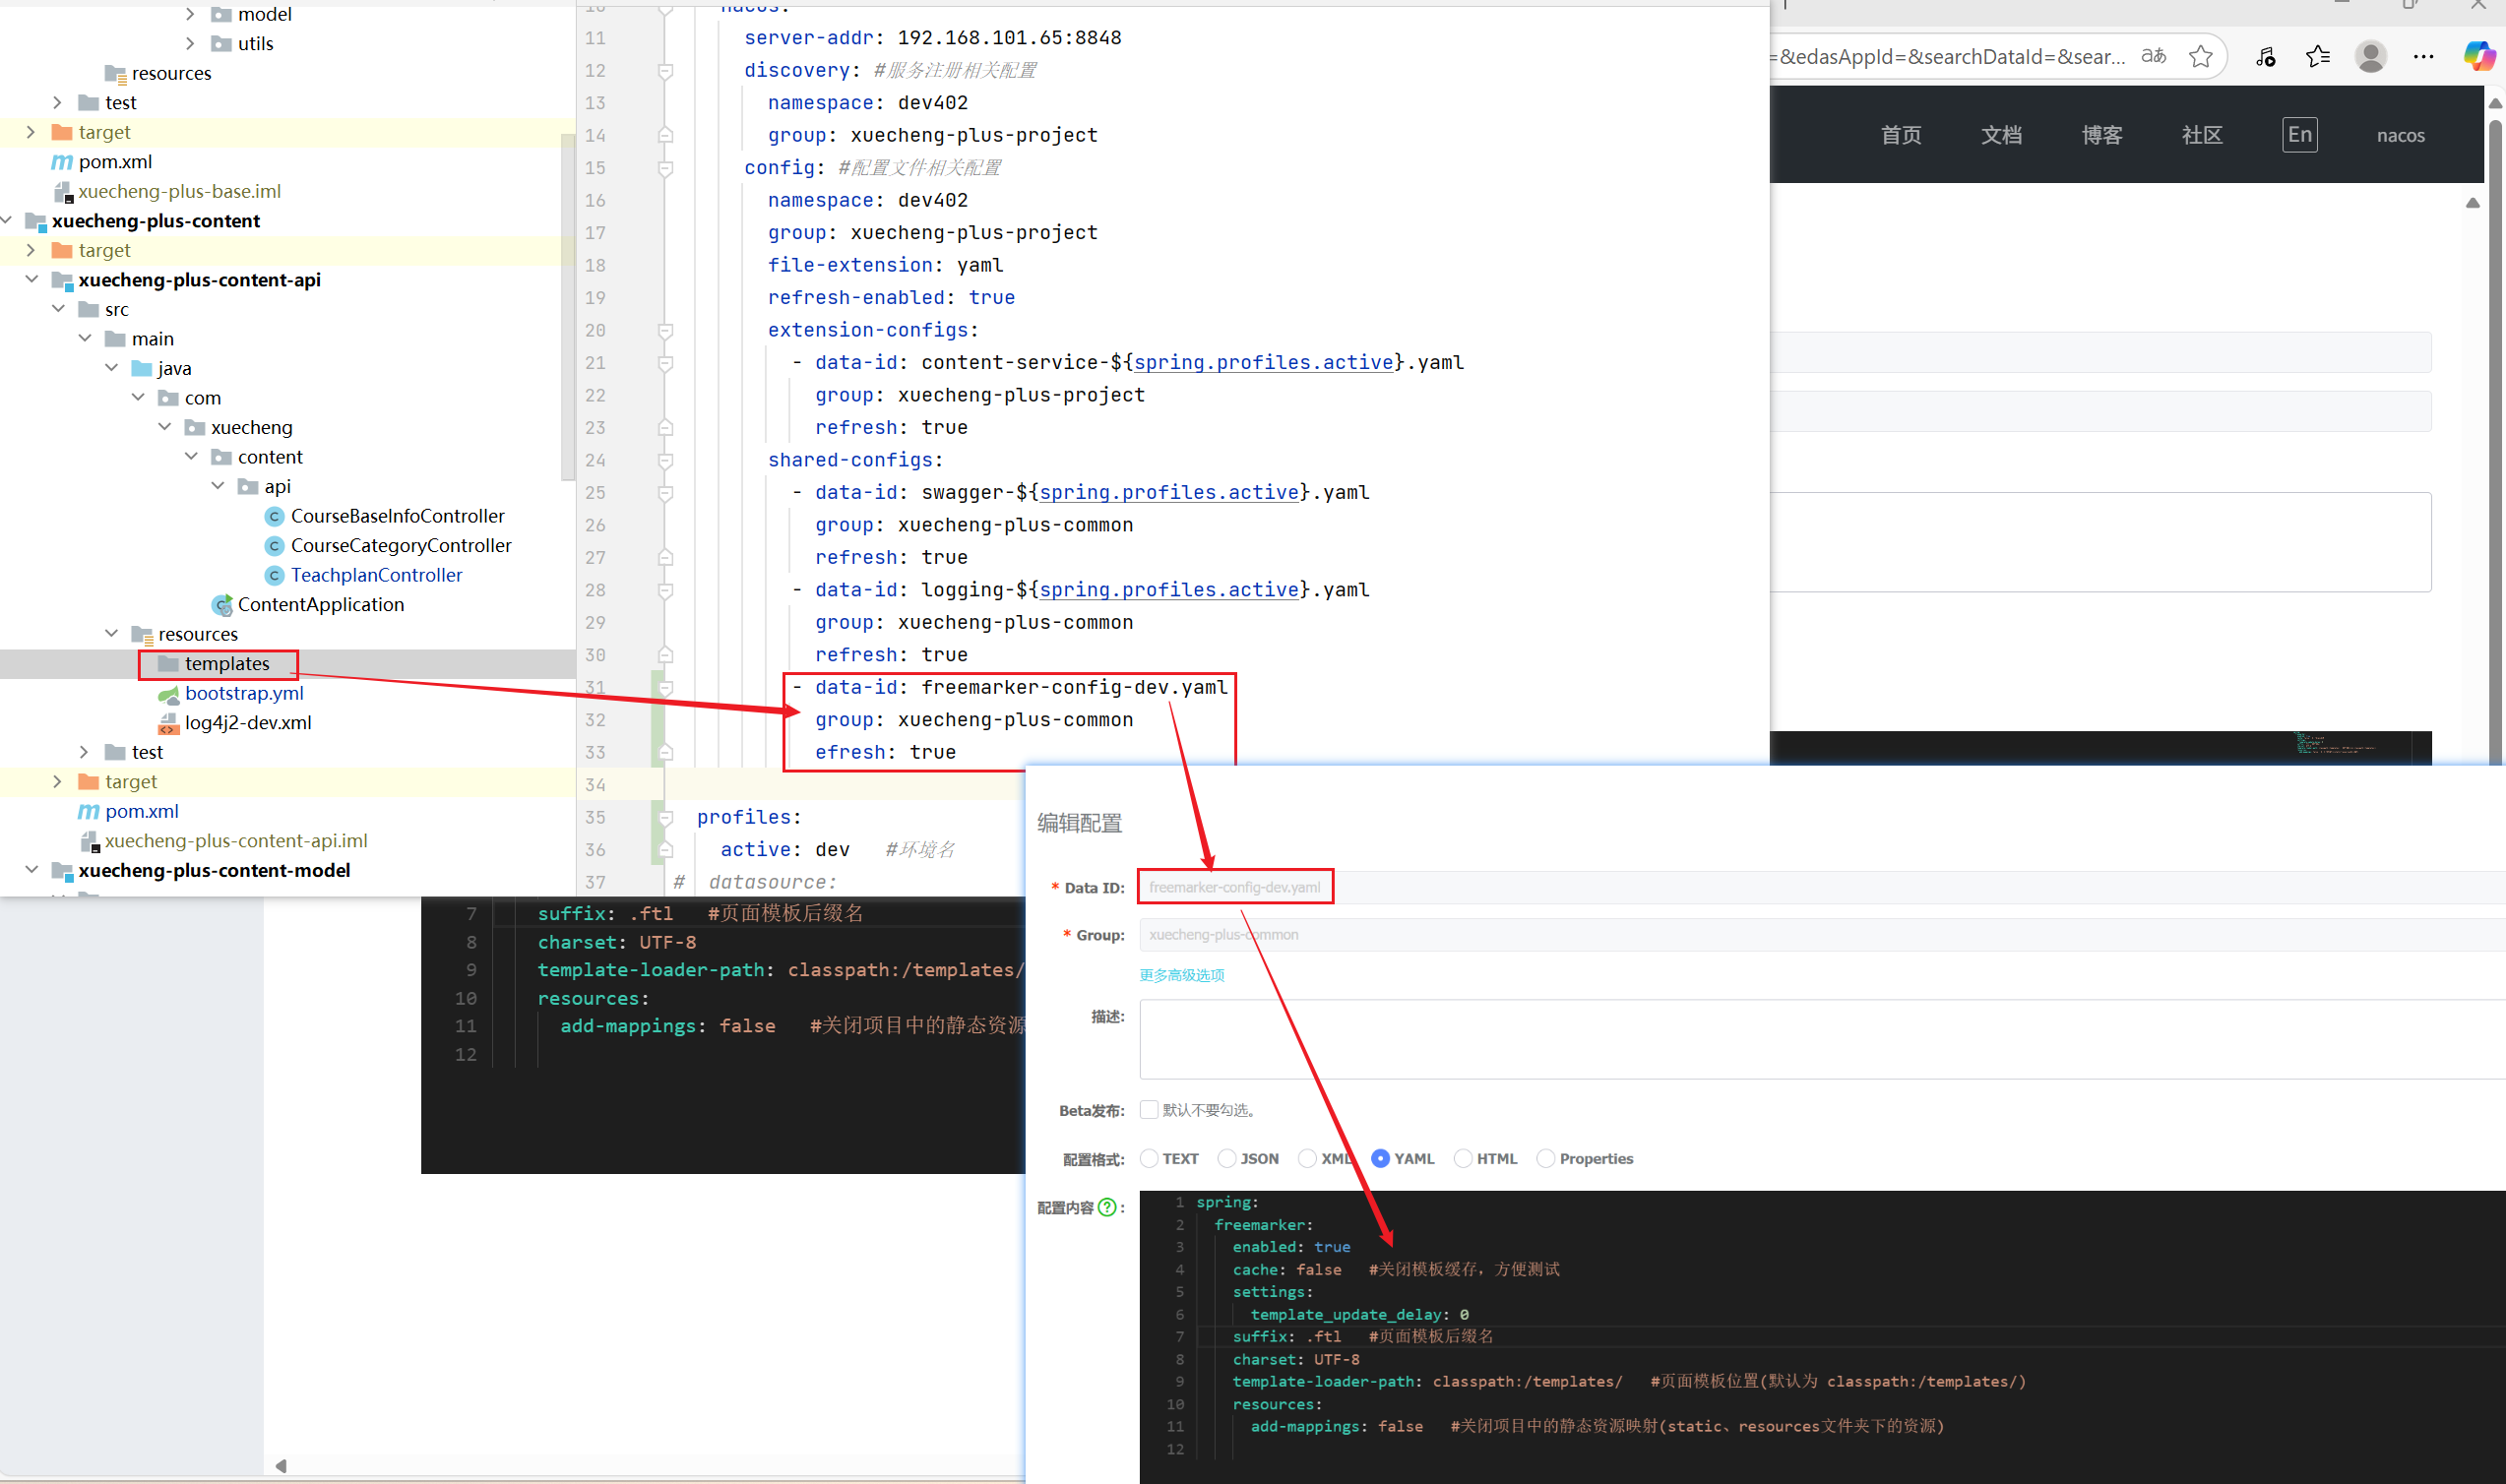
-
添加模板,在resources下创建templates目录,添加test.ftl模板文件
<!DOCTYPE html>
<html>
<head><meta charset="utf-8"><title>Hello World!</title>
</head>
<body>
Hello ${name}!
</body>
</html>-
编写controller方法,准备模型数据
package com.xuecheng.content.api;import org.bouncycastle.math.raw.Mod;
import org.springframework.stereotype.Controller;
import org.springframework.web.bind.annotation.GetMapping;
import org.springframework.web.servlet.ModelAndView;/*** @description freemarker测试*/
@Controller
public class FreemarkerController {@GetMapping("/testfreemarker")public ModelAndView test(){ModelAndView modelAndView = new ModelAndView();// 指定模型数据modelAndView.addObject("name","小明");//指定 模板名称modelAndView.setViewName("test"); // 根据视图名称.ftl 找到模板return modelAndView;}}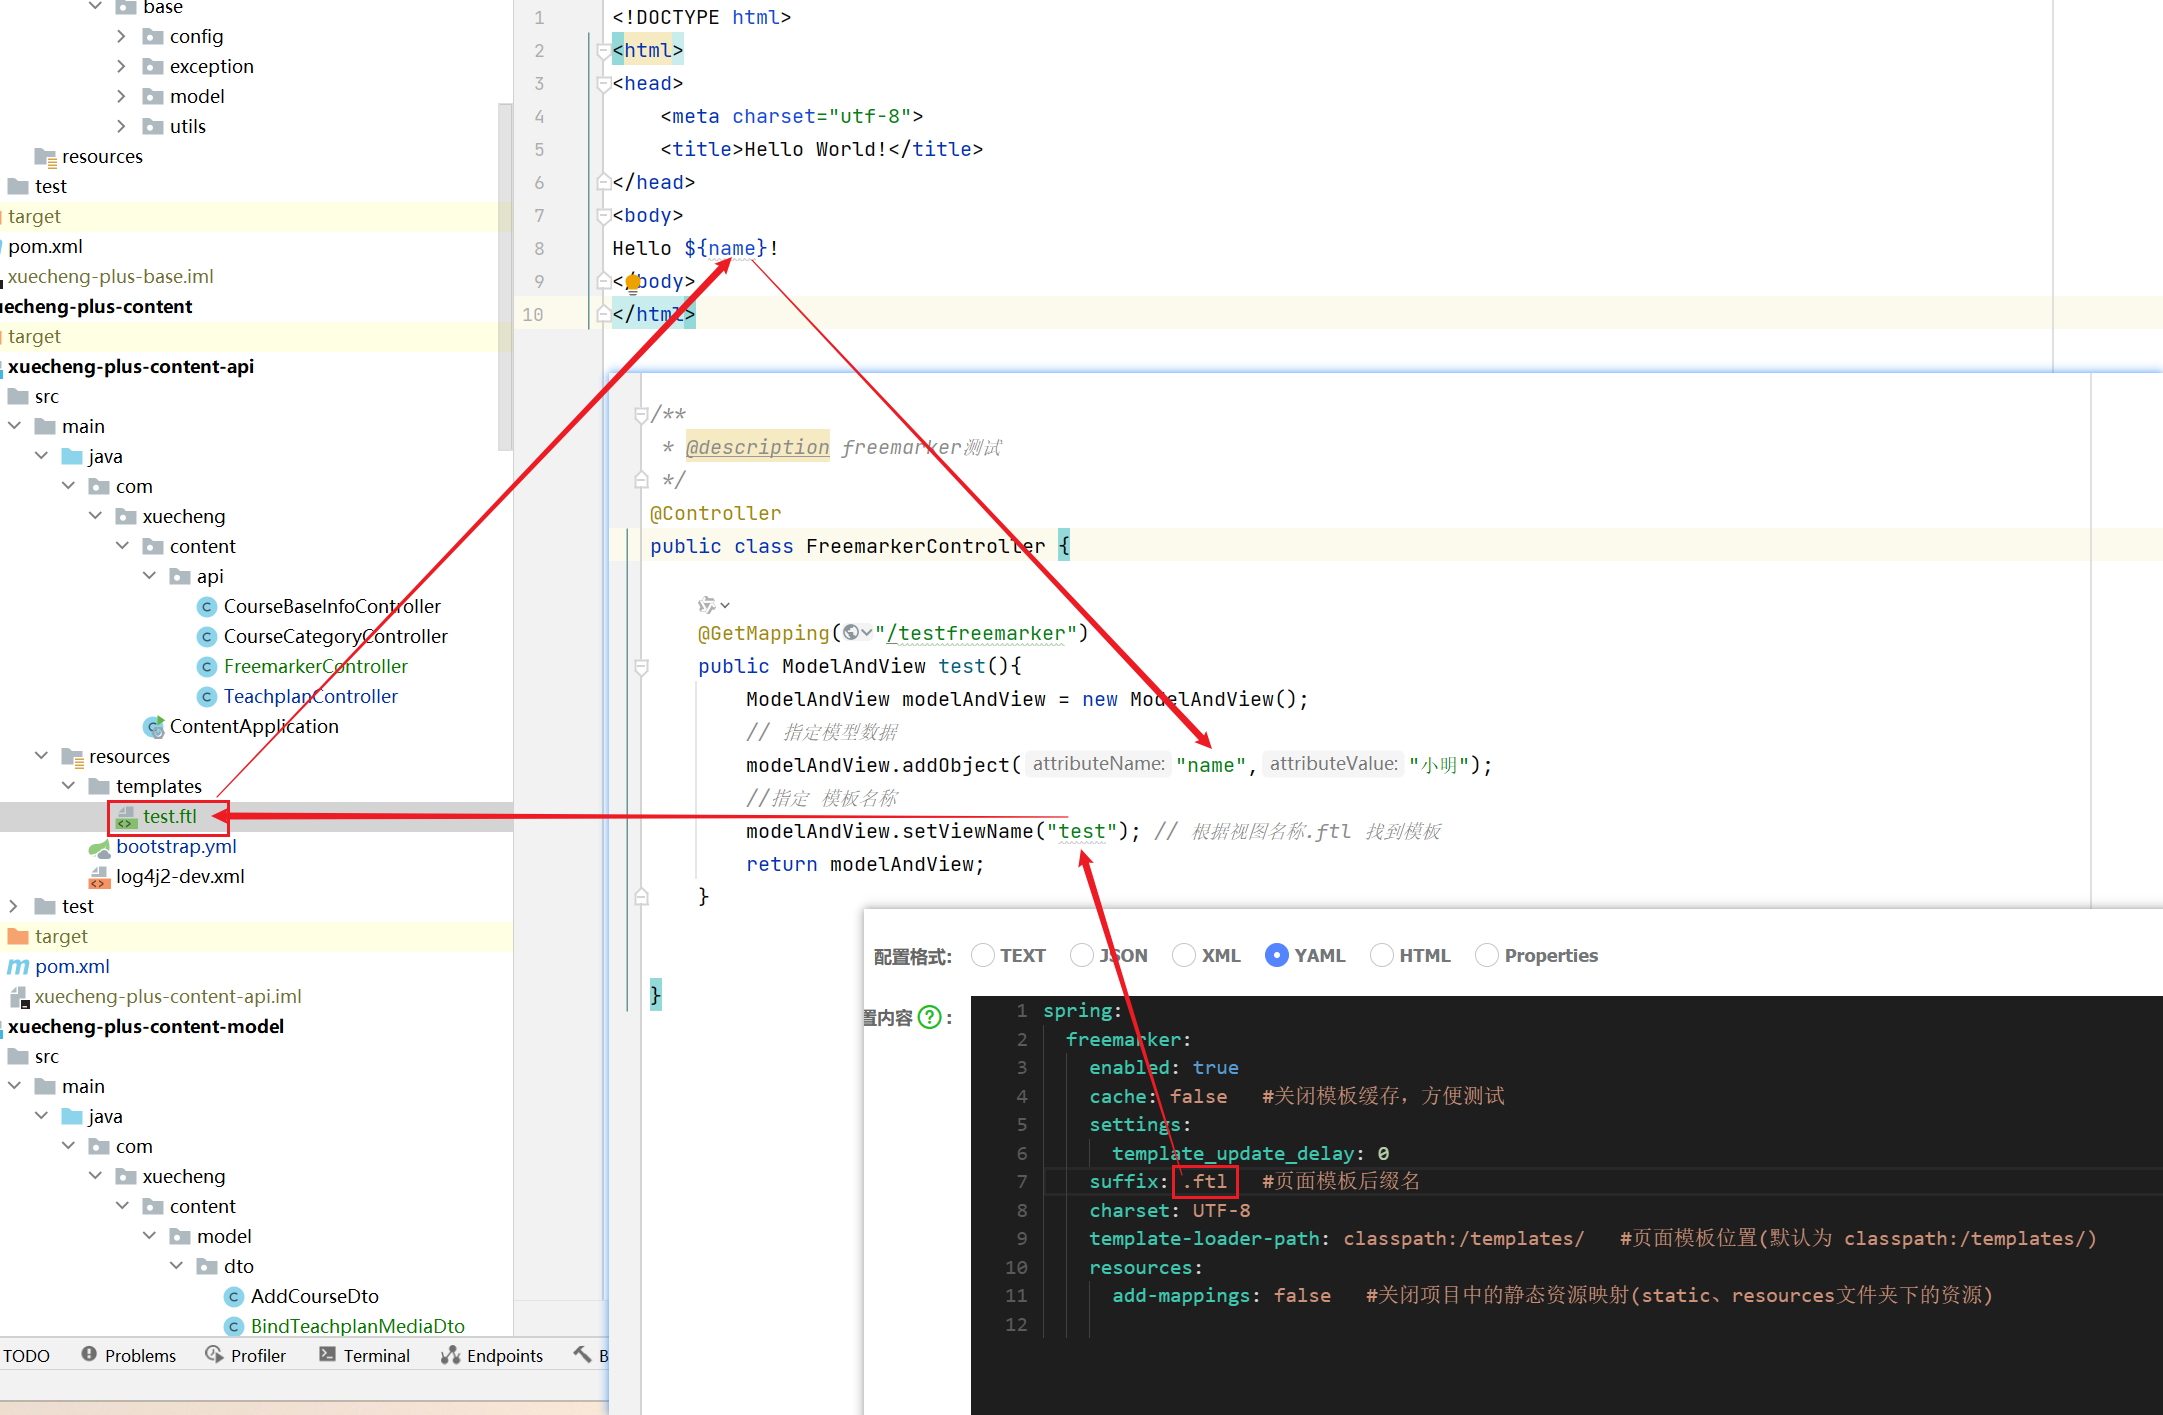
2.2.3 测试静态页面
2.2.3.1 部署网站门户
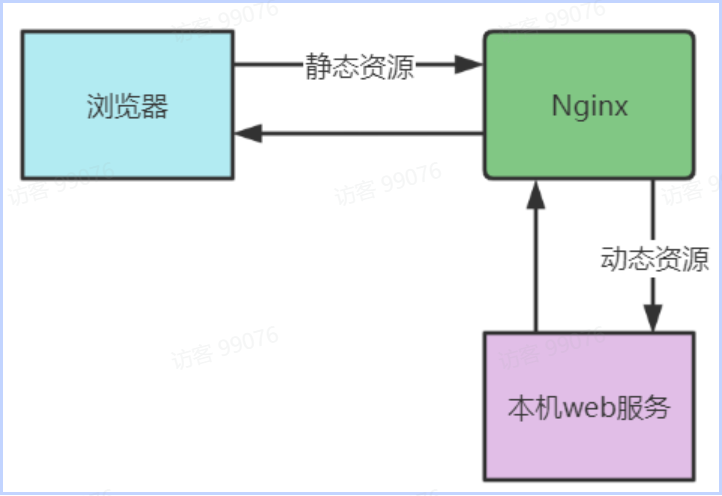
在课程预览界面上要加载css、js、图片等内容,这里部署nginx来访问这些静态资源,对于SpringBoot服务的动态资源由Nginx去代理请求,如下图
1、在本机安装 Nginx ,从课程资料目录获取nginx-1.23.1.zip并解压。
2、运行nginx-1.23.1目录下的nginx.exe。
默认端口为80,如果本机80端口被占用,则需要杀掉占用进程后再启动nginx。
如果无法杀掉80端口占用进程则需要修改nginx-1.23.1目录下conf/nginx.conf配置文件

将80端口修改为空闲端口。
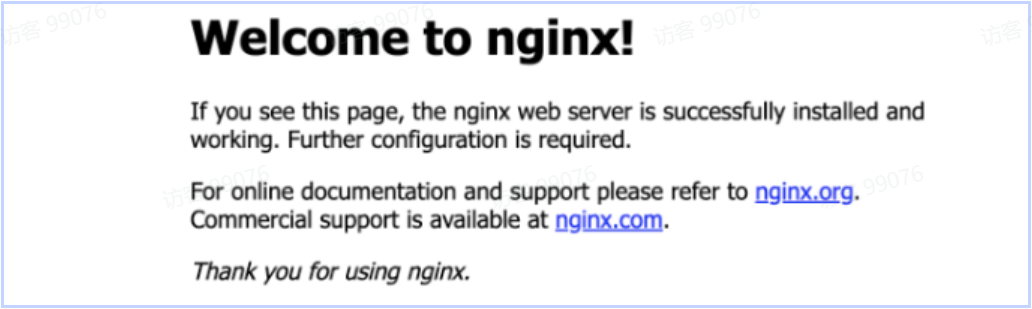
启动nginx,访问http://localhost 出现下边的网页表示启动成功
下边开始部署前端工程:
1、从课程资料目录获取xc-ui-pc-static-portal.zip 并解压。
2、修改本机hosts文件,加入127.0.0.1 www.51xuecheng.cn 51xuecheng.cn ucenter.51xuecheng.cn teacher.51xuecheng.cn file.51xuecheng.cn。
window10操作系统hosts文件在C:\Windows\System32\drivers\etc下
Centos7操作系统的hosts文件在/etc目录下。
在hosts文件加入如下配置
127.0.0.1 www.51xuecheng.cn 51xuecheng.cn ucenter.51xuecheng.cn teacher.51xuecheng.cn file.51xuecheng.cn3、在nginx-1.23.1目录中找到conf目录,配置目录下的nginx.conf文件。
配置内容如下,注意更改xc-ui-pc-static-portal目录的路径:
http {include       mime.types;default_type  application/octet-stream;client_max_body_size 100M; # 设置客户端请求体最大值client_body_buffer_size 128k; # 设置请求体缓存区大小#log_format  main  '$remote_addr - $remote_user [$time_local] "$request" '#                  '$status $body_bytes_sent "$http_referer" '#                  '"$http_user_agent" "$http_x_forwarded_for"';#access_log  logs/access.log  main;sendfile        on;#tcp_nopush     on;#keepalive_timeout  0;keepalive_timeout  65;#gzip  on;
server {listen       80;server_name  www.51xuecheng.cn localhost;#rewrite ^(.*) https://$server_name$1 permanent;#charset koi8-r;ssi on;ssi_silent_errors on;#access_log  logs/host.access.log  main;location / {alias   D:/itcast2022/xc_edu3.0/code_1/xc-ui-pc-static-portal/;index  index.html index.htm;}#静态资源location /static/img/ {  alias  D:/itcast2022/xc_edu3.0/code_1/xc-ui-pc-static-portal/img/;} location /static/css/ {  alias   D:/itcast2022/xc_edu3.0/code_1/xc-ui-pc-static-portal/css/;} location /static/js/ {  alias   D:/itcast2022/xc_edu3.0/code_1/xc-ui-pc-static-portal/js/;} location /static/plugins/ {  alias   D:/itcast2022/xc_edu3.0/code_1/xc-ui-pc-static-portal/plugins/;add_header Access-Control-Allow-Origin http://ucenter.51xuecheng.cn;  add_header Access-Control-Allow-Credentials true;  add_header Access-Control-Allow-Methods GET;} location /plugins/ {  alias   D:/itcast2022/xc_edu3.0/code_1/xc-ui-pc-static-portal/plugins/;} #error_page  404              /404.html;# redirect server error pages to the static page /50x.html#error_page   500 502 503 504  /50x.html;location = /50x.html {root   html;}# proxy the PHP scripts to Apache listening on 127.0.0.1:80##location ~ \.php$ {#    proxy_pass   http://127.0.0.1;#}# pass the PHP scripts to FastCGI server listening on 127.0.0.1:9000##location ~ \.php$ {#    root           html;#    fastcgi_pass   127.0.0.1:9000;#    fastcgi_index  index.php;#    fastcgi_param  SCRIPT_FILENAME  /scripts$fastcgi_script_name;#    include        fastcgi_params;#}# deny access to .htaccess files, if Apache's document root# concurs with nginx's one##location ~ /\.ht {#    deny  all;#}}
}
启动nginx:
进入任务管理器,杀死nginx的两个进程
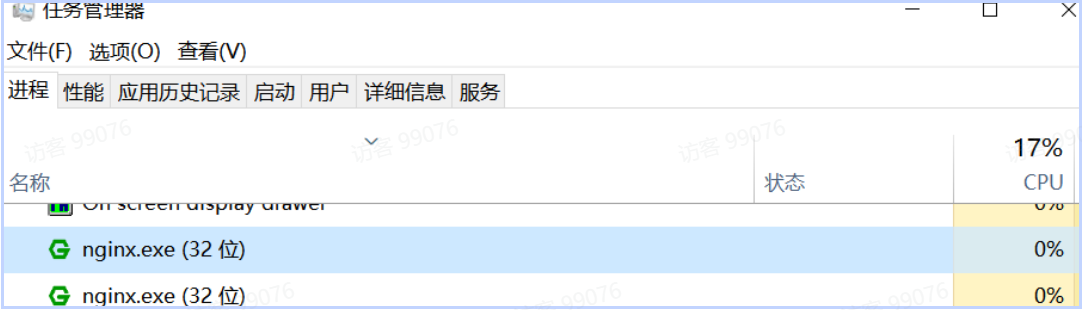
杀死后再次双击nginx.exe。
启动成功在任务管理器会出现nginx的进程。
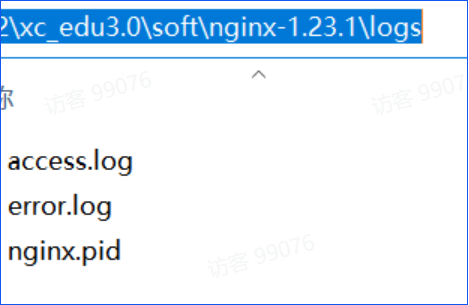
日志文件在nginx安装目录下的logs目录:
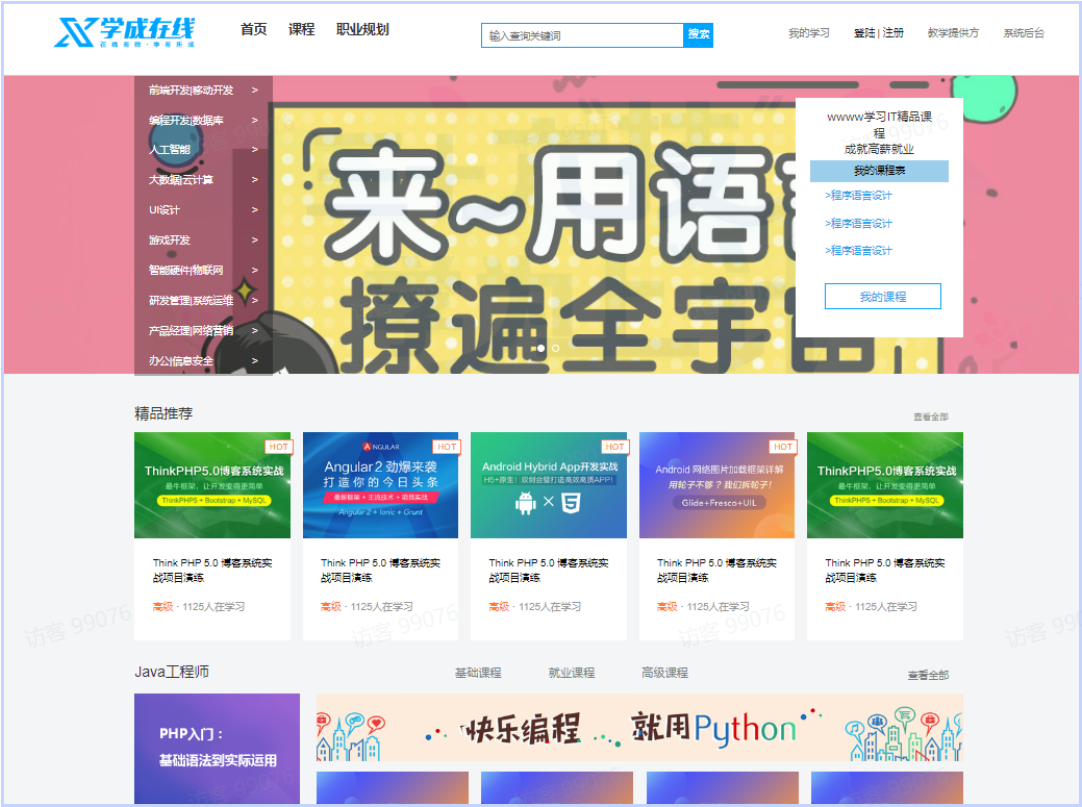
启动成功访问http://www.51xuecheng.cn
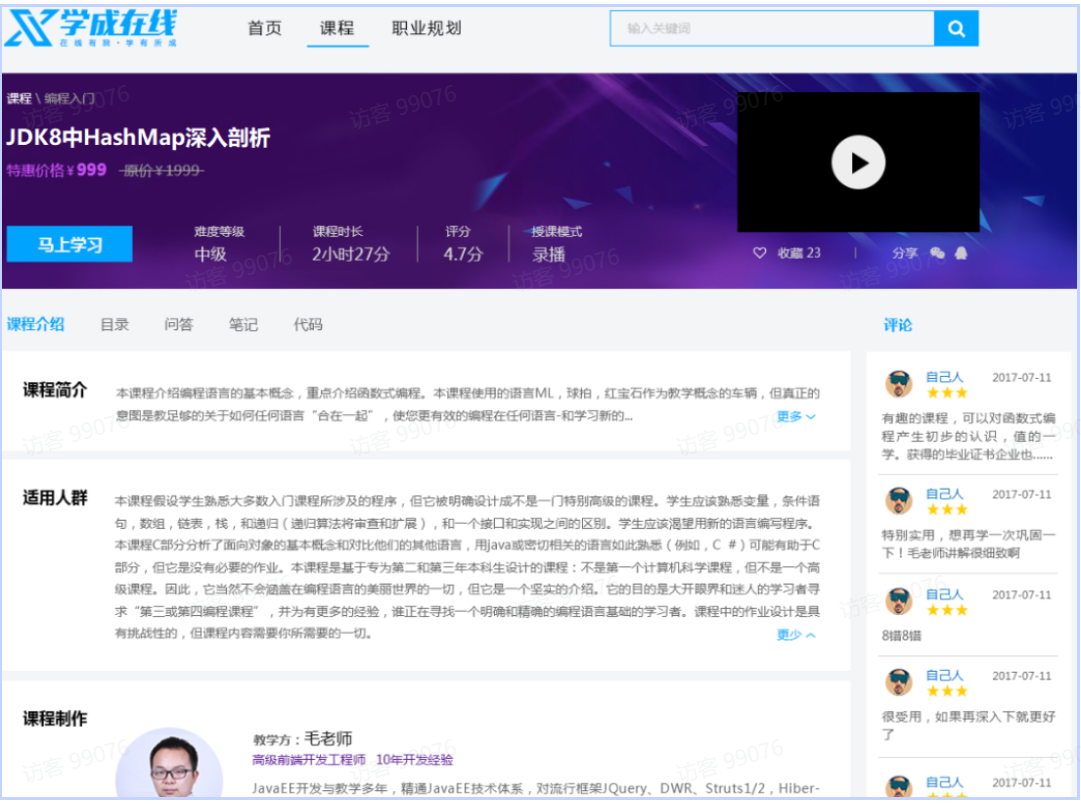
2.2.3.2 课程详情页面
course_template.html是一个静态html页面,里边还没有添加freemarker标签,如果要预览该页面需要借助Nginx进行预览,因为页面需要加载一些css样式表、图片等内容。
course_template.html文件在xc-ui-pc-static-portal\course目录下
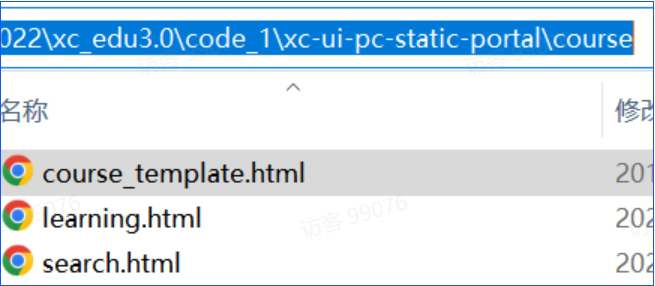
通过浏览器访问:http://www.51xuecheng.cn/course/course_template.html
效果如下:
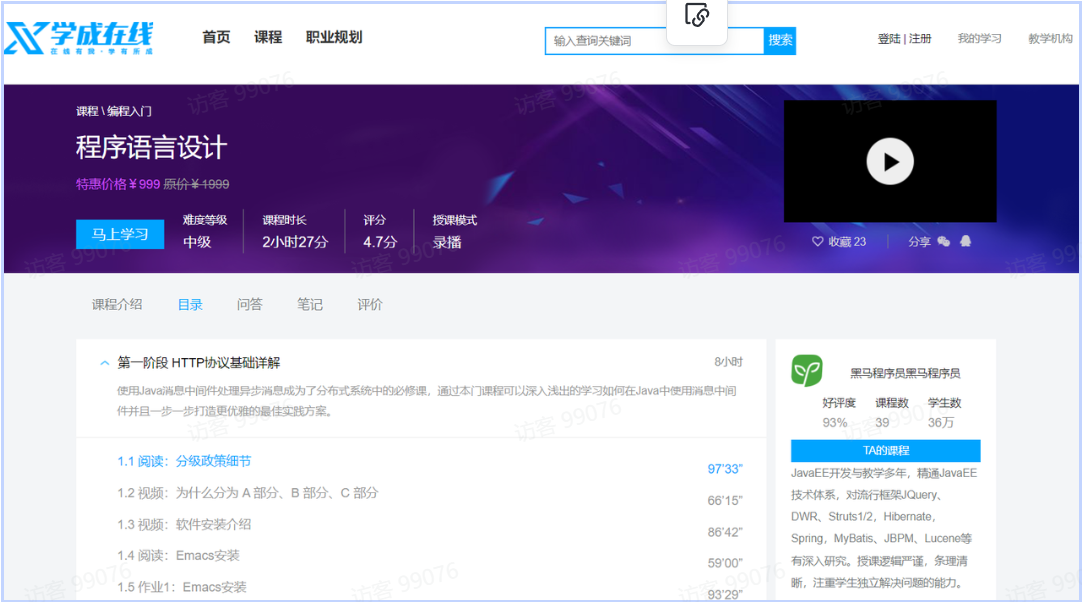
出现这个画面说明模板文件正常浏览是没有问题的。
2.2.3.3 文件服务器
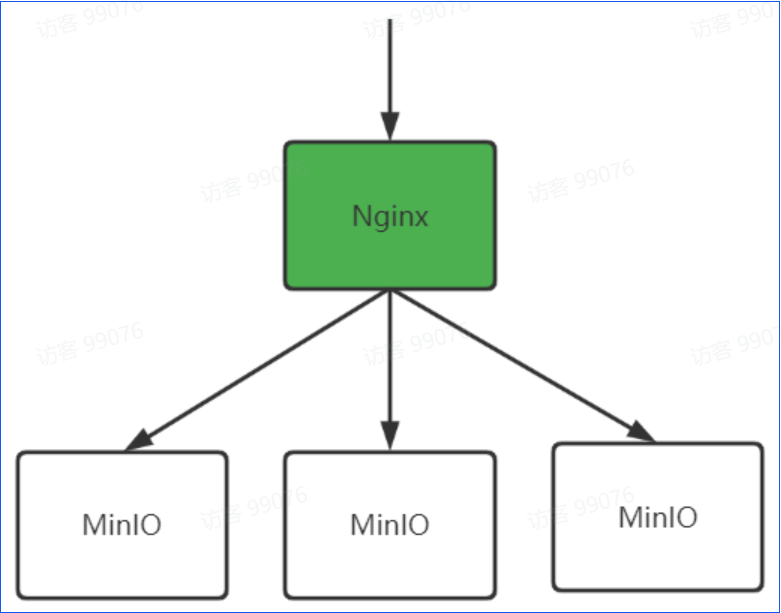
在进行课程预览时需要展示课程的图片,在线插放课程视频,课程图片、视频这些都在MinIO文件系统存储,下边统一由Nginx代理,通过文件服务域名统一访问。如下图:
在hosts文件配置如下内容,如果已存在不要重复配置。
127.0.0.1 www.51xuecheng.cn file.51xuecheng.cn在nginx.conf中配置文件服务器的代理地址
#文件服务upstream fileserver{server 192.168.101.65:9000 weight=10;} server {listen 80;server_name file.51xuecheng.cn;#charset koi8-r;ssi on;ssi_silent_errors on;#access_log logs/host.access.log main;location /video {proxy_pass http://fileserver;}location /mediafiles {proxy_pass http://fileserver;}}配置完毕,重新加载nginx配置文件。
通过cmd进入nginx.exe所在目录,运行如下命令
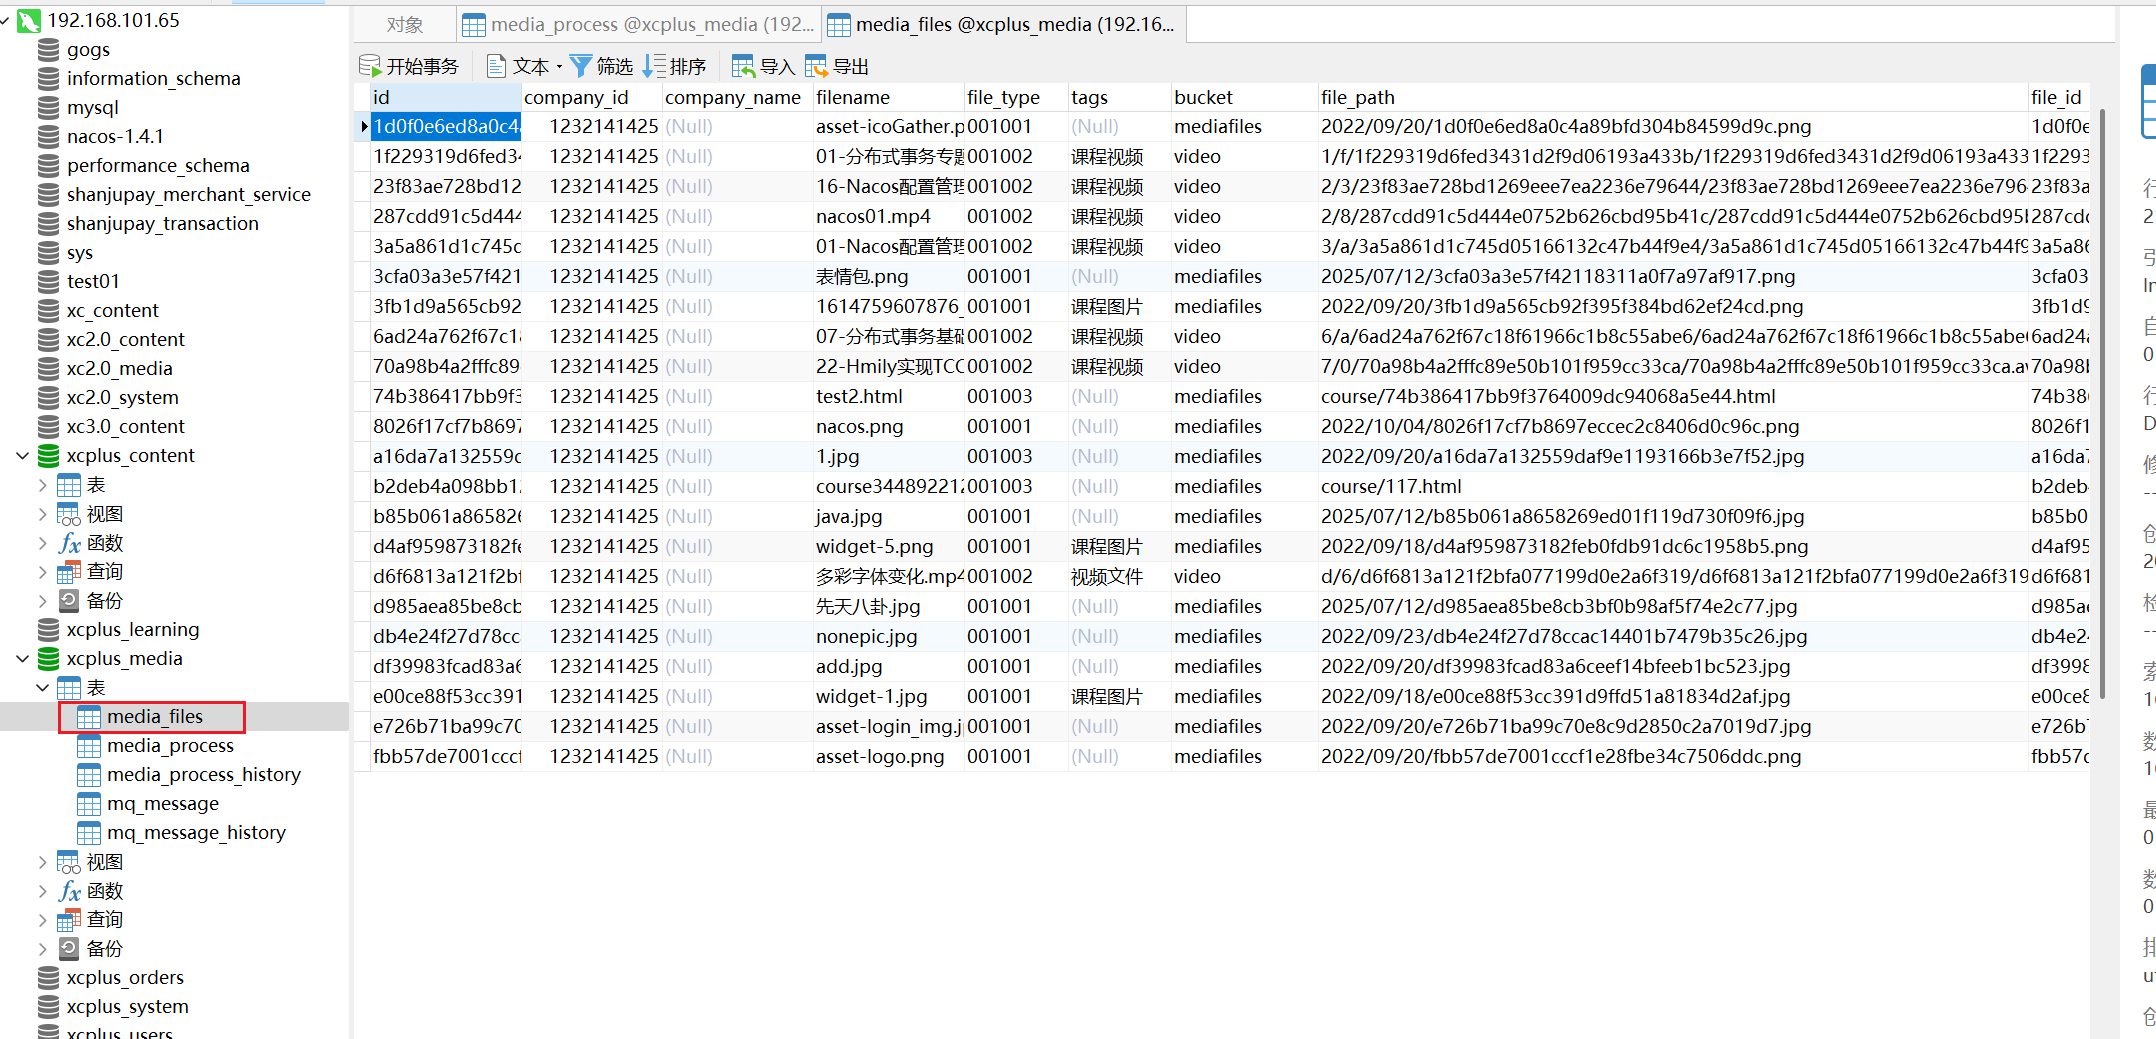
nginx.exe -s reload通过http://file.51xuecheng.cn/mediafiles/图片文件地址 访问图片
在媒资数据库的文件表中找一个图片的地址进行测试。
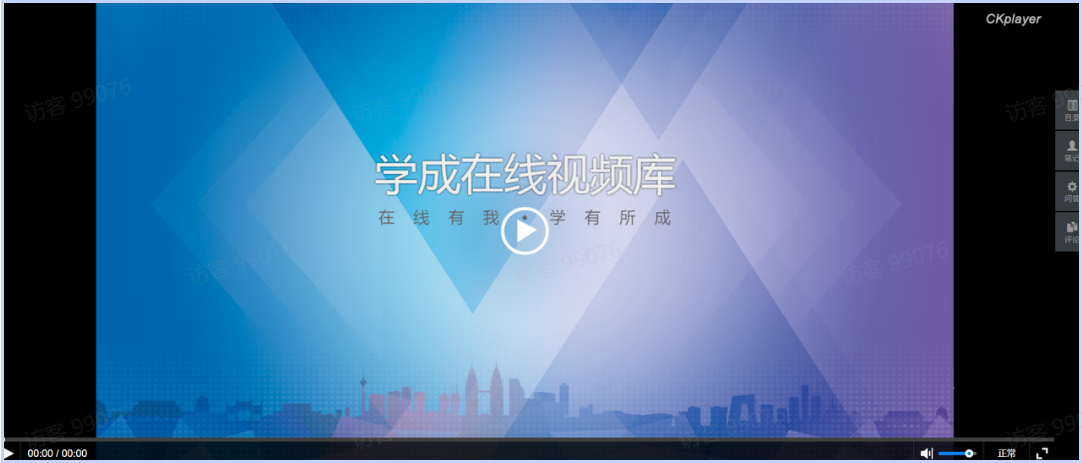
2.2.3.4 视频播放页面
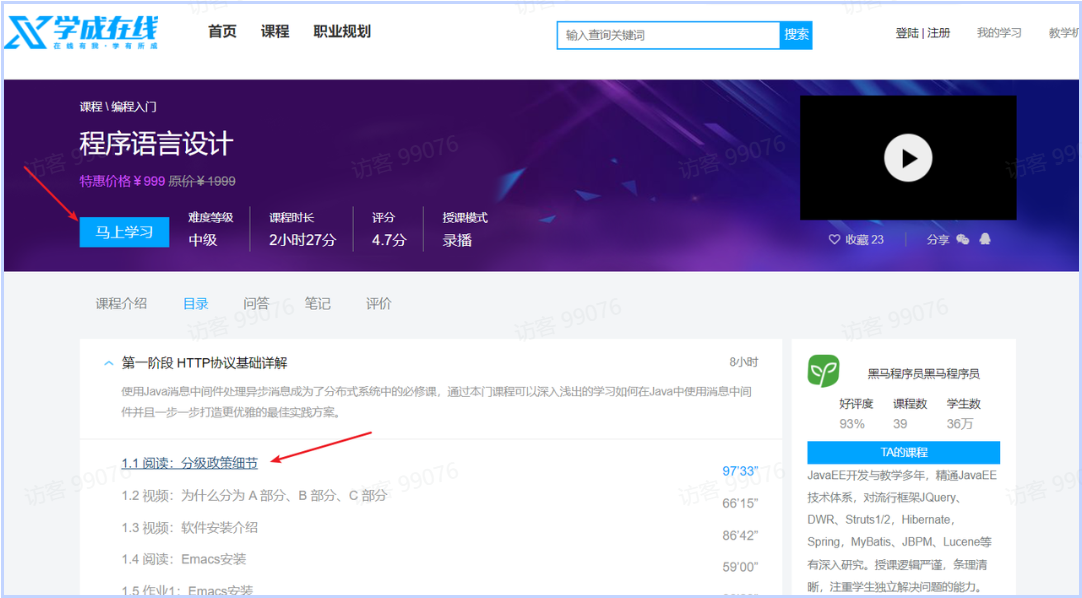
进入课程详情页面,点击马上学习或课程目录下的小节的名称将打开视频播放页面。
首先在nginx.conf中配置视频播放页面的地址
location /course/preview/learning.html {alias D:/itcast2022/xc_edu3.0/code_1/xc-ui-pc-static-portal/course/learning.html;} location /course/search.html { root D:/itcast2022/xc_edu3.0/code_1/xc-ui-pc-static-portal;} location /course/learning.html { root D:/itcast2022/xc_edu3.0/code_1/xc-ui-pc-static-portal;} 加载nginx配置文件
点击课程详情页面上的视频播放链接,打开视频播放页面,如下图:
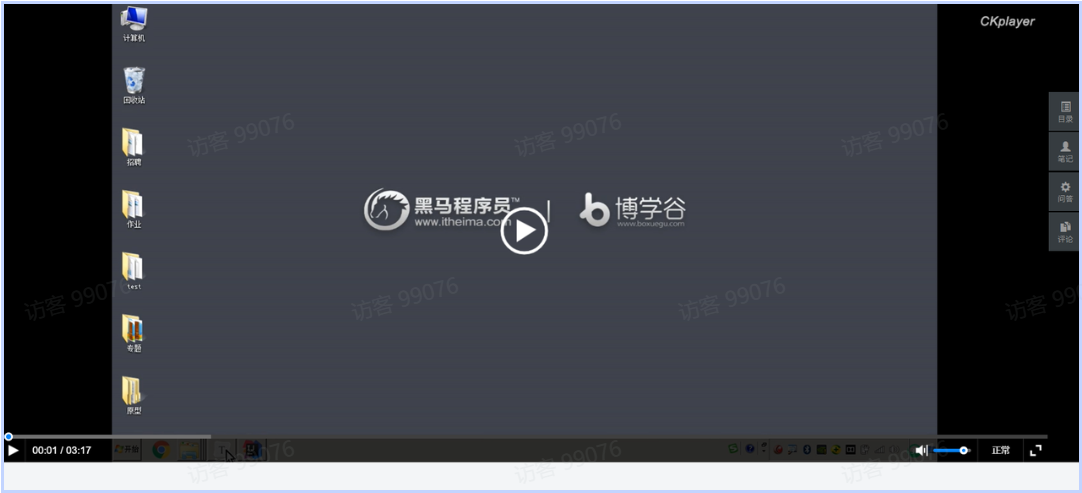
下边需要配置learning.html页面的视频播放路径来测试视频播放页面,找到learning.html页面中videoObject对象的定义处,配置视频的播放地址。
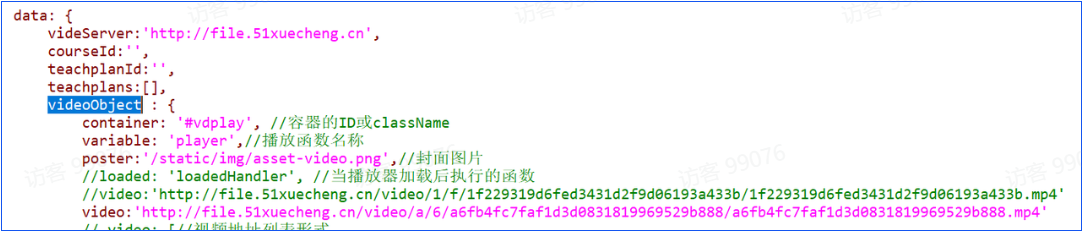
配置完成,刷新页面,观察视频是否可以正常播放。
注意:此页面会去请求后台接口获取课程计划,这里暂时不处理,稍后在接口开发处进行处理。只要页面可以正常打开,可以播放视频就测试通过了。
2.2.4 接口定义
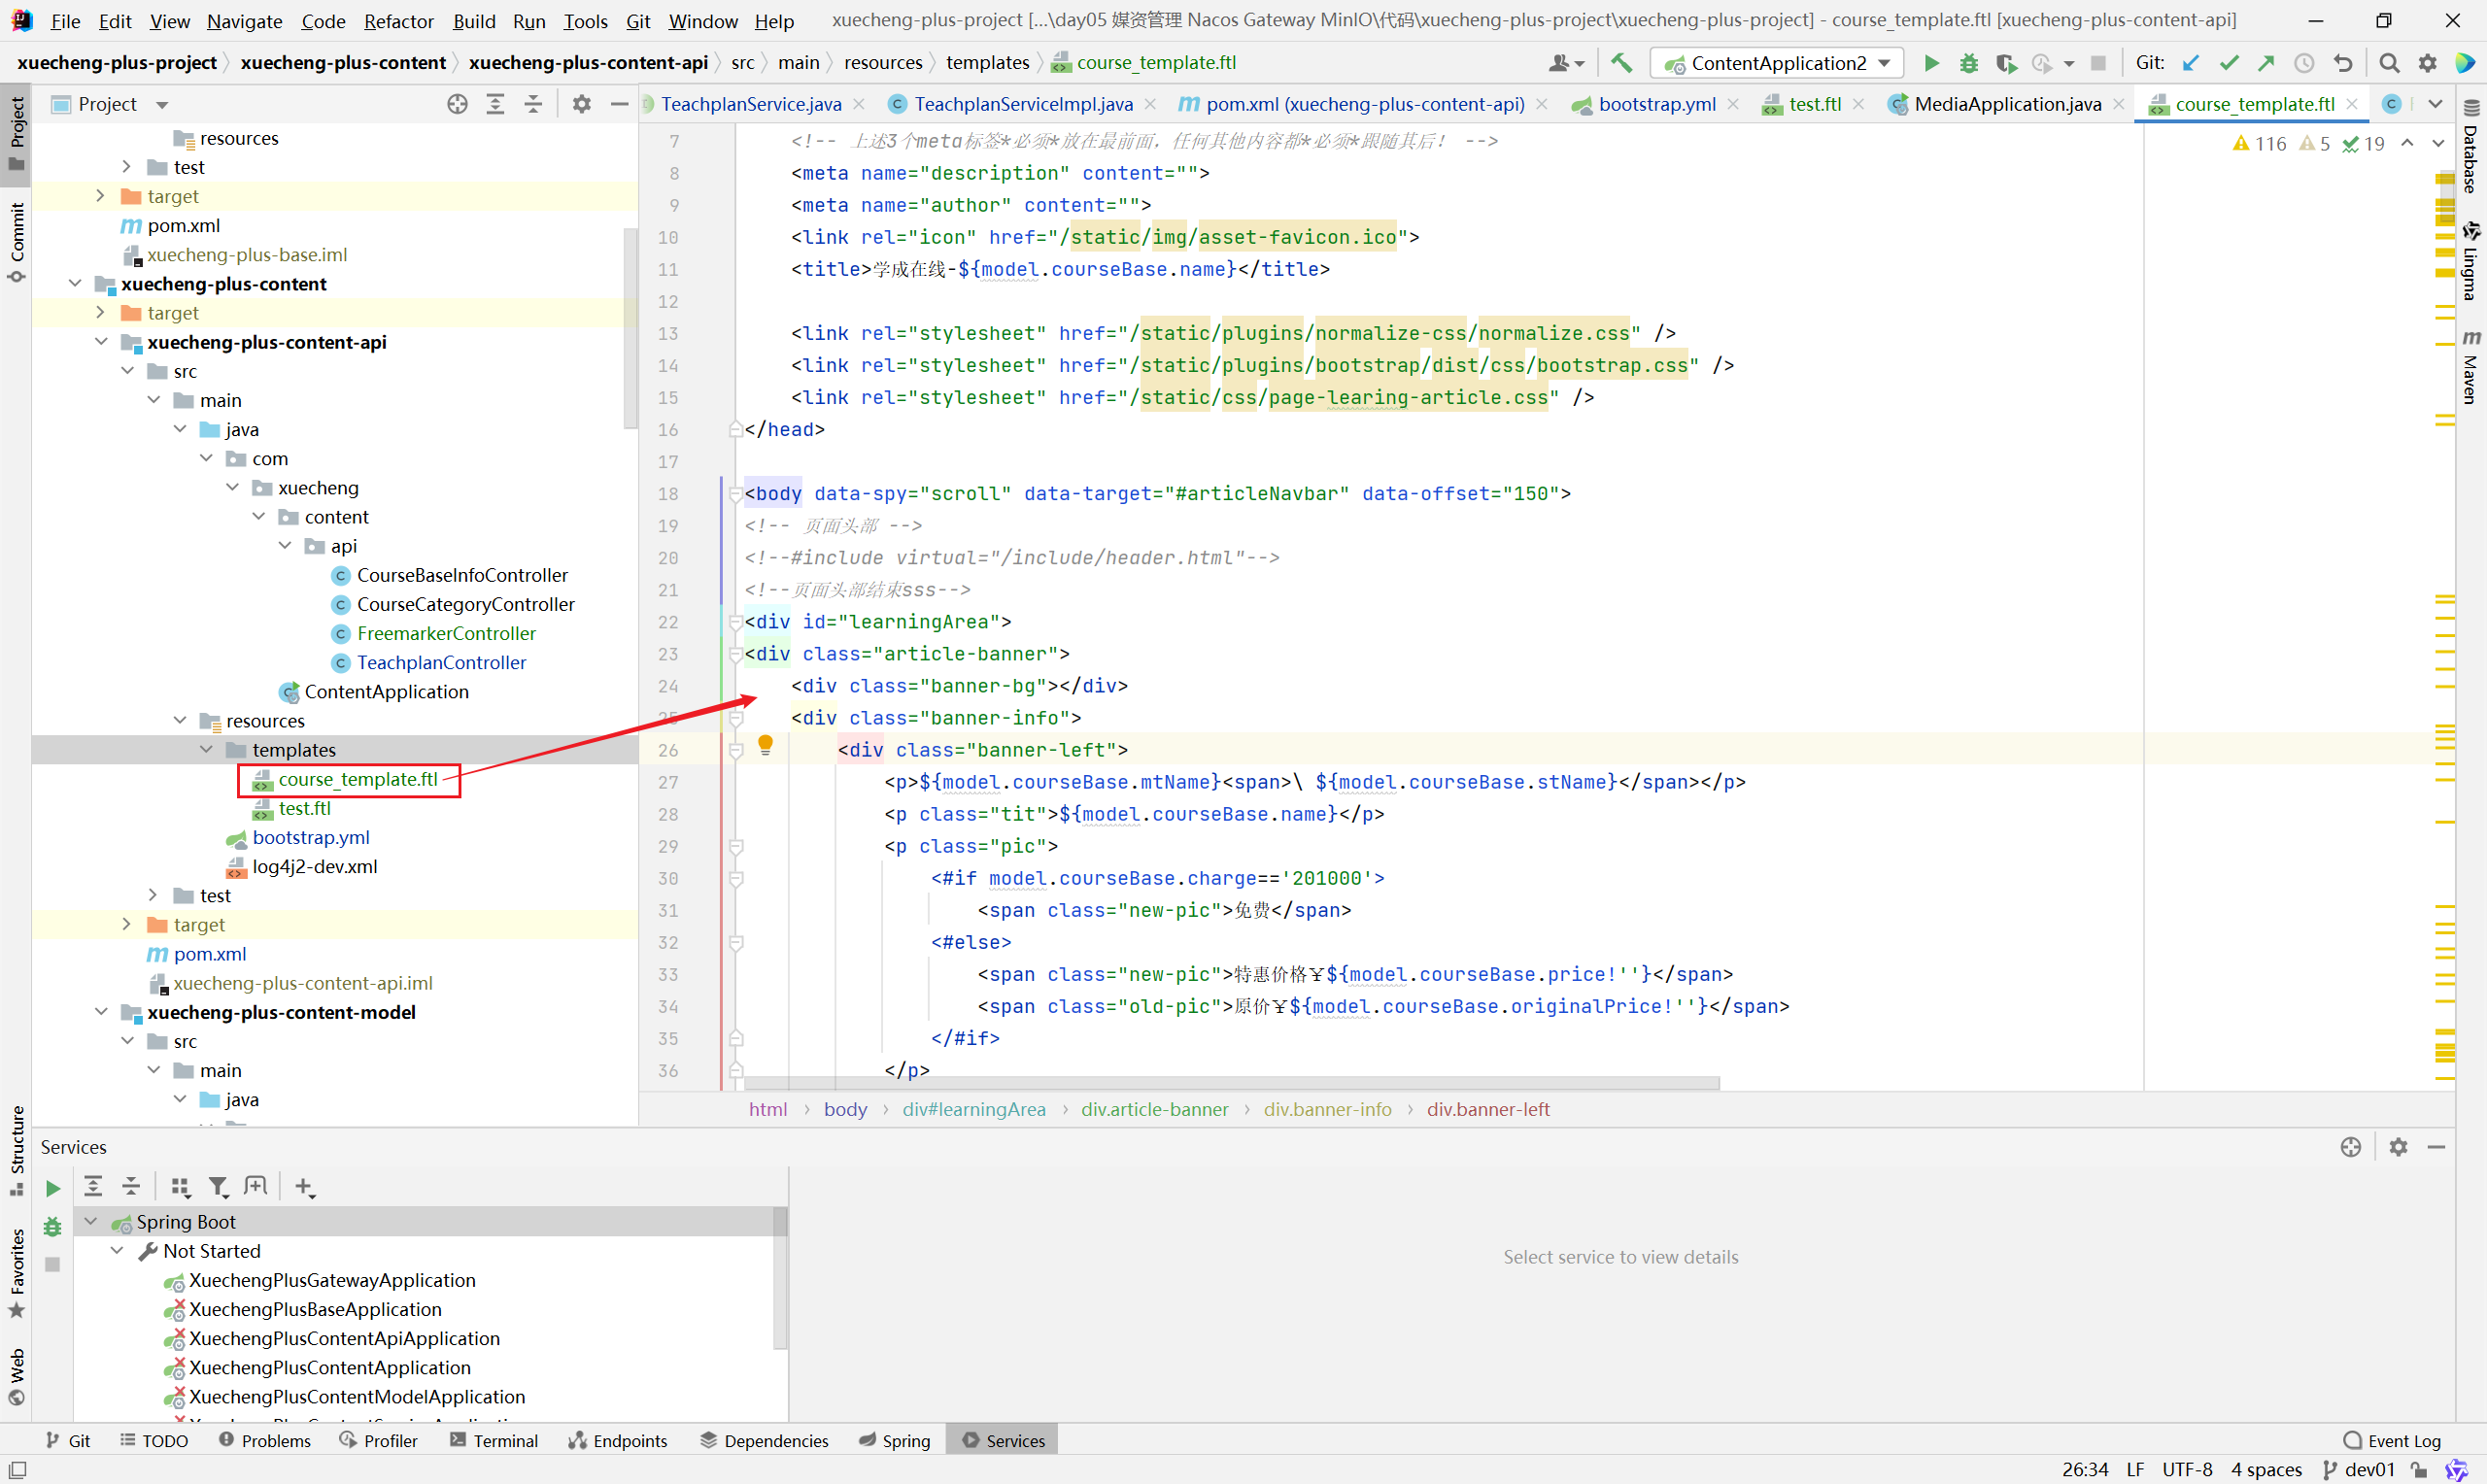
响应页面到浏览器使用freemarker模板引擎技术实现,首先从课程资料目录下获取课程预览页面course_template.html,拷贝至内容管理的接口工程的resources/templates下,并将其在本目录复制一份命名为course_template.ftl
定义controller层接口
package com.xuecheng.content.api;import com.xuecheng.content.model.dto.CoursePreviewDto;
import com.xuecheng.content.service.CoursePublishService;
import org.springframework.beans.factory.annotation.Autowired;
import org.springframework.stereotype.Controller;
import org.springframework.web.bind.annotation.GetMapping;
import org.springframework.web.bind.annotation.PathVariable;
import org.springframework.web.servlet.ModelAndView;import java.util.Map;/*** @description 课程预览,发布*/
@Controller
public class CoursePublishController {@Autowiredprivate CoursePublishService coursePublishService;@GetMapping("/coursepreview/{courseId}")public ModelAndView preview(@PathVariable("courseId") Long courseId){//        获取课程信息CoursePreviewDto coursePreviewInfo = coursePublishService.getCoursePreviewInfo(courseId);// 创建 ModelAndView 实例用于视图渲染ModelAndView modelAndView = new ModelAndView();// 添加模型数据,此处 model 为 null,表示暂无实际数据传入modelAndView.addObject("model", coursePreviewInfo);// 设置视图名称,对应视图模板 "course_template"modelAndView.setViewName("course_template");// 返回 ModelAndView 结果,交由视图解析器处理return modelAndView;}}
配置反向代理
课程预览接口虽然可以正常访问,但是页面没有样式,查看浏览器请求记录,发现图片、样式无法正常访问,需要由Nginx反向代理访问课程预览接口,通过门户的URL去访问课程预览
- 在Nginx下配置
#后台网关upstream gatewayserver{server 127.0.0.1:63010 weight=10;} server {listen 80;server_name www.51xuecheng.cn localhost;....#apilocation /api/ {proxy_pass http://gatewayserver/;} ....- 重新加载Nginx配置文件
nginx.exe -s reload启动微服务网关,访问新地址:http://www.51xuecheng.cn/api/content/coursepreview/74,
输出如下,页面样式正常
2.2.5 接口开发
2.2.5.1 模型
在使用freemarker渲染生成视图时需要数据模型,此数据模型包括了基本信息、营销信息、课程计划、师资等信息。
首先定义一个数据模型类
package com.xuecheng.content.model.dto;import lombok.Data;
import lombok.ToString;import java.util.List;/*** @description 课程预览数据模型*/
@Data
@ToString
public class CoursePreviewDto {//课程基本信息,课程营销信息CourseBaseInfoDto courseBase;//课程计划信息List<TeachplanDto> teachplans;}
CourseBaseInfoDto:包括了课程基本信息、营销信息。
List<TeachplanDto> :包括了课程计划列表
2.2.5.2 service接口
package com.xuecheng.content.service;import com.xuecheng.content.model.dto.CoursePreviewDto;/*** @description 课程预览、发布接口*/
public interface CoursePublishService {/*** @description 获取课程预览信息* @param courseId 课程id* @return com.xuecheng.content.model.dto.CoursePreviewDto*/public CoursePreviewDto getCoursePreviewInfo(Long courseId);}
测试类
package com.xuecheng.content.service.impl;import com.xuecheng.content.model.dto.CourseBaseInfoDto;
import com.xuecheng.content.model.dto.CoursePreviewDto;
import com.xuecheng.content.model.dto.TeachplanDto;
import com.xuecheng.content.service.CourseBaseInfoService;
import com.xuecheng.content.service.CoursePublishService;
import com.xuecheng.content.service.TeachplanService;
import org.springframework.beans.factory.annotation.Autowired;
import org.springframework.stereotype.Service;import java.util.List;@Service
public class CoursePublishServiceImpl implements CoursePublishService {@AutowiredCourseBaseInfoService courseBaseInfoService;@AutowiredTeachplanService teachplanService;/*** 获取课程预览信息* @param courseId 课程id* @return*/@Overridepublic CoursePreviewDto getCoursePreviewInfo(Long courseId) {//课程基本信息、营销信息CourseBaseInfoDto courseBaseInfo = courseBaseInfoService.getCourseBaseInfo(courseId);//课程计划信息List<TeachplanDto> teachplanTree= teachplanService.findTeachplanTree(courseId);CoursePreviewDto coursePreviewDto = new CoursePreviewDto();coursePreviewDto.setCourseBase(courseBaseInfo);coursePreviewDto.setTeachplans(teachplanTree);return coursePreviewDto;}
}
2.2.5.3 前后端联调测试
原来前端直接指向后台网关地址,现在要更改为Nginx的地址,如下

重启前端工程,进入课程列表点击"预览"按钮,正常打开课程预览页面http://www.51xuecheng.cn/api/content/coursepreview/2
2.2.5.4 编写模板
模型数据准备好后下一步将模型数据填充到course_template.ftl上,填充时注意不要一次填充太多,一边填充一边刷新调试。
freemarker提供很多指令用于解析各种类型的数据模型,参考地址:
http://freemarker.foofun.cn/ref_directives.html
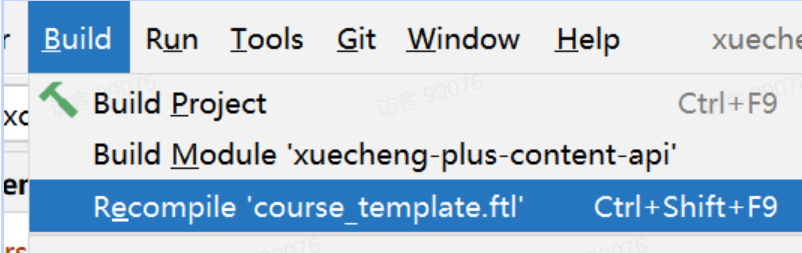
修改模板后需要编译,如下图:
在调试模板时,可以看出哪些信息有缺少,在课程管理处进行补充,比如下图显示课程计划信息不完整,需要进入课程计划界面添加课程计划
2.2.5.5 视频播放页面接口
从课程详情页面进入视频播放页面,如下图
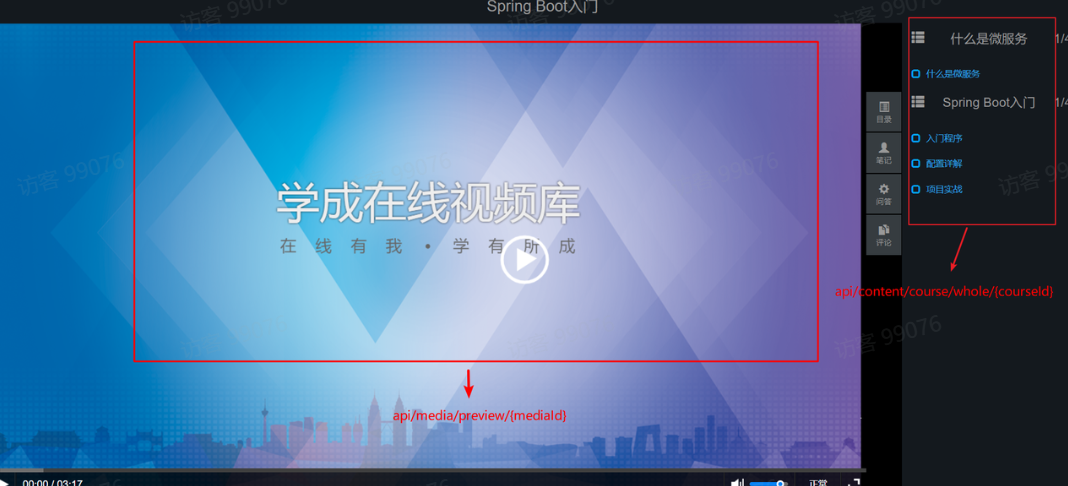
在此页面需要从后台获取课程信息、根据课程计划获取对应的视频地址,下边编写这两个接口:
获取课程信息接口:/open/content/course/whole/{courseId}
课程计划获取视频地址接口:/open/media/preview/{mediaId}
-
在nginx配置如下地址
#openapi
location /open/content/ {proxy_pass http://gatewayserver/content/open/;
}
location /open/media/ {proxy_pass http://gatewayserver/media/open/;
} -
在内容管理接口层定义CourseOpenController类,并定义接口
package com.xuecheng.content.api;import com.xuecheng.content.model.dto.CoursePreviewDto;
import com.xuecheng.content.service.CourseBaseInfoService;
import com.xuecheng.content.service.CoursePublishService;
import io.swagger.annotations.Api;
import org.springframework.beans.factory.annotation.Autowired;
import org.springframework.web.bind.annotation.GetMapping;
import org.springframework.web.bind.annotation.PathVariable;
import org.springframework.web.bind.annotation.RequestMapping;
import org.springframework.web.bind.annotation.RestController;/*** 课程公开查询接口*/
@Api(value = "课程公开查询接口",tags = "课程公开查询接口")
@RestController
@RequestMapping("/open")
public class CourseOpenController {@Autowiredprivate CourseBaseInfoService courseBaseInfoService;@Autowiredprivate CoursePublishService coursePublishService;@GetMapping("/course/whole/{courseId}")public CoursePreviewDto getPreviewInfo(@PathVariable("courseId") Long courseId) {//获取课程预览信息CoursePreviewDto coursePreviewInfo = coursePublishService.getCoursePreviewInfo(courseId);return coursePreviewInfo;}}-
在媒资管理服务media-api工程定义MediaOpenController类,并定义接口/open/media/preview/
package com.xuecheng.media.api;import com.xuecheng.base.exception.XueChengPlusException;
import com.xuecheng.base.model.RestResponse;
import com.xuecheng.media.model.po.MediaFiles;
import com.xuecheng.media.service.MediaFileService;
import io.swagger.annotations.Api;
import io.swagger.annotations.ApiOperation;
import org.apache.commons.lang.StringUtils;
import org.springframework.beans.factory.annotation.Autowired;
import org.springframework.web.bind.annotation.GetMapping;
import org.springframework.web.bind.annotation.PathVariable;
import org.springframework.web.bind.annotation.RequestMapping;
import org.springframework.web.bind.annotation.RestController;@Api(value = "媒资文件管理接口",tags = "媒资文件管理接口")
@RestController
@RequestMapping("/open")
public class MediaOpenController {@AutowiredMediaFileService mediaFileService;/*** 获取视频播放地址* @param mediaId* @return*/@ApiOperation("预览文件")@GetMapping("/preview/{mediaId}")public RestResponse<String> getPlayUrlByMediaId(@PathVariable String mediaId){MediaFiles mediaFiles = mediaFileService.getFileById(mediaId);if(mediaFiles == null || StringUtils.isEmpty(mediaFiles.getUrl())){XueChengPlusException.cast("视频还没有转码处理");}return RestResponse.success(mediaFiles.getUrl());}}
- service接口
/*** 根据id查询文件信息* @param mediaId 文件id* @return 文件信息*/MediaFiles getFileById(String mediaId);
- 实现类
/*** 根据id查询文件信息* @param mediaId 文件id* @return*/@Overridepublic MediaFiles getFileById(String mediaId) {MediaFiles mediaFiles = mediaFilesMapper.selectById(mediaId);return mediaFiles;}-
测试