聊一聊 Linux 上对函数进行 hook 的两种方式
一:背景
1. 讲故事
前两篇我们介绍了 Minhook 在 Windows 平台上的强大功效,这一篇我们来聊一聊如何在 Linux 上对函数进行hook,这里介绍两种方式。
- 轻量级的 LD_PRELOAD 拦截
LD_PRELOAD是一种共享库拦截,这种方式的优点在于不需要对源程序做任何修改,达到无侵入的功效,这是windows平台上不可想象的。
- funchook 拦截
在 github 有很多可用于 linux 上的函数 hook,我发现轻量级的,活跃的,开源的 要属 funchook 吧。
二:两种拦截方式
1. LD_PRELOAD 如何实现拦截
要想明白 LD_PRELOAD 如何实现拦截?需要你对 linux 上的进程初始化时的链接器 ld.so 的工作过程有一个了解,简单来说就是它的加载顺序为 主程序的可执行文件 -> LD_PRELOAD 指定的库 -> glibc 标准库 -> 其他依赖库 。
由于 LD_PRELOAD 指定的 so 文件优于 glibc.so 解析,所以可以利用这种先入为主的方式覆盖后续的同名符号方法,那 ld.so 长啥样呢?在我的ubuntu上就是 ld-linux-x86-64.so.2。
root@ubuntu2404:/data2# cat /proc/5322/maps
60c0f8687000-60c0f8688000 r--p 00000000 08:03 1966089                    /data2/main
60c0f8688000-60c0f8689000 r-xp 00001000 08:03 1966089                    /data2/main
60c0f8689000-60c0f868a000 r--p 00002000 08:03 1966089                    /data2/main
60c0f868a000-60c0f868b000 r--p 00002000 08:03 1966089                    /data2/main
60c0f868b000-60c0f868c000 rw-p 00003000 08:03 1966089                    /data2/main
60c1266de000-60c1266ff000 rw-p 00000000 00:00 0                          [heap]
7efd5c600000-7efd5c628000 r--p 00000000 08:03 2242169                    /usr/lib/x86_64-linux-gnu/libc.so.6
7efd5c628000-7efd5c7b0000 r-xp 00028000 08:03 2242169                    /usr/lib/x86_64-linux-gnu/libc.so.6
7efd5c7b0000-7efd5c7ff000 r--p 001b0000 08:03 2242169                    /usr/lib/x86_64-linux-gnu/libc.so.6
7efd5c7ff000-7efd5c803000 r--p 001fe000 08:03 2242169                    /usr/lib/x86_64-linux-gnu/libc.so.6
7efd5c803000-7efd5c805000 rw-p 00202000 08:03 2242169                    /usr/lib/x86_64-linux-gnu/libc.so.6
7efd5c805000-7efd5c812000 rw-p 00000000 00:00 0
7efd5c964000-7efd5c967000 rw-p 00000000 00:00 0
7efd5c977000-7efd5c979000 rw-p 00000000 00:00 0
7efd5c979000-7efd5c97d000 r--p 00000000 00:00 0                          [vvar]
7efd5c97d000-7efd5c97f000 r-xp 00000000 00:00 0                          [vdso]
7efd5c97f000-7efd5c980000 r--p 00000000 08:03 2242166                    /usr/lib/x86_64-linux-gnu/ld-linux-x86-64.so.2
7efd5c980000-7efd5c9ab000 r-xp 00001000 08:03 2242166                    /usr/lib/x86_64-linux-gnu/ld-linux-x86-64.so.2
7efd5c9ab000-7efd5c9b5000 r--p 0002c000 08:03 2242166                    /usr/lib/x86_64-linux-gnu/ld-linux-x86-64.so.2
7efd5c9b5000-7efd5c9b7000 r--p 00036000 08:03 2242166                    /usr/lib/x86_64-linux-gnu/ld-linux-x86-64.so.2
7efd5c9b7000-7efd5c9b9000 rw-p 00038000 08:03 2242166                    /usr/lib/x86_64-linux-gnu/ld-linux-x86-64.so.2
7ffe03c95000-7ffe03cb6000 rw-p 00000000 00:00 0                          [stack]
ffffffffff600000-ffffffffff601000 --xp 00000000 00:00 0                  [vsyscall]
说了这么多,接下来我们演示下如何对 openat 进行拦截,首先定义一个 LD_PRELOAD 需要加载的共享库,代码如下:
#define _GNU_SOURCE
#include <dlfcn.h>
#include <stdio.h>
#include <fcntl.h>
#include <stdarg.h>
#include <unistd.h>
#include <sys/types.h>static int (*real_openat)(int, const char *, int, ...) = NULL;int openat(int dirfd, const char *pathname, int flags, ...)
{mode_t mode = 0;pid_t pid = getpid();pid_t tid = gettid();printf("hooked openat: PID=%d, TID=%d, path=%s\n", pid, tid, pathname);if (!real_openat){real_openat = dlsym(RTLD_NEXT, "openat");}if (flags & O_CREAT){return real_openat(dirfd, pathname, flags, mode);}else{return real_openat(dirfd, pathname, flags);}
}
将上面的 hook_openat.c 做成动态链接库,其中的 -ldl 表示对外提供加载该库的api,比如(dlopen,dlsym), 参考如下:
root@ubuntu2404:/data2# gcc -shared -fPIC -o libhookopenat.so hook_openat.c -ldl
root@ubuntu2404:/data2# ls -lh
total 24K
-rw-r--r-- 1 root root 688 Jun 12 09:14 hook_openat.c
-rwxr-xr-x 1 root root 16K Jun 12 09:20 libhookopenat.so
-rw-r--r-- 1 root root 782 Jun 12 09:18 main.c
共享库搞定之后,接下来就是写 C 代码来调用了,这里我们通过 openat 打开文件,然后让 libhookopenat.so 拦截,参考代码如下:
#define _GNU_SOURCE
#include <fcntl.h>
#include <unistd.h>
#include <stdio.h>
#include <stdlib.h>
#include <string.h> int main()
{// 在当前目录下创建一个新文件int fd = openat(AT_FDCWD, "example.txt", O_WRONLY | O_CREAT | O_TRUNC, 0644);if (fd == -1){perror("openat failed");exit(EXIT_FAILURE);}// 写入一些内容到文件const char *text = "This is a test file created with openat!\n";ssize_t bytes_written = write(fd, text, strlen(text));if (bytes_written == -1){perror("write failed");close(fd);exit(EXIT_FAILURE);}// 关闭文件close(fd);printf("File created and written successfully! Wrote %zd bytes.\n", bytes_written);return 0;
}
root@ubuntu2404:/data2# gcc -o main ./main.c
root@ubuntu2404:/data2# LD_PRELOAD=./libhookopenat.so ./main
hooked openat: PID=4646, TID=4646, path=example.txt
File created and written successfully! Wrote 41 bytes.
从卦中可以清晰的看到 hook 成功!
2. funchook 如何实现拦截
LD_PRELOAD 这种共享库的粒度还是太大,如果粒度再小一点就更加灵活了,比如函数级,这就是本节要介绍到的 funchook,源码在github上:https://github.com/kubo/funchook ,唯一麻烦一点的就是你需要通过源码编译来生成对应的 头文件,静态链接文件,动态链接库 ,参考如下:
root@ubuntu2404:/data4# sudo apt install -y git gcc cmake make
root@ubuntu2404:/data4# git clone https://github.com/kubo/funchook.git
root@ubuntu2404:/data4# cd funchook
root@ubuntu2404:/data4# mkdir build && cd build
root@ubuntu2404:/data4# cmake ..
root@ubuntu2404:/data4# make
root@ubuntu2404:/data4/funchook/build# sudo make install
[ 25%] Built target distorm
[ 42%] Built target funchook-shared
[ 60%] Built target funchook-static
[ 71%] Built target funchook_test
[ 85%] Built target funchook_test_shared
[100%] Built target funchook_test_static
Install the project...
-- Install configuration: ""
-- Installing: /usr/local/include/funchook.h
-- Installing: /usr/local/lib/libfunchook.so.2.0.0
-- Installing: /usr/local/lib/libfunchook.so.2
-- Installing: /usr/local/lib/libfunchook.so
-- Installing: /usr/local/lib/libfunchook.aroot@ubuntu2404:/data4/funchook/build# ldconfig
由于默认安装在了 /usr/local/lib 下,一定要记得用 ldconfig 命令刷新下,否则程序可能找不到新库,最后就是 C 的调用代码,参考如下:
#define _GNU_SOURCE
#include <stdio.h>
#include <dlfcn.h>
#include <fcntl.h>
#include <unistd.h>
#include <funchook.h>// 原始函数指针
static int (*orig_openat)(int dirfd, const char *pathname, int flags, mode_t mode);// 钩子函数
int hooked_openat(int dirfd, const char *pathname, int flags, mode_t mode)
{printf("Hooked openat called: path=%s, flags=0x%x\n", pathname, flags);// 调用原始函数return orig_openat(dirfd, pathname, flags, mode);
}int main()
{// 获取原始 openat 函数地址orig_openat = dlsym(RTLD_NEXT, "openat");if (!orig_openat){fprintf(stderr, "Failed to find openat: %s\n", dlerror());return 1;}// 创建 funchook 实例funchook_t *funchook = funchook_create();if (!funchook){perror("funchook_create failed");return 1;}// 准备 Hookint rv = funchook_prepare(funchook, (void **)&orig_openat, hooked_openat);if (rv != 0){fprintf(stderr, "Prepare failed: %s\n", funchook_error_message(funchook));return 1;}// 安装 Hookrv = funchook_install(funchook, 0);if (rv != 0){fprintf(stderr, "Install failed: %s\n", funchook_error_message(funchook));return 1;}// 测试调用printf("=== Testing openat hook ===\n");int fd = openat(AT_FDCWD, "/etc/passwd", O_RDONLY);if (fd >= 0){printf("Successfully opened file, fd=%d\n", fd);close(fd);}else{perror("openat failed");}// 清理funchook_uninstall(funchook, 0);funchook_destroy(funchook);return 0;
}
接下来就是编译执行了。
root@ubuntu2404:/data2# gcc -o main main.c -lfunchook -ldl
root@ubuntu2404:/data2# ./main
=== Testing openat hook ===
Hooked openat called: path=/etc/passwd, flags=0x0
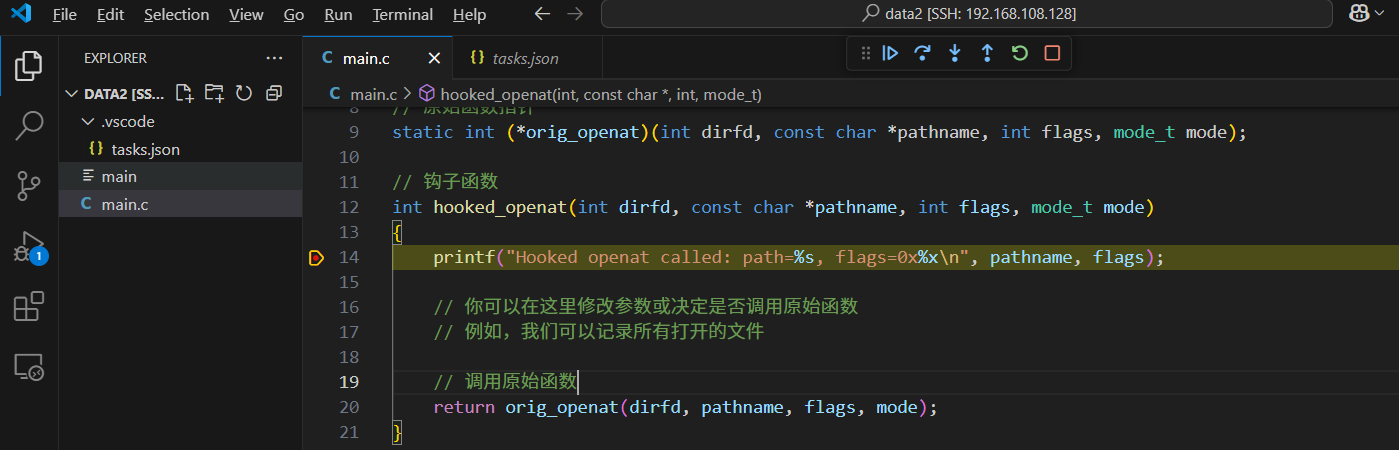
Successfully opened file, fd=3一切都是美好的,当然如果你想可视化的单步调试,可以配置到 vs 的 tasks.json 中,参考如下:
{"tasks": [{"type": "cppbuild","label": "C/C++: gcc build active file","command": "/usr/bin/gcc","args": ["-fdiagnostics-color=always","-g","${file}","-o","${fileDirname}/${fileBasenameNoExtension}","-lfunchook","-L/usr/local/lib"],"options": {"cwd": "${fileDirname}"},"problemMatcher": ["$gcc"],"group": {"kind": "build","isDefault": true},"detail": "Task generated by Debugger."}],"version": "2.0.0"
}
三:总结
这里给大家总结的两种注入方式,LD_PRELOAD 虽然简单,但粒度粗,适合简单的无侵入场景,如果希望更细粒度,建议使用活跃的 funchook 吧,虽然是一个岛国大佬实现的。