mobile自动化测试-appium webdriverio
WebdriverIO是一款支持mobile app和mobile web自动化测试框架,与appium集成,完成对mobile应用测试。支持ios 和android两种平台,且功能丰富,是mobile app自动化测试首选框架。且官方还提供了mobile 应用测试example代码,大大减少了从0构建移动应用自动化测试base code时间。
如果搭建mobile app应用的UI自动化测试代码,在选择框架时需要考虑如下一些点框架是否支持
1.是否支持自动等待?自动等待可提升UI自动化测试稳定性
2.是否支持自动scroll element 到viewport中?如果不支持,UI自动化测试会很脆弱
3.是否支持上下,左右滑动
4.是否支持对目标元素进行拖动
5.是否支持错误截图
6.定位页面元素selector是否丰富
接下来看看webdriverio是否有上面的特性,以及如何实现上下的特性
WebdriverIO支持自动等待
webdriverIO框架支持自动等待,框架有各种等待超时时间设置。例如可以在全局配置文件中,灵活设置连接appium server的超时时间(connectionRetryTimeout,connectionRetryCount),查找页面元素超时时间(waitForSelectorTimeout)。除了全局设置,还可以手动设置超时时间,例如使用await element.waitForDisplayed({timeout: 1000})。通过这些超时时间,可以增加整个UI自动化测试稳定性。
WebdriverIO支持自动scroll element到viewport中
在查找元素的时候,如果元素不在viewport中,webdriverIO会自动向下滑动,直到找到目标元素。以Android为例,下面有三种写法查找目标元素,如果目标元素不在viewport中,框架会自动向下滑动页面,直到找到目标元素。因为三种方式都可以实现向下滑动,建议首选第一种,
//使用UiSelector()直接查找页面元素,如果元素不存在,会默认向下滑动查找目标元素public async goToFirstPage() {const firstPageSelector = driver.isAndroid? 'android=new UiSelector().resourceId("com.binance.dev:id/2131435629")': '//XCUIElementTypeButton[@name="xx"]';await $(firstPageSelector).click()}
// 使用了UiScrollable,如果元素不存在,会默认向下滑动查找目标元素public async scrollDownToSymbol(symbol: string) {// UiScrollable默认是向下滚动,不会向上滚动const symbolSelector = driver.isAndroid? `android=new UiScrollable(new UiSelector().scrollable(true)).scrollIntoView(new UiSelector().text("${symbol}"))`: `//XCUIElementTypeStaticText[@name="${symbol}"]`;await $(symbolSelector).click()}// scrollIntoView默认也是向下滚动,不会向上滚动public async scrollIntoView(symbol: string) {const symbolSelector = driver.isAndroid? `android=new UiSelector().text("${symbol}")`: `//XCUIElementTypeStaticText[@name="${symbol}"]`;await $(symbolSelector).scrollIntoView()}
WebdriverIO如何支持上下、左右滑动
上面介绍了自动向下滑动,直到找到目标元素,在实际场景中,除了向下滑动,有时候需要向上滑动到界面顶部,或者向上滑动直到找到目标元素。另外,有时候还需要左右滑动,下面是具体实现的代码。
//向上滑动
public async scrollUpToSymbol(symbol: string) {const topElementSelector = `new UiSelector().text("${symbol}")`;// 使用 mobile: scroll 支持up,down 滚动,不支持左右滚动await driver.execute('mobile: scroll', {strategy: '-android uiautomator',selector: topElementSelector,direction: 'up' // 指定滚动方向为向上});}
//向右滑动public async swipeRight() {const selector = driver.isAndroid? 'android=new UiSelector().resourceId("com.binance.dev:id/tabLayout")': '//XCUIElementTypeButton[@name="xx"]';const scrollableElement = $(selector)await driver.swipe({// swipe right,屏幕会显示左边的内容direction: "right",scrollableElement: scrollableElement,percent: 0.8,});}
//向左滑动public async swipeLeft() {const selector = driver.isAndroid? 'android=new UiSelector().resourceId("com.binance.dev:id/tabLayout")': '//XCUIElementTypeButton[@name="xx"]';const scrollableElement = $(selector)await driver.swipe({// swipe left,屏幕会显示右边的内容direction: "left",scrollableElement: scrollableElement,percent: 0.8,});}
}
WebdriverIO如何实现拖动目标元素
实际项目中,有些场景需要拖动目标元素到另外一个位置,某些应用的登录页面,可能就存在拖动的场景,下面是使用webdriverio实现拖动的code。dragAndDrop比较简单,因为webdriverIO已经进行了封装,直接调用即可。
it('should demonstrate the dragAndDrop command', async () => {const elem = $('#someElem')const target = $('#someTarget')// drag and drop to other elementawait elem.dragAndDrop(target)// drag and drop relative from current positionawait elem.dragAndDrop({ x: 100, y: 200 })
})
WebdriverIO如何支持错误截图
UI自动测试中,支持错误截图是非常重要的功能,当有大量自动化case在流水线上每天运行时,维护成本是较大的,支持错误截图可以帮助更快的判断失败case的原因,更快的进行修复。支持错误截图非常简单,在conf.ts文件中增加如下配置即可。即便是对原生app进行错误截图,也适用browser.takeScreenshot()方法。
//在conf配置文件中增加如下的配置
afterTest: async function (test, context, { error, result, duration, passed, retries }) {if (!passed) {const screenshot = await browser.takeScreenshot();const fileName = `FAILED_${test.title.replace(/\s+/g, '_')}.png`;const filePath = path.join(process.cwd(), 'screenshots', fileName);// 确保目录存在fs.mkdirSync(path.dirname(filePath), { recursive: true });// 保存截图fs.writeFileSync(filePath, screenshot, 'base64');console.log(`Screenshot taken: ${filePath}`);}},
webdriverio除了支持错误截图,还支持视觉测试,视觉测试本质就是通过对比两张截图来验证功能是否符合预期,如果某些应用页面只读信息比较多,那么可以采用这种方式来进行对比,不用手写每个页面元素进行对比,减少编写代码成本。
WebdriverIO支持哪些Selector
对于Android应用,基本都采用UiAutomator2 Driver,下面列举的selector都是UIAutomator2支持的selector,主要通过resourceId,text,className来定位,如果有多个元素,还可以通过.instance(index)来定位,或者先定位parent元素,再定位children元素。如果目标元素有content-des属性,且该属性值唯一,那么可以直接使用$('~content-desc')来定位。
    public async inputAmount(amount: string) {const amountInputSelector = driver.isAndroid ? 'android=new UiSelector().resourceId("com.binance.dev:id/2131441146")' : "";await $(amountInputSelector).setValue(amount)}public async viewAsset() {const holdingAssetMenu = driver.isAndroid ? 'android=new UiSelector().text("持有币种")' : "";await $(holdingAssetMenu).click()}public async getPnlValue(index: number) {// 这里查找index=2的时候,没有自动向下滑动,可以手动调用scrollIntoView的方法const parentSelector = driver.isAndroid ? `android=new UiSelector().resourceId("com.binance.dev:id/2131431738").instance(${index})` : "";const childSelector = driver.isAndroid ? 'android=new UiSelector().resourceId("com.binance.dev:id/tv_asset_daily_pnl_value")' : "";const pnl_value = await $(parentSelector).$(childSelector).getText()}const selector = 'new UiSelector().text("Cancel").className("android.widget.Button")'
const button = await $(`android=${selector}`)
await button.click()
对于IOS app,工具也支持多种元素定位方式,最常见的是如果目标元素有accessibility id,那么使用$('~accessibility id')定位,另外还可以通过-ios predicate string来定位目标元素。
const selector = `type == 'XCUIElementTypeSwitch' && name CONTAINS 'Allow'`
const switch = await $(`-ios predicate string:${selector}`)
await switch.click()const element = await $(`-ios predicate string:label == 'Login'`);const element = await $(`-ios predicate string:name BEGINSWITH 'Submit'`);const element = await $(`-ios predicate string:value > 10`);const element = await $(`-ios class chain:**/XCUIElementTypeCell[`name BEGINSWITH "A"`][-1]/XCUIElementTypeButton[10]`);
除此之外,webdriverio的还支持zoom,tap,swipe,longPress操作。例如,可以通过tap模拟点击右键操作。
it('should be able to swipe right 3 times in a custom scroll areas to an element and tap on the element', async () => {const elem = $('~myElement')// Swipe right 3 times in the custom scrollable element to find the elementawait elem.tap({direction: 'right',maxScrolls: 3,scrollableElement: $('#scrollable')})
})
除了常规的定位页面元素,操作页面元素外,webdriverio还支持视觉测试,即通过对比图片来达到验证的效果。如果某些app界面变化很小,那么可以采用视觉测试的方法,可有效降低编写代码的成本。
WebdriverIO视觉测试
使用webdriverio开展视觉测试,首先需要在conf文件的services中进行如下配置,配置好后即可开始视觉测试,常用的方法就四个saveElement,checkElement,saveScreenshot,checkScreenshot。
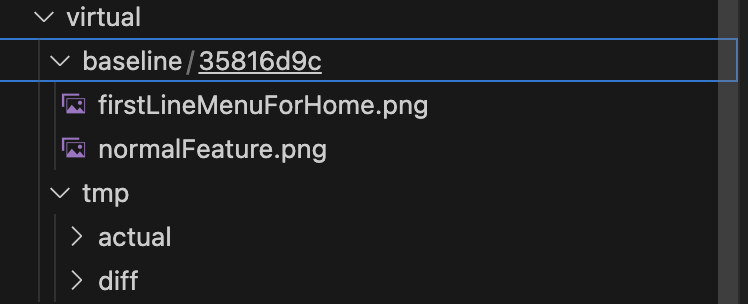
["visual", {baselineFolder: path.join(process.cwd(), "virtual", "baseline"),formatImageName: "{tag}",screenshotPath: path.join(process.cwd(), "virtual", "tmp"),savePerInstance: true,autoSaveBaseline: true,blockOutStatusBar: true,blockOutToolBar: true,ignoreNothing: true,}]//通过saveElement对目标元素进行截图存放到baseline中,再通过checkElement进行对比,如果对比不一致,会在diff文件中存放不一致的图片public async saveScreenForNormalFeature() {const selector = driver.isAndroid? 'android=new UiSelector().resourceId("com.binance.dev:id/2131438006")': '//XCUIElementTypeButton[@name="xx"]';await browser.saveElement(await $(selector), "normalFeature", {enableLayoutTesting: true})}public async checkScreenshotNormalFeature() {const selector = driver.isAndroid? 'android=new UiSelector().resourceId("com.binance.dev:id/2131438006")': '//XCUIElementTypeButton[@name="xx"]';await browser.checkElement(await $(selector), "normalFeature", {enableLayoutTesting: true})}运行测试后,会自动创建响应的目录,并将目标元素截图存放到对应folder中。
 以上就是对webdriverio工具的总体介绍。