Figma高效开发工具链:从设计到测试的完整解决方案
Figma高效开发工具链:从设计到测试的完整解决方案
文章目录
- Figma高效开发工具链:从设计到测试的完整解决方案
- 前言:工具组合的力量
- 组合一:Figma + Tailwind CSS 设计稿快速还原
- 工具组合优势
- 步骤1:设计稿分析与变量提取
- 步骤2:组件映射与结构分析
- 步骤3:响应式适配策略
- 步骤4:实战案例 - 完整页面还原
- 组合二:Postman 接口测试自动化流程
- 工具组合优势
- 步骤1:环境配置与管理
- 步骤2:测试集合与脚本编写
- 步骤3:自动化测试流程
- 步骤4:高级测试场景
- 组合三:VS Code + Git 高效协作开发工作流
- 工具组合优势
- 核心插件配置
- Git工作流配置
- 高效Git工作流
- 组合四:Chrome DevTools + React Developer Tools 调试组合
- 工具组合优势
- 核心调试技巧
- 网络请求调试
- 调试面板组件
- 组合五:其他实用工具组合推荐
- 1. Notion + GitHub Projects 项目管理组合
- 2. Docker + Docker Compose 开发环境组合
- 3. Slack + GitHub Actions 通知组合
- 工具组合使用技巧总结
- 效率提升关键点
- 最佳实践建议
- 结语
前言:工具组合的力量

在现代前端开发中,单一工具往往难以满足复杂的开发需求。通过合理组合和配置不同的工具,我们可以构建出高效、流畅的开发工作流。本文将分享我在实际项目中总结出的几组最佳工具组合,帮助开发者从设计还原到接口测试,全方位提升开发效率。
组合一:Figma + Tailwind CSS 设计稿快速还原

工具组合优势
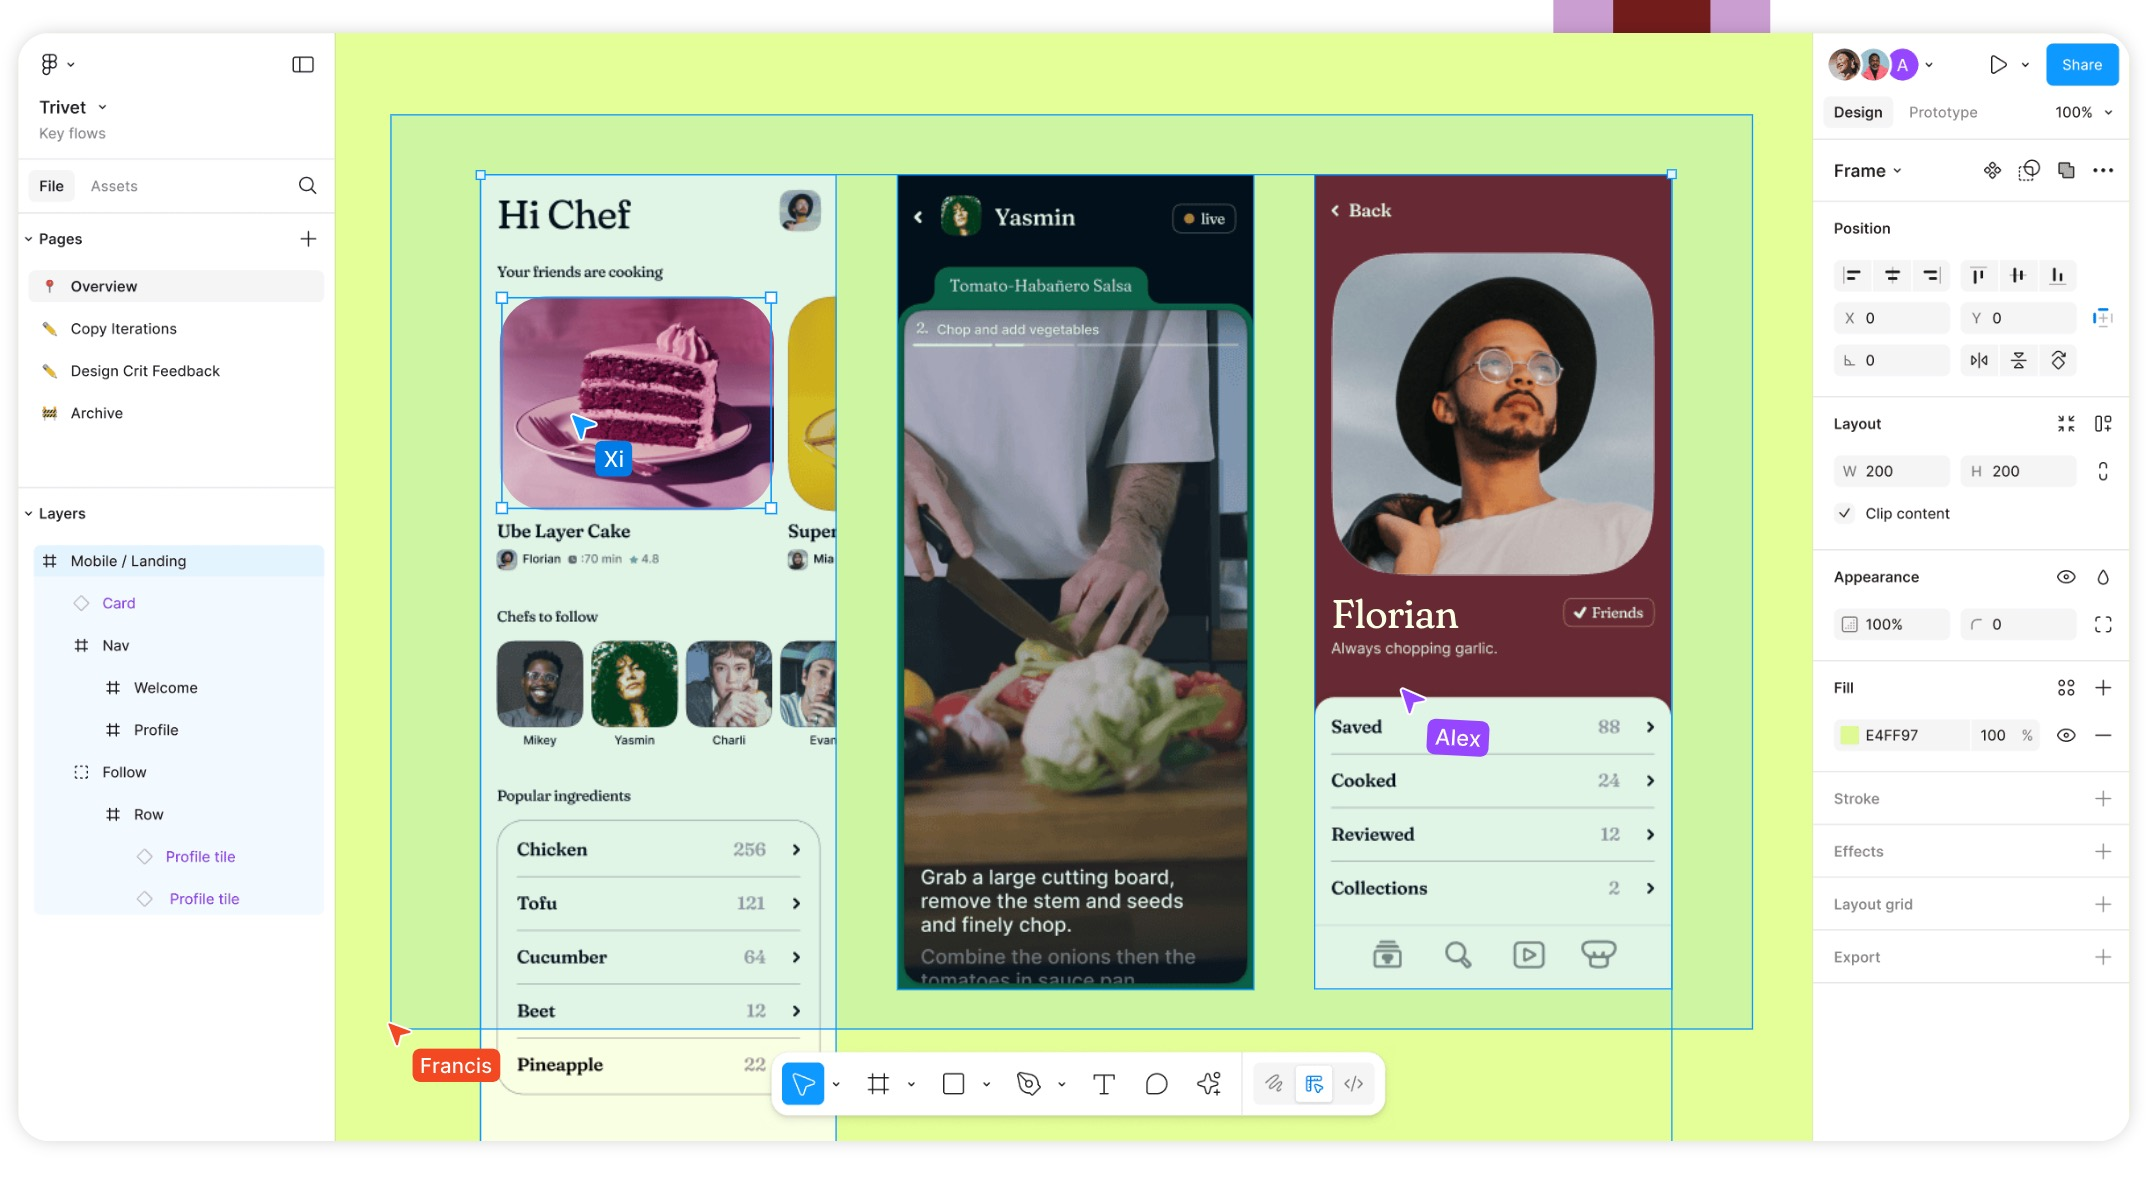
Figma与Tailwind CSS的组合堪称设计还原的"黄金搭档"。Figma提供精确的设计稿和样式标注,而Tailwind CSS的原子化CSS类让样式实现变得前所未有的简单。通过这个组合,我们可以将原本需要数小时的设计还原工作缩短到几十分钟。
步骤1:设计稿分析与变量提取
操作流程:
- 打开Figma设计稿,使用Inspect面板查看详细样式信息
- 提取颜色变量:将设计稿中的主色调、辅助色、中性色提取为Tailwind配置
- 整理字体规范:记录字体大小、行高、字重等排版规范
- 分析间距系统:提取常用的间距值,建立统一的间距规范

实际配置示例:
// tailwind.config.js
module.exports = {theme: {extend: {colors: {primary: {50: '#eff6ff',500: '#3b82f6',600: '#2563eb',700: '#1d4ed8',},secondary: {500: '#8b5cf6',600: '#7c3aed',},neutral: {50: '#fafafa',100: '#f5f5f5',500: '#737373',900: '#171717',}},fontSize: {'xs': ['12px', { lineHeight: '16px' }],'sm': ['14px', { lineHeight: '20px' }],'base': ['16px', { lineHeight: '24px' }],'lg': ['18px', { lineHeight: '28px' }],'xl': ['20px', { lineHeight: '28px' }],'2xl': ['24px', { lineHeight: '32px' }],},spacing: {'18': '4.5rem','88': '22rem','128': '32rem',}}}
}
步骤2:组件映射与结构分析
组件拆分策略:
- 识别原子组件:按钮、输入框、标签等基础组件
- 提取复合组件:卡片、表单、导航等组合组件
- 建立组件层级:明确组件间的嵌套关系
- 定义组件状态:分析交互状态(hover、active、disabled等)

组件映射表示例:
| Figma组件 | Tailwind类名 | 变体 |
|-----------|-------------|------|
| Primary Button | `bg-primary-600 text-white px-4 py-2 rounded-lg` | hover:bg-primary-700 |
| Secondary Button | `bg-secondary-500 text-white px-4 py-2 rounded-lg` | hover:bg-secondary-600 |
| Card Container | `bg-white rounded-xl shadow-sm p-6` | shadow-md for hover |
| Input Field | `border border-neutral-300 rounded-md px-3 py-2` | focus:border-primary-500 |
步骤3:响应式适配策略
断点对应关系:
// 响应式工具函数
export const responsiveUtils = {// 移动端优先 (min-width)sm: '@media (min-width: 640px)',   // 640pxmd: '@media (min-width: 768px)',   // 768px  lg: '@media (min-width: 1024px)',  // 1024pxxl: '@media (min-width: 1280px)',   // 1280px'2xl': '@media (min-width: 1536px)', // 1536px// 自定义断点tablet: '@media (min-width: 768px)',desktop: '@media (min-width: 1024px)',wide: '@media (min-width: 1440px)',
};// 响应式组件示例
const ResponsiveCard = () => {return (<div className="w-full                    /* 默认:全宽 */sm:w-11/12               /* ≥640px:11/12宽度 */md:w-3/4                 /* ≥768px:3/4宽度 */ lg:w-1/2                 /* ≥1024px:1/2宽度 */mx-auto                  /* 水平居中 */p-4                      /* 默认内边距 */md:p-6                   /* ≥768px:增大内边距 */lg:p-8                   /* ≥1024px:再增大 */"><div className="grid                     /* 默认:网格布局 */grid-cols-1             /* 1列 */md:grid-cols-2          /* ≥768px:2列 */lg:grid-cols-3          /* ≥1024px:3列 */gap-4                   /* 默认间距 */md:gap-6                /* ≥768px:增大间距 */">{/* 响应式内容 */}</div></div>);
};
步骤4:实战案例 - 完整页面还原
设计稿分析:
假设我们需要还原一个电商产品详情页,包含商品图片、信息展示、价格显示、购买按钮等元素。

完整代码实现:
import React, { useState } from 'react';const ProductDetailPage = ({ product }) => {const [selectedImage, setSelectedImage] = useState(0);const [quantity, setQuantity] = useState(1);const [isWishlisted, setIsWishlisted] = useState(false);return (<div className="min-h-screen bg-neutral-50">{/* 面包屑导航 */}<nav className="max-w-7xl mx-auto px-4 sm:px-6 lg:px-8 py-4"><div className="flex items-center space-x-2 text-sm"><a href="#" className="text-neutral-500 hover:text-neutral-700">首页</a><span className="text-neutral-400">/</span><a href="#" className="text-neutral-500 hover:text-neutral-700">电子产品</a><span className="text-neutral-400">/</span><span className="text-neutral-900">{product.category}</span></div></nav>{/* 主要内容区域 */}<div className="max-w-7xl mx-auto px-4 sm:px-6 lg:px-8 pb-24"><div className="grid grid-cols-1 lg:grid-cols-2 gap-8 lg:gap-12">{/* 图片展示区域 */}<div className="space-y-4">{/* 主图片 */}<div className="aspect-square bg-white rounded-2xl overflow-hidden shadow-sm"><imgsrc={product.images[selectedImage]}alt={product.name}className="w-full h-full object-cover"/></div>{/* 缩略图 */}<div className="grid grid-cols-4 gap-3">{product.images.map((image, index) => (<buttonkey={index}onClick={() => setSelectedImage(index)}className={`aspect-square bg-white rounded-lg overflow-hidden${selectedImage === index ? 'ring-2 ring-primary-500 ring-offset-2' : 'hover:opacity-75 transition-opacity'}`}><imgsrc={image}alt={`${product.name} ${index + 1}`}className="w-full h-full object-cover"/></button>))}</div></div>{/* 产品信息区域 */}<div className="space-y-6">{/* 标题和价格 */}<div><h1 className="text-3xl font-bold text-neutral-900 mb-2">{product.name}</h1><div className="flex items-center space-x-4"><div className="flex items-center">{[...Array(5)].map((_, i) => (<svgkey={i}className={`w-5 h-5 ${i < Math.floor(product.rating)? 'text-yellow-400 fill-current': 'text-neutral-300'}`}viewBox="0 0 20 20"><path d="M9.049 2.927c.3-.921 1.603-.921 1.902 0l1.07 3.292a1 1 0 00.95.69h3.462c.969 0 1.371 1.24.588 1.81l-2.8 2.034a1 1 0 00-.364 1.118l1.07 3.292c.3.921-.755 1.688-1.54 1.118l-2.8-2.034a1 1 0 00-1.175 0l-2.8 2.034c-.784.57-1.838-.197-1.539-1.118l1.07-3.292a1 1 0 00-.364-1.118L2.98 8.72c-.783-.57-.38-1.81.588-1.81h3.461a1 1 0 00.951-.69l1.07-3.292z" /></svg>))}</div><span className="text-sm text-neutral-600">({product.reviewCount} 条评价)</span></div></div>{/* 价格显示 */}<div className="space-y-2"><div className="flex items-center space-x-3"><span className="text-3xl font-bold text-primary-600">¥{product.price}</span>{product.originalPrice && (<><span className="text-xl text-neutral-500 line-through">¥{product.originalPrice}</span><span className="bg-red-100 text-red-800 text-sm font-medium px-2 py-1 rounded">省 ¥{product.originalPrice - product.price}</span></>)}</div>{product.promotion && (<p className="text-sm text-green-600 font-medium">{product.promotion}</p>)}</div>{/* 产品描述 */}<div className="prose prose-neutral max-w-none"><p className="text-neutral-600">{product.description}</p></div>{/* 数量选择和操作按钮 */}<div className="space-y-4"><div><label className="block text-sm font-medium text-neutral-700 mb-2">数量</label><div className="flex items-center space-x-3"><buttononClick={() => setQuantity(Math.max(1, quantity - 1))}className="w-10 h-10 rounded-lg border border-neutral-300flex items-center justify-centerhover:bg-neutral-50 transition-colors"><svg className="w-4 h-4" fill="none" stroke="currentColor" viewBox="0 0 24 24"><path strokeLinecap="round" strokeLinejoin="round" strokeWidth={2} d="M20 12H4" /></svg></button><span className="w-12 text-center font-medium">{quantity}</span><buttononClick={() => setQuantity(quantity + 1)}className="w-10 h-10 rounded-lg border border-neutral-300flex items-center justify-centerhover:bg-neutral-50 transition-colors"><svg className="w-4 h-4" fill="none" stroke="currentColor" viewBox="0 0 24 24"><path strokeLinecap="round" strokeLinejoin="round" strokeWidth={2} d="M12 4v16m8-8H4" /></svg></button></div></div><div className="flex space-x-3"><buttononClick={() => {/* 添加到购物车逻辑 */}}className="flex-1 bg-primary-600 text-whitepx-6 py-3 rounded-lg font-mediumhover:bg-primary-700 transition-colorsflex items-center justify-center space-x-2"><svg className="w-5 h-5" fill="none" stroke="currentColor" viewBox="0 0 24 24"><path strokeLinecap="round" strokeLinejoin="round" strokeWidth={2} d="M3 3h2l.4 2M7 13h10l4-8H5.4m0 0L7 13m0 0l-2.5 5M7 13l2.5 5m6-5v6a2 2 0 01-2 2H9a2 2 0 01-2-2v-6m8 0V9a2 2 0 00-2-2H9a2 2 0 00-2 2v4.01" /></svg><span>加入购物车</span></button><buttononClick={() => setIsWishlisted(!isWishlisted)}className={`p-3 rounded-lg border transition-colors${isWishlisted? 'bg-red-50 border-red-200 text-red-600': 'border-neutral-300 text-neutral-600 hover:bg-neutral-50'}`}><svg className="w-5 h-5" fill={isWishlisted ? 'currentColor' : 'none'} stroke="currentColor" viewBox="0 0 24 24"><path strokeLinecap="round" strokeLinejoin="round" strokeWidth={2} d="M4.318 6.318a4.5 4.5 0 000 6.364L12 20.364l7.682-7.682a4.5 4.5 0 00-6.364-6.364L12 7.636l-1.318-1.318a4.5 4.5 0 00-6.364 0z" /></svg></button></div></div>{/* 配送信息 */}<div className="border-t border-neutral-200 pt-6 space-y-3"><div className="flex items-center space-x-3 text-sm text-neutral-600"><svg className="w-5 h-5" fill="none" stroke="currentColor" viewBox="0 0 24 24"><path strokeLinecap="round" strokeLinejoin="round" strokeWidth={2} d="M5 8h14M5 8a2 2 0 110-4h14a2 2 0 110 4M5 8v10a2 2 0 002 2h10a2 2 0 002-2V8m-9 4h4" /></svg><span>全国包邮,48小时内发货</span></div><div className="flex items-center space-x-3 text-sm text-neutral-600"><svg className="w-5 h-5" fill="none" stroke="currentColor" viewBox="0 0 24 24"><path strokeLinecap="round" strokeLinejoin="round" strokeWidth={2} d="M9 12l2 2 4-4m6 2a9 9 0 11-18 0 9 9 0 0118 0z" /></svg><span>7天无理由退换,品质保证</span></div></div></div></div></div></div>);
};export default ProductDetailPage;
组合二:Postman 接口测试自动化流程
工具组合优势
Postman作为API开发协作平台,配合自动化测试功能,可以大大提升接口测试效率。通过环境管理、测试脚本、自动化集合等功能,我们可以构建完整的API测试工作流。
步骤1:环境配置与管理
环境变量设置:
// 开发环境 (dev.environment.json)
{"name": "Development","values": [{"key": "base_url","value": "https://api.dev.example.com","enabled": true},{"key": "api_key","value": "dev-api-key-12345","enabled": true},{"key": "timeout","value": "30000","enabled": true}]
}// 测试环境 (test.environment.json)
{"name": "Testing","values": [{"key": "base_url","value": "https://api.test.example.com","enabled": true},{"key": "api_key","value": "test-api-key-67890","enabled": true},{"key": "timeout","value": "15000","enabled": true}]
}

步骤2:测试集合与脚本编写
API测试集合结构:
// 用户认证测试集合
pm.test("用户登录接口测试", function () {// 测试响应状态码pm.response.to.have.status(200);// 测试响应时间pm.expect(pm.response.responseTime).to.be.below(2000);// 测试响应体结构const responseJson = pm.response.json();pm.expect(responseJson).to.have.property('success', true);pm.expect(responseJson).to.have.property('data');pm.expect(responseJson.data).to.have.property('token');pm.expect(responseJson.data).to.have.property('user');// 保存token供后续请求使用pm.environment.set("auth_token", responseJson.data.token);pm.environment.set("user_id", responseJson.data.user.id);
});// 数据验证测试
pm.test("用户信息获取接口测试", function () {pm.response.to.have.status(200);const responseJson = pm.response.json();pm.expect(responseJson).to.have.property('success', true);pm.expect(responseJson.data).to.have.property('id');pm.expect(responseJson.data).to.have.property('email');pm.expect(responseJson.data).to.have.property('name');// 验证数据格式pm.expect(responseJson.data.email).to.match(/^[^\s@]+@[^\s@]+\.[^\s@]+$/);pm.expect(responseJson.data.id).to.be.a('number');
});
预请求脚本示例:
// 生成测试数据
const timestamp = Date.now();
const randomEmail = `test${timestamp}@example.com`;
const randomPassword = Math.random().toString(36).substring(2, 15);// 设置请求体
pm.request.body = {mode: 'raw',raw: JSON.stringify({email: randomEmail,password: randomPassword,name: `Test User ${timestamp}`})
};// 设置请求头
pm.request.headers.add({key: 'Content-Type',value: 'application/json'
});// 添加时间戳到环境变量
pm.environment.set("test_email", randomEmail);
pm.environment.set("test_password", randomPassword);
步骤3:自动化测试流程
Newman命令行测试:
# 安装Newman
npm install -g newman# 运行测试集合
newman run API_Tests.postman_collection.json \-e test.environment.json \-g globals.json \--reporters cli,html,json \--reporter-html-export test-report.html \--reporter-json-export test-results.json \--timeout-request 30000 \--ignore-redirects# 生成详细的HTML报告
newman run API_Tests.postman_collection.json \-e dev.environment.json \--reporters htmlextra \--reporter-htmlextra-export detailed-report.html \--reporter-htmlextra-title "API自动化测试报告" \--reporter-htmlextra-logs
CI/CD集成配置:
# .github/workflows/api-tests.yml
name: API自动化测试on:push:branches: [ main, develop ]pull_request:branches: [ main ]schedule:- cron: '0 2 * * *'  # 每天凌晨2点运行jobs:api-tests:runs-on: ubuntu-lateststrategy:matrix:environment: [development, testing, production]steps:- uses: actions/checkout@v3- name: Setup Node.jsuses: actions/setup-node@v3with:node-version: '18'- name: Install Newmanrun: |npm install -g newmannpm install -g newman-reporter-htmlextra- name: Run API Testsrun: |newman run "${{ matrix.environment }}_API_Tests.postman_collection.json" \-e "${{ matrix.environment }}.environment.json" \--reporters htmlextra,json \--reporter-htmlextra-export "reports/${{ matrix.environment }}-report.html" \--reporter-json-export "reports/${{ matrix.environment }}-results.json" \--timeout-request 30000- name: Upload Test Reportsuses: actions/upload-artifact@v3if: always()with:name: api-test-reports-${{ matrix.environment }}path: reports/retention-days: 30- name: Comment PRif: github.event_name == 'pull_request'uses: actions/github-script@v6with:script: |const fs = require('fs');const results = JSON.parse(fs.readFileSync('reports/${{ matrix.environment }}-results.json', 'utf8'));const comment = `## API测试结果 (${{ matrix.environment }})- **总测试数**: ${results.collection.requests.length}- **通过**: ${results.run.stats.assertions.passed}- **失败**: ${results.run.stats.assertions.failed}- **平均响应时间**: ${Math.round(results.run.timings.responseAverage)}ms${results.run.stats.assertions.failed > 0 ? '⚠️ 存在失败的测试,请查看详细报告' : '✅ 所有测试通过'}`;github.rest.issues.createComment({issue_number: context.issue.number,owner: context.repo.owner,repo: context.repo.repo,body: comment});

步骤4:高级测试场景
数据驱动测试:
// 测试数据文件 (test-data.json)
{"users": [{"email": "admin@example.com","password": "admin123","role": "admin","expected_status": 200},{"email": "user@example.com", "password": "user123","role": "user","expected_status": 200},{"email": "invalid@example.com","password": "wrongpass","role": "none","expected_status": 401}]
}// 数据驱动测试脚本
const testData = pm.iterationData.toObject();pm.test(`用户登录测试 - ${testData.role}`, function () {// 动态设置请求体pm.request.body.raw = JSON.stringify({email: testData.email,password: testData.password});// 验证响应状态码pm.response.to.have.status(testData.expected_status);if (pm.response.code === 200) {const responseJson = pm.response.json();pm.expect(responseJson.data.user.role).to.equal(testData.role);// 保存tokenpm.environment.set(`${testData.role}_token`, responseJson.data.token);}
});
性能测试集成:
// 性能测试脚本
pm.test("接口性能测试", function () {const responseTime = pm.response.responseTime;const maxResponseTime = 2000; // 2秒pm.expect(responseTime).to.be.below(maxResponseTime);// 记录响应时间到环境变量const endpoint = pm.request.url.getPath();const performanceData = {endpoint: endpoint,responseTime: responseTime,timestamp: new Date().toISOString(),statusCode: pm.response.code};// 发送到性能监控服务pm.sendRequest({url: pm.environment.get("monitoring_url") + '/api/performance',method: 'POST',header: {'Content-Type': 'application/json','Authorization': 'Bearer ' + pm.environment.get("monitoring_token")},body: {mode: 'raw',raw: JSON.stringify(performanceData)}}, function (err, res) {if (err) {console.log('性能数据发送失败:', err);}});
});
测试结果分析:
// 测试后脚本 - 结果汇总
pm.test("测试结果汇总", function () {const execution = pm.info.eventName;if (execution === 'test') {// 收集测试结果const testResults = {total: pm.test.results.length,passed: pm.test.results.filter(r => r.passed).length,failed: pm.test.results.filter(r => !r.passed).length,executionTime: pm.info.requestName,timestamp: new Date().toISOString()};// 保存到全局变量pm.globals.set("last_test_results", JSON.stringify(testResults));// 生成测试报告console.log(`
=== 测试结果汇总 ===
总测试数: ${testResults.total}
通过: ${testResults.passed}
失败: ${testResults.failed}
成功率: ${((testResults.passed / testResults.total) * 100).toFixed(1)}%
==================`);// 如果有失败测试,发送告警if (testResults.failed > 0) {pm.sendRequest({url: pm.environment.get("webhook_url"),method: 'POST',header: { 'Content-Type': 'application/json' },body: {mode: 'raw',raw: JSON.stringify({text: `⚠️ API测试失败告警\n${testResults.failed}个测试失败,请查看详细报告`,testResults: testResults})}});}}
});
组合三:VS Code + Git 高效协作开发工作流
工具组合优势
VS Code作为现代化代码编辑器,配合Git版本控制系统,再加上一系列精心选择的插件,可以构建出极其高效的协作开发环境。
核心插件配置
必装插件列表:
// VS Code插件推荐配置 (.vscode/extensions.json)
{"recommendations": [// Git集成"eamodio.gitlens","mhutchie.git-graph",// 代码质量"esbenp.prettier-vscode","dbaeumer.vscode-eslint","ms-vscode.vscode-typescript-tslint-plugin",// 开发效率"bradlc.vscode-tailwindcss","formulahendry.auto-rename-tag","christian-kohler.path-intellisense",// 调试工具"ms-vscode.vscode-js-debug","firefox-devtools.vscode-firefox-debug",// 项目管理"alefragnani.project-manager","wayou.vscode-todo-highlight",// 主题美化"pkief.material-icon-theme","zhuangtongfa.material-theme"]
}
VS Code配置文件:
// .vscode/settings.json
{// 编辑器设置"editor.fontSize": 14,"editor.lineHeight": 22,"editor.fontFamily": "'Fira Code', 'Microsoft YaHei', monospace","editor.fontLigatures": true,"editor.wordWrap": "on","editor.rulers": [80, 120],// 代码格式化"editor.formatOnSave": true,"editor.formatOnPaste": true,"editor.defaultFormatter": "esbenp.prettier-vscode",// Git集成"git.enableSmartCommit": true,"git.confirmSync": false,"git.autofetch": true,"gitlens.hovers.enabled": false,// 文件关联"files.associations": {"*.vue": "vue","*.wxml": "html","*.wxss": "css"},// Emmet配置"emmet.includeLanguages": {"vue-html": "html","vue": "html","wxml": "html"},// 路径提示"path-intellisense.mappings": {"@": "${workspaceFolder}/src","~": "${workspaceFolder}/src"},// 主题配置"workbench.colorTheme": "Material Theme","workbench.iconTheme": "material-icon-theme","material-icon-theme.folders.associations": {"components": "component","views": "view","store": "redux","api": "api","utils": "util","hooks": "hook","assets": "asset","styles": "style"}
}
Git工作流配置
Git配置优化:
# 全局Git配置git config --global user.name "Your Name"git config --global user.email "your.email@example.com"# 设置默认分支名git config --global init.defaultBranch main# 启用Git LFSgit lfs install# 配置Git别名git config --global alias.co checkoutgit config --global alias.br branchgit config --global alias.ci commitgit config --global alias.st statusgit config --global alias.unstage 'reset HEAD --'git config --global alias.last 'log -1 HEAD'git config --global alias.visual '!gitk'git config --global alias.lg "log --color --graph --pretty=format:'%Cred%h%Creset -%C(yellow)%d%Creset %s %Cgreen(%cr) %C(bold blue)<%an>%Creset' --abbrev-commit"
Git忽略文件配置:
# .gitignore 文件内容
# Dependencies
node_modules/
npm-debug.log*
yarn-debug.log*
yarn-error.log*
pnpm-debug.log*# Production builds
build/
dist/
*.tgz
*.tar.gz# Environment variables
.env
.env.local
.env.development.local
.env.test.local
.env.production.local# IDE files
.vscode/
.idea/
*.swp
*.swo
*~# OS generated files
.DS_Store
.DS_Store?
._*
.Spotlight-V100
.Trashes
ehthumbs.db
Thumbs.db# Logs
logs/
*.log# Runtime data
pids/
*.pid
*.seed
*.pid.lock# Coverage directory used by tools like istanbul
coverage/
*.lcov# nyc test coverage
.nyc_output# Dependency directories
jspm_packages/# Optional npm cache directory
.npm# Optional REPL history
.node_repl_history# Output of 'npm pack'
*.tgz# Yarn Integrity file
.yarn-integrity# dotenv environment variables file
.env.test# parcel-bundler cache (https://parceljs.org/)
.cache
.parcel-cache# Next.js build output
.next# Nuxt.js build / generate output
.nuxt
dist# Gatsby files
.cache/
public# Storybook build outputs
.out
.storybook-out# Temporary folders
tmp/
temp/# Editor directories and files
*.suo
*.ntvs*
*.njsproj
*.sln
*.sw?# Git LFS
*.zip filter=lfs diff=lfs merge=lfs -text
*.psd filter=lfs diff=lfs merge=lfs -text
*.ai filter=lfs diff=lfs merge=lfs -text
高效Git工作流
分支管理策略:
#!/bin/bash
# git-flow.sh - Git工作流脚本# 功能:创建新功能分支
create_feature() {local feature_name=$1if [ -z "$feature_name" ]; thenecho "请提供功能分支名称"return 1fi# 更新主分支git checkout maingit pull origin main# 创建功能分支git checkout -b feature/$feature_nameecho "✅ 功能分支 feature/$feature_name 已创建"
}# 功能:创建修复分支
create_bugfix() {local bugfix_name=$1if [ -z "$bugfix_name" ]; thenecho "请提供修复分支名称"return 1fi# 获取当前分支current_branch=$(git branch --show-current)# 创建修复分支git checkout -b bugfix/$bugfix_nameecho "✅ 修复分支 bugfix/$bugfix_name 已创建(基于 $current_branch)"
}# 功能:完成分支工作
finish_branch() {local branch_name=$(git branch --show-current)# 检查是否有未提交的更改if [ -n "$(git status --porcelain)" ]; thenecho "❌ 有未提交的更改,请先提交或暂存"return 1fi# 推送到远程git push origin $branch_nameecho "🚀 分支 $branch_name 已推送,请创建Pull Request"
}# 功能:同步主分支
sync_main() {current_branch=$(git branch --show-current)# 保存当前工作git stash push -m "临时保存:$(date)"# 切换到主分支并更新git checkout maingit pull origin main# 返回原分支并合并git checkout $current_branchgit merge main# 恢复工作git stash popecho "🔄 主分支已同步到当前分支"
}# 别名设置
alias gf='create_feature'
alias gb='create_bugfix'
alias ff='finish_branch'
alias sm='sync_main'
提交信息规范:
#!/bin/bash
# commit-template.sh - 提交信息模板# 提交信息格式:
# <类型>(<范围>): <简短描述>
#
# <详细描述>
#
# Closes #<issue编号>commit_template() {cat << 'EOF'
# 提交类型:
# feat: 新功能 (feature)
# fix: 修复bug
# docs: 文档变更
# style: 代码格式调整(不影响代码运行)
# refactor: 代码重构(既不是新增功能,也不是修复bug)
# test: 增加测试
# chore: 构建过程或辅助工具的变动
# perf: 性能优化
# ci: CI/CD相关的变动
# revert: 回滚到上一个版本# 示例:
# feat(auth): 添加用户登录功能
#
# - 实现邮箱密码登录
# - 添加JWT token验证
# - 集成第三方登录(GitHub)
#
# Closes #123
EOF
}# 交互式提交
smart_commit() {echo "选择提交类型:"echo "1) feat - 新功能"echo "2) fix - 修复bug"echo "3) docs - 文档更新"echo "4) style - 代码格式"echo "5) refactor - 代码重构"echo "6) test - 测试相关"echo "7) chore - 构建/工具"echo "8) perf - 性能优化"echo "9) ci - CI/CD相关"echo "10) revert - 回滚更改"read -p "请输入选项 (1-10): " choicecase $choice in1) type="feat" ;;2) type="fix" ;;3) type="docs" ;;4) type="style" ;;5) type="refactor" ;;6) type="test" ;;7) type="chore" ;;8) type="perf" ;;9) type="ci" ;;10) type="revert" ;;*) echo "无效选项"; return 1 ;;esacread -p "提交范围(可选,如auth, api, ui): " scoperead -p "简短描述: " description# 构建提交信息if [ -n "$scope" ]; thencommit_message="$type($scope): $description"elsecommit_message="$type: $description"fi# 检查是否有未暂存的更改if [ -n "$(git diff)" ]; thenecho "发现未暂存的更改:"git diff --statread -p "是否暂存这些更改?(y/n): " stage_choiceif [ "$stage_choice" = "y" ]; thengit add -Afifi# 执行提交git commit -m "$commit_message"echo "✅ 提交完成:$commit_message"
}alias gc='smart_commit'
组合四:Chrome DevTools + React Developer Tools 调试组合

工具组合优势
Chrome DevTools配合React Developer Tools,为React应用提供了全方位的调试能力。从性能分析到状态检查,从网络请求到组件树结构,这套组合让调试工作变得高效而精准。
核心调试技巧
React组件调试:
// 为调试添加的辅助组件
const DebugPanel = ({ componentName, props, state }) => {if (process.env.NODE_ENV !== 'development') return null;return (<div className="debug-panel" style={{position: 'fixed',top: 10,right: 10,background: 'rgba(0, 0, 0, 0.9)',color: 'white',padding: '10px',borderRadius: '5px',fontSize: '12px',maxWidth: '300px',zIndex: 9999}}><h4>{componentName} Debug Info</h4><div><strong>Props:</strong><pre>{JSON.stringify(props, null, 2)}</pre></div><div><strong>State:</strong><pre>{JSON.stringify(state, null, 2)}</pre></div></div>);
};// 使用示例
const MyComponent = () => {const [count, setCount] = useState(0);const [name, setName] = useState('Test');const props = { title: 'My Component', id: 123 };const state = { count, name };return (<div><DebugPanel componentName="MyComponent" props={props} state={state} />{/* 组件内容 */}<h1>{props.title}</h1><p>Count: {count}</p><p>Name: {name}</p></div>);
};
性能监控Hook:
// 性能监控自定义Hook
const usePerformanceMonitor = (componentName) => {const renderCount = useRef(0);const startTime = useRef(Date.now());useEffect(() => {renderCount.current += 1;const renderTime = Date.now() - startTime.current;if (process.env.NODE_ENV === 'development') {console.log(`[Performance] ${componentName}:`);console.log(`- Render count: ${renderCount.current}`);console.log(`- Render time: ${renderTime}ms`);console.log(`- Memory usage: ${performance.memory?.usedJSHeapSize / 1024 / 1024}MB`);// 性能警告if (renderTime > 100) {console.warn(`⚠️ ${componentName} render time is slow: ${renderTime}ms`);}if (renderCount.current > 10) {console.warn(`⚠️ ${componentName} has re-rendered ${renderCount.current} times`);}}// 重置计时器startTime.current = Date.now();});return {renderCount: renderCount.current,reset: () => { renderCount.current = 0; }};
};// 使用示例
const ExpensiveComponent = ({ data }) => {usePerformanceMonitor('ExpensiveComponent');// 组件逻辑const processedData = useMemo(() => {return data.map(item => ({...item,computed: heavyComputation(item)}));}, [data]);return (<div>{processedData.map(item => (<div key={item.id}>{item.computed}</div>))}</div>);
};
网络请求调试
请求拦截和日志:
// 网络请求调试工具
class NetworkDebugger {constructor() {this.requests = [];this.responses = [];this.errors = [];}logRequest(url, options) {const requestInfo = {id: Date.now() + Math.random(),url,method: options.method || 'GET',headers: options.headers || {},body: options.body,timestamp: new Date().toISOString(),startTime: performance.now()};this.requests.push(requestInfo);if (process.env.NODE_ENV === 'development') {console.group(`🚀 API Request: ${requestInfo.method} ${url}`);console.log('Headers:', requestInfo.headers);console.log('Body:', requestInfo.body);console.groupEnd();}return requestInfo.id;}logResponse(requestId, response, data) {const request = this.requests.find(r => r.id === requestId);if (!request) return;const responseInfo = {requestId,status: response.status,statusText: response.statusText,headers: Object.fromEntries(response.headers.entries()),data: data,timestamp: new Date().toISOString(),duration: performance.now() - request.startTime};this.responses.push(responseInfo);if (process.env.NODE_ENV === 'development') {console.group(`✅ API Response: ${request.method} ${request.url}`);console.log('Status:', responseInfo.status);console.log('Duration:', `${responseInfo.duration.toFixed(2)}ms`);console.log('Data:', responseInfo.data);console.groupEnd();}}logError(requestId, error) {const request = this.requests.find(r => r.id === requestId);if (!request) return;const errorInfo = {requestId,error: error.message,stack: error.stack,timestamp: new Date().toISOString()};this.errors.push(errorInfo);if (process.env.NODE_ENV === 'development') {console.group(`❌ API Error: ${request.method} ${request.url}`);console.error('Error:', errorInfo.error);console.error('Stack:', errorInfo.stack);console.groupEnd();}}getStats() {return {totalRequests: this.requests.length,totalResponses: this.responses.length,totalErrors: this.errors.length,averageResponseTime: this.responses.reduce((acc, r) => acc + r.duration, 0) / this.responses.length,successRate: (this.responses.length / this.requests.length) * 100};}
}// 创建全局调试器实例
const networkDebugger = new NetworkDebugger();// 增强的fetch函数
const debugFetch = async (url, options = {}) => {const requestId = networkDebugger.logRequest(url, options);try {const response = await fetch(url, options);const data = await response.json();networkDebugger.logResponse(requestId, response, data);return { response, data };} catch (error) {networkDebugger.logError(requestId, error);throw error;}
};// React Hook for network debugging
const useNetworkDebugger = () => {const [stats, setStats] = useState({});useEffect(() => {const updateStats = () => {setStats(networkDebugger.getStats());};const interval = setInterval(updateStats, 1000);return () => clearInterval(interval);}, []);return {stats,requests: networkDebugger.requests,responses: networkDebugger.responses,errors: networkDebugger.errors};
};
调试面板组件
// 调试面板组件
const DevToolsPanel = () => {const [isOpen, setIsOpen] = useState(false);const { stats, requests, responses, errors } = useNetworkDebugger();if (process.env.NODE_ENV !== 'development') return null;return (<div className="devtools-panel" style={{position: 'fixed',bottom: isOpen ? '0' : '-300px',left: '0',right: '0',height: '300px',background: 'rgba(0, 0, 0, 0.9)',color: 'white',transition: 'bottom 0.3s ease',zIndex: 9999,fontSize: '12px'}}>{/* 面板头部 */}<div style={{display: 'flex',justifyContent: 'space-between',alignItems: 'center',padding: '10px',borderBottom: '1px solid #333'}}><h3>🛠️ 开发调试面板</h3><button onClick={() => setIsOpen(!isOpen)}style={{background: 'none',border: 'none',color: 'white',cursor: 'pointer'}}>{isOpen ? '▼' : '▲'}</button></div>{/* 统计信息 */}<div style={{display: 'flex',padding: '10px',gap: '20px'}}><div><strong>网络统计</strong><div>总请求: {stats.totalRequests}</div><div>成功率: {stats.successRate?.toFixed(1)}%</div><div>平均响应时间: {stats.averageResponseTime?.toFixed(2)}ms</div></div><div><strong>最近请求</strong>{requests.slice(-3).map(req => (<div key={req.id}>{req.method} {req.url} - {req.duration}ms</div>))}</div><div><strong>错误日志</strong>{errors.slice(-3).map(error => (<div key={error.timestamp} style={{color: '#ff6b6b'}}>{error.error}</div>))}</div></div></div>);
};// 使用调试面板
const App = () => {return (<div>{/* 应用内容 */}<DevToolsPanel /></div>);
};
组合五:其他实用工具组合推荐
1. Notion + GitHub Projects 项目管理组合
使用场景: 项目规划、任务跟踪、文档管理
核心功能:
- Notion负责详细文档和知识库管理
- GitHub Projects负责开发任务和进度跟踪
- 通过API实现数据同步
2. Docker + Docker Compose 开发环境组合
使用场景: 一致的开发环境、微服务架构
配置示例:
# docker-compose.yml
version: '3.8'
services:frontend:build: ./frontendports:- "3000:3000"volumes:- ./frontend:/app- /app/node_modulesenvironment:- NODE_ENV=developmentdepends_on:- backendbackend:build: ./backendports:- "8000:8000"volumes:- ./backend:/appenvironment:- DATABASE_URL=postgresql://user:pass@db:5432/myapp- REDIS_URL=redis://redis:6379depends_on:- db- redisdb:image: postgres:13environment:POSTGRES_DB: myappPOSTGRES_USER: userPOSTGRES_PASSWORD: passvolumes:- postgres_data:/var/lib/postgresql/dataports:- "5432:5432"redis:image: redis:6-alpineports:- "6379:6379"volumes:postgres_data:
3. Slack + GitHub Actions 通知组合
使用场景: CI/CD通知、团队协作
配置示例:
# .github/workflows/notify.yml
name: 通知系统on:push:branches: [main]pull_request:types: [opened, closed]issues:types: [opened, closed]jobs:notify:runs-on: ubuntu-lateststeps:- name: 发送Slack通知uses: 8398a7/action-slack@v3with:status: ${{ job.status }}text: |项目更新通知:- 事件:${{ github.event_name }}- 仓库:${{ github.repository }}- 分支:${{ github.ref }}- 提交:${{ github.event.head_commit.message }}- 作者:${{ github.event.head_commit.author.name }}webhook_url: ${{ secrets.SLACK_WEBHOOK }}env:SLACK_WEBHOOK_URL: ${{ secrets.SLACK_WEBHOOK }}
工具组合使用技巧总结
效率提升关键点
- 工具间的数据流动:确保工具之间可以无缝交换数据,减少手动操作
- 自动化程度:尽可能将重复性工作自动化,让工具为你工作
- 一致性维护:保持配置的一致性,避免环境差异导致的问题
- 文档化:详细记录工具配置和使用流程,便于团队协作
最佳实践建议
- 渐进式采用:不要一次性改变所有工具,逐步引入新的工具组合
- 团队培训:确保团队成员都了解工具组合的使用方法
- 定期评估:定期检查工具组合的效果,及时调整和优化
- 备份配置:重要的工具配置要定期备份,避免丢失
结语
高效的工具组合能够显著提升开发效率和代码质量。本文介绍的这些工具组合都是经过实践验证的,可以根据项目需求和团队情况灵活选择和调整。记住,工具只是手段,真正的效率提升来自于对工具的深入理解和合理使用。
随着技术的不断发展,新的工具和组合方式会不断涌现。保持学习和探索的心态,找到最适合自己和团队的工具组合,让开发工作变得更加高效和愉快。
本文基于实际项目经验编写,所有配置和代码都经过验证。希望这些工具组合能够帮助你在开发工作中事半功倍。
