零基础从头教学Linux(Day 57)
Python编程之常用模块
十一、xml与shelve模块
1.shelve模块简介
shelve类似于一个key-value数据库,可以很方便的用来保存Python的内存对象,其内部使用pickle来序列化数据,简单来说,使用者可以将一个列表、字典、或者用户自定义的类实例保存到shelve中,下次需要用的时候直接取出来,就是一个Python内存对象,不需要像传统数据库一样,先取出数据,然后用这些数据重新构造一遍所需要的对象。
2.shelve模块基本操作
import shelve
import datetimed = shelve.open('test1')  # 打开一个文件
info = {"age":23,"color":"red"
}name = ["tom", "bob", "lili"]d["name"] = name  # 持久化列表
d["info"] = info  # 持久化字典
d["data"] = datetime.datetime.now()d.close()
d = shelve.open('test1')  # 打开一个文件
print(d.get("name"))
print(d.get("info"))
print(d.get("data"))
3.xml模块
3.1.xml模块简介
xml协议在各种语言里的都是支持的,在python中可以用以下模块操作xml
3.2.xml模块基本操作
我们举一个例子:我们先新建一个xml文件(命名为xmltest.xml),内容如下 :
<?xml version="1.0"?>
<data><country name="Liechtenstein"><rank updated="yes">2</rank><year>2008</year><gdppc>141100</gdppc><neighbor name="Austria" direction="E"/><neighbor name="Switzerland" direction="W"/></country><country name="Singapore"><rank updated="yes">5</rank><year>2011</year><gdppc>59900</gdppc><neighbor name="Malaysia" direction="N"/></country><country name="Panama"><rank updated="yes">69</rank><year>2011</year><gdppc>13600</gdppc><neighbor name="Costa Rica" direction="W"/><neighbor name="Colombia" direction="E"/></country>
</data>
我们先看三个最基本的操作:
 # print(root.iter('year')) #全文搜索
# print(root.find('country')) #在root的子节点找,只找一个
# print(root.findall('country')) #在root的子节点找,找所有import xml.etree.ElementTree as ETtree = ET.parse("xmltest.xml")
root = tree.getroot()
print(root.tag)#遍历xml文档
for child in root:print('========>',child.tag,child.attrib,child.attrib['name'])for i in child:print(i.tag,i.attrib,i.text)#只遍历year 节点
for node in root.iter('year'):print(node.tag,node.text)
#---------------------------------------import xml.etree.ElementTree as ETtree = ET.parse("xmltest.xml")
root = tree.getroot()#修改
for node in root.iter('year'):new_year=int(node.text)+1node.text=str(new_year)node.set('updated','yes')node.set('version','1.0')
tree.write('test.xml')#删除node
for country in root.findall('country'):rank = int(country.find('rank').text)if rank > 50:root.remove(country)tree.write('output.xml')
#在country内添加(append)节点year2
import xml.etree.ElementTree as ET
tree = ET.parse("a.xml")
root=tree.getroot()
for country in root.findall('country'):for year in country.findall('year'):if int(year.text) > 2000:year2=ET.Element('year2')year2.text='新年'year2.attrib={'update':'yes'}country.append(year2) #往country节点下添加子节点tree.write('a.xml.swap')
3.3.可以自己创建xml文档
import xml.etree.ElementTree as ETnew_xml = ET.Element("namelist")
name = ET.SubElement(new_xml,"name",attrib={"enrolled":"yes"})
age = ET.SubElement(name,"age",attrib={"checked":"no"})
sex = ET.SubElement(name,"sex")
sex.text = '33'
name2 = ET.SubElement(new_xml,"name",attrib={"enrolled":"no"})
age = ET.SubElement(name2,"age")
age.text = '19'et = ET.ElementTree(new_xml) #生成文档对象
et.write("test.xml", encoding="utf-8",xml_declaration=True)ET.dump(new_xml) #打印生成的格式
十二、configparser模块
1.configparser模块基本操作
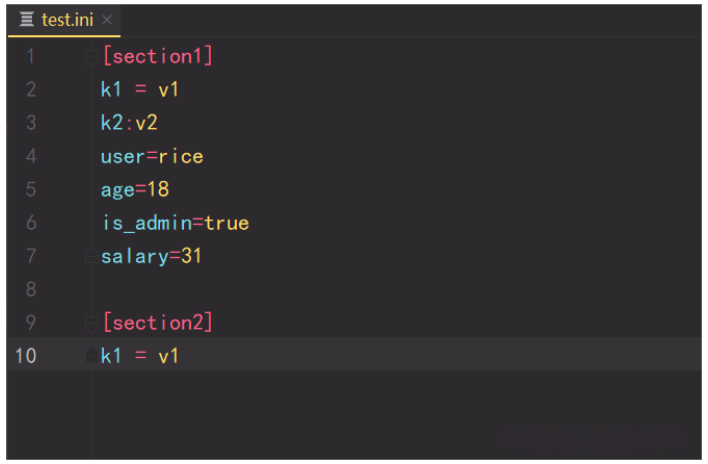
我们先创建一个配置文件(一后缀是.ini/.config)
配置文件如下
读取操作:
import configparserconfig=configparser.ConfigParser()
config.read('a.cfg')#查看所有的标题
res=config.sections() #['section1', 'section2']
print(res)#查看标题section1下所有key=value的key
options=config.options('section1')
print(options) #['k1', 'k2', 'user', 'age', 'is_admin', 'salary']#查看标题section1下所有key=value的(key,value)格式
item_list=config.items('section1')
print(item_list) #[('k1', 'v1'), ('k2', 'v2'), ('user', 'egon'), ('age', '18'), ('is_admin', 'true'), ('salary', '31')]#查看标题section1下user的值=>字符串格式
val=config.get('section1','user')
print(val) #egon#查看标题section1下age的值=>整数格式
val1=config.getint('section1','age')
print(val1) #18#查看标题section1下is_admin的值=>布尔值格式
val2=config.getboolean('section1','is_admin')
print(val2) #True#查看标题section1下salary的值=>浮点型格式
val3=config.getfloat('section1','salary')
print(val3) #31.0
我们也有一些修改操作:import configparserconfig=configparser.ConfigParser()
config.read('a.cfg',encoding='utf-8')#删除整个标题section2
config.remove_section('section2')#删除标题section1下的某个k1和k2
config.remove_option('section1','k1')
config.remove_option('section1','k2')#判断是否存在某个标题
print(config.has_section('section1'))#判断标题section1下是否有user
print(config.has_option('section1',''))#添加一个标题
config.add_section('egon')#在标题egon下添加name=egon,age=18的配置
config.set('egon','name','egon')
config.set('egon','age',18) #报错,必须是字符串#最后将修改的内容写入文件,完成最终的修改
config.write(open('a.cfg','w'))
基于上述方法,添加一个ini文档:
import configparserconfig = configparser.ConfigParser()
config["DEFAULT"] = {'ServerAliveInterval': '45','Compression': 'yes','CompressionLevel': '9'}config['bitbucket.org'] = {}
config['bitbucket.org']['User'] = 'hg'
config['topsecret.server.com'] = {}
topsecret = config['topsecret.server.com']
topsecret['Host Port'] = '50022'     # mutates the parser
topsecret['ForwardX11'] = 'no'  # same here
config['DEFAULT']['ForwardX11'] = 'yes'
with open('example.ini', 'w') as configfile:config.write(configfile)
十三、logging模块
1.日志级别
CRITICAL = 50 #FATAL = CRITICAL
ERROR = 40
WARNING = 30 #WARN = WARNING
INFO = 20
DEBUG = 10
NOTSET = 0 #不设置
2.默认级别为warning,默认打印到终端
import logginglogging.debug('调试debug')
logging.info('消息info')
logging.warning('警告warn')
logging.error('错误error')
logging.critical('严重critical')'''
WARNING:root:警告warn
ERROR:root:错误error
CRITICAL:root:严重critical
'''
3.为logging模块指定全局配置,针对所有logger有效,控制打印到文件中
可在logging.basicConfig()函数中可通过具体参数来更改logging模块默认行为,可用参数有
filename:用指定的文件名创建FiledHandler(后边会具体讲解handler的概念),这样日志会被存储在指定的文件中。
filemode:文件打开方式,在指定了filename时使用这个参数,默认值为“a”还可指定为“w”。
format:指定handler使用的日志显示格式。
datefmt:指定日期时间格式。
level:设置rootlogger(后边会讲解具体概念)的日志级别
stream:用指定的stream创建StreamHandler。可以指定输出到sys.stderr,sys.stdout或者文件,默认为sys.stderr。若同时列出了filename和stream两个参数,则stream参数会被忽略。
format参数中可能用到的格式化串:
%(name)s Logger的名字
%(levelno)s 数字形式的日志级别
%(levelname)s 文本形式的日志级别
%(pathname)s 调用日志输出函数的模块的完整路径名,可能没有
%(filename)s 调用日志输出函数的模块的文件名
%(module)s 调用日志输出函数的模块名
%(funcName)s 调用日志输出函数的函数名
%(lineno)d 调用日志输出函数的语句所在的代码行
%(created)f 当前时间,用UNIX标准的表示时间的浮 点数表示
%(relativeCreated)d 输出日志信息时的,自Logger创建以 来的毫秒数
%(asctime)s 字符串形式的当前时间。默认格式是 “2003-07-08 16:49:45,896”。逗号后面的是毫秒
%(thread)d 线程ID。可能没有
%(threadName)s 线程名。可能没有
%(process)d 进程ID。可能没有
%(message)s用户输出的消息
#========使用
import logging
logging.basicConfig(filename='access.log',format='%(asctime)s - %(name)s - %(levelname)s -%(module)s:  %(message)s',datefmt='%Y-%m-%d %H:%M:%S %p',level=10)logging.debug('调试debug')
logging.info('消息info')
logging.warning('警告warn')
logging.error('错误error')
logging.critical('严重critical')
#========结果
access.log内容:
2017-07-28 20:32:17 PM - root - DEBUG -test:  调试debug
2017-07-28 20:32:17 PM - root - INFO -test:  消息info
2017-07-28 20:32:17 PM - root - WARNING -test:  警告warn
2017-07-28 20:32:17 PM - root - ERROR -test:  错误error
2017-07-28 20:32:17 PM - root - CRITICAL -test:  严重critical
4.logging模块的Formatter,Handler,Logger,Filter对象
我们需要记住的几个参数:
1.logger:产生日志的对象
2.Filter:过滤日志的对象
3.Handler:接收日志然后控制打印到不同的地方,FileHandler用来打印到文件中,StreamHandler用来打印到终端
4.Formatter对象:可以定制不同的日志格式对象,然后绑定给不同的Handler对象使用,以此来控制不同的Handler的日志格式
'''
critical=50
error =40
warning =30
info = 20
debug =10
'''import logging#1、logger对象:负责产生日志,然后交给Filter过滤,然后交给不同的Handler输出
logger=logging.getLogger(__file__)#2、Filter对象:不常用,略#3、Handler对象:接收logger传来的日志,然后控制输出
h1=logging.FileHandler('t1.log') #打印到文件
h2=logging.FileHandler('t2.log') #打印到文件
h3=logging.StreamHandler() #打印到终端#4、Formatter对象:日志格式
formmater1=logging.Formatter('%(asctime)s - %(name)s - %(levelname)s -%(module)s:  %(message)s',  #打印到文件datefmt='%Y-%m-%d %H:%M:%S %p',) formmater2=logging.Formatter('%(asctime)s :  %(message)s',  #打印到文件datefmt='%Y-%m-%d %H:%M:%S %p',)formmater3=logging.Formatter('%(name)s %(message)s',)  #打印到终端#5、为Handler对象绑定格式
h1.setFormatter(formmater1)
h2.setFormatter(formmater2)
h3.setFormatter(formmater3)#6、将Handler添加给logger并设置日志级别
logger.addHandler(h1)
logger.addHandler(h2)
logger.addHandler(h3)
logger.setLevel(10)#7、测试
logger.debug('debug')
logger.info('info')
logger.warning('warning')
logger.error('error')
logger.critical('critical')
5.Logger与Handler的级别
logger是第一级过滤,然后才能到handler,我们可以给logger和handler同时设置level,但是需要 是
import loggingform=logging.Formatter('%(asctime)s - %(name)s - %(levelname)s -%(module)s:  %(message)s',datefmt='%Y-%m-%d %H:%M:%S %p',)ch=logging.StreamHandler()ch.setFormatter(form)
# ch.setLevel(10)
ch.setLevel(0)l1=logging.getLogger('root')
# l1.setLevel(20)
l1.setLevel(10)
l1.addHandler(ch)  #发送的权限要在接收的权限里面,也就是发送的权限要比接收的权限要小l1.debug('l1 debug')
6.应用
6.1.应用1
·我们先写一个setting.py文件,来配置loger
# -*- coding: utf-8 -*-'''
@Time    : 2022/09/01 14:45
@Author  : Rice
@CSDN : C_小米同学
@FileName: setting.py
'''
"""
logging配置
"""import os# 1、定义三种日志输出格式,日志中可能用到的格式化串如下
# %(name)s Logger的名字
# %(levelno)s 数字形式的日志级别
# %(levelname)s 文本形式的日志级别
# %(pathname)s 调用日志输出函数的模块的完整路径名,可能没有
# %(filename)s 调用日志输出函数的模块的文件名
# %(module)s 调用日志输出函数的模块名
# %(funcName)s 调用日志输出函数的函数名
# %(lineno)d 调用日志输出函数的语句所在的代码行
# %(created)f 当前时间,用UNIX标准的表示时间的浮 点数表示
# %(relativeCreated)d 输出日志信息时的,自Logger创建以 来的毫秒数
# %(asctime)s 字符串形式的当前时间。默认格式是 “2003-07-08 16:49:45,896”。逗号后面的是毫秒
# %(thread)d 线程ID。可能没有
# %(threadName)s 线程名。可能没有
# %(process)d 进程ID。可能没有
# %(message)s用户输出的消息# 2、强调:其中的%(name)s为getlogger时指定的名字
standard_format = '[%(asctime)s][%(threadName)s:%(thread)d][task_id:%(name)s][%(filename)s:%(lineno)d]' \'[%(levelname)s][%(message)s]'simple_format = '[%(levelname)s][%(asctime)s][%(filename)s:%(lineno)d]%(message)s'test_format = '%(asctime)s] %(message)s'# 3、日志配置字典
LOGGING_DIC = {'version': 1,'disable_existing_loggers': False,'formatters': {'standard': {'format': standard_format},'simple': {'format': simple_format},'test': {'format': test_format},},'filters': {},'handlers': {#打印到终端的日志'console': {'level': 'DEBUG','class': 'logging.StreamHandler',  # 打印到屏幕'formatter': 'simple'},#打印到文件的日志,收集info及以上的日志'default': {'level': 'DEBUG','class': 'logging.handlers.RotatingFileHandler',  # 保存到文件,日志轮转'formatter': 'standard',# 可以定制日志文件路径# BASE_DIR = os.path.dirname(os.path.abspath(__file__))  # log文件的目录# LOG_PATH = os.path.join(BASE_DIR,'a1.log')'filename': 'a1.log',  # 日志文件'maxBytes': 1024*1024*5,  # 日志大小 5M'backupCount': 5,'encoding': 'utf-8',  # 日志文件的编码,再也不用担心中文log乱码了},'other': {'level': 'DEBUG','class': 'logging.FileHandler',  # 保存到文件'formatter': 'test','filename': 'a2.log','encoding': 'utf-8',},},'loggers': {#logging.getLogger(__name__)拿到的logger配置'''如果都没找到,则用空的'',key是用户提供的''''': {'handlers': ['default', 'console'],  # 这里把上面定义的两个handler都加上,即log数据既写入文件又打印到屏幕'level': 'DEBUG', # loggers(第一层日志级别关限制)--->handlers(第二层日志级别关卡限制)'propagate': False,  # 默认为True,向上(更高level的logger)传递,通常设置为False即可,否则会一份日志向上层层传递},'kkk': {'handlers': ['default', 'console'],  # 这里把上面定义的两个handler都加上,即log数据既写入文件又打印到屏幕'level': 'DEBUG',  # loggers(第一层日志级别关限制)--->handlers(第二层日志级别关卡限制)'propagate': False,  # 默认为True,向上(更高level的logger)传递,通常设置为False即可,否则会一份日志向上层层传递},'bbb': {'handlers': ['default',],  # 这里把上面定义的两个handler都加上,即log数据既写入文件又打印到屏幕'level': 'DEBUG',  # loggers(第一层日志级别关限制)--->handlers(第二层日志级别关卡限制)'propagate': False,  # 默认为True,向上(更高level的logger)传递,通常设置为False即可,否则会一份日志向上层层传递},'专门的采集': {'handlers': ['other',],'level': 'DEBUG','propagate': False,},},
}
然后,我们新建一个src.py来初始化并调用日志
# -*- coding: utf-8 -*-#拿到日志的产生者loggers-kkk/bbb
#先导入日志配置字典LOGGING_DIC
import setting
#import logging.config #注意,直接导入logging,然后在调config是不行的,这不是包,是文件,没有配置__init__文件from logging import config,getLogger
#导入
config.dictConfig(setting.LOGGING_DIC)# logger1 = getLogger('kkk')
#
# logger1.info('hello')  #info权限logger2 = getLogger('bbb')
logger2.info('nihao')
6.2.应用2:一个简单的案例
"""
MyLogging Test
"""import time
import logging
import my_logging  # 导入自定义的logging配置logger = logging.getLogger(__name__)  # 生成logger实例def demo():logger.debug("start range... time:{}".format(time.time()))logger.info("中文测试开始。。。")for i in range(10):logger.debug("i:{}".format(i))time.sleep(0.2)else:logger.debug("over range... time:{}".format(time.time()))logger.info("中文测试结束。。。")if __name__ == "__main__":my_logging.load_my_logging_cfg()  # 在你程序文件的入口加载自定义logging配置demo()
十四、re模块
1.正则表达式简介
正则就是用一些具有特殊含义的符号组合到一起(称为正则表达式)来描述字符或者字符串的方法。或者说:正则就是用来描述一类事物的规则。(在Python中)它内嵌在Python中,并通过 re 模块实现。正则表达式模式被编译成一系列的字节码,然后由用 C 编写的匹配引擎执行。
2.常用匹配模式
| 模式 | 描述 |
|---|---|
| \w | 匹配字母数字及下划线 |
| \W | 匹配非字母数字下划线 |
| \s | 匹配任意空白字符,等价于[Mt\n\Nf] |
| \S | 匹配任意非空字符 |
| \d | 匹配任意数字,等价于[0-9] |
| \D | 匹配任意非数字 |
| \A | 匹配字符串开始 |
| \Z | 匹配字符串结束,如果是存在换行,只匹配到换行前的结束字符串 |
| \G | 匹配最后匹配完成的位置 |
| \n | 匹配一个换行符 |
| \t | 匹配一个制表符 |
| $ | 匹配字符串的末尾。 |
| . | 匹配任意字符,除了换行符,当re.DOTALL标记被指定时,则可以匹配包括换行符的任意字符。 |
| […] | 用来表示一组字符,单独列出:[amk]匹配'a','m'或'k' |
| [^…] | 不在口中的字符:abc匹配除了a,b,c之外的字符。 |
| * | 匹配0个或多个的表达式。 |
| + | 匹配1个或多个的表达式。 |
| ? | 无配0个或1个由前面的正则表达式定义的片段,非贪婪方式 |
| {n} | 精确匹配n个前面表达式。 |
| {n,m} | 匹配n到m次由前面的正则表达式定义的片段,贪婪方式 |
| a|b | 匹配a或b |
| () | 匹配括号内的表达式,也表示一个组 |
# =================================匹配模式=================================
#一对一的匹配
# 'hello'.replace(old,new)
# 'hello'.find('pattern')#正则匹配
import re
#\w与\W
print(re.findall('\w','hello egon 123')) #['h', 'e', 'l', 'l', 'o', 'e', 'g', 'o', 'n', '1', '2', '3']
print(re.findall('\W','hello egon 123')) #[' ', ' ']#\s与\S
print(re.findall('\s','hello  egon  123')) #[' ', ' ', ' ', ' ']
print(re.findall('\S','hello  egon  123')) #['h', 'e', 'l', 'l', 'o', 'e', 'g', 'o', 'n', '1', '2', '3']#\n \t都是空,都可以被\s匹配
print(re.findall('\s','hello \n egon \t 123')) #[' ', '\n', ' ', ' ', '\t', ' ']#\n与\t
print(re.findall(r'\n','hello egon \n123')) #['\n']
print(re.findall(r'\t','hello egon\t123')) #['\n']#\d与\D
print(re.findall('\d','hello egon 123')) #['1', '2', '3']
print(re.findall('\D','hello egon 123')) #['h', 'e', 'l', 'l', 'o', ' ', 'e', 'g', 'o', 'n', ' ']#\A与\Z
print(re.findall('\Ahe','hello egon 123')) #['he'],\A==>^
print(re.findall('123\Z','hello egon 123')) #['he'],\Z==>$
#指定匹配必须出现在字符串的开头或行的开头。\A
#指定匹配必须出现在字符串的开头(忽略 Multiline 选项)。$
#指定匹配必须出现在以下位置:字符串结尾、字符串结尾的 \n 之前或行的结尾。\Z
#指定匹配必须出现在字符串的结尾或字符串结尾的 \n 之前(忽略 Multiline 选项)。#^与$
print(re.findall('^h','hello egon 123')) #['h']
print(re.findall('3$','hello egon 123')) #['3']# 重复匹配:| . | * | ? | .* | .*? | + | {n,m} |
#.
print(re.findall('a.b','a1b')) #['a1b']
print(re.findall('a.b','a1b a*b a b aaab')) #['a1b', 'a*b', 'a b', 'aab']
print(re.findall('a.b','a\nb')) #[]
print(re.findall('a.b','a\nb',re.S)) #['a\nb']
print(re.findall('a.b','a\nb',re.DOTALL)) #['a\nb']同上一条意思一样#*
print(re.findall('ab*','bbbbbbb')) #[]
print(re.findall('ab*','a')) #['a']
print(re.findall('ab*','abbbb')) #['abbbb']#?
print(re.findall('ab?','a')) #['a']
print(re.findall('ab?','abbb')) #['ab']
#匹配所有包含小数在内的数字
print(re.findall('\d+\.?\d*',"asdfasdf123as1.13dfa12adsf1asdf3")) #['123', '1.13', '12', '1', '3']#.*默认为贪婪匹配
print(re.findall('a.*b','a1b22222222b')) #['a1b22222222b']#.*?为非贪婪匹配:推荐使用
print(re.findall('a.*?b','a1b22222222b')) #['a1b']#+
print(re.findall('ab+','a')) #[]
print(re.findall('ab+','abbb')) #['abbb']#{n,m}
print(re.findall('ab{2}','abbb')) #['abb']
print(re.findall('ab{2,4}','abbb')) #['abb']
print(re.findall('ab{1,}','abbb')) #'ab{1,}' ===> 'ab+'
print(re.findall('ab{0,}','abbb')) #'ab{0,}' ===> 'ab*'#[]
print(re.findall('a[1*-]b','a1b a*b a-b')) #[]内的都为普通字符了,且如果-没有被转意的话,应该放到[]的开头或结尾
print(re.findall('a[^1*-]b','a1b a*b a-b a=b')) #[]内的^代表的意思是取反,所以结果为['a=b']
print(re.findall('a[0-9]b','a1b a*b a-b a=b')) #[]内的^代表的意思是取反,所以结果为['a=b']
print(re.findall('a[a-z]b','a1b a*b a-b a=b aeb')) #[]内的^代表的意思是取反,所以结果为['a=b']
print(re.findall('a[a-zA-Z]b','a1b a*b a-b a=b aeb aEb')) #[]内的^代表的意思是取反,所以结果为['a=b']#\# print(re.findall('a\\c','a\c')) #对于正则来说a\\c确实可以匹配到a\c,但是在python解释器读取a\\c时,会发生转义,然后交给re去执行,所以抛出异常
print(re.findall(r'a\\c','a\c')) #r代表告诉解释器使用rawstring,即原生字符串,把我们正则内的所有符号都当普通字符处理,不要转义
print(re.findall('a\\\\c','a\c')) #同上面的意思一样,和上面的结果一样都是['a\\c']#():分组
print(re.findall('ab+','ababab123')) #['ab', 'ab', 'ab']
print(re.findall('(ab)+123','ababab123')) #['ab'],匹配到末尾的ab123中的ab
print(re.findall('(?:ab)+123','ababab123')) #findall的结果不是匹配的全部内容,而是组内的内容,?:可以让结果为匹配的全部内容
print(re.findall('href="(.*?)"','<a href="http://www.baidu.com">点击</a>'))#['http://www.baidu.com']
print(re.findall('href="(?:.*?)"','<a href="http://www.baidu.com">点击</a>'))#['href="http://www.baidu.com"']#|
print(re.findall('compan(?:y|ies)','Too many companies have gone bankrupt, and the next one is my company'))
# ===========================re模块提供的方法介绍===========================
import re
#1
print(re.findall('e','alex make love') )   #['e', 'e', 'e'],返回所有满足匹配条件的结果,放在列表里
#2
print(re.search('e','alex make love').group()) #e,只到找到第一个匹配然后返回一个包含匹配信息的对象,该对象可以通过调用group()方法得到匹配的字符串,如果字符串没有匹配,则返回None。#3
print(re.match('e','alex make love'))    #None,同search,不过在字符串开始处进行匹配,完全可以用search+^代替match#4
print(re.split('[ab]','abcd'))     #['', '', 'cd'],先按'a'分割得到''和'bcd',再对''和'bcd'分别按'b'分割#5
print('===>',re.sub('a','A','alex make love')) #===> Alex mAke love,不指定n,默认替换所有
print('===>',re.sub('a','A','alex make love',1)) #===> Alex make love
print('===>',re.sub('a','A','alex make love',2)) #===> Alex mAke love
print('===>',re.sub('^(\w+)(.*?\s)(\w+)(.*?\s)(\w+)(.*?)$',r'\5\2\3\4\1','alex make love')) #===> love make alexprint('===>',re.subn('a','A','alex make love')) #===> ('Alex mAke love', 2),结果带有总共替换的个数#6
obj=re.compile('\d{2}')print(obj.search('abc123eeee').group()) #12
print(obj.findall('abc123eeee')) #['12'],重用了obj