nginx安装和使用

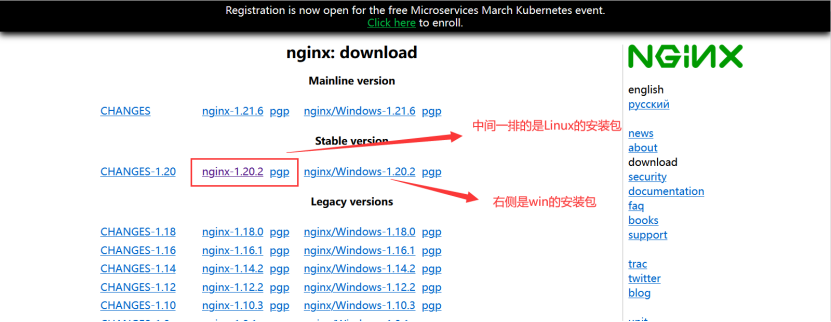
1.官网下载
http://nginx.org/en/download.html
2.安装
1. 解压nginx-1.5.9.tar.gz:
tar -zxvf nginx-1.5.9.tar.gz
2.新建文件夹:
mkdir nginx1.20.2
chmod -R 777 nginx1.20.2
2.初始化:
./configure(指定安装目录:./configure --prefix=/home/nginx/nginx1.20.2
,其中nginx1.20.2是新建的文件夹,不能安装在解压的文件夹!)
 可能报错:
可能报错:
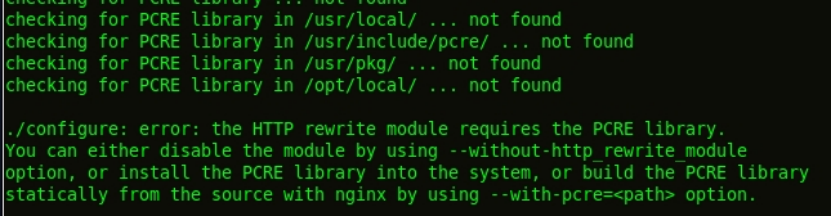
安装pcre-devel解决问题
yum -y install pcre-devel
还有可能出现:
错误提示:./configure: error: the HTTP cache module requires md5 functions
from OpenSSL library. You can either disable the module by using
--without-http-cache option, or install the OpenSSL library into the system,
or build the OpenSSL library statically from the source with nginx by using
--with-http_ssl_module --with-openssl=<path> options.
解决办法:
yum -y install openssl openssl-devel
./configure执行成功后。
继续执行:
make
继续执行:
make install
3.启动
查看启动文件的位置
whereis nginx
启动(不报错,没有提示什么,就是安装成功)
./nginx
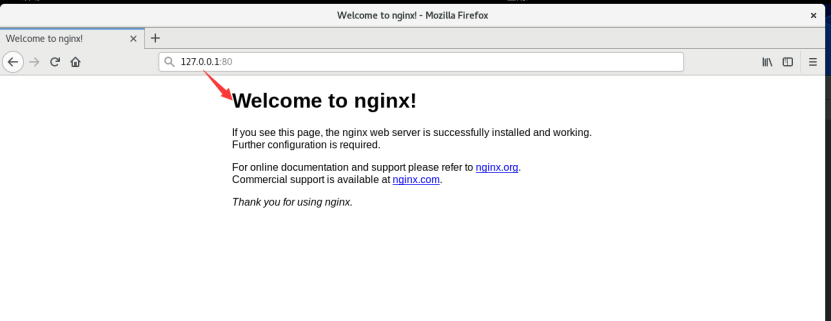
4.验证安装成功
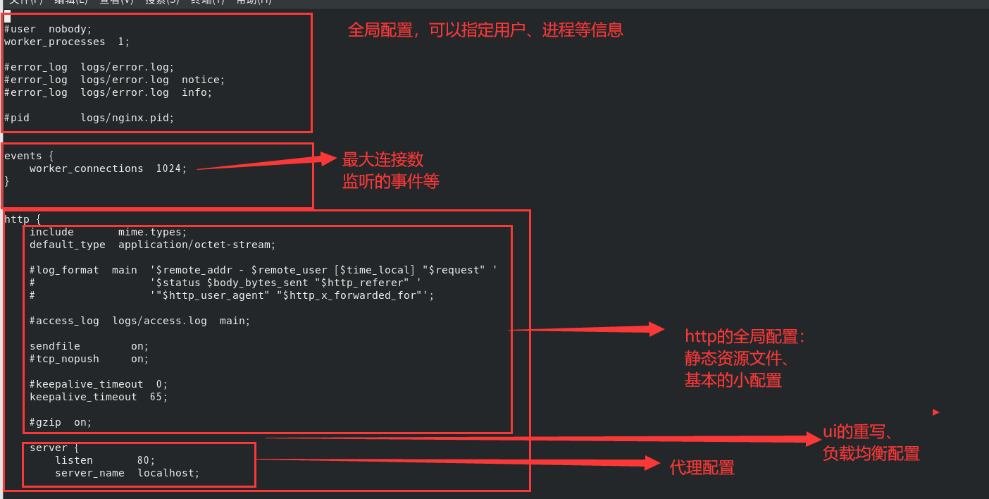
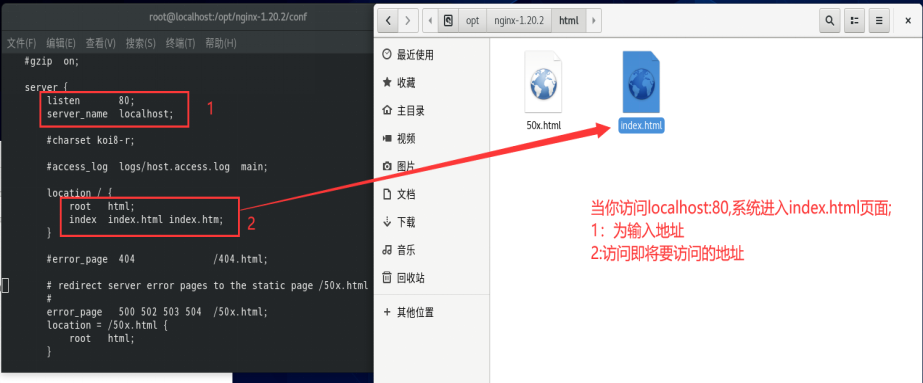
5.配置
cd /opt/nginx-1.20.2/conf
vi nginx.conf
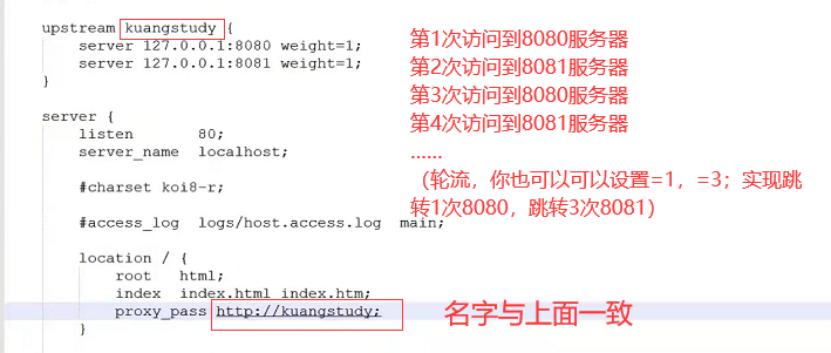
代理的案例:如果你有两个服务器,用户登录的时候随机跳转到任意一台
6.nginx基本命令:
cd /usr/local/nginx
./nginx 启动
./nginx -t 检查nginx.conf配置文件是否正确
./nginx -s stop 停止
./nginx -c /usr/local/nginx/con/nginx.conf 加载配置文件
./nginx –t -c /usr/local/nginx/con/nginx.conf 测试配置文件
./nginx -s reload 重新加载配置文件
ps -aux|grep nginx 查看nginx进程
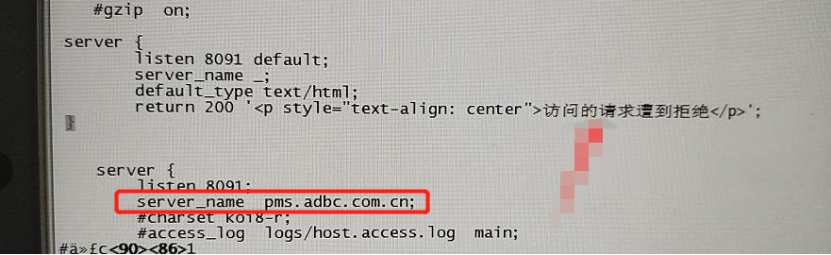
7.禁止ip访问,提示
如果需要禁止ip访问,并且ip访问需要给出提示时,参考如下内容:
defalut:指默认访问的server。就是当外网访问进入nginx时,默认就是用这个带default的server{}。
server_name _:其中_是随便写的,可以是-,也可以是——。意思就是当不知名的(不确定的)ip访问nginx时,就到哪个server{}。他的作用就是禁止ip访问。
server {
listen 8090 default;
server_name _;
default_type text/html;
return 200 '<p style="text-align: center">访问的请求遭到拒绝</p>';
}

解决方法:需要把nginx.conf文件拉出来,通过EditPlus修改为UTF-8编码
8.只允许域名访问:
当只允许域名访问时,再新增一个server{},在server_name后面设置域名即可。
9.日志设置
设置当外网访问192.168.65.129:8090时,日志在这里查看。每个server{}都可以设置一个日志。

10.测试环境nginx.conf模板:
#172.25.29.110:8090代理172.26.1.38:8080/cpms/�?72.25.29.110:8090/cms�?
#user  nobody;
#进程数量
worker_processes  1;#error_log  logs/error.log;
#error_log  logs/error.log  notice;
#error_log  logs/error.log  info;
error_log   /usr/local/nginx/logs/error.log;
#access_log  /usr/local/nginx/logs/access.log;#pid        logs/nginx.pid;#最大连接数
events {worker_connections  1024;
}http {include       mime.types;	default_type  application/octet-stream;
#upstream1
#	upstream cpms {
#    server 172.26.1.40:8070;
#    }
#upstream2
#	upstream cms {
#   server 172.25.29.112:8070;
#    }#log_format  main  '$remote_addr - $remote_user [$time_local] "$request" '#                  '$status $body_bytes_sent "$http_referer" '#                  '"$http_user_agent" "$http_x_forwarded_for"';#access_log  logs/access.log  main;#开启高效文件传输模式sendfile        on;#tcp_nopush     on;#连接超时时间,单位秒#keepalive_timeout  0;keepalive_timeout  65;#gzip  on;#default的作用是默认第一个server请求,当外部请求nginx时,找的第一个server就是这个。其中这个的ip就是,当ip访问时返回200.如果吧ip改为-或者_等,意思是所有访问都返回200.如果只需要域名访问,下面开通域名即可。#server {#listen 8090 default;#server_name 192.168.65.129;#access_log /usr/local/nginx/logs/1/access.log;#default_type text/html;#return 200 '<p style="text-align: center">禁止ip访问The request for access was denied</p>';  #return 403;#}server {listen 8090;server_name  localhost;#charset koi8-r;#access_log  logs/host.access.log  main;
#代理1
#
#client_body_buffer_size 10m;	client_body_temp_path /usr/local/nginx/temp;client_max_body_size 3G;#nginx的server中添加配置禁用除GET|POST|PUT|DELETE之外的请求方法,否则其他方式访问返回403.
if ($request_method !~* GET|POST|PUT|DELETE) {return 403;}#读取时间fastcgi_read_timeout 300;#location /pms/j_sso {#rewrite ^/.* http://$server_name/pms/j_form;#}#location /pms {#root   html;#index  index.html index.htm;	#proxy_pass http://192.168.65.129:8080/pms;#proxy_redirect http:// https://;#proxy_set_header Proxy nginx;#proxy_set_header Host $http_host;#proxy_set_header X-Real-IP $remote_addr;#proxy_set_header X-Forwarded-For $proxy_add_x_forwarded_for;#proxy_set_header X-Forwarded-Proto $scheme;#proxy_set_header X-Forwarded-Port $server_port;#}location /pms {#root   html;#index  index.html index.htm;proxy_pass  http://192.168.65.129:8080/pms;#proxy_set_header Host $host;proxy_set_header Host $host:$server_port;proxy_set_header X-Real-IP $remote_addr;proxy_set_header X-Forwarded-For $proxy_add_x_forwarded_for;proxy_set_header Upgrade $http_upgrade;proxy_set_header Connection "Upgrade";#proxy_redirect http://190.2.37.238:8070 https://testpms.com:8087/pms/j_form;}location /report {root   html;index  index.html index.htm;proxy_pass http://192.168.65.129:8080/report;proxy_redirect http:// https://;proxy_set_header Proxy nginx;proxy_set_header Host $http_host;proxy_set_header X-Real-IP $remote_addr;proxy_set_header X-Forwarded-For $proxy_add_x_forwarded_for;proxy_set_header X-Forwarded-Proto $scheme;proxy_set_header X-Forwarded-Port $server_port;}}#server {#listen 8088;#server_name  localhost;#c    location /cms {#      root   html;#            index  index.html index.htm;#                  proxy_pass   http://172.25.29.112:8070;#                          }#                          harset koi8-r;#access_log  logs/host.access.log  main;
#代理2#error_page  404              /404.html;# redirect server error pages to the static page /50x.html##error_page   500 502 503 504  /50x.html;#location = /50x.html {#    root   html;#}# proxy the PHP scripts to Apache listening on 127.0.0.1:80##location ~ \.php$ {#    proxy_pass   http://127.0.0.1;#}# pass the PHP scripts to FastCGI server listening on 127.0.0.1:9000##location ~ \.php$ {#    root           html;#    fastcgi_pass   127.0.0.1:9000;#    fastcgi_index  index.php;#    fastcgi_param  SCRIPT_FILENAME  /scripts$fastcgi_script_name;#    include        fastcgi_params;#}# deny access to .htaccess files, if Apache's document root# concurs with nginx's one##location ~ /\.ht {#    deny  all;#}#}# another virtual host using mix of IP-, name-, and port-based configuration##server {#    listen       8000;#    listen       somename:8080;#    server_name  somename  alias  another.alias;#    location / {#        root   html;#        index  index.html index.htm;#    }#}# HTTPS server##server {#    listen       443 ssl;#    server_name  localhost;#    ssl_certificate      cert.pem;#    ssl_certificate_key  cert.key;#    ssl_session_cache    shared:SSL:1m;#    ssl_session_timeout  5m;#    ssl_ciphers  HIGH:!aNULL:!MD5;#    ssl_prefer_server_ciphers  on;#    location / {#        root   html;#        index  index.html index.htm;#    }#}}
11.开机自启动
https://blog.csdn.net/u011066470/article/details/126490622
12.怎么看用的是那个nginx的配置文件
nginx -t
- 遇到的问题
没有安装gcc和pcre模块
yum install gcc
yum install pcre pcre-devel
yuminstall -y zlib-devel
启动时报错(没有权限):
可能是因为你没有80的端口权限,端口修改为别的就行,例如我修改为8080,就可以了
