使用 .NET Core 6 Web API 的 RabbitMQ 消息队列
在本文中,我们将讨论 RabbitMQ 消息队列及其使用 .NET Core 6 API 作为消息生产者和控制台应用程序作为消息消费者的实现。
示例代码:https://download.csdn.net/download/hefeng_aspnet/91661804
如果您喜欢此文章,请收藏、点赞、评论,谢谢,祝您快乐每一天。
先决条件
Visual Studio 2022
Docker Desktop
.NET Core 6 SDK
RabbitMQ介绍
Rabbit MQ 是一个消息代理,在使用多个微服务时充当中间件。
RabbitMQ 是一款开源消息代理软件。有时它也被称为面向消息的中间件。
RabbitMQ 是用 Erlang 编程语言编写的。
当某些资源花费大量时间来处理数据时,RabbitMQ 用于减少 Web 应用程序的负载和交付时间。
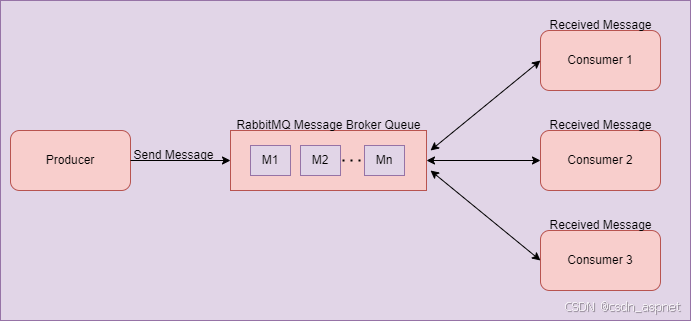
• 如上图所示,有一个生产者向 RabbitMQ 服务器发送消息。服务器会以先进先出 (FIFO) 的方式将该消息存储在队列中。
• 生产者将消息发送到队列后,可能会有多个消费者需要该生产者生成的消息。在这种情况下,消费者会订阅该消息并从消息队列中获取该消息,如上图所示。
• 在本节中,我们将使用一个电子商务网站作为示例,以便更全面地了解。
• 当我们使用电商网站时,后台会运行多个微服务。其中一个服务负责处理订单详情,另一个服务负责处理付款详情和收据。
• 假设我们下了一个订单。此时,订单服务将启动并处理我们的订单。获取订单详情后,它会将数据发送给支付服务,支付服务接收付款并将付款收据发送给最终用户。
• 在这种情况下,支付服务可能存在一些技术问题。如果用户因此未收到付款收据,则可能会受到影响,并需要联系支持团队,了解订单状态。
• 在用户(消费者)端可能还存在另一种情况。例如,由于某些技术问题,用户在付款过程中退出了应用程序。然而,在后端服务成功处理付款后,用户不会收到任何收据详情。
• 在这些场景中,RabbitMQ 在消息队列中处理消息方面发挥着至关重要的作用。因此,当消费者上线时,他将从消息队列中收到由生产者生成的订单收据消息,而不会对 Web 应用程序造成影响。
• 所有这些示例仅供理解之用。在使用多个微服务时,RabbitMQ 在许多场景中都可能发挥重要作用。有时,RabbitMQ 会被充分利用,用于多个服务之间的负载均衡或许多其他用途。
使用 RabbitMQ 的好处
使用消息代理向消费者发送数据有很多好处。下面我们将讨论其中的一些好处。
高可用性
当应用程序使用多个微服务时,如果其中一个微服务由于技术原因停止,消息永远不会丢失。相反,它会持久保存在 RabbitMQ 服务器中。一段时间后,当我们的服务恢复运行时,它将连接到 RabbitMQ 并轻松接收待处理的消息。
可扩展性
当我们使用 RabbitMQ 时,我们的应用程序不再依赖于一台服务器和虚拟机来处理请求。如果我们的服务器当时停止运行,RabbitMQ 会将应用程序负载转移到另一台在后台运行相同服务的服务器上。
使用 .NET Core 6 实现 RabbitMQ
让我们从使用 .NET Core 6 Web API 作为生产者和控制台应用程序作为消费者的 RabbitMQ 的实际实现开始。
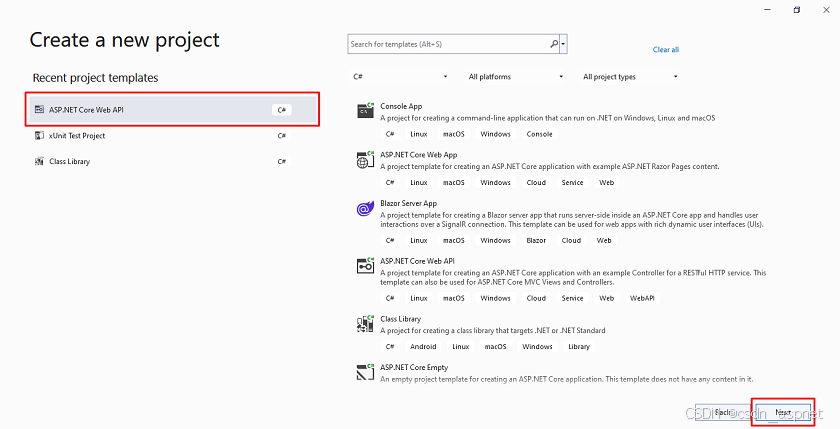
步骤 1.创建一个 .NET Core API 项目
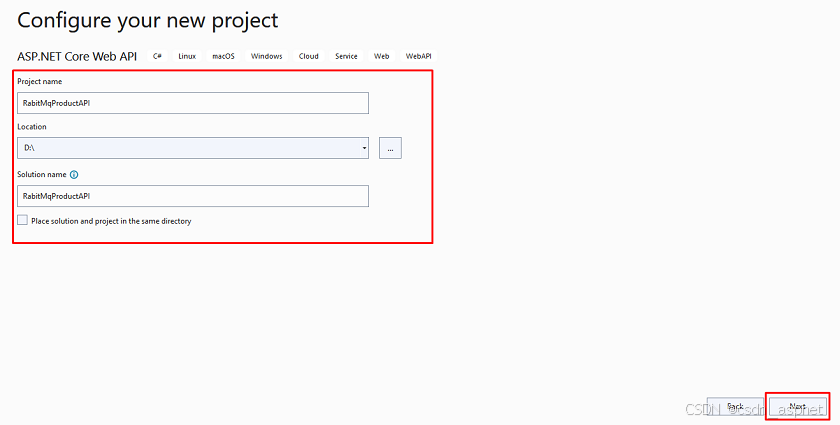
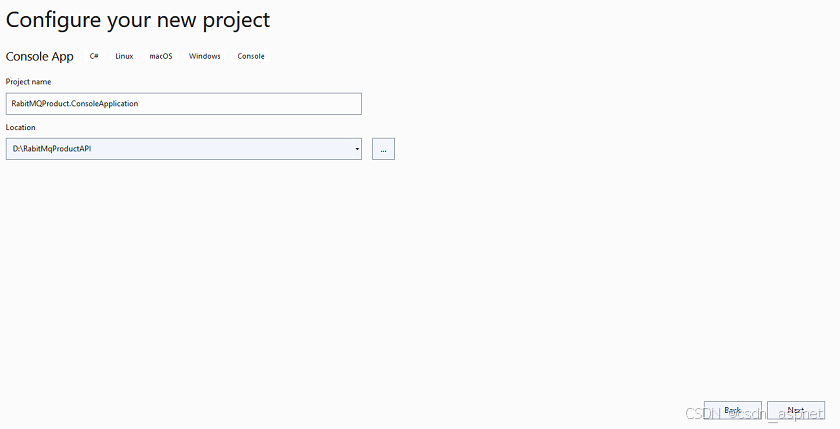
步骤2.配置您的项目
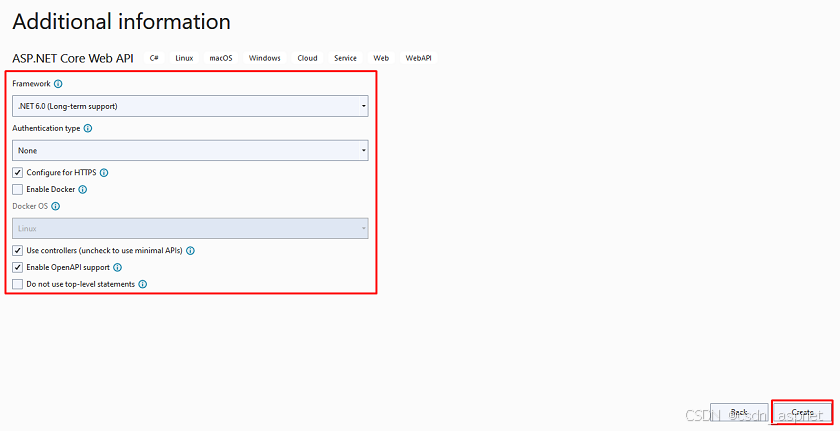
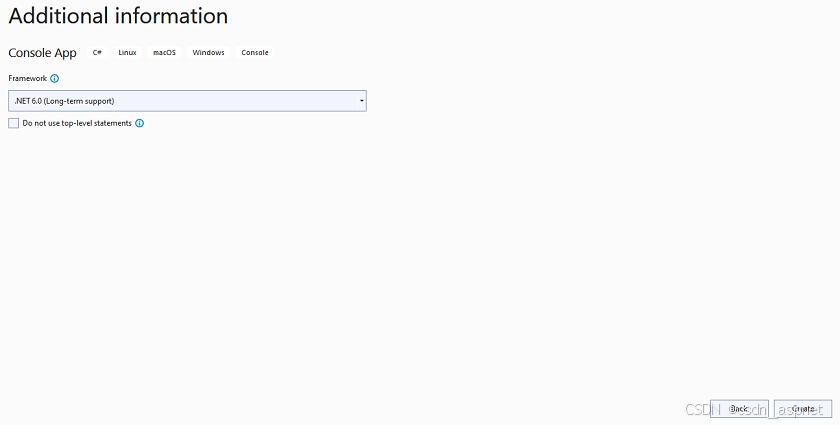
步骤 3.提供有关您的项目的其他信息
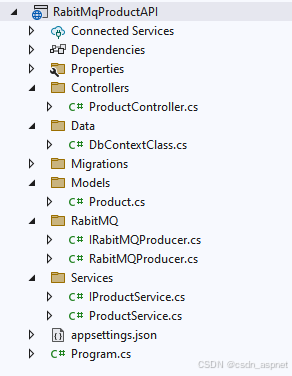
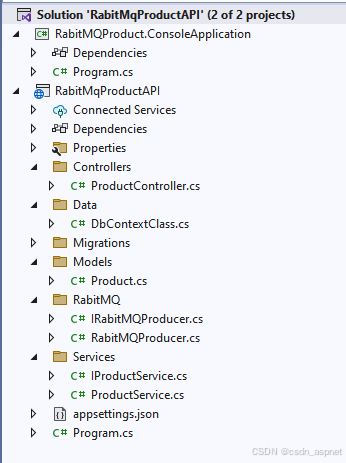
步骤4.生产者应用程序的项目结构
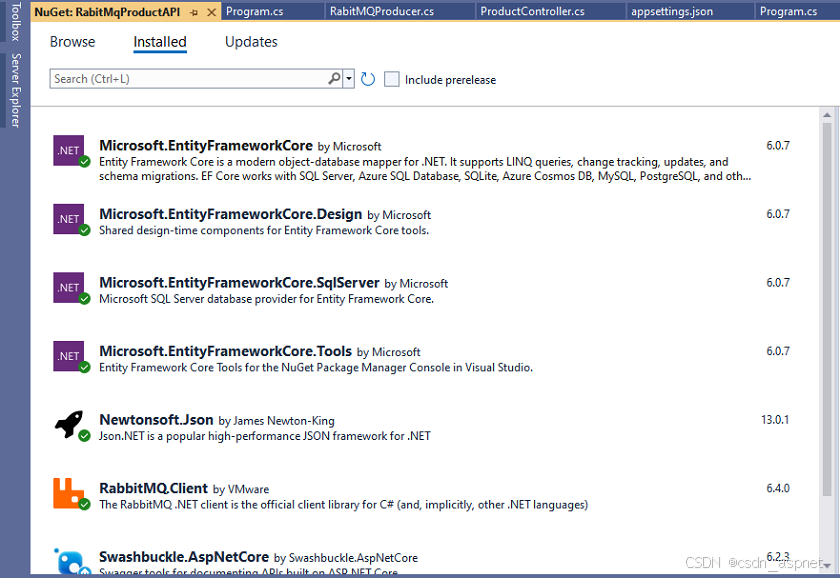
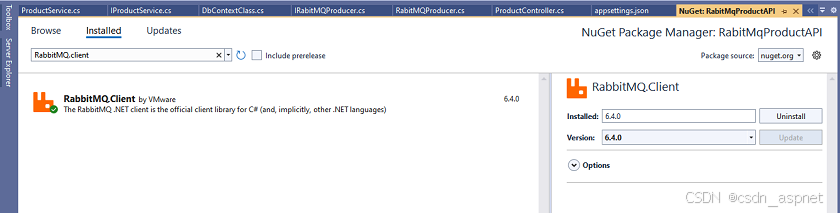
步骤 5.安装一些 NuGet 包
步骤 6.在 Models 文件夹中创建一个产品类
namespace RabitMqProductAPI.Models {
public class Product {
public int ProductId {
get;
set;
}
public string ProductName {
get;
set;
}
public string ProductDescription {
get;
set;
}
public int ProductPrice {
get;
set;
}
public int ProductStock {
get;
set;
}
}
}
步骤 7.接下来,在 Data 文件夹中创建一个 DbContextClass.cs 类
using Microsoft.EntityFrameworkCore;
using RabitMqProductAPI.Models;
namespace RabitMqProductAPI.Data {
public class DbContextClass: DbContext {
protected readonly IConfiguration Configuration;
public DbContextClass(IConfiguration configuration) {
Configuration = configuration;
}
protected override void OnConfiguring(DbContextOptionsBuilder options) {
options.UseSqlServer(Configuration.GetConnectionString("DefaultConnection"));
}
public DbSet < Product > Products {
get;
set;
}
}
}
步骤8.稍后,在 Services 文件夹中创建 IProductService.cs 和 ProductService.cs 类
using RabitMqProductAPI.Models;
namespace RabitMqProductAPI.Services {
public interface IProductService {
public IEnumerable < Product > GetProductList();
public Product GetProductById(int id);
public Product AddProduct(Product product);
public Product UpdateProduct(Product product);
public bool DeleteProduct(int Id);
}
}
创建 ProductService.cs
using RabitMqProductAPI.Data;
using RabitMqProductAPI.Models;
namespace RabitMqProductAPI.Services {
public class ProductService: IProductService {
private readonly DbContextClass _dbContext;
public ProductService(DbContextClass dbContext) {
_dbContext = dbContext;
}
public IEnumerable < Product > GetProductList() {
return _dbContext.Products.ToList();
}
public Product GetProductById(int id) {
return _dbContext.Products.Where(x => x.ProductId == id).FirstOrDefault();
}
public Product AddProduct(Product product) {
var result = _dbContext.Products.Add(product);
_dbContext.SaveChanges();
return result.Entity;
}
public Product UpdateProduct(Product product) {
var result = _dbContext.Products.Update(product);
_dbContext.SaveChanges();
return result.Entity;
}
public bool DeleteProduct(int Id) {
var filteredData = _dbContext.Products.Where(x => x.ProductId == Id).FirstOrDefault();
var result = _dbContext.Remove(filteredData);
_dbContext.SaveChanges();
return result != null ? true : false;
}
}
}
步骤9.在RabbitMQ文件夹内为消息队列创建IRabitMQProducer.cs和RabitMQProducer.cs类
namespace RabitMqProductAPI.RabitMQ {
public interface IRabitMQProducer {
public void SendProductMessage < T > (T message);
}
}
接下来,创建一个 RabitMQProducer.cs 类
using Newtonsoft.Json;
using RabbitMQ.Client;
using System.Text;
namespace RabitMqProductAPI.RabitMQ {
public class RabitMQProducer: IRabitMQProducer {
public void SendProductMessage < T > (T message) {
//Here we specify the Rabbit MQ Server. we use rabbitmq docker image and use it
var factory = new ConnectionFactory {
HostName = "localhost"
};
//Create the RabbitMQ connection using connection factory details as i mentioned above
var connection = factory.CreateConnection();
//Here we create channel with session and model
using
var channel = connection.CreateModel();
//declare the queue after mentioning name and a few property related to that
channel.QueueDeclare("product", exclusive: false);
//Serialize the message
var json = JsonConvert.SerializeObject(message);
var body = Encoding.UTF8.GetBytes(json);
//put the data on to the product queue
channel.BasicPublish(exchange: "", routingKey: "product", body: body);
}
}
}
步骤10.之后,创建一个新的ProductController.cs
using Microsoft.AspNetCore.Mvc;
using RabitMqProductAPI.Models;
using RabitMqProductAPI.RabitMQ;
using RabitMqProductAPI.Services;
namespace RabitMqProductAPI.Controllers {
[Route("api/[controller]")]
[ApiController]
public class ProductController: ControllerBase {
private readonly IProductService productService;
private readonly IRabitMQProducer _rabitMQProducer;
public ProductController(IProductService _productService, IRabitMQProducer rabitMQProducer) {
productService = _productService;
_rabitMQProducer = rabitMQProducer;
}
[HttpGet("productlist")]
public IEnumerable < Product > ProductList() {
var productList = productService.GetProductList();
return productList;
}
[HttpGet("getproductbyid")]
public Product GetProductById(int Id) {
return productService.GetProductById(Id);
}
[HttpPost("addproduct")]
public Product AddProduct(Product product) {
var productData = productService.AddProduct(product);
//send the inserted product data to the queue and consumer will listening this data from queue
_rabitMQProducer.SendProductMessage(productData);
return productData;
}
[HttpPut("updateproduct")]
public Product UpdateProduct(Product product) {
return productService.UpdateProduct(product);
}
[HttpDelete("deleteproduct")]
public bool DeleteProduct(int Id) {
return productService.DeleteProduct(Id);
}
}
}
在这里,您可以看到我们在构造函数中注入了 IRabitMQProducer 服务,并在添加产品 API 端点中使用它来将数据发送到消息队列。这会将产品详细信息插入 RabbitMQ 队列中,稍后消费者将获取该数据。这就是持续监听队列。
步骤11.在appsetting.json文件中添加连接字符串
{
"Logging": {
"LogLevel": {
"Default": "Information",
"Microsoft.AspNetCore": "Warning"
}
},
"AllowedHosts": "*",
"ConnectionStrings": {
"DefaultConnection": "Data Source=DESKTOP-***;Initial Catalog=RabitMQDemo;User Id=**;Password=***@1;"
}
}
步骤12.接下来,在Program.cs类中注册一些服务
using RabitMqProductAPI.Data;
using RabitMqProductAPI.RabitMQ;
using RabitMqProductAPI.Services;
var builder = WebApplication.CreateBuilder(args);
// Add services to the container.
builder.Services.AddScoped < IProductService, ProductService > ();
builder.Services.AddDbContext < DbContextClass > ();
builder.Services.AddScoped < IRabitMQProducer, RabitMQProducer > ();
builder.Services.AddControllers();
// Learn more about configuring Swagger/OpenAPI at https://aka.ms/aspnetcore/swashbuckle
builder.Services.AddEndpointsApiExplorer();
builder.Services.AddSwaggerGen();
var app = builder.Build();
// Configure the HTTP request pipeline.
if (app.Environment.IsDevelopment()) {
app.UseSwagger();
app.UseSwaggerUI();
}
app.UseHttpsRedirection();
app.UseAuthorization();
app.MapControllers();
app.Run();
步骤13.在主项目下的包管理器控制台中执行以下实体框架命令后,使用以下命令添加迁移和更新
add-migration "first"
qupdate-database
步骤14.使用以下命令安装rabbitmq docker文件(注意-docker桌面处于运行模式)
docker pull rabbitmq:3-management
接下来,创建一个容器并开始使用我们下载的 Rabbitmq Dockerfile:
docker run --rm -it -p 15672:15672 -p 5672:5672 rabbitmq:3-management
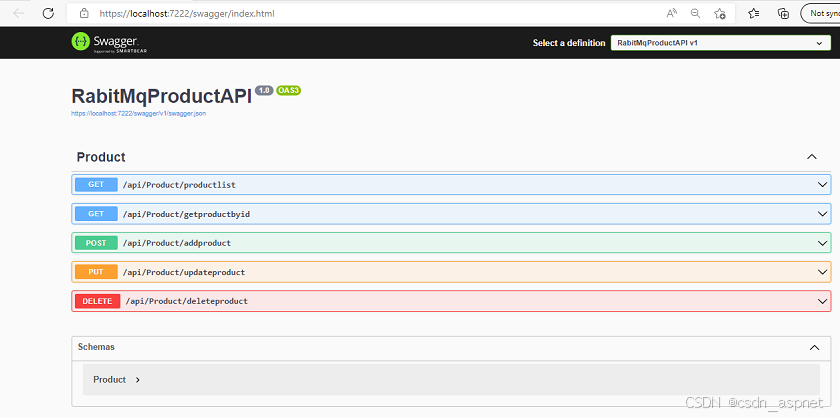
步骤15.最后,运行您的应用程序,您将看到 swagger UI 和 API 端点
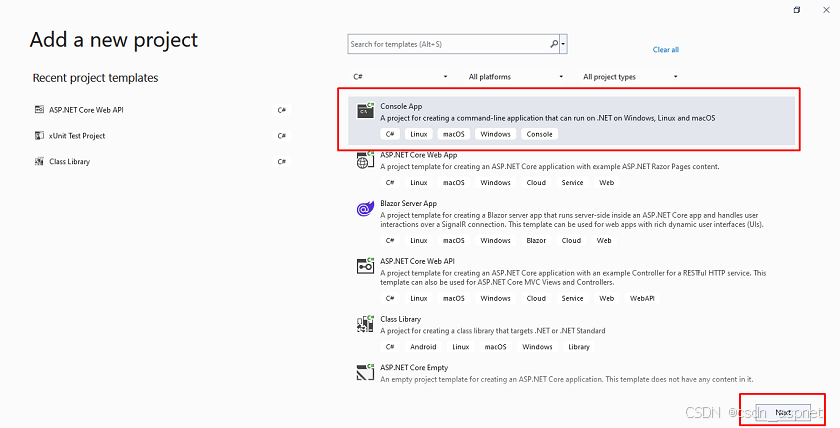
创建新的控制台应用程序
以上就是关于 Product Web API 作为生产者的全部内容。现在,让我们创建一个新的控制台应用程序,作为消费者来消费生产者发送的消息。
步骤 1.在同一个解决方案中添加一个新的控制台应用程序
步骤2.配置您的新项目
步骤 3.提供附加信息
步骤 4.安装一些 NuGet 包
步骤5.在Program.cs类中添加以下代码
using RabbitMQ.Client;
using RabbitMQ.Client.Events;
using System.Text;
//Here we specify the Rabbit MQ Server. we use rabbitmq docker image and use it
var factory = new ConnectionFactory {
HostName = "localhost"
};
//Create the RabbitMQ connection using connection factory details as i mentioned above
var connection = factory.CreateConnection();
//Here we create channel with session and model
using
var channel = connection.CreateModel();
//declare the queue after mentioning name and a few property related to that
channel.QueueDeclare("product", exclusive: false);
//Set Event object which listen message from chanel which is sent by producer
var consumer = new EventingBasicConsumer(channel);
consumer.Received += (model, eventArgs) => {
var body = eventArgs.Body.ToArray();
var message = Encoding.UTF8.GetString(body);
Console.WriteLine($ "Product message received: {message}");
};
//read the message
channel.BasicConsume(queue: "product", autoAck: true, consumer: consumer);
Console.ReadKey();
步骤6.最终项目结构
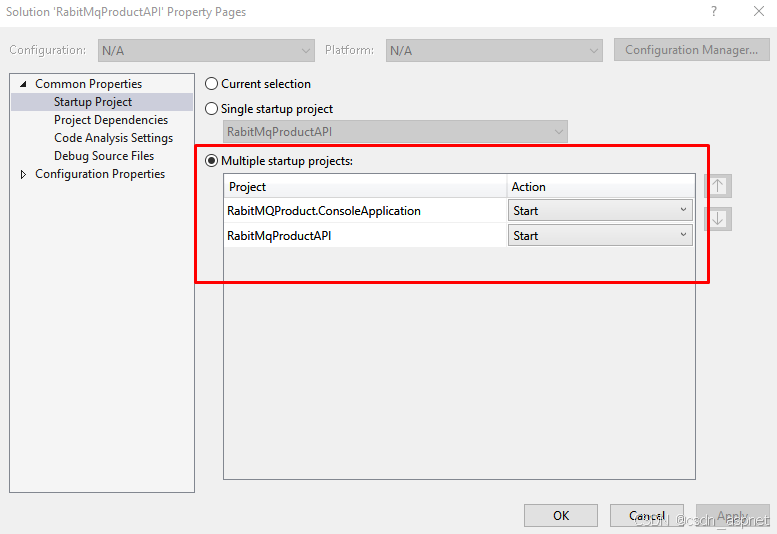
第七步,进入解决方案属性,将生产者和消费者项目都配置为起始项目,如下所示
步骤8.打开以下URL,在运行docker时我们设置的端口上打开RabbitMQ仪表板
http://localhost:15672/
当您单击该 URL 时,登录页面将会打开。
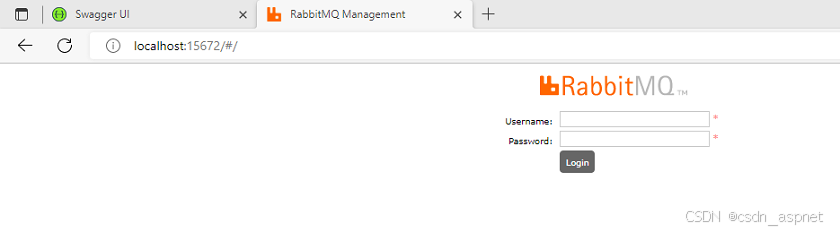
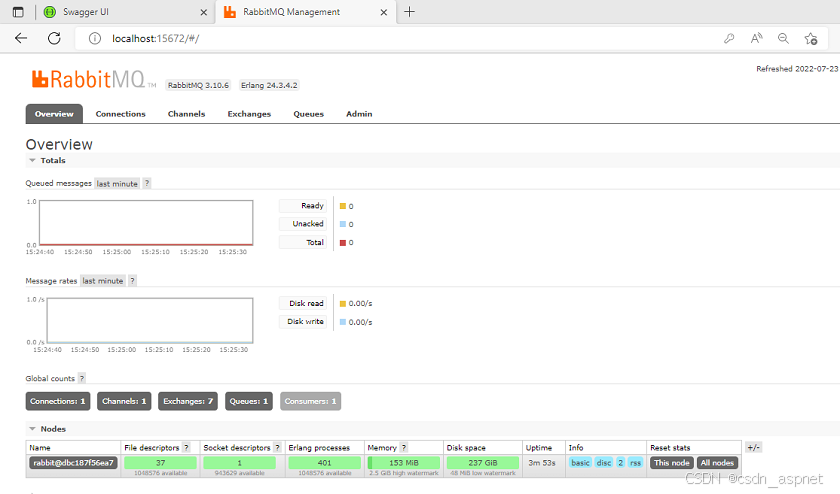
输入默认用户名(“guest”)和密码(也是“guest”),接下来您将看到仪表板。
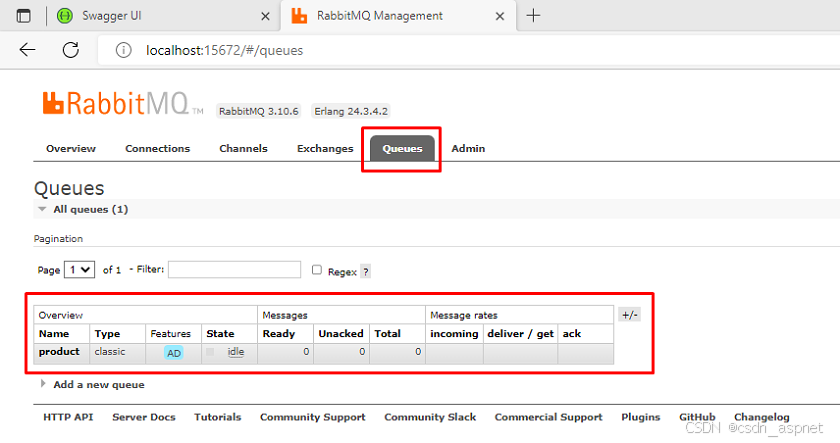
打开队列选项卡,您将在其中看到我们的产品队列。
步骤9.输入一个产品详细信息并执行API
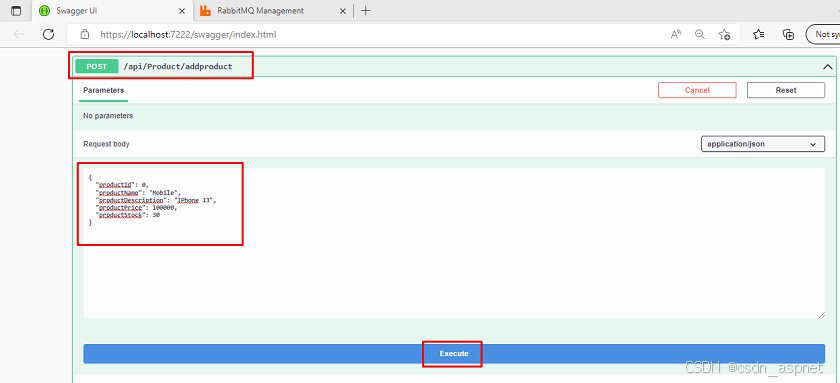
步骤 10.当您使用 Swagger 执行上述 API 时,消息将被发送到队列
您可以在消费者的控制台窗口中立即看到他从队列中监听到的产品详情。

以上就是关于 RabbitMQ 的全部内容。您可以根据自己的需求和目的来使用它。
结论
我们讨论了与 RabbitMQ 相关的所有内容,从介绍、工作开始,然后设置一个 docker 镜像以及一些与使用产品应用程序的生产者和消费者相关的功能。
示例代码:https://download.csdn.net/download/hefeng_aspnet/91661804
如果您喜欢此文章,请收藏、点赞、评论,谢谢,祝您快乐每一天。