C++多线程编程
参考视频:C++11 多线程编程-小白零基础到手撕线程池
1. 线程库的基本使用
1.1 具体代码(创建线程,并回收)
#include<iostream>
#include<thread>
#include<string>
using namespace std;void thread_cb(string str) {cout << str << endl;return;
}int main() {// 创建一个线程thread t1(thread_cb, "hello,world"); // 传入函数指针(线程执行的代码), 后续为函数指针的参数bool isJoin = t1.joinable(); // 通过返回值判断是否可用join和detach方法if (isJoin) {t1.join(); // 阻塞等待线程结束,并回收资源// t1.detach()  // 将线程脱离,线程资源由系统回收}return 0;
}
创建线程,参数1为回调函数,后续参数为回调函数的参数
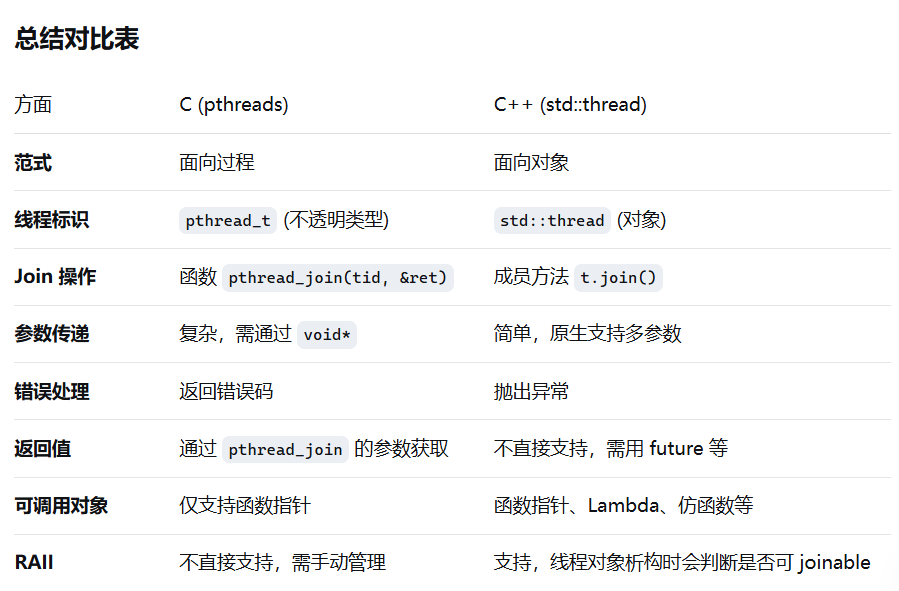
1.2 线程在c和c++的使用对比
2. 线程中的数据未定义错误
2.1 引用传递
#include<iostream>
#include<thread>
#include<string>
using namespace std;void thread_cb(int &x) {x++;return;
}int main() {int a = 10;thread t1(thread_cb, a);t1.join();cout << a << endl;return 0;
}
std::thread 的构造函数会将传递给线程函数的所有参数默认进行按值拷贝。而非常量引用类型不能被赋值为一个临时变量(拷贝出来的数据)
常量引用可以绑定到右值上,底层机制:编译器会隐式地创建一个临时的、匿名的 int 对象,并用 42 或 x+1 的结果来初始化这个临时对象。然后,函数参数 num 会绑定到这个临时对象上。
非常量引用不能绑定右值,因为可能会对这个引用的原对象修改,而对一个右值对象修改是不合理的
解决办法:ref()
#include<iostream>
#include<thread>
#include<string>
#include<functional>
using namespace std;void thread_cb(int& x) {x++;return;
}int main() {int a = 10;thread t1(thread_cb, ref(a));t1.join();cout << a << endl;return 0;
}
ref会创建一个对象包含指向a的指针,线程会通过值传递拷贝这个对象。在线程中,给引用赋值的时候该对象会隐身转换为引用类型。
2.2 传递指针或引用指向局部变量问题
#include<iostream>
#include<thread>
#include<string>
#include<functional>
#include<Windows.h>
using namespace std;thread t1;void thread_cb(int& x) {Sleep(2);cout << x << endl;x++;return;
}void test() {int a = 10;t1 = thread(thread_cb, ref(a));
}int main() {test();t1.join();return 0;
}
线程回调函数中使用传入参数时,该参数是test()函数的局部变量,在test结束就释放,因此会打印一个非法值
解决办法:将传入参数设置为全局变量
#include<iostream>
#include<thread>
#include<string>
#include<functional>
#include<Windows.h>
using namespace std;thread t1;
int a = 10;void thread_cb(int& x) {Sleep(2);cout << x << endl;x++;return;
}void test() {t1 = thread(thread_cb, ref(a));
}int main() {test();t1.join();return 0;
}
2.3 传递指针或引用指向已释放内存问题
和指向局部变量的问题相同
2.4 类成员函数作为函数入口,类对象被提前释放
#include<iostream>
#include<thread>
#include<string>
#include<functional>
#include<Windows.h>
using namespace std;class MyClass {
public:void func() {cout << "hello world" << endl;}
};int main() {MyClass myclass;// 获取成员函数地址必须使用&=》&MyClass::functhread t(&MyClass::func, &myclass);t.join();return 0;
}
在thread创建线程时,thread的构造函数会判断若传入的函数指针是类成员的函数指针,则参2需传递对象指针(this),指定哪个对象的 func 方法应该被调用
这种写法下会有生命周期的风险,在join前若myclass被销毁了,可能出现错误
解决办法:智能指针
#include<iostream>
#include<thread>
#include<string>
#include<functional>
#include<memory>
using namespace std;class MyClass {
public:void func() {cout << "hello world" << endl;}
};int main() {shared_ptr<MyClass> ptr = make_shared<MyClass>();  // 创建一个指向myclass对象的智能指针thread t(&MyClass::func, ptr); // 将智能指针作为this指针绑定t.join();return 0;
}
智能指针负责自动释放所指向的对象,当指向该对象的最后一个智能指针被销毁时,会释放对象
2.5 入口函数为类的私有函数
class MyClass {
private:void func() {cout << "hello world" << endl;}
};void thread_func() {shared_ptr<MyClass> ptr = make_shared<MyClass>();  // 创建一个指向myclass对象的智能指针thread t(&MyClass::func, ptr); // 将只能指针作为this指针绑定t.join();return;
}
当类方法为私有时,不能直接设置为线程的入口函数
解决方法:在类中将使用创建线程的函数设置为友元
class MyClass {
private:friend void thread_func();  // 设置友元void func() {cout << "hello world" << endl;}
};void thread_func() {shared_ptr<MyClass> ptr = make_shared<MyClass>();  // 创建一个指向myclass对象的智能指针thread t(&MyClass::func, ptr); // 将只能指针作为this指针绑定t.join();return;
}
3. 互斥量解决多线程数据共享问题
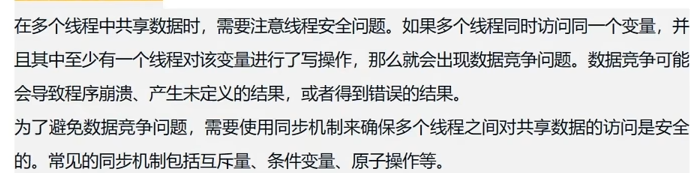
3.1 数据共享问题
3.2 实例
#include<iostream>
#include<thread>
#include<mutex>
using namespace std;mutex m1; // 创建一个全局锁
int a = 0;void func() {for (int i = 0; i < 1000000; i++) {m1.lock();		// 上锁a += 1;			// 临界区m1.unlock();	// 解锁}return;
}int main() {thread t1(func);thread t2(func);t1.join();t2.join();cout << a << endl;return 0;
}
全局锁mutex,在lock时检查是否mutex是否已经加锁,若未加锁,执行临界区代码;若已加锁,则等待解锁,再加锁,执行临界区代码
4. lock_guard和unique_lock
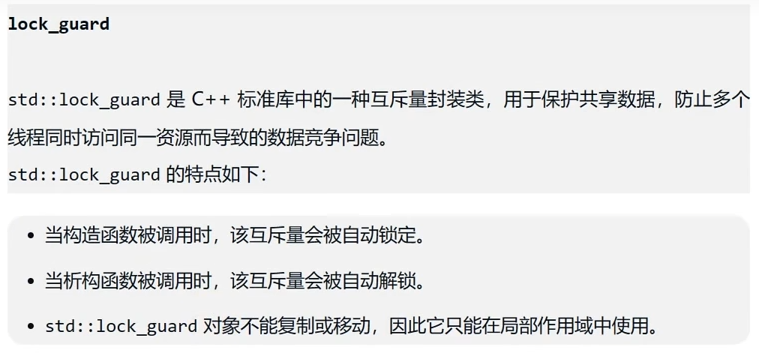
4.1 lock_guard
实例:
mutex m1; // 创建一个全局锁
int sharenum = 0;void func() {for (int i = 0; i < 10; i++) {lock_guard<mutex> lock(m1); // 自动加锁sharenum += 1;// 作用域结束自动解锁}cout << "sharenum = " << sharenum << endl;return;
}int main() {thread t1(func);t1.join();cout << "over" << endl;return 0;
}
lock_guard会在作用域内自动加锁,作用域结束会自动解锁
可以设置加锁类型
4.2 unique_lock
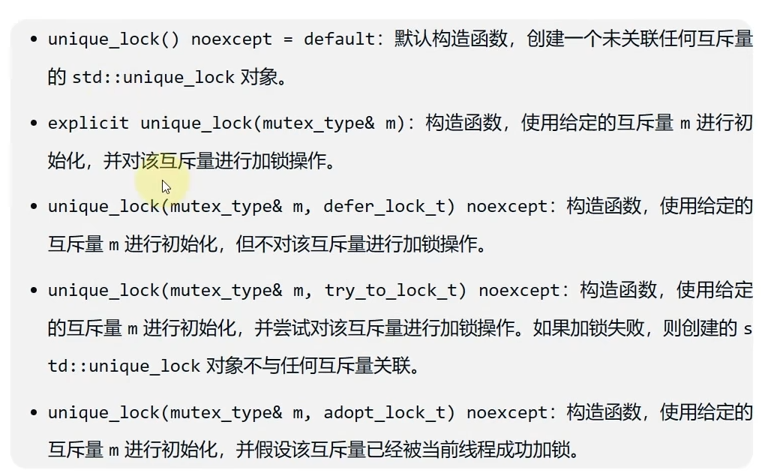
构造函数:
成员函数:
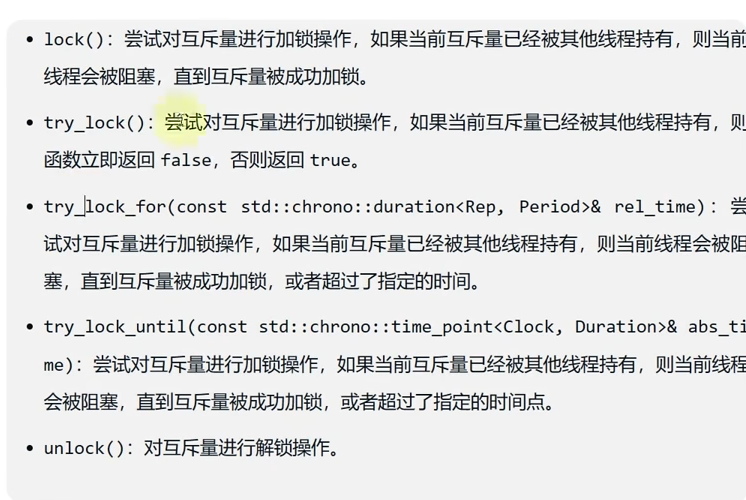
实例1:普通用法
mutex m1; // 创建一个全局锁
int sharenum = 0;void func() {for (int i = 0; i < 10; i++) {unique_lock<mutex> ul(m1, defer_lock); // 创建一个unique_lock但不加锁// 手动加锁ul.lock();sharenum += 1;// 手动解锁ul.unlock();}cout << "sharenum = " << sharenum << endl;return;
}int main() {thread t1(func);t1.join();cout << "over" << endl;return 0;
}
创建unique_lock时的defer_lcok表示创建但不加锁
实例2:限时等待,超时返回false
#include<iostream>
#include<thread>
#include<mutex>
using namespace std;timed_mutex m1; // 对时间操作时,需使用时间锁
int sharenum = 0;void func() {unique_lock<timed_mutex> ul(m1, defer_lock); // 创建一个unique_lock但不加锁if (ul.try_lock_for(chrono::seconds(1))) {  // 超时时间设置为1ssharenum += 1;}this_thread::sleep_for(chrono::seconds(2)); // 手动睡线程2s	return;
}void func2() {unique_lock<timed_mutex> ul(m1, defer_lock); // 创建一个unique_lock但不加锁if (ul.try_lock_for(chrono::seconds(1))) {  // 超时时间设置为1ssharenum += 1;}this_thread::sleep_for(chrono::seconds(2)); // 手动睡线程2sreturn;
}int main() {thread t1(func);thread t2(func2);t1.join();t2.join();cout << "sharenum = " << sharenum << endl;cout << "over" << endl;return 0;
}
运行结果输出1,因为当线程1可以加锁时,线程2等待时间超时,未对全局变量操作,仅线程1进行+1操作
注:这里需要使用timed_mutex,因为对时间进行操作
5. call_once–用于单例模式
5.1 单例模式
懒汉模式:直接创建
class Log {
public:Log() {} // 删除默认构造函数Log(const Log &log) = delete; // 删除拷贝构造函数Log & operator =  (const Log &log) = delete;  // 运算符“=”重载,删除赋值static Log* getinstance() {  // 创建一个实例return m_log;}void print(string msg) {cout <<  msg << endl;}private:static Log* m_log;
};// 创建一个log实例,使用类名访问静态方法或属性
Log* Log::m_log = new Log;
饿汉模式:饿了才创建
class Log {
public:static Log* getinstance() {  // 创建一个实例,饿汉模式static Log* m_log = nullptr;m_log = new Log;return m_log;}void print(string msg) {cout <<  msg << endl;}private:// 将构造函数设置为私有Log()  = default;  Log(const Log &log) = default;Log & operator =  (const Log &log) = default;
};
整个类共用一个静态变量或静态方法
5.2 call_once
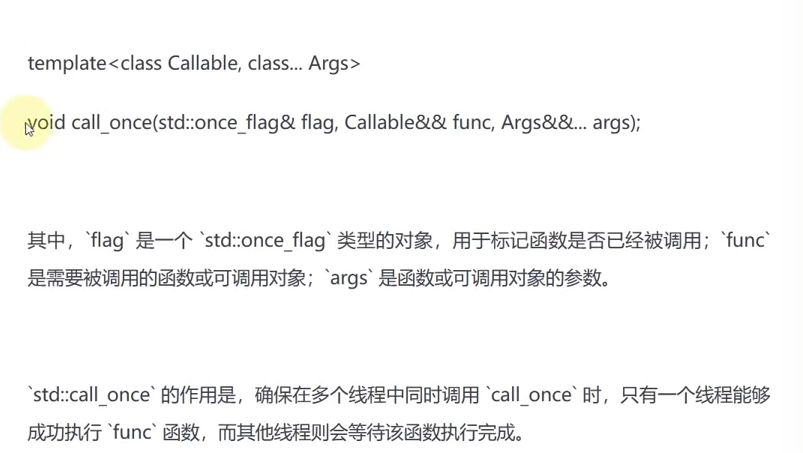
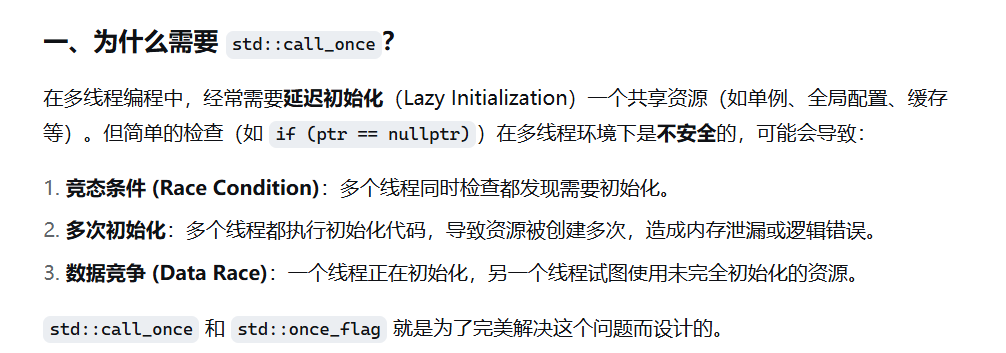
需要call_once的原因:
5.3 实例
#include<iostream>
#include<thread>
#include<mutex>
#include<string>
using namespace std;class Log {
public:static void create() {if (!m_log)  // 当为非空时,才赋值m_log = new Log;}static Log* getinstance() {  // 创建一个实例,饿汉模式call_once(once, &Log::create); // 传入静态函数指针return m_log;}void print(string msg) {cout <<  msg << endl;}private:// 将构造函数设置为私有Log()  = default;  Log(const Log &log) = default;Log & operator =  (const Log &log) = default;static once_flag once; // 必须是全局/静态变量static Log* m_log; // 只会初始化一次
};// 类外定义静态成员
once_flag Log::once;
Log* Log::m_log = nullptr;void func() {Log::getinstance()->print("error");return;
}int main() {thread t1(func);thread t2(func);t1.join();t2.join();return 0;
}
call_once的参数都需要传全局/静态变量。若是静态变量,需要在类外进行初始化
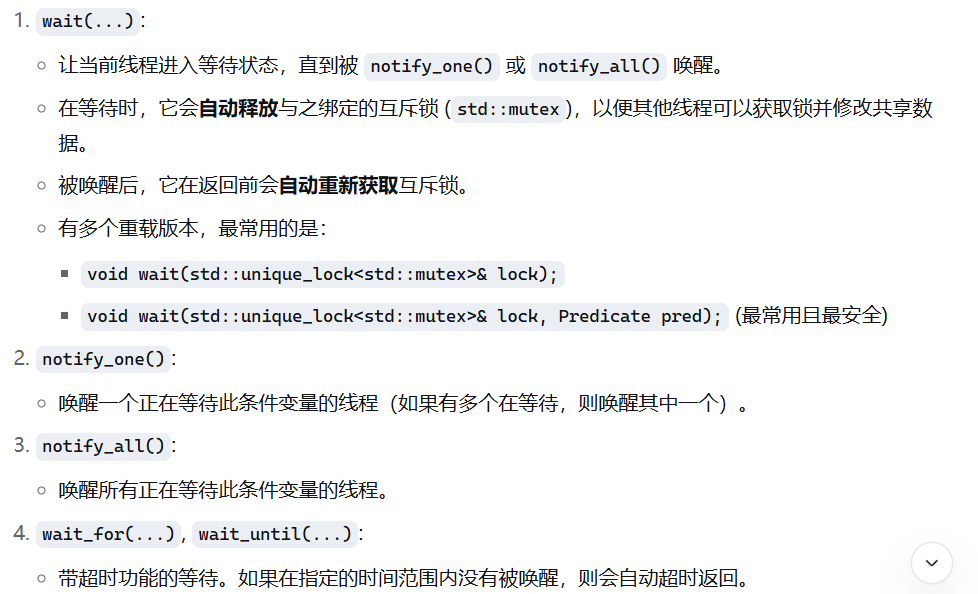
6. condition_variable及其使用场景
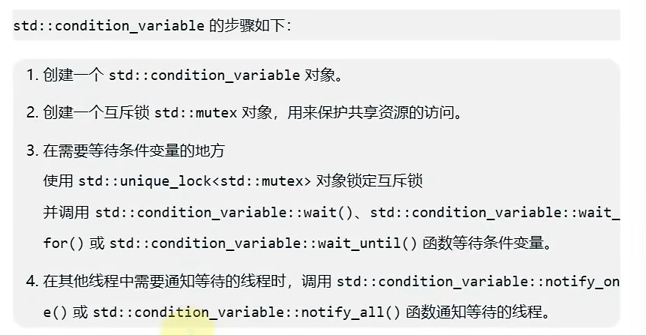
6.1 条件变量使用步骤
6.2 核心成员函数
6.3 实例:消费者生产者模型
#include<iostream>
#include<thread>
#include<mutex>
#include<string>
#include<condition_variable>
#include<queue>
using namespace std;mutex mtx;
queue<int> g_que;
condition_variable g_cv; // 创建一个全局条件变量void producer() {for (int i = 0; i < 10; i++) {  // 生产10个产品unique_lock<mutex> ul(mtx);g_que.push(i);cout << "produce:" << i << endl;g_cv.notify_one(); // 通知线程条件已满足this_thread::sleep_for(chrono::microseconds(100)); // 线程休眠100ms}}void consumer() {while (1) {  // 循环取数据unique_lock<mutex> ul(mtx);  // 将unique_lock和mutex绑定,并加锁// 阻塞等待条件满足,若条件不满足释放mtx,等待条件满足,上锁,再进行后续步骤g_cv.wait(ul, []() {return !g_que.empty(); });   int value = g_que.front();g_que.pop();  // 模拟消费数据cout << "consume:" << value << endl;}
}int main() {thread t1(producer);thread t2(consumer);t1.join();t2.join();return 0;
}
当消费者先进入线程时,会先拿到mtx锁,发现条件不满足,则会释放mtx,阻塞等待条件满足。当条件满足,则会重新获取mtx然后再执行后续代码
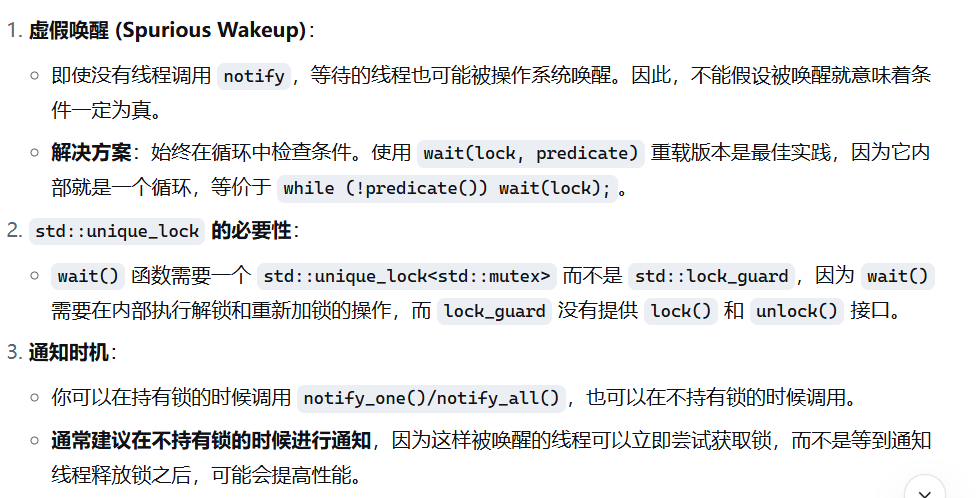
6.4 注意事项
7. C++跨平台线程池
7.1 线程池的成员变量
private: vector<thread> threads; // 保存线程数组queue<function<void()>> tasks; // 任务队列(元素为返回值为void,参数为空的函数)mutex mtx; // 互斥访问类的静态资源condition_variable condition; // 条件变量bool stop; // 判断线程池是否开启,true表示关闭
- threads数组保存线程池当前的线程
- tasks保存要处理的任务,当tasks不为空时,调度线程池里的线程处理任务。每有一个线程处理任务,就将该任务出队
- mtx是一个互斥锁,用来互斥地访问线程池的资源
- 条件变量用于判断线程循环处理任务
- stop是线程池是否开启的标志
7.2 构造函数
// 构造函数
ThreadPool(int numThreads) :stop(false) {for (int i = 0; i < numThreads; i++) {// 使用emplace_back是移动构造,而push_back是拷贝构造// thread无拷贝构造,且emplace_back更加节省资源threads.emplace_back([this]() {while (1) {unique_lock<mutex> lock(mtx);  // 创建一个unique_lock,管理互斥锁资源,并对mtx上锁// 等待条件满足condition.wait(lock, [this]() {return !tasks.empty() || stop;  // 当队列不为空或线程池关闭,条件满足});if (stop && tasks.empty()) {return;}// 取任务// 将队头任务赋值给task,这里move后可以使用移动构造函数节省资源function<void()> task(std::move(tasks.front()));  tasks.pop();  // 弹出队首元素lock.unlock();  // 手动解锁,让其他线程拿到锁,多线程// 执行任务task();}});}
}
- 创建线程池是传入一个要创建的线程数n,循环创建n个线程
- 线程的vector使用emplace_back添加线程,因为线程删除了拷贝构造函数,而push_back底层为拷贝构造,emplace_back底层直接在vector的空间内创造对象。而且push_back由于是拷贝对象,因此不能直接传入一个lambda表达式,会报错
- 使用unique_lock对互斥量mtx进行管理
- 条件变量阻塞线程,当有任务来时,才继续执行任务
7.3 析构函数
// 析构函数~ThreadPool(){{unique_lock<mutex> lock(mtx);stop = true;} // 作用域结束会自动释放mtx// 通知唤醒所有阻塞在条件上的进程condition.notify_all();for (auto &t : threads) {t.join();}}
- 当析构线程池时,需把线程池设置为关闭,stop=true
- 关闭线程池后,需通知所有线程,执行完后续任务。此时,线程不会因为条件而阻塞,而会因为拿不到mtx而阻塞
- 回收所有线程资源
7.4 任务入队
// 任务入队
template<class F, class... Args> // 使用可变参数模板
void enqueue(F &&f, Args&&... args) {   // && 表示万能模板// 使用完美转发,保证参数不会混乱// bind的将函数和参数绑定function<void()> task = bind(forward<F>(f), forward<Args>(args)...);{unique_lock<mutex> lock(mtx);tasks.emplace(task);  // 使用emplace入队,开销更小}condition.notify_one(); // 通知线程条件满足
}
- 使用可变参数模板,接收函数名,以及参数列表
- 使用&& 万能模板,接收所有类型的参数
- 使用完美转发forward,保证绑定的参数类型与传入的类型一致
- 模板参数包展开:
Args&&… args --> args1, args2, args3 …
std::forward< Args >(args)… --> std::forward< Arg1 >(arg1), …- 通知所有阻塞在条件变量的线程,条件已满足
7.4 具体代码
#include<iostream>
#include<thread>
#include<vector>
#include<functional>
#include<queue>
#include<mutex>
#include<condition_variable>
#include<chrono>
using namespace std;class ThreadPool {
public:// 构造函数ThreadPool(int numThreads) :stop(false) {for (int i = 0; i < numThreads; i++) {// 使用emplace_back是移动构造,而push_back是拷贝构造// thread无拷贝构造,且emplace_back更加节省资源threads.emplace_back([this]() {while (1) {unique_lock<mutex> lock(mtx); // 创建一个unique_lock,管理互斥锁资源,并对mtx上锁// 等待条件满足condition.wait(lock, [this]() {return !tasks.empty() || stop; // 当队列不为空或线程池关闭,条件满足});if (stop && tasks.empty()) {return;}// 取任务// 将队头任务赋值给task,这里move后可以使用移动构造函数节省资源function<void()> task(std::move(tasks.front())); tasks.pop(); // 弹出队首元素lock.unlock(); // 手动解锁,让其他线程拿到锁,多线程// 执行任务task();}});}}// 析构函数~ThreadPool(){{unique_lock<mutex> lock(mtx);stop = true;} // 作用域结束会自动释放mtx// 通知唤醒所有阻塞在条件上的进程condition.notify_all();for (auto &t : threads) {t.join();}}// 任务入队template<class F, class... Args> // 使用可变参数模板void enqueue(F &&f, Args&&... args) { // && 表示万能模板// 使用完美转发,保证参数不会混乱// bind的将函数和参数绑定function<void()> task = bind(forward<F>(f), forward<Args>(args)...);{unique_lock<mutex> lock(mtx);tasks.emplace(task); // 使用emplace入队,开销更小}condition.notify_one(); // 通知线程条件满足}private: vector<thread> threads; // 保存线程数组queue<function<void()>> tasks; // 任务队列(元素为返回值为void,参数为空的函数)mutex mtx; // 互斥访问类的静态资源condition_variable condition; // 条件变量bool stop; // 判断线程池是否开启,true表示关闭
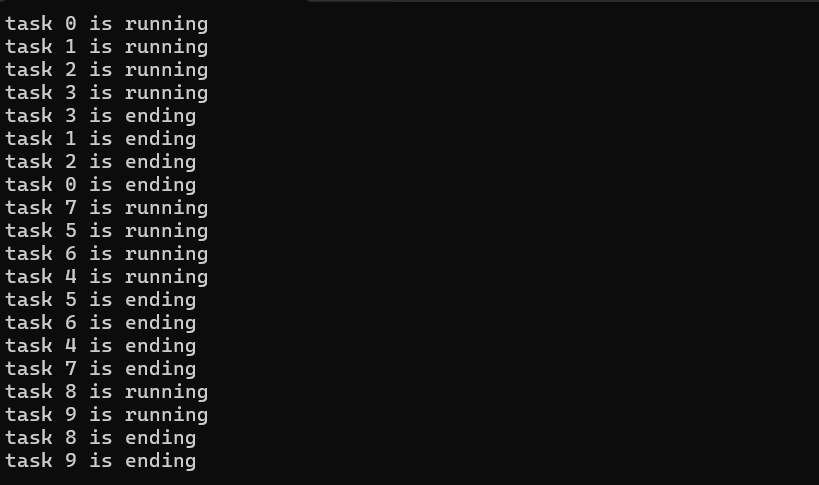
};int main() {ThreadPool pool(4);// 模拟生成10个任务for (int i = 0; i < 10; i++) {pool.enqueue([i]() {printf("task %d is running\n", i);this_thread::sleep_for(chrono::milliseconds(500));printf("task %d is ending\n", i);});}return 0;
}
- main函数中模拟生成了10个任务,并使用chrono睡眠线程500ms
- 使用printf打印,而不使用cout打印,因为cout每一段都是分开打印,可能会被打断而出现乱序。printf存在行缓冲,遇到换行才打印。
运行结果:
8. 异步并发
需包含头文件future
8.1 async和future

std::async 像一个“异步函数调用”,它返回一个 std::future 对象,该对象在未来会持有函数的返回值。你可以选择任务是真正异步执行,还是延迟到获取结果时才执行(惰性求值)
实例:简单使用
#include<iostream>
#include<future>
#include<thread>
using namespace std;int func() {int res = 0;for (int i = 0; i < 1000; i++) {res += 1;}return res;
}int main() {// 模板里的类型为函数返回值类型// 使用 std::async 启动一个异步任务// std::launch::async 策略确保函数会在新线程中执行future<int> result_future = async(launch::async, func);int main_result = func(); // 主函数中调用funccout << "main_result = " << main_result << endl;// 使用get方法,从future对象中获取函数的返回值cout << "result_future = " << result_future.get() << endl;return 0;
}
- async会创建一个future对象,绑定func函数。在创建的时候就会执行func
- func的返回值会被保存在future对象中,使用get方法获取
- 当调用get方法时,func还未执行完毕,则会阻塞等待
运行结果:

8.2 packaged_task
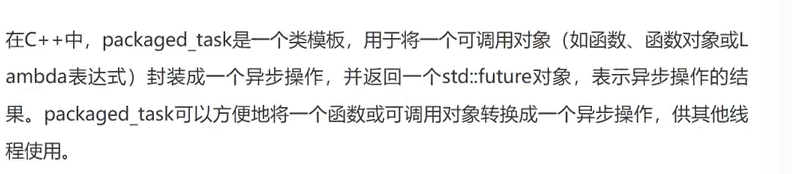
packaged_task是将一个函数与异步操作绑定,返回一个package_task对象。在使用这个对象的get_future方法,可以创建一个绑定func的future对象。但与async不同的是,在创建future时,不会直接运行func,而是需要手动开辟线程,然后传入task。返回值则是通过future打印
实例:简单使用
#include<iostream>
#include<future>
#include<thread>
using namespace std;int func() {int res = 0;for (int i = 0; i < 1000; i++) {res += 1;}return res;
}int main() {// func返回值为int,传入参数为空packaged_task<int()> task(func);future<int> result_future = task.get_future(); // 生成一个future对象thread t1(std::move(task));  // 这里不能直接传入task,因为线程不能拷贝t1.join();// 使用get方法打印返回值cout << "result_future = " << result_future.get() << endl;return 0;
}
- 创建一个package_task类封装函数func
- 使用package_task的get_future方法创建future对象,该对象保存运行func的结果
- 创建线程,传入task。但不能直接传入,需转换语义
- 运行的结果保存在future的get方法中
8.3 promise

实例:基本使用
#include<iostream>
#include<future>
#include<thread>
using namespace std;void func(promise<int> &prom) {// promise设置的值会保存在future中,可以在其他线程获取prom.set_value(1000);return;
}int main() {// 创建一个promise---future对promise<int> prom;   // 表示promise保存的值为int型future<int> fut = prom.get_future(); // future的类型与promise相同// 创建线程thread t1(func, ref(prom)); // 引用传递t1.join();// 会阻塞等待func执行,并设置promisecout << "value = " << fut.get() << endl;return 0;
}
- 创建一个promise–future对,将promise设置的结果保存在future中
- 需要创建线程,并传入promise,才能在其他线程中设置promise
- 使用future的get方法,可以获取promise设置的值
运行结果:

9. 原子操作
添加atomic头文件
9.1 atomic介绍
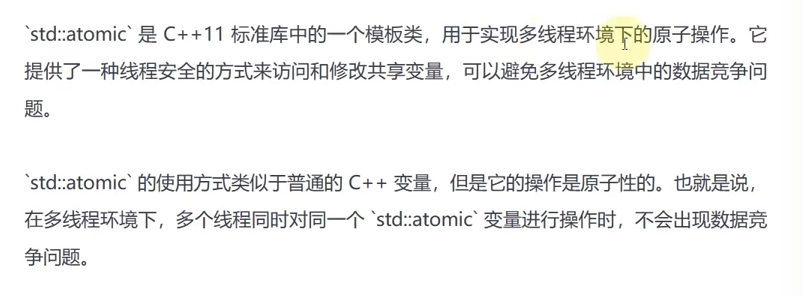
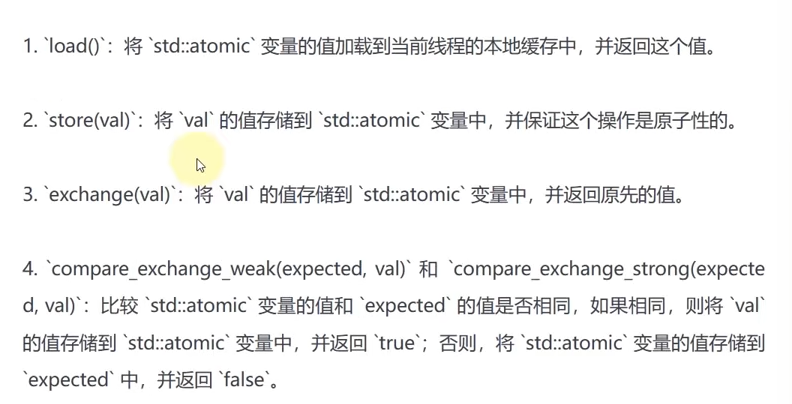
9.2 常用操作
9.3 实例
#include<iostream>
#include<thread>
#include<atomic>
using namespace std;// 创建一个原子类型的int,shared_num
atomic<int> shared_num = 0;void func() {for (int i = 0; i < 1000000; i++) {shared_num.store(shared_num + 1);  // 赋值,保证为原子操作}return;
}int main() {thread t1(func);thread t2(func);t1.join();t2.join();cout << "shared_num = " << shared_num.load() << endl;int preval = shared_num.exchange(1); // 赋值,并返回原valcout << "preval = " << preval << endl;cout << "newval = " << shared_num.load() << endl;return 0;
}
运行结果:
