SpringBoot教程(三十一) | SpringBoot集成SpringSecurity权限框架
SpringBoot教程(三十一) | SpringBoot集成SpringSecurity权限框架
- 一、SpringSecurity是什么?
- 二、Spring Security的主要功能
- 三、引入maven依赖
- 四、创建Controller 测试类
- 1. 默认用户密码
- 2. 自定义用户名密码
- 五、开始配置安全验证
- 1. 基于内存方式(供开发环境调试)
- PasswordEncoderConfig 配置类
- WebSecurityConfg配置类
- 2. 基于数据库方式
- 设计库表
- 创建entity实体
- CustomUserDetailsService实现类
- 六、配置角色访问控制
- 七、调整密码为 加密保存
- 八、密码修改
- 九、用户角色多对多关系
一、SpringSecurity是什么?
Spring Security是一个功能强大且高度可定制的身份验证和访问控制框架,它基于Spring框架构建,为Java应用程序提供全面的安全性解决方案。
二、Spring Security的主要功能
认证:验证用户名和密码是否合法(是否系统中用户)
授权:是系统用户不代表你能使用某些功能,因为你可能没有权限
防御会话固定,点击劫持,跨站点请求伪造等攻击
Servlet API集成
与Spring Web MVC的可选集成
三、引入maven依赖
<dependency><groupId>org.springframework.boot</groupId><artifactId>spring-boot-starter-security</artifactId>
</dependency>
四、创建Controller 测试类
package com.example.springbootsecuritydemo.controller;import org.springframework.web.bind.annotation.GetMapping;
import org.springframework.web.bind.annotation.RestController;@RestController
public class HelloController {@Autowiredprivate UserInfoService userInfoService;@GetMapping("/hello")public String request() {return "hello";}@GetMapping("/get-user")public UserInfo getUser(@RequestParam String username){return userInfoService.getUserInfoByUsername(username);}
}
1. 默认用户密码
启动项目,我们会发现有这么一段日志。
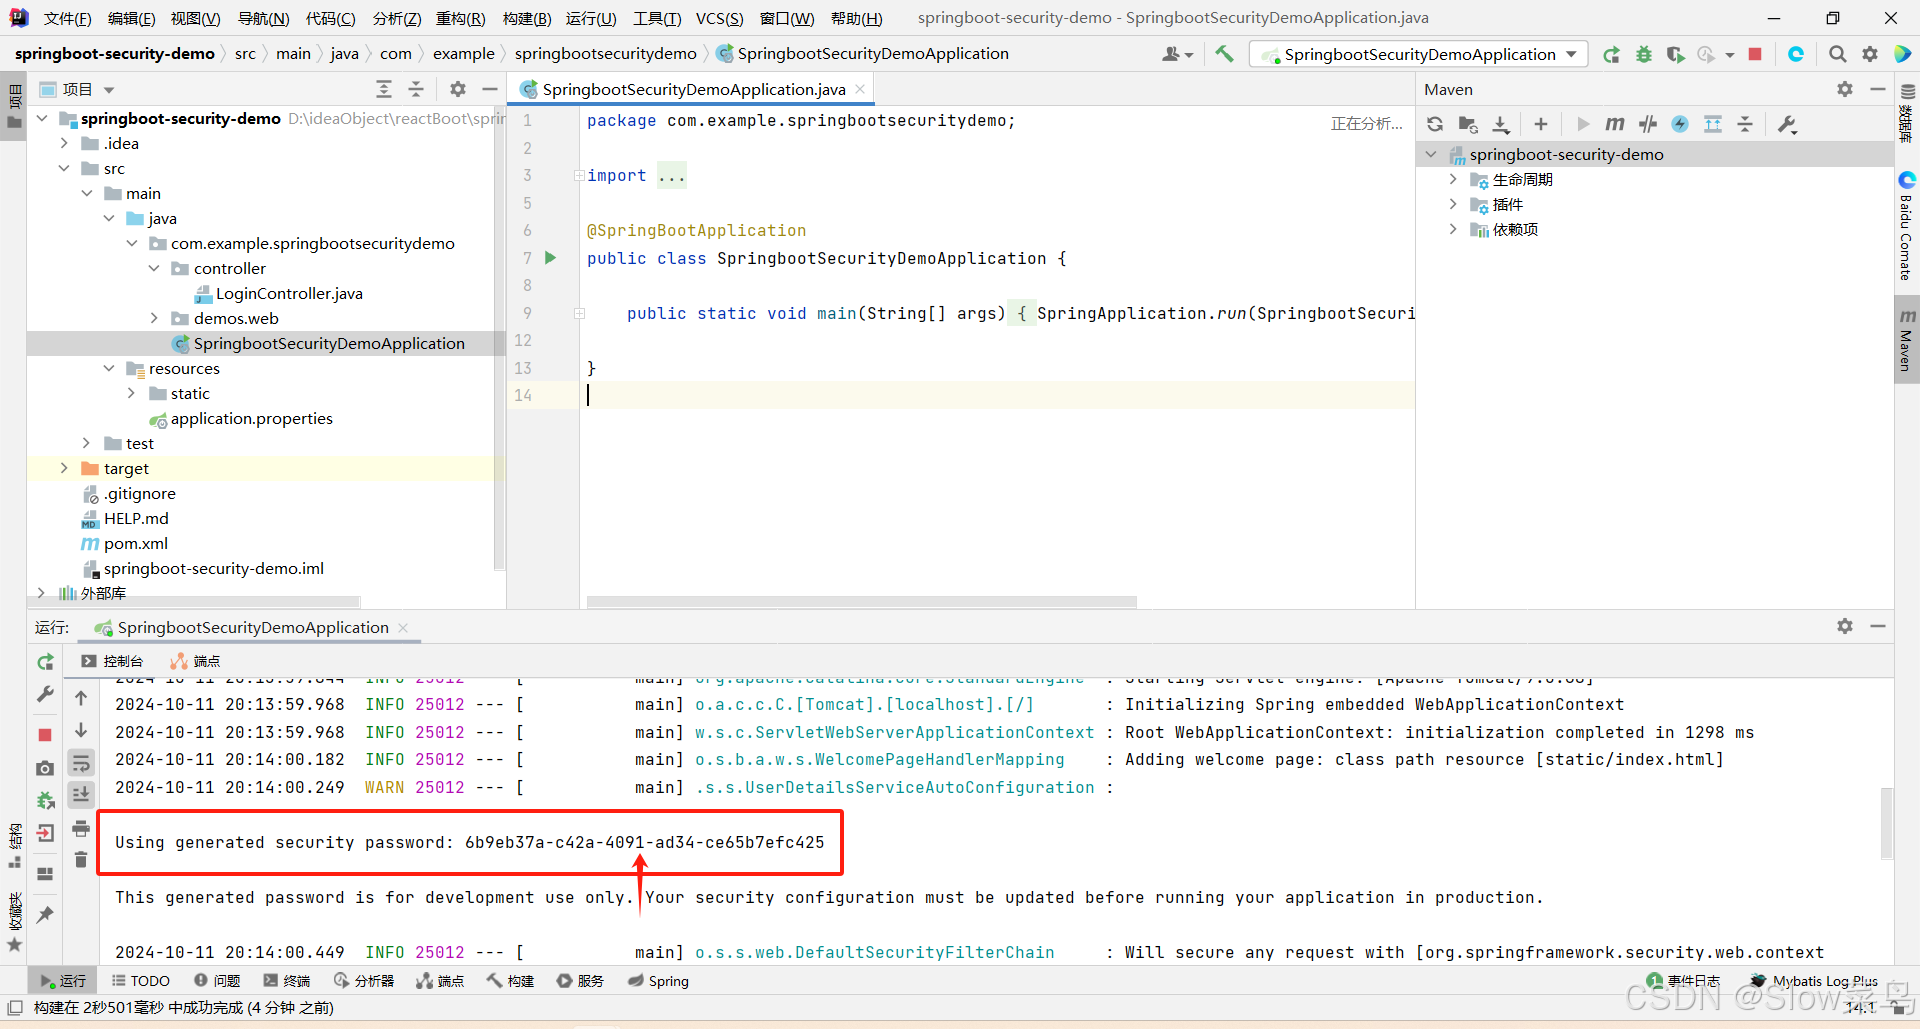
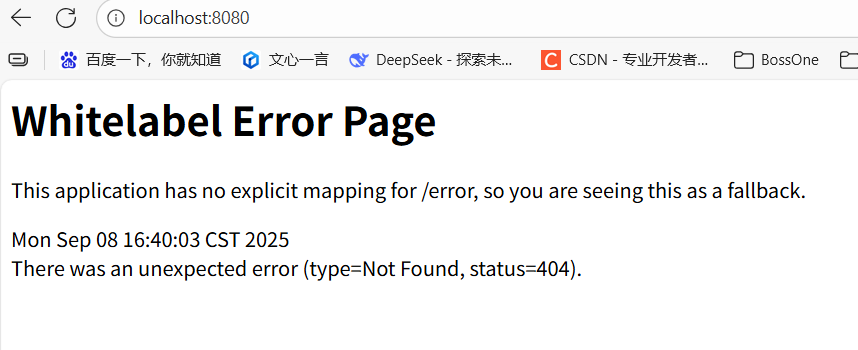
此时表示Security生效,默认对项目进行了保护,我们访问该Controller中的接口(http://localhost:8080/hello),你会发现会被重定向到登录页http://localhost:8080/login,且会见到如下登录界面(此界面为security框架自带的默认登录界面,后期不用可以换成自定义登录界面)

要求我们登录系统,Spring Security默认的用户名是user,项目启动的时候会生成默认密码
就是在启动日志中可以看到的 “Using generated security password: 6b9eb37a-c42a-4091-ad34-ce65b7efc425” 其中的 6b9eb37a-c42a-4091-ad34-ce65b7efc425 就是密码。
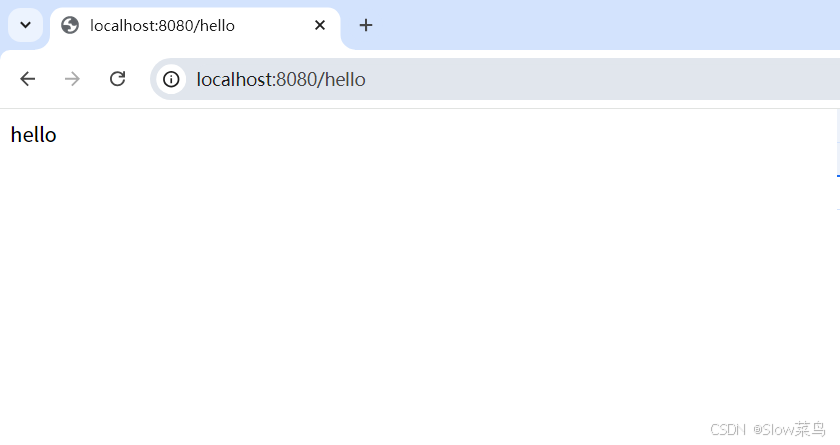
登录成功后,会是以下这种情况
再次请求 http://localhost:8080/hello,我们可以看到此时可以正常访问该接口
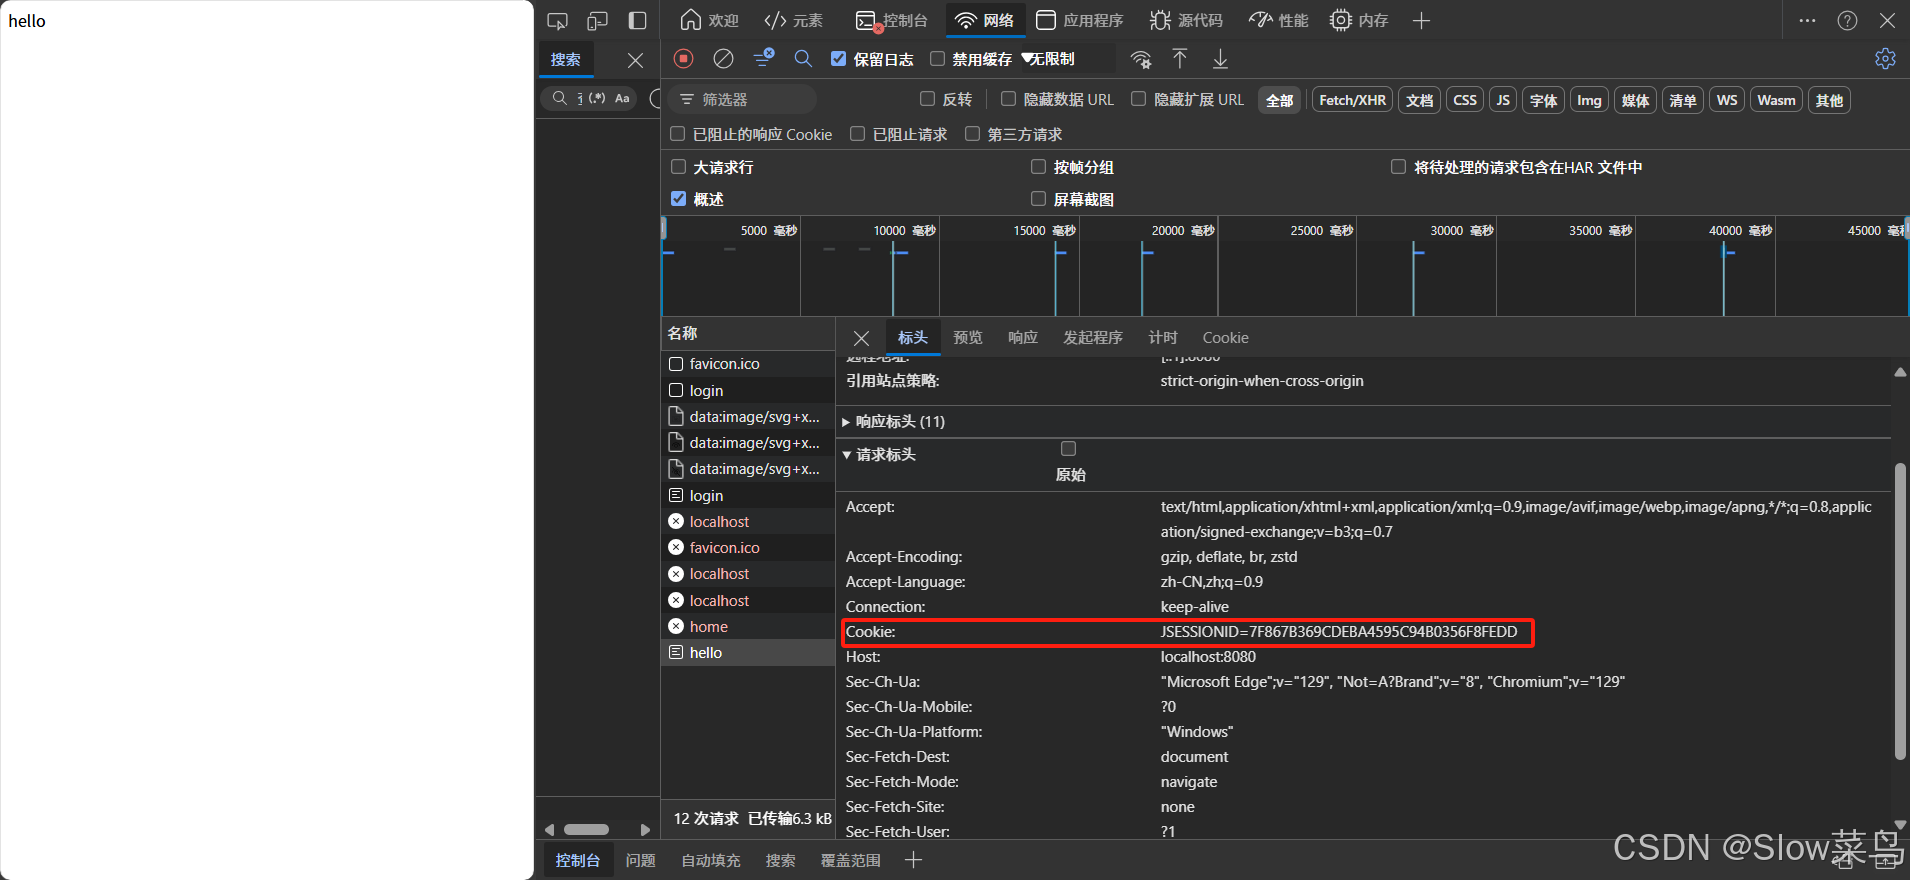
按一下f12,你会发现有个Cookie 携带在请求里面
2. 自定义用户名密码
当然也可以自定义用户名密码,在配置文件添加如下内容即可:
spring.security.user.name=wude
spring.security.user.password=123456
注意:自定义用户名密码以后,“项目启动的时候会生成默认密码” 该情况不会再出现
五、开始配置安全验证
1. 基于内存方式(供开发环境调试)
供开发环境调试,生产环境不能这样做的哦
PasswordEncoderConfig 配置类
用于指定加密方式
@Configuration
public class PasswordEncoderConfig {/*** 指定加密方式*/@Beanpublic PasswordEncoder passwordEncoder(){// 使用BCrypt加密密码return new BCryptPasswordEncoder();}}
WebSecurityConfg配置类
Spring Security的核心配置类是 WebSecurityConfigurerAdapter抽象类,这是权限管理启动的入口,这里我们自定义一个实现类去实现它。
@EnableWebSecurity //开启Spring Security的功能
public class WebSecurityConfg extends WebSecurityConfigurerAdapter {@Autowiredprivate PasswordEncoder passwordEncoder;@Overrideprotected void configure(AuthenticationManagerBuilder auth) throws Exception {/*** 基于内存的方式,创建两个用户admin/123456,user/123456* */auth.inMemoryAuthentication().withUser("admin")//用户名.password(passwordEncoder.encode("123456"))//密码.roles("ADMIN");//角色auth.inMemoryAuthentication().withUser("user")//用户名.password(passwordEncoder.encode("123456"))//密码.roles("USER");//角色}
}
这样重新运行后我们就可以通过admin/123456、user/123456两个用户登录了。
注意:配置文件中“自定义的用户密码”将会失效
2. 基于数据库方式
设计库表
SQL脚本
-- ----------------------------
-- Table structure for user
-- ----------------------------
DROP TABLE IF EXISTS `user`;
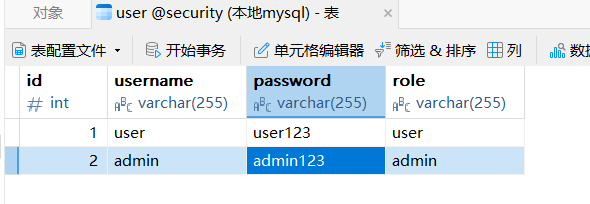
CREATE TABLE `user` (`id` int NOT NULL AUTO_INCREMENT COMMENT 'id',`username` varchar(255) CHARACTER SET utf8mb4 COLLATE utf8mb4_0900_ai_ci NULL DEFAULT NULL COMMENT '用户名',`password` varchar(255) CHARACTER SET utf8mb4 COLLATE utf8mb4_0900_ai_ci NULL DEFAULT NULL COMMENT '密码',`role` varchar(255) CHARACTER SET utf8mb4 COLLATE utf8mb4_0900_ai_ci NULL DEFAULT NULL COMMENT '角色',PRIMARY KEY (`id`) USING BTREE
) ENGINE = InnoDB AUTO_INCREMENT = 3 CHARACTER SET = utf8mb4 COLLATE = utf8mb4_0900_ai_ci ROW_FORMAT = Dynamic;-- ----------------------------
-- Records of user
-- ----------------------------
INSERT INTO `user` VALUES (1, 'user', 'user123', 'user');
INSERT INTO `user` VALUES (2, 'admin', 'admin123', 'admin');
创建entity实体
@Data
public class UserInfo {private int id;private String username;private String password;private String role;
}
CustomUserDetailsService实现类
UserDetailsService是需要实现的登录用户查询的service接口,实现loadUserByUsername()方法,
这里我们自定义CustomUserDetailsService实现类去实现UserDetailsService接口
@Component
public class CustomUserDetailsService implements UserDetailsService {@Autowiredprivate UserInfoService userInfoService;@Autowiredprivate PasswordEncoder passwordEncoder;@Overridepublic UserDetails loadUserByUsername(String username) throws UsernameNotFoundException {// 通过用户名从数据库获取用户信息UserInfo userInfo = userInfoService.getUserInfoByUsername(username);if (userInfo == null) {throw new UsernameNotFoundException("用户不存在");}// 得到用户角色String role = userInfo.getRole();// 角色集合List<GrantedAuthority> authorities = new ArrayList<>();// 角色必须以`ROLE_`开头,数据库中没有,则在这里加authorities.add(new SimpleGrantedAuthority("ROLE_" + role));return new User(userInfo.getUsername(),// 因为数据库是明文,所以这里需加密密码passwordEncoder.encode(userInfo.getPassword()),authorities);}
}
修改 Security的配置类WebSecurityConfig的configure(auth)方法:
@EnableWebSecurity //开启Spring Security的功能
public class WebSecurityConfg extends WebSecurityConfigurerAdapter {@Autowiredprivate CustomUserDetailsService userDetailsService;@Autowiredprivate PasswordEncoder passwordEncoder;/*** 定义用户身份认证规则* AuthenticationManagerBuilder 认证管理器*/@Overrideprotected void configure(AuthenticationManagerBuilder auth) throws Exception {System.out.printf("yyyyyy");// 从数据库读取的用户进行身份认证auth.userDetailsService(userDetailsService) // 绑定自定义的用户数据加载服务.passwordEncoder(passwordEncoder); // 指定密码加密器}
}
上面设置完后,重新启动,在登录页面就可以输入数据库中的用户名/密码了。
登录成功以后,通过访问localhost:8080/get-user?username=user,可以获取到用户信息

六、配置角色访问控制
上面设置后,可以使用数据库中的用户名/密码登录,还获取到了用户的角色。通过用户的角色,可以限制用户的请求访问:
开启方法的访问权限,需要在WebSecurityConfig添加 @EnableGlobalMethodSecurity(prePostEnabled = true) 注解
@EnableWebSecurity
@EnableGlobalMethodSecurity(prePostEnabled = true) //prePostEnabled属性决定Spring Security在接口前注解是否可用@PreAuthorize,@PostAuthorize等注解,设置为true,会拦截加了这些注解的接口
public class WebSecurityConfig extends WebSecurityConfigurerAdapter {...
}
修改HelloController.java类,增加方法的访问权限
@RestController
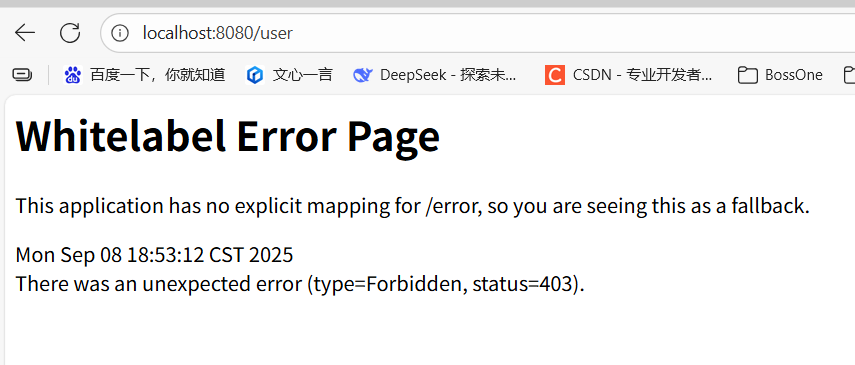
public class HelloController {@Autowiredprivate UserInfoService userInfoService;@GetMapping("/hello")public String request() {return "hello";}@GetMapping("/get-user")public UserInfo getUser(@RequestParam String username){return userInfoService.getUserInfoByUsername(username);}// 只能user角色才能访问该方法@PreAuthorize("hasAnyRole('user')") @GetMapping("/user")public String user(){return "user角色访问";}// 只能admin角色才能访问该方法@PreAuthorize("hasAnyRole('admin')")@GetMapping("/admin")public String admin(){return "admin角色访问";}}当我用admin用户登录成功以后,访问 “localhost:8080/user” 接口 出现
访问 “localhost:8080/admin” 接口 出现
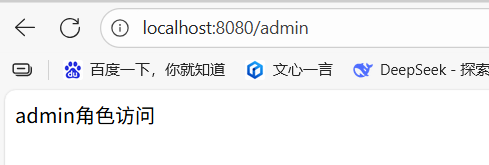
说明 @PreAuthorize(“hasAnyRole(‘admin’)”) 实现了角色控制
七、调整密码为 加密保存
前面的用户密码都是手动添加的,所以数据库中是明文显示,在实际开发中,都是需要加密保存的。
下面模拟简单注册用户,加密保存密码:
UserInfoMapper.java类中添加【新增用户】接口
@Mapper
@Repository
public interface UserMapper {// 新增用户@Insert("insert into user(username, password, role) value(#{username}, #{password}, #{role})")int insertUserInfo(UserInfo userInfo);
}
UserInfoService.java中添加插入方法,注意要加密密码
@Service
public class UserInfoService {...@Autowiredprivate PasswordEncoder passwordEncoder;//新增用户public int insertUser(UserInfo userInfo){// 加密密码userInfo.setPassword(passwordEncoder.encode(userInfo.getPassword()));return userInfoMapper.insertUserInfo(userInfo);}
HelloController.java中增加添加用户接口
@RestController
public class HelloController {@PostMapping("/add-user")public int addUser(@RequestBody UserInfo userInfo){return userInfoService.insertUser(userInfo);}
}
配置完后,启动服务,使用Postman发送POST请求来添加用户:
点击Send按钮后,添加失败,不会返回成功1,看到红框的状态码显示401 Unauthorized,说明无权限,需要登录,但注册用户是不用登录的,所以就需要注册用户的请求无需身份验证:
修改WebSecurityConfig配置类,重写configure(HttpSecurity http)方法,配置允许注册用户的请求访问:
@EnableWebSecurity
@EnableGlobalMethodSecurity(prePostEnabled = true)
public class WebSecurityConfig extends WebSecurityConfigurerAdapter {@Overrideprotected void configure(HttpSecurity http) throws Exception {http.authorizeRequests().antMatchers(HttpMethod.POST, "/add-user").permitAll() // 允许post请求/add-user,而无需认证.anyRequest() // 任何其它请求.authenticated() // 都需要身份认证.and().formLogin() // 使用默认的登录页面.and().csrf().disable();// post请求要关闭csrf验证,不然访问报错;实际开发中开启,需要前端配合传递其他参数}
}
配置允许POST请求/add-user访问后,再在Postman发送请求就可以成功了:
增加的新用户储存数据库的密码为 加密的,所以我们 需要修改CustomUserDetailsService类,之前从数据库拿到明文密码后需要加密,现在数据库里面的密码已经加密了,就不用加密了:
@Component
public class CustomUserDetailsService implements UserDetailsService {@Autowiredprivate UserInfoService userInfoService;@Autowiredprivate PasswordEncoder passwordEncoder;@Overridepublic UserDetails loadUserByUsername(String username) throws UsernameNotFoundException {// 通过用户名从数据库获取用户信息UserInfo userInfo = userInfoService.getUserInfoByUsername(username);if (userInfo == null) {throw new UsernameNotFoundException("用户不存在");}// 得到用户角色String role = userInfo.getRole();// 角色集合List<GrantedAuthority> authorities = new ArrayList<>();// 角色必须以`ROLE_`开头,数据库中没有,则在这里加authorities.add(new SimpleGrantedAuthority("ROLE_" + role));return new User(userInfo.getUsername(),// 数据库密码已加密,不用再加密user.getPassword(),authorities);}
}
浏览器访问localhost:8080/user,输入zeng/zeng123登录即可。
八、密码修改
UserInfoMapper.java类中添加更新用户密码操作:
@Mapper
@Repository
public interface UserMapper {@Update("update user set password = #{newPwd} where username = #{username}")int updatePwd(String username, String newPwd);
}
UserInfoService.java类中添加更新密码的操作方法:
@Service
public class UserInfoService { ...public int updatePwd(String oldPwd, String newPwd) {// 获取当前登录用户信息(注意:没有密码的)UserDetails principal = (UserDetails) SecurityContextHolder.getContext().getAuthentication().getPrincipal();String username = principal.getUsername();// 通过用户名获取到用户信息(获取密码)UserInfo userInfo = userInfoMapper.getUserInfoByUsername(username);// 判断输入的旧密码是正确if (passwordEncoder.matches(oldPwd, userInfo.getPassword())) {// 不要忘记加密新密码return userInfoMapper.updatePwd(username, passwordEncoder.encode(newPwd));}return 0;}
}
HelloController.java类增加修改用户密码接口:
@RestController
public class HelloController {    @PostMapping("/updatePwd")public int updatePwd(@RequestBody Map<String, String> map){return userInfoService.updatePwd(map.get("oldPwd"), map.get("newPwd"));}
}
先浏览器输入http://localhost:8080/login登录用户zeng/zeng123:
再使用postman 调用 更新接口后,重启后就可以使用新密码登录了。
九、用户角色多对多关系
上面的设置后,能基本实现了身份认证和角色授权了,但还是有一点不足:
我们前面用户表中,用户和角色是绑定一起,用户就只有一个角色了,但实际上,用户可能拥有多个角色,角色拥有多个用户,是多对多的关系,所以需要重新设置用户表和角色表。
新建表,主键id全部都是自增。
用户user2表
CREATE TABLE user2 ( uid int(11) NOT NULL AUTO_INCREMENT,
username varchar(255) CHARACTER SET utf8 COLLATE utf8_general_ci
NULL DEFAULT NULL, password varchar(255) CHARACTER SET utf8
COLLATE utf8_general_ci NULL DEFAULT NULL, PRIMARY KEY (uid) USING
BTREE ) ENGINE = InnoDB AUTO_INCREMENT = 11 CHARACTER SET = utf8
COLLATE = utf8_general_ci ROW_FORMAT = Dynamic;
角色role2表,指定了2个角色
CREATE TABLE role2 ( rid int(11) NOT NULL AUTO_INCREMENT,
role varchar(255) CHARACTER SET utf8 COLLATE utf8_general_ci NULL
DEFAULT NULL, PRIMARY KEY (rid) USING BTREE ) ENGINE = InnoDB
AUTO_INCREMENT = 3 CHARACTER SET = utf8 COLLATE = utf8_general_ci
ROW_FORMAT = Dynamic;
用户角色关系user2_role2表
CREATE TABLE user2_role2 ( id int(11) NOT NULL AUTO_INCREMENT,
uid int(11) NULL DEFAULT NULL, rid int(11) NULL DEFAULT NULL,
PRIMARY KEY (id) USING BTREE ) ENGINE = InnoDB AUTO_INCREMENT = 10
CHARACTER SET = utf8 COLLATE = utf8_general_ci ROW_FORMAT = Dynamic;
初始化数据:
-- 添加1个用户
INSERT INTO user2 VALUES (1, 'user', 'user123');-- 添加2个角色
INSERT INTO role2 VALUES (1, 'user');
INSERT INTO role2 VALUES (2, 'admin');-- 1个用户,拥有2个角色
INSERT INTO user2_role2 VALUES (1, 1, 1);
INSERT INTO user2_role2 VALUES (2, 1, 2);
使用Navicat可视化表的数据结构为:

调整 entity 实体类
@Data
public class User {private Integer uid;private String username;private String password;
}
增加 Role类
@Data
public class Role {private Integer rid;private String role;
}
创建DTO类
因为用户和角色是多对多关系,需要在用户中含有角色的对象,角色中含有用户的对象,创建DTO类而不再entity类中添加,是因为entity类属性是和表字段一一对应的,一般不推荐在entity类中添加与表字段无关的属性。
新建dto包,在包下创建如下类:
UserDTO类
/ 注意,多对多不要用@Data,因为ToString会相互调用,导致死循环
@Setter
@Getter
public class UserDTO extends User {private Set<Role> roles;
}
RoleDTO类(目前用不到,可不建)
// 注意,多对多不要用@Data,因为ToString会相互调用,导致死循环
@Setter
@Getter
public class RoleDTO extends Role {private Set<User> users;
}
添加UserMapper.java类
@Mapper
@Repository
public interface UserMapper {// 查询用户UserDTO selectUserByUsername(@Param("username") String username);
}
UserMapper.xml。因为需要关联查询,所有使用xml方式
<?xml version="1.0" encoding="UTF-8" ?>
<!DOCTYPE mapper PUBLIC "-//mybatis.org//DTD Mapper 3.0//EN" "http://mybatis.org/dtd/mybatis-3-mapper.dtd" >
<mapper namespace="com.example.bdatabasemanytomanyrole.mapper.UserMapper"><resultMap id="userRoleMap" type="com.example.bdatabasemanytomanyrole.dto.UserDTO"><id property="uid" column="uid"/><result property="username" column="username"/><result property="password" column="password"/><collection property="roles" ofType="com.example.bdatabasemanytomanyrole.dto.RoleDTO"><id property="rid" column="rid"/><result property="role" column="role"></result></collection></resultMap><select id="selectUserByUsername" resultMap="userRoleMap">select user2.uid, user2.username, user2.password, role2.rid, role2.rolefrom user2, user2_role2, role2where user2.username=#{username} and user2.uid = user2_role2.uid and user2_role2.rid = role2.rid</select>
</mapper>
UserService.java
@Service
public class UserService {@Autowiredprivate UserMapper userMapper;public UserDTO getUser(String username){return userMapper.selectUserByUsername(username);}
}
UserController.java
@RestController
public class UserController {@Autowiredprivate UserService userService;@GetMapping("/get-user")public UserDTO getUser(@RequestParam String username){return userService.getUser(username);}
}
重写 CustomUserDetailsService 里面的 loadUserByUsername方法
@Component
public class CustomUserDetailsService implements UserDetailsService {@Autowiredprivate UserService userService;@Autowiredprivate PasswordEncoder passwordEncoder;@Overridepublic UserDetails loadUserByUsername(String username) throws UsernameNotFoundException {UserDTO user = userService.getUser(username);if (user == null) {throw new UsernameNotFoundException("用户不存在");}// 添加用户拥有的多个角色List<GrantedAuthority> grantedAuthorities = new ArrayList<>();Set<Role> roles = user.getRoles();for (Role role : roles) {grantedAuthorities.add(new SimpleGrantedAuthority("ROLE_" + role.getRole()));}return new User(user.getUsername(),// 数据库中密码没加密,需加密passwordEncoder.encode(user.getPassword()),grantedAuthorities);}
}
重新启动,可以使用user/user123登录了。
查看登录用户信息
要查看登录用户信息,我们可以在UserController 中添加方法:
@RestController
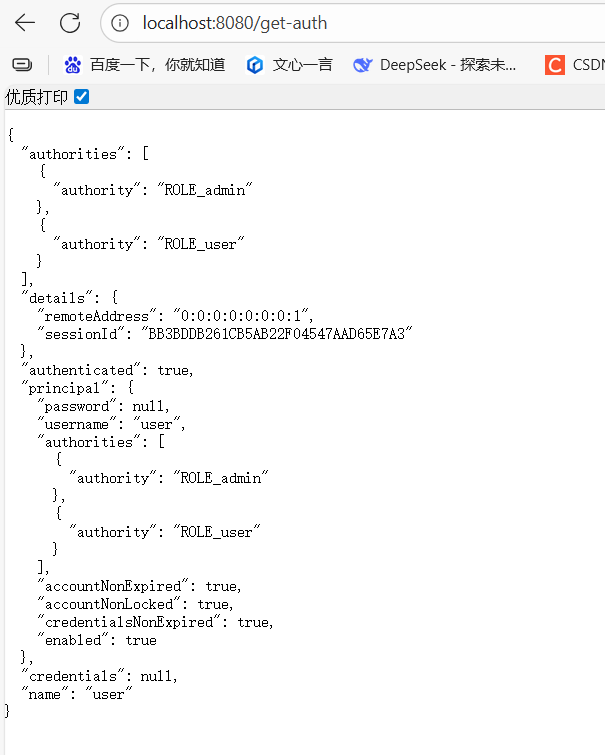
public class UserController {@Autowiredprivate UserService userService;@GetMapping("/get-user2")public UserDTO getUser2(@RequestParam String username){return userService.getUser(username);}/*** 查看登录用户信息*/@GetMapping("/get-auth")public Authentication getAuth(){return SecurityContextHolder.getContext().getAuthentication();}
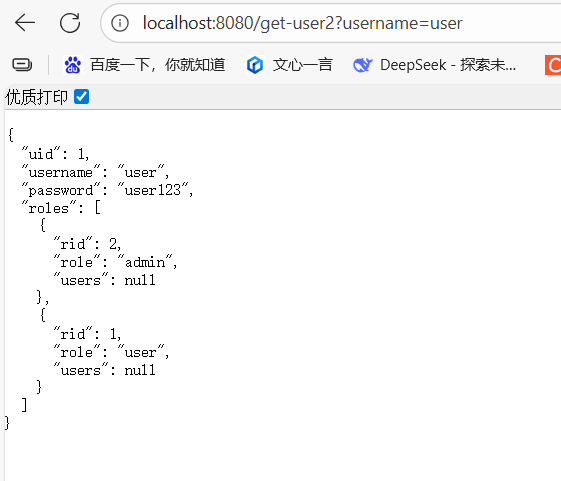
}使用 user/user123 登录后,
访问localhost:8080/get-user2?username=user,会返回:
访问localhost:8080/get-auth,会返回:
参考连接:
[1] springboot整合springsecurity最完整,只看这一篇就够了
[2] SpringBoot整合SpringSecurity(通俗易懂)