Logstash常用插件-ES集群加密
🌟Logstash的mutate插件
生成测试数据
vim generate_log.py
#!/usr/bin/env python
# -*- coding: UTF-8 -*-
# @author : zhuimport datetime
import random
import logging
import time
import sysLOG_FORMAT = "%(levelname)s %(asctime)s [xyz.zhubl.%(module)s] - %(message)s "
DATE_FORMAT = "%Y-%m-%d %H:%M:%S"# 配置root的logging.Logger实例的基本配置
logging.basicConfig(level=logging.INFO, format=LOG_FORMAT, datefmt=DATE_FORMAT, filename=sys.argv[1], filemode='a',)
actions = ["浏览页面", "评论商品", "加入收藏", "加入购物车", "提交订单", "使用优惠券", "领取优惠券","搜索", "查看订单", "付款", "清空购物车"]while True:time.sleep(random.randint(1, 5))user_id = random.randint(1, 10000)# 对生成的浮点数保留2位有效数字.price = round(random.uniform(15000, 30000),2)action = random.choice(actions)svip = random.choice([0,1,2])logging.info("DAU|{0}|{1}|{2}|{3}".format(user_id, action,svip,price))
python3 generate_log.py /tmp/apps.log
编写Logstash配置文件
vim /etc/logstash/conf.d/05-beats_apps-to-es.conf
input {beats {port => 5044}
}filter {mutate {split => { "message" => "|" }add_field => { "other" => "%{[message][0]}" "uid" => "%{[message][1]}" "action" => "%{[message][2]}" "svip" => "%{[message][3]}" "price" => "%{[message][4]}" }}mutate {convert => {"svip" => "integer""uid" => "integer""price" => "float"}split => { "other" => " " }add_field => { "datetime" => "%{[other][1]} %{[other][2]}" }remove_field => [ "tags","input","agent","@version","ecs" , "log", "host","message","other"]}
}output {stdout { } #elasticsearch {#    hosts => ["10.0.0.91:9200","10.0.0.92:9200","10.0.0.93:9200"]#    index => "zhu-elfk-logstash"#}
}
启动Logstash
logstash -rf /etc/logstash/conf.d/05-beats_apps-to-es.conf
编写Filebeat采集apps日志配置文件
vim /etc/filebeat/config/10-apps-to-logstash.yaml
filebeat.inputs:
- type: filestreampaths:- /tmp/apps.logoutput.logstash:hosts: ["10.0.0.93:5044"]
启动Filebeat
filebeat -e -c /etc/filebeat/config/10-apps-to-logstash.yaml
🌟Logstash的date插件分析数据实战
编写Logstash配置文件
vim /etc/logstash/conf.d/05-beats_apps-to-es.conf
input {beats {port => 5044}
}filter {mutate {split => { "message" => "|" }add_field => { "other" => "%{[message][0]}" "uid" => "%{[message][1]}" "action" => "%{[message][2]}" "svip" => "%{[message][3]}" "price" => "%{[message][4]}" }}mutate {convert => {"svip" => "integer""uid" => "integer""price" => "float"}split => { "other" => " " }add_field => { "datetime" => "%{[other][1]} %{[other][2]}" }remove_field => [ "tags","input","agent","@version","ecs" , "log", "host","message","other"]}date {# "2024-09-01 09:48:34"match => [ "datetime", "yyyy-MM-dd HH:mm:ss" ]# 将解析后的时间数据存储在指定字段,若不指定,则默认覆盖"@timestamp"#target => "dt"}
}output {stdout { } #elasticsearch {#    hosts => ["10.0.0.91:9200","10.0.0.92:9200","10.0.0.93:9200"]#    index => "zhu-elfk-logstash"#}
}
启动Logstash
logstash -rf /etc/logstash/conf.d/05-beats_apps-to-es.conf
Filebeat采集数据
rm -rf /var/lib/filebeat/
filebeat -e -c /etc/filebeat/config/10-apps-to-logstash.yaml
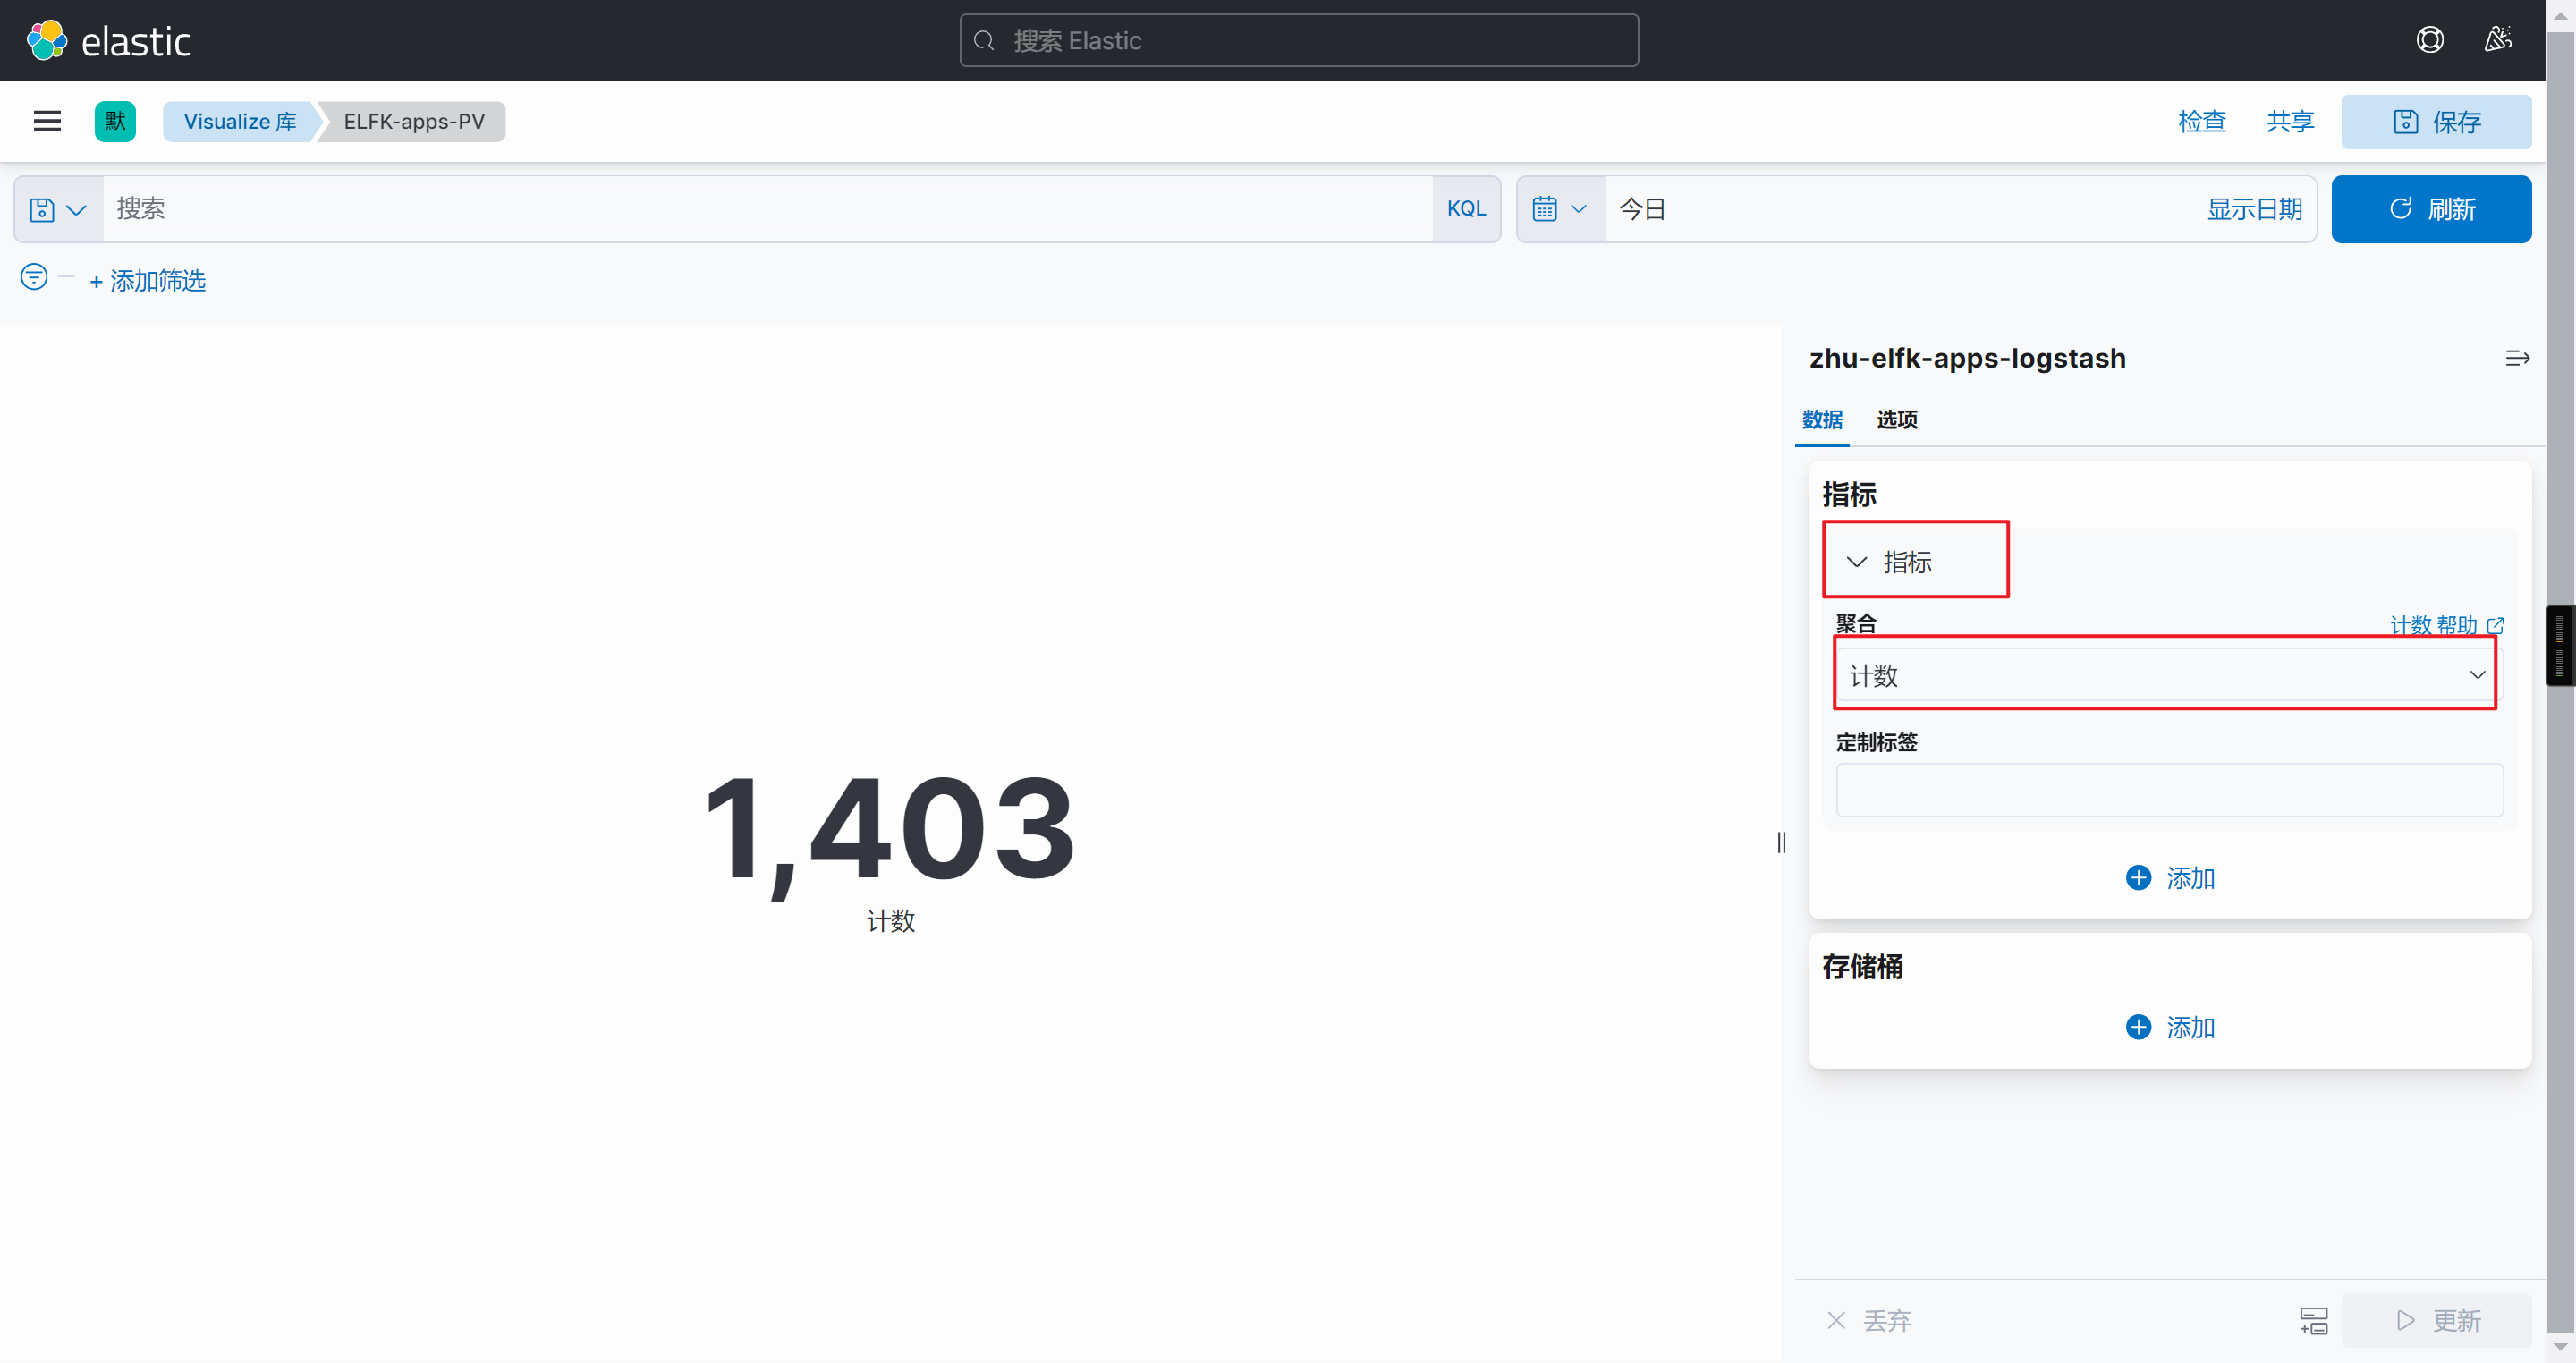
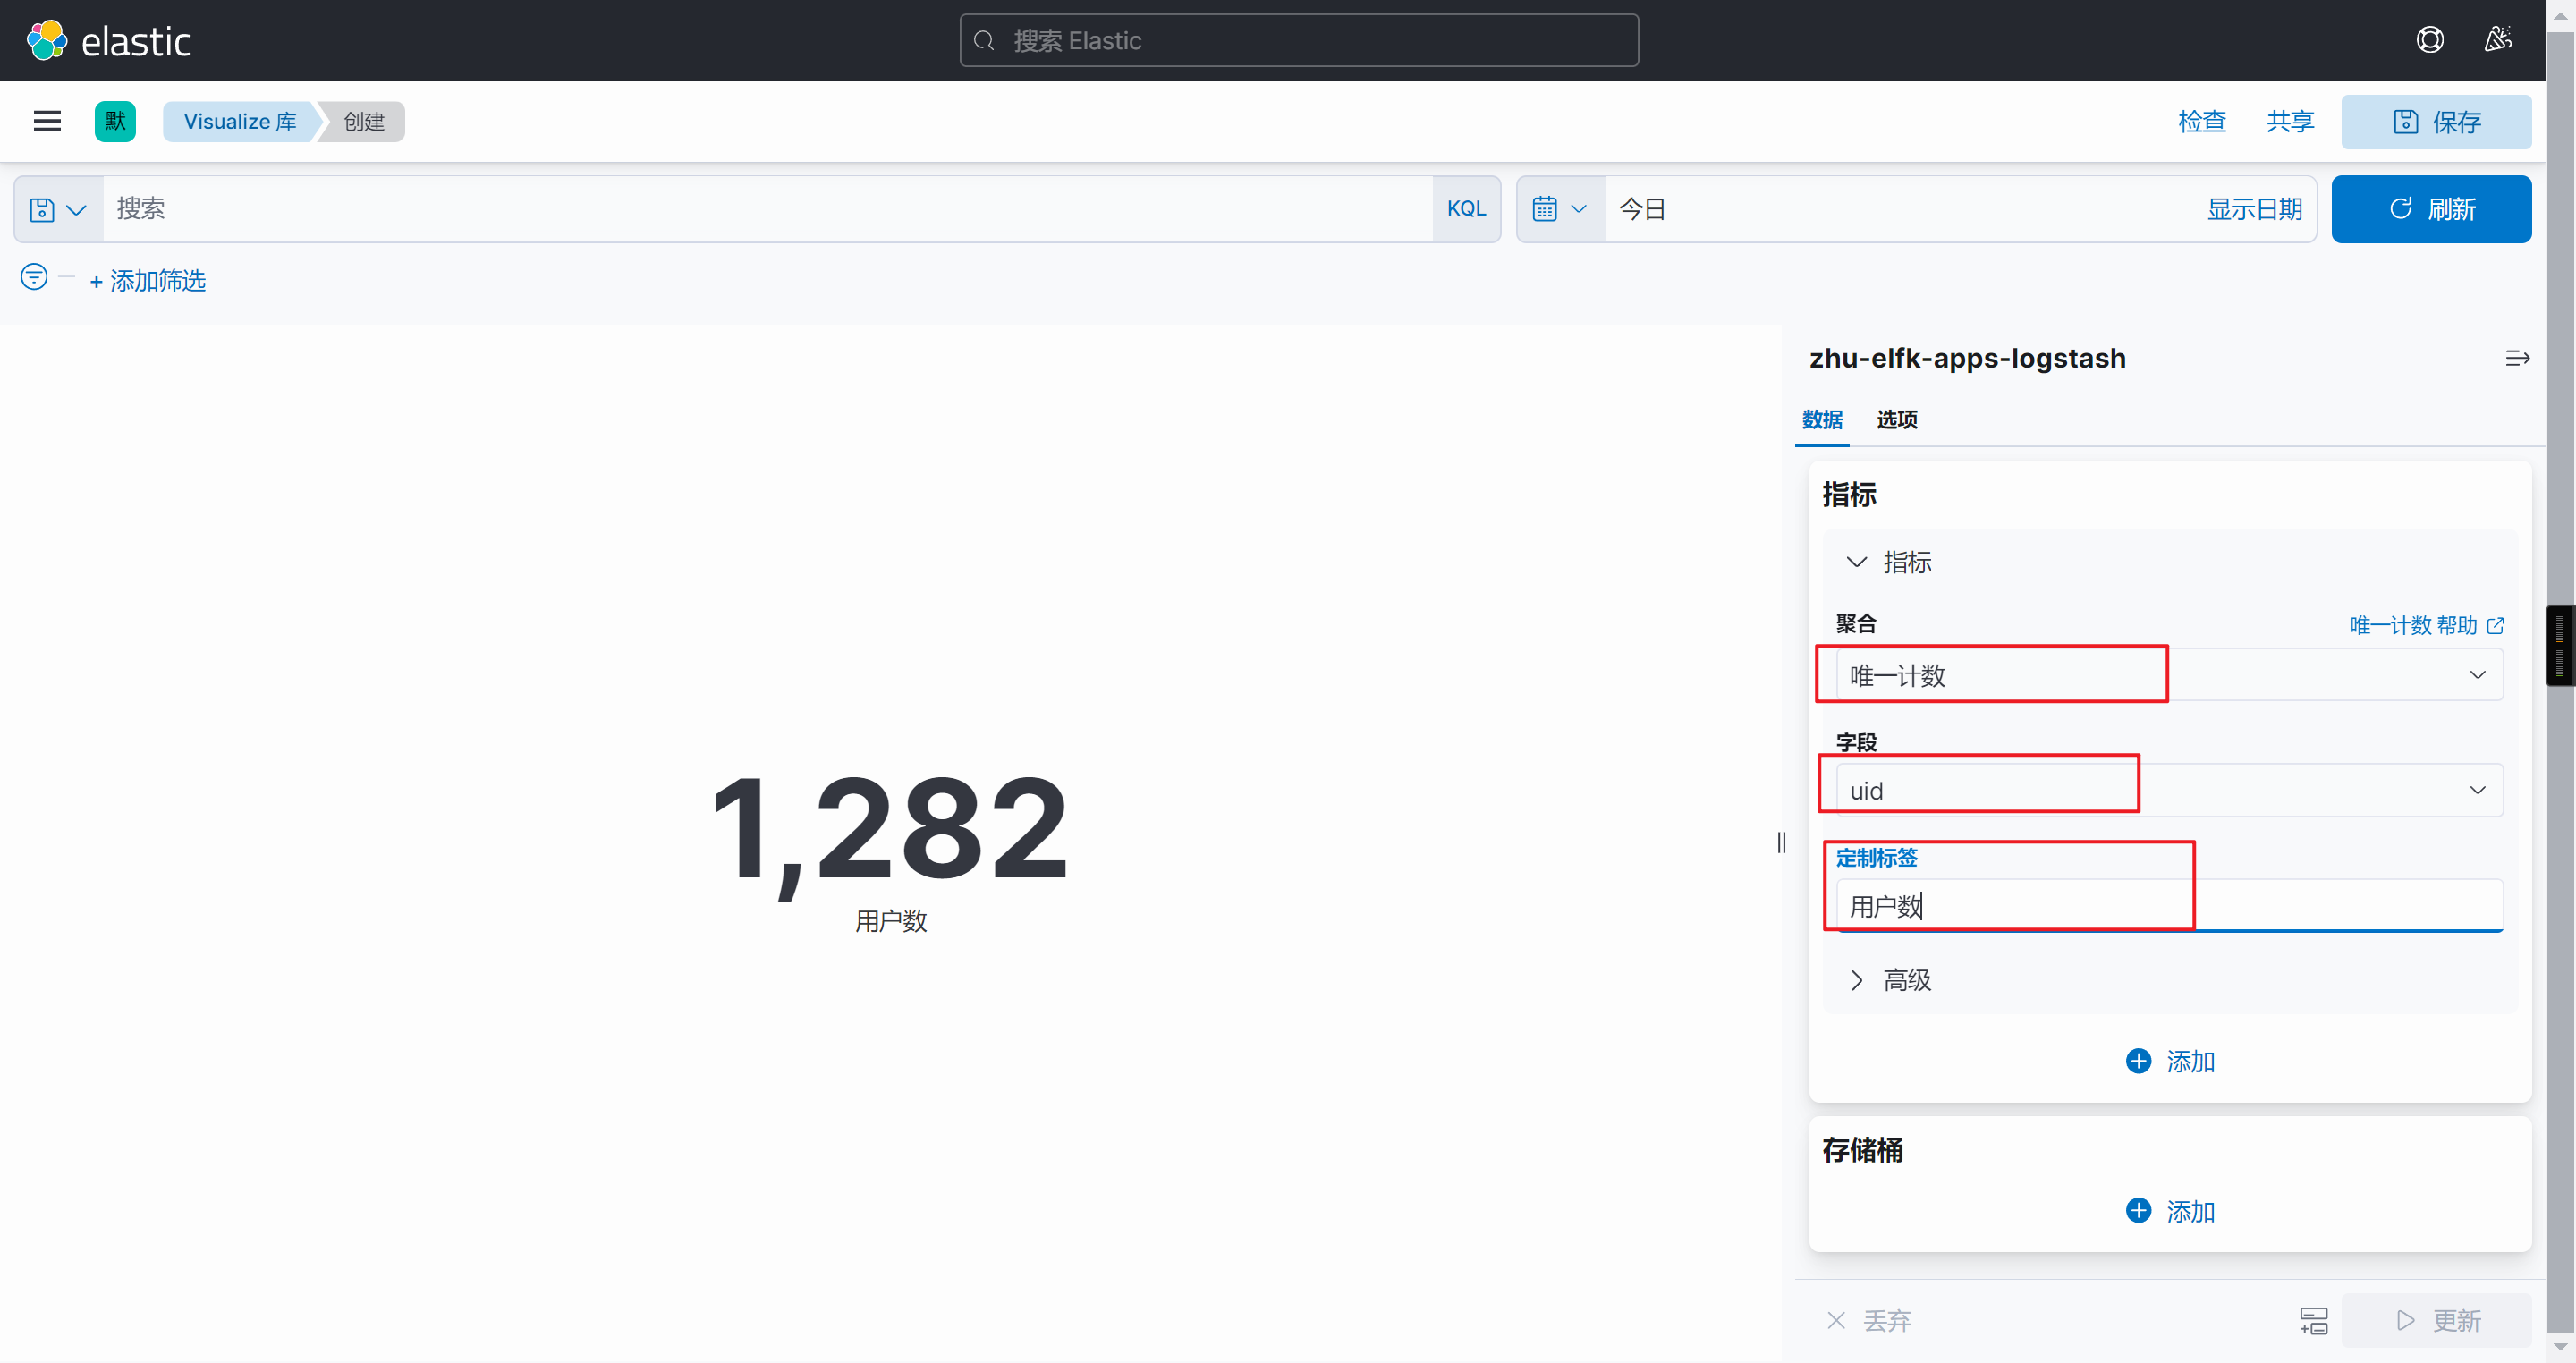
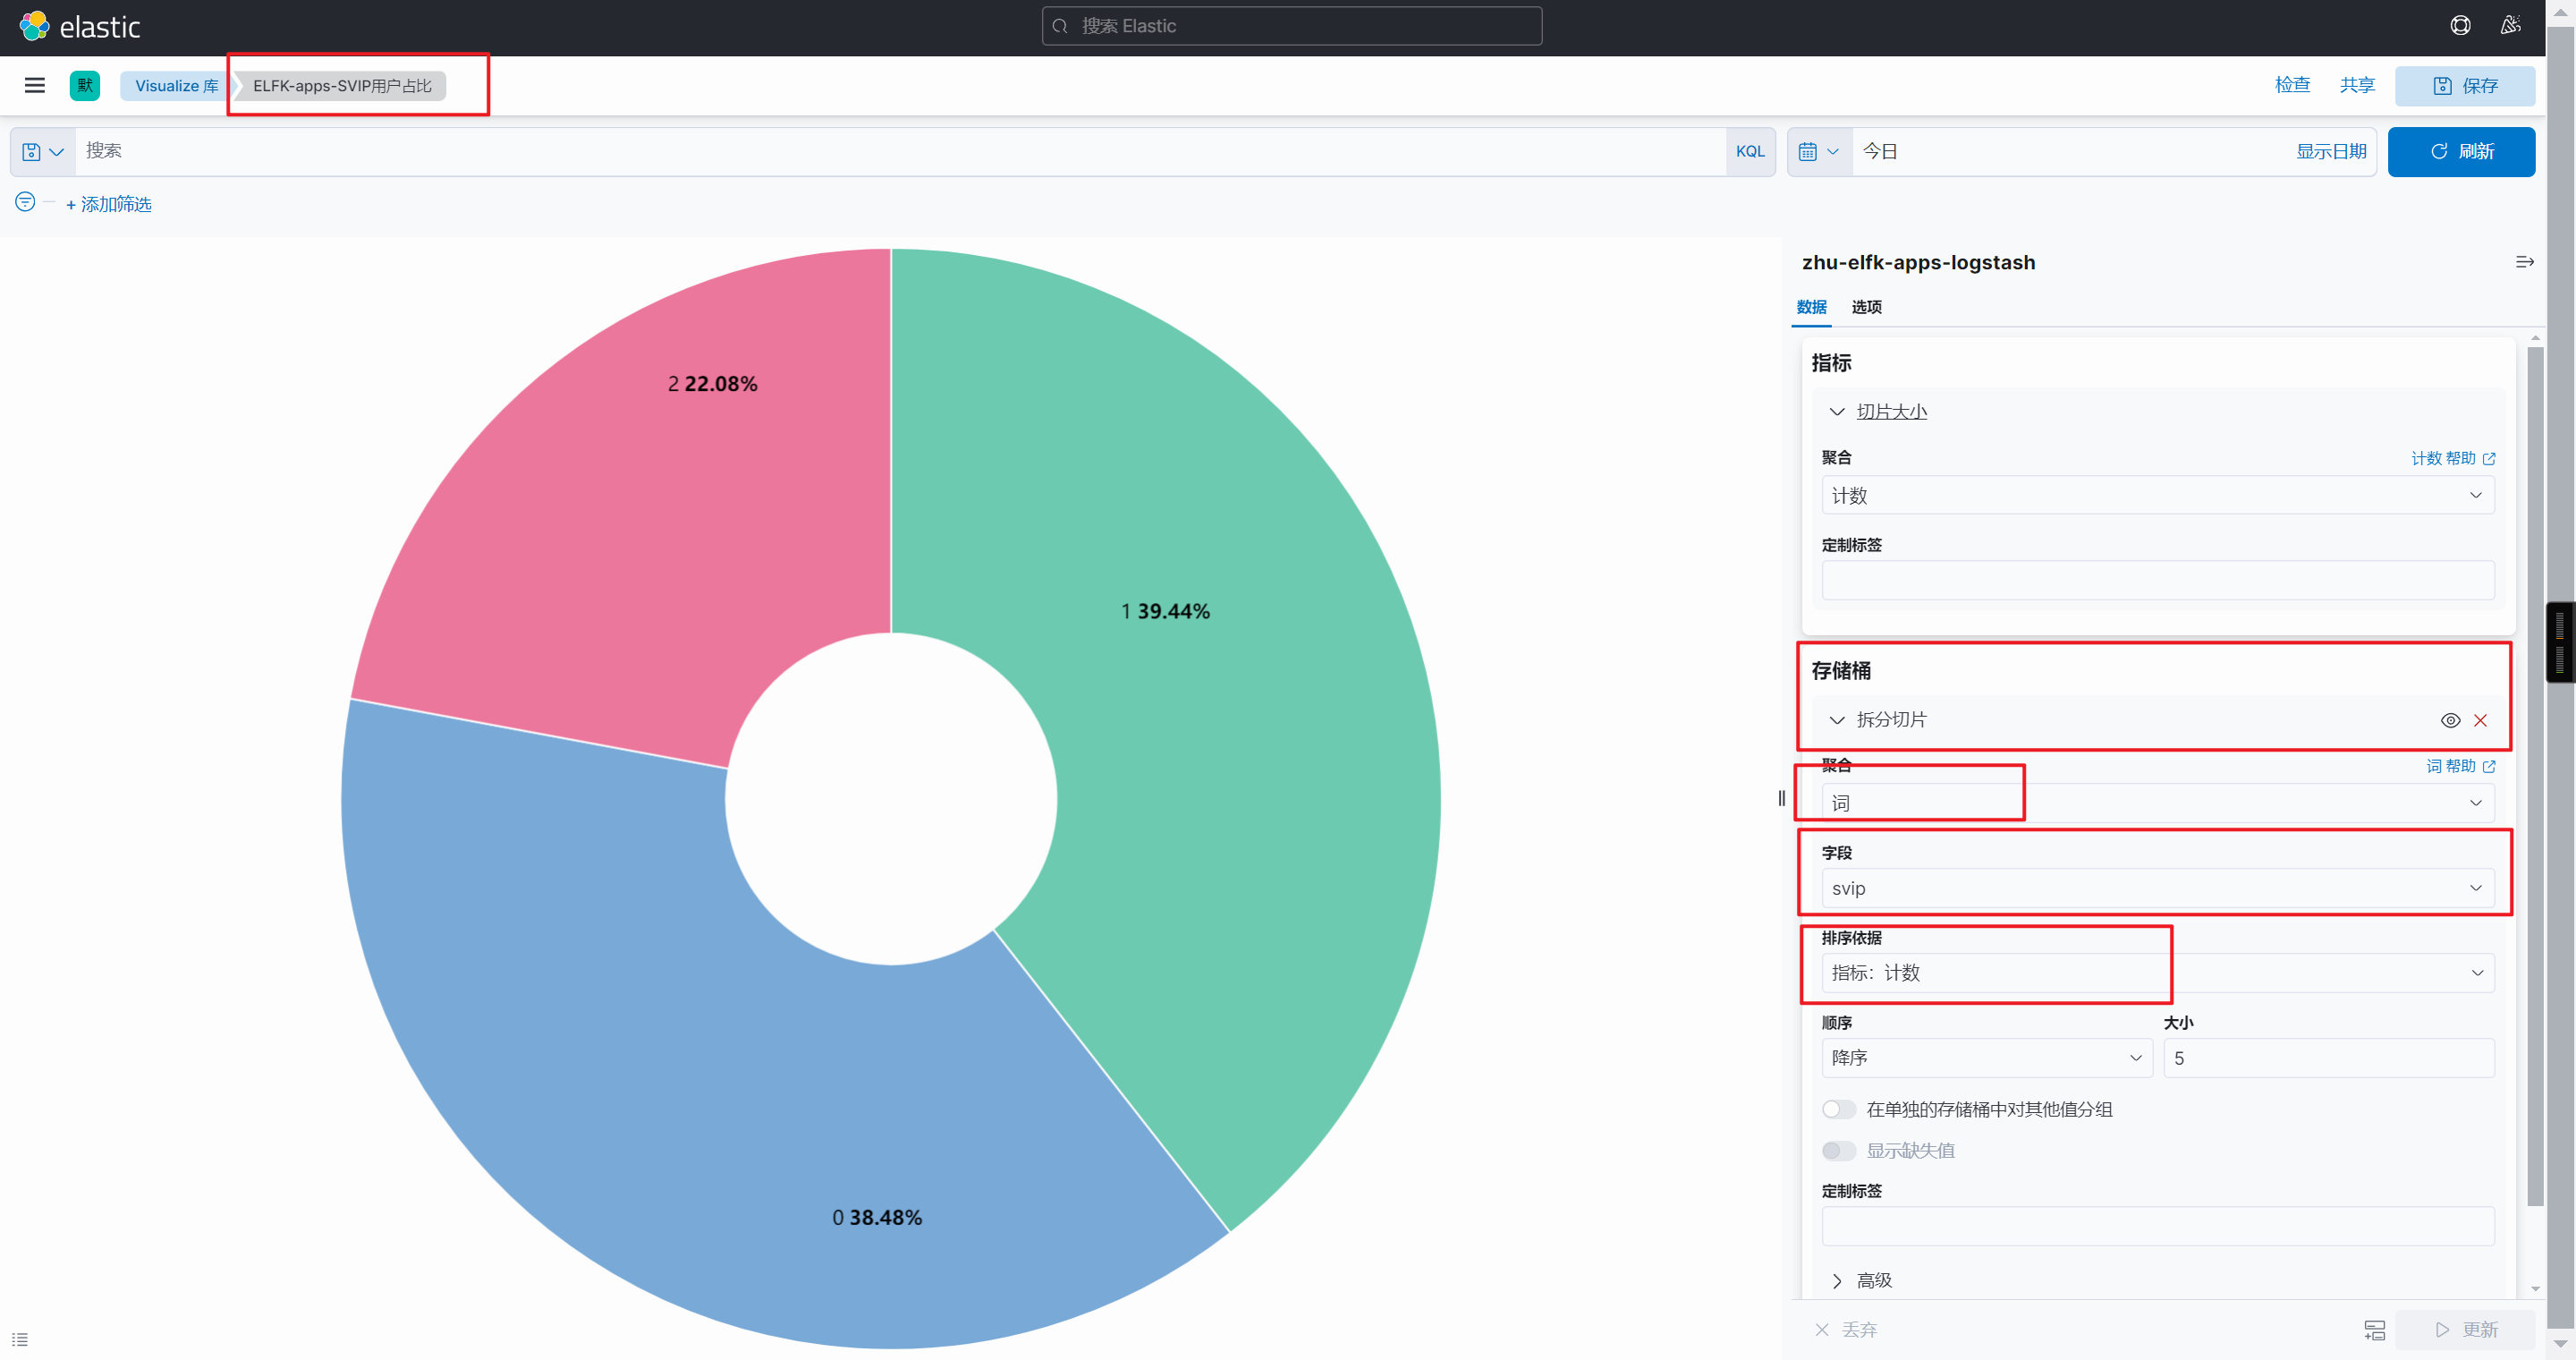
Kibana出图展示
PV统计
用户数统计
SVIP用户占比
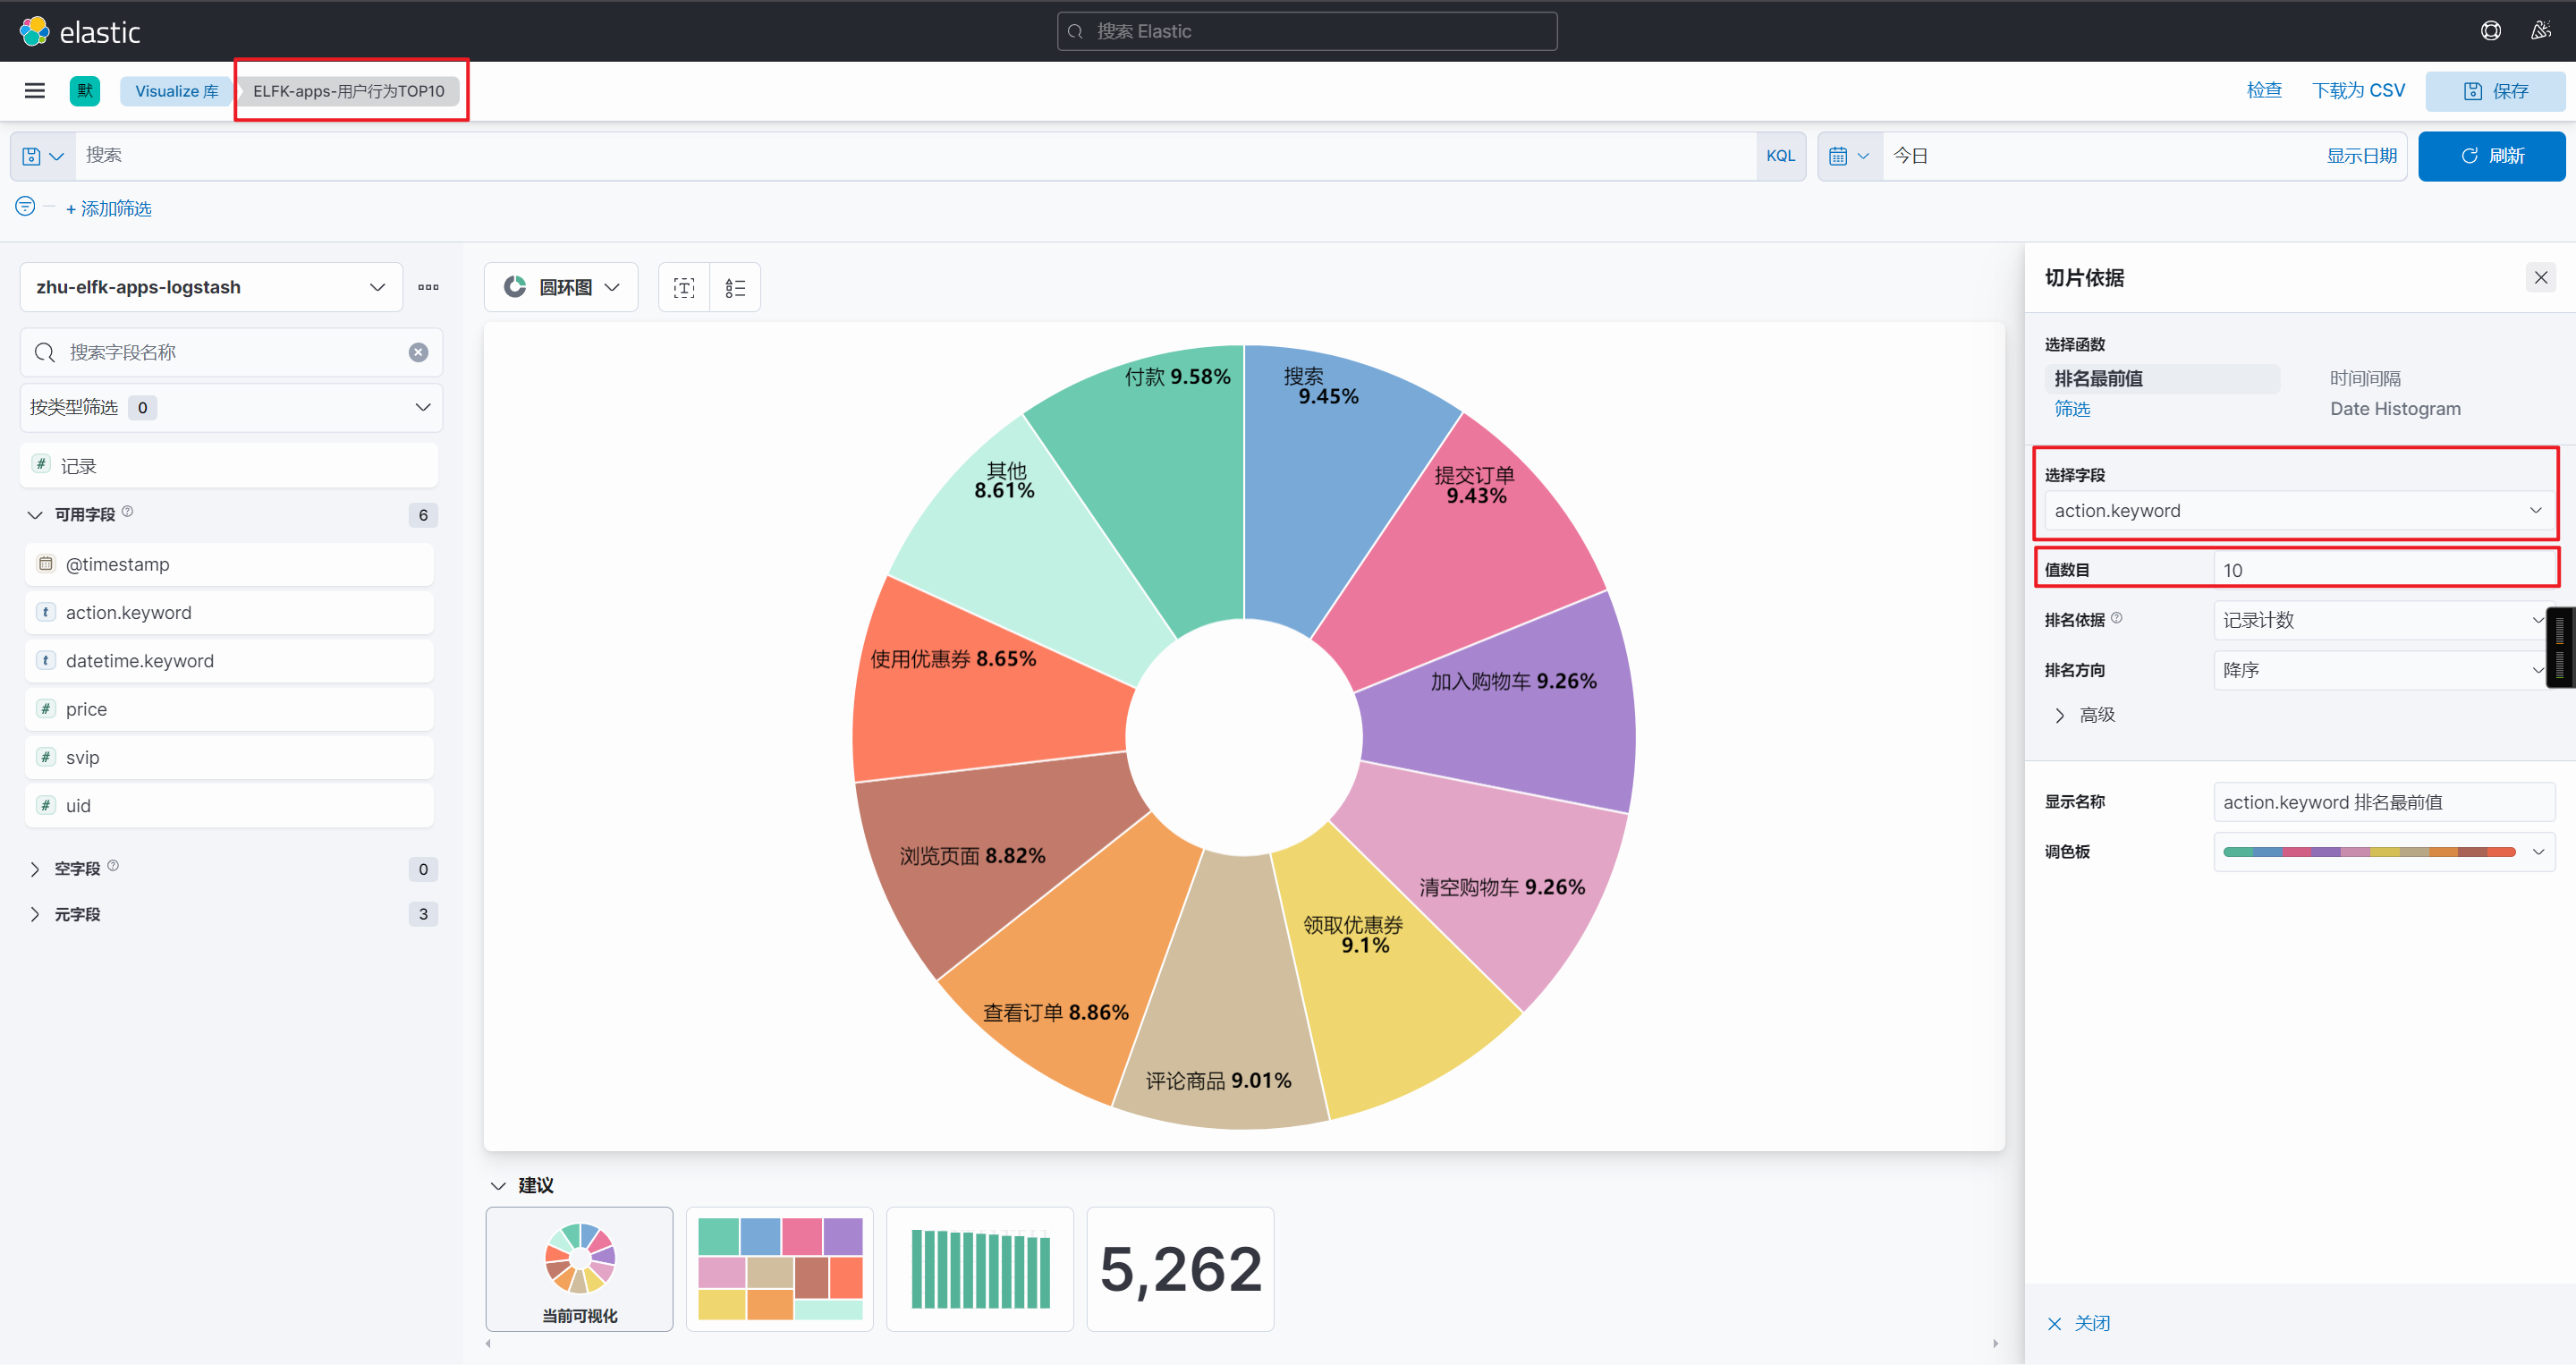
用户行为TOP10
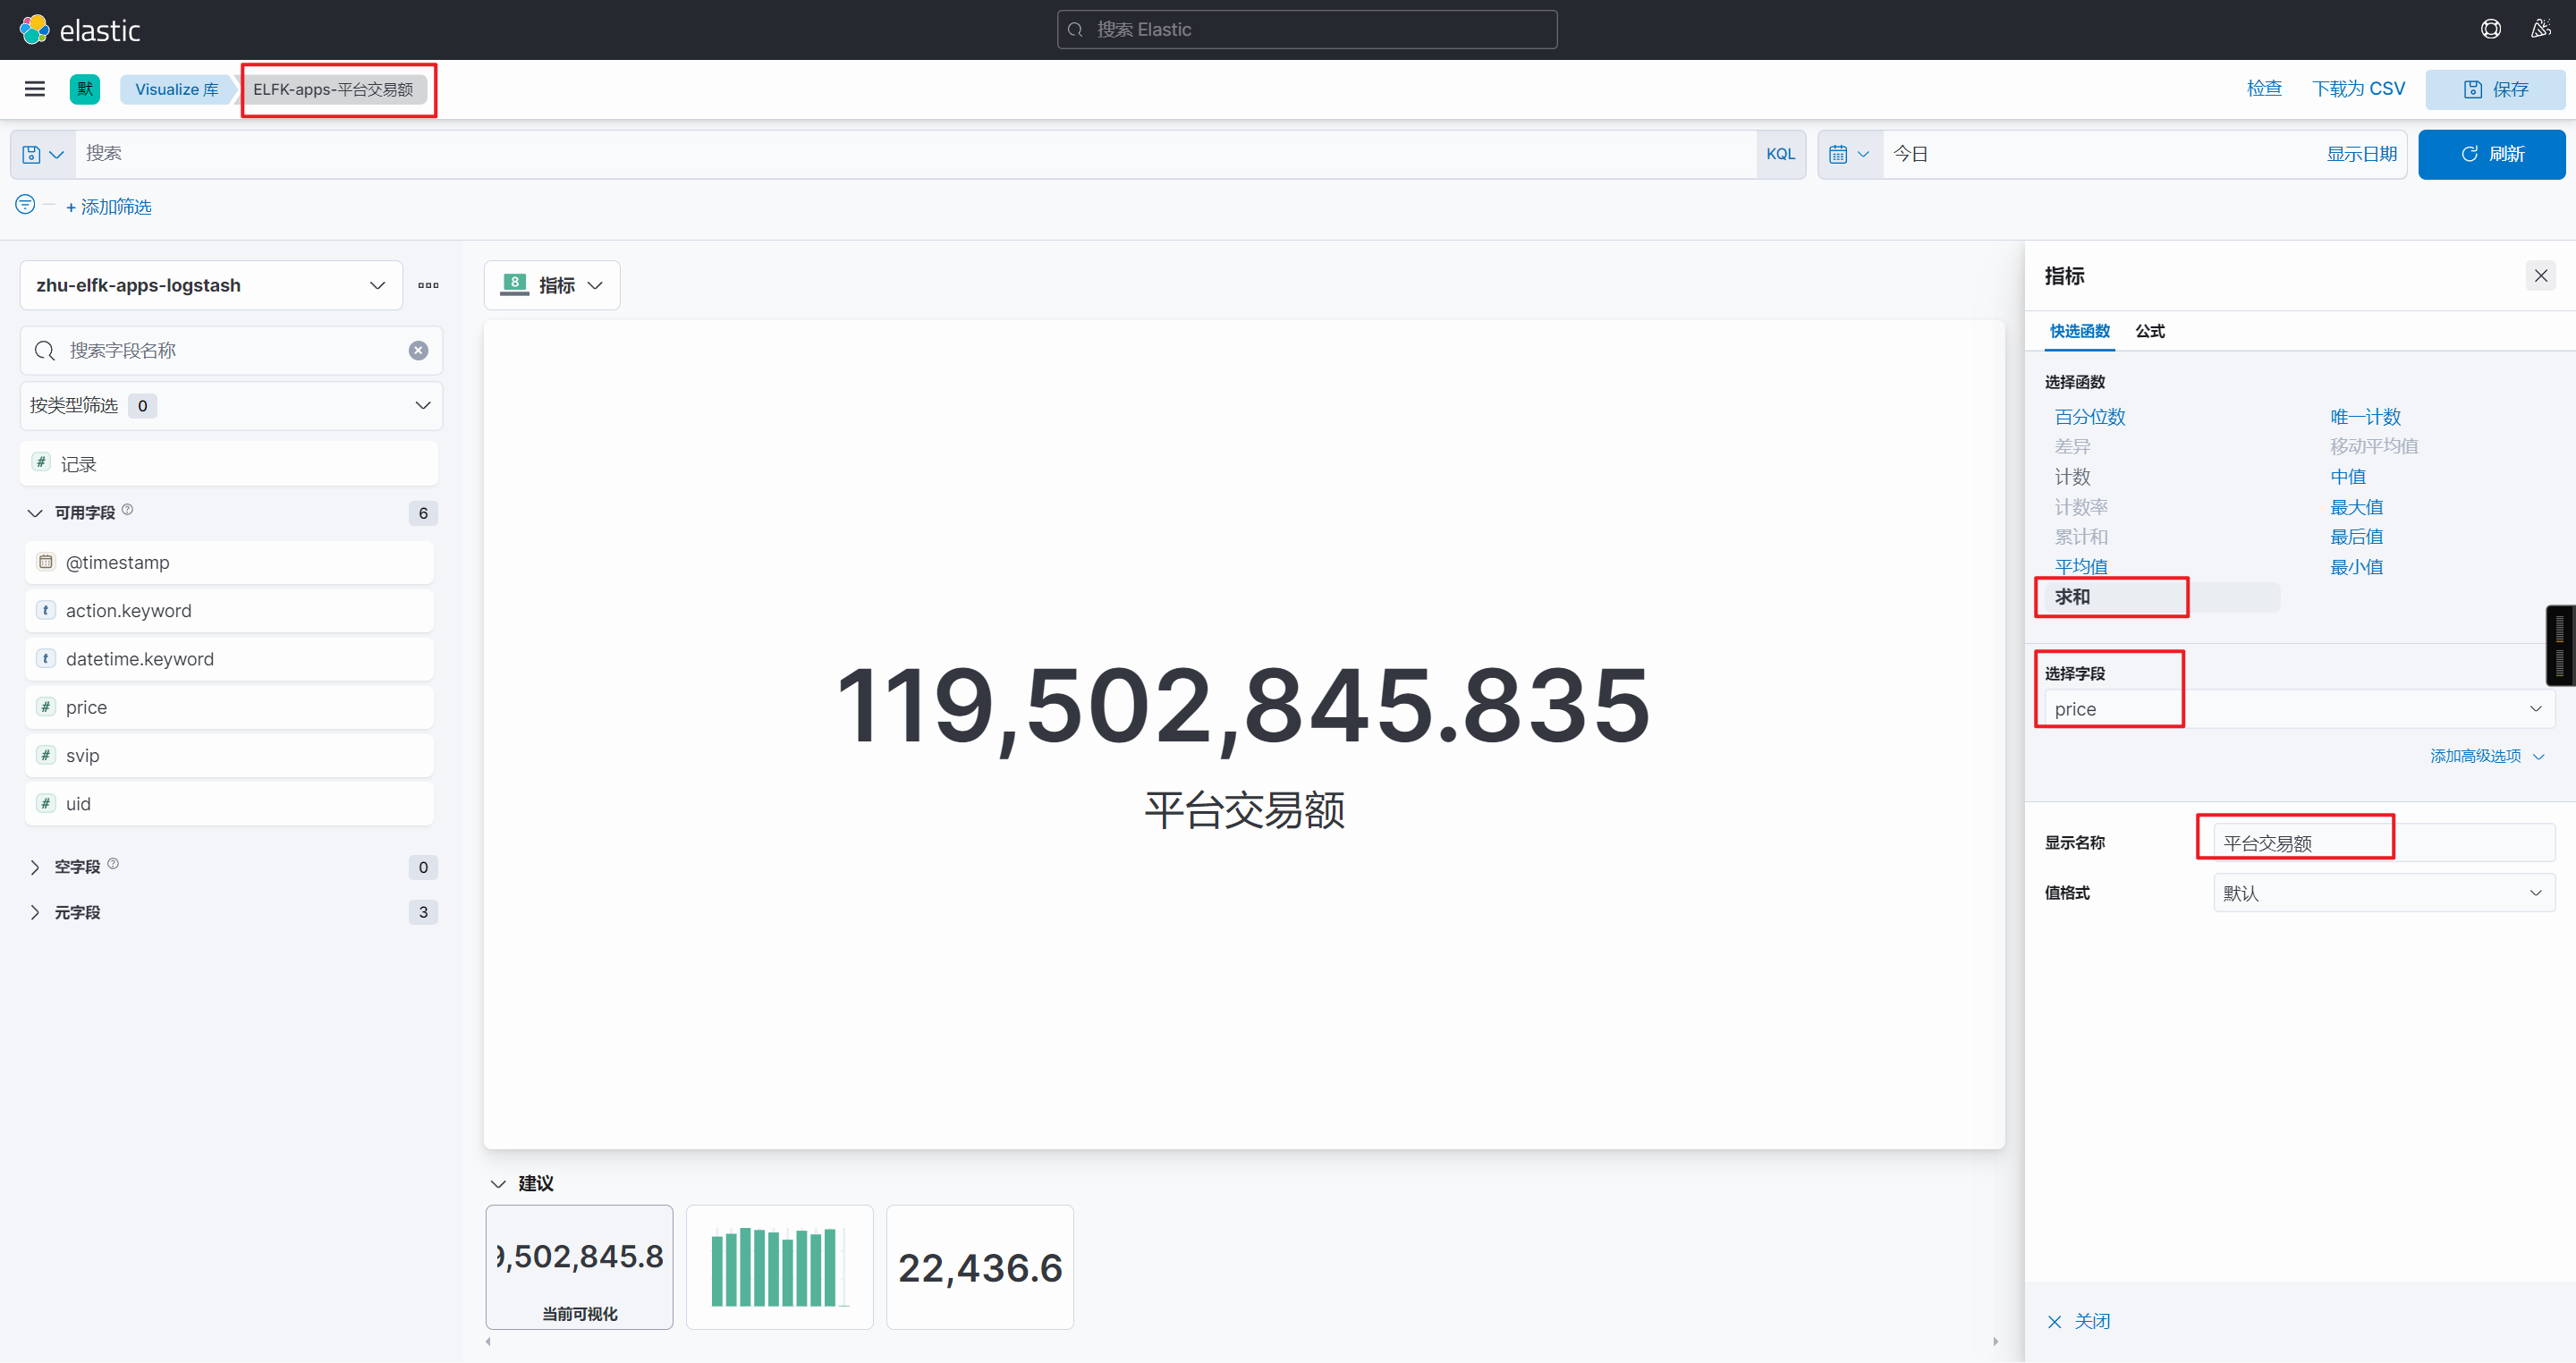
平台交易额
🌟ELFK架构分析nginx之grok实战案例
编写Logstash的配置文件
vim /etc/logstash/conf.d/06-nginx-to-es.conf
input {beats {port => 5044}
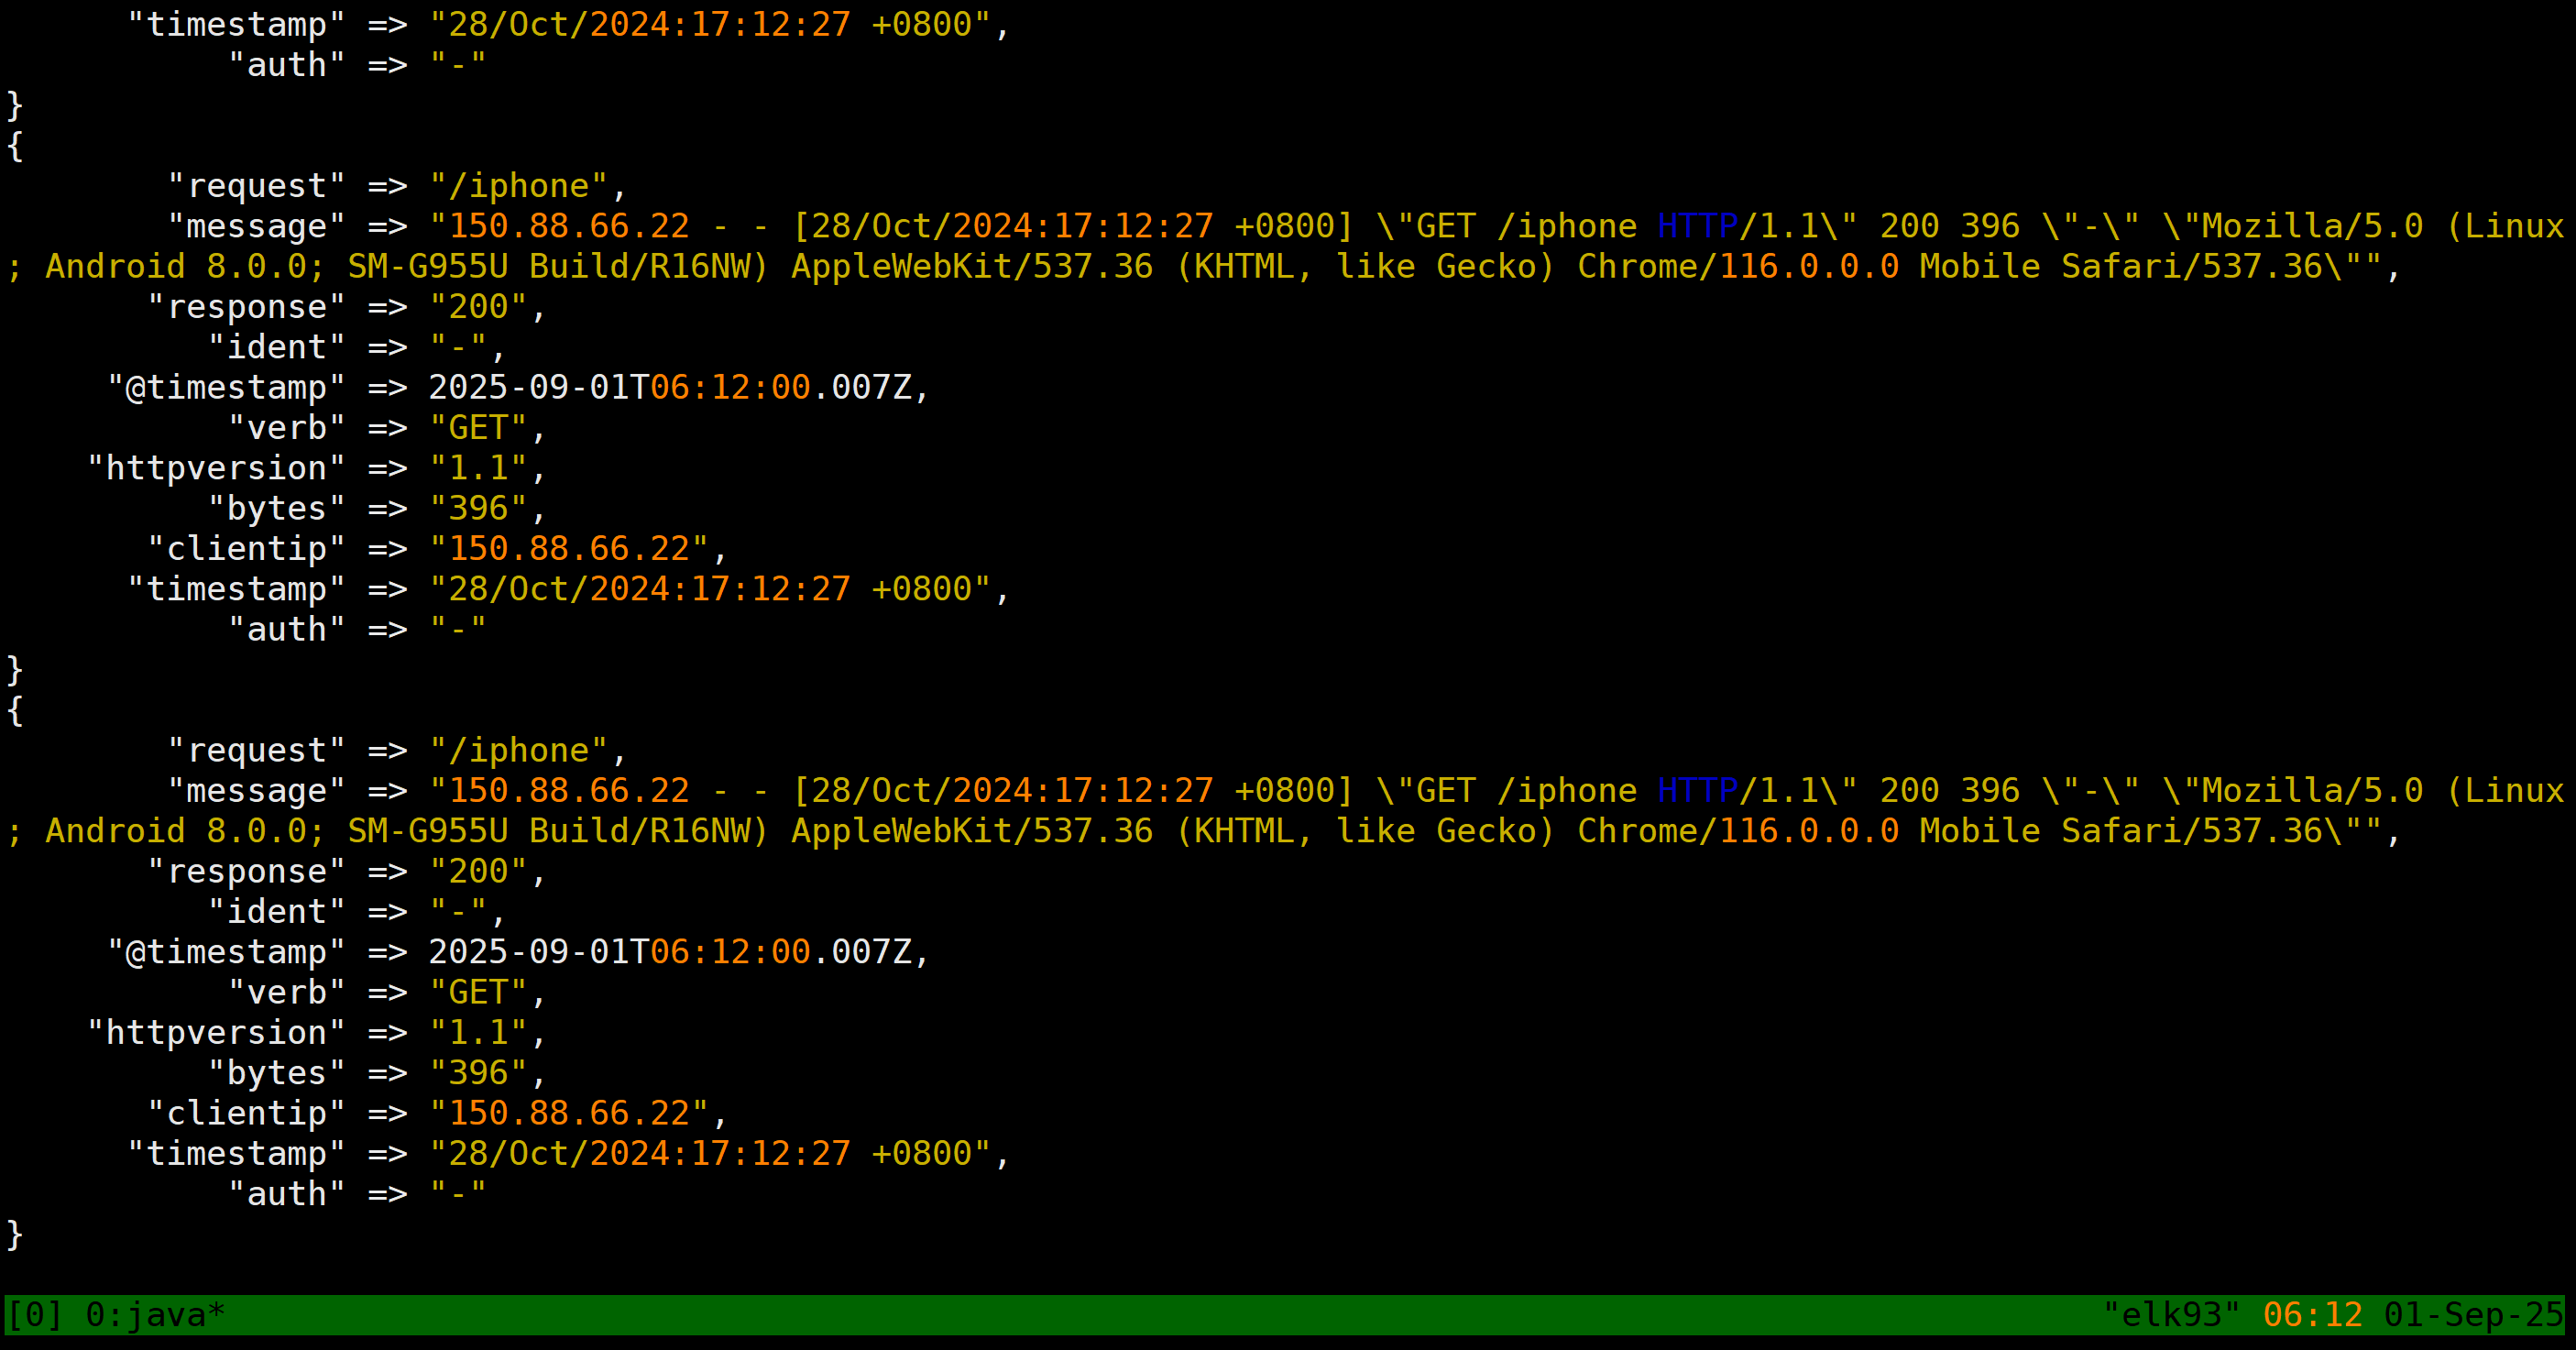
}filter {mutate {remove_field => [ "tags","input","agent","@version","ecs" , "log", "host"]}# 提取任意文本内容grok {match => {"message" => "%{HTTPD_COMMONLOG}"}}
}output {stdout { } #elasticsearch {# hosts => ["10.0.0.91:9200","10.0.0.92:9200","10.0.0.93:9200"]# index => "zhu-elfk-nginx-grok"#}
}
启动Logstash
logstash -rf /etc/logstash/conf.d/06-nginx-to-es.conf
编写Filebeat采集nginx日志
vim /etc/filebeat/config/11-nginx-to-logstash.yaml
filebeat.inputs:
- type: filestreampaths:- /root/access.logoutput.logstash:hosts: ["10.0.0.93:5044"]
启动Filebeat
filebeat -e -c /etc/filebeat/config/11-nginx-to-logstash.yaml
logstash控制台查看结果
🌟ELFK架构分析nginx之geoip实战案例
下载geoip数据库
官网下载:
编写Logstash的配置文件
vim /etc/logstash/conf.d/06-nginx-to-es.conf
input {beats {port => 5044}
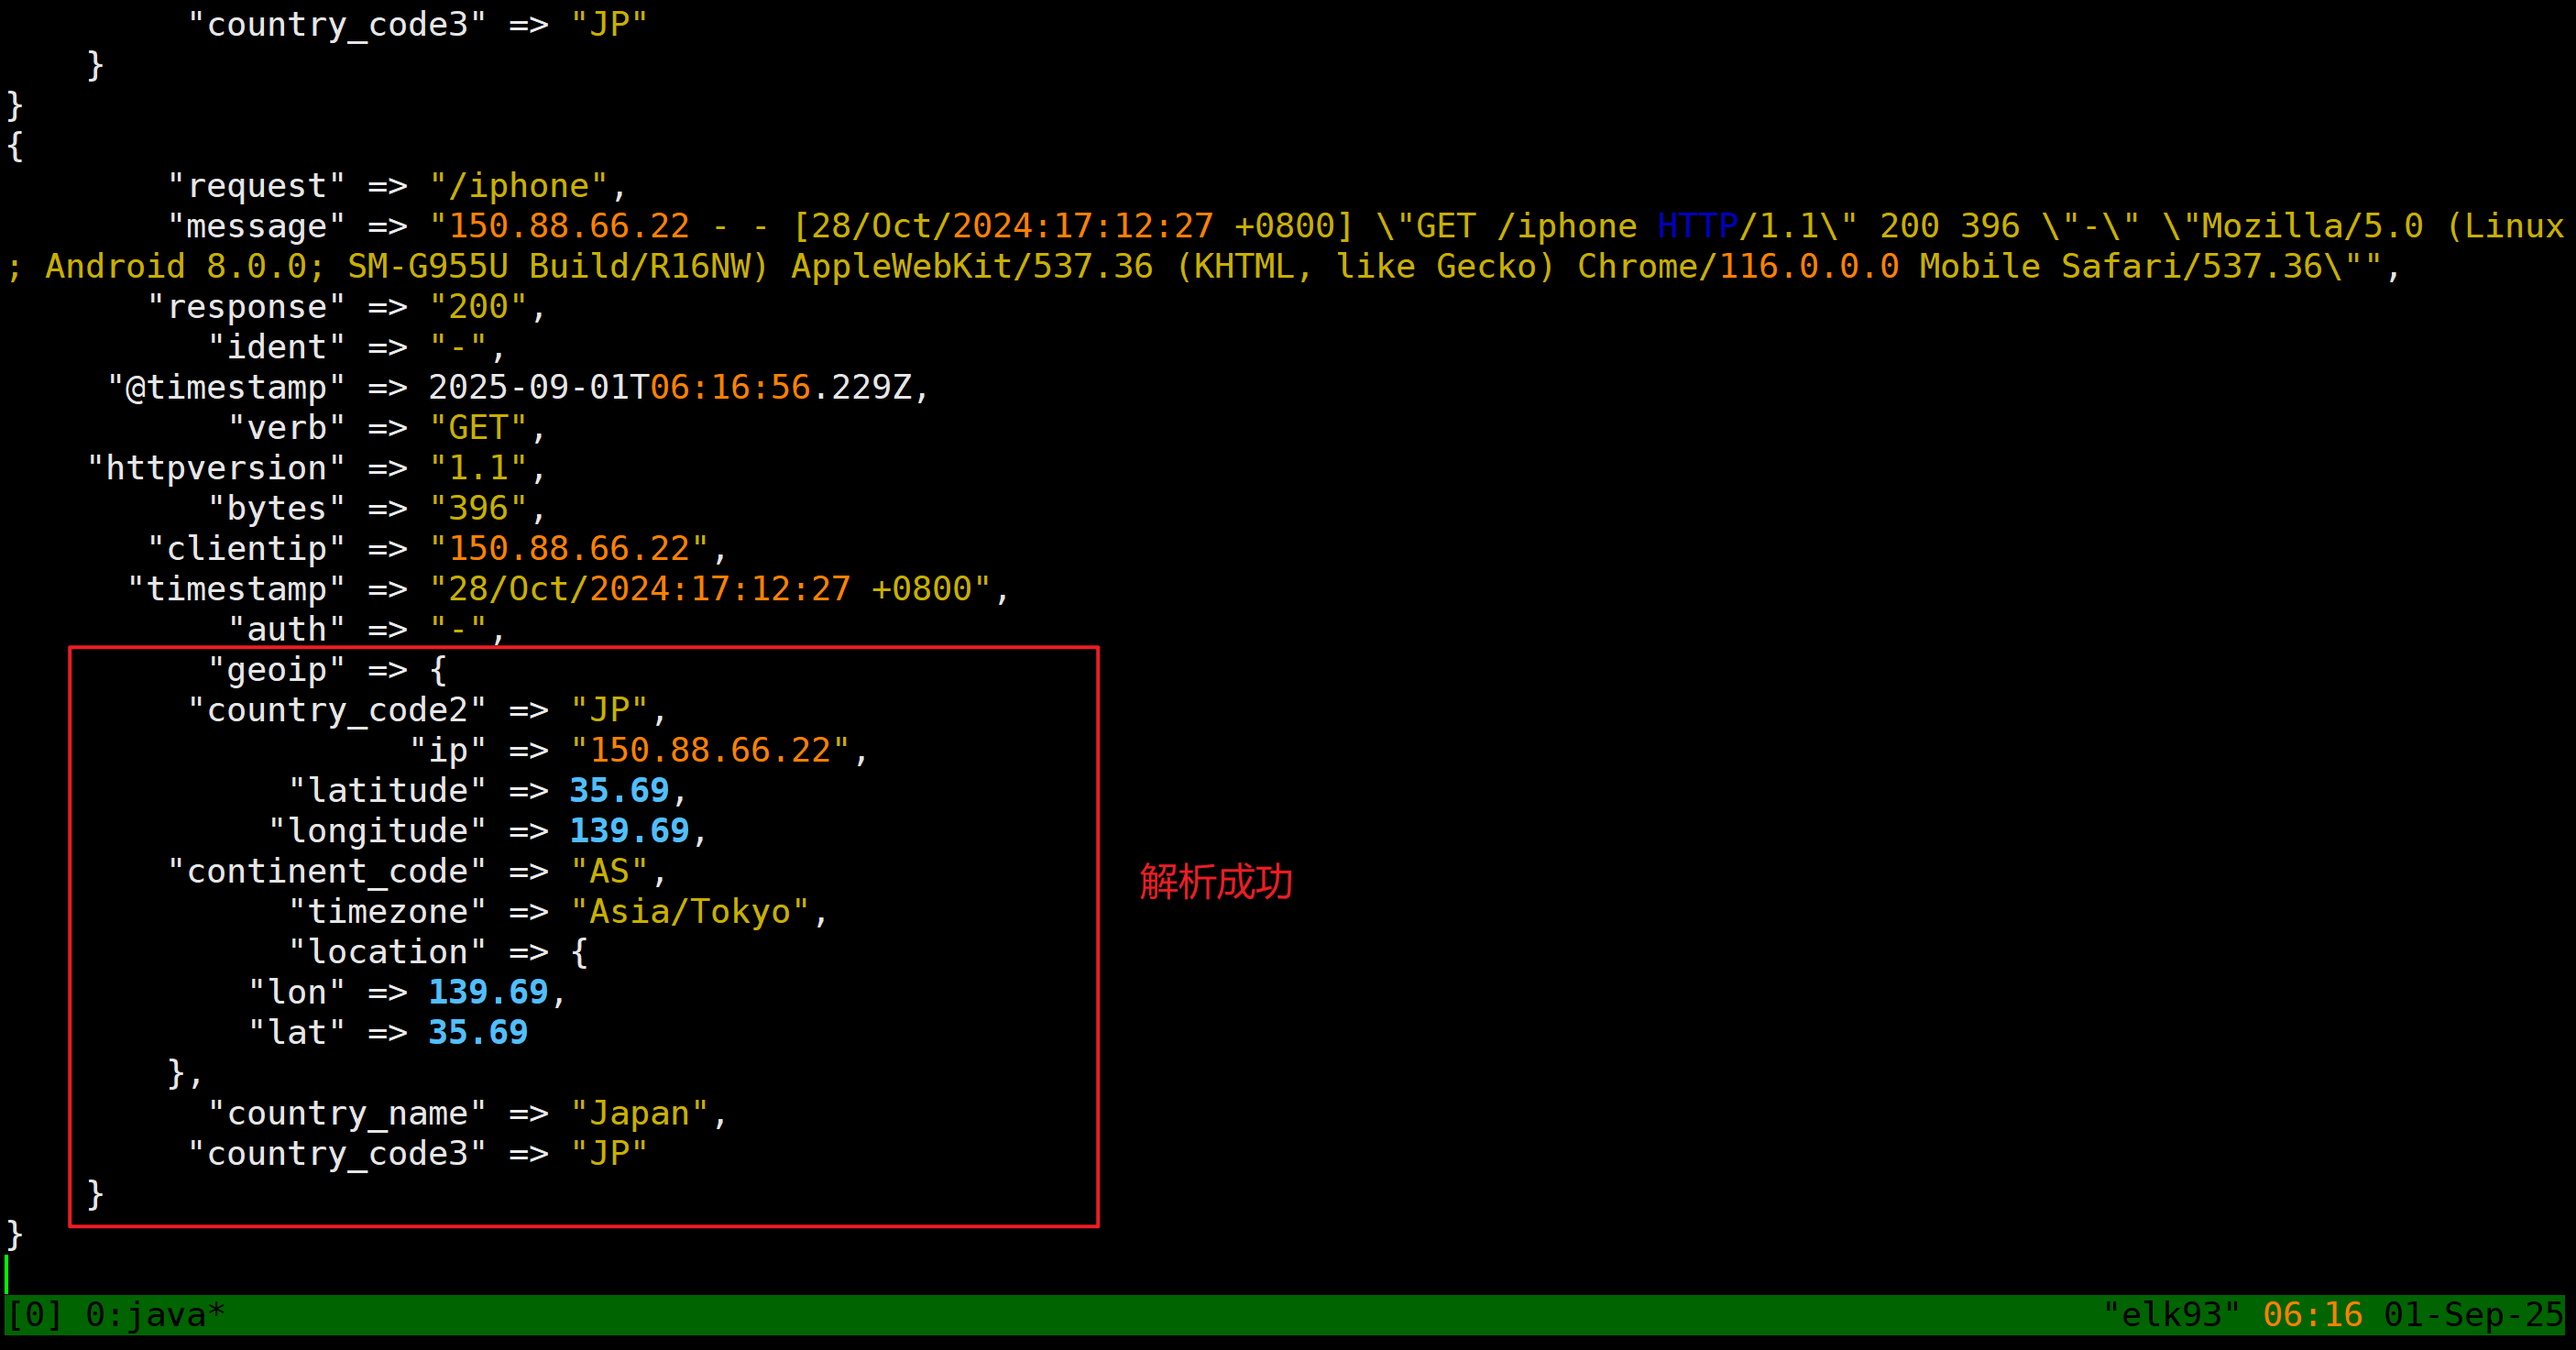
}filter {mutate {remove_field => [ "tags","input","agent","@version","ecs" , "log", "host"]}# 提取任意文本内容grok {match => {"message" => "%{HTTPD_COMMONLOG}"}}# 解析公网IP地址geoip {source => "clientip"database => "/root/GeoLite2-City_20250311/GeoLite2-City.mmdb"default_database_type => "City"}
}
output {stdout { } #elasticsearch {# hosts => ["10.0.0.91:9200","10.0.0.92:9200","10.0.0.93:9200"]# index => "zhu-elfk-nginx-grok"#}
}
启动Logstash实例
logstash -rf /etc/logstash/conf.d/06-nginx-to-es.conf
Logstash控制台查看结果
🌟ELFK架构分析nginx之date实战案例
编写Logstash配置文件
vim /etc/logstash/conf.d/06-nginx-to-es.conf
input {beats {port => 5044}
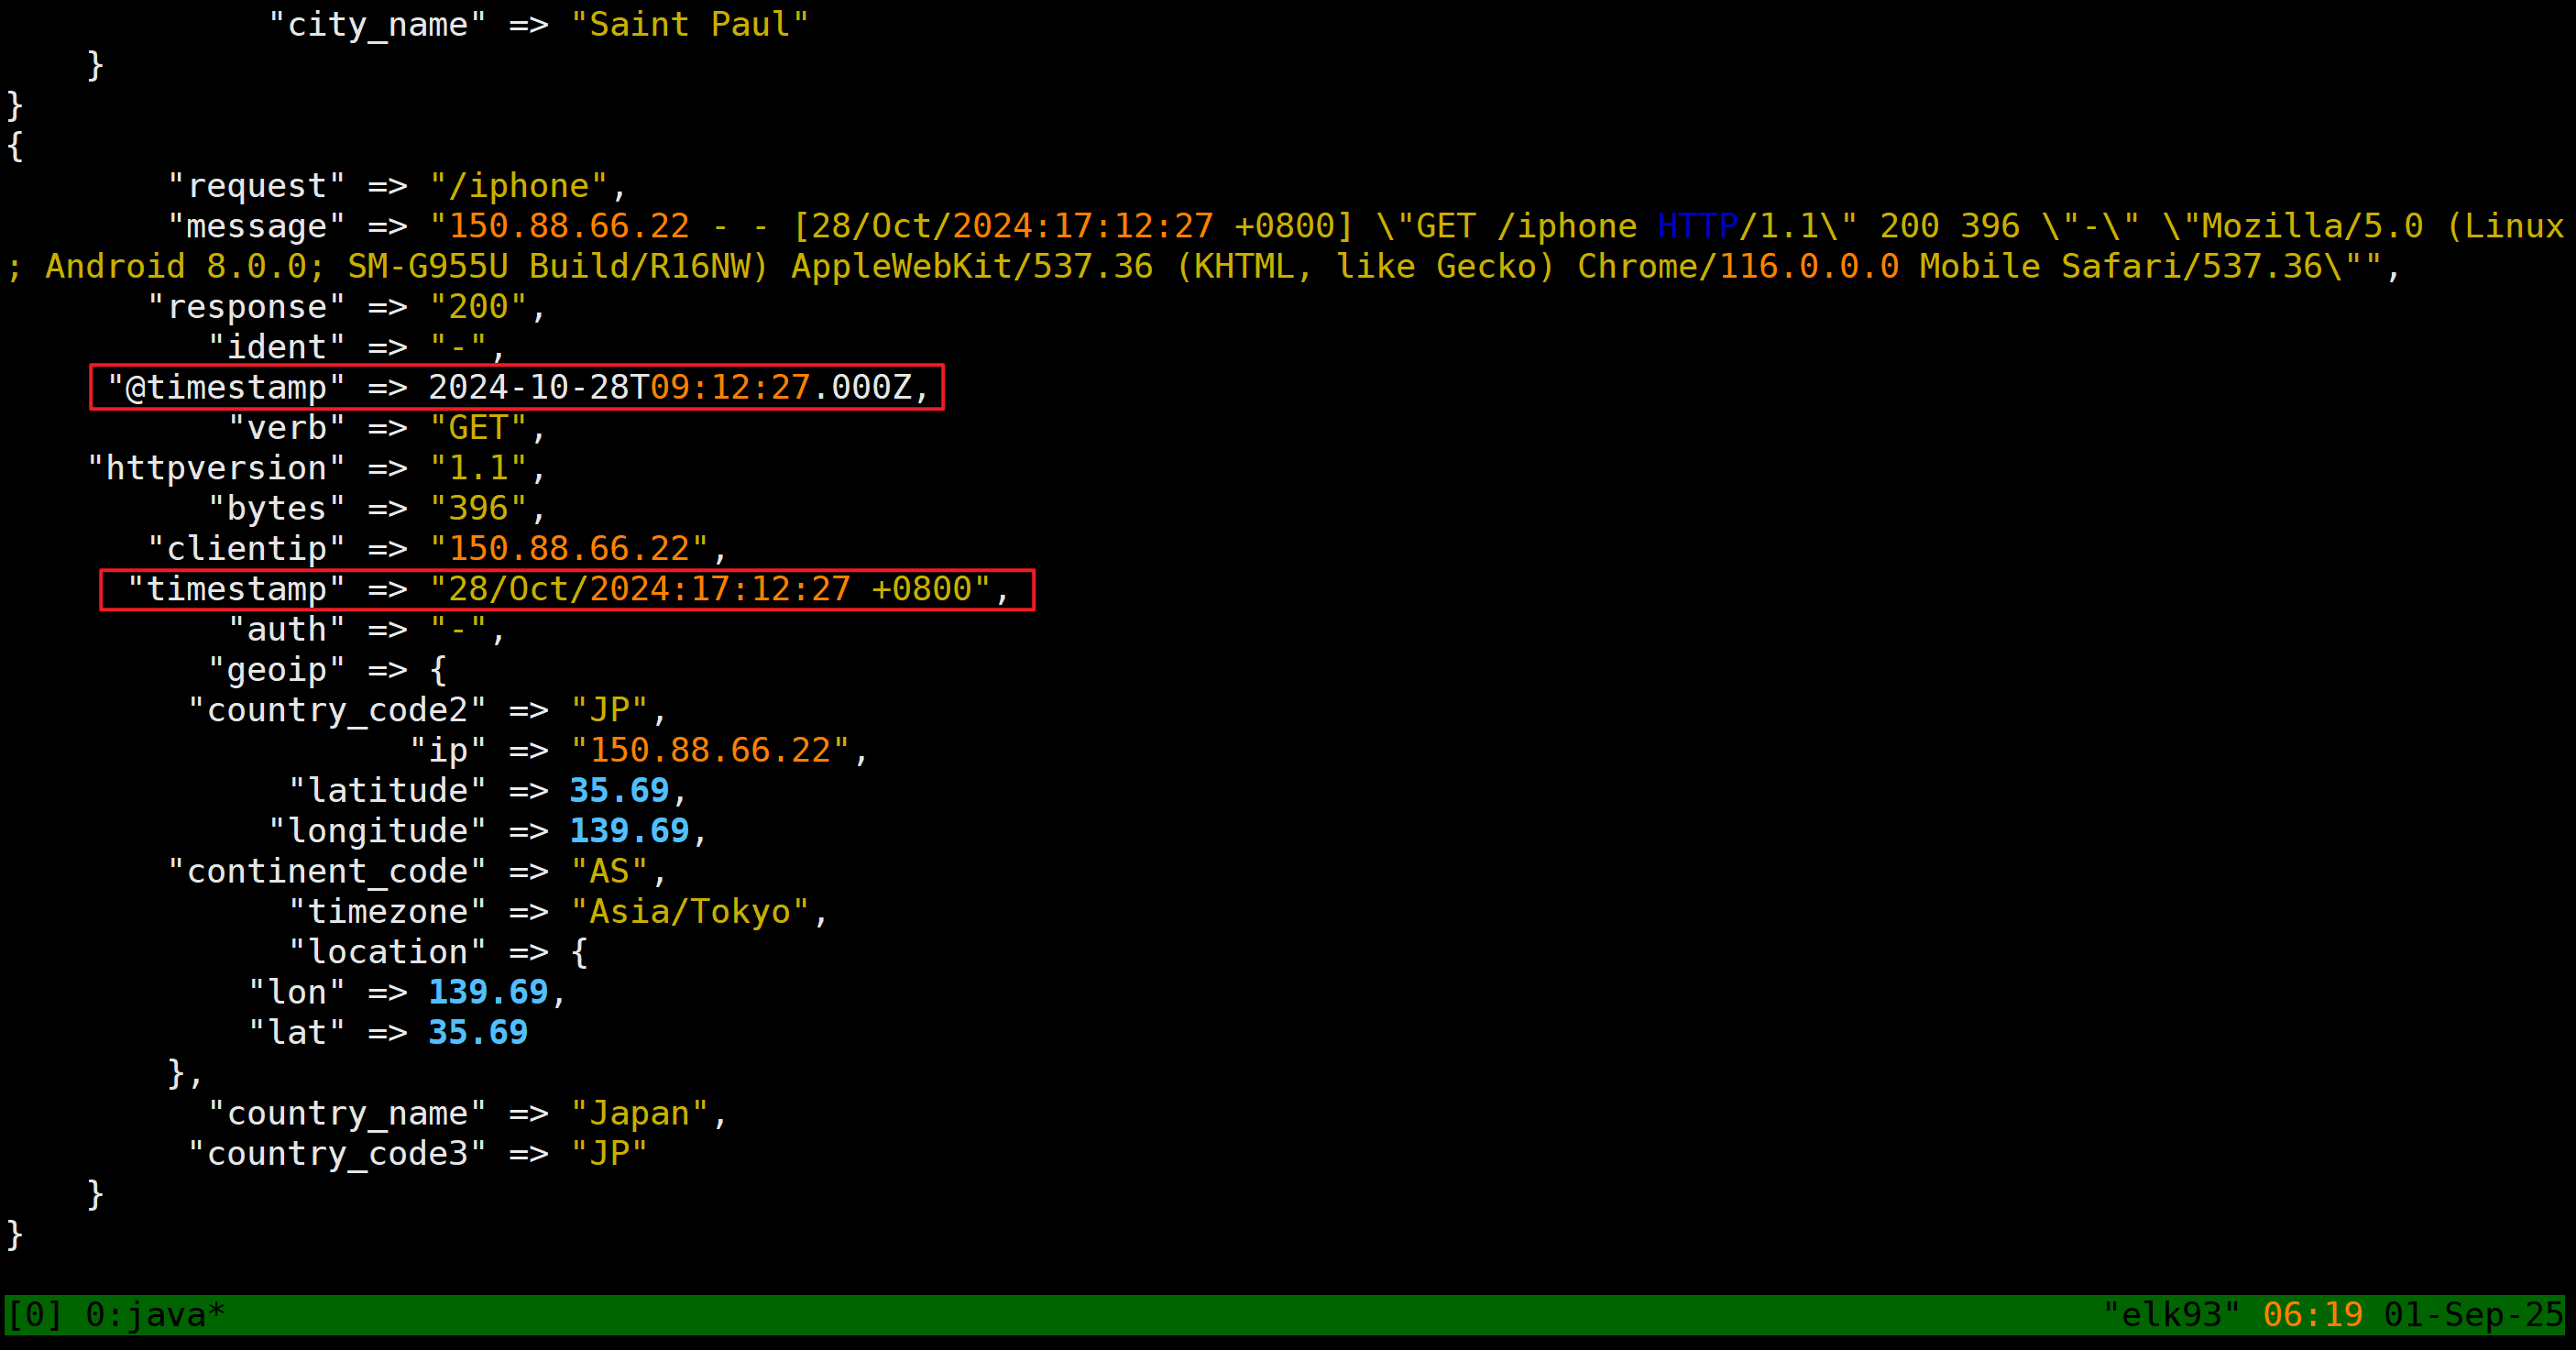
}filter {mutate {remove_field => [ "tags","input","agent","@version","ecs" , "log", "host"]}# 提取任意文本内容grok {match => {"message" => "%{HTTPD_COMMONLOG}"}}# 解析公网IP地址geoip {source => "clientip"database => "/root/GeoLite2-City_20250311/GeoLite2-City.mmdb"default_database_type => "City"}# 处理访问时间date {# "28/Oct/2024:17:12:27 +0800"match => [ "timestamp", "dd/MMM/yyyy:HH:mm:ss Z" ]}
}
output {stdout { } #elasticsearch {# hosts => ["10.0.0.91:9200","10.0.0.92:9200","10.0.0.93:9200"]# index => "zhu-elfk-nginx-grok"#}
}
启动Logstash实例
logstash -rf /etc/logstash/conf.d/06-nginx-to-es.conf
Logstash控制台查看结果
输出到ES集群
vim /etc/logstash/conf.d/06-nginx-to-es.conf
input {beats {port => 5044}
}filter {mutate {remove_field => [ "tags","input","agent","@version","ecs" , "log", "host"]}# 提取任意文本内容grok {match => {"message" => "%{HTTPD_COMMONLOG}"}}# 解析公网IP地址geoip {source => "clientip"database => "/root/GeoLite2-City_20250311/GeoLite2-City.mmdb"default_database_type => "City"}# 处理访问时间date {# "28/Oct/2024:17:12:27 +0800"match => [ "timestamp", "dd/MMM/yyyy:HH:mm:ss Z" ]}
}
output {#stdout { } elasticsearch {hosts => ["10.0.0.91:9200","10.0.0.92:9200","10.0.0.93:9200"]index => "zhu-elfk-nginx-grok-geoip-date"}
}
🌟ELFK架构故障案例
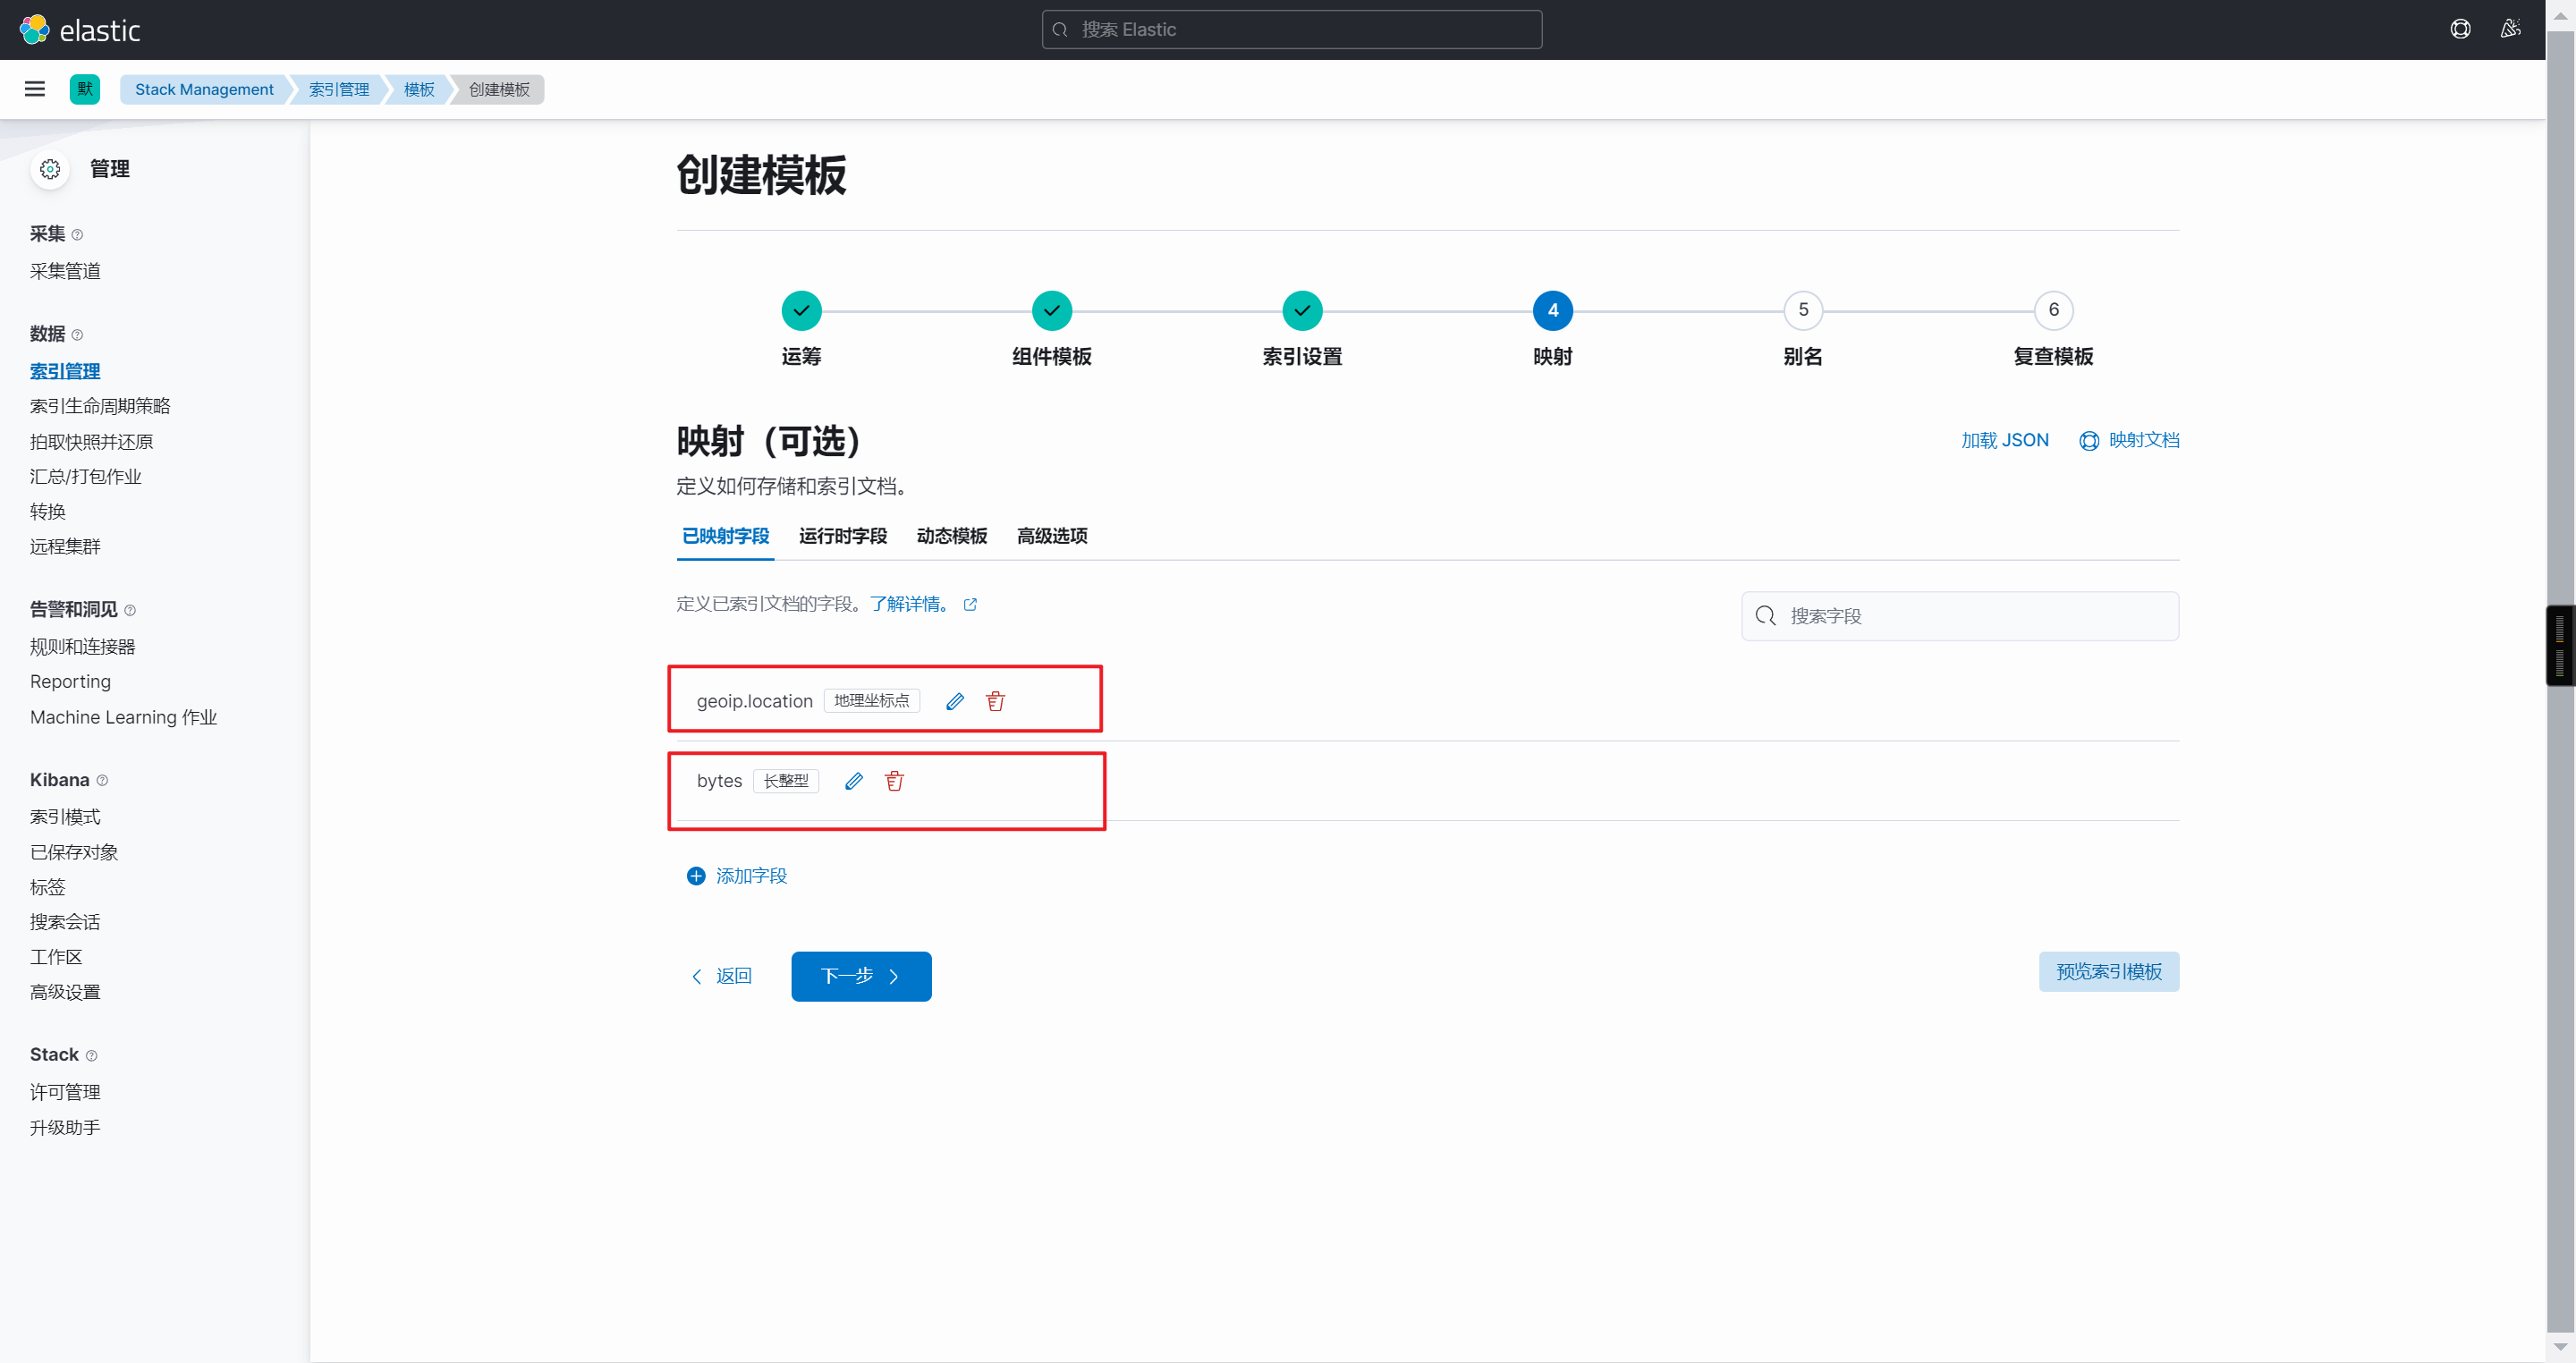
⚠️geoip.location数据类型有问题,导致无法添加map地图
⚠️bytes数据类型为字符,无法统计带宽总数
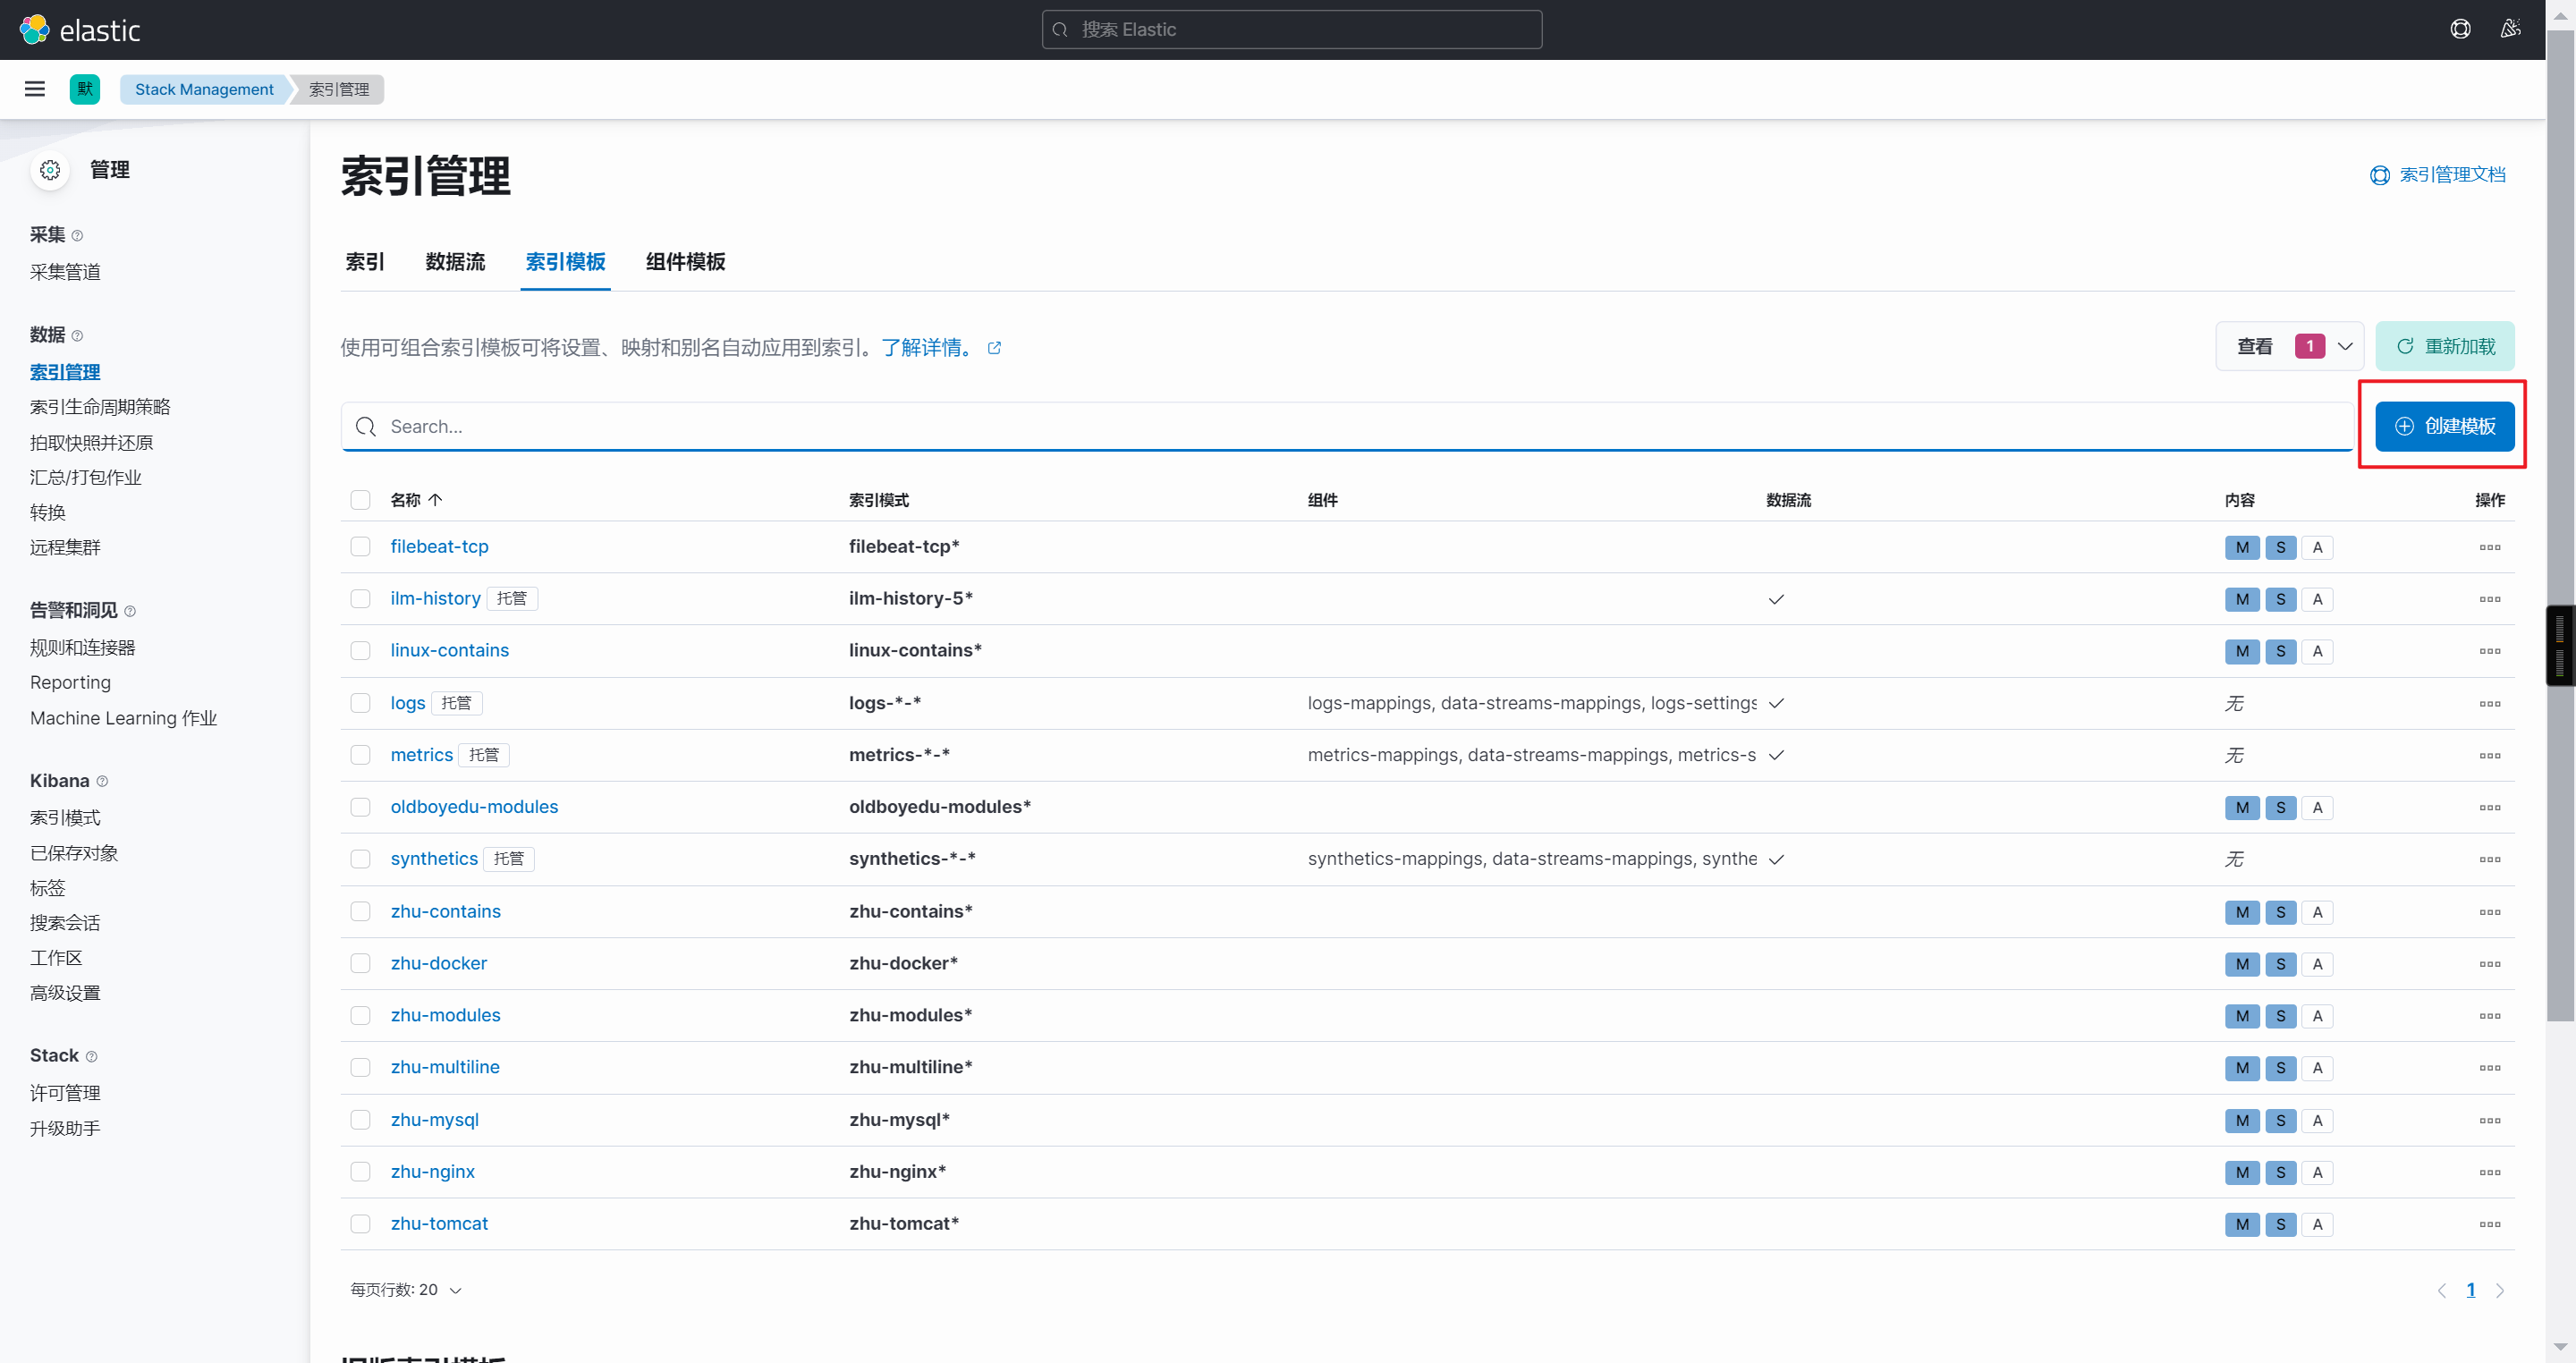
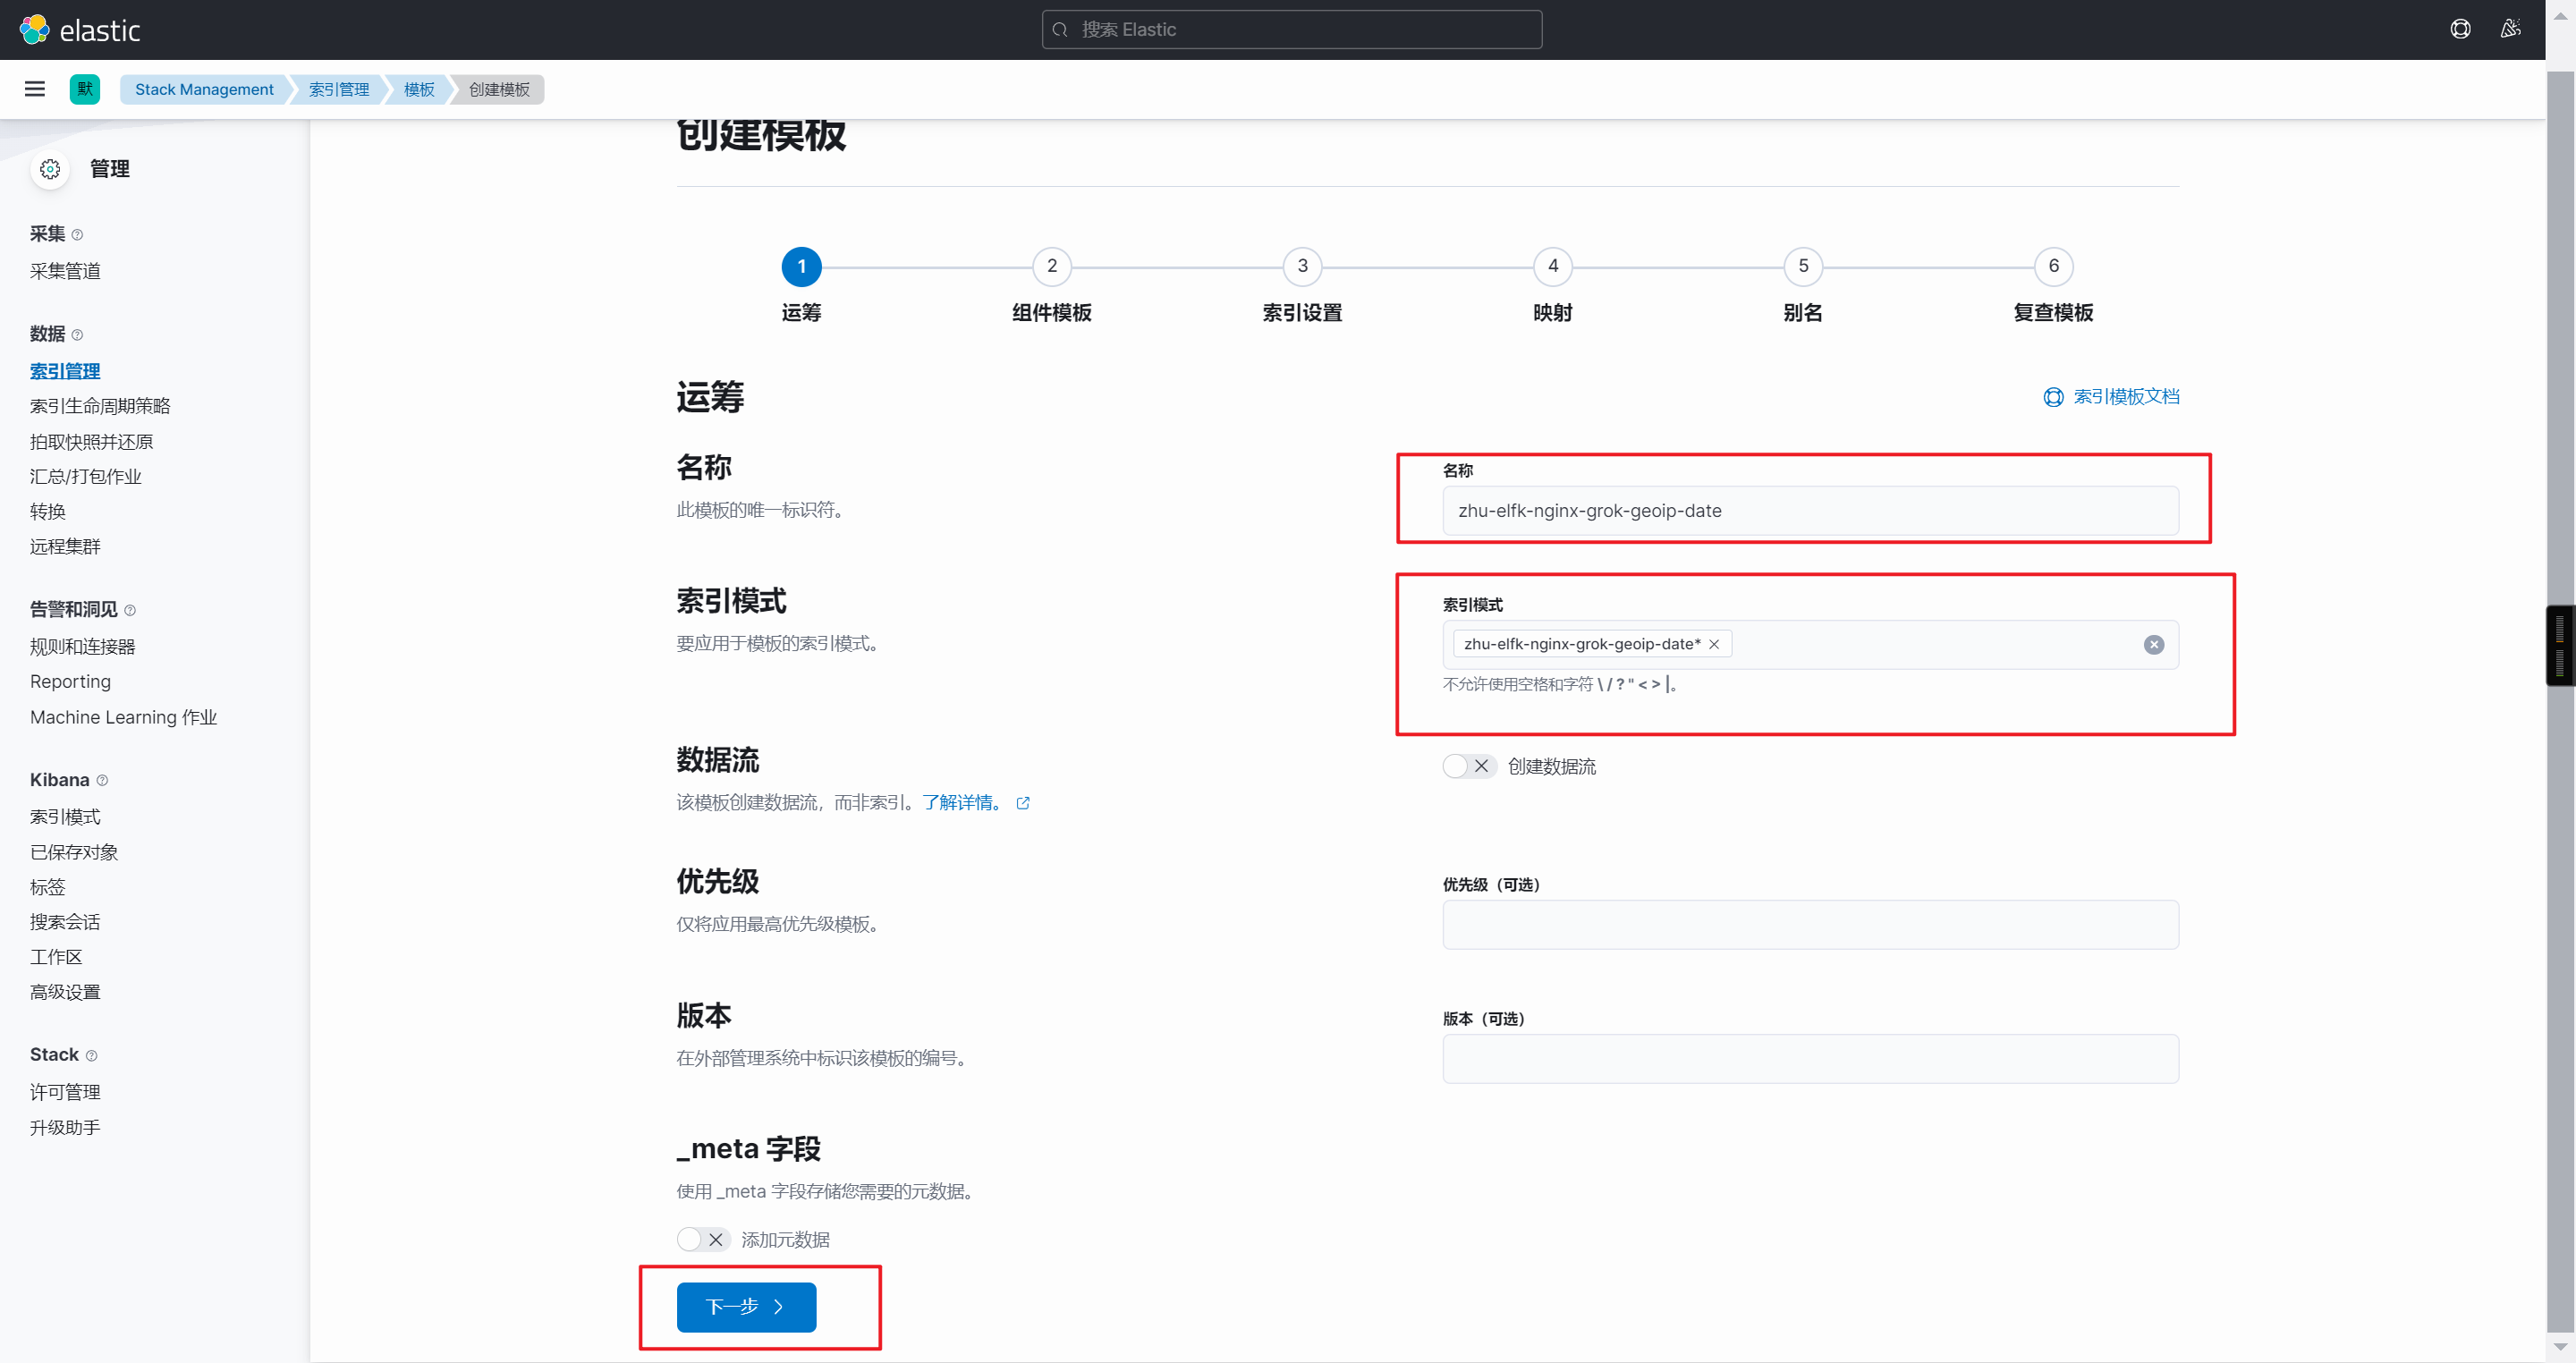
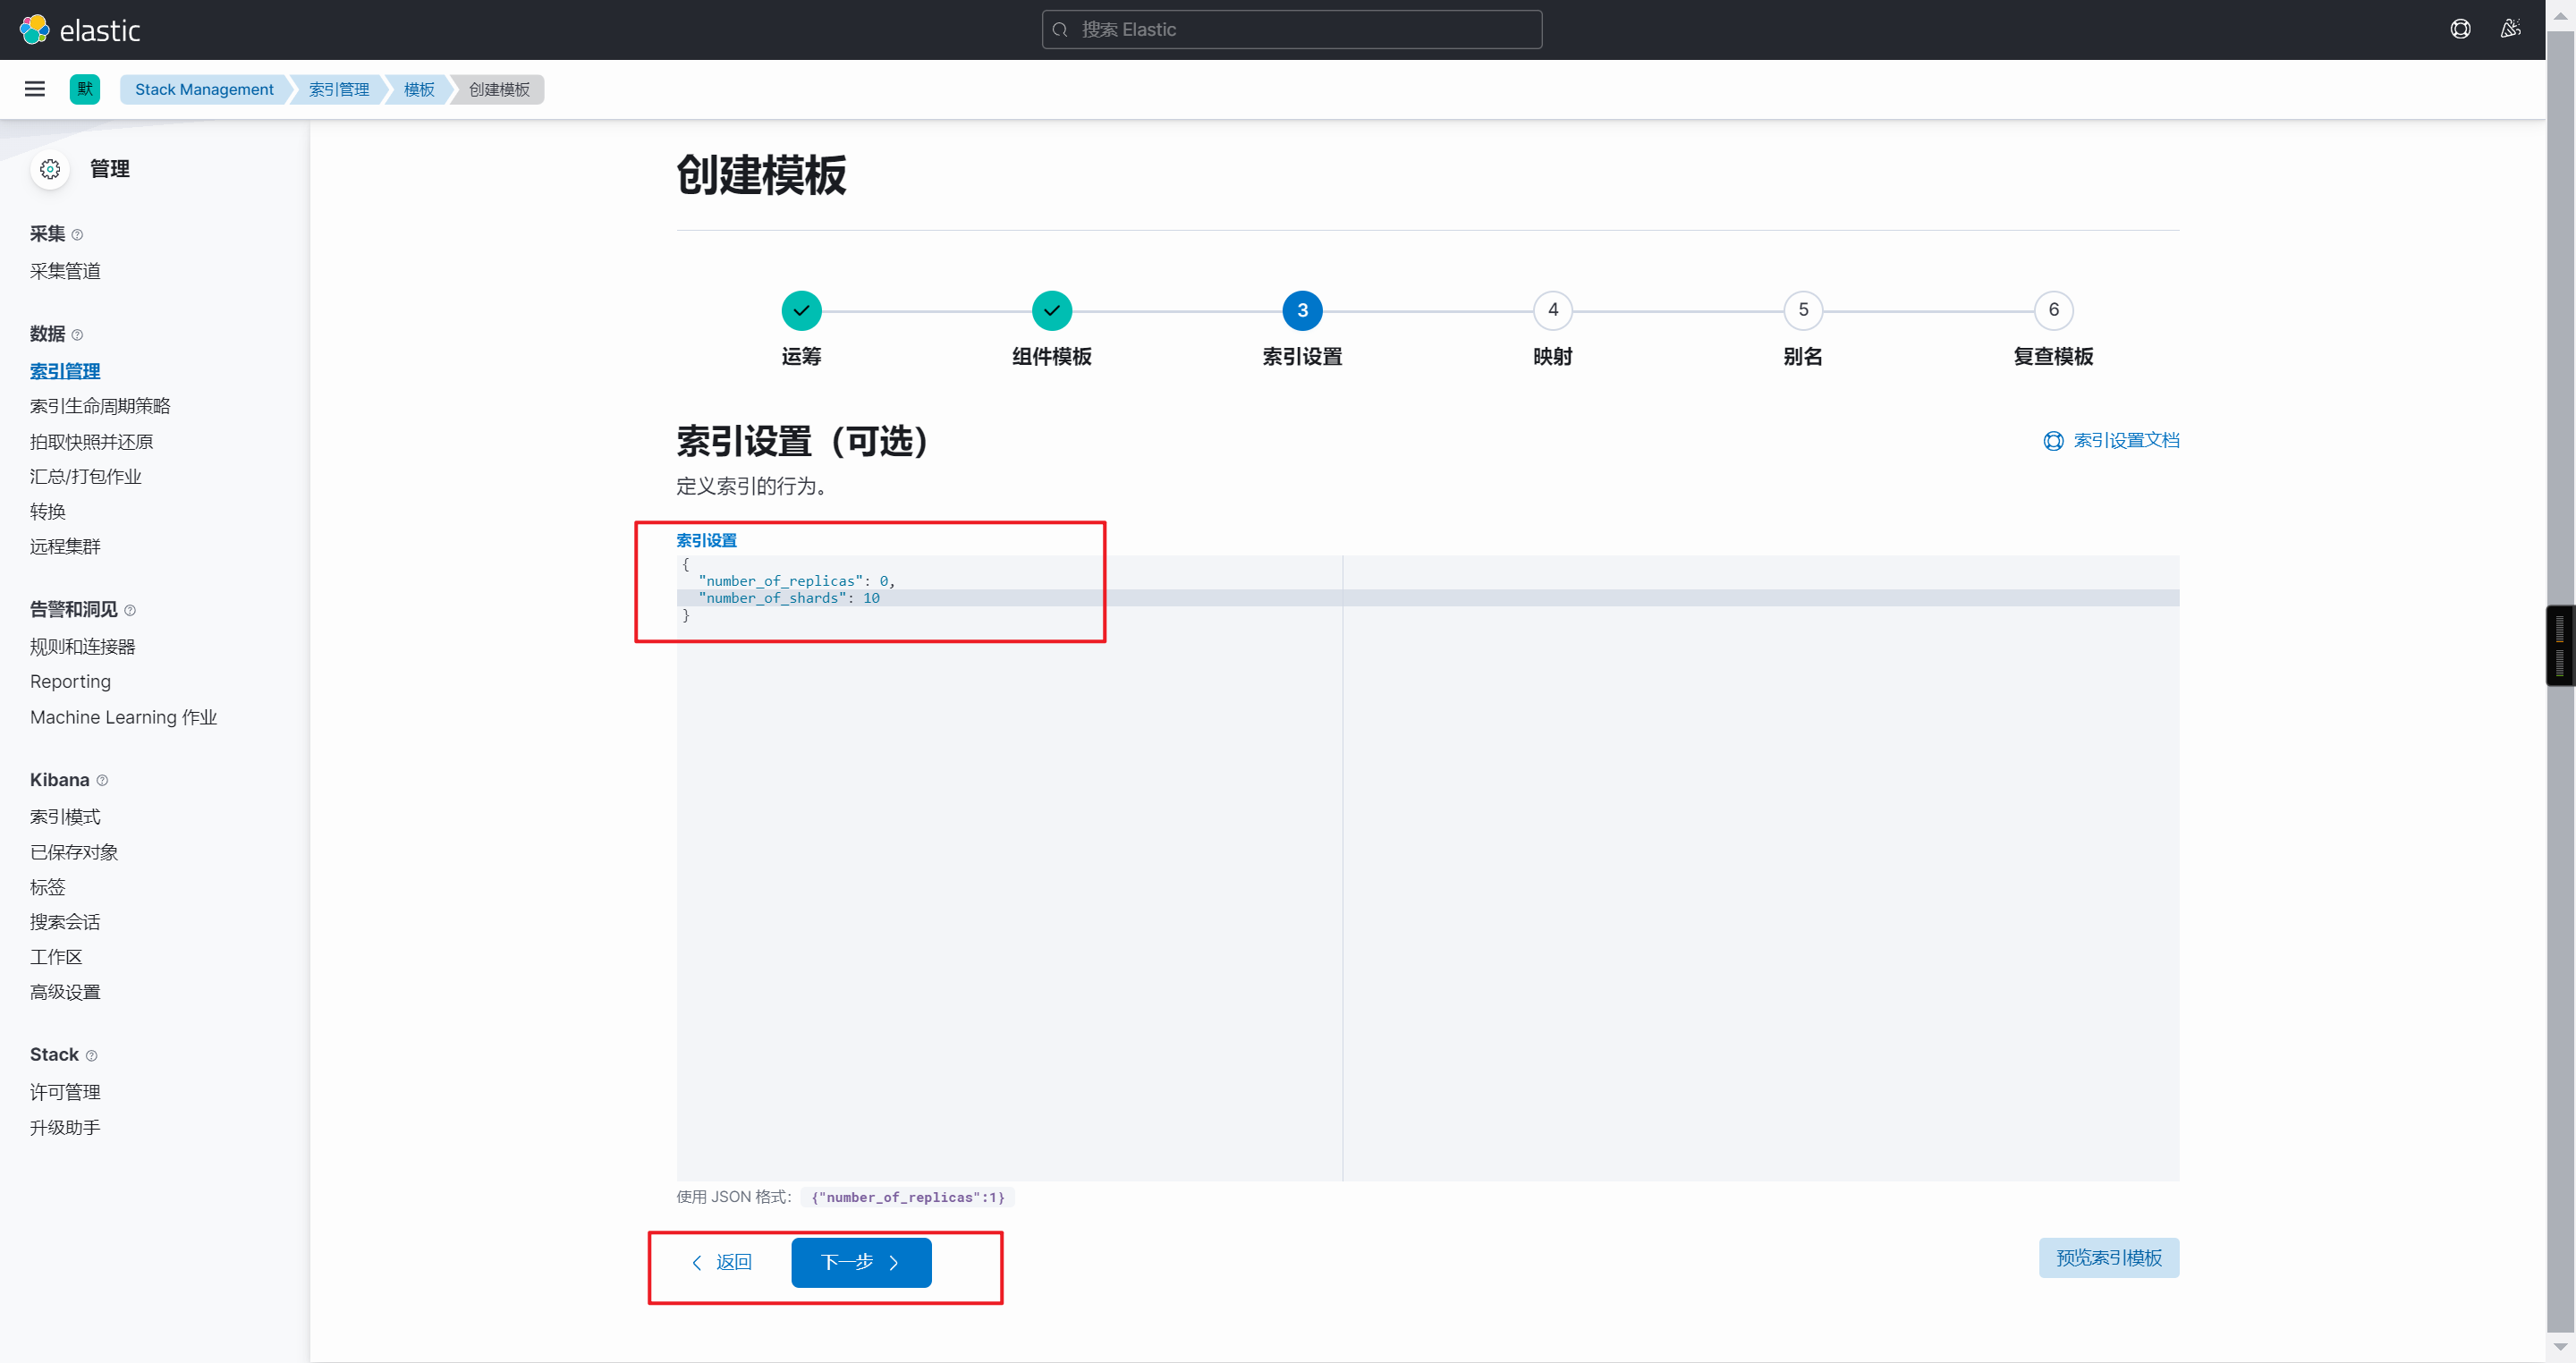
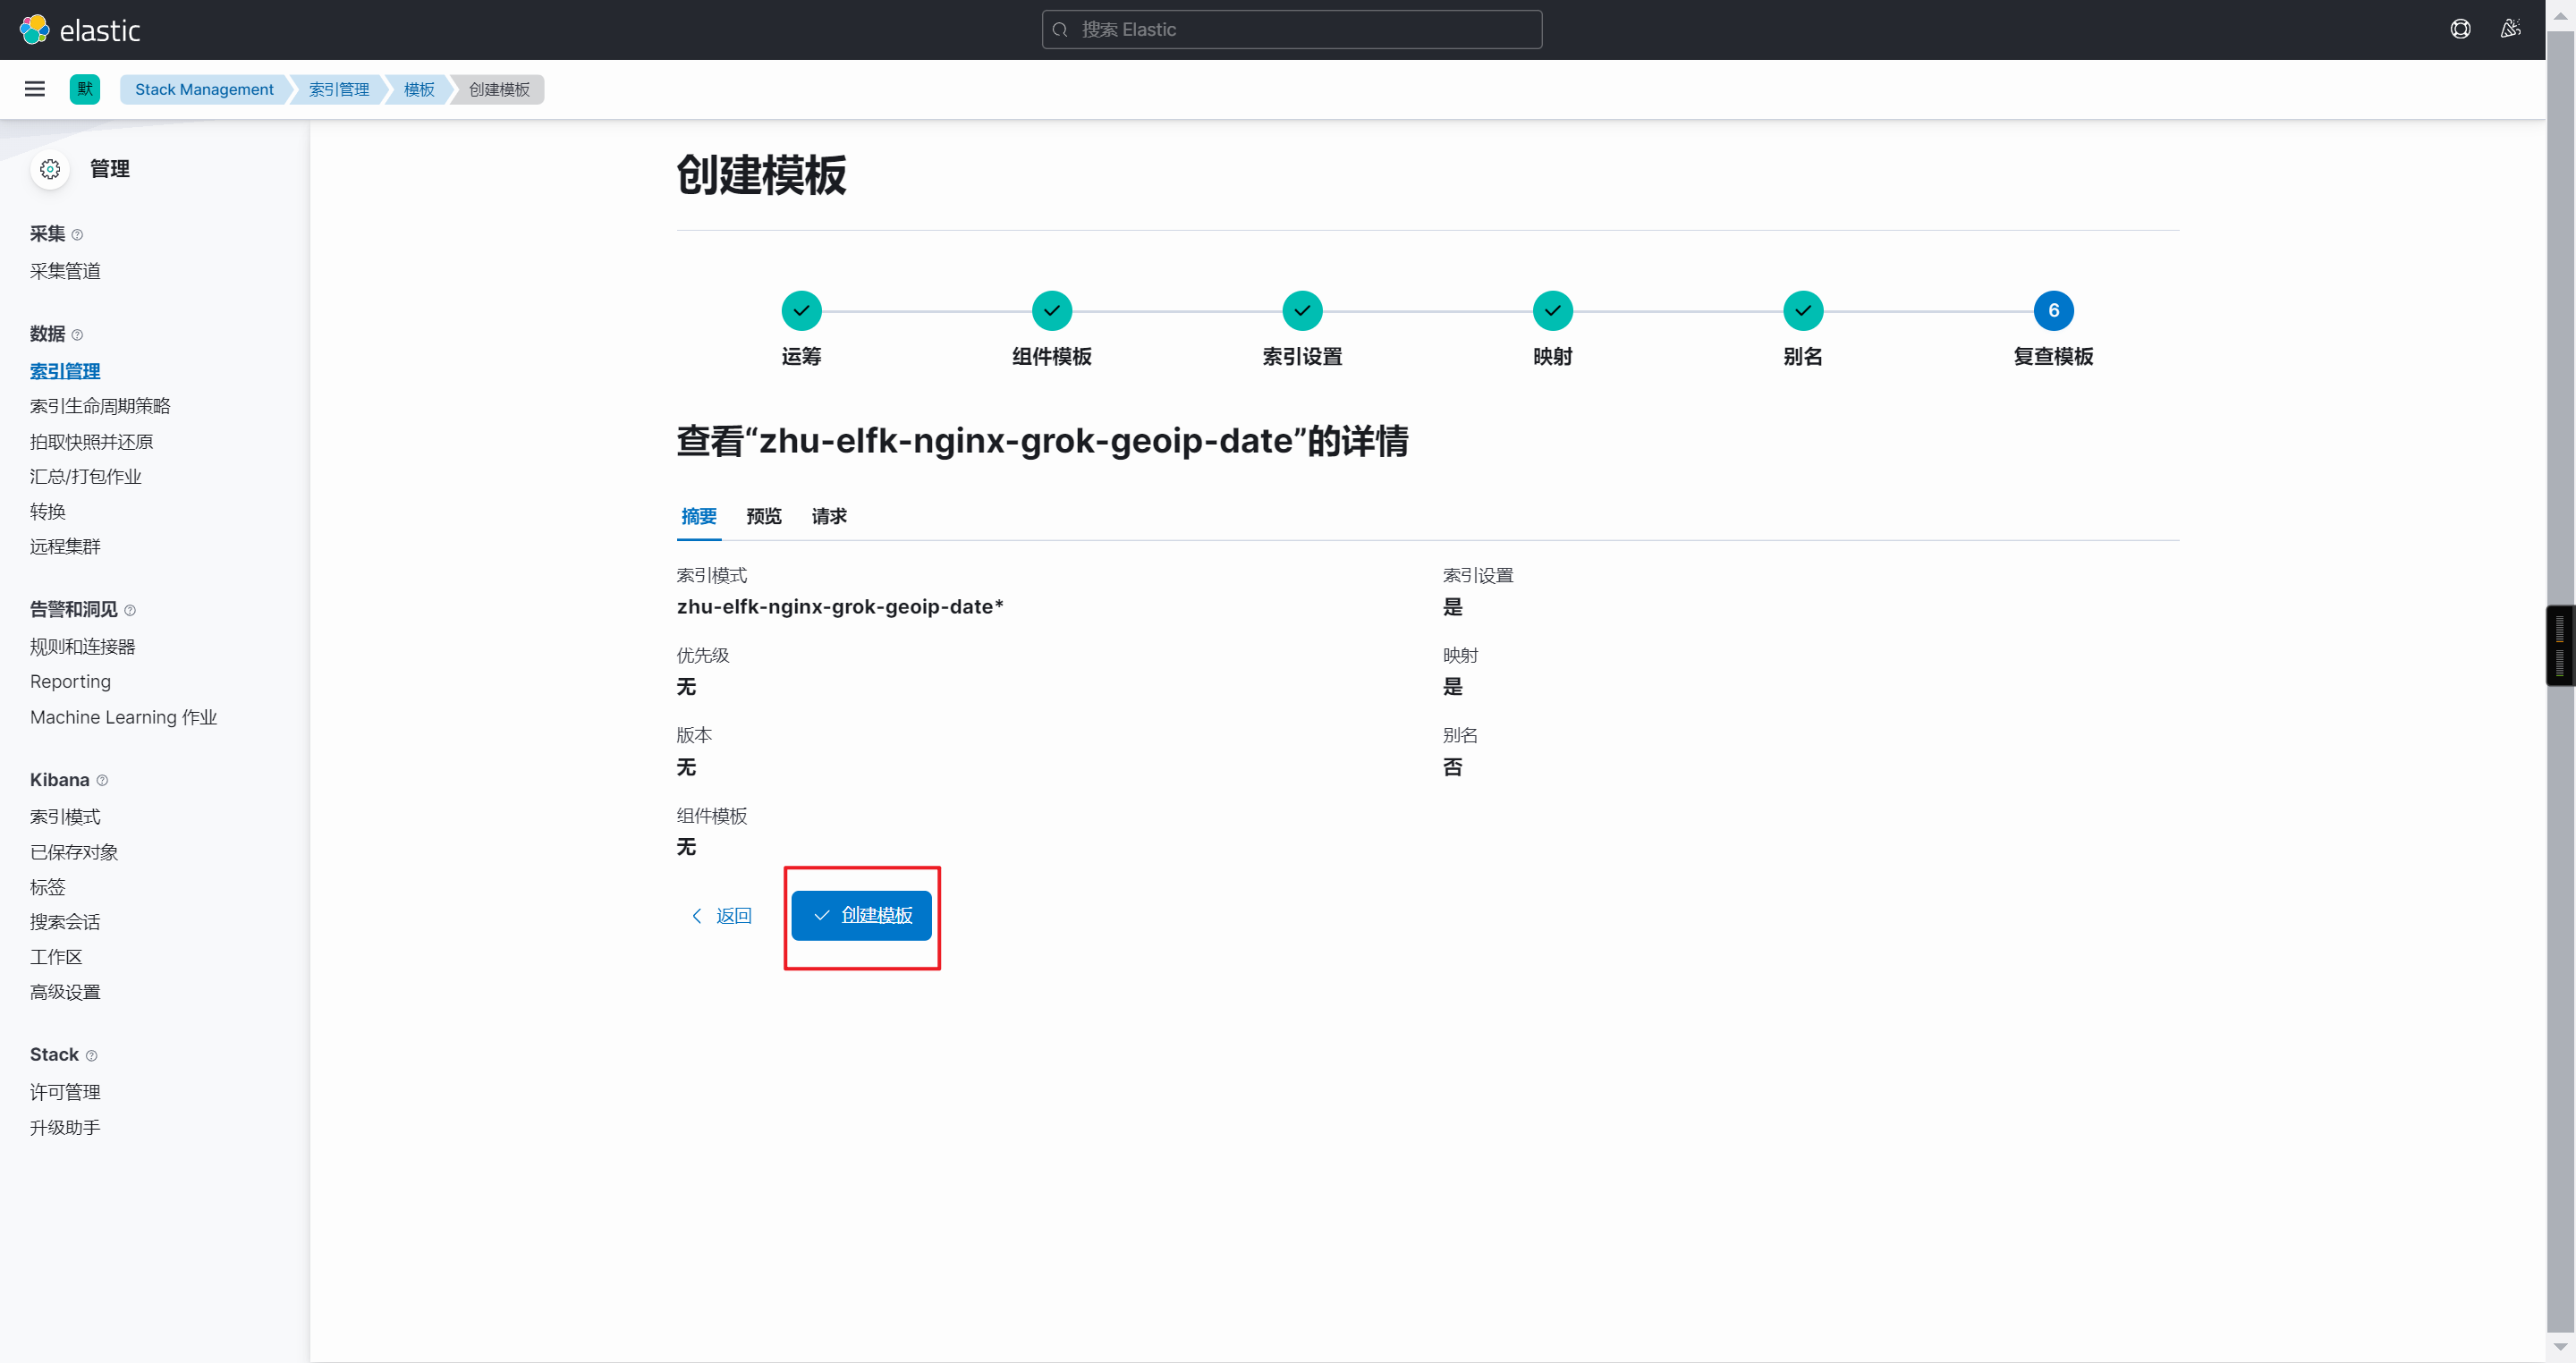
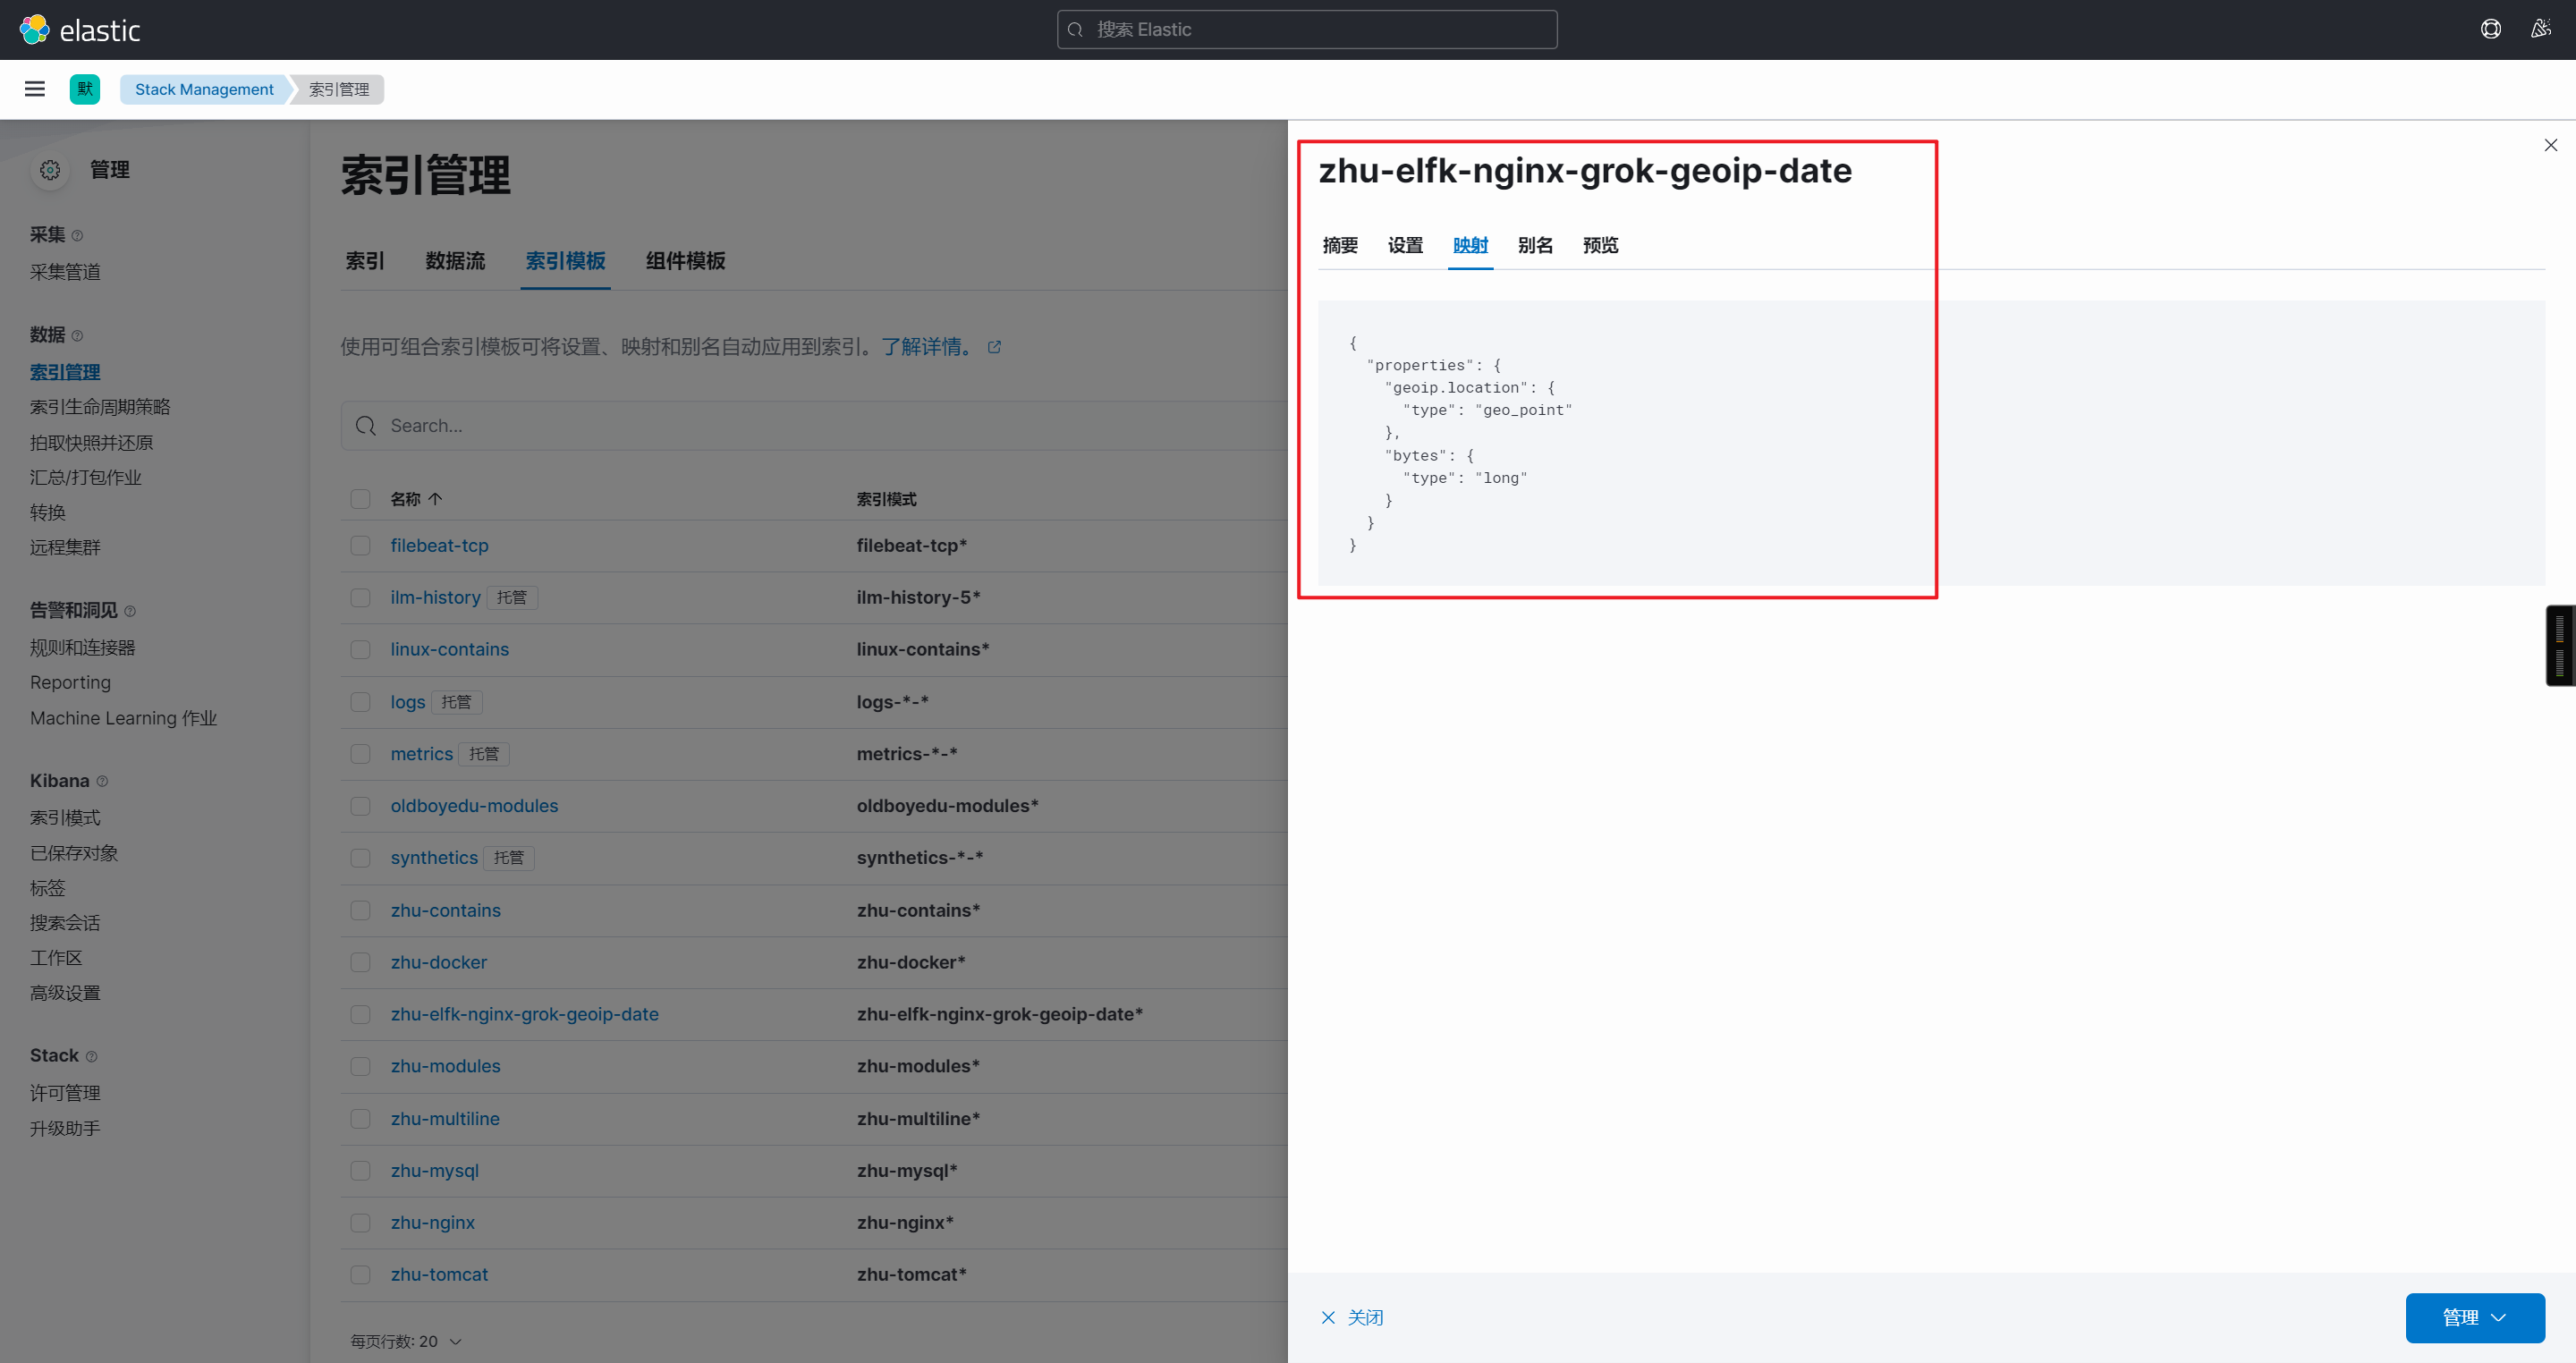
创建索引模板
指定数据类型
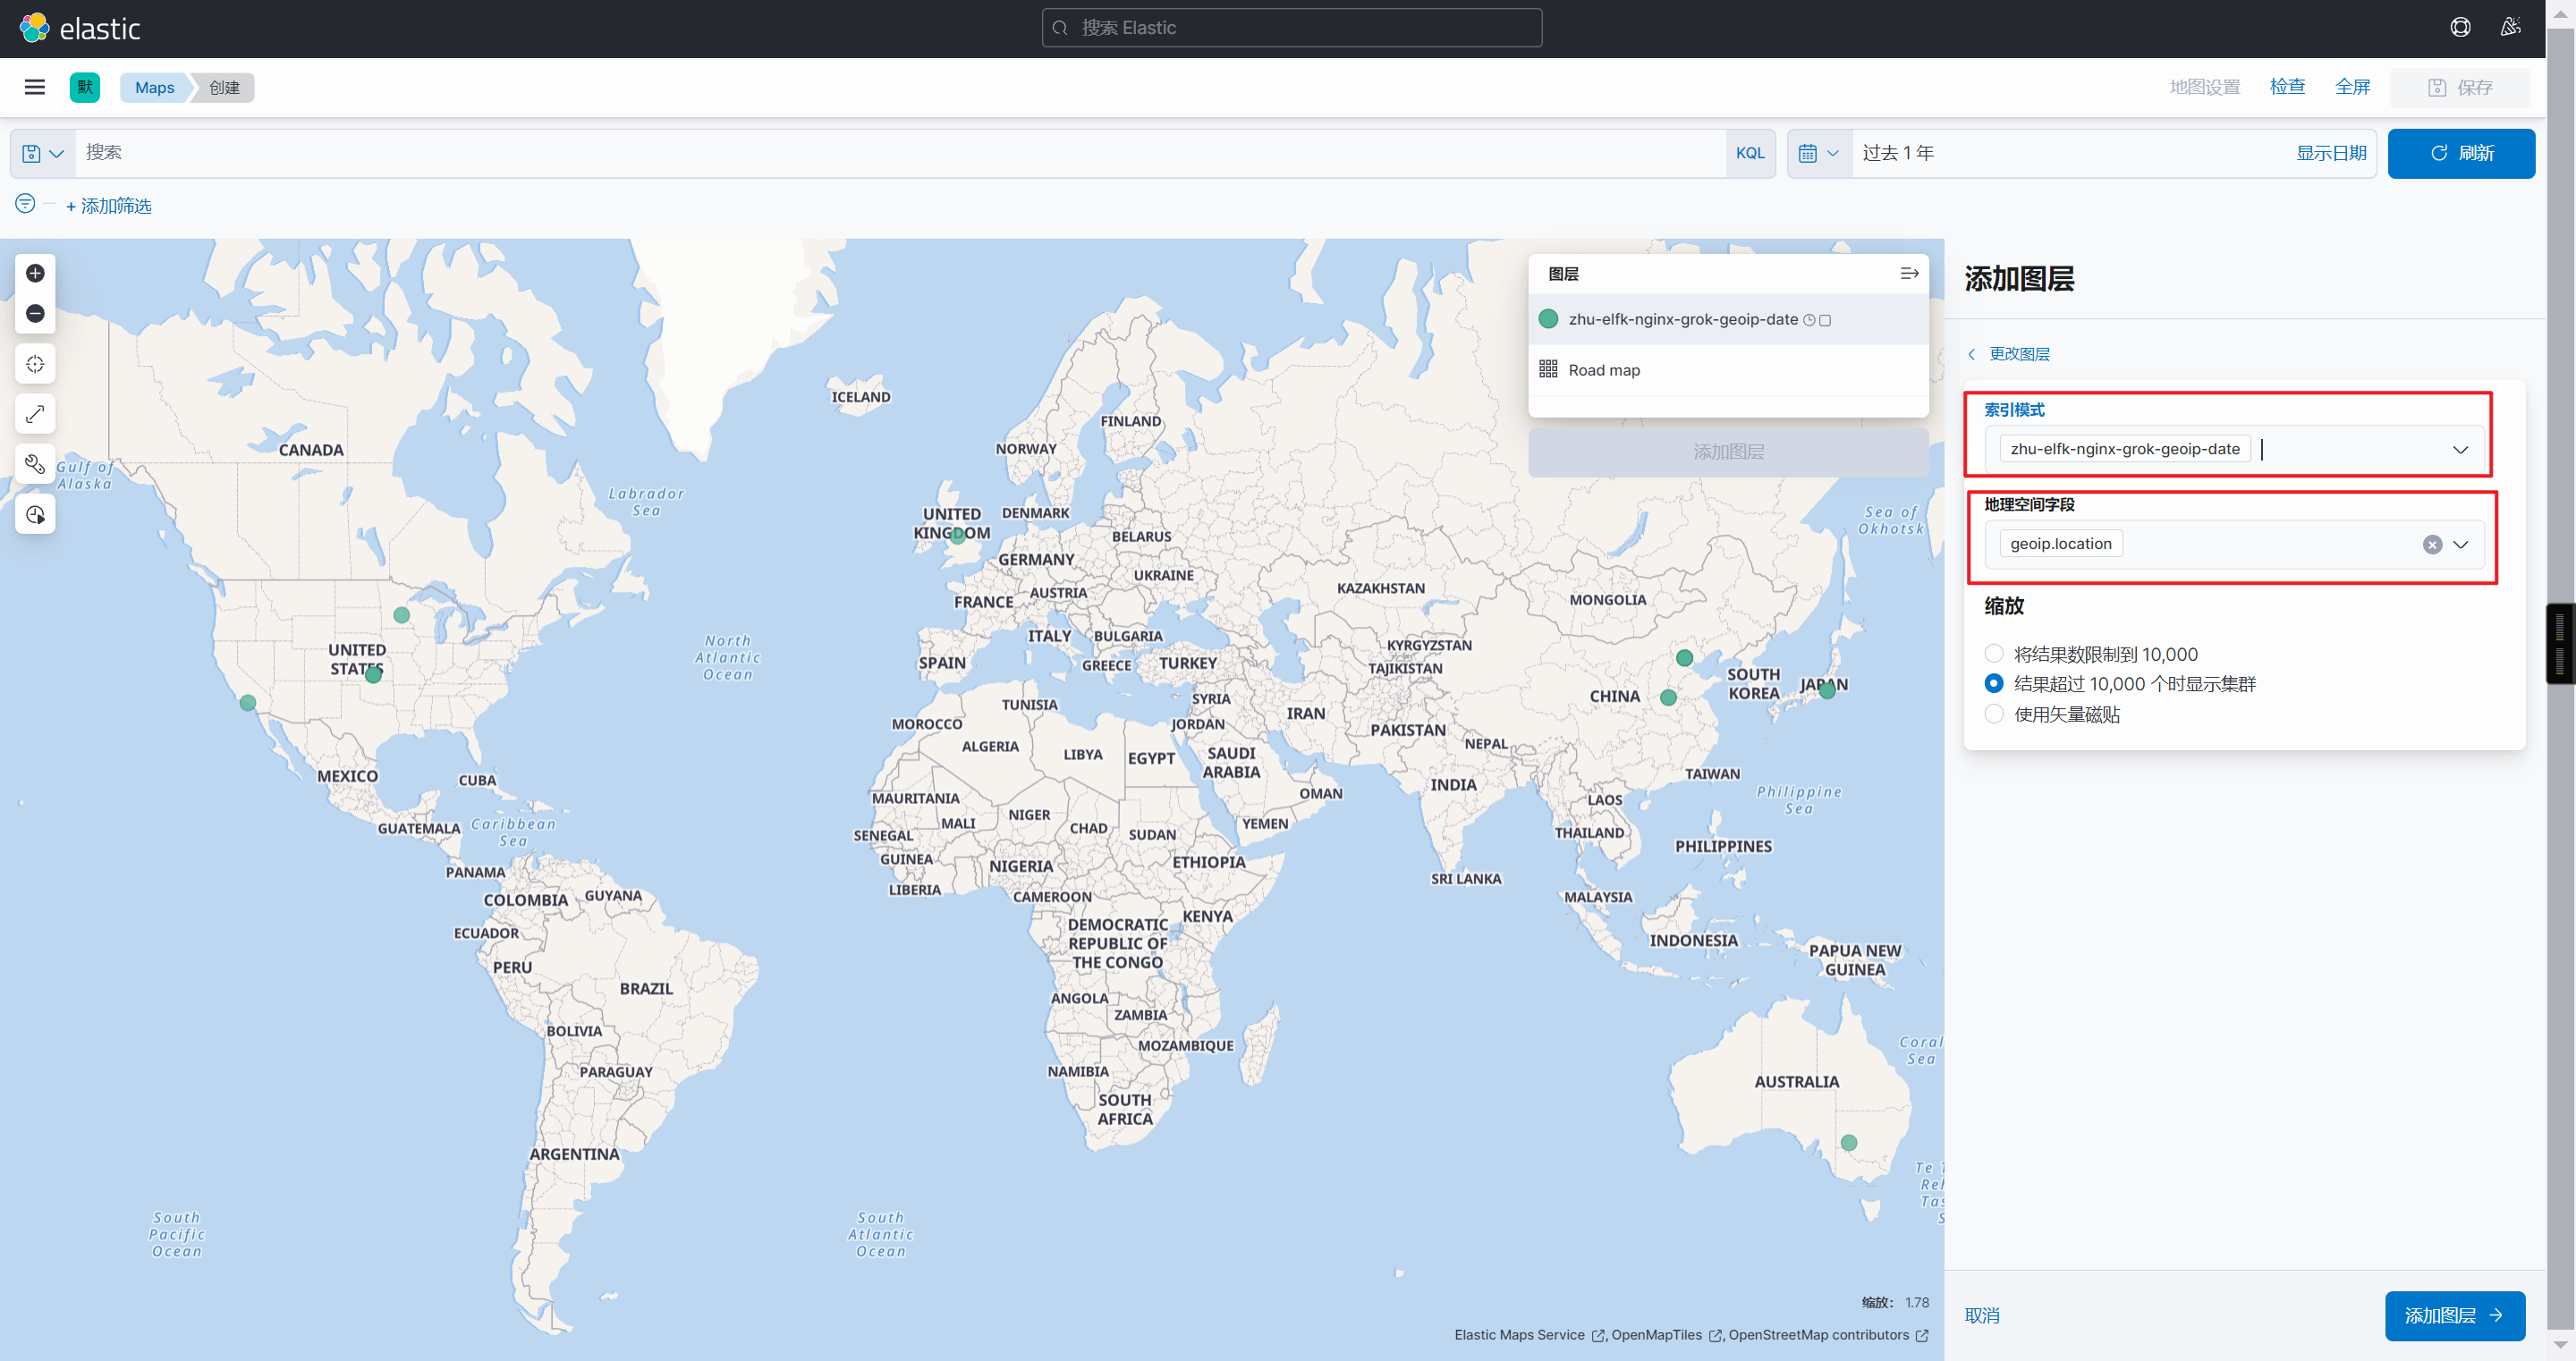
Kibana出图展示
全球用户分布图
带宽统计

🌟ES集群加密配置
生成证书文件
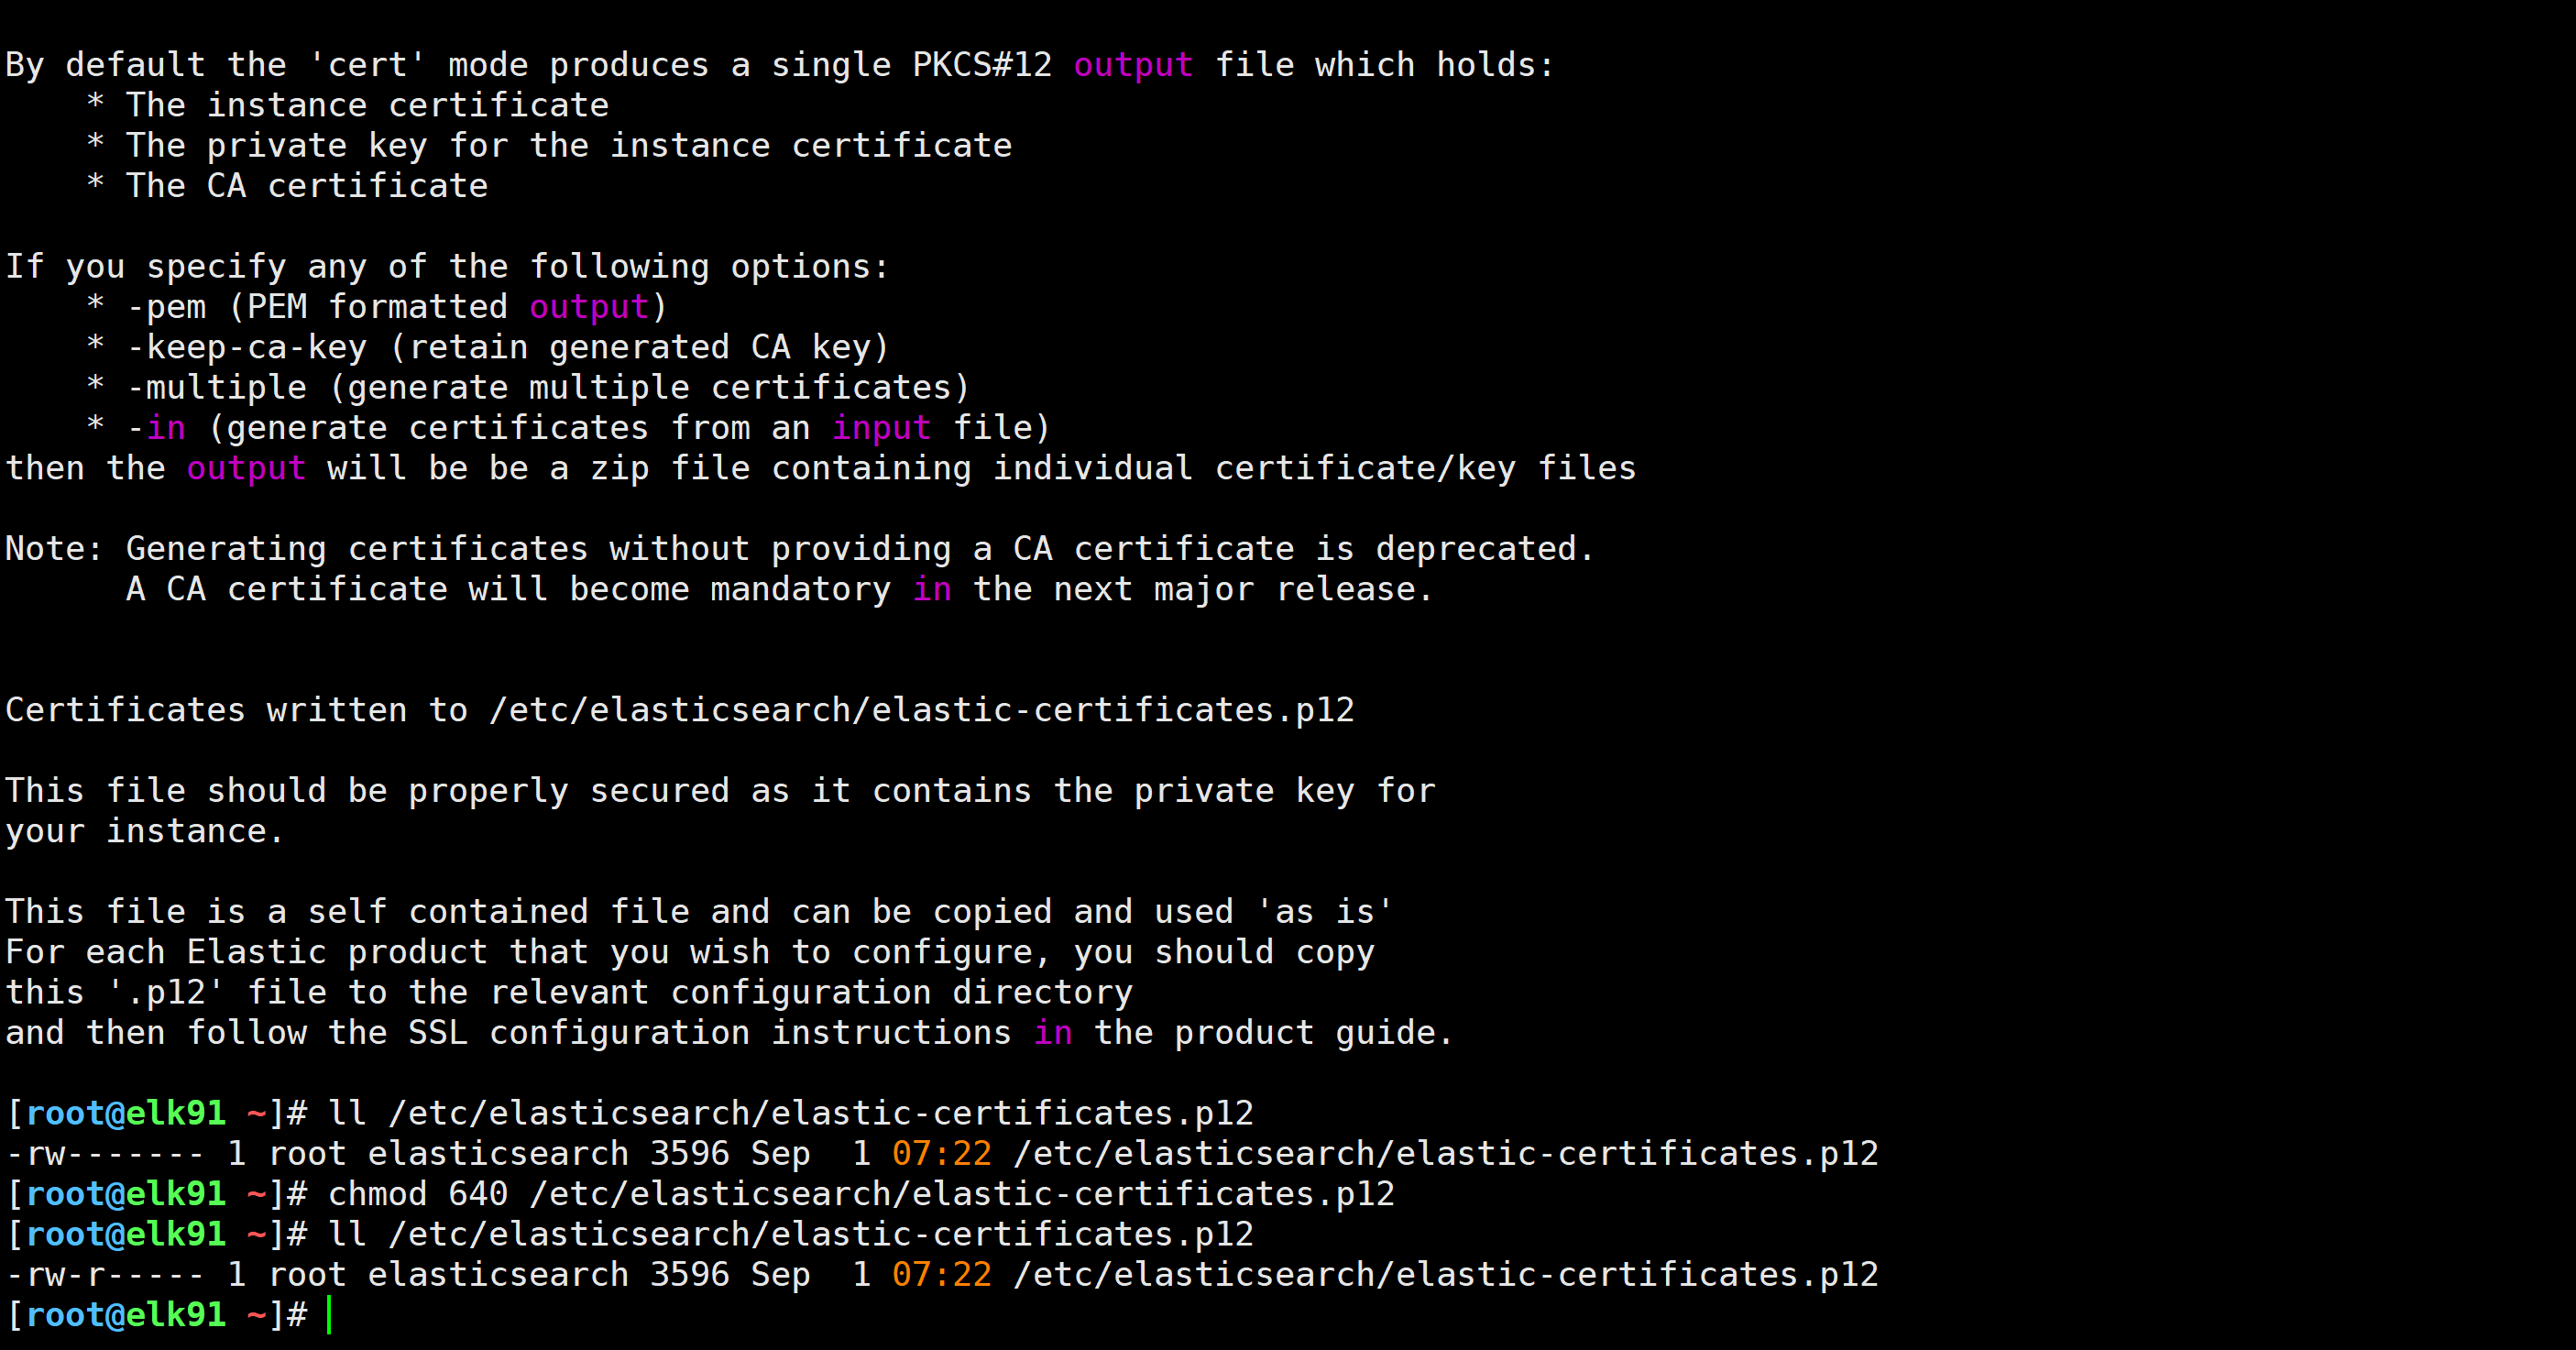
1.生成证书文件
/usr/share/elasticsearch/bin/elasticsearch-certutil cert -out /etc/elasticsearch/elastic-certificates.p12 -pass "" --days 365002.检查证书是否生成
ll /etc/elasticsearch/elastic-certificates.p123.修改证书文件权限
chmod 640 /etc/elasticsearch/elastic-certificates.p12
ll /etc/elasticsearch/elastic-certificates.p12
将证书文件拷贝到其他节点
scp -p /etc/elasticsearch/elastic-certificates.p12 10.0.0.92:/etc/elasticsearch
scp -p /etc/elasticsearch/elastic-certificates.p12 10.0.0.93:/etc/elasticsearch

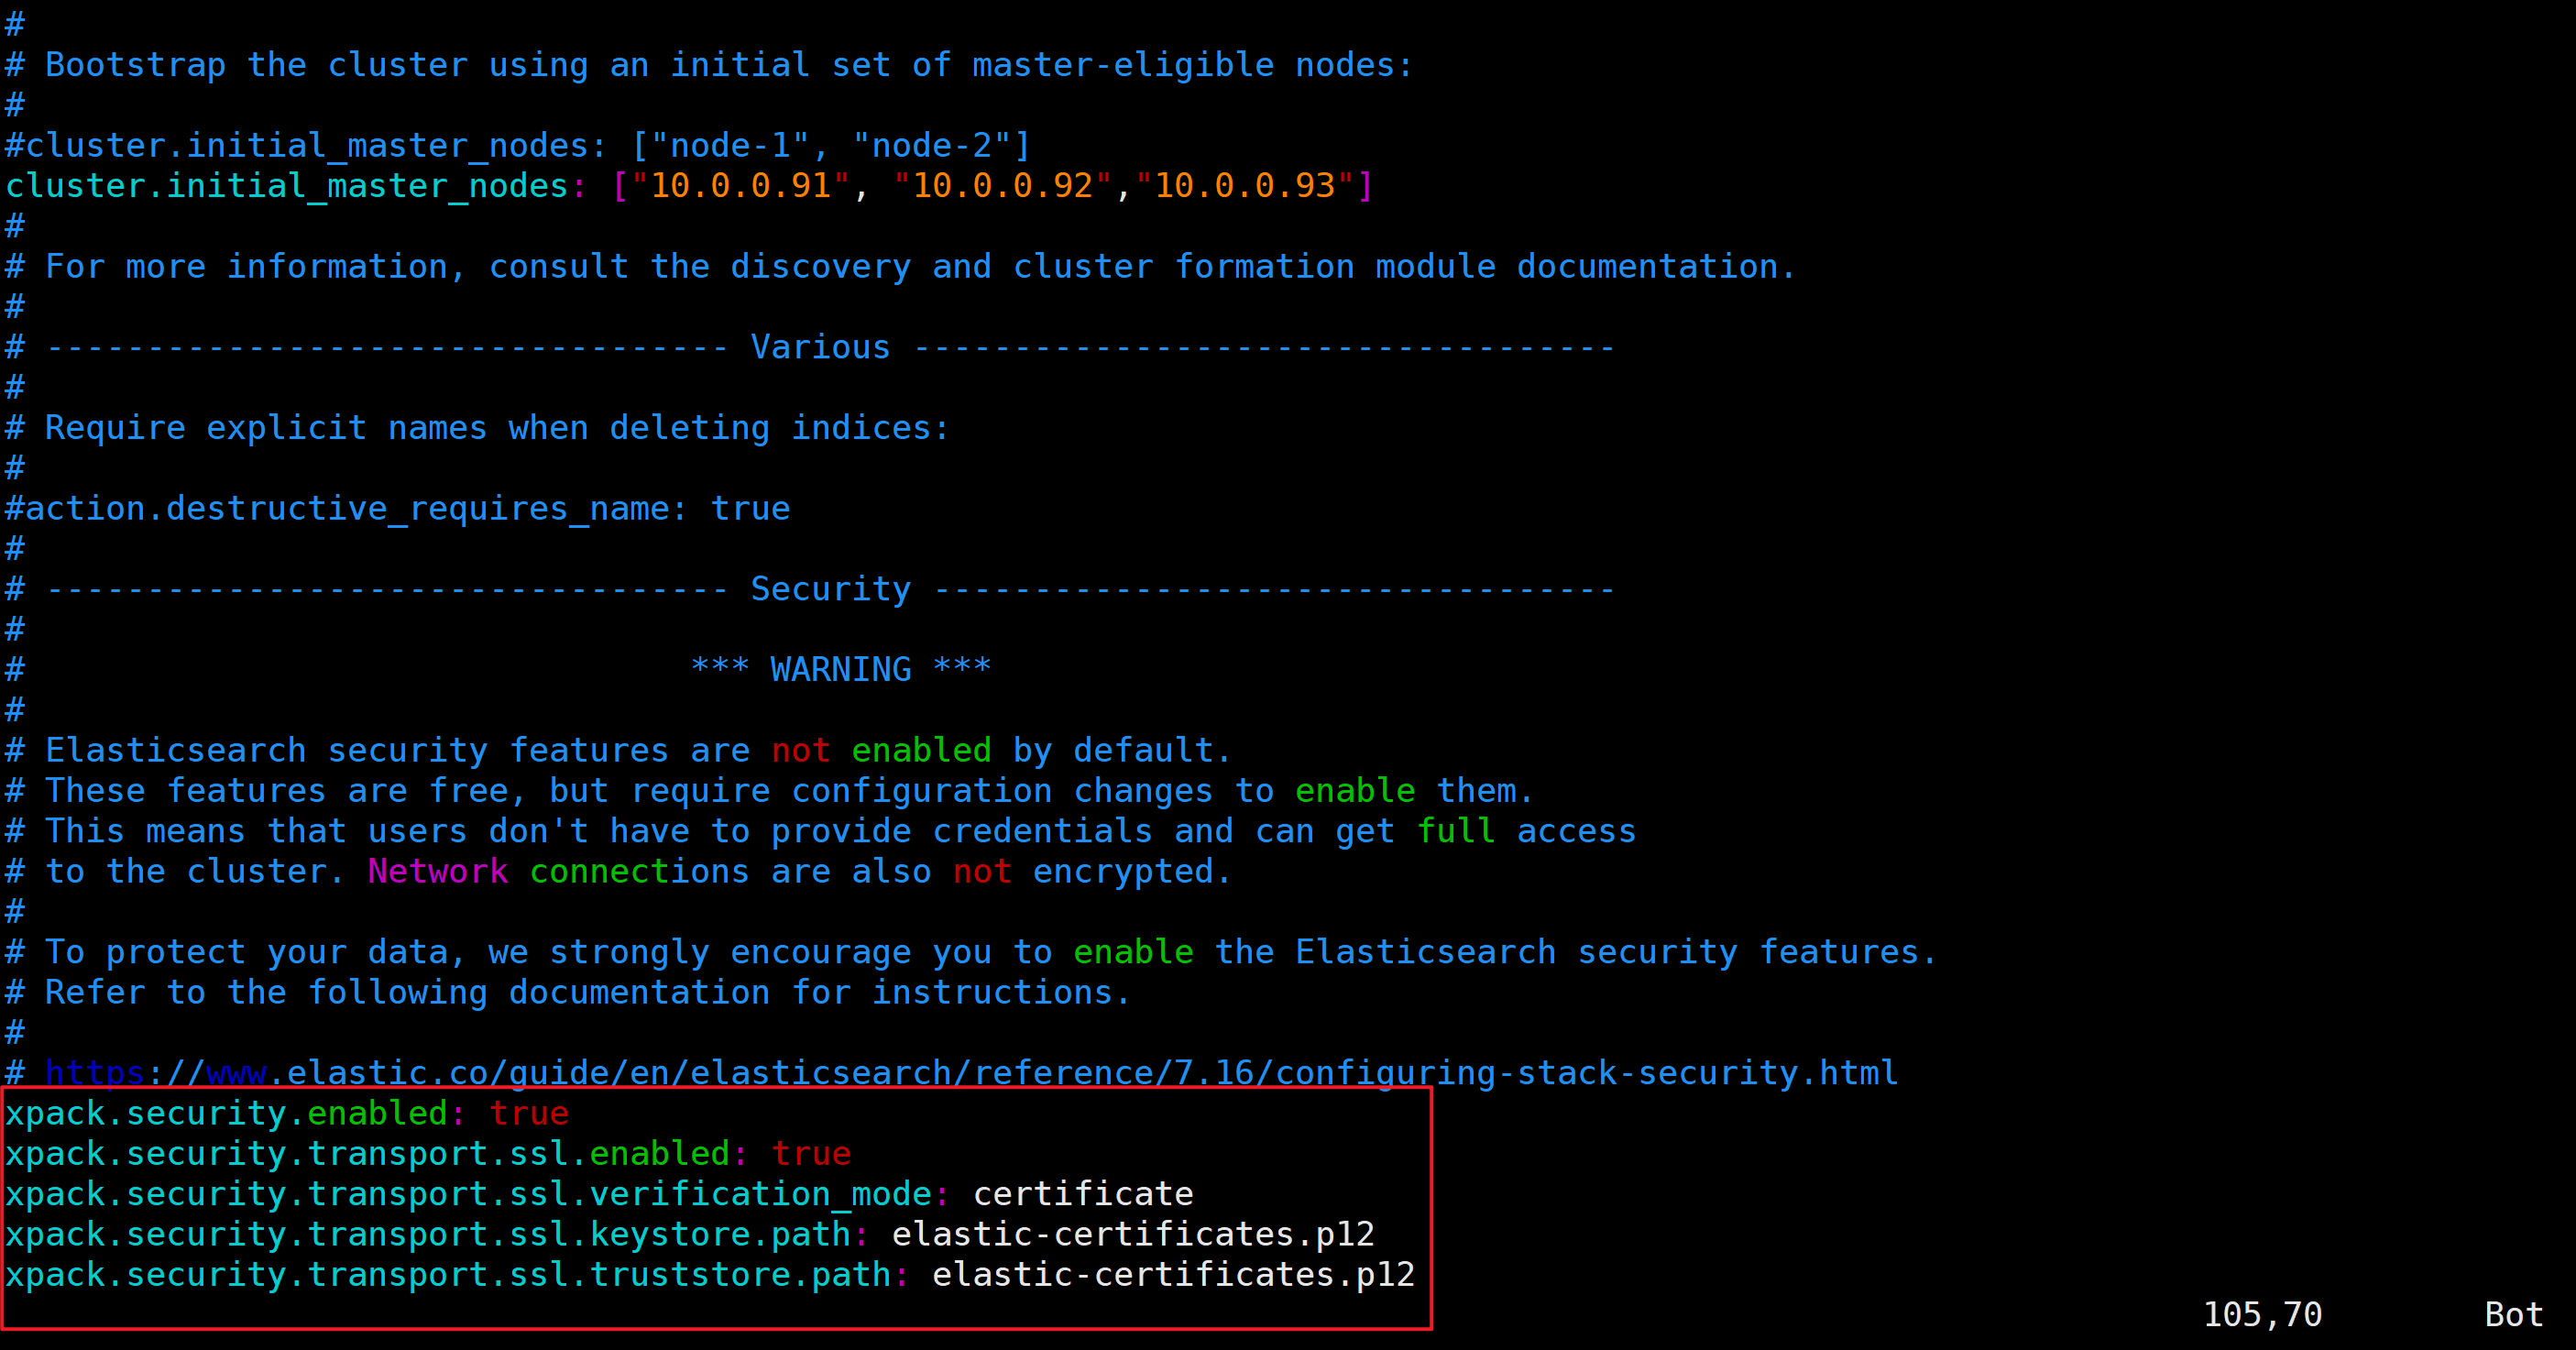
修改ES集群的配置文件
vim /etc/elasticsearch/elasticsearch.yml
xpack.security.enabled: true
xpack.security.transport.ssl.enabled: true
xpack.security.transport.ssl.verification_mode: certificate
xpack.security.transport.ssl.keystore.path: elastic-certificates.p12
xpack.security.transport.ssl.truststore.path: elastic-certificates.p12
同步ES配置文件到其他节点
scp /etc/elasticsearch/elasticsearch.yml  10.0.0.92:/etc/elasticsearch/
scp /etc/elasticsearch/elasticsearch.yml  10.0.0.93:/etc/elasticsearch/

所有节点重启ES集群
[root@elk91 ~]# systemctl restart elasticsearch.service
[root@elk92 ~]# systemctl restart elasticsearch.service
[root@elk93 ~]# systemctl restart elasticsearch.service
测试验证ES集群访问
curl 10.0.0.91:9200/_cat/nodes?v

⚠️此时提示401认证失败
生成随机密码
[root@elk91 ~]# /usr/share/elasticsearch/bin/elasticsearch-setup-passwords  auto
Initiating the setup of passwords for reserved users elastic,apm_system,kibana,kibana_system,logstash_system,beats_system,remote_monitoring_user.
The passwords will be randomly generated and printed to the console.
Please confirm that you would like to continue [y/N]yChanged password for user apm_system
PASSWORD apm_system = SBPIn4n9EZUQgWOEUBP8Changed password for user kibana_system
PASSWORD kibana_system = l4Y21gD35vcKKA7YFpqLChanged password for user kibana
PASSWORD kibana = l4Y21gD35vcKKA7YFpqLChanged password for user logstash_system
PASSWORD logstash_system = 09ucDXCf9zYPForORqzkChanged password for user beats_system
PASSWORD beats_system = VGn4F7LWnWgNzYpRTOFSChanged password for user remote_monitoring_user
PASSWORD remote_monitoring_user = QfN9mrTOYYzq50OVGG0ZChanged password for user elastic
PASSWORD elastic = 1bf0X8NT6AVlaMcTEj3r
验证集群是否正常
curl -u elastic:1bf0X8NT6AVlaMcTEj3r 10.0.0.91:9200/_cat/nodes?v

🌟Kibana对接ES加密集群
修改Kibana的配置文件
vim /etc/kibana/kibana.yml
elasticsearch.username: "kibana_system"
elasticsearch.password: "l4Y21gD35vcKKA7YFpqL"
重启Kibana
systemctl restart kibana.service
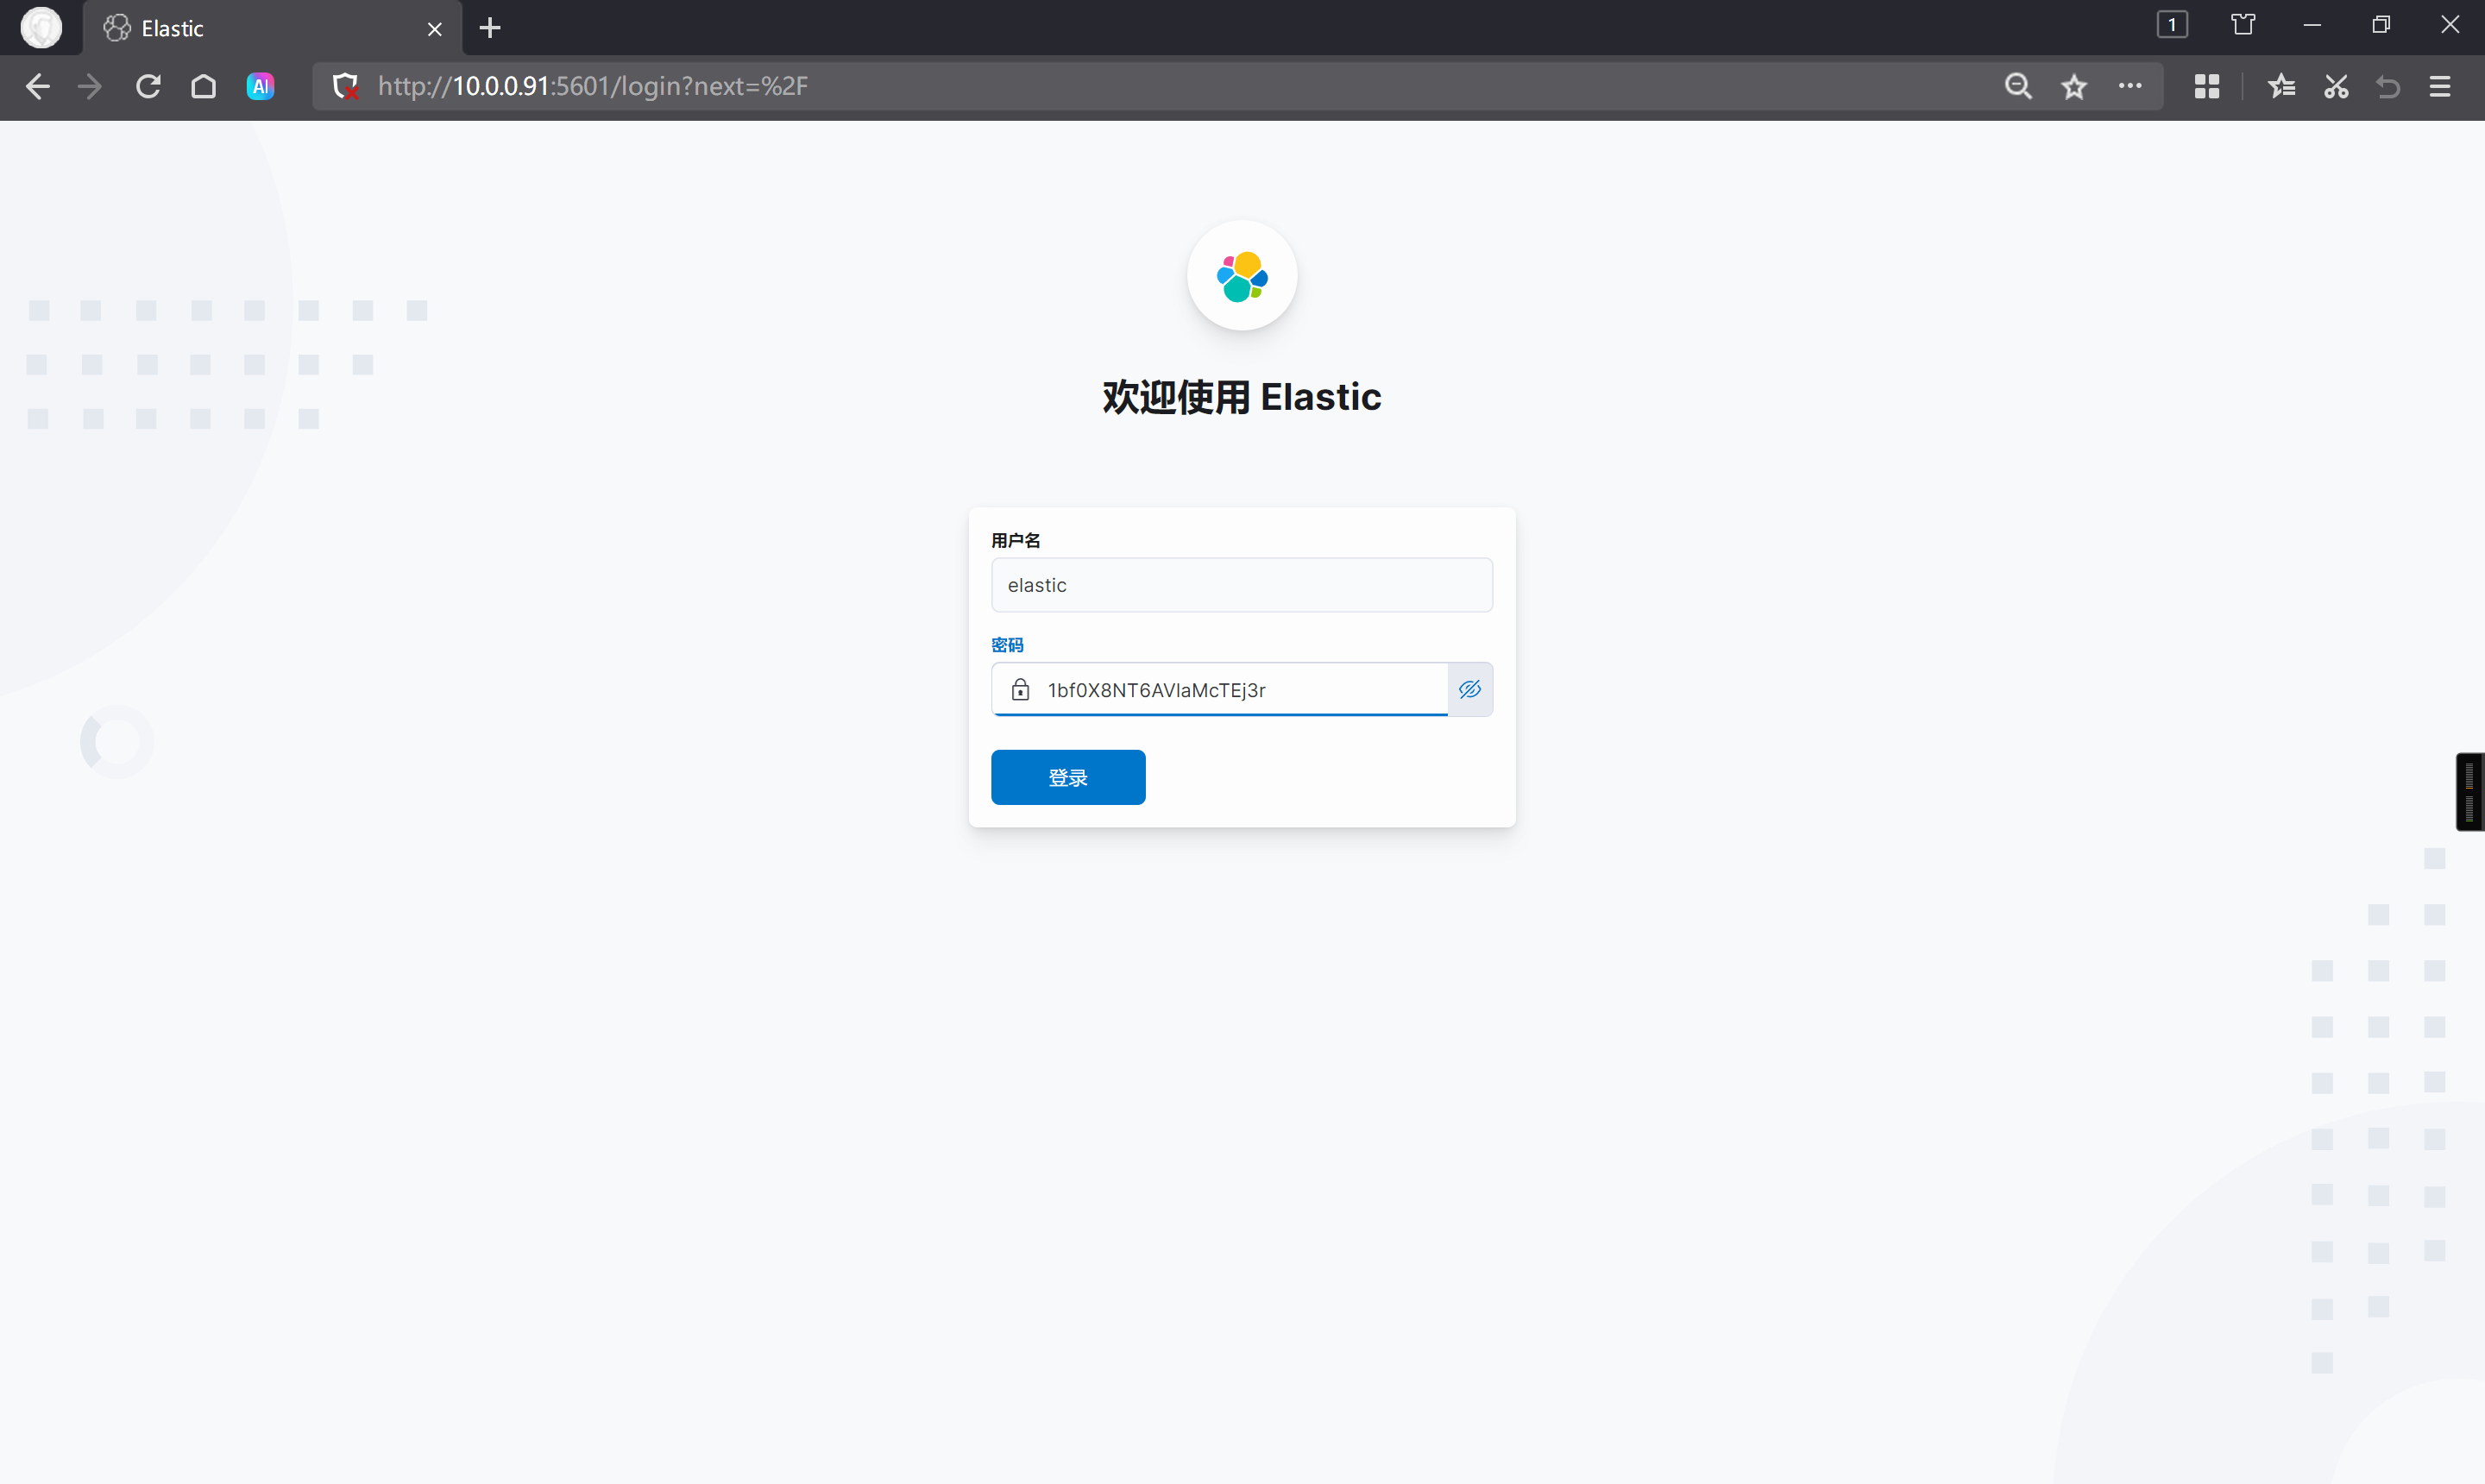
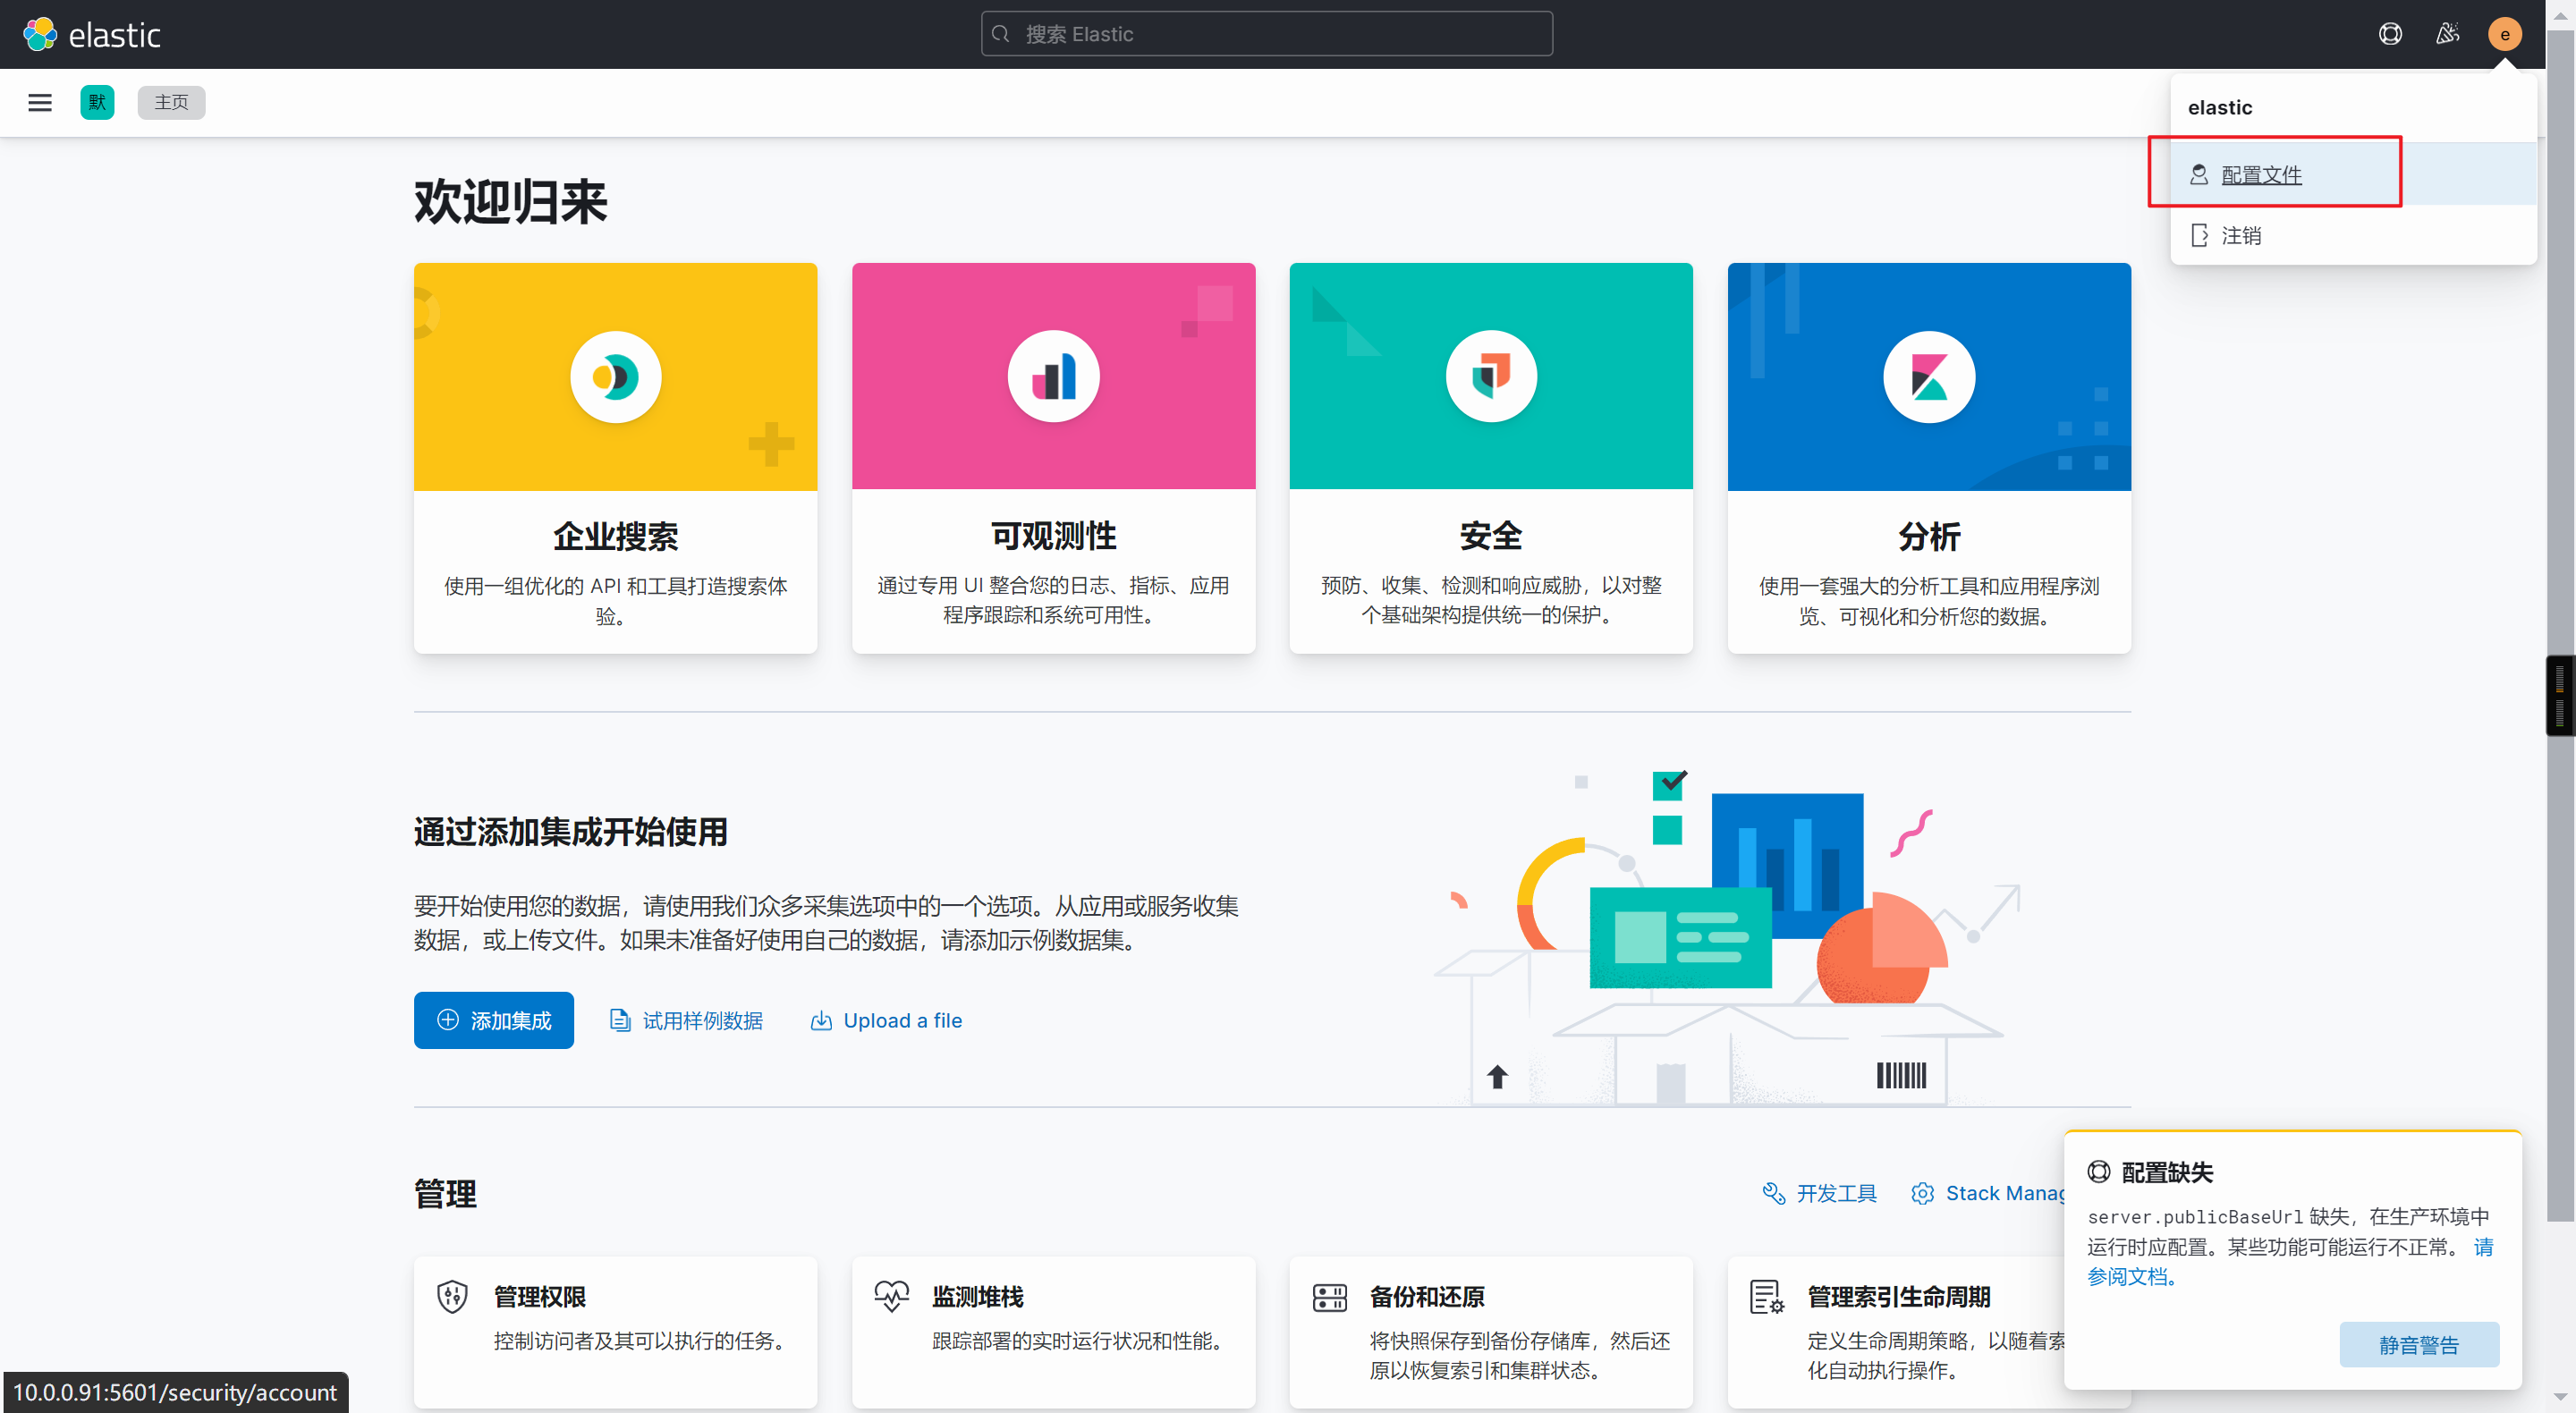
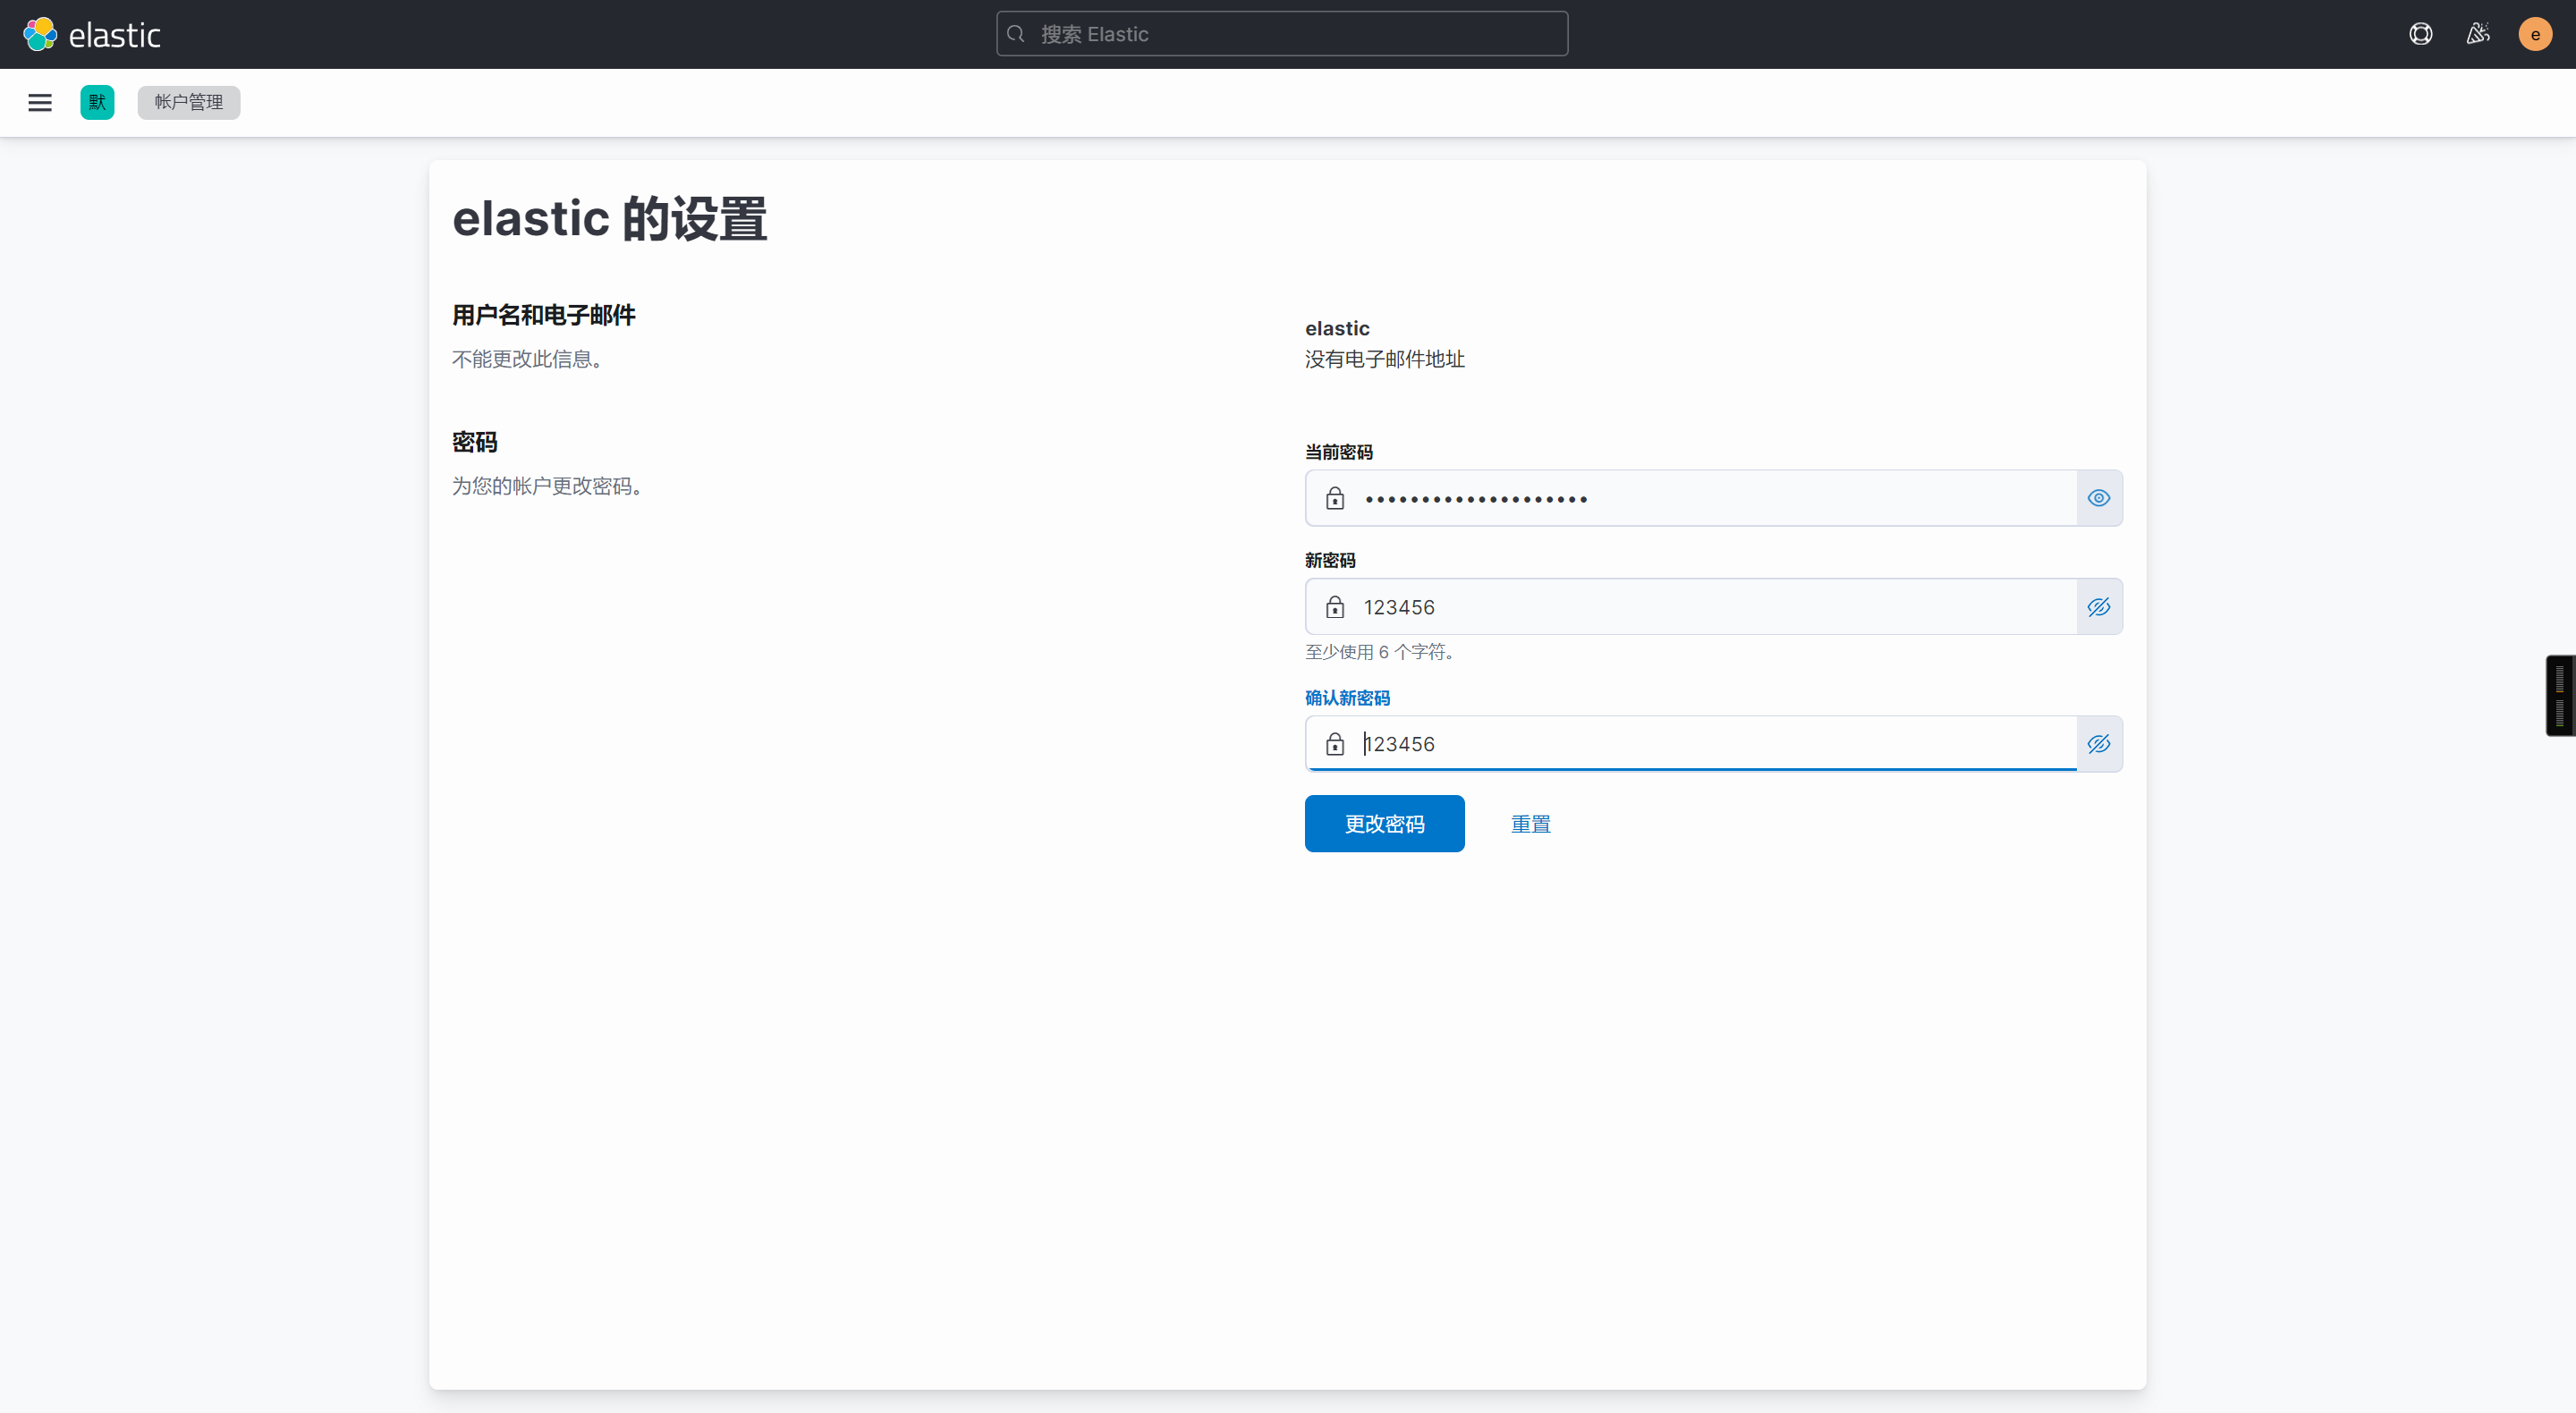
访问Kibana的webUI重置管理员密码
使用elastic用户进行登录即可
🌟ES7重置elastic管理员密码案例
创建一个超级管理员角色
/usr/share/elasticsearch/bin/elasticsearch-users useradd zhu -p 123456 -r superuser
查看用户列表
/usr/share/elasticsearch/bin/elasticsearch-users list

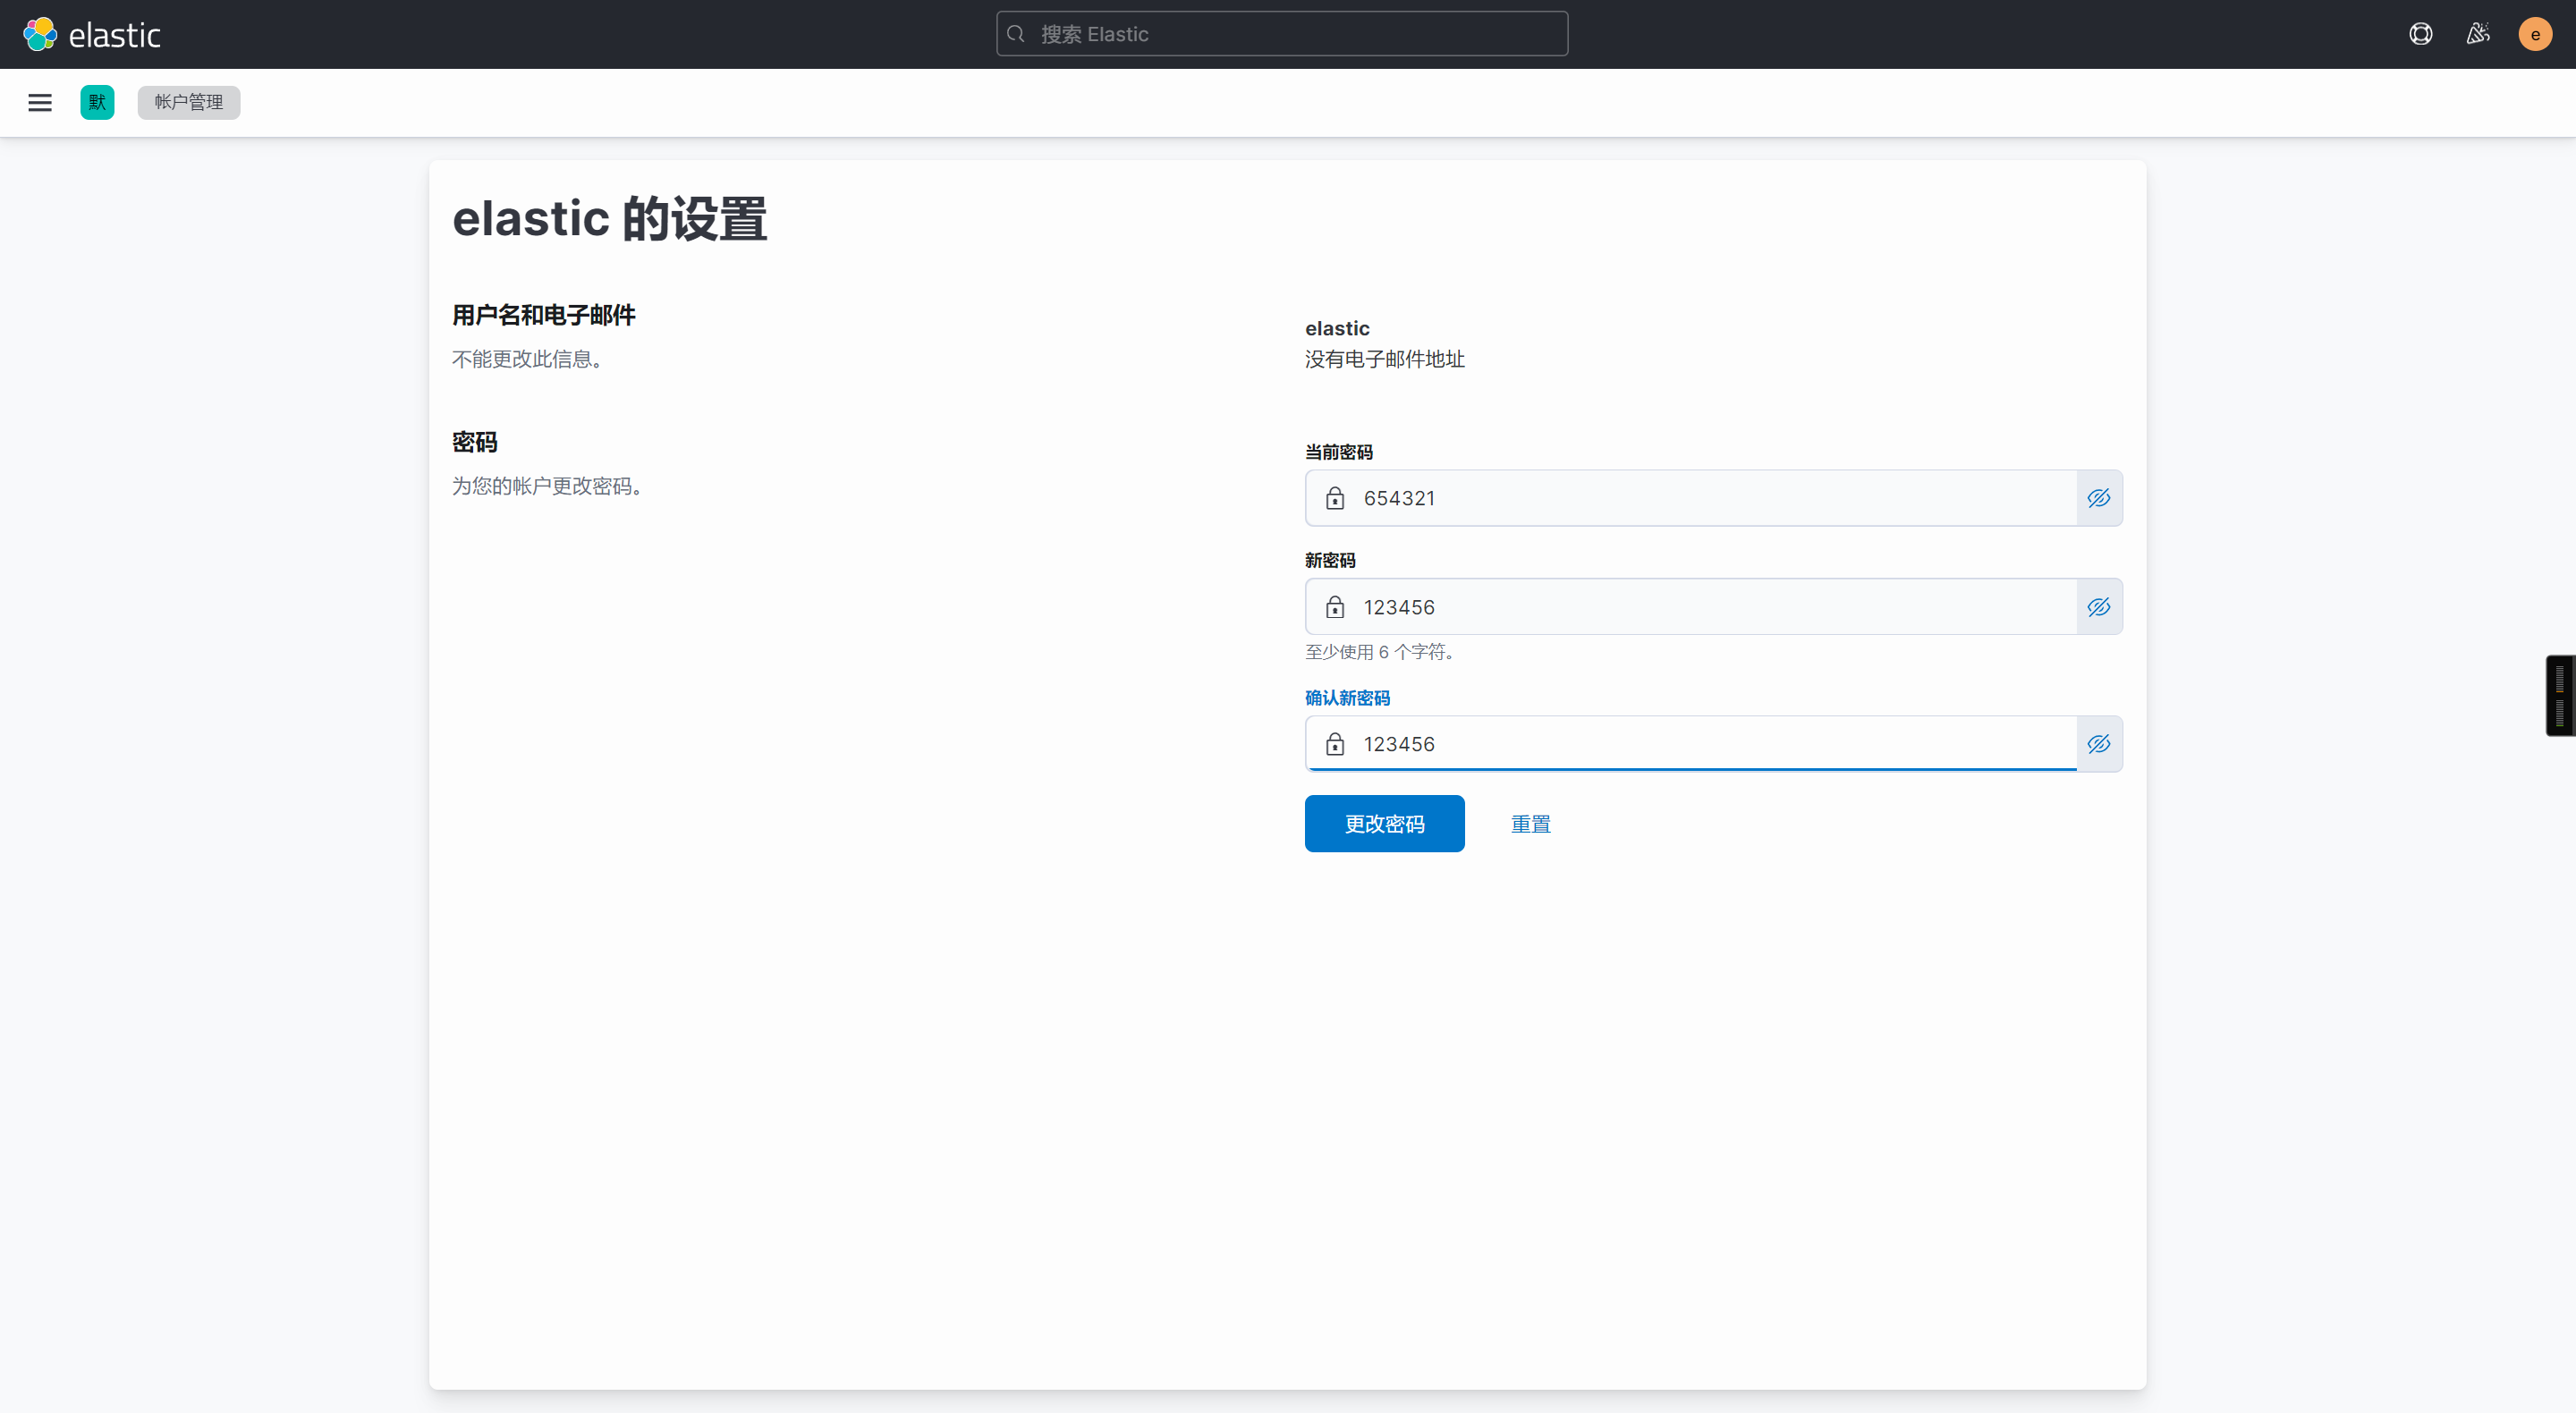
基于本地管理员修改密码
curl -s --user zhu:123456 -XPUT "http://localhost:9200/_xpack/security/user/elastic/_password?pretty" -H 'Content-Type: application/json' -d'{"password" : "654321"}'

使用密码登录
curl 10.0.0.91:9200/_cat/nodes -u elastic:654321

再使用Kibana重置密码

🌟Filebeat对接ES加密集群
编写Filebeat配置文件
vim /etc/filebeat/config/12-tcp-to-es.yaml
filebeat.inputs:
- type: tcphost: "0.0.0.0:9000"output.elasticsearch:hosts: - "http://10.0.0.91:9200"- "http://10.0.0.92:9200"- "http://10.0.0.93:9200"index: "zhu-es-tls-filebeat-%{+yyyy-MM-dd}" username: "elastic"password: "123456"setup.ilm.enabled: false
setup.template.name: "zhu-es-tls-filebeat"
setup.template.pattern: "zhu-es-tls-filebeat-*"
setup.template.overwrite: false
setup.template.settings:index.number_of_shards: 3index.number_of_replicas: 1
启动filebeat实例
filebeat -e -c /etc/filebeat/config/12-tcp-to-es.yaml
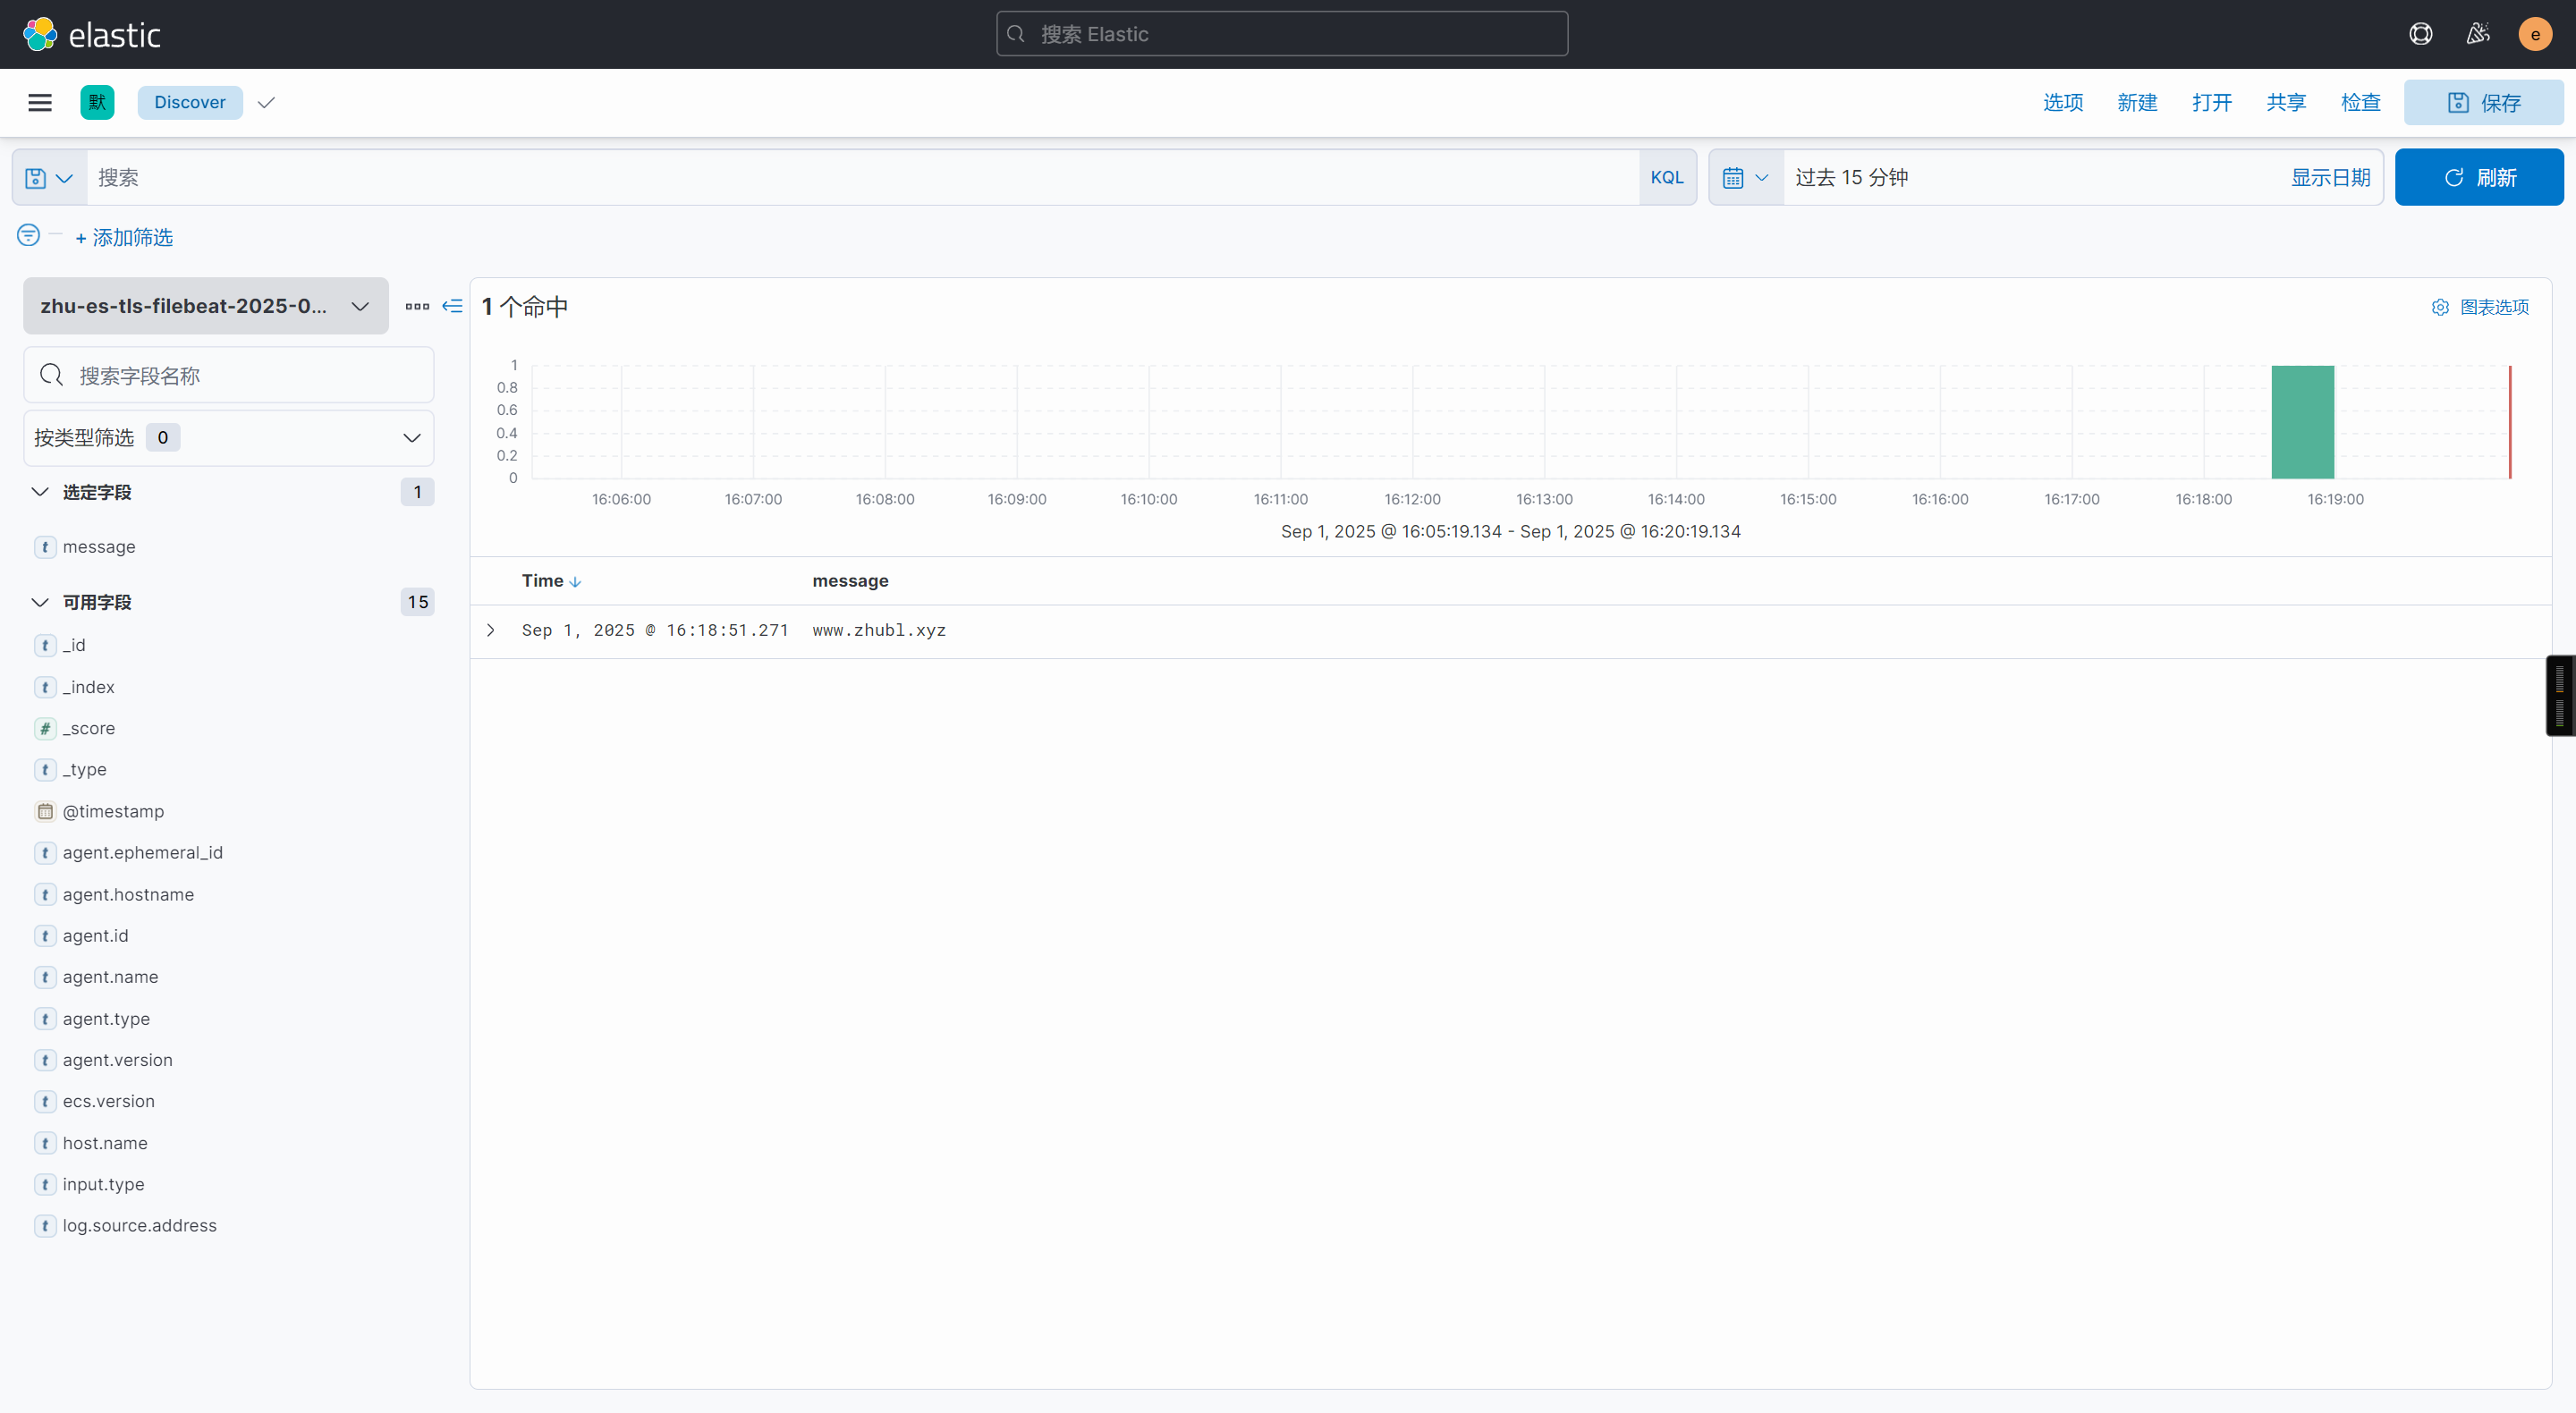
发送测试数据
echo www.zhubl.xyz | nc 10.0.0.92 9000
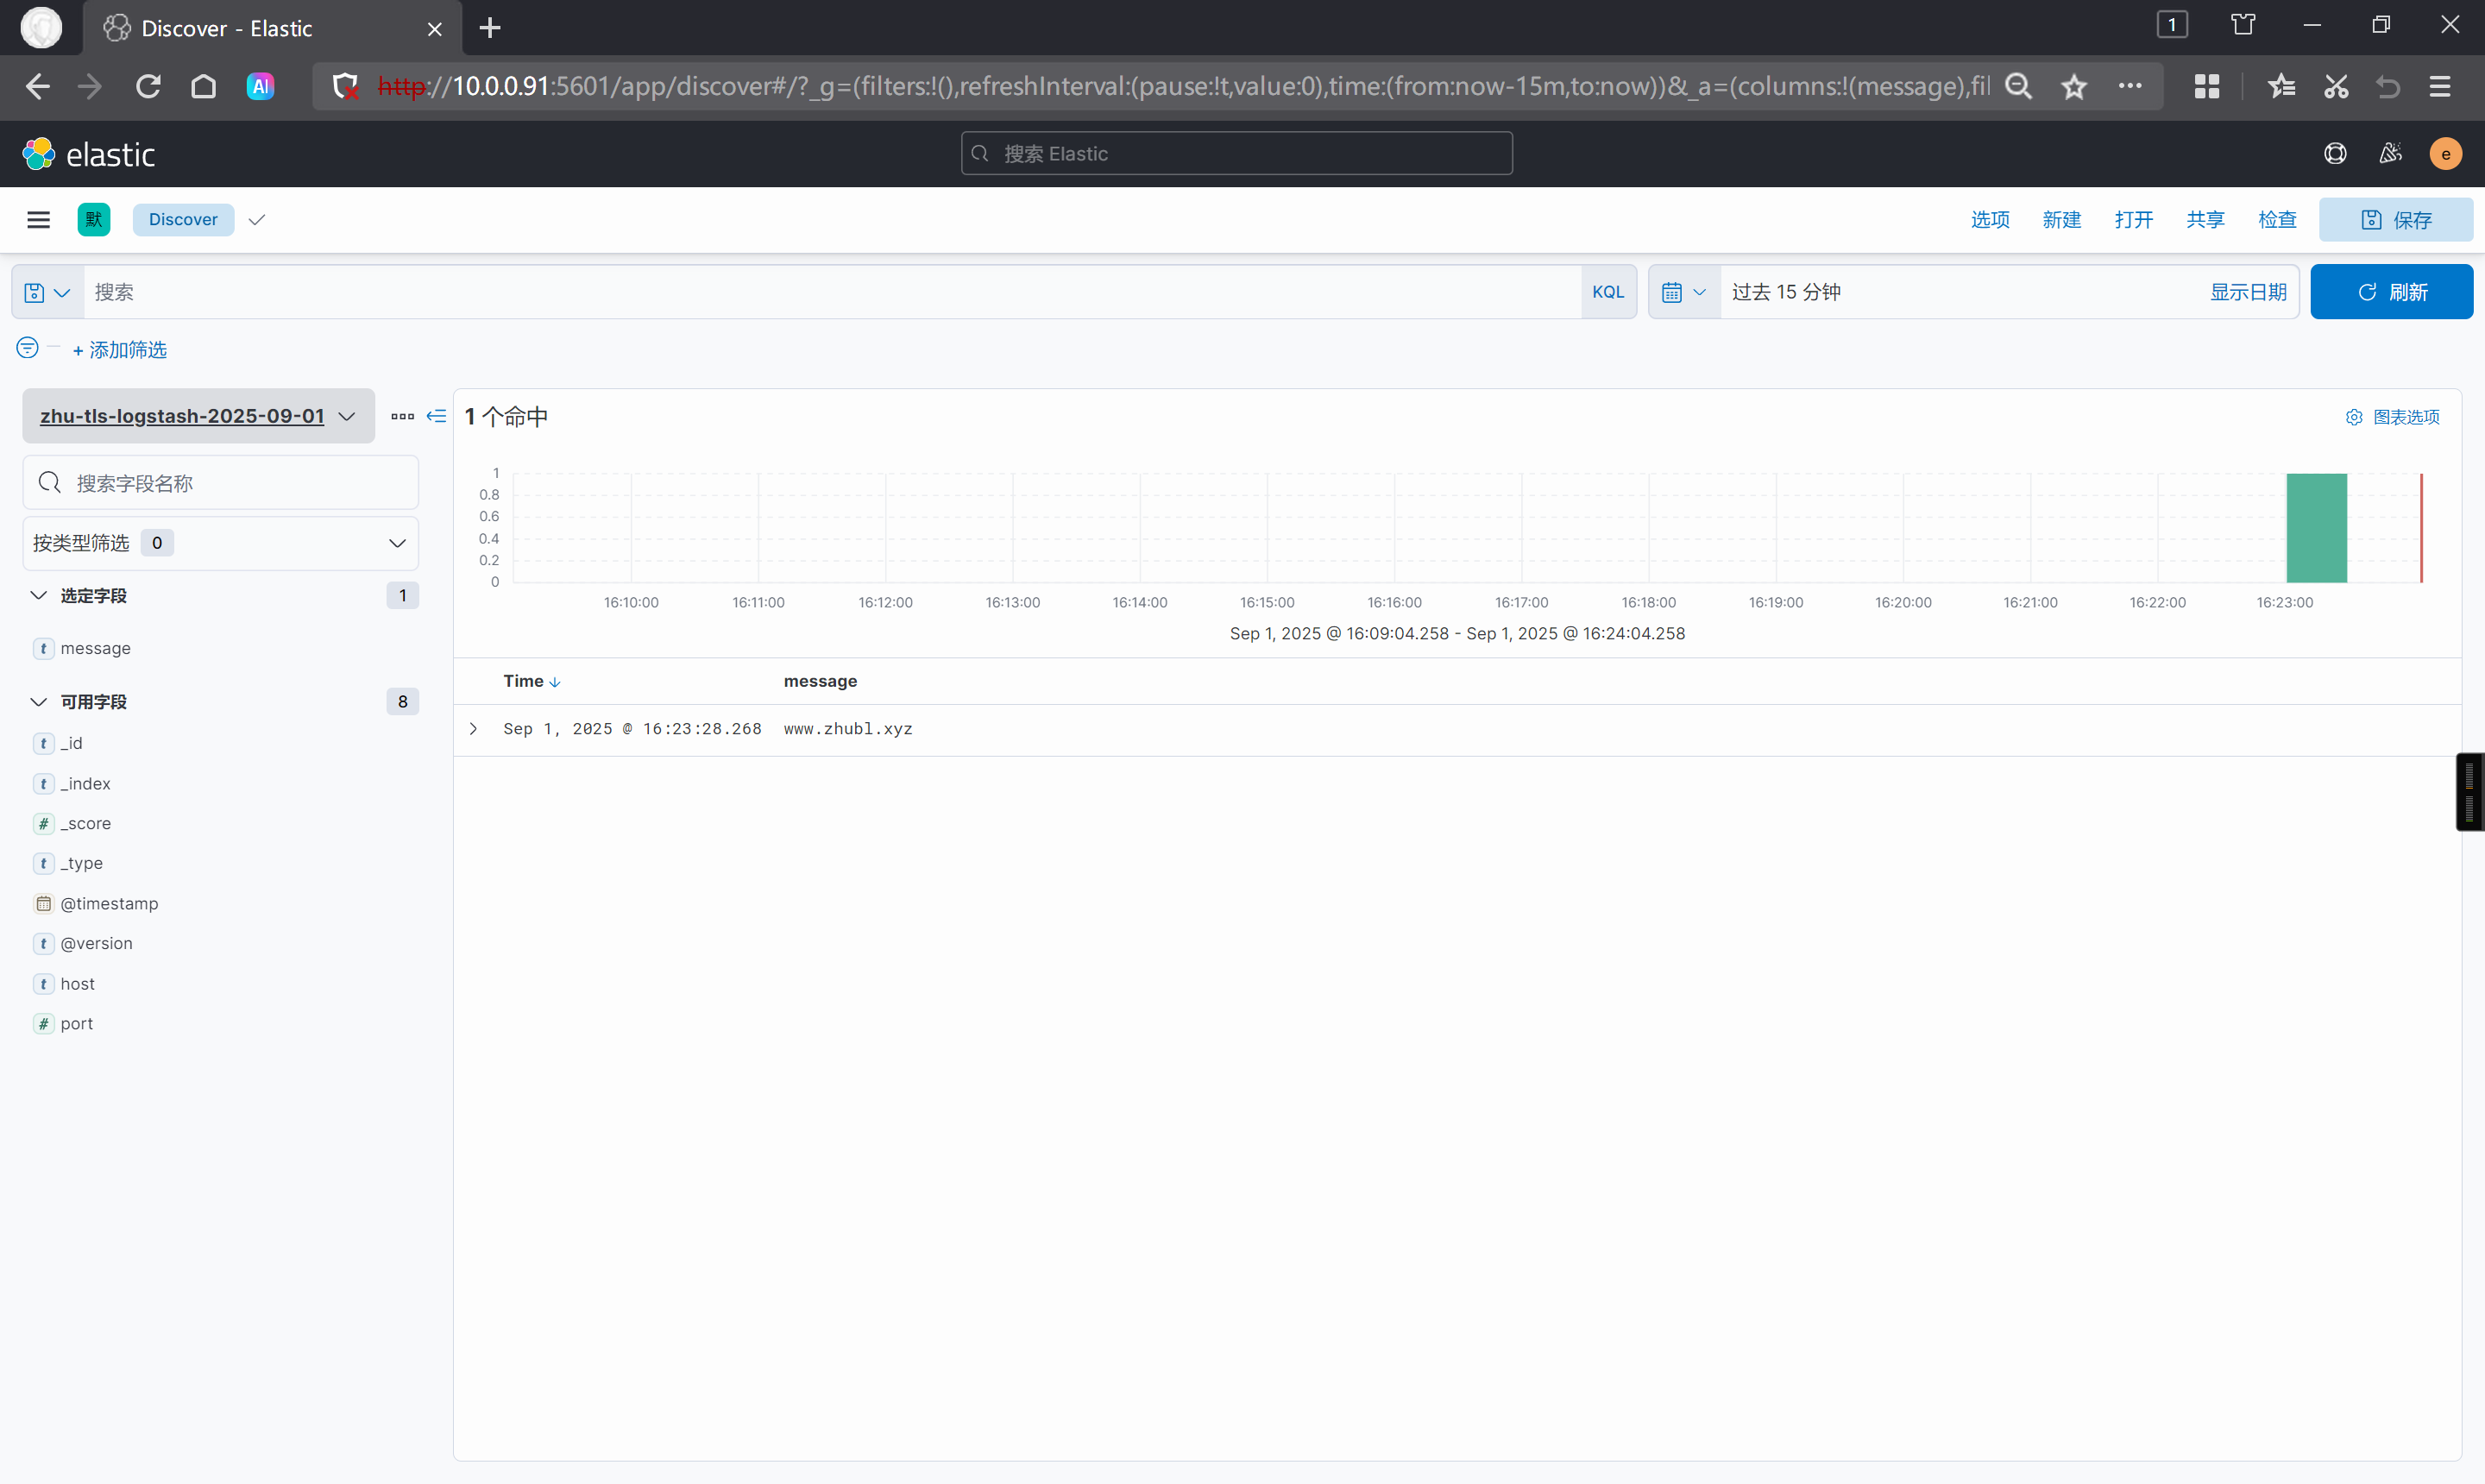
Kibana测试验证
🌟Logstash对接ES加密集群
编写Logstash的配置文件
vim /etc/logstash/conf.d/08-tcp-to-es_tls.conf
input {tcp {port => 8888}
}output {elasticsearch {hosts => ["http://10.0.0.91:9200","http://10.0.0.92:9200","http://10.0.0.93:9200"]index => "zhu-tls-logstash-%{+yyyy-MM-dd}"user => "elastic"password => "123456"}}
启动Logstash
logstash -f /etc/logstash/conf.d/08-tcp-to-es_tls.conf
发送测试数据
echo www.zhubl.xyz | nc 10.0.0.93 8888
Kibana测试验证