SpringAMQP 的发布方确认
前言
这里的发布方确认是以 SpringAMQP 写的,之前我们在前面的篇章中就学过了 使用 Java 原生的SDK编写,当时是发布确认模式,在这里我们将用 Spring 集成的 rabbitmq 方法来编写
开启发布者确认机制需要进行下面的配置,以 yml 为例:
spring:rabbitmq:publisher-confirm-type: correlated #消息发送确认
在使用RabbitMQ的时候,可以通过消息持久化来解决因为服务器的异常崩溃而导致的消息丢失,但是还有一个问题,当消息的生产者将消息发送出去之后,消息到底有没有正确地到达服务器呢?
如果在消息到达服务器之前已经丢失(比如RabbitMQ重启,那么RabbitMQ重启期间生产者消息投递失败),持久化操作也解决不了这个问题,因为消息根本没有到达服务器,何谈持久化?
RabbitMQ为我们提供了两种解决方案:
a.通过事务机制实现
b.通过发送方确认(publisherconfirm)机制实现
事务机制比较消耗性能,在实际工作中使用也不多,咱们主要介绍confirm机制来实现发送方的确认.
RabbitMQ为我们提供了两个方式来控制消息的可靠性投递
1.confirm确认模式
2. return退回模式
我们提前准备一下交换机和队列:
//发送方确认public static final String CONFIRM_QUEUE = "CONFIRM_QUEUE";public static final String CONFIRM_EXCHANGE = "CONFIRM_EXCHANGE";public static final String CONFIRM_ROUTING_KEY = "CONFIRM_ROUTING_KEY";
//发送方确认@Bean("confirmQueue")public Queue confirmQueue() {return QueueBuilder.durable(MQConstants.CONFIRM_QUEUE).build();}@Bean("confirmExchange")public Exchange confirmExchange() {return ExchangeBuilder.directExchange(MQConstants.CONFIRM_EXCHANGE).durable(true).build();}@Bean("confirmBinding")public Binding confirmBinding(@Qualifier("confirmExchange") Exchange exchange, @Qualifier("confirmQueue") Queue queue) {return BindingBuilder.bind(queue).to(exchange).with(MQConstants.CONFIRM_ROUTING_KEY).noargs();}
confirm
Producer在发送消息的时候,对发送端设置一个ConfirmCallback的监听,无论消息是否到达
Exchange,这个监听都会被执行,如果Exchange成功收到,ACK(Acknowledgecharacter,确认
字符)为true,如果没收到消息,ACK就为false.
confirm 模式是用于确认发送方的消息是否到达交换机
要启动 confirm ,我们还需要创建一个新的 RabbitTemplate,通过rabbitTemplate.setConfirmCallback 来进行设置,ack 有两种返回值,true和false,根据不同的返回值做不同的处理
@Configuration
public class RabbitTemplateConfig {/*** 构建原生的 RabbitTemplate* @param connectionFactory* @return*/@Bean("rabbitTemplate")public RabbitTemplate rabbitTemplate(ConnectionFactory connectionFactory) {return new RabbitTemplate(connectionFactory);}/*** 构建发布方确认的 RabbitTemplate* @param connectionFactory* @return*/@Bean("confirmRabbitTemplate")public RabbitTemplate confirmRabbitTemplate(ConnectionFactory connectionFactory) {RabbitTemplate rabbitTemplate = new RabbitTemplate(connectionFactory);//设置回调方法rabbitTemplate.setConfirmCallback(new RabbitTemplate.ConfirmCallback(){@Overridepublic void confirm(CorrelationData correlationData, boolean ack, String cause) {System.out.println("调用了 confirm 方法");if(ack){System.out.printf("消息发送成功,消息ID:%s \n", correlationData == null ? null : correlationData.getId());}else {System.out.printf("消息发送失败, 消息ID:%s, cause: %s \n", correlationData == null ? null :correlationData.getId(), cause);//响应的业务处理,如重发消息等等...}}});return rabbitTemplate;}
}
这里如果项目需要使用到原始的 RabbitTemplate 的话,需要创建一个,因为在你自定义创建过 RabbitTmeplate 的时候,Spring 就不会自动帮你创建原始的 RabbitTemplate 了。
参数介绍:
public void confirm(CorrelationData correlationData, boolean ack, String cause)
correlationData是消息的唯一标识,也就说序列号,我们可以通过生产者那边进行设置,注意这里和消费者那边的 deliveryTag 是不一样的,correlationData是生产者使用的,deliveryTag 是队列创建的
ack 是否确认消息达到
cause 存储消息发送失败的原因
我们来演示消息发送失败的场景:
@RequestMapping("/confirm")public String confirm() {for (int i = 0; i < 10; i++) {CorrelationData correlationData = new CorrelationData(UUID.randomUUID().toString());confirmRabbitTemplate.convertAndSend(MQConstants.CONFIRM_EXCHANGE, "hello", "confirm: " + i, correlationData);}return "消息发送成功";}
我们将 routingkey 设置错误,观察效果:
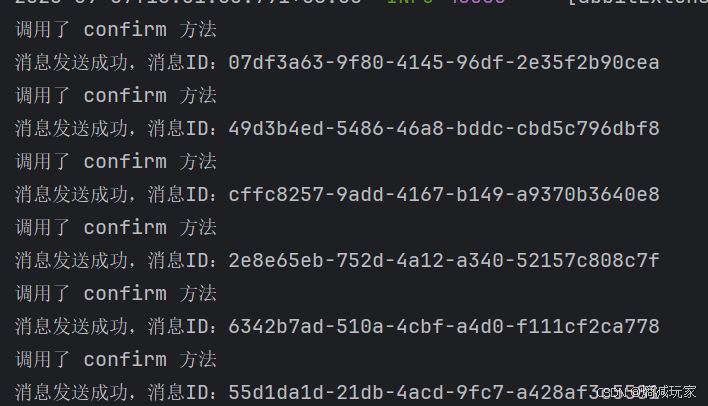
我们会发现消息发送成功,这是因为消息确实达到的指定的交换机,但是我们查看队列的时候是没有消息的,因此进一步验证了 confirm 模式只是确认消息是否达到交换机,并不能确认是否到达指定的队列
接下来我们来指定一个不存在的交换机:
@RequestMapping("/confirm")public String confirm() {for (int i = 0; i < 10; i++) {CorrelationData correlationData = new CorrelationData(UUID.randomUUID().toString());confirmRabbitTemplate.convertAndSend("hello 85246", MQConstants.CONFIRM_ROUTING_KEY, "confirm: " + i, correlationData);}return "消息发送成功";}

在 cause 的打印信息中:得知队列不存在,因此 confirm 确实可以验证消息有没有达到指定的交换机里
returns
消息到达Exchange之后,会根据路由规则匹配,把消息放入Queue中.Exchange到Queue的过程,如果一条消息无法被任何队列消费(即没有队列与消息的路由键匹配或队列不存在等),可以选择把消息退回给发送者,消息退回给发送者时,我们可以设置一个返回回调方法,对消息进行处理
简单来说,returns 是确认交换机上的消息是否成功到达队列上的
@Bean("returnRabbitTemplate")public RabbitTemplate returnRabbitTemplate(ConnectionFactory connectionFactory) {RabbitTemplate rabbitTemplate = new RabbitTemplate(connectionFactory);rabbitTemplate.setMandatory(true);rabbitTemplate.setReturnsCallback(new RabbitTemplate.ReturnsCallback() {@Overridepublic void returnedMessage(ReturnedMessage returned) {System.out.println("调用了 returnedMessage 方法");System.out.printf("消息被退回:%s \n", returned);}});return rabbitTemplate;}
使用RabbitTemplate的setMandatory方法设置消息的mandatory属性为true(默认为false).这个属性的作用是告诉RabbitMQ,如果一条消息无法被任何队列消费,RabbitMQ应该将消息返回给发送者,此时ReturnCallback就会被触发.
如果我们指定一个不存在的 routingkey,那就没有队列能接收到消息,就会触发ReturnsCallback方法

合并使用
当然这两个模式是可以一起使用的,代码演示:
/*** 构建发布方确认的 RabbitTemplate* @param connectionFactory* @return*/@Bean("confirmRabbitTemplate")public RabbitTemplate confirmRabbitTemplate(ConnectionFactory connectionFactory) {RabbitTemplate rabbitTemplate = new RabbitTemplate(connectionFactory);//设置回调方法rabbitTemplate.setConfirmCallback(new RabbitTemplate.ConfirmCallback(){@Overridepublic void confirm(CorrelationData correlationData, boolean ack, String cause) {System.out.println("调用了 confirm 方法");if(ack){System.out.printf("消息发送成功,消息ID:%s \n", correlationData == null ? null : correlationData.getId());}else {System.out.printf("消息发送失败, 消息ID:%s, cause: %s \n", correlationData == null ? null :correlationData.getId(), cause);//响应的业务处理,如重发消息等等...}}});//设置消息退回回调rabbitTemplate.setMandatory(true);rabbitTemplate.setReturnsCallback(new RabbitTemplate.ReturnsCallback() {@Overridepublic void returnedMessage(ReturnedMessage returned) {System.out.println("调用了 returnedMessage 方法");System.out.printf("消息被退回:%s \n", returned);}});return rabbitTemplate;}