Webassemly和声明宏的联合使用
前言
笔者好久没有玩过Webassemly,玩一玩。
应该搞什么?不能搞太复杂了,类似于前面的
syn和quote的简单使用——生成结构体-CSDN博客![]() https://blog.csdn.net/qq_63401240/article/details/150609865?spm=1001.2014.3001.5502
https://blog.csdn.net/qq_63401240/article/details/150609865?spm=1001.2014.3001.5502
- 前端传入字符串
- 生成结构体
- 编译成wasm
- 前端调用
前面的函数宏需要的字符串,而不是字面量,而且前面函数宏提前编译,不能动态使用
因此,需要写一下新的宏,不能搞太复杂了。
需要先重构前面通过字符串生成结构体的宏。行,搞事情。
正文
重构生成结构体的宏
确定输入参数
希望如下代码能运行
fn main() {build_struct!(Student, [(id, i32), (name, String)]);let s = Student::new(1, "Alice".into());println!("{:?}", s);
}
打印结果如下
Student { id: 1, name: "Alice" }
前面使用的是过程宏中的函数宏,这里就不能使用了,既然如下,就使用声明宏
同理,对输入进行观察
- 第一个参数是一个标识符ident
- 第二个参数是一个中括号,里面多个类似重复的元素
- 每一个元素用小括号包裹,其中有两个参数,第一个参数也是标识符——ident,第二个参数是类型ty。
- 需要为结构体实现new方法
上面四点观察,确定这个声明宏的参数如下。
macro_rules! build_struct {($name:ident,[$(($field:ident,$type:ty)),*]) => {};
}
把$(..),*表示前面括号里的模式按逗号分隔重复 0 次或多次,每次重复元素都用逗号 ,连接起来
经典操作。
生成结构体
简单来说,代码如下
#[derive(Debug)]pub struct $name {$(pub $field: $type),*}重复循环就可以了
实现new方法
impl $name{pub fn new($($field: $type),*)->Self{Self{$($field),*}}}整体上就是使用了上面的$(..),*语法,不必多说。
build_struct宏的代码如下
macro_rules! build_struct {($name:ident,[$(($field:ident,$type:ty)),*]) => {#[derive(Debug)]pub struct $name {$(pub $field: $type),*}impl $name{pub fn new($($field: $type),*)->Self{Self{$($field),*}}}};
}
运行没问题。很好。
结构体被编译后在前端运行
需要使用wasm-bindgen这个crate的一些宏,在此之前,先建立一个项目
- 笔者使用pnpm create vite创建一个react项目
- 进入react项目,使用rsw new <webassembly项目名>创建一个webassembly项目
- 在根目录下使用rsw watch启动项目
参考
rwasm/vite-plugin-rsw - Vite 中文文档![]() https://www.viterc.cn/en/vite-plugin-rsw.html其中rsw.toml文件中的关键内容如下
https://www.viterc.cn/en/vite-plugin-rsw.html其中rsw.toml文件中的关键内容如下
cli = "pnpm"
[new]
using = "rsw"
[[crates]]
name = "parse-wasm"完成之后,进入webassembly项目,src/lib.rs中,删除初始代码,写下如下代码
#[wasm_bindgen]
pub struct Student {pub id: i32,pub name: String,
}
#[wasm_bindgen]
impl Student {#[wasm_bindgen(constructor)]pub fn new(id: i32, name: String) -> Student {Student {id,name}}
}
前端代码
import {useEffect} from "react"
import init, {Student} from "../parse-wasm/pkg"
import './App.css'function App() {useEffect(() => {(async () => {await init();const s=new Student(1,"张三")console.log(s)console.log(s.name)console.log(s.id)})()}, [])return null   // 暂时什么都不渲染
}export default App
前后端意思不必细说,但是报错了
error[E0277]: the trait bound `String: std::marker::Copy` is not satisfied
--> src\lib.rs:6:15
|
3 | #[wasm_bindgen]
| --------------- in this procedural macro expansion
...
6 | pub name: String,
| ^^^^^^ the trait `std::marker::Copy` is not implemented for `String`
|
note: required by a bound in `__wbg_get_student_name::assert_copy`
--> src\lib.rs:3:1
|
3 | #[wasm_bindgen]
| ^^^^^^^^^^^^^^^ required by this bound in `assert_copy`
= note: this error originates in the derive macro `::wasm_bindgen::__rt::BindgenedStruct` (in Nightly builds, run with -Z macro-backtrace for more info)
简单地说,报错的原因是String这个类型没有实现Copy这个trait,
但是,可以发现__wbg_get_student_name,这个东西,为name这个字段实现了get方法。
这内部如何实现的,很有可能wasm_bindgen这个属性宏有关。总之,报错了
如果说,去掉pub这个关键字,即
#[wasm_bindgen]
pub struct Student {pub id: i32,name: String,
}
编译成功了,直接给出前端运行的结果,如下
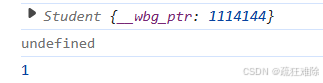
无法获取到name这个字段了。
因此,可以认为
对于pub字段,wasm_bindgen会为其生成get方法。
这里,因为String没有实现Copy,因此,报错了。
String in std::string - Rust![]() https://doc.rust-lang.org/std/string/struct.String.html可以去掉pub,然后自己生成,也可以使用另一种方法
https://doc.rust-lang.org/std/string/struct.String.html可以去掉pub,然后自己生成,也可以使用另一种方法
#[wasm_bindgen]
pub struct Student {pub id: i32,#[wasm_bindgen(getter_with_clone)]pub name: String,
}
为属性宏添加一个元数据getter_with_clone,笔者选择这种方法,应该还有其他方法。
在前端,src/App.tsx文件中,代码如下
运行,结果如下
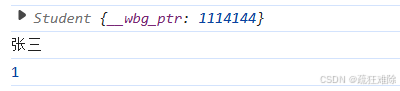
前端,可以使用rust的“结构体”
使用声明宏生成结构体
结合前面所述,代码如下
use wasm_bindgen::prelude::*;macro_rules! build_struct {($name:ident,[$(($field:ident, $type:ty)),*]) => {#[wasm_bindgen]#[derive(Debug, Clone)]pub struct $name {$(#[wasm_bindgen(getter_with_clone)] pub $field: $type),*}#[wasm_bindgen]impl $name {#[wasm_bindgen(constructor)]pub fn new($($field: $type),*) -> Self {Self { $($field),* }}}};
}build_struct!(Student, [(id, i32), (name, String)]);
运行没问题
前端传入字符串生成结构体
这一步无法实现,因为宏展开发生在编译期,前端传进来的字符串是运行期数据,编译期根本无法知道它的值。所以,这一步走不了,可惜了,
就这样吧!!!!!!!!!!!!!!