Spring AI 的应用和开发
什么是Spring AI
官网Spring AI
spring AI 是spring官方推出的集成框架,让spring Boot的开发者可以更好的调用大语言模型进行开发。常见的大模型(deepseek,chatGpt、Ollama、Azure OpenAI、阿里通义千问、百度文心一言 等)
什么是模型:在人工智能中,模型就是一个经过训练的数学函数,换句话说模型就是AI的大脑
什么是提示词:提示词是用户或者系统提供给大模型的指令或文本,用于引导模型进行特定的输出
Spring AI的应用与开发
环境的要求
JDK:最低要求是JDK17+
SpringBoot:最低要求是Spring Boot 3.2+
接入DeepSeek
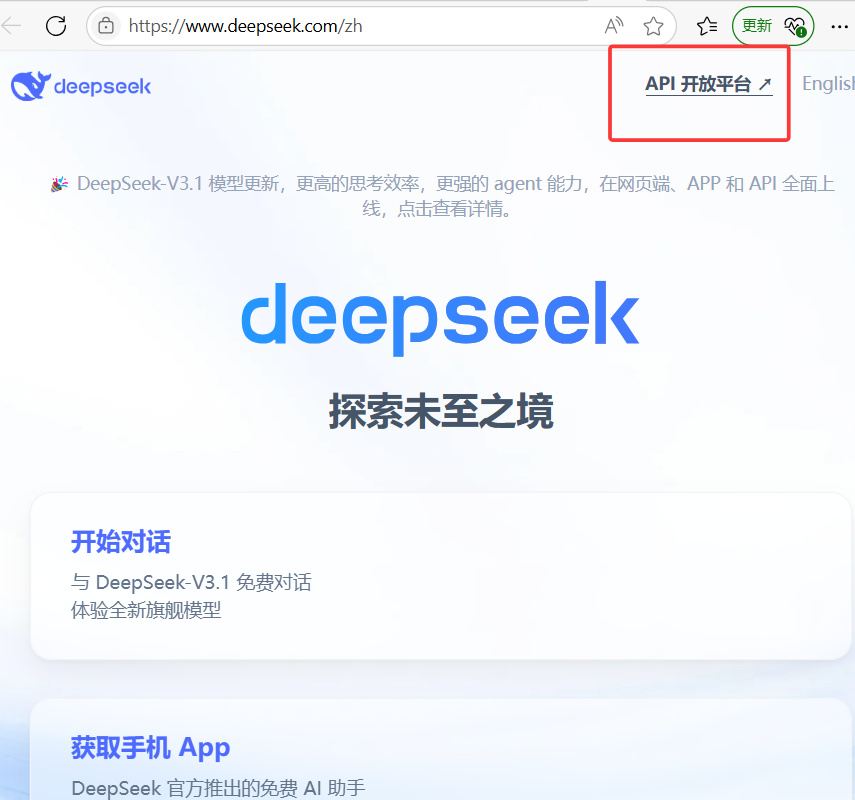
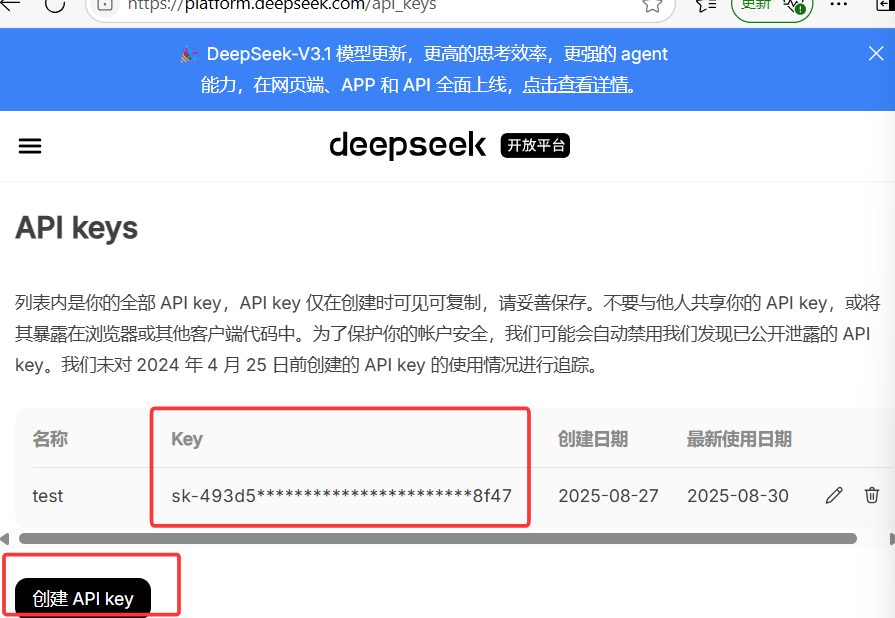
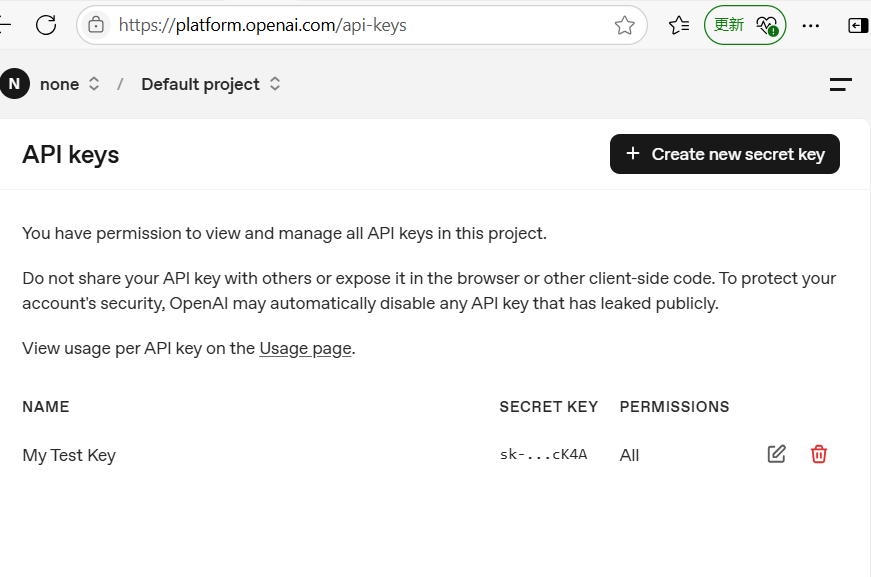
我们需要在DeepSeek的官网上申请DeepSeek API Keys
DeepSeek API文档:

我们来使用一下
首先创建一个项目
通过<dependencyManagement>导入到BOM到项目中
<dependencyManagement><dependencies><dependency><groupId>org.springframework.ai</groupId><artifactId>spring-ai-bom</artifactId><version>1.0.0-M6</version><type>pom</type><scope>import</scope></dependency></dependencies></dependencyManagement>引入依赖
<dependency><groupId>org.springframework.ai</groupId><artifactId>spring-ai-openai-spring-boot-starter</artifactId><version>1.0.0-M6</version></dependency>创建启动类
@SpringBootApplication
public class SpringAiApplication {public static void main(String[] args) {SpringApplication.run(SpringAiApplication.class,args);}
}
配置好application.yml中的API密钥
spring:application:name: spring-aiai:openai:
#      deepSeekapi-key: 写自己的api keybase-url: https://api.deepseek.comchat:options:model: deepseek-chattemperature: 0.7
Spring AI已经集成了OpenAI的API,因此我们不需要实现向OpenAI发送请求和接收响应的交互程序了, Spring AI已经实现了这⼀内容,我们只需要通过调⽤SpringAI为我们提供的接⼝即可
@RequestMapping("/ai")
@RestController
public class DeepSeekController {@Autowiredprivate OpenAiChatModel openAiChatModel;@RequestMapping("/chat")public String chat(String message){return openAiChatModel.call(message);}
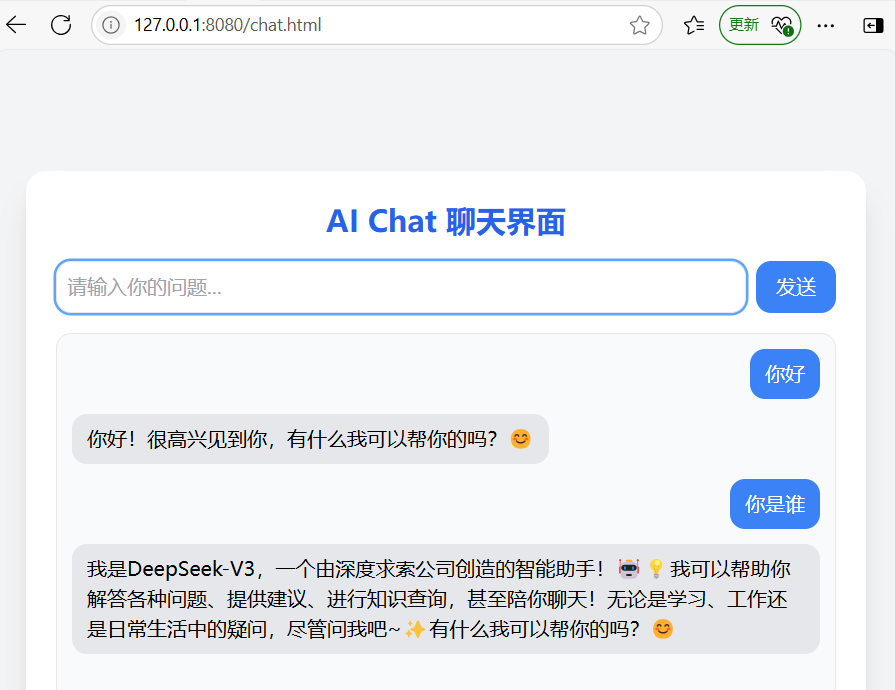
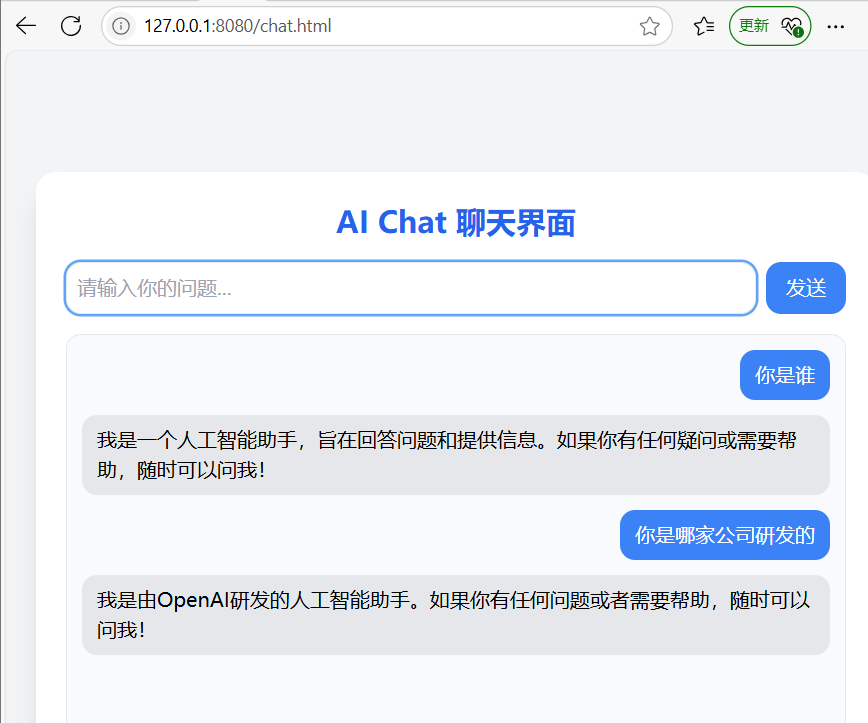
}自己整了一个前端的AI框框,可以更好的观察和调试,需要的可以借用
<!DOCTYPE html>
<html lang="zh">
<head><meta charset="UTF-8"><title>AI Chat Demo</title><script src="https://cdn.tailwindcss.com"></script>
</head>
<body class="bg-gray-100 flex items-center justify-center min-h-screen">
<div class="bg-white shadow-xl rounded-2xl w-full max-w-2xl p-6"><h1 class="text-2xl font-bold text-center text-blue-600 mb-4">AI Chat 聊天界面</h1><!-- 输入框 --><div class="flex gap-2 mb-4"><input id="userInput"type="text"placeholder="请输入你的问题..."class="flex-grow border rounded-xl p-2 focus:outline-none focus:ring-2 focus:ring-blue-400"><button onclick="sendMessage()"class="bg-blue-500 text-white px-4 py-2 rounded-xl hover:bg-blue-600 transition">发送</button></div><!-- 聊天显示区域 --><div id="chatBox" class="h-96 overflow-y-auto border rounded-xl p-3 bg-gray-50 space-y-3"><!-- 聊天内容会追加到这里 --></div>
</div><script>async function sendMessage() {const input = document.getElementById("userInput");const chatBox = document.getElementById("chatBox");const message = input.value.trim();if (!message) return;// 显示用户消息const userMsg = document.createElement("div");userMsg.className = "text-right";userMsg.innerHTML = `<span class="inline-block bg-blue-500 text-white px-3 py-2 rounded-xl">${message}</span>`;chatBox.appendChild(userMsg);chatBox.scrollTop = chatBox.scrollHeight;input.value = "";try {// 调用后端接口const response = await fetch(`/ai/chat?message=${encodeURIComponent(message)}`);const text = await response.text();// 显示 AI 回复const aiMsg = document.createElement("div");aiMsg.className = "text-left";aiMsg.innerHTML = `<span class="inline-block bg-gray-200 px-3 py-2 rounded-xl">${text}</span>`;chatBox.appendChild(aiMsg);chatBox.scrollTop = chatBox.scrollHeight;} catch (err) {alert("请求出错: " + err);}}// 回车键发送消息document.getElementById("userInput").addEventListener("keydown", e => {if (e.key === "Enter") sendMessage();});</script>
</body>
</html>
我们来访问,调用成功了
接入ChatGpt
ChatGPT是OpenAI开发并发布的核⼼产品之⼀,如果要使用ChatGpt,我们需要《科学上网》,创建好ChatGPT的账号后,创建API Keys
添加其依赖
<dependency><groupId>org.springframework.ai</groupId><artifactId>spring-ai-openai-spring-boot-starter</artifactId></dependency>配置API密钥
spring:ai:openai:api-key: your-api-keys
调用接口
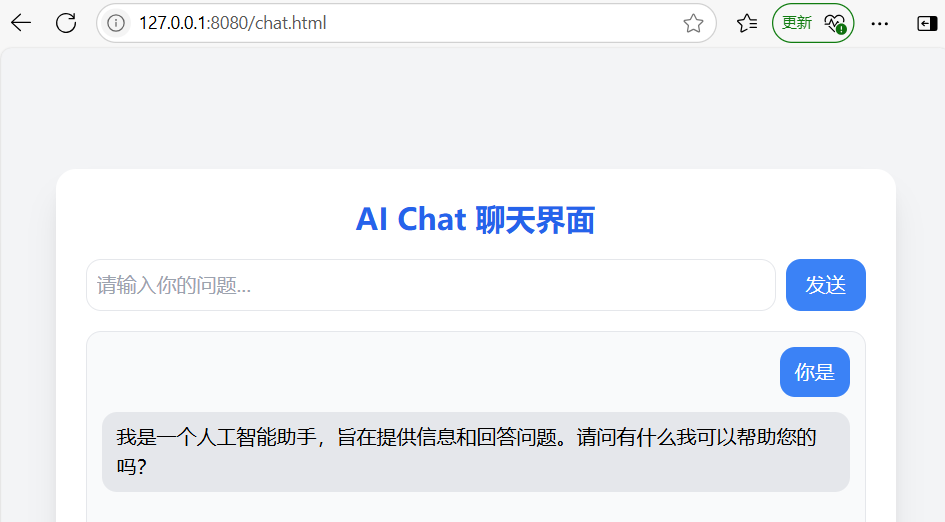
@RequestMapping("/ai")
@RestController
public class ChatGptController {@Autowiredprivate OpenAiChatModel openAiChatModel;@RequestMapping("/chat2")public String chat2(String message){return openAiChatModel.call(message);}
}
Spring AI-聊天模型
在Spring AI框架中,ChatModel和ChatClient构建对话式AI的两大核心接口
ChatClient
ChatClient是对ChatModel封装后更高级的API接口
ChatClient的使用
创建ChatClient然后注入使用
@RequestMapping("/chat")
@RestController
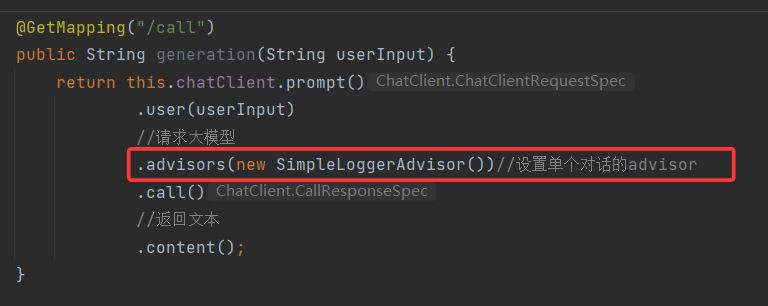
public class ChatClientController {@Autowiredprivate ChatClient chatClient;@GetMapping("/call")public String generation(String userInput) {return this.chatClient.prompt().user(userInput)//请求⼤模型.advisors(new SimpleLoggerAdvisor())//设置单个对话的advisor.call()//返回⽂本.content();}
}
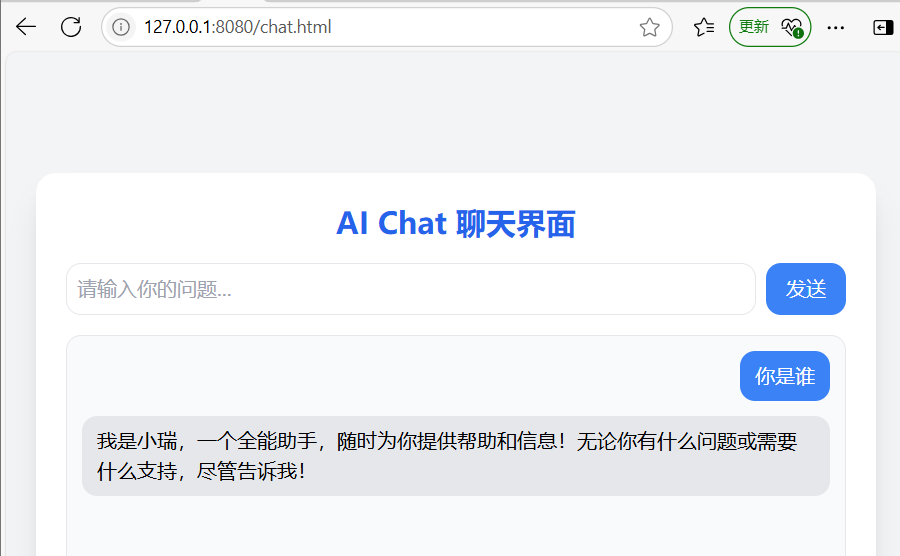
我们也可以为AI设定角色预设
通过defaultSystem来配置系统角色
@Configuration
public class ChatClientConfiguration {@Beanpublic ChatClient chatClient(ChatClient.Builder chatClientBuilder) {return chatClientBuilder.defaultSystem("你的名字叫小瑞,你是一个全能助手").defaultAdvisors(new SimpleLoggerAdvisor())//设置全局的advisor.build();}
}
结构化输出
如果你想从AI大模型接收结构化输出,Spring AI支持将ChatModel/ChatClient方法的返回类型从String更改成其他的类型
生成一份菜单
record Recipe(String dishName, List<String> ingredients){}@GetMapping("/entity")public String entity(String userPut){Recipe recipe=this.chatClient.prompt().user(String.format("请帮我生成%s的食谱",userPut)).call().entity(Recipe.class);return recipe.toString();}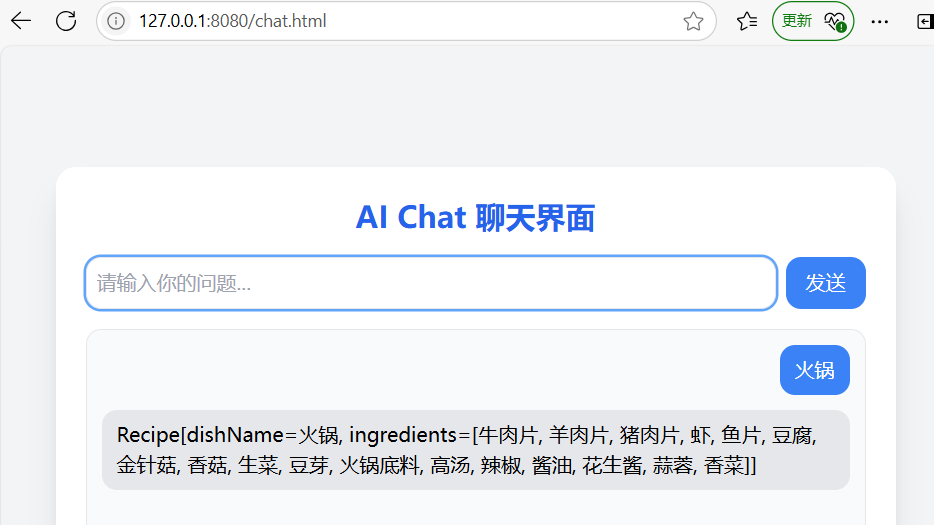
实现流式输出
使⽤ ChatClient 的 stream() ⽅法⽣成实现 Flux<String> 流
就是一点一点输出,不是等待加载完后整体输出
@GetMapping(value = "/stream", produces = "text/html;charset=utf-8")public Flux<String> stream(String userPut){return this.chatClient.prompt().user(userPut).stream().content();}打印日志
Spring AI借用Advisors来实现日志的打印功能的
Spring AI 内置了⼀些Advisor, SimpleLoggerAdvisor 就在其中, 主要功能是记录⽇志
设置日志的级别
logging:level:root: info # 全局默认日志级别org.springframework.ai.chat.client.advisor: debug # 只针对 Spring AI 的 advisor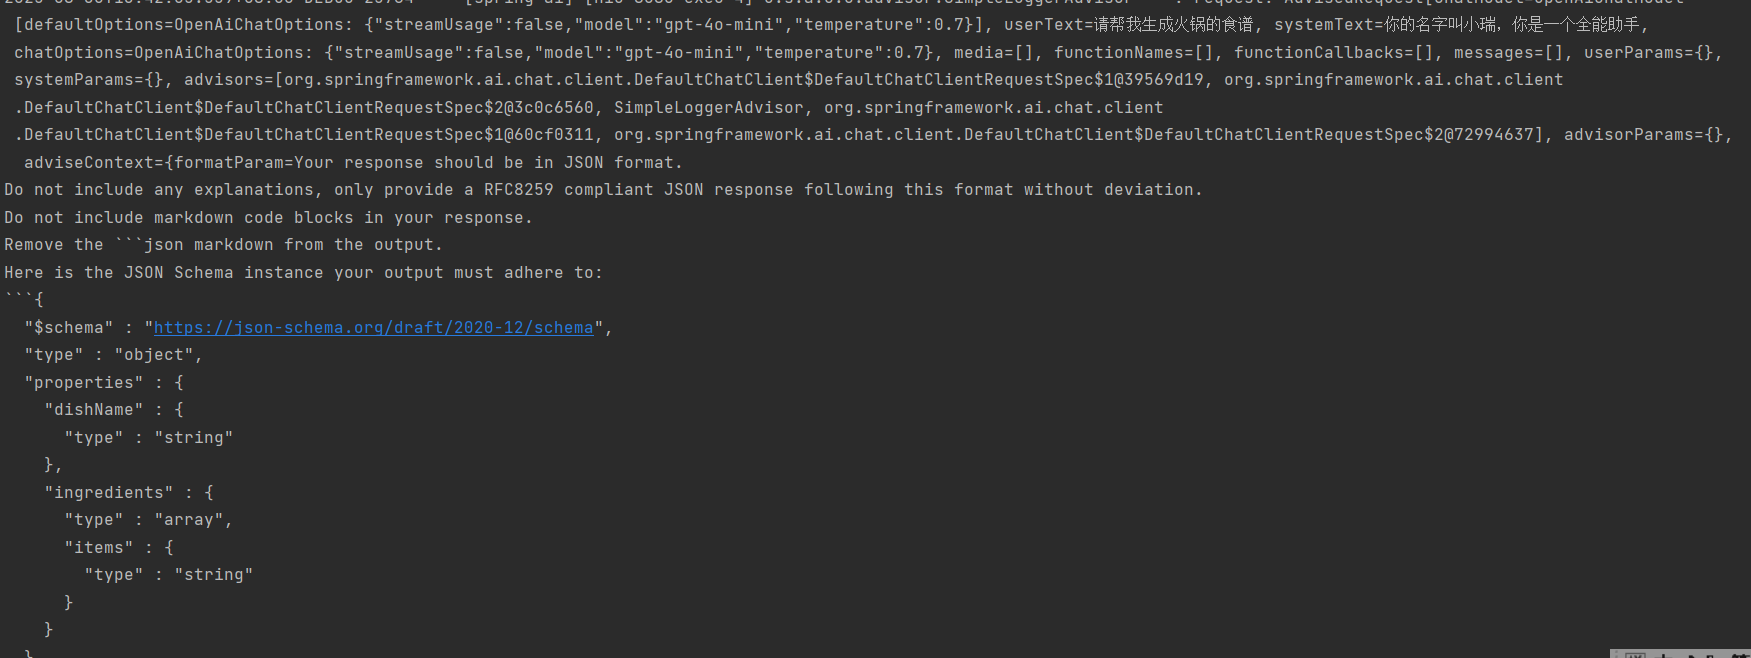
流式编程
SSE协议
Http协议本身设计为无状态的请求-响应模式,是无法做到服务器主动发送消息给客户端,但是通过SSE技术可以实现流式编程,允许服务器向浏览器推送数据流,也就是说,服务器向客⼾端声明,接下来要发送的是流消息(streaming),这时客⼾端不会关闭连接,会⼀ 直等待服务器发送过来新的数据流。
数据格式
数据格式是 纯文本格式
SSE 数据是 一行一行的文本,以 \n(换行符) 分隔,每条事件之间用 空行 分隔。
@RestController
@RequestMapping("/sse")
public class SseController {@RequestMapping("/data")public void data(HttpServletResponse response) throws IOException, InterruptedException {response.setContentType("text/event-stream;charset=utf-8");PrintWriter writer = response.getWriter();for (int i = 0; i < 20; i++) {String s="data:" + new Date() +"\n\n";writer.write(s);writer.flush();Thread.sleep(1000L);}}
}
浏览器端 JS可以这样接收
// 创建 EventSource 对象,指向你的 SSE 接口const evtSource = new EventSource("/sse/data");// 当接收到消息时触发evtSource.onmessage = function(e) {console.log("收到消息:", e.data);注:SSE必须是单向,消息必须以 \n\n 结尾,浏览器会自动在连接断开时尝试重连
使用Flux更优雅的实现SSE协议
public class FluxTest {public static void main(String[] args) throws InterruptedException {Flux<String> flux=Flux.just("apple","banana","pear").delayElements(Duration.ofSeconds(1));flux.map(String::toUpperCase).subscribe(System.out::println);Thread.sleep(5000);}
}
ChatModel
是Sping AI中的核心接口
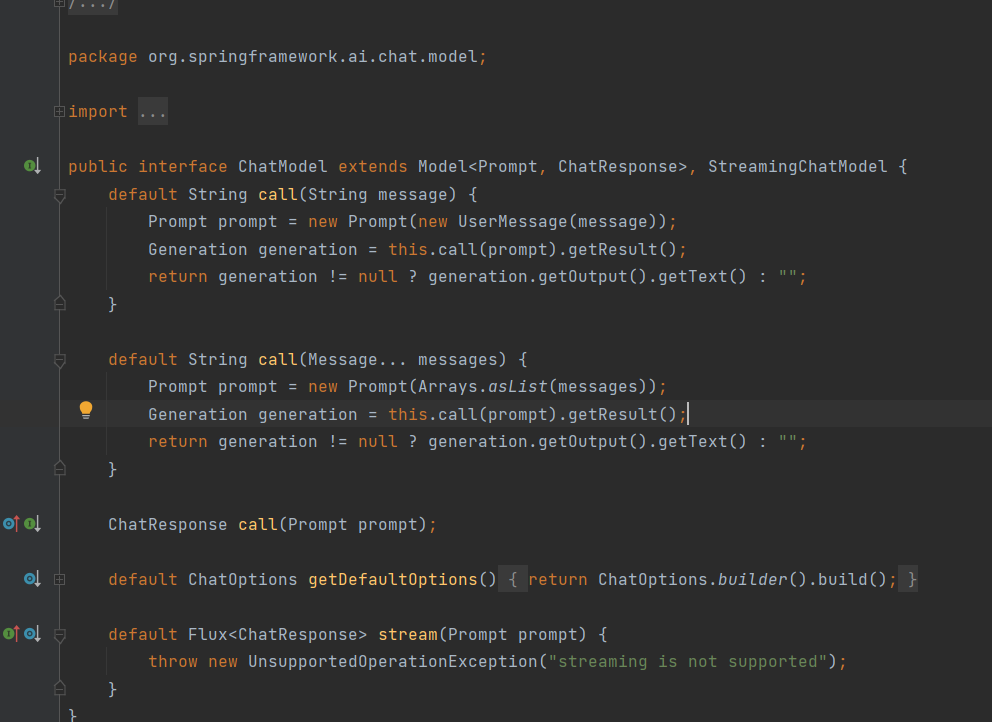
简单对话的实现
@RequestMapping("/ai")
@RestController
public class DeepSeekController {@Autowiredprivate OpenAiChatModel openAiChatModel;@RequestMapping("/chat")public String chat(String message){return openAiChatModel.call(message);}
}
在 chatModel中的Prompt,通常指的是输入给模型的提示词/上下文信息。
@RequestMapping("/chatByPrompt")public String chatByPrompt(String message){Prompt prompt=new Prompt(message);ChatResponse call = openAiChatModel.call(prompt);return call.getResult().getOutput().getText();}角色预设
@RequestMapping("/roleChat")public String roleChat(String message){SystemMessage systemMessage=new SystemMessage("你的名字叫小瑞,你是一个智能的电脑管家助手");UserMessage userMessage=new UserMessage(message);Prompt prompt=new Prompt(systemMessage,userMessage);ChatResponse call = openAiChatModel.call(prompt);return call.getResult().getOutput().getText();}流式输出
@RequestMapping(value = "/streamChat",produces = MediaType.TEXT_EVENT_STREAM_VALUE)public Flux<String> streamChat(String message){Prompt prompt=new Prompt(message);return openAiChatModel.stream(prompt).map(x->x.getResults().get(0).getOutput().getText());}ChatClient 和ChatModel的区别
ChatModel是SpringAI框架中的底层接⼝,直接与具体的⼤语⾔模型交互,提供了简单的call和stream方法,开发者需要手动处理提示词组装其中的细节,使用上灵活,ChatClient对ChatModel进⾏了封装,不需要开发者手动处理其中的细节,提高了开发的效率。
本地部署大模型
我们使用ollama进行本地的部署
我们需要在ollama的官网上 Ollama 下载ollama,安装后,ollama会默认启动
拉取模型deepseek-r1
ollama的使用
引入ollama 的依赖
<dependency><groupId>org.springframework.ai</groupId><artifactId>spring-ai-ollama-spring-boot-starter</artifactId></dependency>配置application.yml
server:port: 8081
spring:application:name: spring-ollama-demoai:ollama:base-url: http://127.0.0.1:11434chat:model: deepseek-r1:1.5b
简单的对话
@RequestMapping("/ollama")
@RestController
public class OllamaController {@Autowiredprivate OllamaChatModel ollamaChatModel;@RequestMapping("/Call")public String Call(String message){return ollamaChatModel.call(message);}@RequestMapping("/stream")public String stream(String message){return ollamaChatModel.stream(new Prompt(message)).toString();}
}
将其封装成ChatClient
@Configuration
public class ChatClientConfiguration {@Beanpublic ChatClient chatClient(OllamaChatModel chatModel){return ChatClient.builder(chatModel).defaultAdvisors(new SimpleLoggerAdvisor()).defaultSystem("你的名字是小瑞").build();}
}
Spring AI Alibaba
Spring AI Alibaba 开源项目基于 Spring AI 构建,是阿里云通义系列模型及服务在 Java AI 应用开发领域的最佳实践,提供高层次的 AI API 抽象与云原生基础设施集成方案,帮助开发者快速构建 AI 应用。
申请阿⾥云百炼平台API-KEY大模型服务平台百炼控制台

获得API-KEY
在项目中引入依赖
<dependency><groupId>com.alibaba.cloud.ai</groupId><artifactId>spring-ai-alibaba-starter</artifactId><version>1.0.0-M6.1</version></dependency>配置.yml
server:port: 8082
spring:application:name: spring-alibaba-demoai:dashscope:api-key: 你的API-KEYchat:options:model: qwen-vl-max-latest #模型名称multi-model: true #是否启⽤多模型
实现简单的对话
@RestController
@RequestMapping("/alibaba")
public class AlibabaController {private final ChatClient chatClient;public AlibabaController(ChatClient chatClient) {this.chatClient = chatClient;}@RequestMapping("/call")public String call(String message){return chatClient.prompt(message).call().content();}@RequestMapping("/stream")public Flux<String> stream(String message){return chatClient.prompt(message).stream().content();}
}
设置默认的系统信息
@BeanChatClient chatClient1(ChatClient.Builder builder){return builder.defaultSystem("你是名字是小瑞").build();}
也可以在创建ChatClient的时候,在调用前修改请求的参数
@BeanChatClient chatClient(ChatClient.Builder builder) {return builder.defaultSystem(" 请你给我回答问题时, 前⾯带⼀个 {word}").build();}@GetMapping("/chat")public String chat(String message, String words) {return chatClient.prompt(message).system(sp->sp.param("word", words)).call().content();}多模态
多模态性指模型同时理解和处理⽂本、图像、⾳频及其他数据格式等多源信息的能⼒
我们借助Spring AI Alibaba来实现多模态
<dependency><groupId>com.alibaba.cloud.ai</groupId><artifactId>spring-ai-alibaba-starter-dashscope</artifactId><version>1.0.0.2</version>
</dependency>
记得在.yml文件中添加,开启多模态
chat:options:model: qwen-vl-max-latest #模型名称multi-model: true #是否启⽤多模型通过上传图片,让AI进行分析
@RestController
@RequestMapping("/multi")
public class ImageController {private final ChatClient chatClient;public ImageController(ChatClient chatClient) {this.chatClient = chatClient;}@GetMapping("/image")public String image(String message) throws Exception {String url = "https://dashscope.oss-cn-beijing.aliyuncs.com/images/dog_and_girl.jpeg";List<Media> mediaList = List.of(new Media(MimeTypeUtils.IMAGE_JPEG, new URI(url)));UserMessage userMessage = UserMessage.builder().text("请分析这张图片并描述内容: "+message).media(mediaList).build();ChatResponse chatResponse = chatClient.prompt(new Prompt(userMessage)).call().chatResponse();return chatResponse.getResult().getOutput().getText();}
}
希望能对大家有所帮助!!!!