Protobuf安装和使用
背景环境
- 系统:macOS sequoia 15.6(Apple M1)
- 最近在研究上报框架,想要设计一套高效精简易使用的跨平台上报框架,刚好在现有项目中已经使用到了protobuf-lite(3.9.2),所以想使用protobuf来作为数据序列化工具,就此研究一下这个工具。
protobuf安装(homebrew&不推荐)
简单起见打算使用homebrew来安装,这里记录一下homebrew的几个操作以加深记忆,在其他软件安装过程中也可以参考用法。
- 首先查看brew维护了哪些版本
brew search protobuf

我这里已经安装过protobuf了,所以在protobuf这里有一个绿色小勾
- 安装protobuf(我们主要是为了要使用protobuf的头文件和编译器protoc)
brew install protobuf
- 安装完成后通过如下命令确认
protoc --version

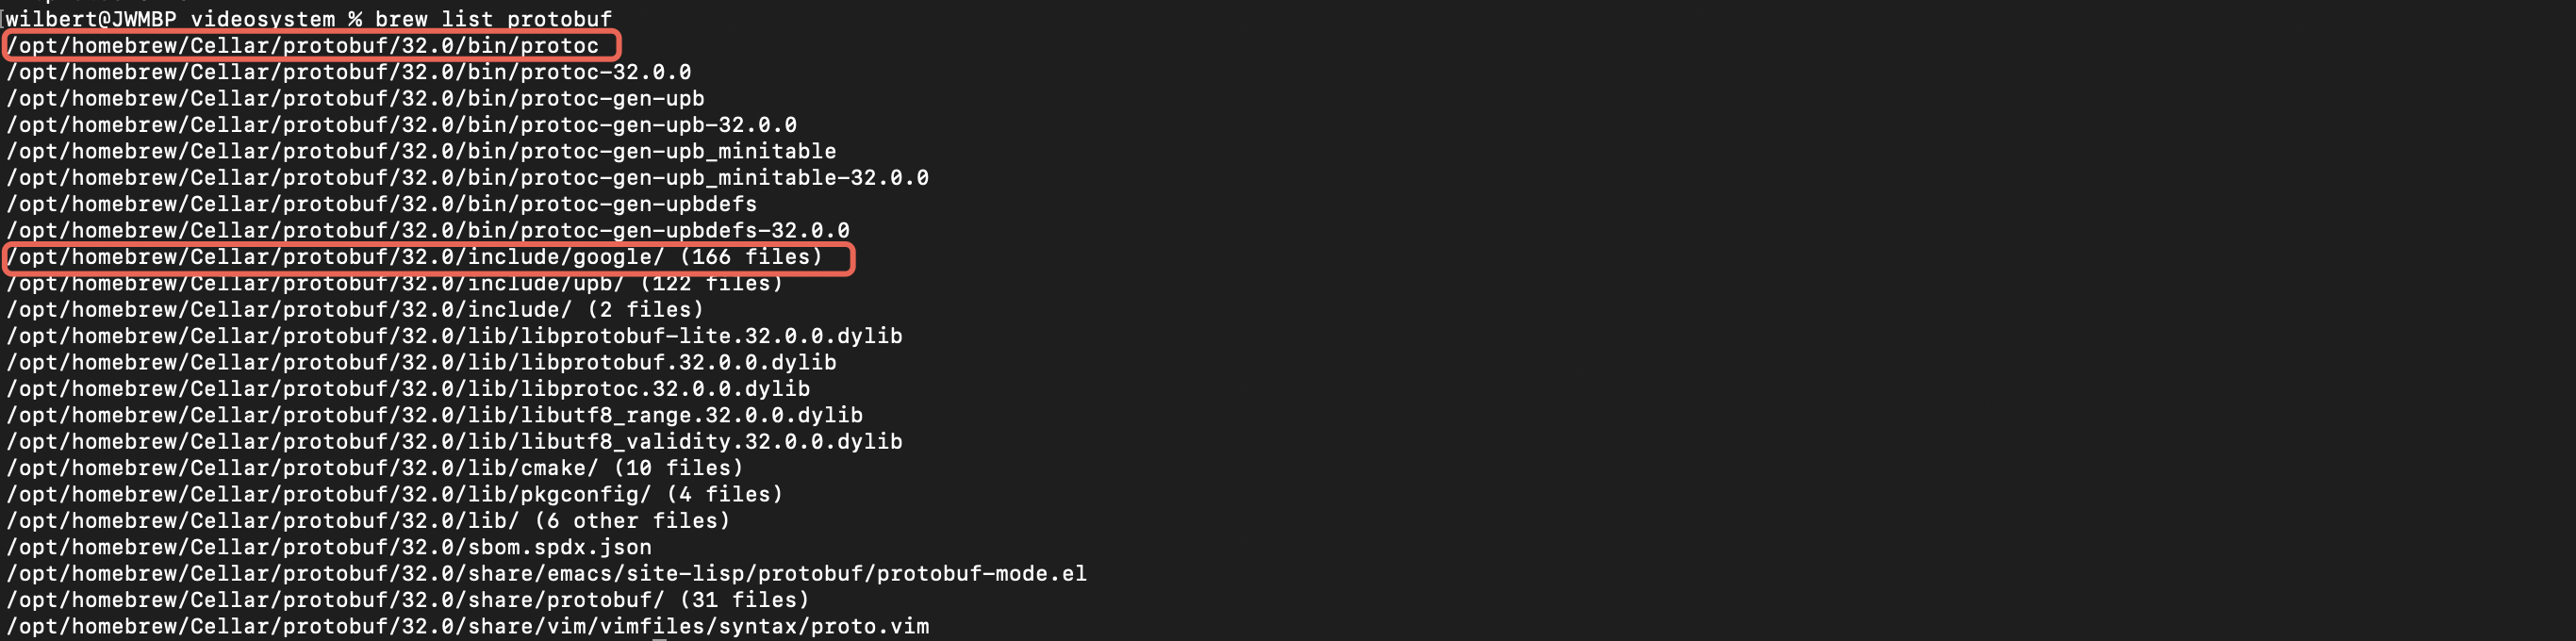
- 确认protoc和头文件安装位置
brew list protobuf
- 踩坑
走完以上步骤后发现代码报错
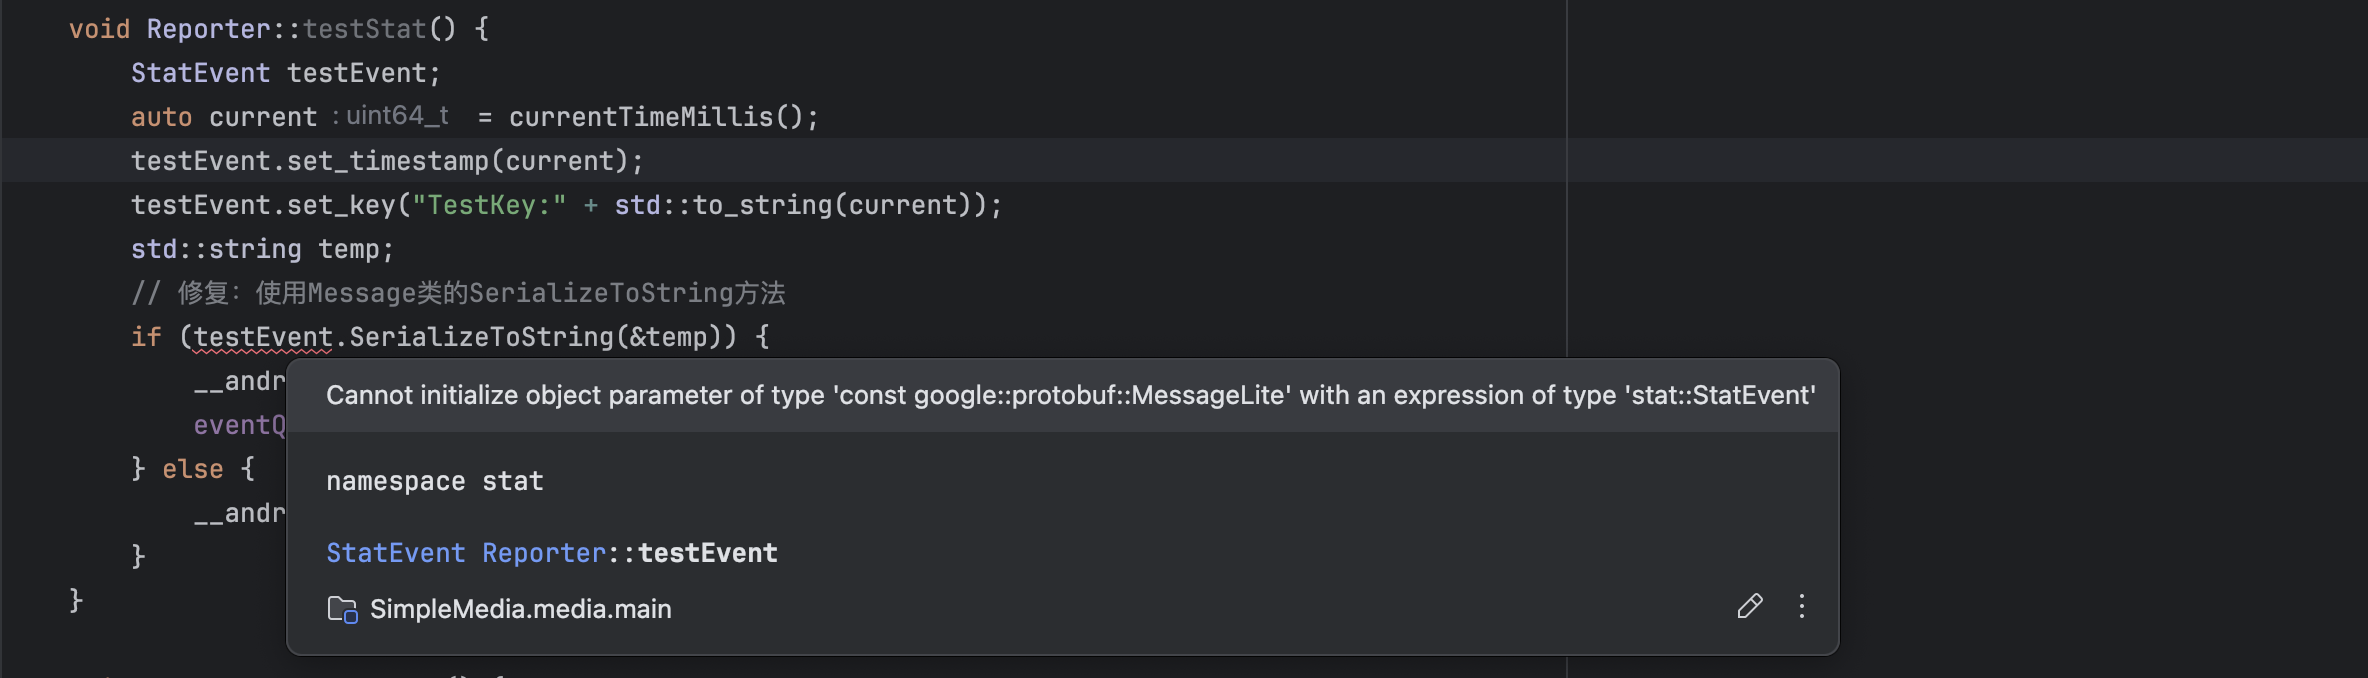
单独看这里可能还无法立即确认为什么我定义的的StatEvent会不是MessageLite类型的,当看到下面这个定义的时候就比较明确了,我项目中的protobuf-lite的版本号为“3009002”,但是我使用homebrew安装的protoc要求版本号不能小于“3021000”,所以报错了。我后续又陆续尝试了protobuf@21,protobuf@29和protobuf@3的版本都无法正常使用,git clone了protobuf代码后查看3.9.x分支的版本号与我本地项目使用的头文件版本号一致,所以决定源码编译protobuf使用。
brew管理多版本小技巧,例如:“brew install protobuf@21”安装完protobuf@21版本后,先使用“brew unlink protobuf"再使用“brew link protobuf@21"
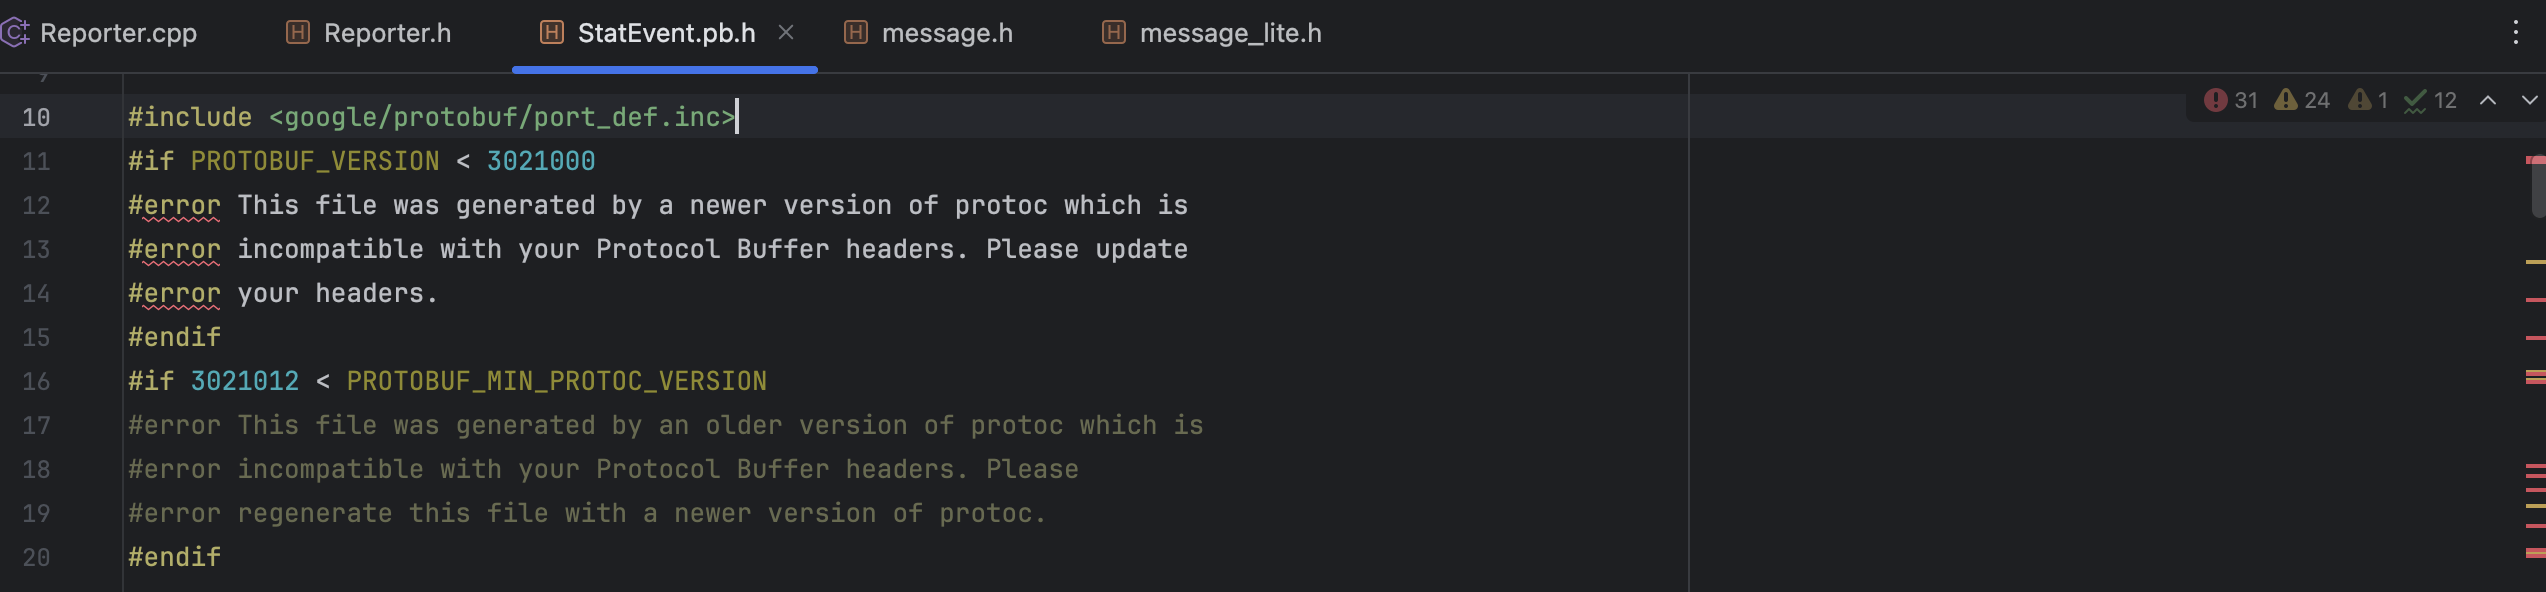
protobuf头文件查看版本号方法,如下图所示,在port_def.inc文件中搜索“PROTOBUF_VERSION”即可

protobuf安装(源码编译&推荐使用)
- 由于前面已经使用brew安装过了一些版本,所以这里首先需要使用“brew unlink protobuf",来取消链接到homebrew为我安装的所有protobuf版本
- 然后使用cd命令切换到protobuf源码目录,并且使用"git checkout 3.9.x"切换到期望的分支3.9.x

- 在项目根目录执行autogen.sh(主要作用为生成configure相关文件),不执行autogen.sh直接configure会报如下所示错误

- 在项目根目录执行configure命令
./configure --prefix=/usr/local/protobuf
- 执行make
- 执行sudo make install
- 执行完成后先执行"protoc --version"确认一下是否正常

- 正常的话再把对应路径添加到环境变量中,我本机是在~/.zshrc中添加 export PATH=“/usr/local/protobuf/bin:$PATH”

- 添加完成后使用“source ~/.zshrc”使该环境变量变更生效,至此源码安装就完成了

protobuf使用
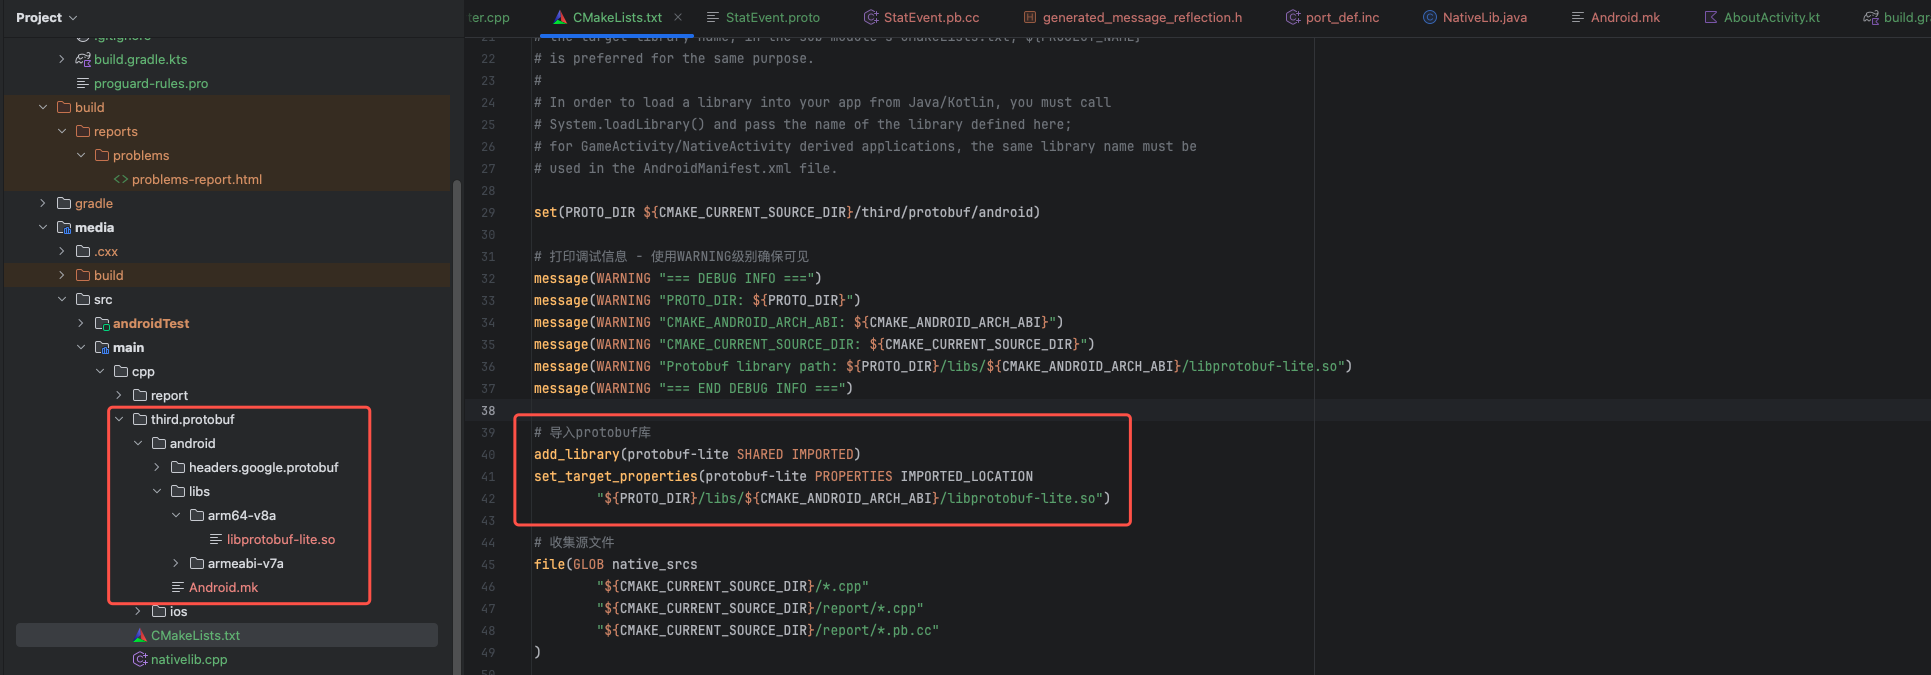
- 拷贝现有的libprotobuf-lite.so以及相关头文件到当前项目的main/cpp/third下,并在CMakeList.txt中添加对应的导入
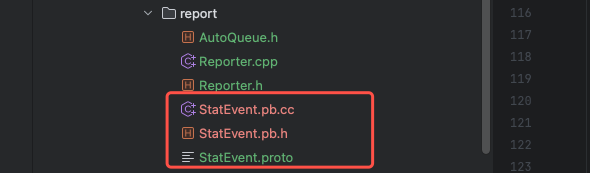
- 编写StatEvent.proto文件,定义message
syntax = "proto2";
package stat;
option optimize_for = LITE_RUNTIME;message StatEvent {required uint64 timestamp = 1;required string key = 2;
}
避坑:由于使用的是lite版本,一定要加上“option optimize_for = LITE_RUNTIME;”,否则会在编译阶段报一些方法未定义的错误,例如:ld.lld: error: undefined symbol: google::protobuf::internal::AddDescriptors(google::protobuf::internal::DescriptorTable const)*
3. 使用protoc编译.proto文件
cd进入所编写的StatEvent.proto所在的目录,并执行如下proto命令,将会在当前目录下生成StatEvent.pb.h和StatEvent.pb.cc
protoc StatEvent.proto --cpp_out=./
4. 由于protobuf依赖了c++_shared,所以需要在build.gradle中添加libc++_shared.so

5. 编写protobuf的序列化和解析测试代码
void Reporter::testStat() {StatEvent testEvent;auto current = currentTimeMillis();testEvent.set_timestamp(current);testEvent.set_key("TestKey:" + std::to_string(current));std::string temp = "testEmpty";// 修复:使用Message类的SerializeToString方法if (testEvent.SerializeToString(&temp)) {__android_log_print(ANDROID_LOG_ERROR, "protoTest", "Reporter::%s %s", __FUNCTION__, temp.c_str());eventQueue.push(std::move(temp));} else {__android_log_print(ANDROID_LOG_ERROR, "protoTest", "Reporter::%s Serialization failed", __FUNCTION__);}}void Reporter::testParse() {std::string temp;auto res = eventQueue.popWhen(temp, [](const std::string& item) -> PopCode {StatEvent testEvent;testEvent.ParseFromString(item);__android_log_print(ANDROID_LOG_ERROR, "protoTest", "popEvent timestamp:%lu, key:%s", testEvent.timestamp(), testEvent.key().c_str());return PopCode::Unknown;});__android_log_print(ANDROID_LOG_ERROR, "protoTest", "Reporter::%s finished with:%d", __FUNCTION__, res);}
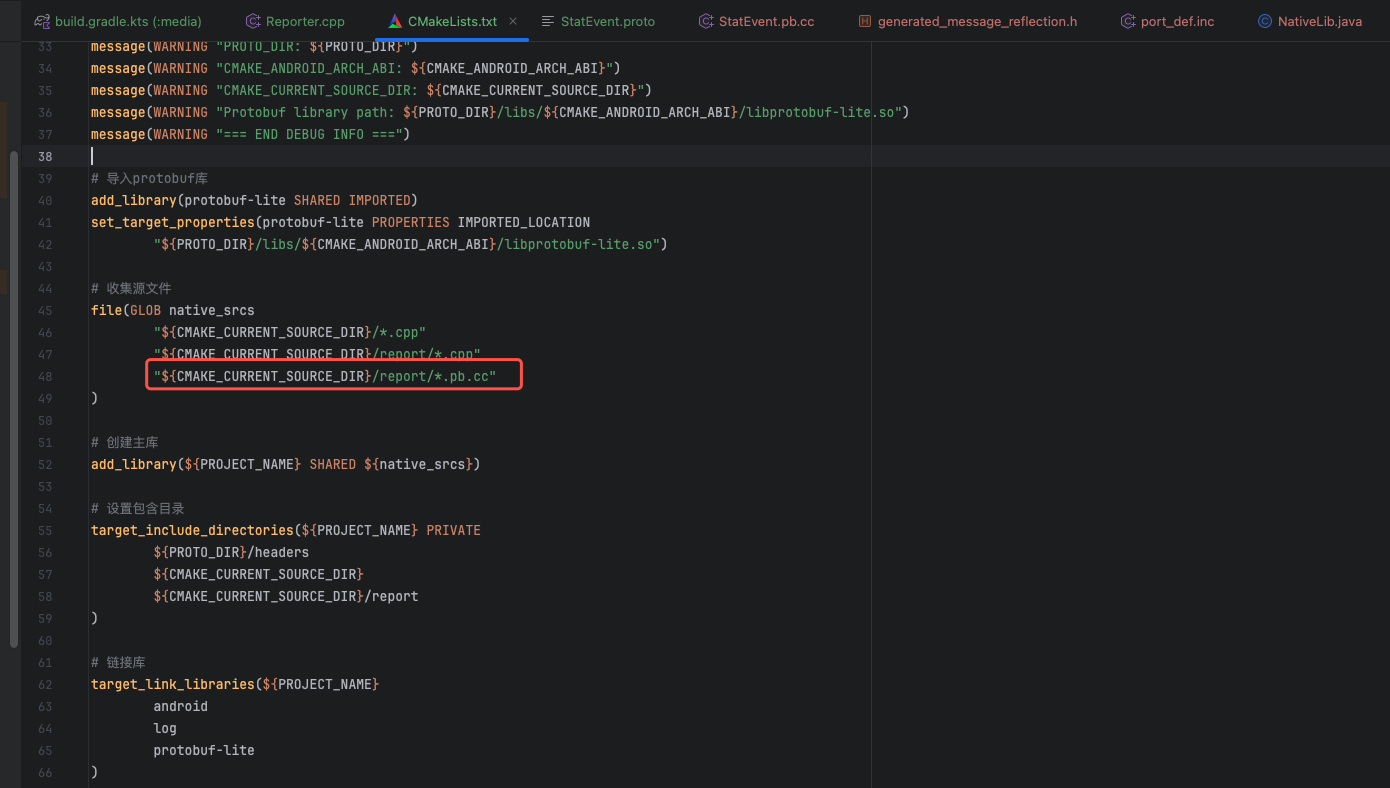
- 编写完整的CMakeList.txt,将StatEvent.pb.cc添加到编译链中,编译并运行代码即可看到效果
项目地址
所有代码位于https://github.com/jarviswrap/SimpleMedia
