MCP终极指南 - 从原理到实战(基础篇)
MCP终极指南 - 从原理到实战(基础篇)内容总结
下面视频讲的很清楚,建议直接看视频。我这里只是做一个回顾
MCP终极指南 - 从原理到实战(基础篇)内容总结链接视频:
一、MCP简要介绍
-
全称:Model Context Protocol(模型上下文协议)
-
核心功能:让大模型更好地使用各类外部工具,例如:
- 让模型使用浏览器查询信息
- 让模型操作Unity编写游戏
- 让模型查询实时路况等
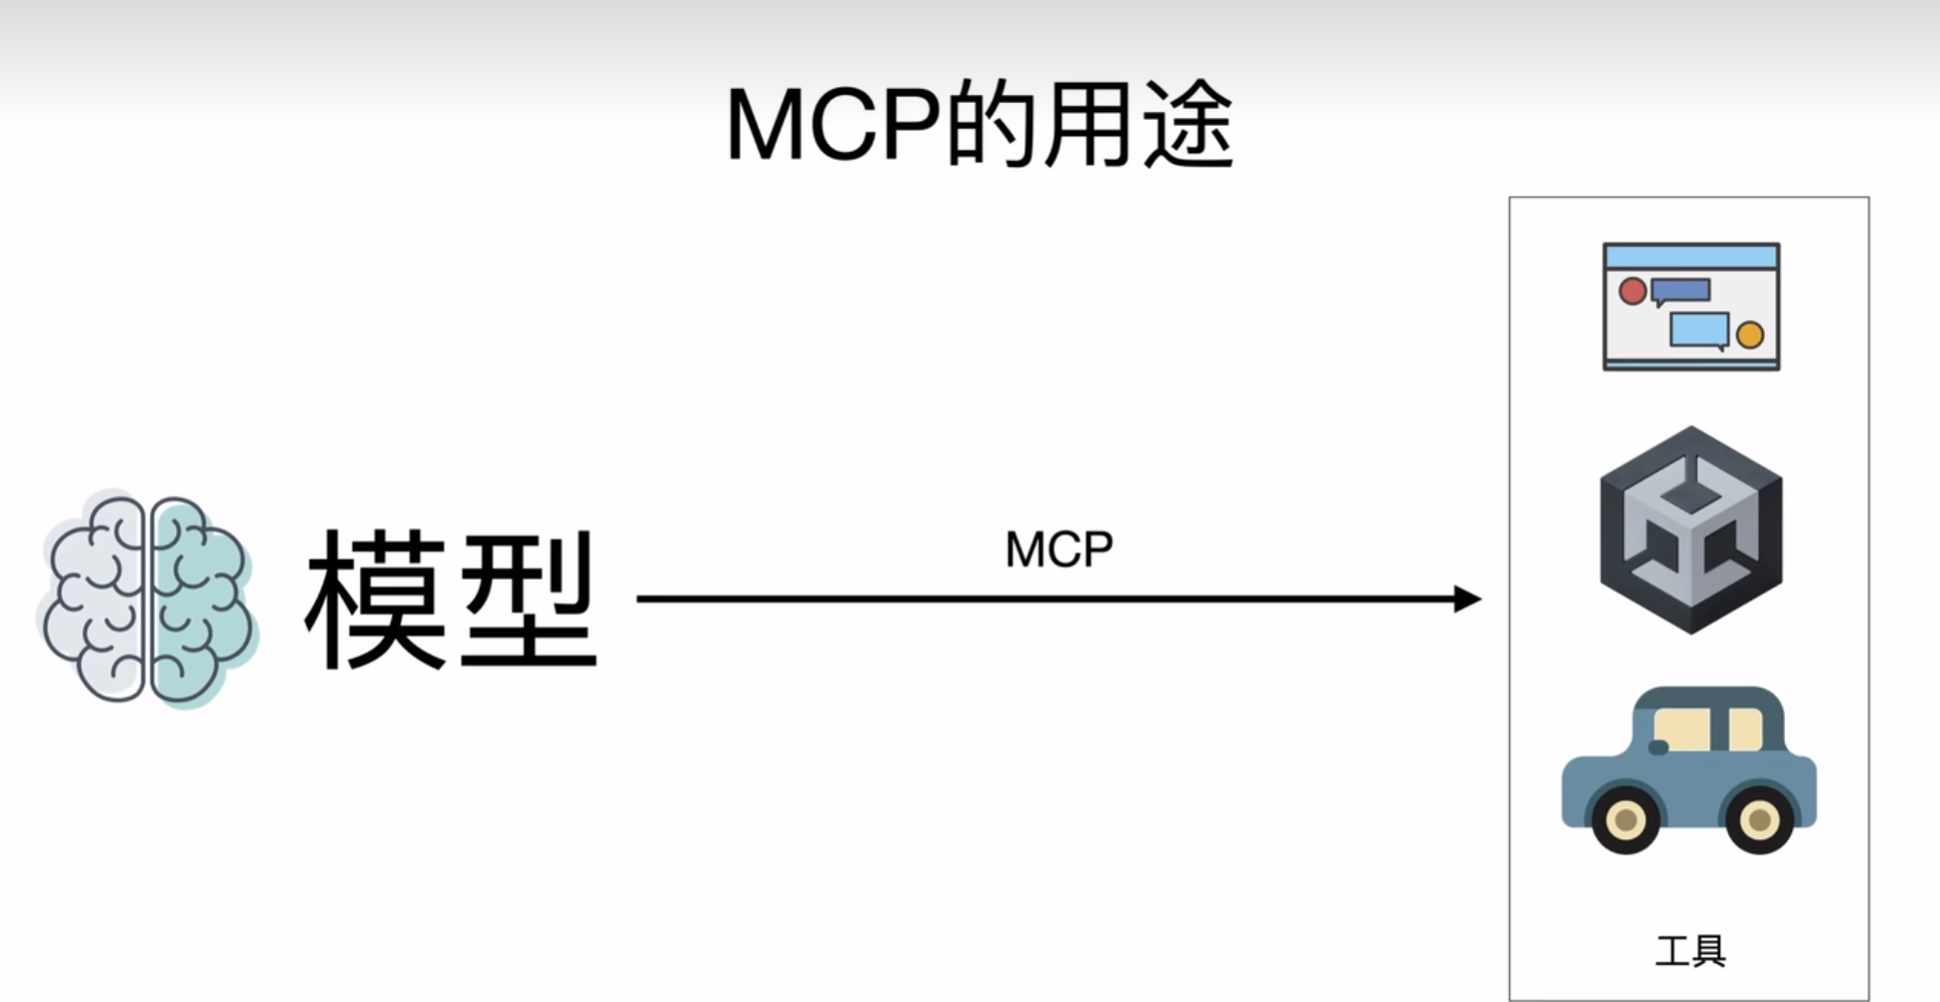
重点理解:大模型只能对话,且不具备记忆能力
二、安装MCP Host(Cline)
- MCP Host定义:支持MCP协议的软件
- 先安装vs code
- 在vs code中搜索并安装 cline 插件
- 安装完成后,点击插件图标即可使用
三、配置Cline用的API Key
- 支持的模型:
- cloud3.7:对MCP支持最好,但价格较高
- deep seek v30324:效果不错,价格较低
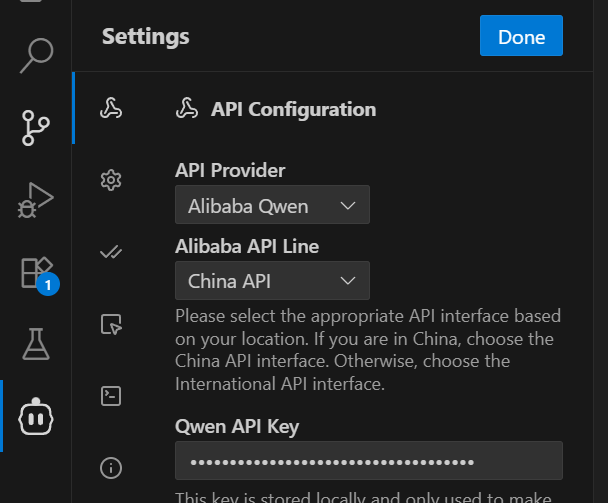
- 以open router为例的配置步骤:
- 登录open router网站,创建API key并妥善保存(创建后无法找回)
- 若使用付费模型,需在open router中充值
- 在cline中配置:选择API provider为open router,填写API key,选择模型(如deep seek v30324或者qwen都可以)
- 在act mode中也需配置相同信息
四、第一个MCP问题
- 示例问题:明天纽约的天气怎么样
- 解决方案:cline建议创建一个天气相关的MCP server来解决该问题
五、概念解释:MCP Server和Tool
- MCP Server:
- 本质:符合MCP协议的程序
- 运行方式:可本地运行(通过node或Python启动),也可联网使用
- 类比:类似手机应用,内置功能模块来解决特定问题
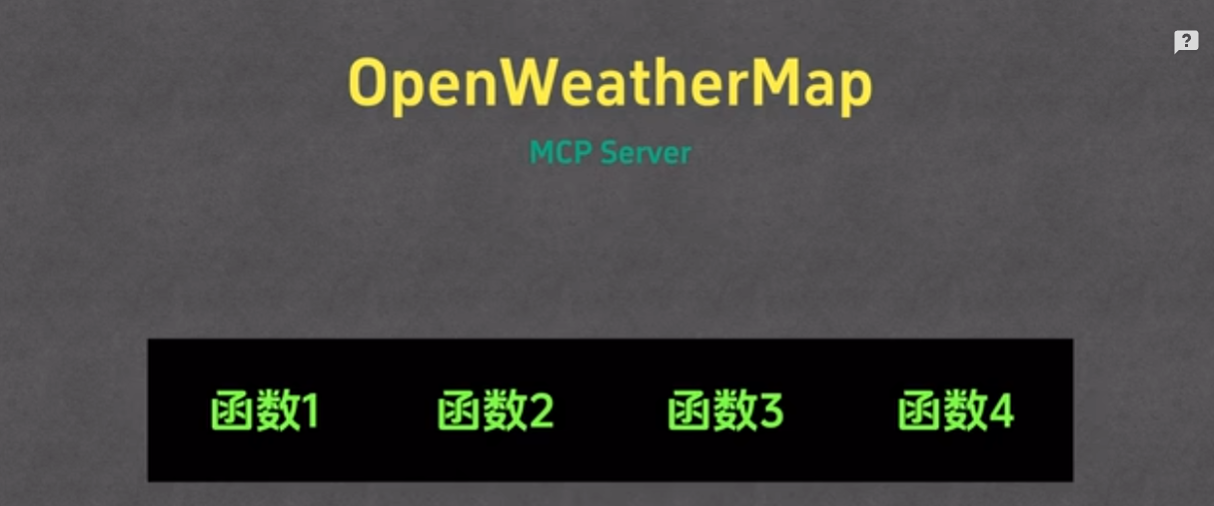
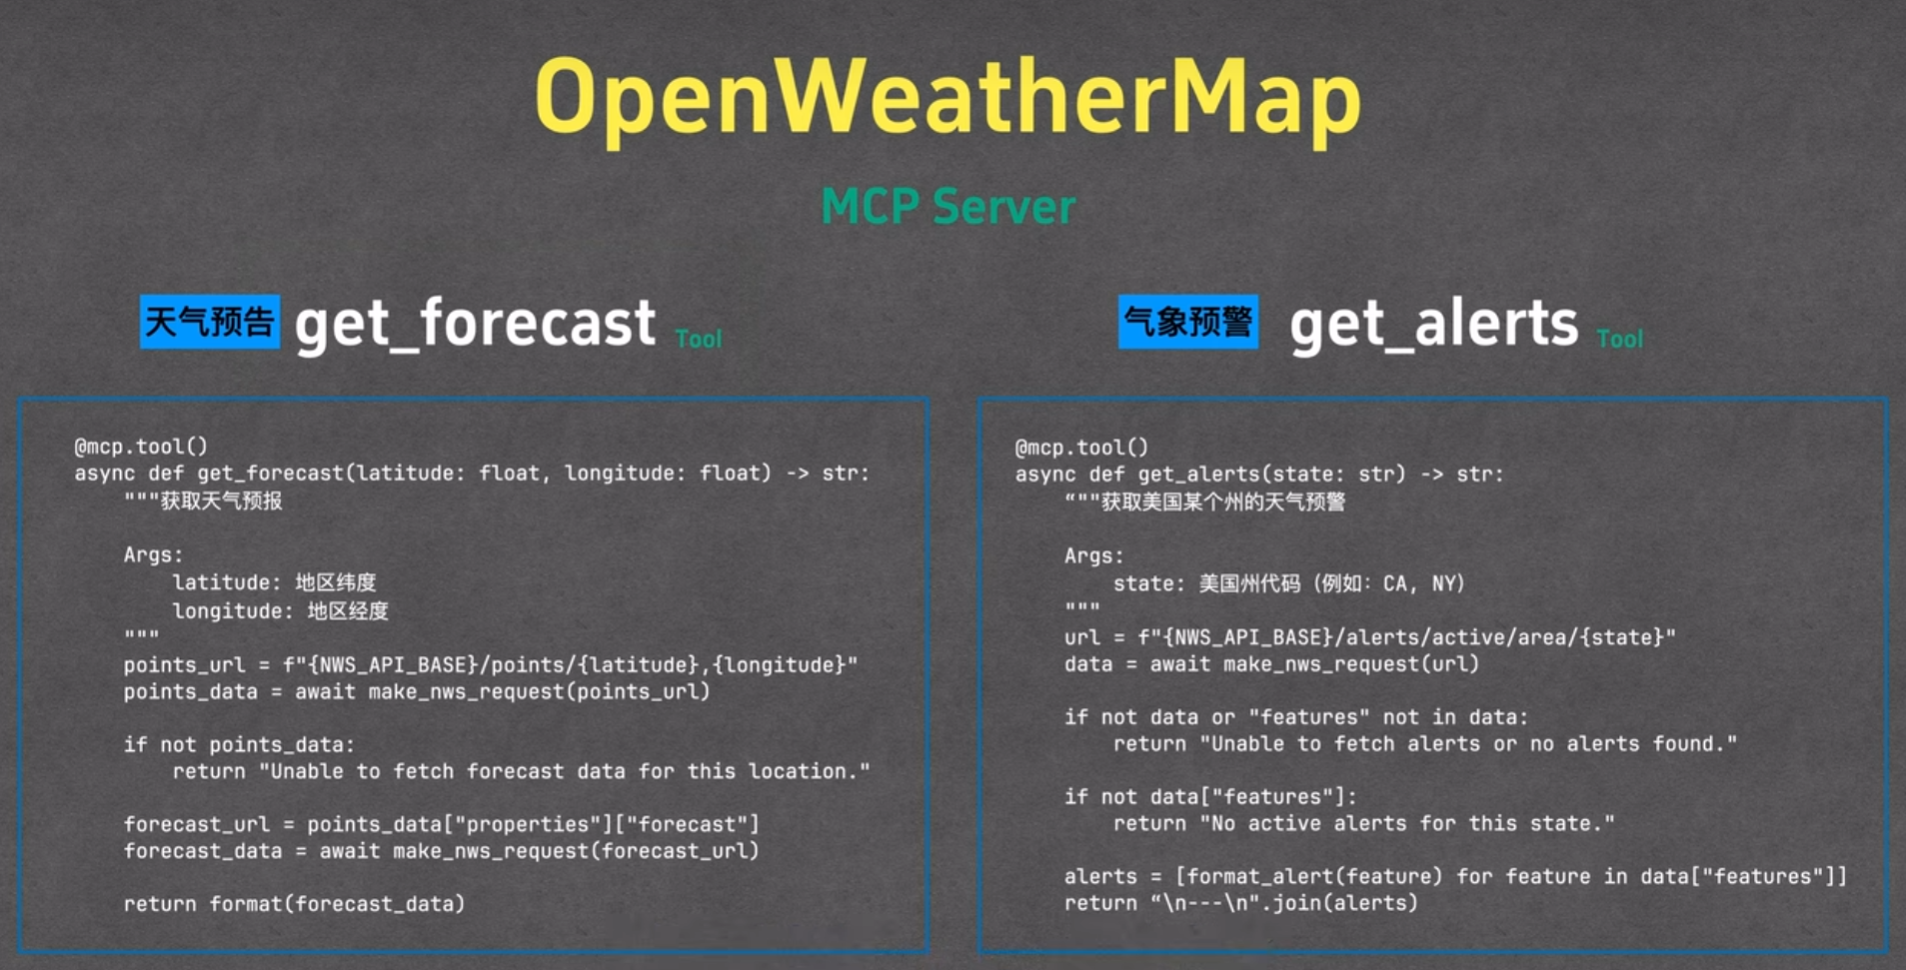
- Tool:
- 本质:编程语言中的函数,是MCP Server内置的功能模块
- 作用:执行特定任务,接收输入并返回输出
- 示例:天气MCP server可能包含get forecast(传入经纬度返回未来几天天气)和get alert(传入地区返回气象预警)等Tool
六、配置MCP Server
对于配置MCP Server,本质就是运行MCP Server,并和host通过握手协议来完成以下工作
- 提供工具预览
- 请求工具调用
- 返回工具调用结果
通信的格式可以是任何约定好的信息格式
- 配置方式:
- 自动安装:让模型主导安装过程,或在MCP server市场直接点击安装。安装的过程就是让cline运行weather.py程序
- 手动配置:在JSON格式文件中填入启动命令等信息,包括:
- MCP server的名字
- 是否禁用(disabled)
- 超时时间(time out)
- 启动程序及参数(command和args)
- 沟通方式(transports type,如STDIO)
- 生效方式:保存配置文件后,cline会自动识别并加载MCP server
{
{"mcpServers": {"weather": {"disabled": false,"timeout": 60,"type": "stdio","command": "uv","args": ["--directory","D:/work/test1_weather/weather","run","weather.py"]}}
}
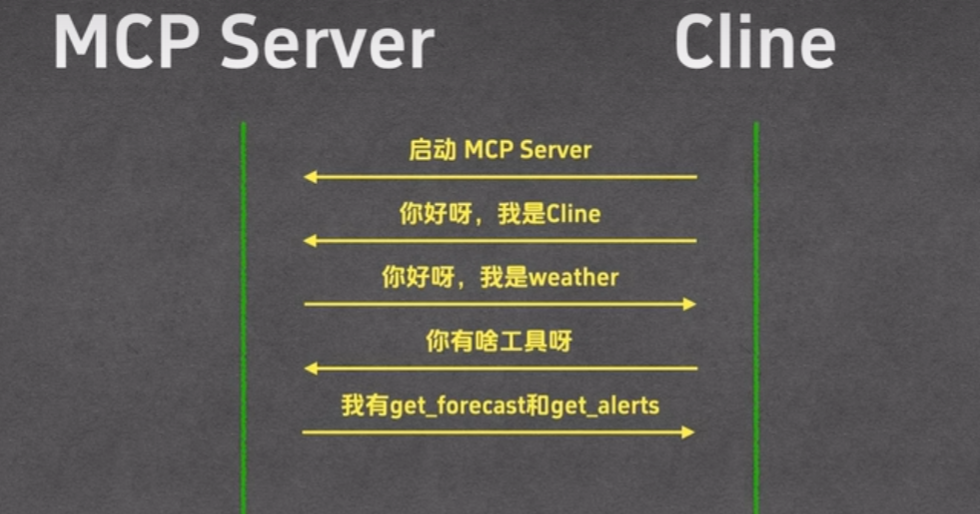
启动MCP SERVER之后,host会和server进行协议交流(握手,相互交流下各自的信息),方式就是通过传递json,也可以是xml的任何约定好的格式
七、使用MCP Server
MCP server代码:这里我自己加了一个自动截图的功能测试
from typing import Any
import httpx
from mcp.server.fastmcp import FastMCP# Initialize FastMCP server
mcp = FastMCP("weather", log_level="ERROR")# Constants
NWS_API_BASE = "https://api.weather.gov"
USER_AGENT = "weather-app/1.0"async def make_nws_request(url: str) -> dict[str, Any] | None:"""Make a request to the NWS API with proper error handling."""headers = {"User-Agent": USER_AGENT,"Accept": "application/geo+json"}async with httpx.AsyncClient() as client:try:response = await client.get(url, headers=headers, timeout=30.0)response.raise_for_status()return response.json()except Exception:return Nonedef format_alert(feature: dict) -> str:"""Format an alert feature into a readable string."""props = feature["properties"]return f"""
Event: {props.get('event', 'Unknown')}
Area: {props.get('areaDesc', 'Unknown')}
Severity: {props.get('severity', 'Unknown')}
Description: {props.get('description', 'No description available')}
Instructions: {props.get('instruction', 'No specific instructions provided')}
"""@mcp.tool()
async def get_alerts(state: str) -> str:"""Get weather alerts for a US state.Args:state: Two-letter US state code (e.g. CA, NY)"""url = f"{NWS_API_BASE}/alerts/active/area/{state}"data = await make_nws_request(url)if not data or "features" not in data:return "Unable to fetch alerts or no alerts found."if not data["features"]:return "No active alerts for this state."alerts = [format_alert(feature) for feature in data["features"]]return "\n---\n".join(alerts)@mcp.tool()
async def get_forecast(latitude: float, longitude: float) -> str:"""Get weather forecast for a location.Args:latitude: Latitude of the locationlongitude: Longitude of the location"""# First get the forecast grid endpointpoints_url = f"{NWS_API_BASE}/points/{latitude},{longitude}"points_data = await make_nws_request(points_url)if not points_data:return "Unable to fetch forecast data for this location."# Get the forecast URL from the points responseforecast_url = points_data["properties"]["forecast"]forecast_data = await make_nws_request(forecast_url)if not forecast_data:return "Unable to fetch detailed forecast."# Format the periods into a readable forecastperiods = forecast_data["properties"]["periods"]forecasts = []for period in periods[:5]:  # Only show next 5 periodsforecast = f"""
{period['name']}:
Temperature: {period['temperature']}°{period['temperatureUnit']}
Wind: {period['windSpeed']} {period['windDirection']}
Forecast: {period['detailedForecast']}
"""forecasts.append(forecast)return "\n---\n".join(forecasts)
import os
import time@mcp.tool()
def take_screenshots() -> str:"""每隔5秒截图一次,保存到当前目录的 pick 文件夹,累计10张后停止。"""try:import pyautoguiexcept ImportError:return "请先安装 pyautogui 库:pip install pyautogui"save_dir = os.path.join(os.getcwd(), "pick")os.makedirs(save_dir, exist_ok=True)for i in range(1, 11):img = pyautogui.screenshot()filename = os.path.join(save_dir, f"screenshot_{i:02d}.png")img.save(filename)time.sleep(5)return "截图已完成,已保存10张图片到 pick 文件夹。"if __name__ == "__main__":# Initialize and run the servermcp.run(transport='stdio')
- 以查询纽约天气为例:
- 开启配置好的天气MCP server
- 再次询问纽约明天的天气,cline会发现该server及其中的get forecast Tool
- cline填入纽约经纬度,经用户确认后,调用Tool获取天气信息
- 模型对信息进行总结,给出纽约明天的天气情况及相关建议
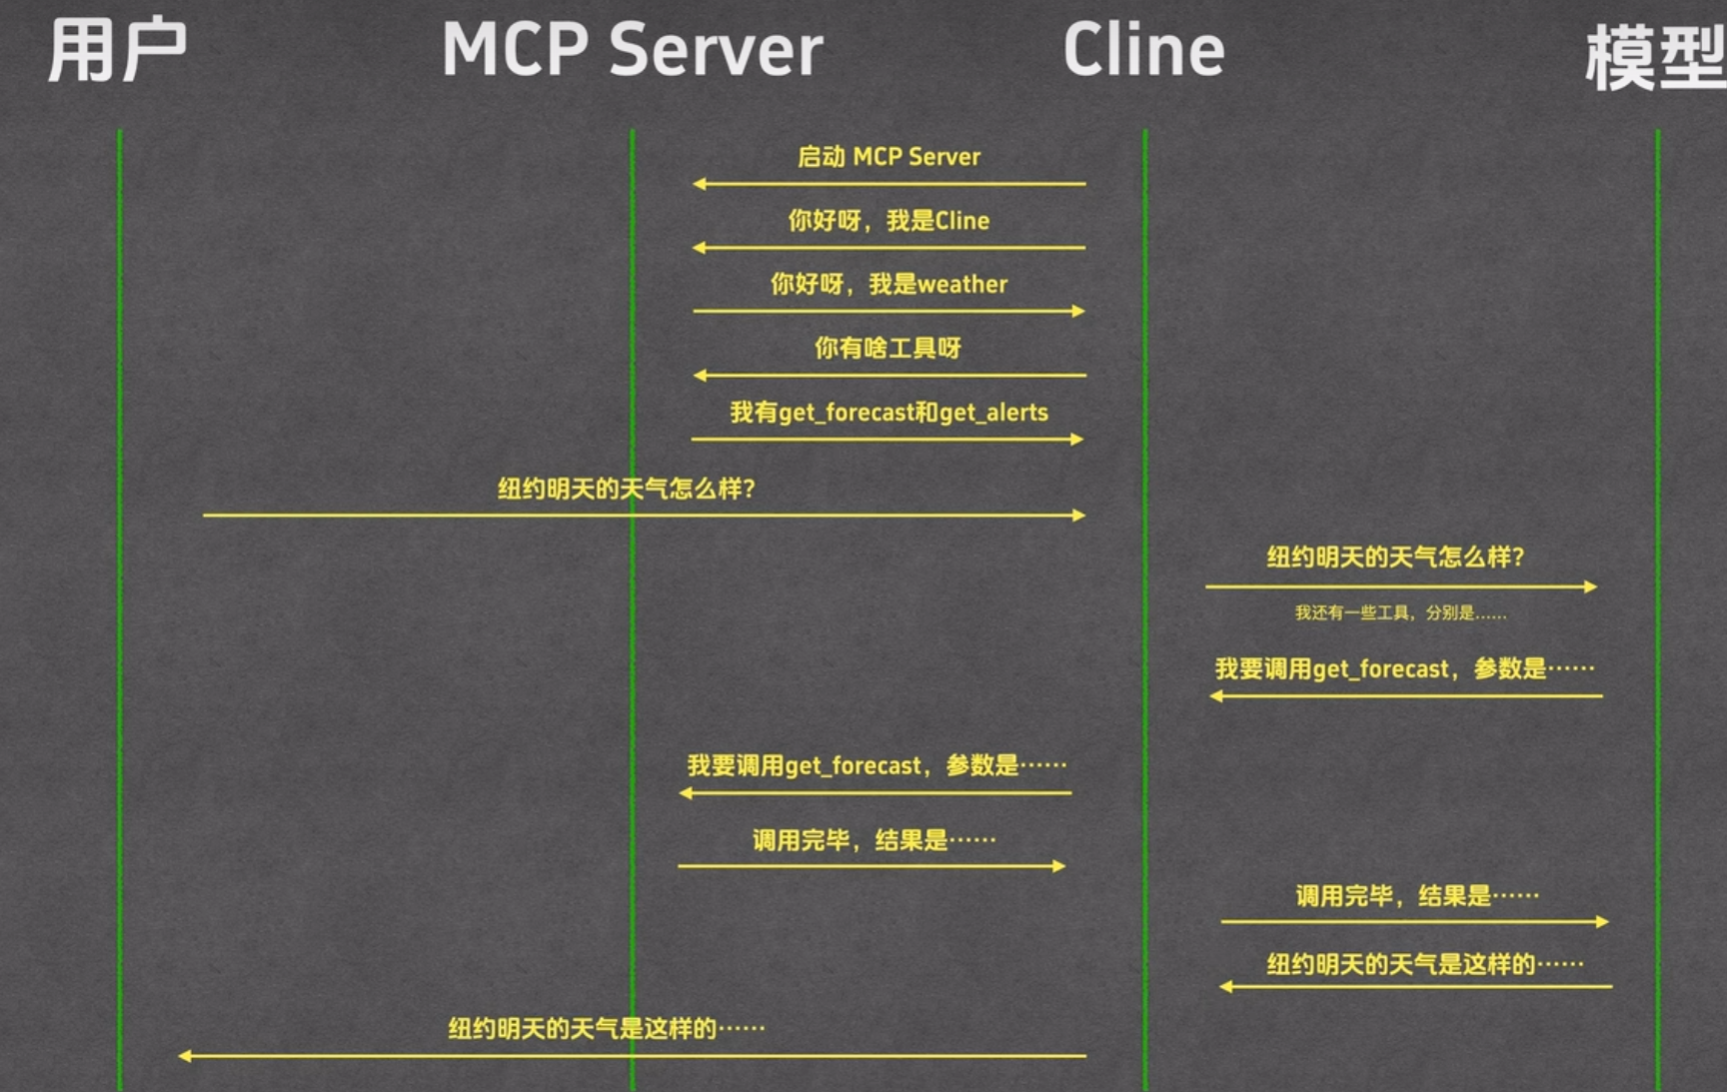
八、MCP交互流程详解
- 配置并保存MCP server后,cline执行程序,与server交互获取Tool列表
- 用户提问后,cline将问题和Tool列表传给模型(这里是使用JSON的格式)
- 模型决定需要调用的Tool及参数,并告知cline
- cline调用对应MCP server的Tool,获取结果
- cline将结果返回给模型,模型对结果进行总结
- 模型将答案反馈给cline,cline再将答案返回给用户
九、如何使用他人制作的MCP Server
- 获取渠道:MCP市场(如MCP.so、mcp market.com、smedery.AI等)
- 常见编写语言:Python、node,对应的启动程序一般是UVX或NPX
(一)uvx部分
- UVX:u v to run命令的缩写,用于运行Python程序(UV是Python界的包管理软件)
- 使用步骤:
- 安装UV(可从UV的GITHUB仓库获取安装命令)
- 在MCP市场找到目标MCP server(如fetch,用于抓取网页内容),复制其UVX配置命令
- 在cline的配置文件中粘贴并格式化命令,点击安装
- 若首次执行因下载耗时导致超时,可先在终端执行命令完成下载,再在cline中点击retry connection重新加载
(二)npx部分
- NPX:用于运行node程序,是node的一部分
- 使用步骤:
- 安装node js(从官方网站下载安装)
- 在MCP市场找到目标MCP server(如hot news,用于拉取新闻),复制其NPX配置命令
- 在cline的配置文件中粘贴命令,完成加载
- 若加载超时,可先在终端执行命令完成下载,再在cline中重新加载
- 使用时,新建对话提问,经用户确认后,模型调用Tool并总结结果返回
以上就是MCP调用的流程,下一篇会是对host和mcp server交流的细节。