【Dify】分享一篇之前部署过的过程
全新Ubuntu服务器中部署
帮助文件:https://docs.dify.ai/v/zh-hans
git地址:https://github.com/langgenius/dify
参考社区版部署说明:https://docs.dify.ai/v/zh-hans/getting-started/install-self-hosted/local-source-code
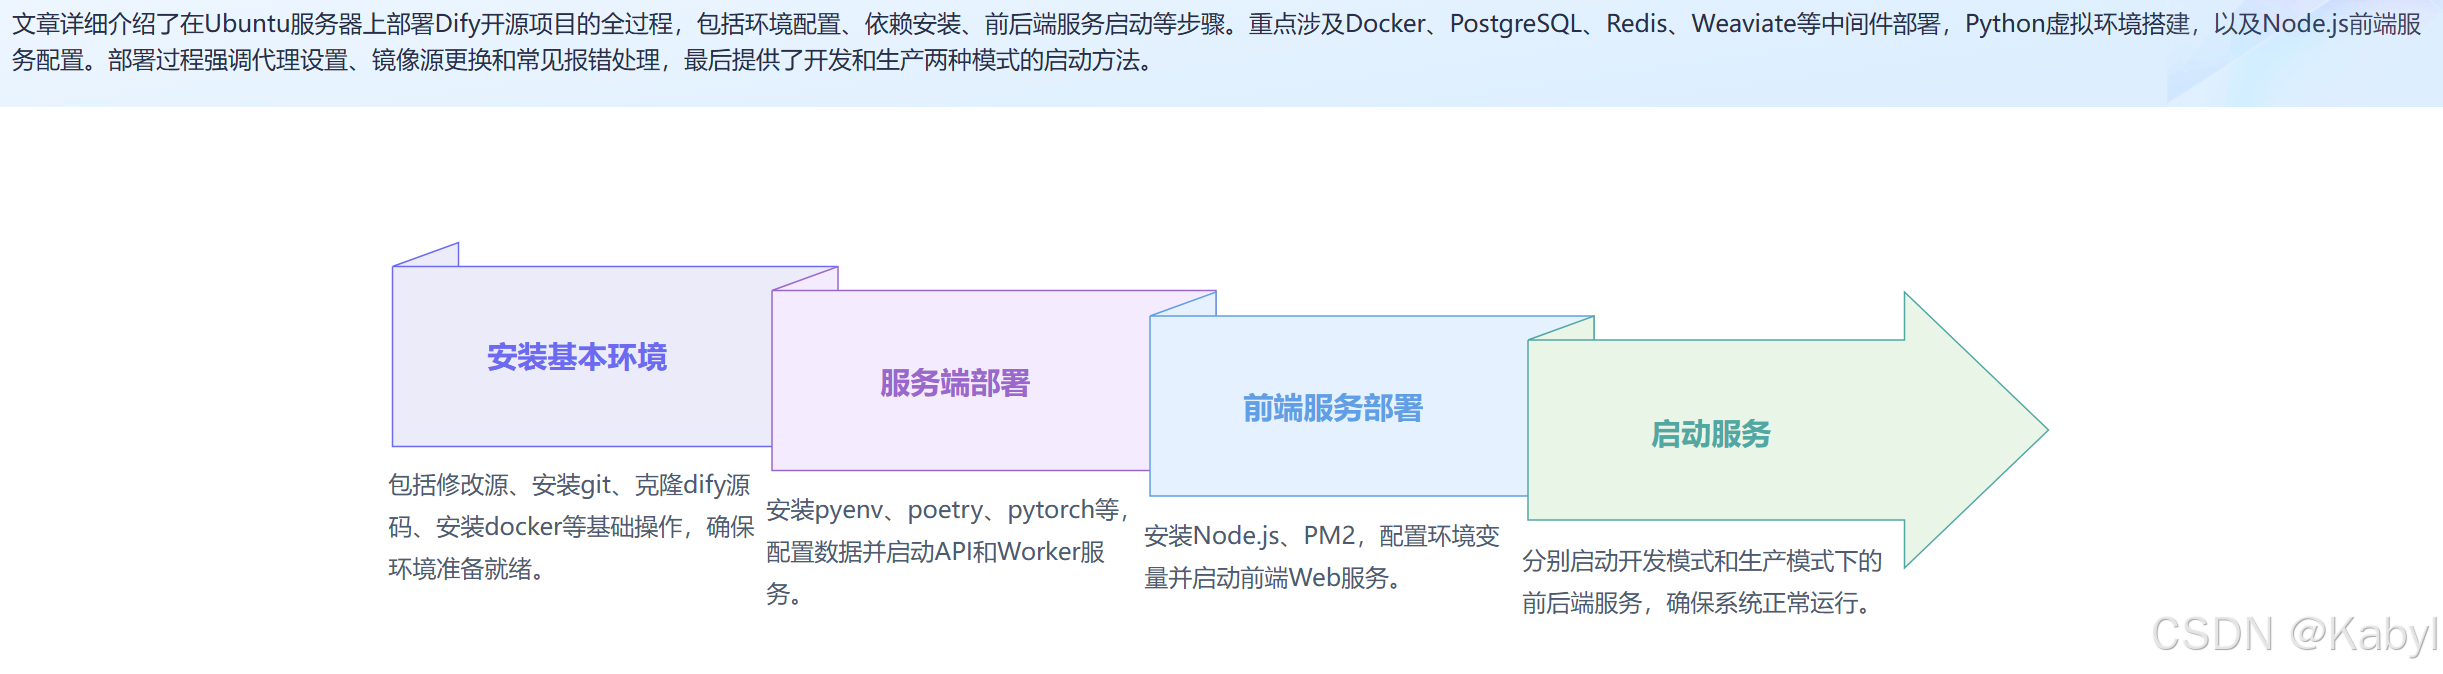
1 安装基本环境
1.1 修改源
备份源:
cp /etc/apt/sources.list /etc/apt/sources.list.bak
修改源:
建议两个源都放进来,否则 update的时候会报错。(当然,配了代理,就可以直接用原生的源操作了,不需要配置)
# 清华源
deb https://mirrors.tuna.tsinghua.edu.cn/ubuntu/ focal main restricted universe multiverse
deb-src https://mirrors.tuna.tsinghua.edu.cn/ubuntu/ focal main restricted universe multiverse
deb https://mirrors.tuna.tsinghua.edu.cn/ubuntu/ focal-updates main restricted universe multiverse
deb-src https://mirrors.tuna.tsinghua.edu.cn/ubuntu/ focal-updates main restricted universe multiverse
deb https://mirrors.tuna.tsinghua.edu.cn/ubuntu/ focal-backports main restricted universe multiverse
deb-src https://mirrors.tuna.tsinghua.edu.cn/ubuntu/ focal-backports main restricted universe multiverse
# 阿里源
deb http://mirrors.aliyun.com/ubuntu/ focal main restricted universe multiverse
deb-src http://mirrors.aliyun.com/ubuntu/ focal main restricted universe multiverse
deb http://mirrors.aliyun.com/ubuntu/ focal-security main restricted universe multiverse
deb-src http://mirrors.aliyun.com/ubuntu/ focal-security main restricted universe multiverse
deb http://mirrors.aliyun.com/ubuntu/ focal-updates main restricted universe multiverse
deb-src http://mirrors.aliyun.com/ubuntu/ focal-updates main restricted universe multiverse
deb http://mirrors.aliyun.com/ubuntu/ focal-backports main restricted universe multiverse
deb-src http://mirrors.aliyun.com/ubuntu/ focal-backports main restricted universe multiverse# 以下安全更新软件源包含了官方源与镜像站配置,如有需要可自行修改注释切换
deb http://security.ubuntu.com/ubuntu/ focal-security main restricted universe multiverse
deb-src http://security.ubuntu.com/ubuntu/ focal-security main restricted universe multiverse
更新之前一定确认系统的时间,如果日期不正确,需要同步日期
同时,以下所有部署,均实在开代理的条件下完成的,无代理基本上过不去,使用系统原生的官方源。
安装ntpdate :sudo apt install ntpdate
同步时间:sudo ntpdate time.nist.gov
然后再执行 apt update
更新之后,上面的镜像源只保留其中一种即可
1.2 安装git
apt update
apt install git
1.3 克隆dify源码
cd /data/
git clone https://github.com/langgenius/dify.git
克隆成功的情况,转到/data目录下
cd /data/
此处如果克隆不下来,从网页上下载zip包拷贝进去。下面为源文件。
暂时无法在飞书文档外展示此内容
cd
cd /data/
unzip dify-main.zip
1.4 安装docker
由于国内禁用了docker官网资源,很多教程已经不适用
参考链接:
https://zhuanlan.zhihu.com/p/588264423
https://github.com/docker
本次部署的系统为: Ubuntu 22.04.3 LTS ,以下部署步骤记录。
step 0. 安装设置仓库必须的工具
sudo apt update
sudo apt install -y ca-certificates curl gnupg lsb-release
step 1. 添加阿里的 Docker 镜像仓库证书
curl -fsSL https://mirrors.aliyun.com/docker-ce/linux/ubuntu/gpg | sudo gpg --dearmor -o /etc/apt/keyrings/aliyun-docker.gpg
step 2. 添加仓库
echo \"deb [arch=$(dpkg --print-architecture) signed-by=/etc/apt/keyrings/aliyun-docker.gpg] https://mirrors.aliyun.com/docker-ce/linux/ubuntu \$(lsb_release -cs) stable" | sudo tee /etc/apt/sources.list.d/docker.list > /dev/null
step 3. 安装
安装最新版的 docker-ce。
sudo apt update
sudo apt install -y docker-ce
step 4. 启动
在 WSL 上,如果未开启 systemd,docker 不会自启动,每次都需要手动执行下面的命令。
sudo service docker start
其他系统安装完就自己启动了,不需要任何操作。
step 5. 验证
sudo docker info
以下内容参考,也可以操作,本次未用到。
基本配置
将当前用户添加到 docker 用户组
每次都用 sudo 执行 docker 命令也太麻烦了,可以将当前用户添加到 docker 用户组,以后就不需要 sudo 了。
sudo usermod -aG docker $USER
newgrp docker
如果报错说不存在 docker group,就先用下面的命令创建 docker group,然后再执行上面添加用户到组的命令。
sudo groupadd docker
配置 ustc 的 docker hub 镜像
国内的 docker hub 镜像都下架了。本段失效
执行 docker image pull 时默认会去 https://hub.docker.com/ 拖镜像,但网速可能会比较慢。可以配置国内的第三方 registry,他们会缓存用户拖过的镜像,下载会快很多。
在 /etc/docker/daemon.json 加入如下配置。
{"registry-mirrors": ["https://docker.mirrors.ustc.edu.cn/"]}
ustc 的这个 registry 是我知道的唯一不需要申请账户的。如果你有其他 registry,也可以添加到上面的列表中。
不管在这个文件中写入了什么配置,都不会自动生效,一般都得重启。
一般 ubuntu 系统都是使用 systemd 启动 docker,要执行下面的指令才能让上面的配置生效:
sudo systemctl daemon-reload
sudo systemctl restart docker
1.5 PostgresSQL / Redis / Weaviate
PostgreSQL(通常简称为Postgres)是一个功能强大的开源对象-关系数据库系统(ORDBMS)。它支持几乎所有的SQL标准,并提供了大量的额外特性,使得它非常灵活和强大。PostgreSQL以其可靠性、数据完整性、强大的功能集和对复杂查询的高效处理而闻名。它是许多企业级应用和互联网服务的首选数据库解决方案。
Redis是一个开源的、内存中的数据结构存储系统,它可以用作数据库、缓存和消息中间件。Redis支持多种类型的数据结构,如字符串(strings)、哈希(hashes)、列表(lists)、集合(sets)、有序集合(sorted sets)等,并且支持对这些数据结构的原子操作。由于其高性能和低延迟,Redis非常适合用于需要快速读取和写入操作的场景。
Weaviate是一个开源的、基于向量的智能搜索引擎,它结合了图数据库和向量搜索技术的优点,为用户提供了强大的数据检索和语义搜索能力。Weaviate能够理解和处理复杂的查询,并返回与用户查询最相关的结果,非常适合于需要处理大量非结构化数据(如文本、图像等)的应用场景。
操作步骤如下:
Step 0. 从dify源码的docker目录中进行复制镜像
cd /data/dify/docker/
cp middleware.env.example middleware.env
docker compose -f docker-compose.middleware.yaml up -d
上面完成后打个快照,防止出问题!
2 服务端部署
API 接口服务
Worker 异步队列消费服务
每个会话窗口需要单独开代理才能有速度:proxy_on
2.1 安装pyenv
参考链接:https://blog.csdn.net/qq_23518283/article/details/94388366
pyenv是一个用于管理多个Python版本的工具,它允许用户在系统上安装、维护和切换不同的Python版本,以确保项目的兼容性和稳定性。
克隆pyenv
git clone https://github.com/pyenv/pyenv.git ~/.pyenv
或者
git clone https://gitee.com/krypln/pyenv.git   ~/.pyenv
配置环境变量
echo 'export PYENV_ROOT="$HOME/.pyenv"' >> ~/.bashrc
echo 'export PATH="$PYENV_ROOT/bin:$PATH"' >> ~/.bashrc
echo 'eval "$(pyenv init -)"' >> ~/.bashrc
查看可以安装的python版本
pyenv install --list
在安装python之前,要先安装python的一些依赖包,否则会安装失败:
sudo apt install libc6-dev gcc
sudo apt install -y make build-essential libssl-dev zlib1g-dev libbz2-dev libreadline-dev libsqlite3-dev wget curl llvm
sudo apt install python3-pip
安装好之后,输入命令:pyenv install -v 3.10.12 ,安装成功
查看版本:pyenv versions
此处经过尝试各种python版本,3.10.12可以实现后端api服务。
要切换到 “3.10.12” Python 环境,请使用以下命令:
pyenv global 3.10.12
pyenv version
2.2 安装 pyenv-virtualenv
pyenv的安装目录是(/.pyenv,所以我们需要把pyenv-virtualenv克隆到)/.pyenv/plugins下,执行下面的命令
git clone https://github.com/pyenv/pyenv-virtualenv.git ~/.pyenv/plugins/pyenv-virtualenv
配置环境变量 终端输入下面的命令
echo 'eval "$(pyenv virtualenv-init -)"' >> ~/.bashrc# 重新初始化 shell 环境,如果不执行该命令需要重新启动终端窗口
exec $SHELL
创建虚拟环境(暂时不用)
2.3 安装Poetry
使用 pip安装
pip install poetry
# 或
python3 -m pip install --user poetry
配置环境变量
# /usr/local/bin 为poetry的路径
export PATH="/usr/local/bin:$PATH"
source ~/.bashrc  # 更改生效
确保Poetry是最新版本:
poetry self update
2.4 安装pytorch
pip install torch torchvision torchaudio
检查安装是否成功:
python
import torch
print(torch.__version__)
2.5安装 TensorFlow
pip install some-package -i https://pypi.tuna.tsinghua.edu.cn/simple
pip install tensorflow
检查安装是否成功:
python
import tensorflow as tf
print(tf.__version__)
2.6 安装 Flax
pip install flax
检查安装是否成功:
python
import flax
print(flax.__version__)
2.7 配置数据
进入 api 目录
cd /data/dify/api
环境变量配置文件
cp .env.example .env
生成随机密钥,并替换 .env 中 SECRET_KEY 的值
openssl rand -base64 42
sed -i 's/SECRET_KEY=.*/SECRET_KEY=<your_value>/' .env
Dify API 服务使用 Poetry 来管理依赖。您可以执行 poetry shell 来激活环境。
poetry env use 3.10.12
poetry install
执行数据库迁移: 将数据库结构迁移至最新版本。
poetry shell
“flask db upgrade” 指的是使用 Flask-Migrate(一个Flask的数据库迁移工具)来升级数据库。
flask db upgrade
此处有两个库的缺失报错,需要单独安装一下,回到root,输入
sudo apt install python-tk
sudo apt install liblzma-dev
报错处理
Python 无法找到名为 _lzma 的模块,为解决这个问题,重装了一遍python3.10.12,编译安装
wget https://www.python.org/ftp/python/3.10.12/Python-3.10.12.tgz
tar -xzvf Python-3.10.12.tgz
cd Python-3.10.12/# --enable-optimizations 是可选的,用于启用一些优化选项,但会增加编译时间。
./configure --enable-optimizations --with-lzma
# -j $(nproc) 会告诉 make 使用所有可用的处理器核心来加速编译过程
make -j $(nproc)
# 编译完成后,使用以下命令安装 Python
sudo make altinstall
# 验证安装
python
# 如果执行不了,则配置环境变量解决
import lzma
print("LZMA support is available.")
环境变量配置在 vim ~/.bashrc 最后面增加 export PATH=“/usr/local/bin:$PATH”,路径为实际的python路径
虽然重新安装了3.10.12,但仍然没解决,最后还是用 pyenv重新安装了3.10.12,然后重复上面的步骤,安装了pytorch、tensorflow(这里用的是缓存安装了),这里比较折腾,可能要卸载重装。
将数据库结构迁移至最新版本。
flask db upgrade
2.8 启动 API 服务
flask run --host 0.0.0.0 --port=5001 --debug
正确输出:
Debug mode: on
INFO:werkzeug:WARNING: This is a development server. Do not use it in a production deployment. Use a production WSGI server instead.
Running on all addresses (0.0.0.0)
Running on http://127.0.0.1:5001
INFO:werkzeug:Press CTRL+C to quit
INFO:werkzeug: * Restarting with stat
WARNING:werkzeug: * Debugger is active!
INFO:werkzeug: * Debugger PIN: 695-801-919
2.9 启动 Worker 服务
用于消费异步队列任务,如数据集文件导入、更新数据集文档等异步操作。 Linux / MacOS 启动:
celery -A app.celery worker -P gevent -c 1 -Q dataset,generation,mail,ops_trace --log
执行后会报错,先更新依赖[开代理]:
cd /data/dify/api
poetry update
poetry shell
celery -A app.celery worker -P gevent -c 1 -Q dataset,generation,mail,ops_trace
正确输出:
 -------------- celery@TAKATOST.lan v5.2.7 (dawn-chorus)
--- ***** -----
-- ******* ---- macOS-10.16-x86_64-i386-64bit 2023-07-31 12:58:08
*** --- * ---
** ---------- [config]
** ---------- .> app:         app:0x7fb568572a10
** ---------- .> transport:   redis://:**@localhost:6379/1
** ---------- .> results:     postgresql://postgres:**@localhost:5432/dify
*** --- * --- .> concurrency: 1 (gevent)
-- ******* ---- .> task events: OFF (enable -E to monitor tasks in this worker)
--- ***** ----- -------------- [queues].> dataset          exchange=dataset(direct) key=dataset.> generation       exchange=generation(direct) key=generation.> mail             exchange=mail(direct) key=mail[tasks]. tasks.add_document_to_index_task.add_document_to_index_task. tasks.clean_dataset_task.clean_dataset_task. tasks.clean_document_task.clean_document_task. tasks.clean_notion_document_task.clean_notion_document_task. tasks.create_segment_to_index_task.create_segment_to_index_task. tasks.deal_dataset_vector_index_task.deal_dataset_vector_index_task. tasks.document_indexing_sync_task.document_indexing_sync_task. tasks.document_indexing_task.document_indexing_task. tasks.document_indexing_update_task.document_indexing_update_task. tasks.enable_segment_to_index_task.enable_segment_to_index_task. tasks.generate_conversation_summary_task.generate_conversation_summary_task. tasks.mail_invite_member_task.send_invite_member_mail_task. tasks.remove_document_from_index_task.remove_document_from_index_task. tasks.remove_segment_from_index_task.remove_segment_from_index_task. tasks.update_segment_index_task.update_segment_index_task. tasks.update_segment_keyword_index_task.update_segment_keyword_index_task[2023-07-31 12:58:08,831: INFO/MainProcess] Connected to redis://:**@localhost:6379/1
[2023-07-31 12:58:08,840: INFO/MainProcess] mingle: searching for neighbors
[2023-07-31 12:58:09,873: INFO/MainProcess] mingle: all alone
[2023-07-31 12:58:09,886: INFO/MainProcess] pidbox: Connected to redis://:**@localhost:6379/1.
[2023-07-31 12:58:09,890: INFO/MainProcess] celery@TAKATOST.lan ready.
3 前端服务部署
Web 前端服务启动需要用到 Node.js v18.x (LTS) 、NPM 版本 8.x.x 或 Yarn。
3.1 安装NodeJs
参考阿里方法:https://developer.aliyun.com/article/1567954
安装nvm
nvm(Node Version Manager) 是一个用于管理多个Node.js版本的工具,可让您在同一台机器上安装和维护不同版本的Node.js。
curl -o- https://raw.githubusercontent.com/nvm-sh/nvm/v0.39.1/install.sh | bash
然后按官网的方法来安装
# layouts.download.codeBox.installsNvm
curl -o- https://raw.githubusercontent.com/nvm-sh/nvm/v0.39.7/install.sh | bash# layouts.download.codeBox.downloadAndInstallNodejsRestartTerminal
nvm install 18# layouts.download.codeBox.verifiesRightNodejsVersion
node -v # layouts.download.codeBox.shouldPrint# layouts.download.codeBox.verifiesRightNpmVersion
npm -v # layouts.download.codeBox.shouldPrint
3.2 安装PM2
全局安装pm2
npm install pm2 -g
3.3 启动步骤
进入 web 目录
cd web
安装依赖包
先修改npm镜像源,我用的第一个淘宝镜像
# 淘宝镜像npm config set registry https://registry.npmmirror.com
# 阿里云镜像
npm config set registry https://npm.aliyun.com
# 腾讯云镜像
npm config set registry http://mirrors.cloud.tencent.com/npm/
# 华为云镜像
npm config set registry https://mirrors.huaweicloud.com/repository/npm/
# 官方
npm config set registry https://registry.npmjs.org/
# 查看镜像
npm config get registry
安装
npm install --loglevel verbose
报错处理
清理npm缓存
npm cache clean --force
配置环境变量。在当前目录下创建文件 .env.local,并复制.env.example中的内容。根据需求修改这些环境变量的值:
NEXT_PUBLIC_API_PREFIX和NEXT_PUBLIC_PUBLIC_API_PREFIX这里是透到外网的地址和端口154.8.210.132:10002
For production release, change this to PRODUCTION
NEXT_PUBLIC_DEPLOY_ENV=DEVELOPMENT
The deployment edition, SELF_HOSTED
NEXT_PUBLIC_EDITION=SELF_HOSTED
The base URL of console application, refers to the Console base URL of WEB service if console domain is
different from api or web app domain.
example: http://cloud.dify.ai/console/api
NEXT_PUBLIC_API_PREFIX=http://154.8.210.132:10002/console/api
The URL for Web APP, refers to the Web App base URL of WEB service if web app domain is different from
console or api domain.
example: http://udify.app/api
NEXT_PUBLIC_PUBLIC_API_PREFIX=http://154.8.210.132:10002/apiSENTRY
NEXT_PUBLIC_SENTRY_DSN=
NEXT_PUBLIC_SENTRY_ORG=
NEXT_PUBLIC_SENTRY_PROJECT=
构建代码
npm run build
报错处理,安装缺失的模块
# 解决 elkjs/lib/elk.bundled.js 找不到的问题
npm install elkjs --save
# 解决 lodash/uniqueId 找不到的问题
npm install lodash --save
再次构建,成功。
root@jm-166:/data/dify/web# npm run build> dify-web@0.6.16 build
> next build▲ Next.js 14.2.5- Environments: .env.localCreating an optimized production build ...✓ Compiled successfullySkipping validation of typesSkipping linting✓ Collecting page data✓ Generating static pages (15/15)✓ Collecting build traces✓ Finalizing page optimizationRoute (app)                                                Size     First Load JS
┌ ƒ /                                                      199 B          95.6 kB
├ ƒ /_not-found                                            879 B          89.1 kB
├ ƒ /activate                                              19.1 kB         199 kB
├ ƒ /app/[appId]/annotations                               242 B          2.03 MB
├ ƒ /app/[appId]/configuration                             36.1 kB        2.26 MB
├ ƒ /app/[appId]/develop                                   64.1 kB         271 kB
├ ƒ /app/[appId]/logs                                      242 B          2.03 MB
├ ƒ /app/[appId]/overview                                  63.6 kB        1.34 MB
├ ƒ /app/[appId]/workflow                                  775 kB         3.02 MB
├ ƒ /apps                                                  15.4 kB        1.89 MB
├ ƒ /chat/[token]                                          3.93 kB        2.56 MB
├ ƒ /chatbot/[token]                                       10.7 kB        2.56 MB
├ ƒ /completion/[token]                                    1.15 kB        2.48 MB
├ ƒ /datasets                                              26.8 kB         286 kB
├ ƒ /datasets/[datasetId]/api                              148 B          88.3 kB
├ ƒ /datasets/[datasetId]/documents                        7.2 kB         1.32 MB
├ ƒ /datasets/[datasetId]/documents/[documentId]           8.73 kB         316 kB
├ ƒ /datasets/[datasetId]/documents/[documentId]/settings  10.7 kB        1.32 MB
├ ƒ /datasets/[datasetId]/documents/create                 240 B           1.4 MB
├ ƒ /datasets/[datasetId]/hitTesting                       12.1 kB        1.37 MB
├ ƒ /datasets/[datasetId]/settings                         11.5 kB        1.88 MB
├ ƒ /datasets/create                                       239 B           1.4 MB
├ ƒ /explore/apps                                          7.2 kB         1.29 MB
├ ƒ /explore/installed/[appId]                             725 B          2.59 MB
├ ƒ /forgot-password                                       4.01 kB         174 kB
├ ƒ /init                                                  2.81 kB         116 kB
├ ƒ /install                                               2.98 kB         180 kB
├ ƒ /signin                                                34.1 kB         217 kB
├ ƒ /tools                                                 22 kB          1.32 MB
├ ƒ /webapp-signin                                         832 B           108 kB
└ ƒ /workflow/[token]                                      1.15 kB        2.48 MB
+ First Load JS shared by all                              88.2 kB├ chunks/7023-dee61bef071c40d2.js                        31.7 kB├ chunks/fd9d1056-8d8e638876b64173.js                    53.6 kB└ other shared chunks (total)                            2.85 kBƒ  (Dynamic)  server-rendered on demand
启动 web 服务
npm run start
正常启动后,终端会输出如下信息:
ready - started server on 0.0.0.0:3000, url: http://localhost:3000
warn  - You have enabled experimental feature (appDir) in next.config.js.
warn  - Experimental features are not covered by semver, and may cause unexpected or broken application behavior. Use at your own risk.
info  - Thank you for testing appDir please leave your feedback at https://nextjs.link/a
4 启动服务【开发模式】
以上步骤部署完成之后,重新进入Ubuntu系统之后,只需要对前后端启动服务即可。
4.1 API服务
cd /data/dify/api/
poetry shell
flask db upgrade
flask run --host 0.0.0.0 --port=5001
4.2 Worker服务
cd /data/dify/api/
poetry shell
celery -A app.celery worker -P gevent -c 1 -Q dataset,generation,mail,ops_trace
4.3 前端web服务
# 已经构建完的启动方式
cd /data/dify/web/
npm run build
npm run start
5 启动服务【生产模式】
后端
cd /data/dify/api/
poetry shell
nohup flask run --host 0.0.0.0 --port=5001 > /data/dify/log/api.log 2>&1 &
nohup celery -A app.celery worker -P gevent -c 1 -Q dataset,generation,mail,ops_trace > /data/dify/log/Worker.log 2>&1 &
前端
cd /data/dify/web/
# 第一次用这个
pm2 start npm --name "frontend-web-server" -- run start
# 以后用这个
pm2 start 1
pm2其他指令
# 查看
pm2 list
# 停所有
pm2 stop all
# 停指定
pm2 stop frontend-dev-server
# 停ID
pm2 stop 0
# 开所有
pm2 start all
# 开指定
pm2 start frontend-dev-server
# 开ID
pm2 start 0
# 删所有
pm2 delete all
# 删指定
pm2 delete frontend-dev-server
# 删ID
pm2 delete 0