asp网站做搜索seo快排公司哪家好
1、概述
本篇文章主要讲解 使用 SpringCloud 组件 快速的构建一套分布式系统,包括注册中心搭建、网关搭建以及业务微服务的规划,本文采用的技术栈主要包括 SpringBoot 、 Nacos、Gateway、Loadbalancer 以及 OpenFeign。搭建完成后依次测试 系统的 服务发现、服务注册、网关路由、负载均衡 等功能的验证。后续我们将会在此基础上继续的深入分析 注册中心、远程过程调用以及负载均衡原理的实现,参考其中一些优秀的设计整合到我们的 Cheese 中
2、环境搭建
本次我们要搭建的项目逻辑架构如下图所示

2.1、父工程搭建
本案例使用的依赖版本如下
JDK: 17
SpringBoot: 3.3.4
SpringCloud: 2023.0.3
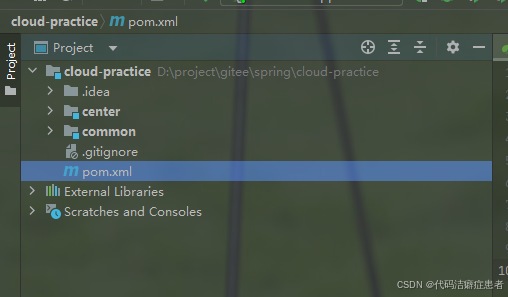
SpringCloudAlibaba: 2023.0.3.2首先创建一个cloud-practice 的 Maven 工程,然后删掉 src 目录,我们将这个工程作为父工程
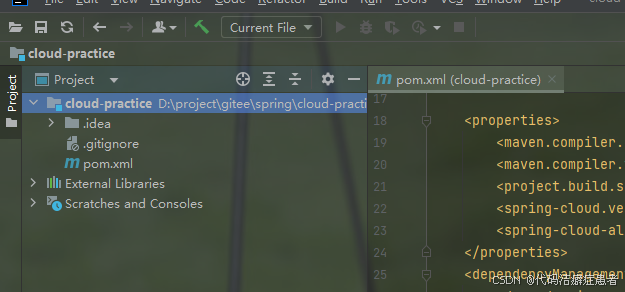
接着修改POM文件,并且加入相关的依赖,如下所示
<?xml version="1.0" encoding="UTF-8"?>
<project xmlns="http://maven.apache.org/POM/4.0.0"xmlns:xsi="http://www.w3.org/2001/XMLSchema-instance"xsi:schemaLocation="http://maven.apache.org/POM/4.0.0 http://maven.apache.org/xsd/maven-4.0.0.xsd"><modelVersion>4.0.0</modelVersion><parent><groupId>org.springframework.boot</groupId><artifactId>spring-boot-starter-parent</artifactId><version>3.3.4</version><relativePath/> <!-- lookup parent from repository --></parent><packaging>pom</packaging><groupId>org.wcan.cloud</groupId><artifactId>cloud-practice</artifactId><version>1.0-SNAPSHOT</version><properties><maven.compiler.source>17</maven.compiler.source><maven.compiler.target>17</maven.compiler.target><project.build.sourceEncoding>UTF-8</project.build.sourceEncoding><spring-cloud.version>2023.0.3</spring-cloud.version><spring-cloud-alibaba.version>2023.0.3.2</spring-cloud-alibaba.version></properties><dependencyManagement><dependencies><dependency><groupId>org.springframework.cloud</groupId><artifactId>spring-cloud-dependencies</artifactId><version>${spring-cloud.version}</version><type>pom</type><scope>import</scope></dependency><dependency><groupId>com.alibaba.cloud</groupId><artifactId>spring-cloud-alibaba-dependencies</artifactId><version>${spring-cloud-alibaba.version}</version><type>pom</type><scope>import</scope></dependency></dependencies></dependencyManagement><build><plugins><plugin><groupId>org.springframework.boot</groupId><artifactId>spring-boot-maven-plugin</artifactId></plugin></plugins></build>
</project>
2.2、服务注册中心
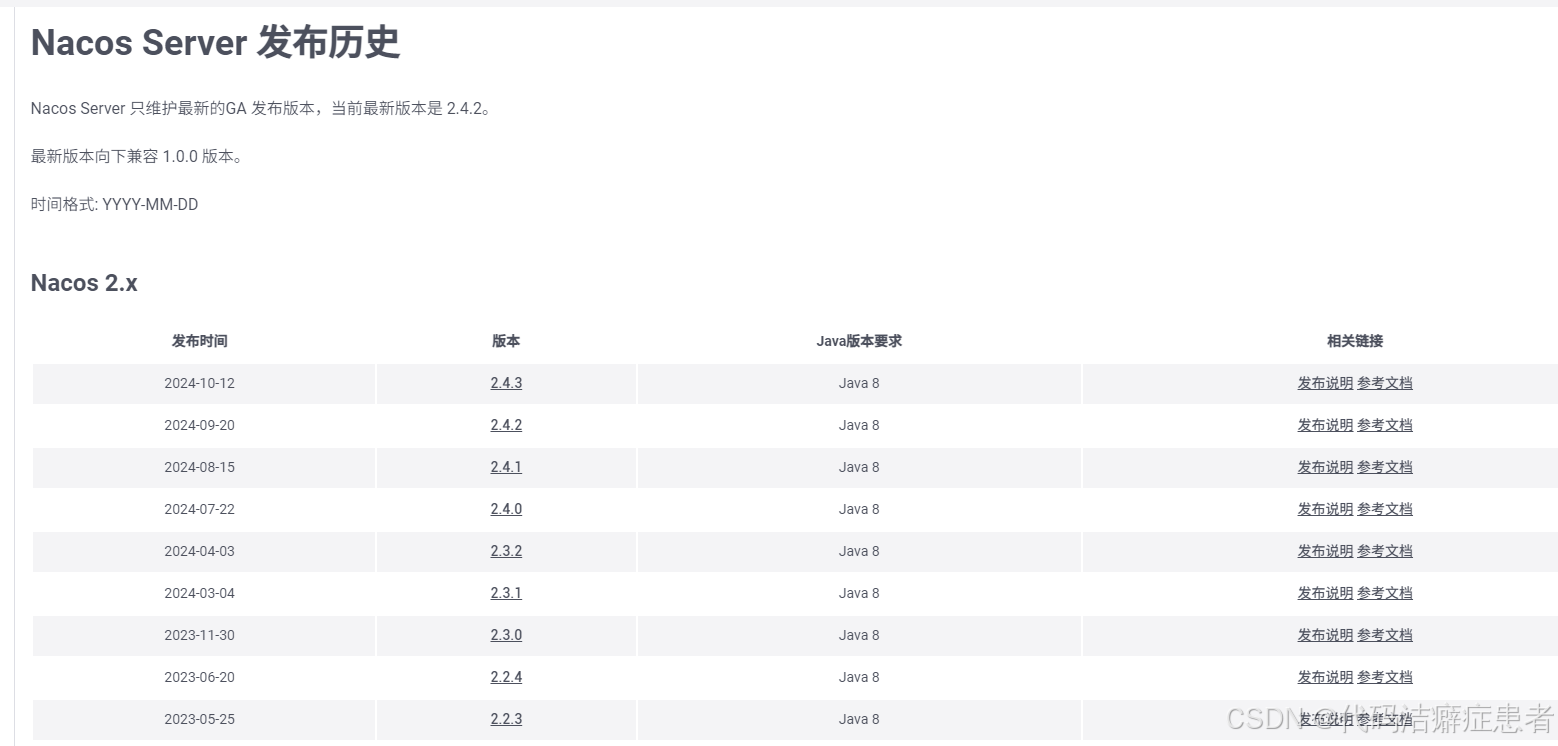
本文的服务注册中心选择nacos,我们去官网下载安装包 链接如下
https://nacos.io/download/release-history/?spm=5238cd80.47ee59c.0.0.189fcd36tSrNtV我们选择2.4.3的版本
下载之后解压,在bin目录下打开cmd命令行
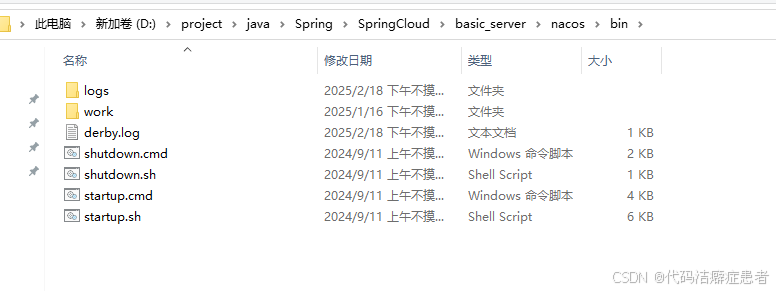
启动命令如下
## windows
startup.cmd -m standalone ## Linux
startup.sh -m standalone 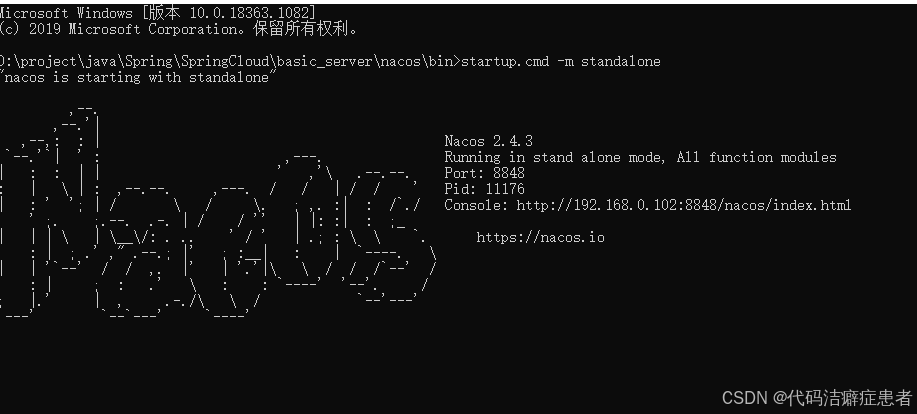
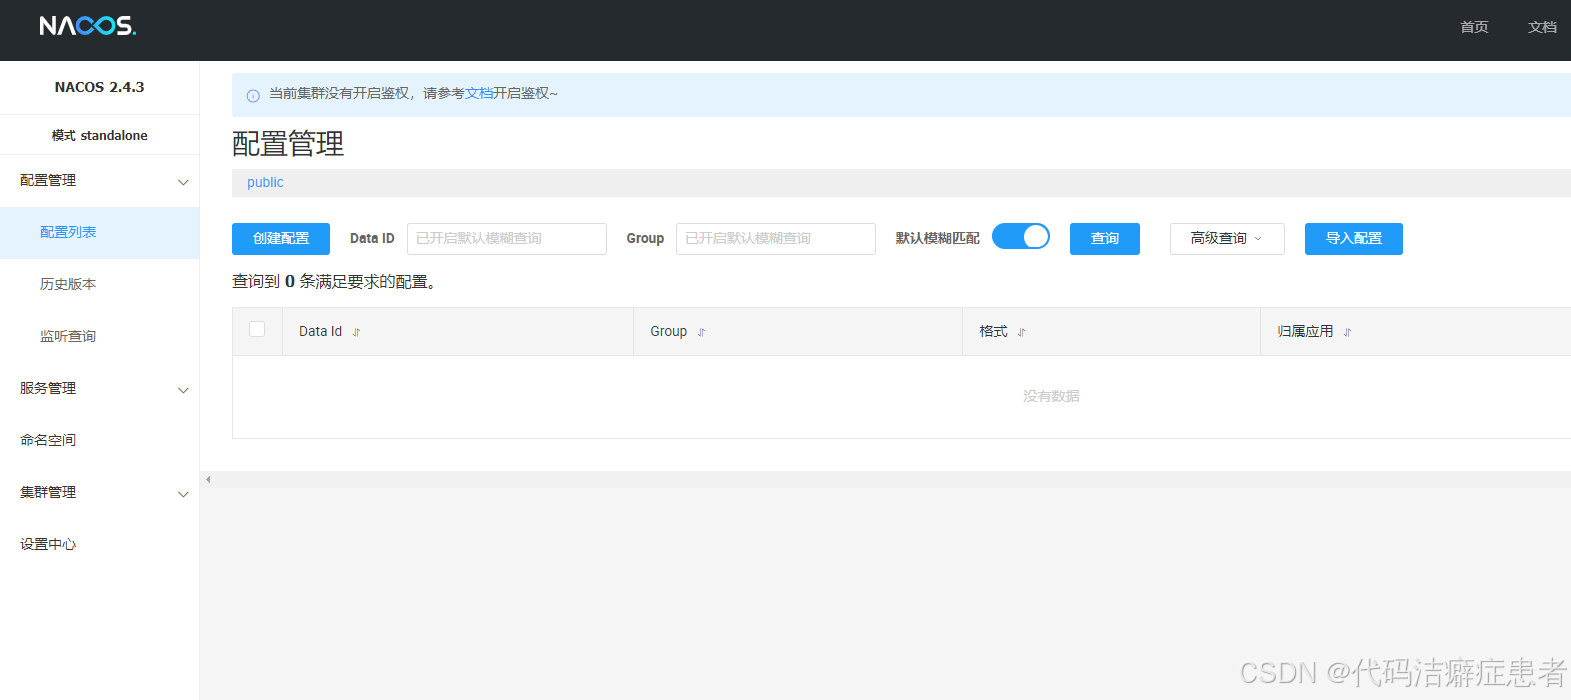
等待启动完成后 浏览器访问 ip:8848/nacos 即可访问控制台。
2.3、业务微服务搭建
2.3.1、业务模块和公共组件
我们在父工程下在继续新建 center 和 common 子模块,我们计划将所有的业务中心的微服务放在center 下,因此center 模块的打包方式应该是 pom ,common子模块存放项目需要的公共组件,打包方式为 jar。
center 模块相关的依赖如下:
<?xml version="1.0" encoding="UTF-8"?>
<project xmlns="http://maven.apache.org/POM/4.0.0"xmlns:xsi="http://www.w3.org/2001/XMLSchema-instance"xsi:schemaLocation="http://maven.apache.org/POM/4.0.0 http://maven.apache.org/xsd/maven-4.0.0.xsd"><modelVersion>4.0.0</modelVersion><parent><groupId>org.wcan.cloud</groupId><artifactId>cloud-practice</artifactId><version>1.0-SNAPSHOT</version></parent><artifactId>center</artifactId><packaging>pom</packaging><properties><maven.compiler.source>17</maven.compiler.source><maven.compiler.target>17</maven.compiler.target><project.build.sourceEncoding>UTF-8</project.build.sourceEncoding></properties><dependencies><!--        服务发现 --><dependency><groupId>com.alibaba.cloud</groupId><artifactId>spring-cloud-starter-alibaba-nacos-discovery</artifactId></dependency><dependency><groupId>org.springframework.cloud</groupId><artifactId>spring-cloud-starter-openfeign</artifactId></dependency><dependency><groupId>org.springframework.boot</groupId><artifactId>spring-boot-starter-test</artifactId><scope>test</scope></dependency><dependency><groupId>org.springframework.cloud</groupId><artifactId>spring-cloud-starter-loadbalancer</artifactId></dependency><dependency><groupId>org.springframework.boot</groupId><artifactId>spring-boot-starter-web</artifactId></dependency><dependency><groupId>org.wcan.cloud</groupId><artifactId>common</artifactId><version>1.0-SNAPSHOT</version></dependency></dependencies>
</project>
common 模块的依赖
<?xml version="1.0" encoding="UTF-8"?>
<project xmlns="http://maven.apache.org/POM/4.0.0"xmlns:xsi="http://www.w3.org/2001/XMLSchema-instance"xsi:schemaLocation="http://maven.apache.org/POM/4.0.0 http://maven.apache.org/xsd/maven-4.0.0.xsd"><modelVersion>4.0.0</modelVersion><parent><groupId>org.wcan.cloud</groupId><artifactId>cloud-practice</artifactId><version>1.0-SNAPSHOT</version></parent><artifactId>common</artifactId><properties><maven.compiler.source>17</maven.compiler.source><maven.compiler.target>17</maven.compiler.target><project.build.sourceEncoding>UTF-8</project.build.sourceEncoding></properties><dependencies><dependency><groupId>org.projectlombok</groupId><artifactId>lombok</artifactId></dependency></dependencies></project>
2.3.2、公共组件
我们在 common 模块下存放整个项目需要使用的公共的类和 api 。首先我们先新建几个pojo类。
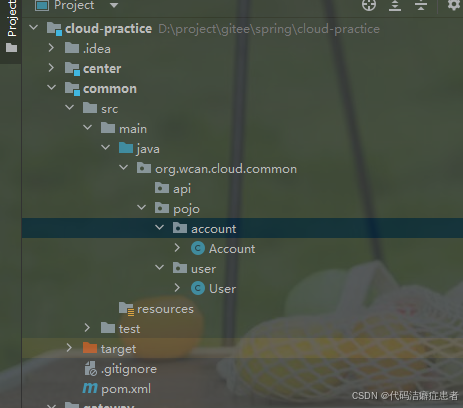
其中 User 实体类主代码如下
package org.wcan.cloud.common.pojo.user;import lombok.Data;@Data
public class User {private Long userId;private String userName;private Integer sex;private String hobby;private String address;
}
Account 实体类代码如下
package org.wcan.cloud.common.pojo.account;import lombok.Data;
import java.math.BigDecimal;@Data
public class Account {private Long accountId;private Long accountType;private Long userId;private String userName;private String accountName;private BigDecimal balance;private String address;
}
2.3.3、用户微服务
2.3.3.1、新建项目模块
我们在 center 模块下 新建一个 user-service 模块,和用户信息相关的业务逻辑放在这个模块下。因为继承了center模块,已经具备了基本的 SpringWeb、Nacos、OpenFeign 的支持 所以暂时不许需要额外的添加依赖,后面需要用的的时候在加
2.3.3.2、启动类
添加一个启动类
package org.wcan.cloud;import org.springframework.boot.SpringApplication;
import org.springframework.boot.autoconfigure.SpringBootApplication;
import org.springframework.cloud.client.discovery.EnableDiscoveryClient;/*** @Description* @Author wcan* @Date 2025/2/18 下午 12:52* @Version 1.0*/
@EnableDiscoveryClient
@SpringBootApplication
public class UseServiceApplication {public static void main(String[] args) {SpringApplication.run(UseServiceApplication.class, args);}
}
需要注意的是 启动类上要标注 @EnableDiscoveryClient 用于开启服务发现的功能
2.3.3.3、配置文件
接着我们需要编写配置文件 在 resource 目录下新建一个 application.yml 的配置文件,并且添加nacos 的地址 以及指定服务的端口号
server:port: 8000spring:application:name: user-servicecloud:nacos:server-addr: 127.0.0.1:88482.3.3.4、业务controller
接着我们编写一个简单的 UserInfoController
package org.wcan.cloud.controller;import org.springframework.web.bind.annotation.GetMapping;
import org.springframework.web.bind.annotation.PathVariable;
import org.springframework.web.bind.annotation.RequestMapping;
import org.springframework.web.bind.annotation.RestController;
import org.wcan.cloud.common.pojo.user.User;/*** @Description 用户信息* @Author wcan* @Date 2025/2/18 下午 12:54* @Version 1.0*/
@RestController
@RequestMapping("/userInfo")
public class UserInfoController {/*** @Description  测试方法 获取用户信息  url: http://localhost:8000/userInfo/getUserInfoByUserId/1* @Param [userId]* @return org.wcan.cloud.common.pojo.user.User* @Date 2025/2/19 下午 14:34* @Author wcan* @Version 1.0*/@GetMapping("/getUserInfoByUserId/{userId}")public User getUserInfoByUserId(@PathVariable("userId") Long userId) {User user = new User();user.setUserId(userId);user.setUserName("Tom");user.setSex(1);user.setHobby("炒股");user.setAddress("北京");return user;}
}
2.3.4、账户微服务
2.3.4.1、新建项目
和用户微服务一样,我们在 center 下新建一个 account-service 模块,暂时不需要添加依赖
2.3.4.2、启动类
启动类需要注意,我们要使用 Open Feign 进行远程调用,所以需要标注 @EnableFeignClients 注解,这个注解的作用是 启用 Feign 客户端
package org.wcan.cloud;import org.springframework.boot.SpringApplication;
import org.springframework.boot.autoconfigure.SpringBootApplication;
import org.springframework.cloud.client.discovery.EnableDiscoveryClient;
import org.springframework.cloud.openfeign.EnableFeignClients;/*** @Description* @Author wcan* @Date 2025/2/18 下午 13:02* @Version 1.0*/
@EnableFeignClients
@EnableDiscoveryClient
@SpringBootApplication
public class AccountServiceApplication {public static void main(String[] args) {SpringApplication.run(AccountServiceApplication.class, args);}
}
2.3.4.3、配置文件
配置文件内容如下:
server:port: 9000spring:application:name: account-servicecloud:nacos:server-addr: 127.0.0.1:88482.3.4.4、业务controller
我们编写一个创建账户的controller,相关的代码如下
package org.wcan.cloud.controller;import org.springframework.beans.factory.annotation.Autowired;
import org.springframework.web.bind.annotation.*;
import org.wcan.cloud.common.pojo.account.Account;
import org.wcan.cloud.pojo.AccountVo;
import org.wcan.cloud.service.AccountService;import java.math.BigDecimal;@RestController
@RequestMapping("/accountInfo")
public class AccountInfoController {@Autowiredprivate AccountService accountService;@PostMapping("/createAccount/")public Account createAccount(@RequestBody AccountVo accountVo){Account  account =  accountService.createAccount(accountVo);return account;}/*** @Description   测试方法  url : http://localhost:9000/accountInfo/queryAccountByUserId/123* @Param [userId]* @return org.wcan.cloud.common.pojo.account.Account* @Date 2025/2/19 下午 14:31* @Author wcan* @Version 1.0*/@GetMapping("/queryAccountByUserId/{userId}")public Account queryAccountByUserId(@PathVariable("userId") Long userId){Account account = new Account();account.setAccountId(1232943425L);account.setUserId(userId);account.setAccountName("测试账户信息");account.setUserName("tom");account.setBalance(new BigDecimal(100));return account;}
}
service 接口如下
package org.wcan.cloud.service;import org.wcan.cloud.common.pojo.account.Account;
import org.wcan.cloud.pojo.AccountVo;/*** @Description* @Author wcan* @Date 2025/2/17 下午 22:58* @Version 1.0*/
public interface AccountService {Account createAccount(AccountVo userId);
}
实现类
package org.wcan.cloud.service;import org.springframework.beans.factory.annotation.Autowired;
import org.springframework.stereotype.Service;
import org.wcan.cloud.common.pojo.account.Account;
import org.wcan.cloud.common.pojo.user.User;
import org.wcan.cloud.feign.UserServiceFeignClinet;
import org.wcan.cloud.pojo.AccountVo;import java.math.BigDecimal;/*** @Description* @Author wcan* @Date 2025/2/17 下午 22:59* @Version 1.0*/
@Service
public class AccountServiceImpl implements AccountService{@Autowiredprivate UserServiceFeignClinet userServiceFeignClinet;@Overridepublic Account createAccount(AccountVo accountVo) {Long userId = accountVo.getUserId();Account account = new Account();account.setAccountId(1L);account.setUserId(userId);User userInfo = userServiceFeignClinet.getUserInfoByUserId(userId);account.setUserName(userInfo.getUserName());account.setAccountName(accountVo.getAccountName());account.setBalance(new BigDecimal(100));account.setAddress(userInfo.getAddress());return account;}
}
业务VO 类
@Data
public class AccountVo {private String accountName;private Long accountType;private Long userId;
}
2.3.4.5、远程调用设计
我们在创建账户的需要查询用户信息,但是查询用户信息的功能应该是归属在 用户中心模块,因此需要远程调用 user-service 模块的接口。
我们新建一个 feign 的包,里面用来存放 调用其他中心的接口,我们在里面新建一个UserServiceFeignClinet的接口,相关代码如下
package org.wcan.cloud.feign;import org.springframework.cloud.openfeign.FeignClient;
import org.springframework.web.bind.annotation.GetMapping;
import org.springframework.web.bind.annotation.PathVariable;
import org.wcan.cloud.common.pojo.user.User;@FeignClient(value = "user-service",fallback = UserServiceFeignClientFallback.class) // feign客户端
public interface UserServiceFeignClinet {@GetMapping("/userInfo/getUserInfoByUserId/{userId}")public User getUserInfoByUserId(@PathVariable("userId") Long userId);
}
其中 @FeignClient 注解是用来标注这个接口是 feign 远程调用的客户端。value= "user-service "是指定调用用户中心的接口 而 fallback = UserServiceFeignClientFallback.class 是用于指定一个兜底返回信息的类,当远程接口没有调通 或者多次发生异常 就会触发 fallback 指定的兜底方法。
UserServiceFeignClientFallback 代码如下
package org.wcan.cloud.feign;import org.springframework.stereotype.Component;
import org.wcan.cloud.common.pojo.user.User;/*** @Description* @Author wcan* @Date 2025/2/18 下午 13:05* @Version 1.0*/
@Component
public class UserServiceFeignClientFallback implements UserServiceFeignClinet {@Overridepublic User getUserInfoByUserId(Long userId) {User user = new User();user.setUserId(userId);user.setUserName("查询报错 未知用户");return user;}
}
我们暂时返回一个未知用户的错误信息。
项目结构如下

2.4、网关搭建
2.4.1、新建项目
业务中心的工程我们搭建了两个,接下面还需要一个网关工程作为我们的分布式系统的服务入口。我们在父工程(最外层的工程 )下新建一个 gateway 模块 (和 center同级)。

2.4.2、依赖
添加相关依赖
<?xml version="1.0" encoding="UTF-8"?>
<project xmlns="http://maven.apache.org/POM/4.0.0"xmlns:xsi="http://www.w3.org/2001/XMLSchema-instance"xsi:schemaLocation="http://maven.apache.org/POM/4.0.0 http://maven.apache.org/xsd/maven-4.0.0.xsd"><modelVersion>4.0.0</modelVersion><parent><groupId>org.wcan.cloud</groupId><artifactId>cloud-practice</artifactId><version>1.0-SNAPSHOT</version></parent><artifactId>gateway</artifactId><properties><maven.compiler.source>17</maven.compiler.source><maven.compiler.target>17</maven.compiler.target><project.build.sourceEncoding>UTF-8</project.build.sourceEncoding></properties><dependencies><dependency><groupId>org.springframework.cloud</groupId><artifactId>spring-cloud-starter-loadbalancer</artifactId></dependency><dependency><groupId>com.alibaba.cloud</groupId><artifactId>spring-cloud-starter-alibaba-nacos-discovery</artifactId></dependency><dependency><groupId>org.springframework.cloud</groupId><artifactId>spring-cloud-starter-gateway</artifactId></dependency><dependency><groupId>org.projectlombok</groupId><artifactId>lombok</artifactId><scope>annotationProcessor</scope></dependency></dependencies>
</project>
2.4.3、启动类
新建一个启动类
/*** @Description 网关启动类* @Author wcan* @Date 2025/2/18 下午 23:05* @Version 1.0*/
@EnableDiscoveryClient
@SpringBootApplication
public class GatewayApplication {public static void main(String[] args) {SpringApplication.run(GatewayApplication.class, args);}
}
2.4.4、配置文件
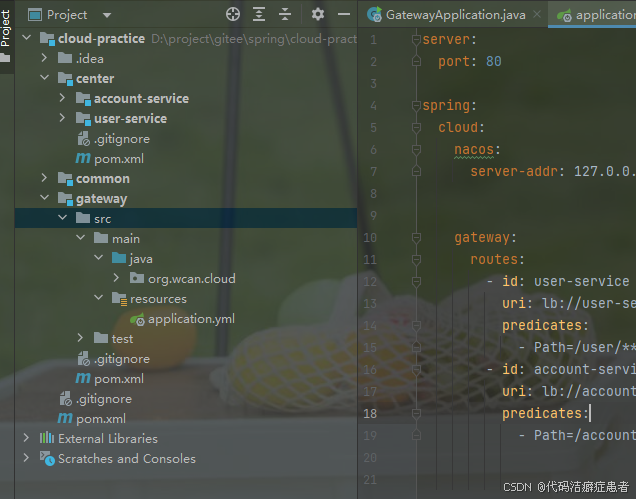
配置文件内容如下
server:port: 80spring:cloud:nacos:server-addr: 127.0.0.1:8848gateway:routes:- id: user-serviceuri: lb://user-servicepredicates:- Path=/userInfo/**- id: account-serviceuri: lb://account-servicepredicates:- Path=/accountInfo/**这里定义了一个简单的路由规则,当请求的 url 是 /userInfo 开头的 网关就会将请求转发到 用户中心, /accountInfo 开头的就会转发到账户中心。
2.5、总结
至此我们的整个工程基础架构搭建完成,目前的结构是这样的
3、基础环境测试
环境搭建完成后我们需要进行测试,下面我们就来测试下。
3.1、基础服务测试
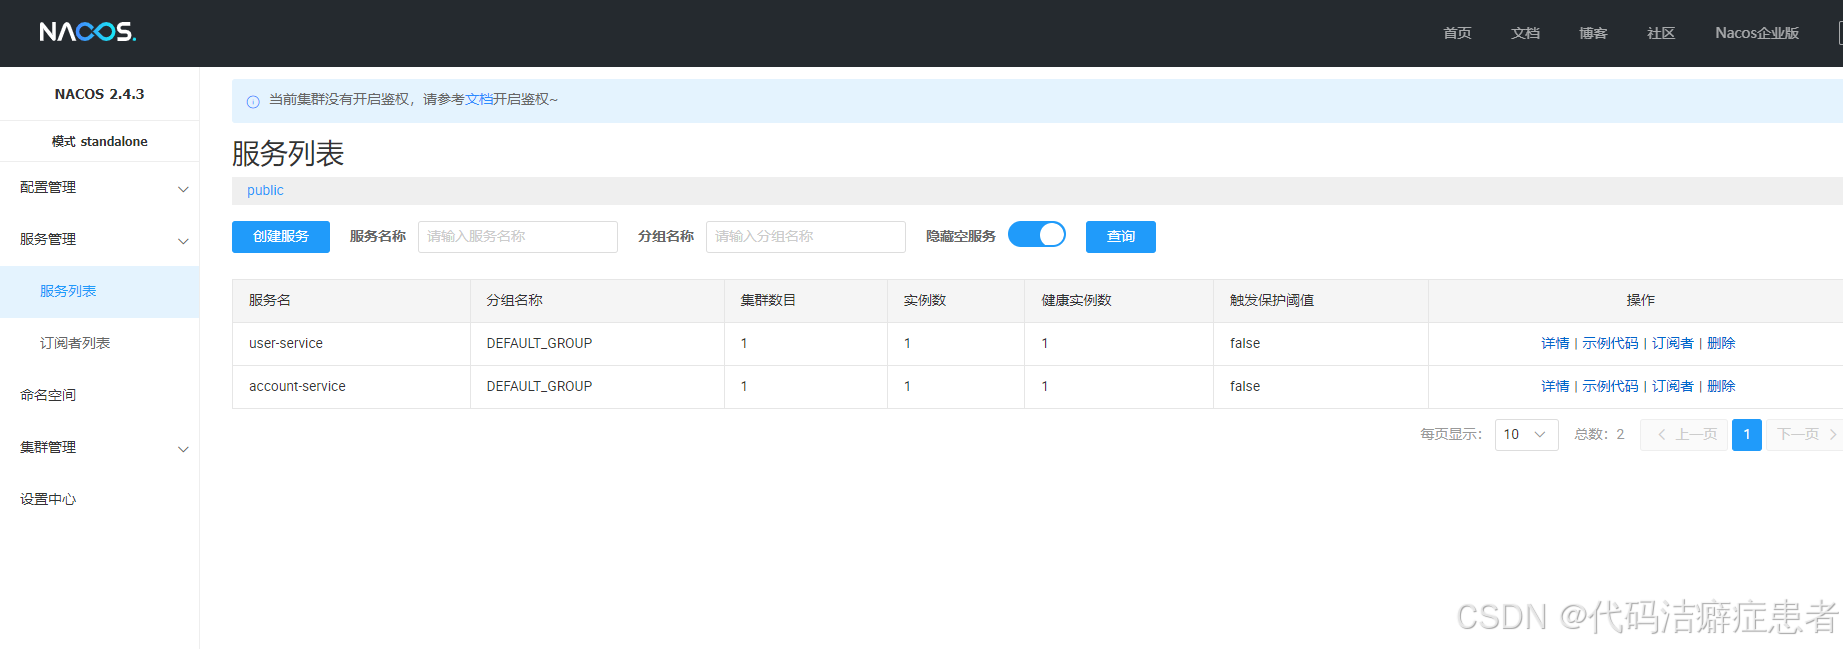
我们先启动 Nacos, 然后启动用户微服务和账户微服务。
启动成功后我们打开 Nacos 控制台即可查看服务的信息
接着我们浏览器访问测试方法
http://localhost:8000/userInfo/getUserInfoByUserId/123

http://localhost:9000/accountInfo/queryAccountByUserId/1

我们单个的微服务已经调通了。接下来我们需要测试下网关 。
3.2、网关测试
我们启动 gateway 项目,正常情况下 前端都是调用网关,网关根据对应的路由规则将请求转发到对应的微服务。
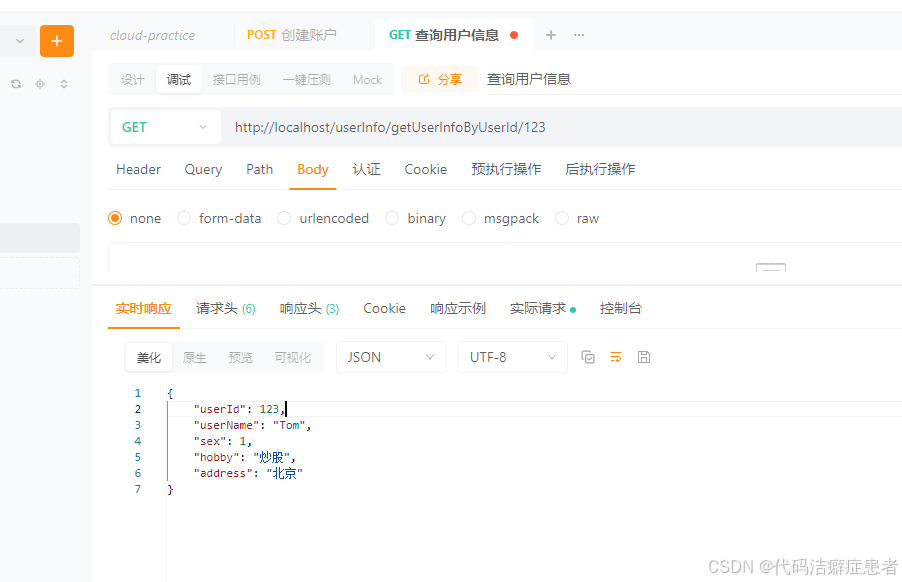
我们之前在配置文件中编写了路由规则的配置,所以我们直接使用浏览器访问网关即可
http://localhost/userInfo/getUserInfoByUserId/123

http://localhost/accountInfo/queryAccountByUserId/123

网关服务的测试我们也通过了。
3.3、远程调用测试
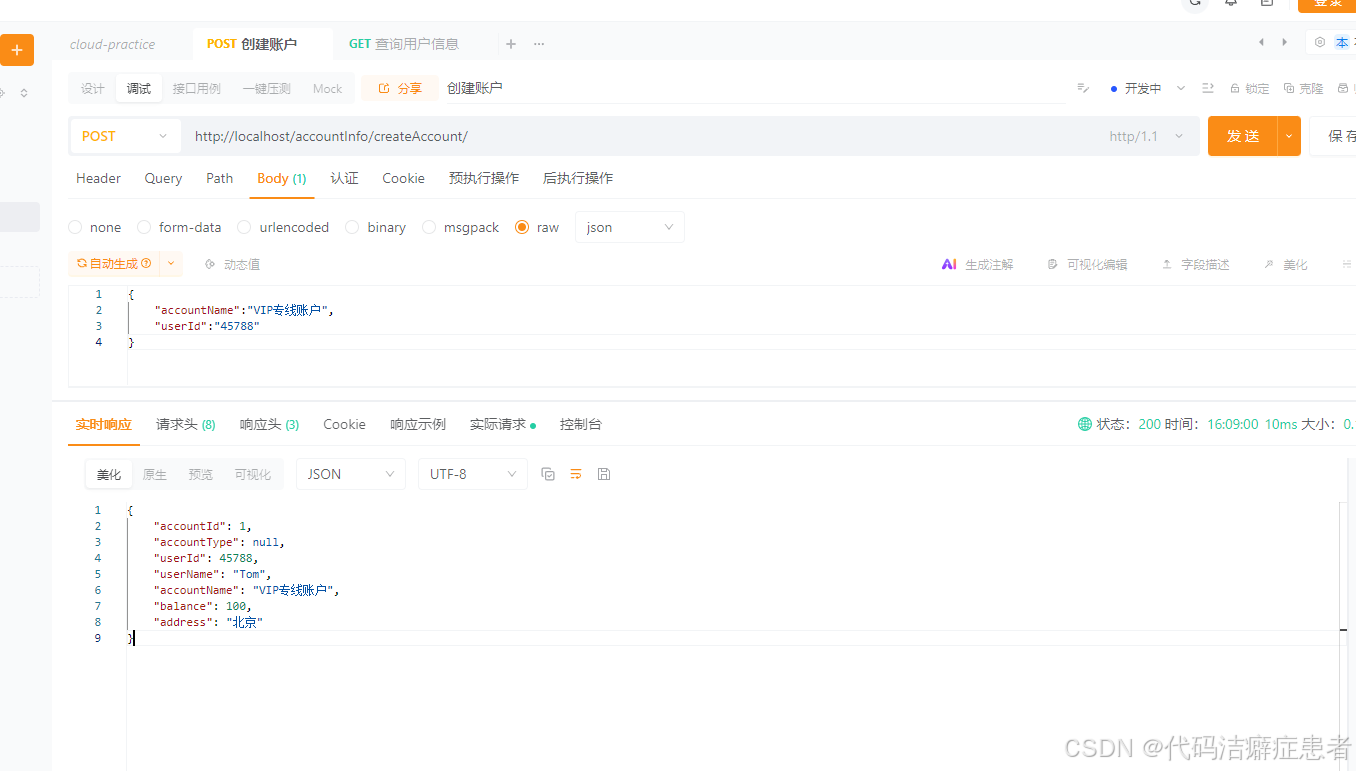
测试好了网关服务,接下来我们就需要验证远程调用了,我们在 账户中心 编写了一个创建账户的测试方法,在service 接口的实现中通过 OpenFeign 远程调用用户中心的接口 查询用户信息,接下来我们使用 Apipost 测试一下
我们先访问 http://localhost:9000/accountInfo/createAccount/
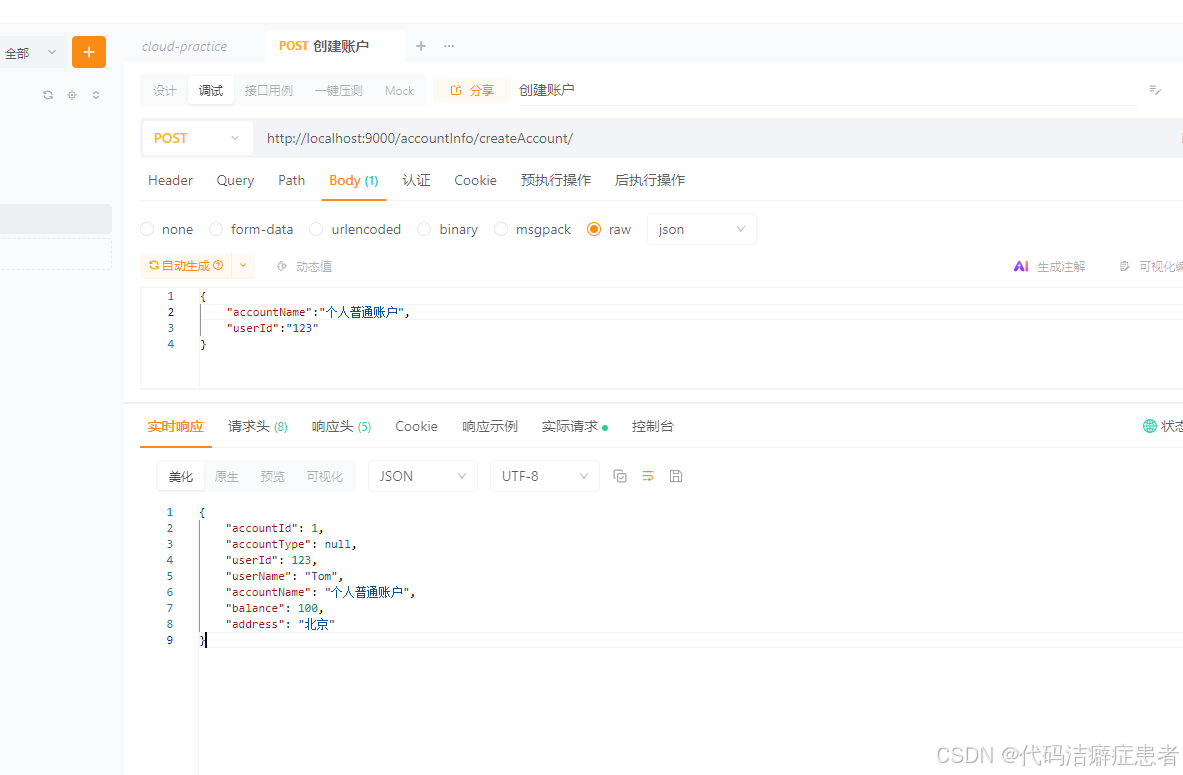
单独访问账户服务的接口没问题,接下来我们试试 通过网关发起
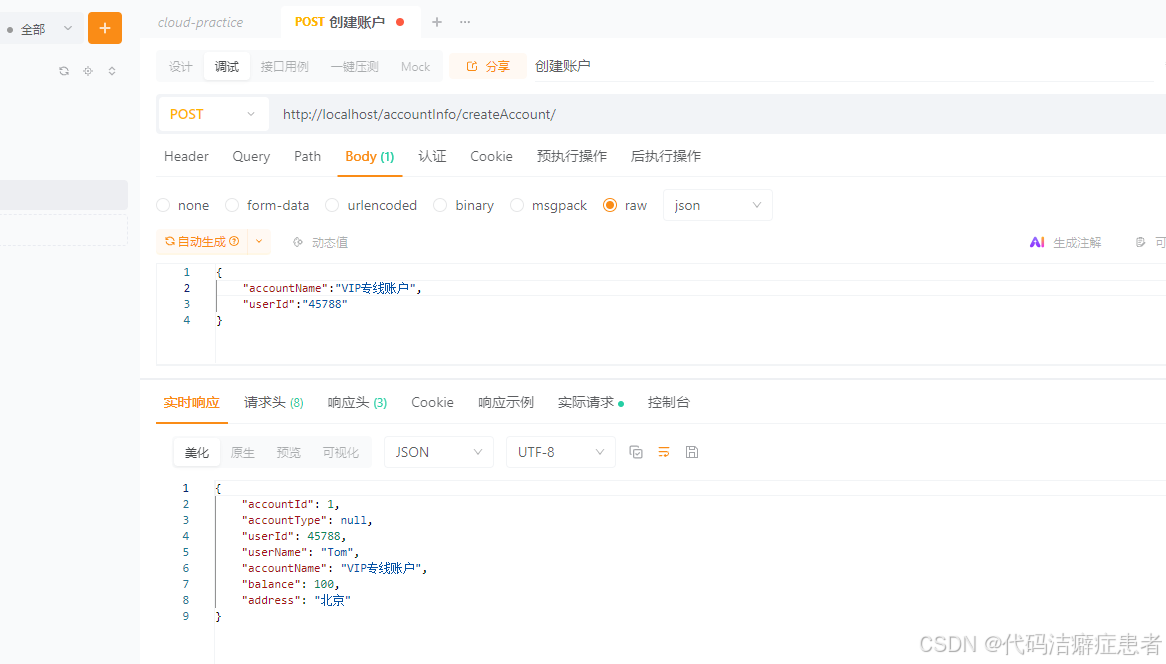
这里也是可以的。
3.4、网关负载均衡测试
基本的功能已经测试完成了 对于系统而言 业务已经跑通了,下面我们来测试下 负载均衡。
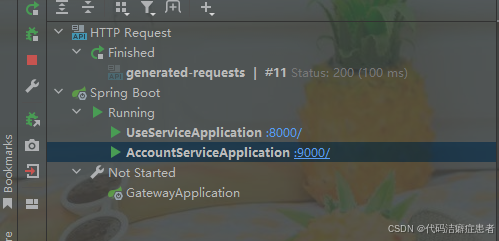
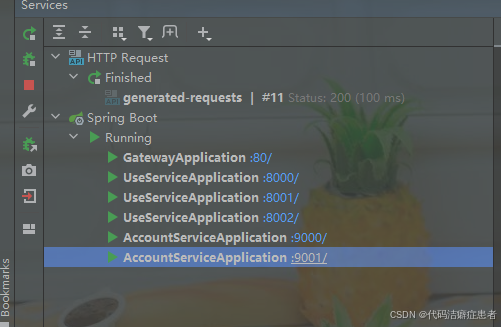
我们启动3个用户服务,分别设置端口 8000、8001、8002 启动2个账户服务 9000、9001。
启动后如下图所示
我们先来试下 通过网关 访问 用户服务。在此之前我们需要 改造一下查询用户信息的controller,加一行日志
@GetMapping("/getUserInfoByUserId/{userId}")public User getUserInfoByUserId(@PathVariable("userId") Long userId) {User user = new User();user.setUserId(userId);user.setUserName("Tom");user.setSex(1);user.setHobby("炒股");user.setAddress("北京");log.info("我被调用了。。。。。。。。。。"+System.currentTimeMillis());return user;}我们使用 apipost 发起请求
我们多发送几次请求,然后观察 三个用户微服务的控制台输出 就能发现 请求能够被均匀的转发到三个节点上了。
3.5、远程调用负载均衡测试
前面我们启动了3个用户微服了,接下来我们测试一下 创建账户的时候远程调用的负载均情况,
我们继续观察三个用户微服务的控制台, 就能发现远程调用也是具备负载均衡的能力。
4、总结
本篇文章主要搭建了一个简单的分布式系统,主要包含两个服务,后面我们可以基于这个项目深入的学习分布式系统环境中的一些组件以及实现原理和一些优秀的设计。
前面我们在设计 Cheese 的时候有给大家介绍过 服务注册中心、远程过程调用相关的内容,通过本次案例相信你有更加深入的理解了。后续我们将会继续的深入分析 注册中心、远程过程调用以及负载均衡原理的实现,参考其中一些优秀的设计整合到我们的 Cheese 中。