配置安装mmsegmentation并同步至远程服务器
Github地址:https://github.com/open-mmlab/mmsegmentation/blob/main/README_zh-CN.md
mmsegmentation是一个框架、mmseg是mmsegmentation作为库之后的包名字、mmcv是OpenMMLab的底层依赖、mmengine是训练管理系统
- 先使用conda env list查看所有环境。
- 创建新环境安装Python、Pytorch:这里需要注意匹配上pytorch和mmcv的版本可以在mmcv的官方文档里查找:https://mmcv.readthedocs.io/zh-cn/latest/get_started/installation.html
conda create -n mmseg python=3.8 #激活环境 conda activate mmseg conda install pytorch==2.0.0 torchvision==0.15.0 torchaudio==2.0.0 pytorch-cuda=11.8 -c pytorch -c nvidia - 安装mmcv,直接根据Github中给出的连接即可:
pip install mmcv==2.0.0 -f https://download.openmmlab.com/mmcv/dist/cu118/torch2.0/index.html - 安装mmseg,也是直接根据Github中的安装教程即可
pip install -U openmim
pip install "mmsegmentation>=1.0.0"
mim download mmsegmentation --config pspnet_r50-d8_4xb2-40k_cityscapes-512x1024 --dest .
打印检查:
python -c "import torch, mmcv, mmengine, mmseg; \ print('torch:', torch.__version__); \ print('mmcv:', mmcv.__version__); \ print('mmengine:', mmengine.__version__); \ print('mmseg:', mmseg.__version__)" - 将在远程服务器上的虚拟环境与本地编译环境建立连接:
写在文章Pycharm SSH连接_pycharm连接ssh-CSDN博客 - 在运行过程中出现了ftfy 和regex没有的问题,重新去远程环境里下载了对应的库:
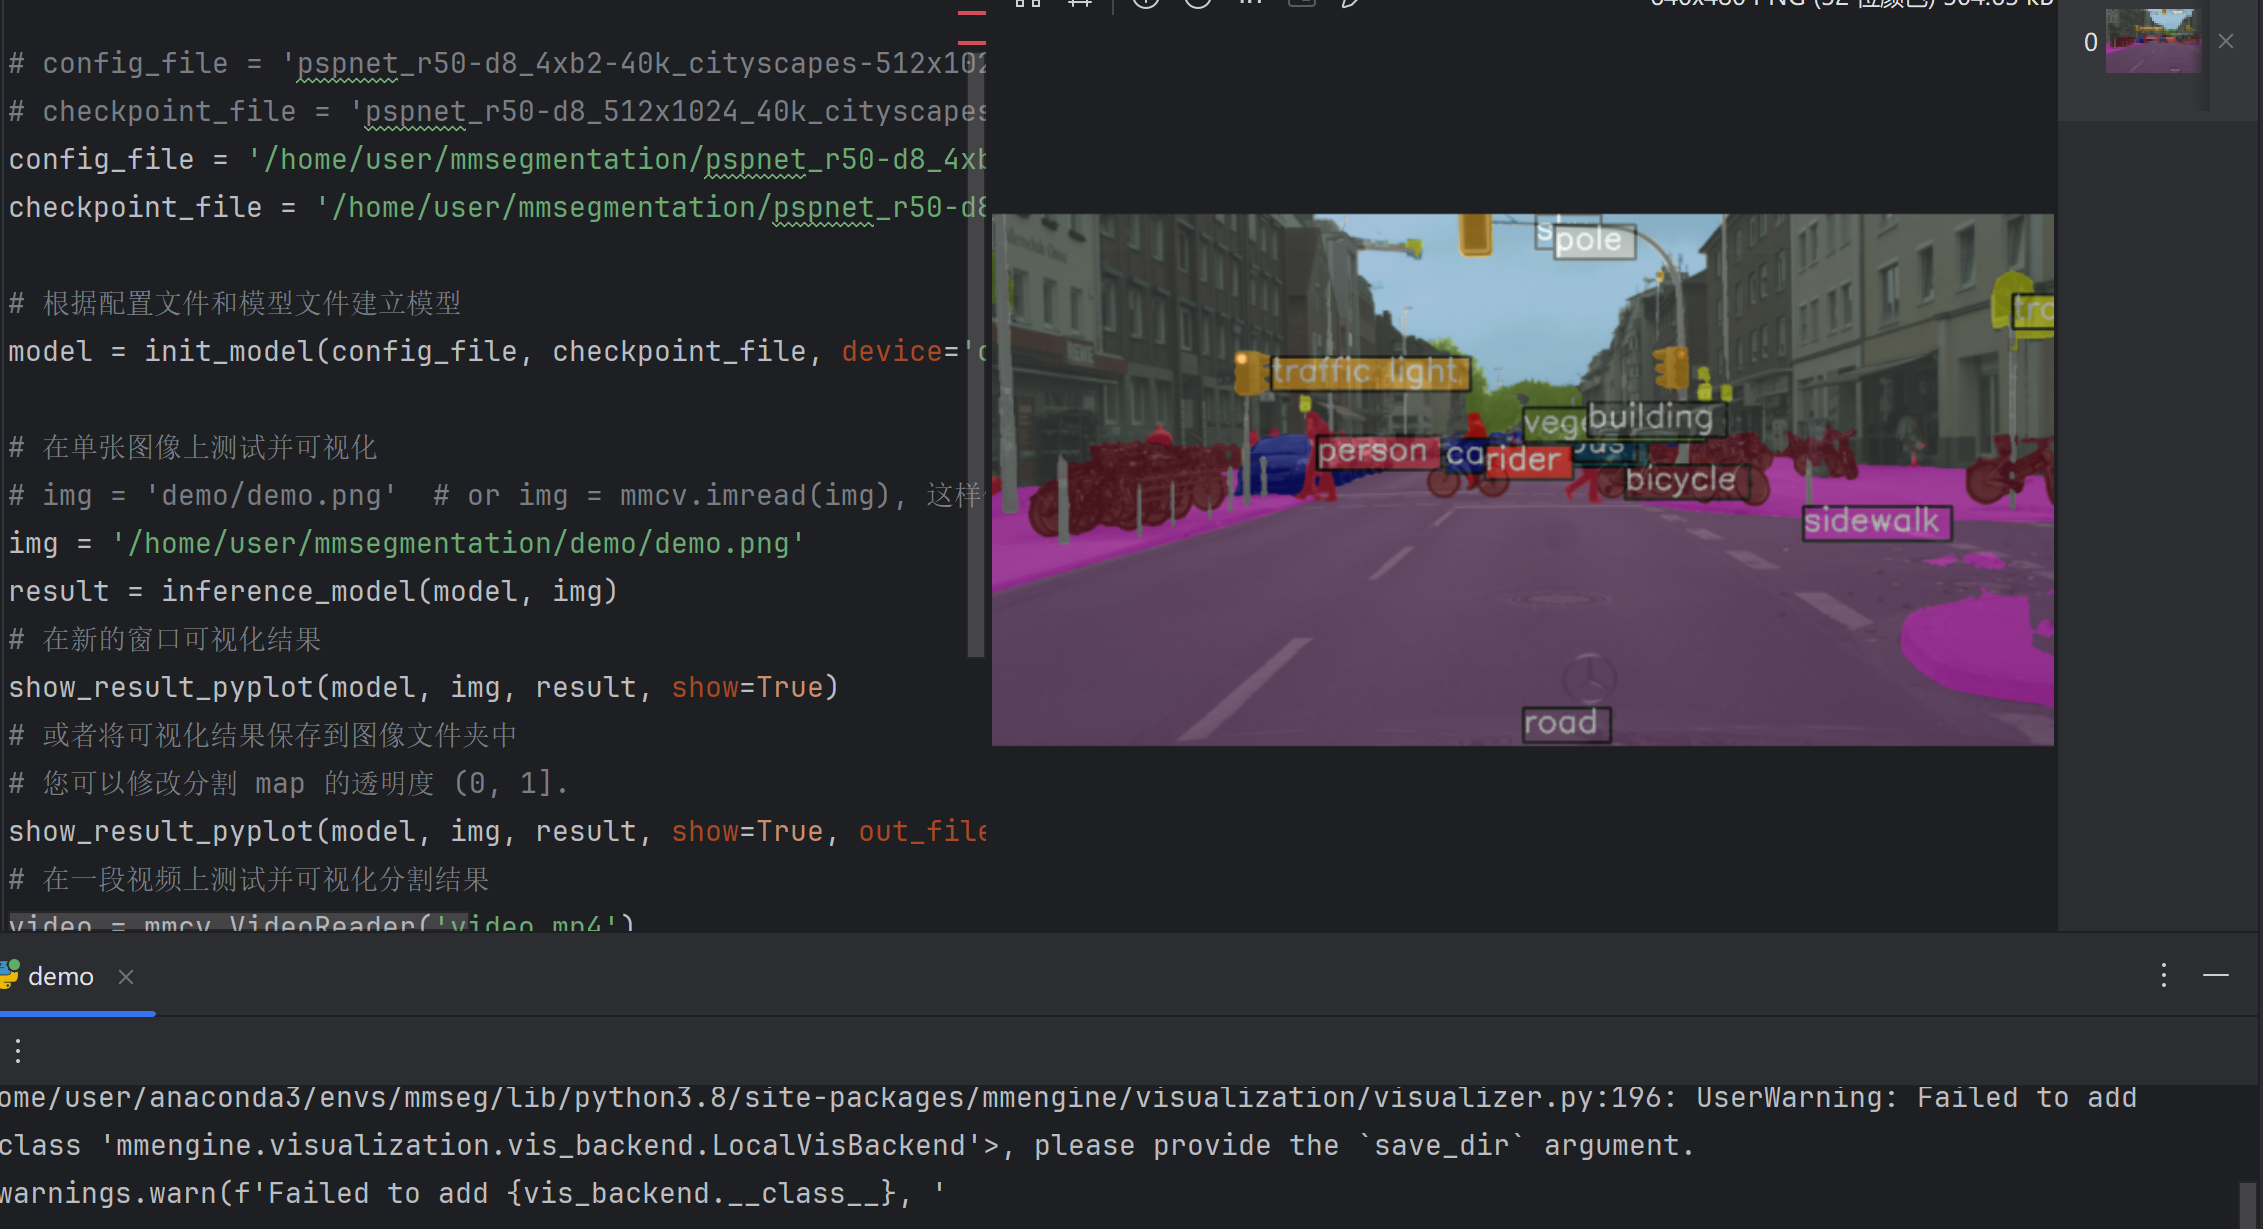
pip install ftfy pip install regex - 建立一个demo来检查库是否安装正确,代码就使用Github上提供的即可,会需要根据自己的安装路径来修改这里的config_file 、checkpoint_file:
from mmseg.apis import inference_model, init_model, show_result_pyplot import mmcvconfig_file = 'pspnet_r50-d8_4xb2-40k_cityscapes-512x1024.py' checkpoint_file = 'pspnet_r50-d8_512x1024_40k_cityscapes_20200605_003338-2966598c.pth'# 根据配置文件和模型文件建立模型 model = init_model(config_file, checkpoint_file, device='cuda:0')# 在单张图像上测试并可视化 img = 'demo/demo.png' # or img = mmcv.imread(img), 这样仅需下载一次 result = inference_model(model, img) # 在新的窗口可视化结果 show_result_pyplot(model, img, result, show=True) # 或者将可视化结果保存到图像文件夹中 # 您可以修改分割 map 的透明度 (0, 1]. show_result_pyplot(model, img, result, show=True, out_file='result.jpg', opacity=0.5) -
完成