深度学习:基于YOLOv8模型的海洋生物目标检测系统 深度学习 pytorch 计算机 PySide6界面✅
博主介绍:✌全网粉丝10W+,前互联网大厂软件研发、集结硕博英豪成立软件开发工作室,专注于计算机相关专业项目实战6年之久,累计开发项目作品上万套。凭借丰富的经验与专业实力,已帮助成千上万的学生顺利毕业,选择我们,就是选择放心、选择安心毕业✌
> 🍅想要获取完整文章或者源码,或者代做,拉到文章底部即可与我联系了。🍅点击查看作者主页,了解更多项目!
🍅感兴趣的可以先收藏起来,点赞、关注不迷路,大家在毕设选题,项目以及论文编写等相关问题都可以给我留言咨询,希望帮助同学们顺利毕业 。🍅
1、毕业设计:2026年计算机专业毕业设计选题汇总(建议收藏)✅
2、最全计算机专业毕业设计选题大全(建议收藏)✅
1、项目介绍
技术栈:
python语言、YoloV8模型、PySide6界面、opencv、训练集测试集
2、项目界面
(1)多目标检测识别

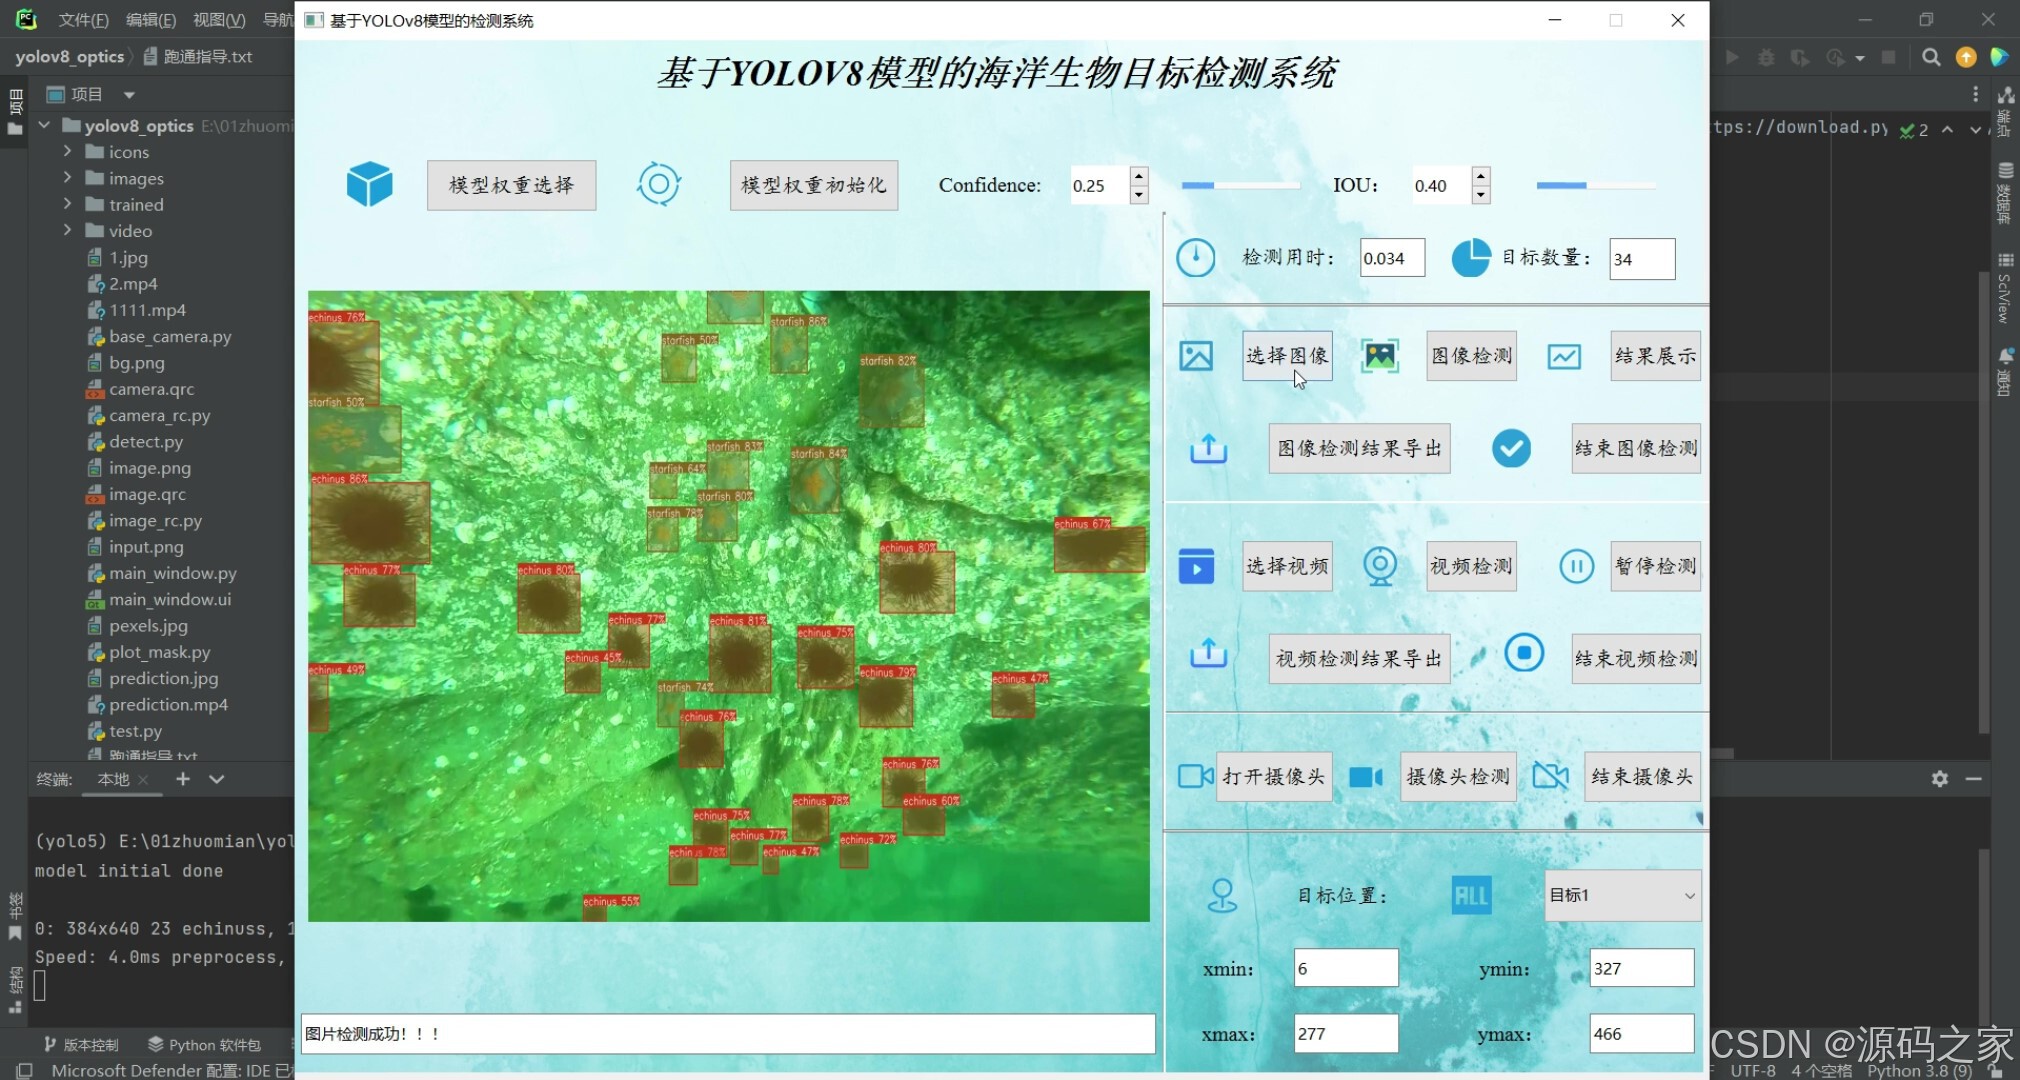
(2)多目标检测识别

(3)多目标检测识别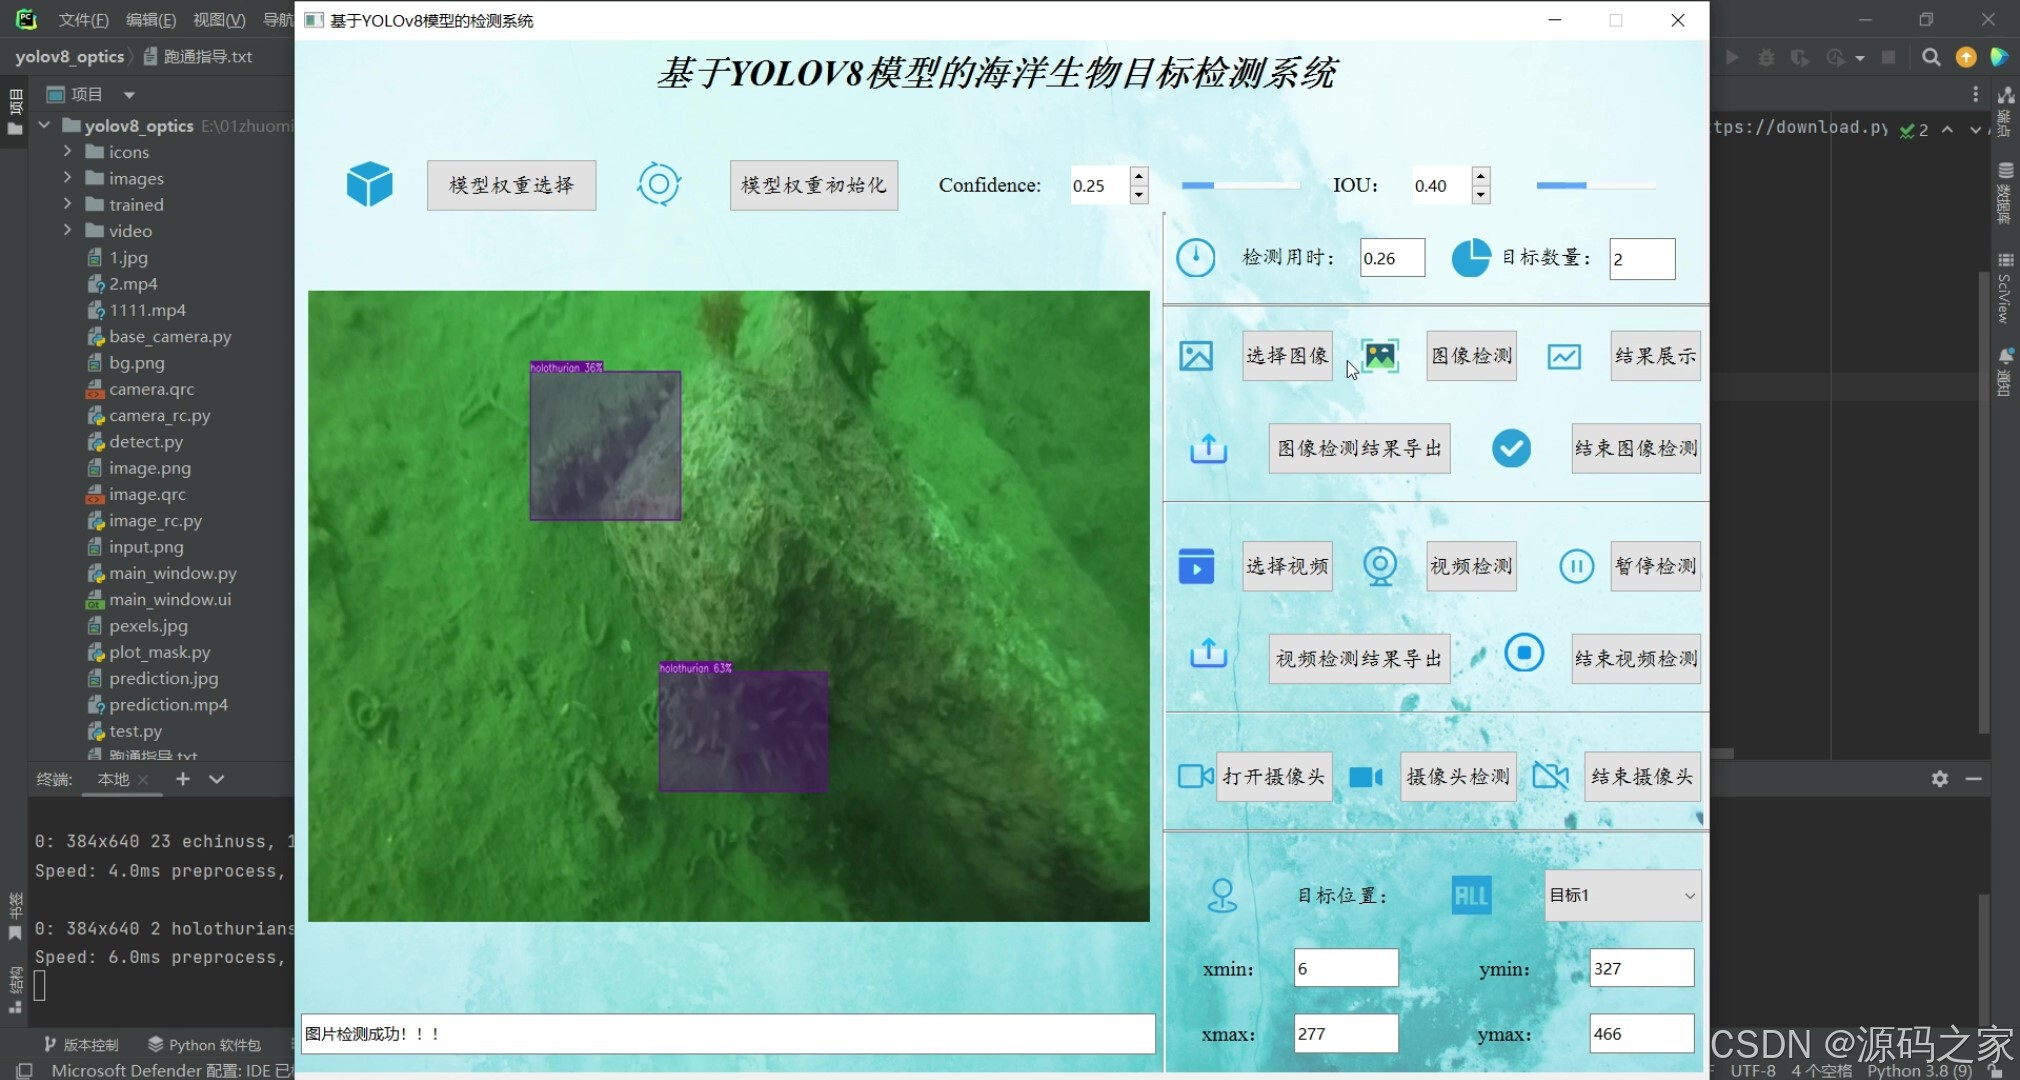
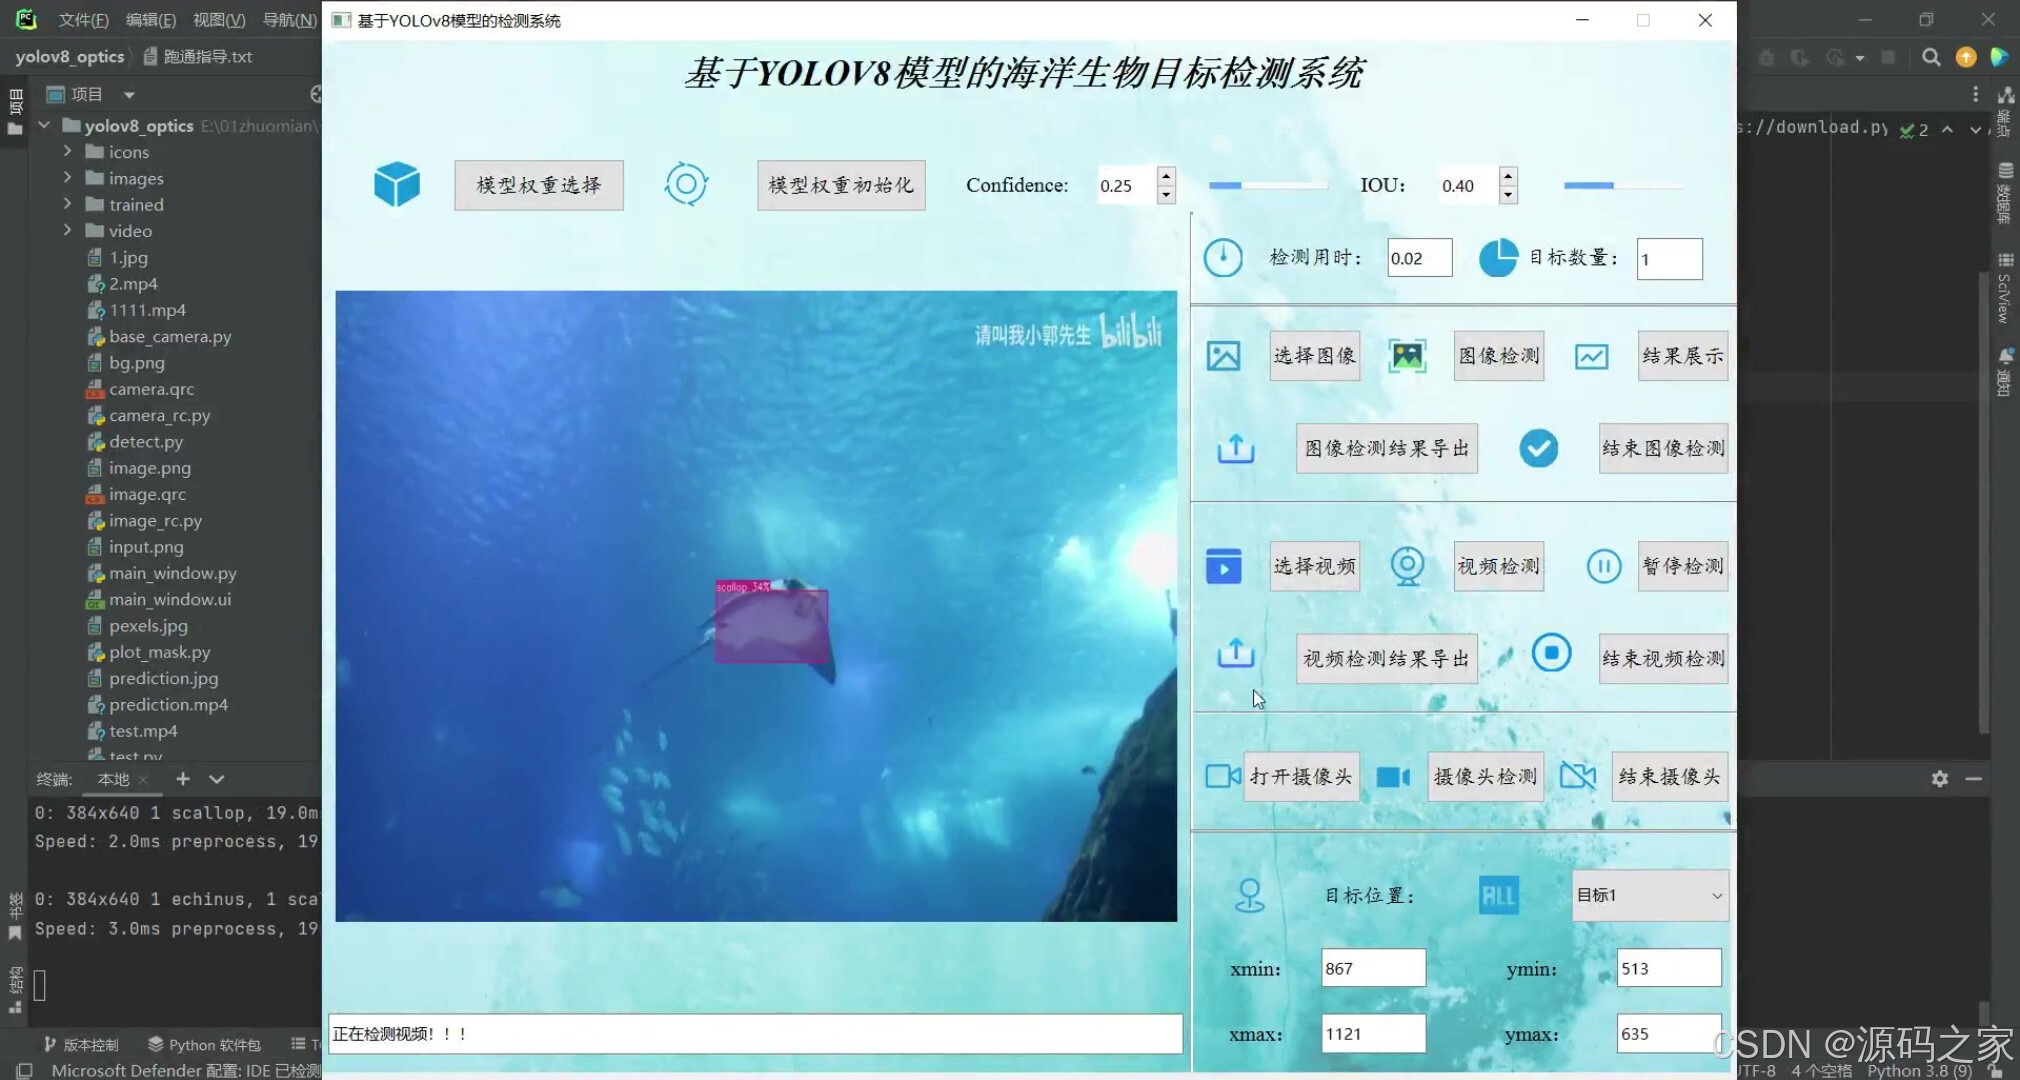
(4)多目标检测识别
(5)多目标检测识别
3、项目说明
基于YOLOv8模型的海洋生物目标检测系统可用于日常生活中检测海洋生物目标,利用深度学习算法可实现图片、视频、摄像头等方式的目标检测识别,另外支持结果可视化与图片或视频检测结果的导出。本系统采用YOLOv8目标检测模型训练数据集,使用Pysdie6库来搭建页面展示系统,同时支持ONNX、PT等模型作为权重模型的输出。本系统支持的功能包括训练模型的导入、初始化;置信分与IOU阈值的调节、图像上传、检测、可视化结果展示、结果导出与结束检测;视频的上传、检测、可视化结果展示、结果导出与结束检测;摄像头的上传、检测、可视化结果展示与结束检测;已检测目标列表、位置信息;前向推理用时等功能
4、核心代码
import argparse
import random
import sys
import torch
import numpy as np
from PySide6 import QtWidgets
from PySide6.QtWidgets import QMainWindow, QApplication, QFileDialog
# 显示图片
from PySide6 import QtGui, QtCore
from PySide6.QtGui import QPixmap, QImage
from PySide6.QtCore import QTimer, Qt
from main_window import Ui_MainWindow
from threading import Thread
from plot_mask import draw_detectionsimport argparse
import os
import sys
import shutil
from pathlib import Pathimport cv2
import torch.backends.cudnn as cudnn
FILE = Path(__file__).resolve()
ROOT = FILE.parents[0]
if str(ROOT) not in sys.path:sys.path.append(str(ROOT))  # add ROOT to PATH
# ROOTS = Path(os.path.relpath(ROOT, Path.cwd()))  # relative
import camera_rc# 已有功能:
# 权重加载,权重初始化
# 图像导入,图像检测,图像结果展示,图像导出,图像检测退出
# 视频导入,视频检测,视频结果展示,视频导出,视频检测退出
# 摄像头导入,摄像头检测,摄像头结果展示,摄像头导出,摄像头检测退出
# 检测时间,检测目标数,检测目标类别,检测目标位置信息def convert2QImage(img):height, width, channel = img.shapereturn QImage(img, width, height, width * channel, QImage.Format_RGB888)def letterbox(im, new_shape=(640, 640), color=(114, 114, 114), auto=True, scaleFill=False, scaleup=True, stride=32):# Resize and pad image while meeting stride-multiple constraintsshape = im.shape[:2] # current shape [height, width]if isinstance(new_shape, int):new_shape = (new_shape, new_shape)# Scale ratio (new / old)r = min(new_shape[0] / shape[0], new_shape[1] / shape[1])if not scaleup: # only scale down, do not scale up (for better val mAP)r = min(r, 1.0)# Compute paddingratio = r, r # width, height ratiosnew_unpad = int(round(shape[1] * r)), int(round(shape[0] * r))dw, dh = new_shape[1] - new_unpad[0], new_shape[0] - new_unpad[1] # wh paddingif auto: # minimum rectangledw, dh = np.mod(dw, stride), np.mod(dh, stride) # wh paddingelif scaleFill: # stretchdw, dh = 0.0, 0.0new_unpad = (new_shape[1], new_shape[0])ratio = new_shape[1] / shape[1], new_shape[0] / shape[0] # width, height ratiosdw /= 2 # divide padding into 2 sidesdh /= 2if shape[::-1] != new_unpad: # resizeim = cv2.resize(im, new_unpad, interpolation=cv2.INTER_LINEAR)top, bottom = int(round(dh - 0.1)), int(round(dh + 0.1))left, right = int(round(dw - 0.1)), int(round(dw + 0.1))im = cv2.copyMakeBorder(im, top, bottom, left, right, cv2.BORDER_CONSTANT, value=color) # add borderreturn im, ratio, (dw, dh)class MainWindow(QMainWindow, Ui_MainWindow):def __init__(self):super(MainWindow, self).__init__()self.setupUi(self)self.input_width = self.input.width()self.input_height = self.input.height()# self.output_width = self.output.width()# self.output_height = self.output.height()self.imgsz = 640self.timer = QTimer()self.timer.setInterval(1)self.timer_c = QTimer(self)self.timer_c.timeout.connect(self.detect_camera)self.video = Noneself.out = None# 若是cpu检测,将cuda:0替换成cpuself.device = "cuda:0"self.num_stop = 1self.numcon = self.con_slider.value() / 100.0self.numiou = self.iou_slider.value() / 100.0self.results = []self.camera = Noneself.running = Falseself.bind_slots()self.init_icons()def open_image(self):self.timer.stop()options = QFileDialog.Options()options |= QFileDialog.DontUseNativeDialogself.file_path, _ = QFileDialog.getOpenFileName(self, "Select File", "./", "Images (*.png *.xpm *.jpg *.jpeg *.bmp)", options=options)if self.file_path:dialog = QFileDialog(self, "Open File", self.file_path)dialog.resize(800, 600)dialog.close()pixmap = QPixmap(self.file_path)scaled_pixmap = pixmap.scaled(640, 480, aspectMode=Qt.KeepAspectRatio)# scaled_pixmap = pixmap.scaledToWidth(self.input.width())# scaled_pixmap = pixmap.scaled(self.input.size(), aspectMode=Qt.KeepAspectRatio)self.input.setPixmap(QPixmap(self.file_path))self.lineEdit.setText('图片打开成功!!!')def open_video(self):self.timer.stop()options = QFileDialog.Options()options |= QFileDialog.DontUseNativeDialogself.video_path, _ = QFileDialog.getOpenFileName(self, "Select vidos", dir='./', filter="Videos (*.mp4 *.avi *.gif *.MPEG)", options=options)if self.video_path:dialog = QFileDialog(self, "Open File", self.video_path)dialog.resize(800, 600)dialog.close()self.video_path = self.video_pathself.video = cv2.VideoCapture(self.video_path)# 读取一帧用于展示ret, frame = self.video.read()if ret:self.lineEdit.setText("成功打开视频!!!")frame = cv2.cvtColor(frame, cv2.COLOR_BGR2RGB)dst_size = (self.input_width, self.input_height)resized_frame = cv2.resize(frame, dst_size, interpolation=cv2.INTER_AREA)self.input.setPixmap(QPixmap(convert2QImage(resized_frame)))else:self.lineEdit.setText("视频有误,请重新打开!!!")self.out = cv2.VideoWriter('prediction.mp4', cv2.VideoWriter_fourcc(*'mp4v'), 30, (int(self.video.get(3)), int(self.video.get(4))))def load_model(self):options = QFileDialog.Options()options |= QFileDialog.DontUseNativeDialogself.openfile_name_model, _ = QFileDialog.getOpenFileName(self.button_weight_select, '选择权重文件','weights/', "Weights (*.pt *.onnx *.engine)", options=options)if not self.openfile_name_model:QtWidgets.QMessageBox.warning(self, u"Warning", u"权重打开失败", buttons=QtWidgets.QMessageBox.Ok,defaultButton=QtWidgets.QMessageBox.Ok)else:dialog = QFileDialog(self, "Open File", self.openfile_name_model)dialog.resize(800, 600)dialog.close()result_str = '成功加载模型权重, 权重地址: ' + str(self.openfile_name_model)self.lineEdit.setText(result_str)def init_model(self):from ultralytics import YOLOself.weights_path = str(self.openfile_name_model)# 8.0.124self.model = YOLO(self.weights_path)self.names = self.model.namesself.colors = [[random.randint(0, 255)for _ in range(3)] for _ in self.names]print("model initial done")QtWidgets.QMessageBox.information(self, u"!", u"模型初始化成功", buttons=QtWidgets.QMessageBox.Ok,defaultButton=QtWidgets.QMessageBox.Ok)self.lineEdit.setText("成功初始化模型!!!")def detect_begin(self):# name_list = []self.img = cv2.imread(self.file_path)self.pred = self.model.predict(source=self.img, iou=self.numiou, conf=self.numcon) # save plotted imagespreprocess_speed = self.pred[0].speed['preprocess']inference_speed = self.pred[0].speed['inference']postprocess_speed = self.pred[0].speed['postprocess']self.lineEdit_detect_time.setText(str(round((preprocess_speed + inference_speed + postprocess_speed) / 1000, 3)))self.lineEdit_detect_object_nums.setText(str(self.pred[0].boxes.conf.shape[0]))self.results = self.pred[0].boxes.xyxy.tolist()if self.pred[0].boxes.conf.shape[0]:for i in range(self.pred[0].boxes.conf.shape[0]):self.comboBox.addItem('目标' + str(i + 1))QtWidgets.QMessageBox.information(self, u"!", u"成功检测图像", buttons=QtWidgets.QMessageBox.Ok,defaultButton=QtWidgets.QMessageBox.Ok)self.lineEdit.setText("成功检测图像!!!") def convert2QImage(img):height, width, channel = img.shapereturn QImage(img, width, height, width * channel, QImage.Format_RGB888)def detect_show(self):conf_list = self.pred[0].boxes.conf.tolist()cls_list_int = [int(i) for i in self.pred[0].boxes.cls.tolist()]xyxy_list_int = [[round(num) for num in sublist] for sublist in self.pred[0].boxes.xyxy.tolist()]self.combined_image = draw_detections(self.img, xyxy_list_int, conf_list, cls_list_int, 0.4)self.result = cv2.cvtColor(self.combined_image, cv2.COLOR_BGR2BGRA)self.QtImg = QtGui.QImage(self.result.data, self.result.shape[1], self.result.shape[0], QtGui.QImage.Format_RGB32)self.input.setPixmap(QtGui.QPixmap.fromImage(self.QtImg))self.input.setScaledContents(True) # 自适应界面大小self.lineEdit.setText('图片检测成功!!!')cv2.imwrite('prediction.jpg', self.combined_image)# 视频检测def detect_video(self):self.timer.start()ret, frame = self.video.read()if not ret:self.timer.stop()self.video.release()self.out.release()else:name_list = [] self.comboBox.clear()# 检测每一帧self.pred = self.model.predict(source=frame, iou=self.numiou, conf=self.numcon) # save plotted imagespreprocess_speed = self.pred[0].speed['preprocess']inference_speed = self.pred[0].speed['inference']postprocess_speed = self.pred[0].speed['postprocess']self.lineEdit_detect_time.setText(str(round((preprocess_speed + inference_speed + postprocess_speed) / 1000, 2)))self.lineEdit_detect_object_nums.setText(str(self.pred[0].boxes.conf.shape[0]))self.results = self.pred[0].boxes.xyxy.tolist()if self.pred[0].boxes.conf.shape[0]:for i in range(self.pred[0].boxes.conf.shape[0]):self.comboBox.addItem('目标' + str(i + 1))# 画图conf_list = self.pred[0].boxes.conf.tolist()cls_list_int = [int(i) for i in self.pred[0].boxes.cls.tolist()]xyxy_list_int = [[round(num) for num in sublist] for sublist in self.pred[0].boxes.xyxy.tolist()]self.combined_image = draw_detections(frame, xyxy_list_int, conf_list, cls_list_int, 0.4)# 写视频self.out.write(self.combined_image)self.result_frame = cv2.cvtColor(self.combined_image, cv2.COLOR_BGR2BGRA)self.QtImg = QtGui.QImage(self.result_frame.data, self.result_frame.shape[1], self.result_frame.shape[0], QtGui.QImage.Format_RGB32)self.input.setPixmap(QtGui.QPixmap.fromImage(self.QtImg))self.input.setScaledContents(True) # 自适应界面大小self.lineEdit.setText('正在检测视频!!!')def suspend_video(self):self.timer.blockSignals(False)if self.timer.isActive() == True and self.num_stop % 2 == 1:self.button_video_suspend.setText(u'继续视频检测') # 当前状态为暂停状态self.num_stop = self.num_stop + 1 # 调整标记信号为偶数self.timer.blockSignals(True)else:self.num_stop = self.num_stop + 1self.button_video_suspend.setText(u'暂停视频检测')🍅✌感兴趣的可以先收藏起来,点赞关注不迷路,想学习更多项目可以查看主页,大家在毕设选题,项目编程以及论文编写等相关问题都可以给我留言咨询,希望可以帮助同学们顺利毕业!🍅✌
5、源码获取方式
🍅由于篇幅限制,获取完整文章或源码、代做项目的,拉到文章底部即可看到个人联系方式。🍅
点赞、收藏、关注,不迷路,下方查看👇🏻获取联系方式👇🏻