二十一、kubernetes 1.29 之 运维 03
一、Deain & Cordon

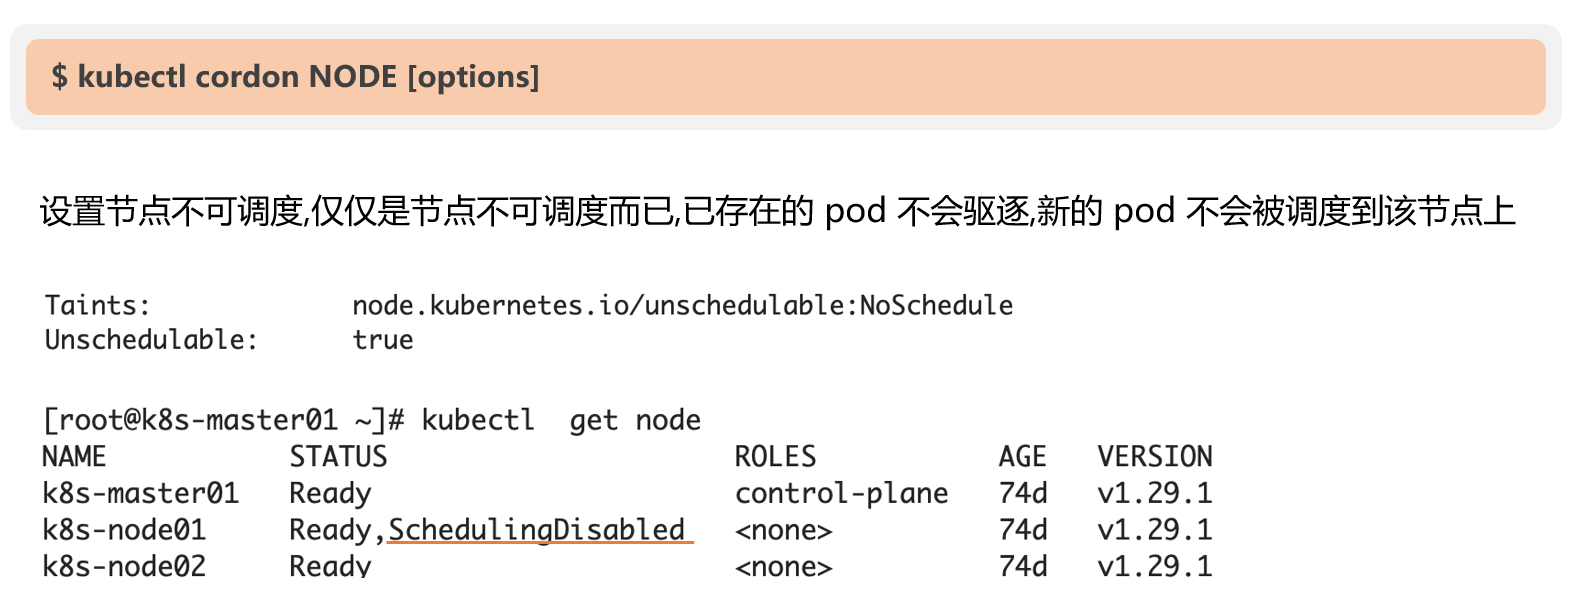
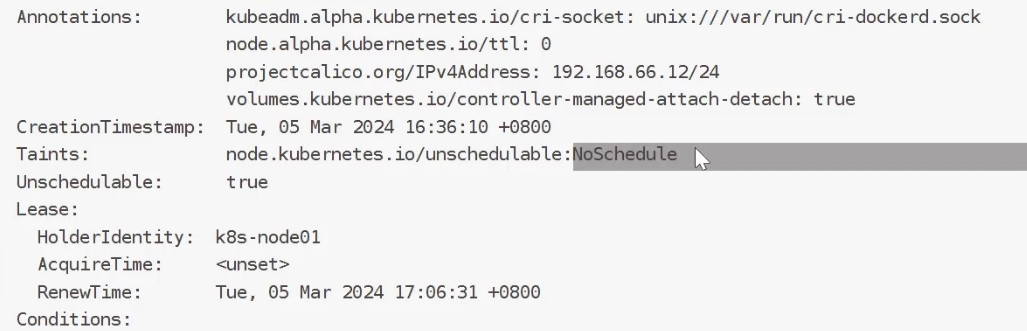
1、cordon设置和取消
取消

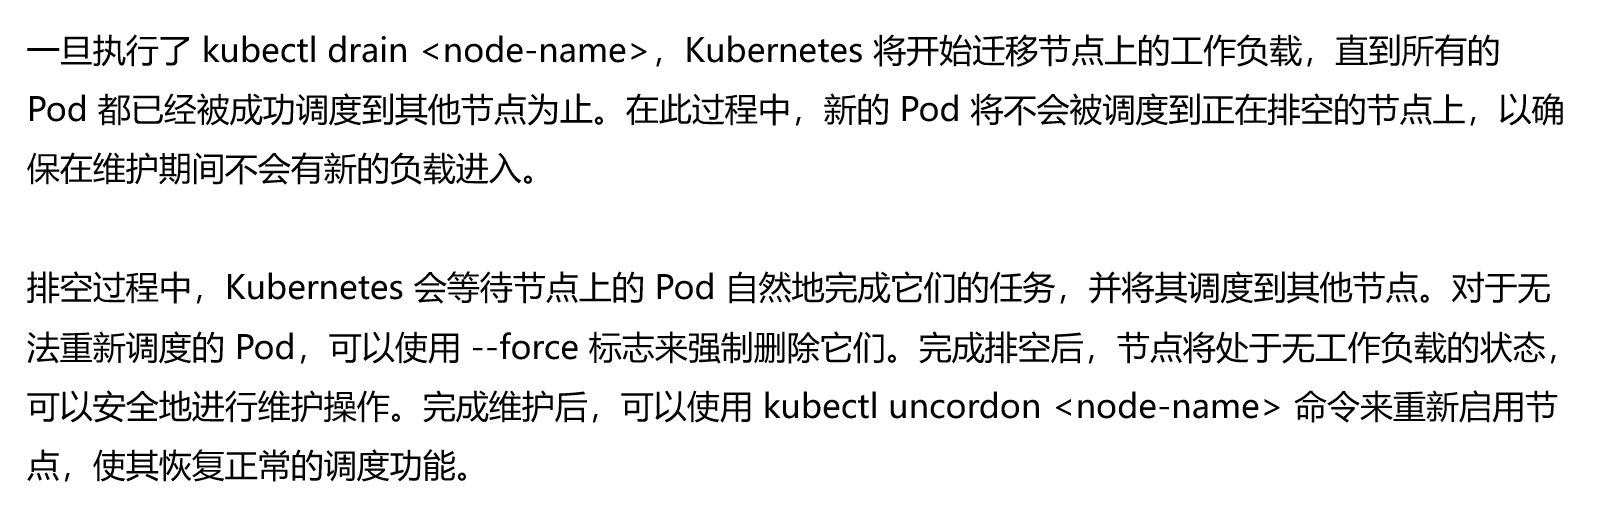
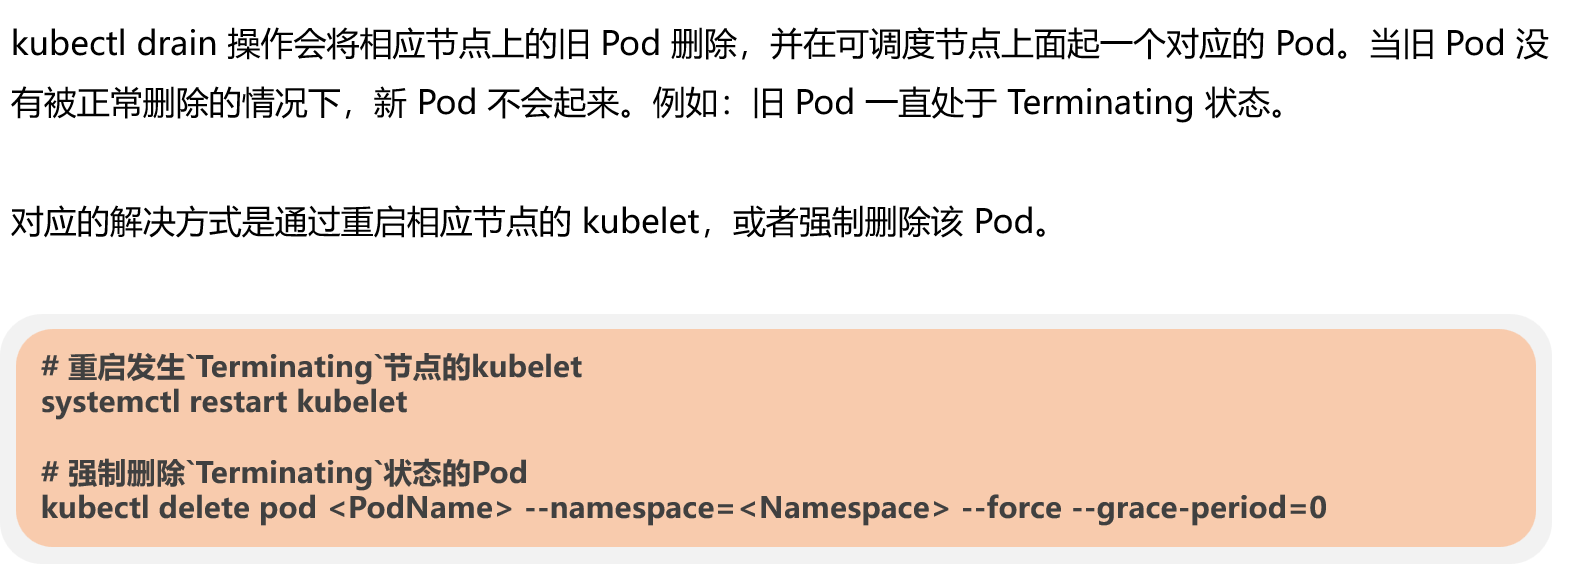
2、drain -- 排空
设置

说明
3、对比

二、自定义CRD
1、概念
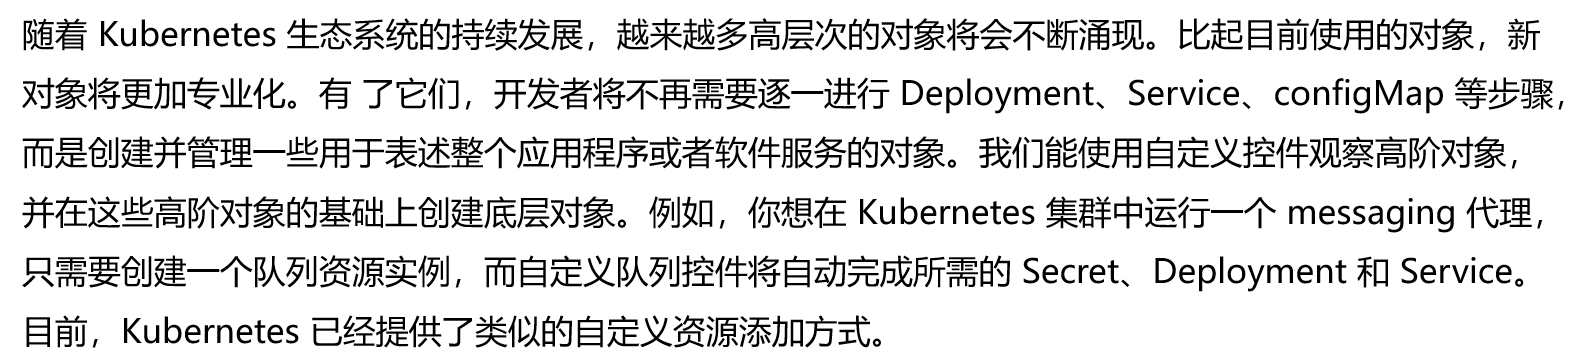
2、CRD的概念
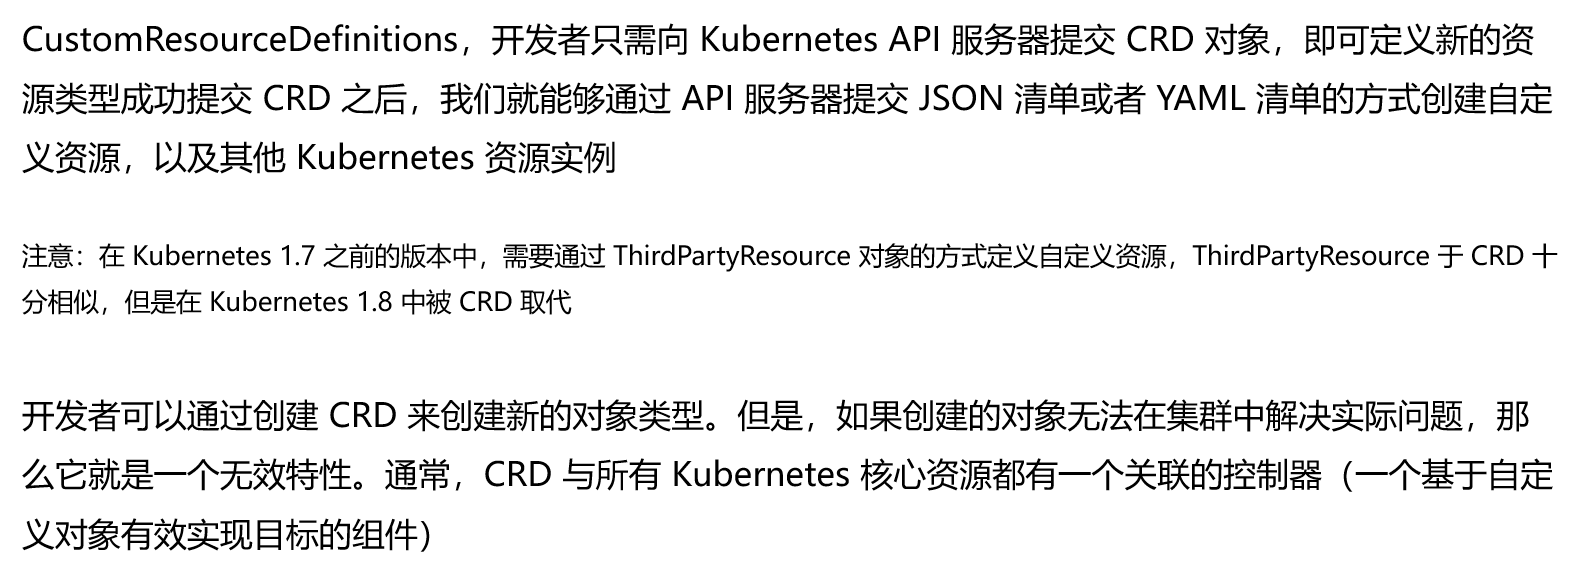
3、CRD创建流程
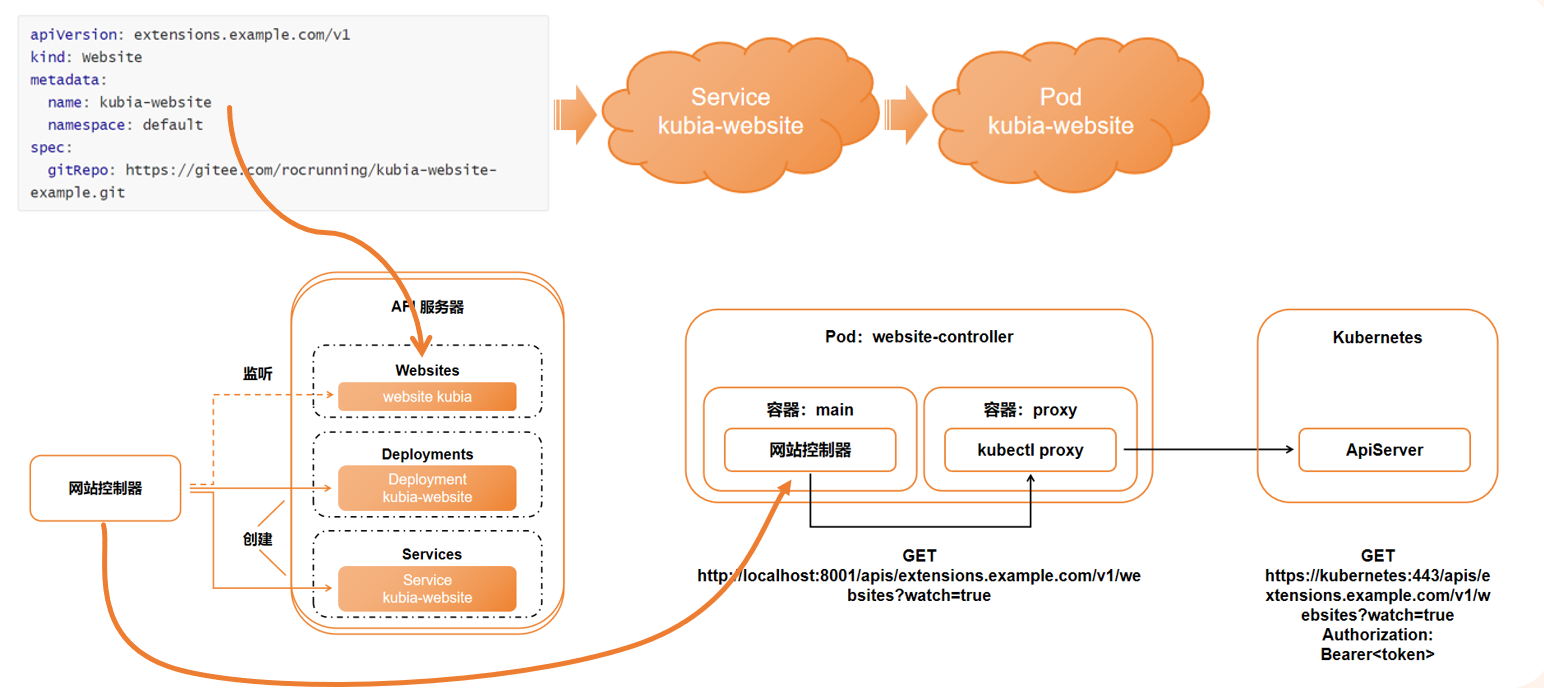
4、案例
5、CRD安装 -- 略
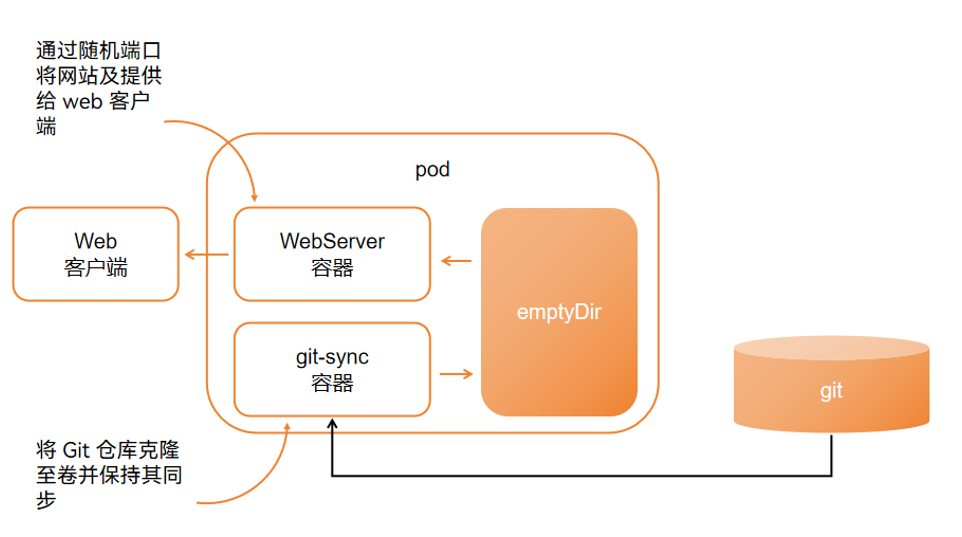
CRD 添加
apiVersion: apiextensions.k8s.io/v1
kind: CustomResourceDefinition
metadata:name: websites.extensions.example.com
spec:group: extensions.example.comversions:- name: v1served: truestorage: trueschema:openAPIV3Schema:type: objectproperties:spec:type: objectproperties:gitRepo:type: stringrequired:- specscope: Namespacednames:plural: websitessingular: websitekind: Website
解释
1. 基础标识信息
apiVersion: apiextensions.k8s.io/v1表示该 CRD 使用的 Kubernetes API 版本,apiextensions.k8s.io/v1是当前 CRD 的稳定版本,用于定义自定义资源。
kind: CustomResourceDefinition明确资源类型为 CRD,作用是告诉 Kubernetes:“我要定义一个新的资源类型”。
metadata.name: websites.extensions.example.comCRD 的唯一名称,格式必须为<复数形式>.<API组>(这里websites是复数,extensions.example.com是自定义 API 组),用于在集群中标识这个 CRD。2. 核心配置(
spec)
group: extensions.example.com自定义资源所属的 API 组(类似原生资源的apps、v1等组),用于归类和版本管理,这里是用户自定义的extensions.example.com。
versions定义自定义资源的版本信息(支持多版本管理):
name: v1:版本名称为v1。
served: true:表示该版本可被 Kubernetes API 服务器处理(即允许通过该版本的 API 路径访问资源)。
storage: true:表示该版本是 存储版本(Kubernetes 会以该版本格式持久化存储资源数据)。
schema.openAPIV3Schema定义自定义资源的 数据结构规范(类似 “数据模板”),确保创建的自定义资源符合格式要求:
type: object:资源整体是一个对象。
properties.spec:定义资源的spec字段(自定义资源的核心配置区):
properties.gitRepo: {type: string}:spec中必须包含gitRepo字段,且类型为字符串(比如用于存储网站的 Git 仓库地址)。
required: [spec]:强制要求创建资源时必须提供spec字段,否则会报错。
scope: Namespaced定义自定义资源的作用范围:Namespaced表示该资源是命名空间级别的(类似 Pod、Deployment),必须属于某个命名空间;若为Cluster则是集群级别的(类似 Namespace、Node)。
names定义自定义资源的名称相关标识(用于命令行和清单中引用):
plural: websites:资源的复数形式(用于 API 路径,如kubectl get websites)。
singular: website:资源的单数形式(如kubectl describe website <名称>)。
kind: Website:资源在 YAML 清单中使用的类型名称(类似原生资源的Pod、Deployment)。
测试 CRD 是否有效
apiVersion: extensions.example.com/v1
kind: Website
metadata:name: xxhfnamespace: default
spec:gitRepo: https://gitee.com/rocrunning/kubia-website-example.git

创建RBAC
apiVersion: v1
kind: Namespace
metadata:name: website
---
apiVersion: v1
kind: ServiceAccount
metadata:name: website-controllernamespace: website
---
apiVersion: rbac.authorization.k8s.io/v1
kind: ClusterRoleBinding
metadata:name: website-controller
roleRef:apiGroup: rbac.authorization.k8s.iokind: ClusterRolename: cluster-admin
subjects:
- kind: ServiceAccountname: website-controllernamespace: website
部署 website-controller
apiVersion: apps/v1
kind: Deployment
metadata:name: website-controllernamespace: website
spec:replicas: 1selector:matchLabels:app: website-controllertemplate:metadata:labels:app: website-controllerspec:containers:- image: wangyanglinux/tools:website-controllername: main- image: wangyanglinux/tools:kubectl-proxyname: proxyserviceAccount: website-controllerserviceAccountName: website-controller
三、backup --- 备份
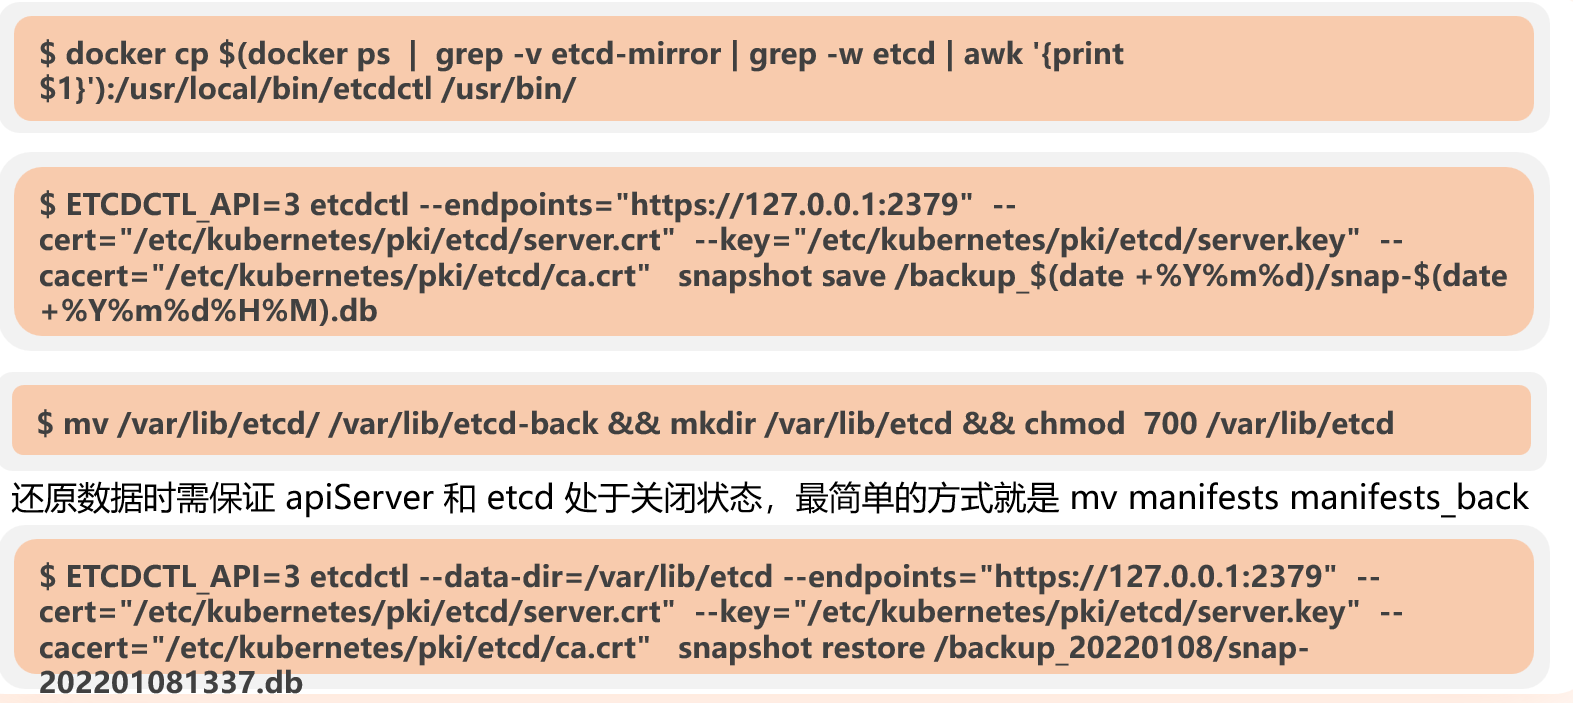
1、ETCD数据库备份/还原
2、velero -- 工具
2.1 说明
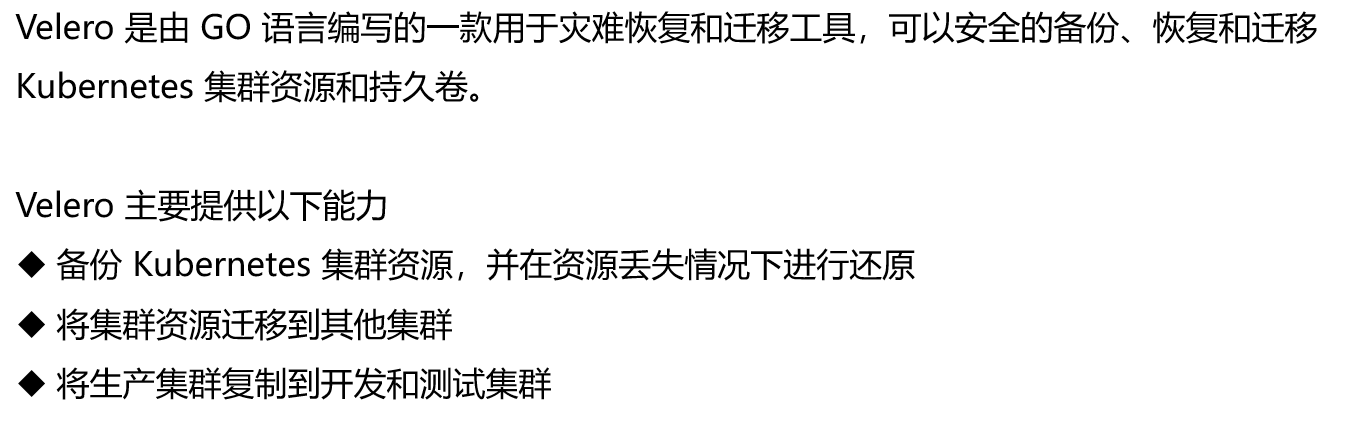
2.2 原理

2.3 对象存储同步

3、使用
3.1 准备
新开一台具有机器,来部署
上传docker包、解压
进图docker运行安装脚本./install.sh
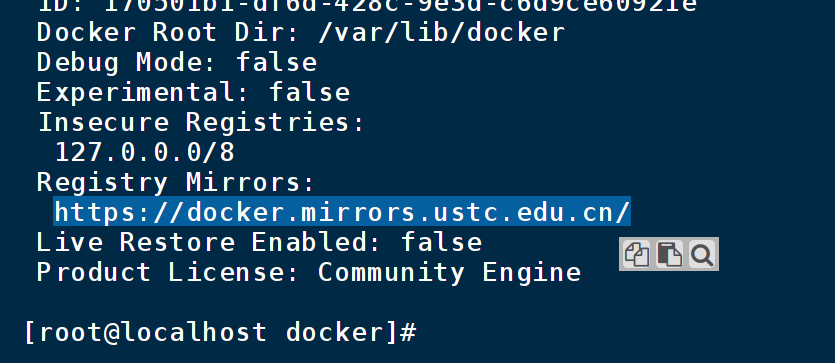
查看
docker info
配置
vi /etc/resolv.confnameserver 8.8.8.8    # 谷歌公共DNS
nameserver 114.114.114.114  # 国内114 DNS
vi /etc/docker/daemon.json"registry-mirrors": ["https://docker.m.daocloud.io","https://3xtbc4eh.mirror.aliyuncs.com","https://proxy.1panel.live","https://docker.1panel.top","https://docker.m.daocloud.io","https://docker.1ms.run","https://docker.ketches.cn","https://your-aliyun-mirror.com"]

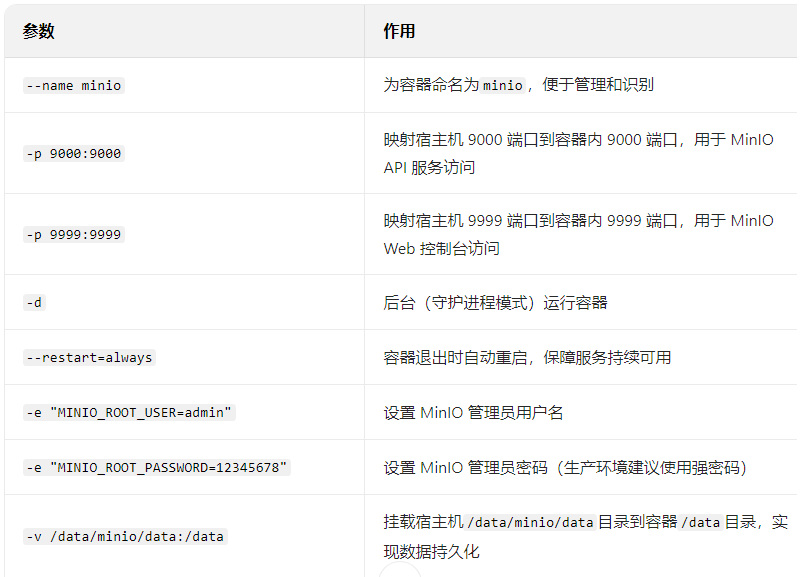
3.2 安装 minio 服务
docker run --name minio -p 9000:9000 -p 9999:9999 -d --restart=always -e "MINIO_ROOT_USER=admin" -e "MINIO_ROOT_PASSWORD=12345678" -v /data/minio/data:/data minio/minio:RELEASE.2022-04-12T06-55-35Z server /data --console-address '0.0.0.0:9999'


http://192.168.125.104:9999/login
admin、12345678
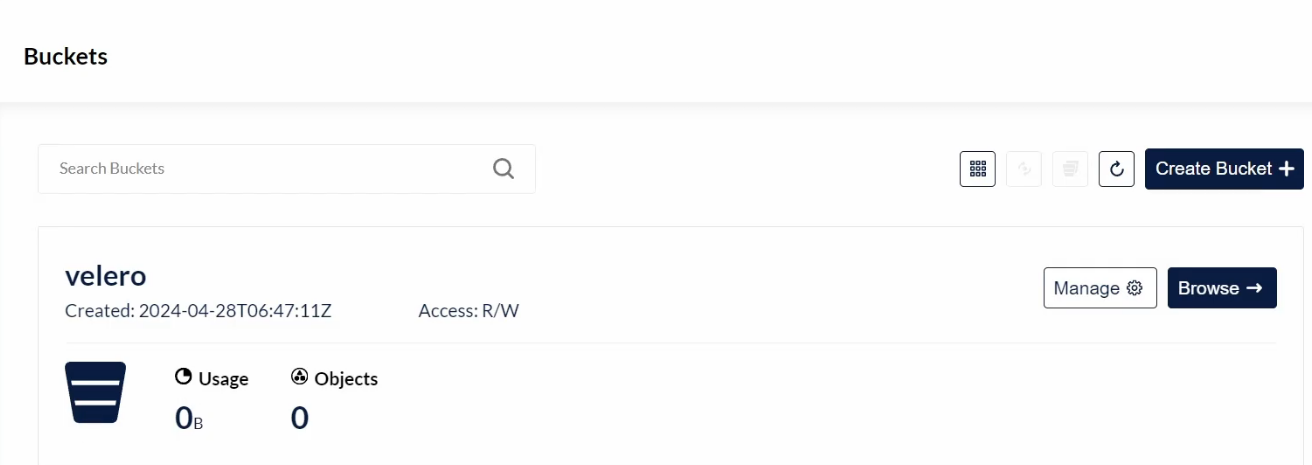
创建桶,velero

3.3 在k8s集群中初始化velero
Velero Client 安装
- 下载地址:
https://github.com/vmware-tanzu/velero/releases/tag/v1.13.2#上传解压- 操作:解压后放置到
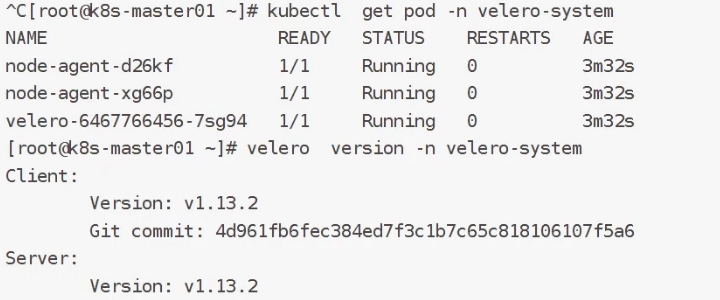
mv velero /usr/local/bin/查看版本号
认证文件配置
mkdir /data/velero/
vi velero-auth.txt
[default]
aws_access_key_id = admin
aws_secret_access_key = 12345678
velero安装
# 不支持 hostPath 卷
velero --kubeconfig /root/.kube/config install --use-node-agent --default-volumes-to-fs-backup --provider aws --plugins velero/velero-plugin-for-aws:latest --bucket velero --secret-file /data/velero/velero-auth.txt --use-volume-snapshots=false --namespace velero-system --backup-location-config region=minio,s3ForcePathStyle='true',s3Url=http://192.168.66.14:9000一段时间后

备份操作(含实验演示)
1. 实验演示:基础资源准备与备份
(1)待备份资源清单
需先创建待备份的持久卷声明(PVC)和 Pod(挂载 PVC,模拟有状态数据):
yaml
# 1. 持久卷声明(PVC)
apiVersion: v1
kind: PersistentVolumeClaim
metadata:name: my-pvc
spec:storageClassName: ""  # 可指定存储类,若不指定则使用默认accessModes: [ReadWriteOnce]  # 单节点读写权限resources:requests:storage: 1Gi  # 申请1Gi存储# 2. 挂载PVC的Pod(模拟有状态应用)
apiVersion: v1
kind: Pod
metadata:name: my-pod
spec:containers:- name: my-containerimage: wangyanglinux/myapp:v1.0  # 业务镜像volumeMounts:- name: my-persistent-storage  # 卷名,与下方volumes对应mountPath: /usr/local/nginx/html  # 容器内挂载路径(数据存储目录)volumes:- name: my-persistent-storagepersistentVolumeClaim:claimName: my-pvc  # 关联上述PVC
(2)基础备份命令(按命名空间备份)
按日期生成唯一备份名,备份
default命名空间下所有资源(默认 TTL 30 天,可通过--ttl指定过期时间):bash
# 1. 定义日期变量(生成格式:YYYYMMDDHHMMSS)
DATE=`date +%Y%m%d%H%M%S`# 2. 执行备份(指定kubeconfig、命名空间,备份至velero-system下)
velero backup create default-backup-${DATE} \--kubeconfig /root/.kube/config \--include-namespaces default \  # 仅备份default命名空间--namespace velero-system \    # Velero组件所在命名空间--ttl 24h0m0s  # 可选,设置备份保留24小时(不指定则默认30天)
还原命令

2. 常用备份命令(按场景过滤资源)
(1)按标签选择器备份
仅备份标签为
app=nginx的所有对象:bash
velero backup create nginx-backup \--selector app=nginx \ # 标签过滤,仅匹配app=nginx的资源--kubeconfig /root/.kube/config \--namespace velero-system(2)排除指定标签的备份
备份除标签为
backup=ignore之外的所有对象:bash
velero backup create all-except-ignore \--selector 'backup notin (ignore)' \ # 排除标签backup=ignore的资源--kubeconfig /root/.kube/config \--namespace velero-system(3)定时备份(按 Cron 表达式)
创建周期性备份,支持按时间间隔(如每天、每小时)自动执行,备份名格式为
<调度名>-<时间戳>:bash
# 示例1:每天备份1次(Cron表达式:0 0 * * *,或简化为@every 24h)
velero schedule create daily-backup \--schedule "@every 24h" \  # 定时规则(@every 24h=每天,也可写Cron如0 3 * * *表示每天3点)--include-namespaces default \  # 仅备份default命名空间--kubeconfig /root/.kube/config \--namespace velero-system# 示例2:定时备份指定标签资源
velero schedule create nginx-daily-backup \--schedule "0 2 * * *" \  # 每天凌晨2点执行--selector app=nginx \--kubeconfig /root/.kube/config \--namespace velero-system
(4)资源过滤备份(含 / 排除指定资源 / 命名空间)
bash
# 1. 排除指定命名空间(如kube-system)
velero backup create cluster-backup \--exclude-namespaces kube-system \  # 排除系统命名空间--kubeconfig /root/.kube/config \--namespace velero-system# 2. 仅备份指定资源类型(如deployments、configmaps)
velero backup create deploy-config-backup \--include-resources deployments,configmaps \  # 仅备份部署和配置映射--include-namespaces default \--kubeconfig /root/.kube/config \--namespace velero-system# 3. 排除指定资源类型(如secrets、rolebindings)
velero backup create no-secret-backup \--exclude-resources secrets,rolebindings \  # 不备份密钥和角色绑定--include-namespaces default \--kubeconfig /root/.kube/config \--namespace velero-system# 4. 备份命名空间+集群级资源(如节点、存储类)
velero backup create ns-with-cluster-res \--include-namespaces default \--include-cluster-resources=true \  # 同时备份集群级资源--kubeconfig /root/.kube/config \--namespace velero-system
二、还原操作
1. 基础还原命令
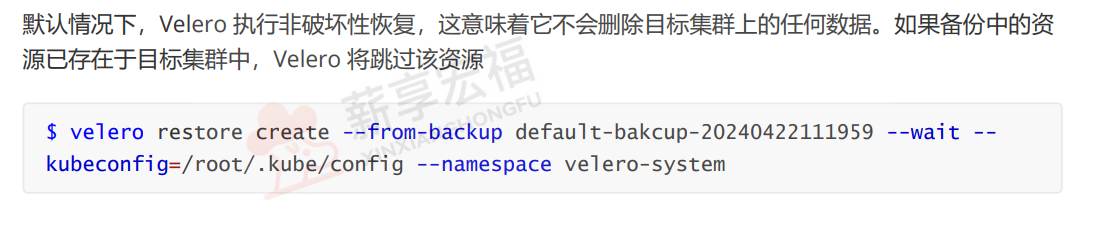
从指定备份中恢复资源,默认恢复所有备份内容,可通过过滤参数指定范围:
bash
# 1. 基础还原(从备份default-backup-20241001120000恢复)
velero restore create restore-from-default \--from-backup default-backup-20241001120000 \  # 指定来源备份名--kubeconfig /root/.kube/config \--namespace velero-system \--wait  # 可选,等待还原完成后再退出# 2. 还原指定命名空间(仅恢复备份中的default命名空间)
velero restore create restore-default-ns \--from-backup cluster-backup-20241001120000 \--include-namespaces default \  # 仅还原default命名空间--kubeconfig /root/.kube/config \--namespace velero-system# 3. 跳过已存在资源(仅还原不存在的资源,避免覆盖)
velero restore create restore-skip-existing \--from-backup default-backup-20241001120000 \--skip-existing-resources \  # 跳过已存在的资源--kubeconfig /root/.kube/config \--namespace velero-system
2. 安全还原(控制备份存储位置访问权限)
通过修改备份存储位置(BackupStorageLocation)的访问模式,避免还原时误写备份数据:
bash
# 1. 设为只读模式(还原前执行,防止备份数据被篡改)
kubectl patch backupstoragelocation default \--namespace velero-system \--type merge \--patch '{"spec":{"accessMode":"ReadOnly"}}'# 2. 还原完成后,恢复为读写模式(便于后续备份)
kubectl patch backupstoragelocation default \--namespace velero-system \--type merge \--patch '{"spec":{"accessMode":"ReadWrite"}}'
3. 恢复钩子(自定义还原前后操作)
支持在 Pod 还原前后执行自定义命令(如数据初始化、服务检查),分两种类型:
(1)InitContainer 恢复钩子
在还原的 Pod 启动应用容器前,先启动 InitContainer 执行初始化操作(如创建目录、写入配置):
方式 1:通过 Pod 注释指定
bash
# 给待还原的Pod添加注释(还原时自动注入InitContainer)
kubectl annotate pod -n default my-pod \init.hook.restore.velero.io/container-name="restore-init" \  # InitContainer名称init.hook.restore.velero.io/container-image="alpine:latest" \  # InitContainer镜像init.hook.restore.velero.io/command='("/bin/sh", "-c", "mkdir -p /usr/local/nginx/html && echo 'init ok' > /usr/local/nginx/html/init.log")'  # 执行命令(创建目录+写初始化日志)
方式 2:通过 Restore 资源清单指定
yaml
apiVersion: velero.io/v1
kind: Restore
metadata:name: r2namespace: velero-system
spec:backupName: default-backup-20241001120000  # 来源备份名includedNamespaces: ["default"]  # 仅还原default命名空间hooks:resources:- name: my-pod  # 目标Pod名namespace: default  # 目标Pod命名空间kind: Podinit:  # InitContainer钩子配置- name: restore-hook-init1image: alpine:latestcommand: ["/bin/sh", "-c", "echo -n 'DEADFEED' >> /restores/pvc1-vm/deadfeed"]  # 自定义命令volumeMounts:- name: pvc1-vm  # 挂载Pod的卷(用于操作数据)mountPath: /restores/pvc1-vm
(2)Exec Restore 钩子
在还原的 Pod 启动后,在指定容器内执行命令(如数据库恢复、服务验证):
方式 1:通过 Pod 注释指定
bash
# 给待还原的Pod添加注释(还原后执行命令)
kubectl annotate pod -n default my-pod \post.hook.restore.velero.io/container="my-container" \  # 目标容器名(默认第一个容器)post.hook.restore.velero.io/command='("/bin/bash", "-c", "psql -U postgres -d mydb < /backup/backup.sql")' \  # 执行数据库恢复post.hook.restore.velero.io/on-error="Fail" \  # 命令失败时标记还原为PartiallyFailedpost.hook.restore.velero.io/exec-timeout="1m" \  # 命令执行超时时间(默认30秒)post.hook.restore.velero.io/wait-timeout="5m" \  # 等待容器就绪的时间post.hook.restore.velero.io/wait-for-ready="true"  # 等待容器进入Ready状态再执行命令
方式 2:通过 Restore 资源清单指定
yaml
apiVersion: velero.io/v1
kind: Restore
metadata:name: r2namespace: velero-system
spec:backupName: default-backup-20241001120000includedNamespaces: ["default"]hooks:resources:- name: my-podnamespace: defaultkind: PodpostHooks:  # 还原后执行的钩子- exec:  # Exec类型钩子container: postgres  # 目标容器(如数据库容器)command: ["/bin/bash", "-c", "while ! pg_isready; do sleep 1; done"]  # 等待数据库就绪execTimeout: 1m  # 执行超时1分钟waitTimeout: 5m  # 等待容器就绪5分钟onError: Fail  # 失败时终止后续钩子- exec:container: postgrescommand: ["/bin/bash", "-c", "psql < /backup/backup.sql"]  # 执行数据库恢复脚本execTimeout: 1m
三、备份还原验证命令
用于检查备份 / 还原状态、排查错误:
bash
# 1. 查看备份列表及状态
velero backup get --namespace velero-system# 2. 查看单个备份详情(含资源清单、状态)
velero backup describe default-backup-20241001120000 --namespace velero-system# 3. 查看备份日志(排查备份失败原因)
velero backup logs default-backup-20241001120000 --namespace velero-system# 4. 查看还原列表及状态
velero restore get --namespace velero-system# 5. 查看单个还原详情
velero restore describe restore-from-default --namespace velero-system# 6. 查看还原日志(排查还原失败原因)
velero restore logs restore-from-default --namespace velero-system# 7. 查看Pod卷备份状态(持久卷备份详情)
kubectl -n velero-system get podvolumebackups -l velero.io/backup-name=default-backup-20241001120000 -o yaml# 8. 查看Pod卷还原状态
kubectl -n velero-system get podvolumerestores -l velero.io/restore-name=restore-from-default -o yaml
四、关键注意事项
不支持的卷类型:Velero 不支持
hostPath卷备份,若 Pod 使用hostPath挂载数据,需通过其他方式(如脚本)单独备份。持久卷备份依赖:若需备份持久卷数据,需确保 Velero 配置了
--use-node-agent(启用节点代理)和--default-volumes-to-fs-backup(默认文件系统备份),或通过restic工具(需额外配置)。资源过滤优先级:标签过滤(
--selector)与命名空间 / 资源类型过滤(--include-namespaces/--include-resources)可组合使用,最终备份 / 还原结果为 “交集”。备份保留策略:通过
--ttl指定备份过期时间(如--ttl 72h),过期后 Velero 自动清理备份文件,避免存储占用过多。