ComfyUI部署以及节点扩展
ComfyUI文件夹获取
方法一:github拉取
git clone https://github.com/comfyanonymous/ComfyUI.githttps://github.com/comfyanonymous/ComfyUI.git
方法二:从GitHub上面下载压缩包
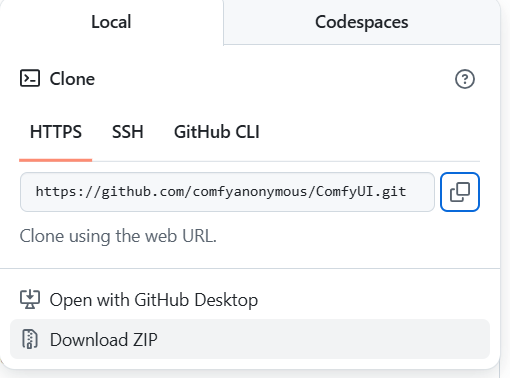
点击Dowenload ZIP直接下载压缩包
安装Comfyui相关依赖
安装torch
在安装相关依赖之前,确保自己的电脑有torch
根据自己cuda的版本号进行安装,具体查看对应torch版本号安装命令访问下面网站。
Get Started
cuda=12.6对应命令
pip3 install torch torchvision --index-url https://download.pytorch.org/whl/cu126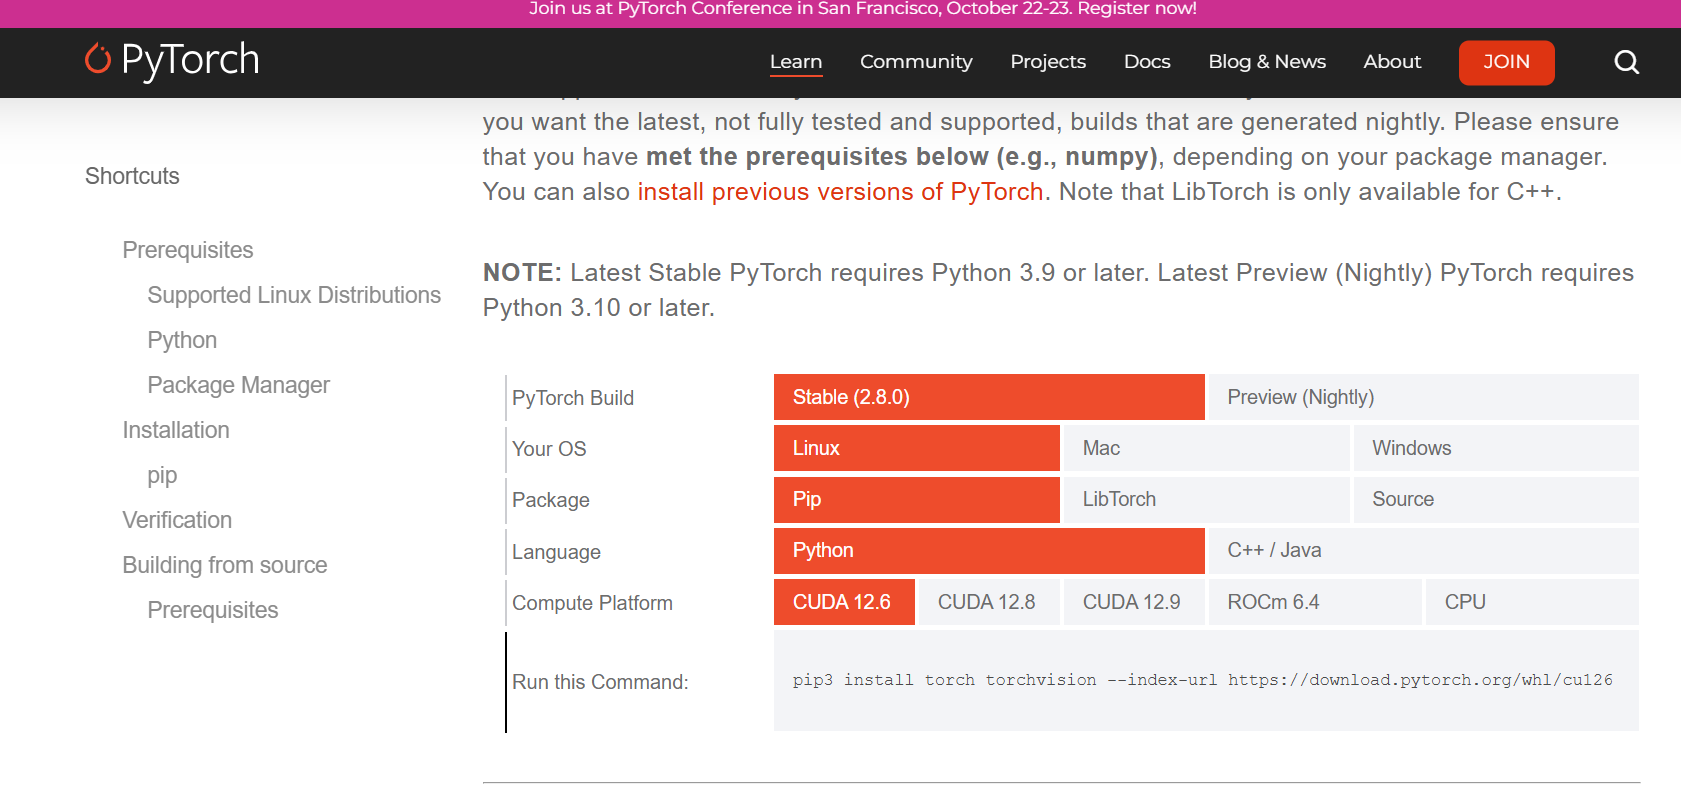
安装相关依赖
cd ./comfyui具体文件夹根据自己解压之后的文件夹命名来调整
pip install -r requirements.txt运行main.py
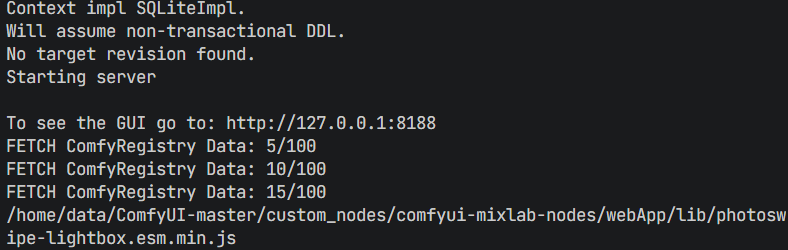
python main.py出现下面这个ip地址代码成功,使用浏览器访问这个ip即可。确保每次打开之前8188端口没有被占用,如果占用的话,需要杀死占用线程或者切换运行端口号。
ComfyUI-Manager
安装ComfyUI-Manager
ComfyUI-Manager 是一个旨在增强 ComfyUI 可用性的扩展。它提供了安装、删除、禁用和启用 ComfyUI 的各种自定义节点的管理功能。此外,此扩展还提供了集线器和便利功能,以访问 ComfyUI 中的各种信息。
方法一:github拉取
- 转到终端中的目录 (cmd)
ComfyUI/custom_nodes -
git clone https://github.com/ltdrdata/ComfyUI-Manager comfyui-manager - 重启 ComfyUI
方法二:便携式ComfyUI版本安装:仅限ComfyUI-Manager
- 安装 git
- https://git-scm.com/download/win
- 单机版
- 选择选项:使用 Windows 默认控制台窗口
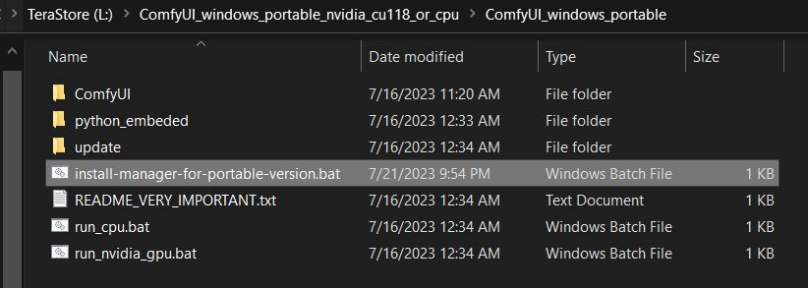
- 将 scripts/install-manager-for-portable-version.bat 下载到已安装的目录中
"ComfyUI_windows_portable"
- 不要点击。右键单击链接并选择“另存为...”
- 双击批处理文件
install-manager-for-portable-version.bat
方法三:通过 comfy-cli 安装:一次安装 ComfyUI 和 ComfyUI-Manager
推荐:comfy-cli 提供了从 CLI 管理 ComfyUI 的各种功能。
- 先决条件:Python 3、Git
窗户:
python -m venv venv
venv\Scripts\activate
pip install comfy-cli
comfy install
Linux/macOS:
python -m venv venv
. venv/bin/activate
pip install comfy-cli
comfy install
方法四:Linux+venv 安装:ComfyUI + ComfyUI-Manager
要使用 venv 环境在 Linux 上安装带有 ComfyUI-Manager 的 ComfyUI,您可以按照以下步骤作:
- 先决条件:python-is-python3、python3-venv、git
- 将 scripts/install-comfyui-venv-linux.sh 下载到空的安装目录中
- 不要点击。右键单击链接并选择“另存为...”
- ComfyUI 将安装在指定目录的子目录中,该目录将包含生成的可执行脚本。
chmod +x install-comfyui-venv-linux.sh./install-comfyui-venv-linux.sh
使用ComfyUI-Manager
-
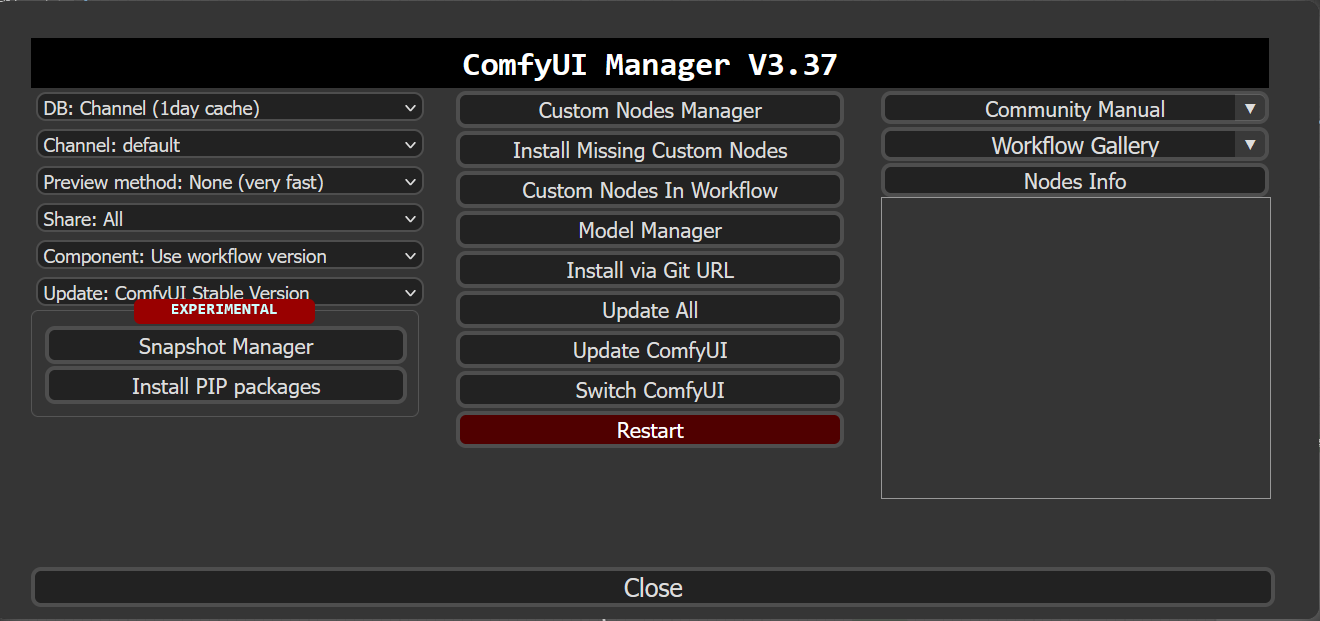
单击主菜单上的“管理器”按钮

-
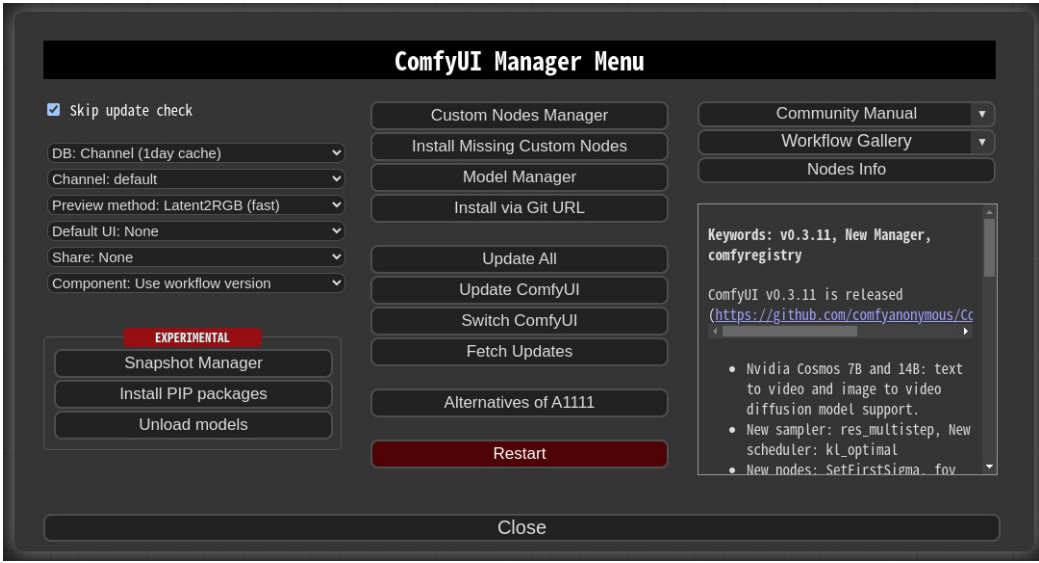
如果单击“安装自定义节点”或“安装模型”,将打开一个安装程序对话框。
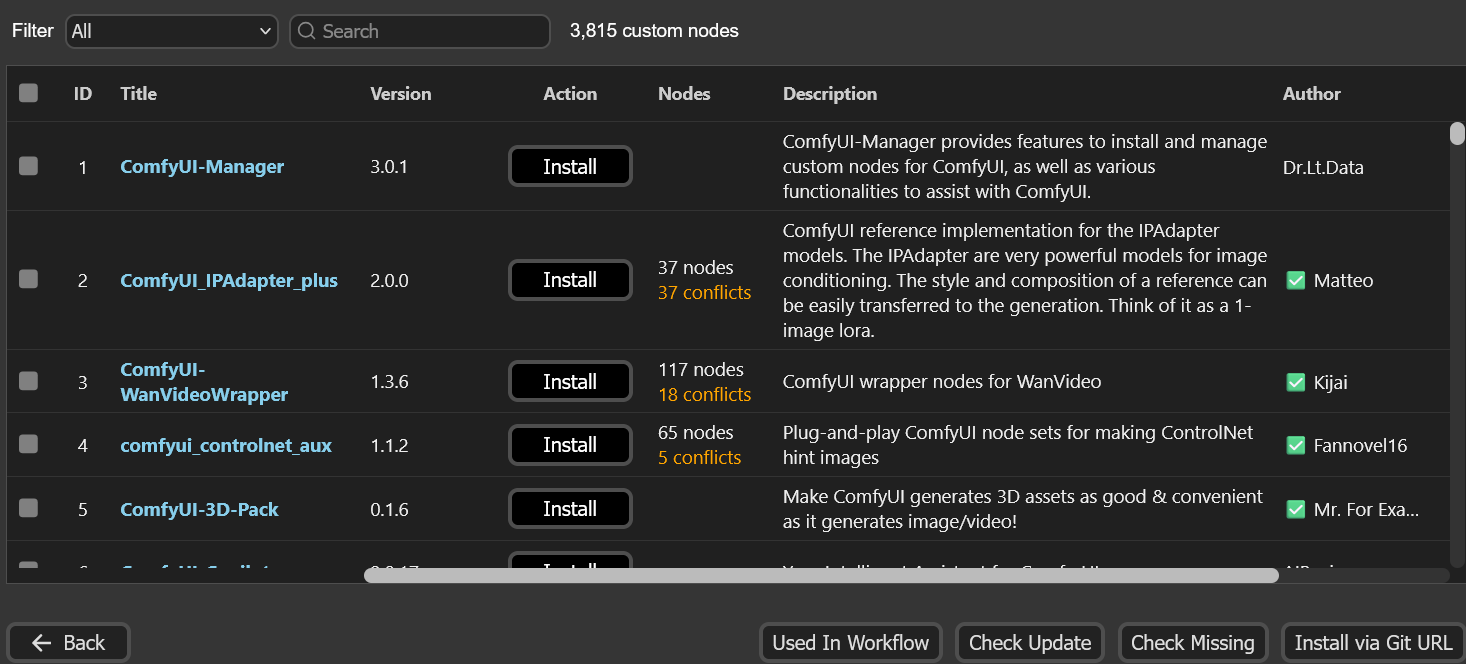
下载新节点的话,可以点击Custom Nodes Manger ,点击Install下载,下载之后需要重启comfyui。
节点配置方法
具体节点文件存放在comfyui/custom_nodes中,确保每个节点之间不会存在依赖冲突。
可以通过压缩包上传到custom_nodes中,解压安装,如果存在requirements.txt,需要安装。